
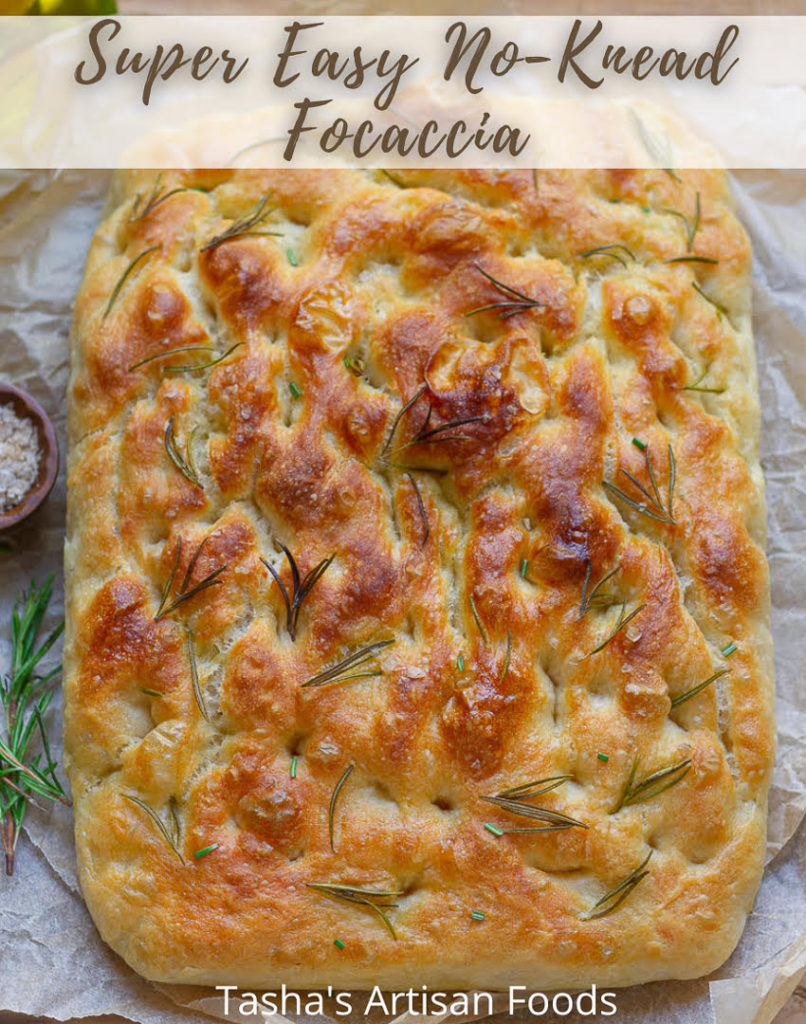
No-knead focaccia is a super-easy snack idea made with zero effort and no technique (not even kneading). With the softest crumbs, fantastic texture, and delicious flavor, it’s the easy focaccia recipe you didn’t know you were looking for.
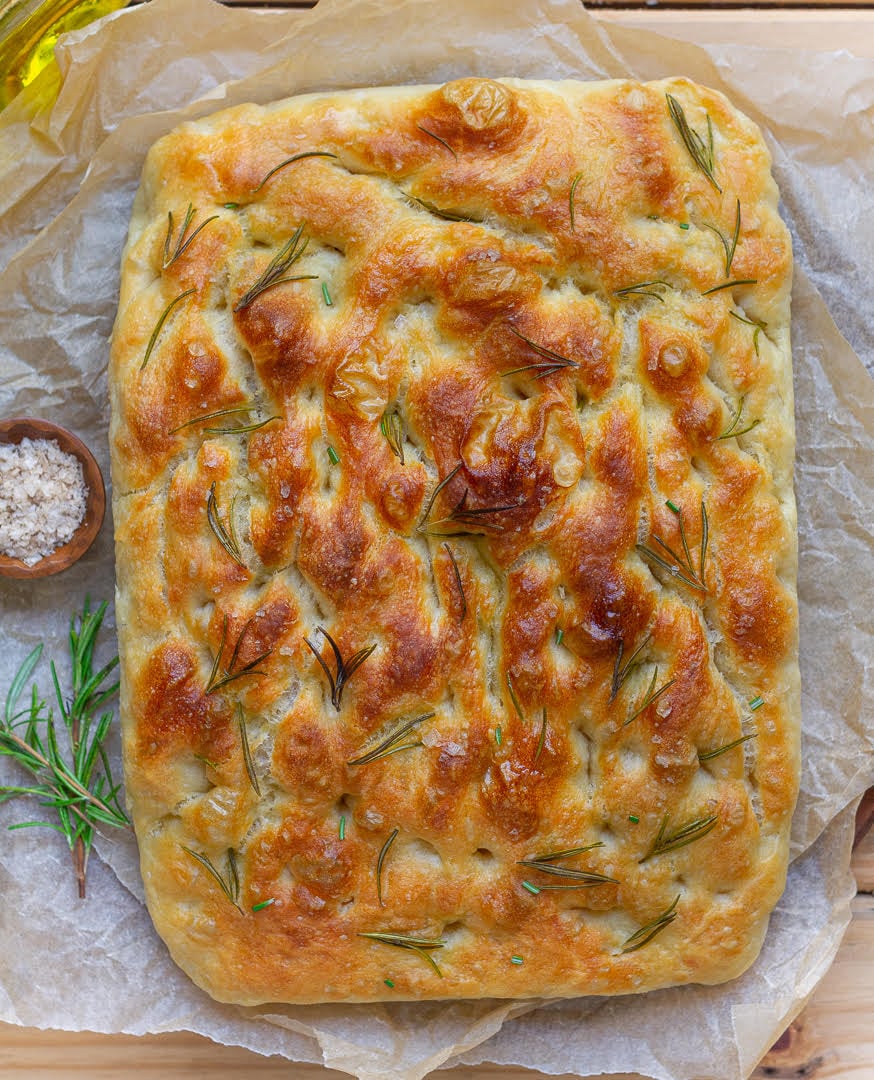
This homemade focaccia gives that visceral satisfaction you can get only from freshly baked bread! Barely out of the oven, and I know it’s the best focaccia bread I’ve made, and that’s saying something because I’ve baked by the dozen.
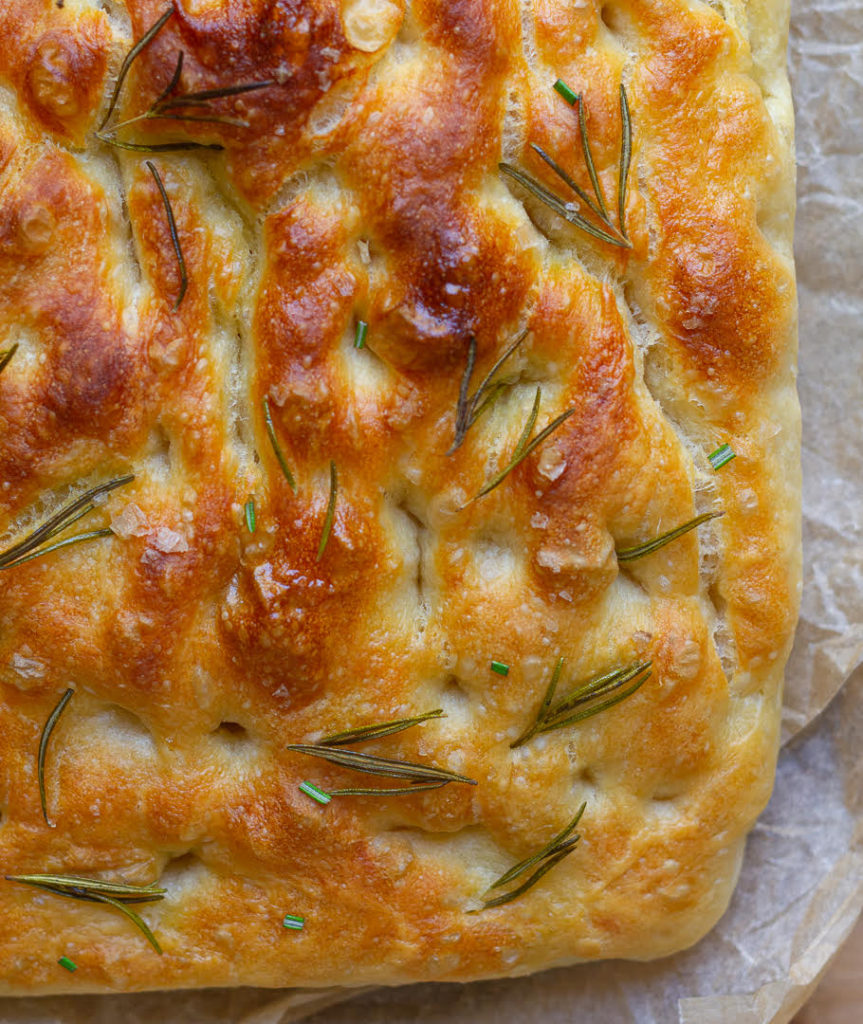
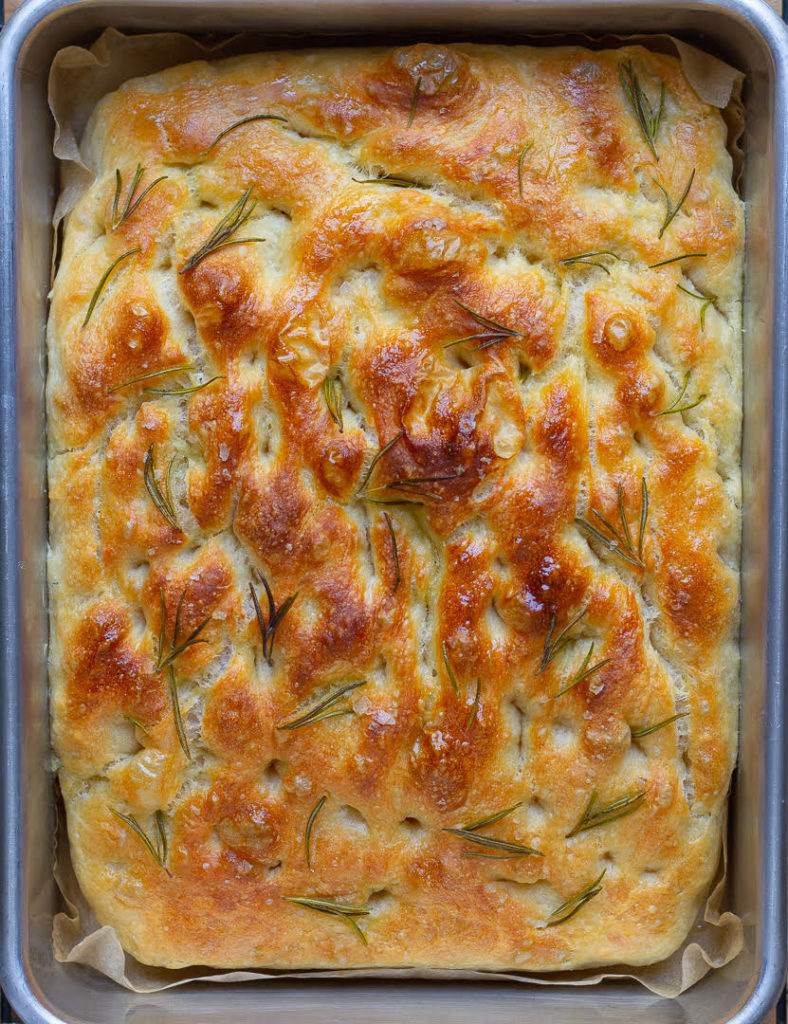
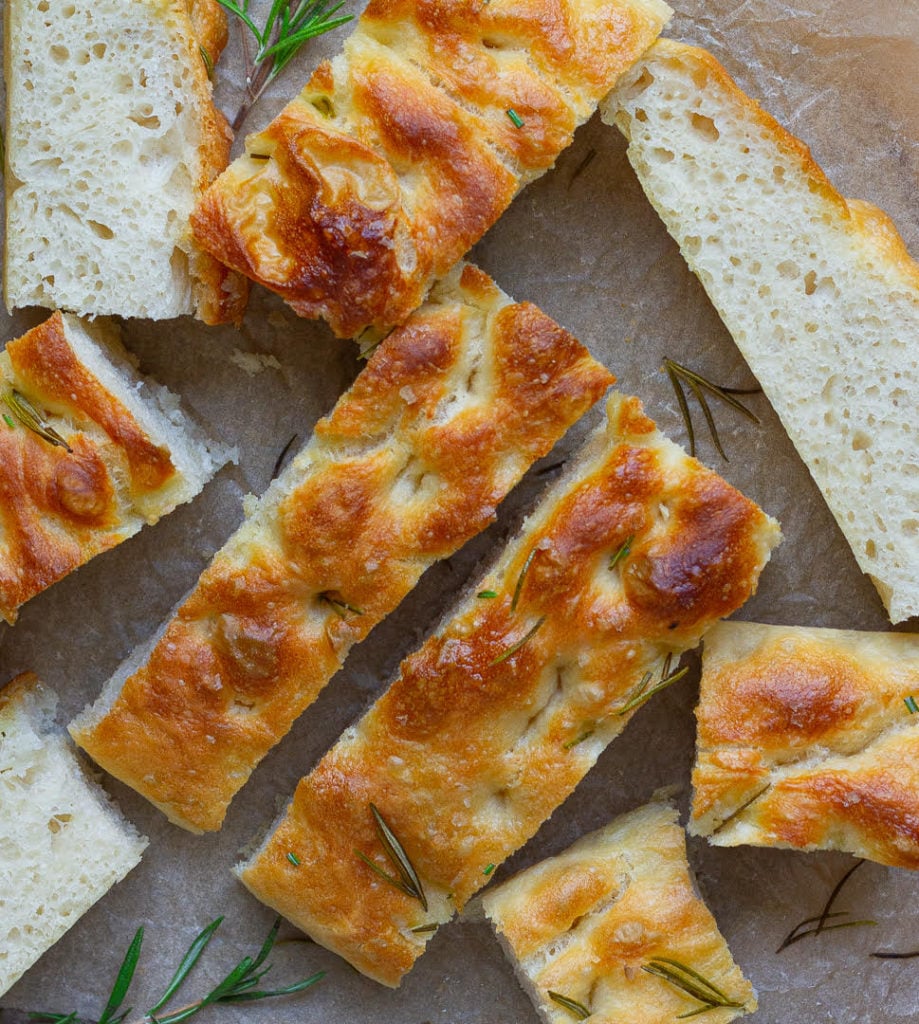
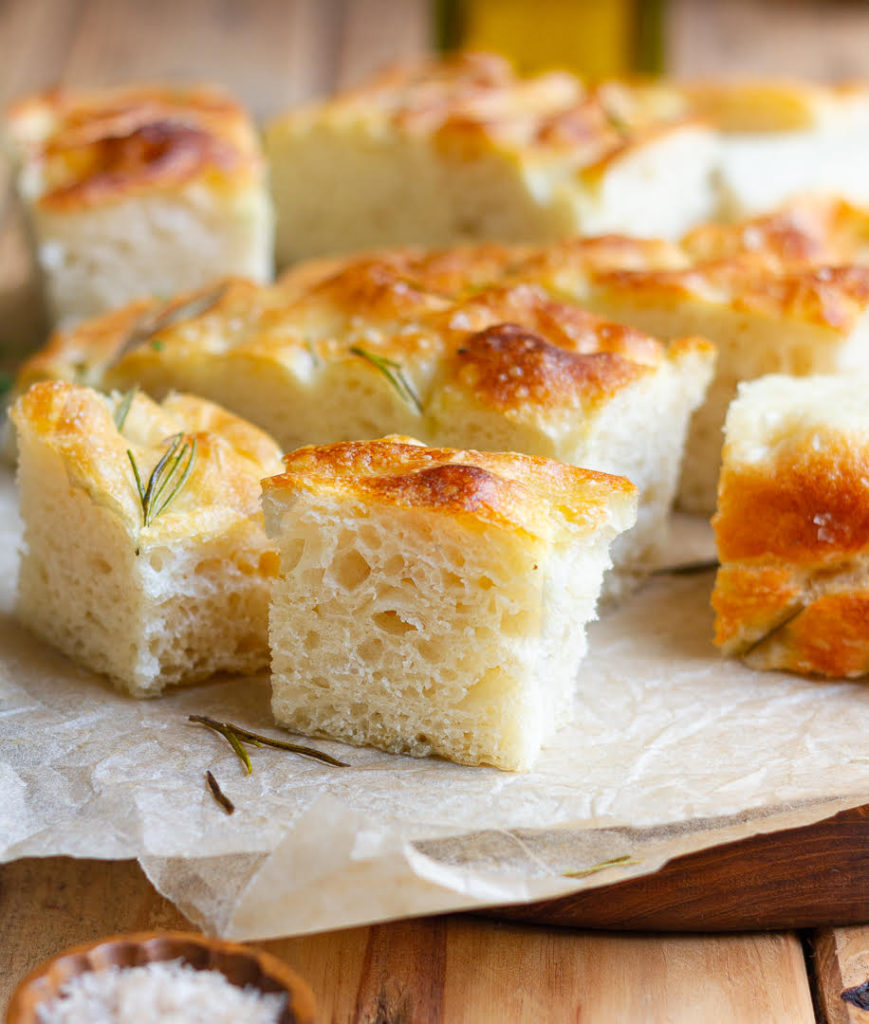
The warm crust is fragrant with rosemary, and when you bite in, it crunches marvelously, and then you get the kick from the sea salt. The crumbs are soft but still chewy, and with that little tang from the long fermentation, that makes you have one more slice.
Jump to:
Why should you make this recipe
Why do you need to try this recipe for homemade focaccia?
It requires no kneading. The fridge and oven do most of the work.
It takes zilch effort — only 15 minutes over 2 days!
It uses no special equipment or technique. Just a pan, a whisk, a spatula, and some folding over.
Never baked bread at home? This is the safest, easiest, and tastiest recipe to begin with!
What is the no-knead method?
I love the no-knead method of making bread. Like everyone on this earth, I was introduced to the concept by Jim Lahey long, long ago. My copy of his book became a bible of sorts and Jim, my guru.
Since then, I’ve baked plenty of no-knead breads, but this homemade focaccia (adapted from Alexandra’s Kitchen with a few Tasha twists thrown in) was the simplest. By far.
Why? Because (a) the dough was the most comfortable to work with, (b) it gave excellent results, and (c) it’s fantastic for beginners.
So, what is the super-easy no-knead method?
It’s exactly what it says. You mix all the ingredients (flour, salt, sugar, and yeast) in a bowl and let it sit and proof. You don’t knead.
How does it work?
In bread, there are 2 ways to form a gluten network (the internal structure that makes freshly baked bread so amazing).
The first is kneading.
As you work the dough with your hands, the normally knotted up proteins in the flour untangle, and join together, developing the network of gluten.
The other is by letting the dough rest.
When you give the dough a lot of time to proof, the proteins break down into teeny, tiny (and manageable) strands. At the same time, thanks to the yeast consuming sugar, air bubbles (CO2) start to bubble up in the dough.
These bubbles push and nudge the protein strands into alignment. And once they are lined up like good little soldiers, they start to cross-link, creating the network of gluten. Without you having to knead the dough till your forearms hurt.
So much science!!
How to make no-knead focaccia?
The key here is time.
Because there is no kneading involved, it needs a long rise. The longer you let the dough rest, the more depth of flavor and airy crumbs you get.
Yes, this means you need to plan ahead, but who's complaining when you literally don’t have to do anything else for this recipe!
On day 1, do 5 mins of prep on no-knead focaccia
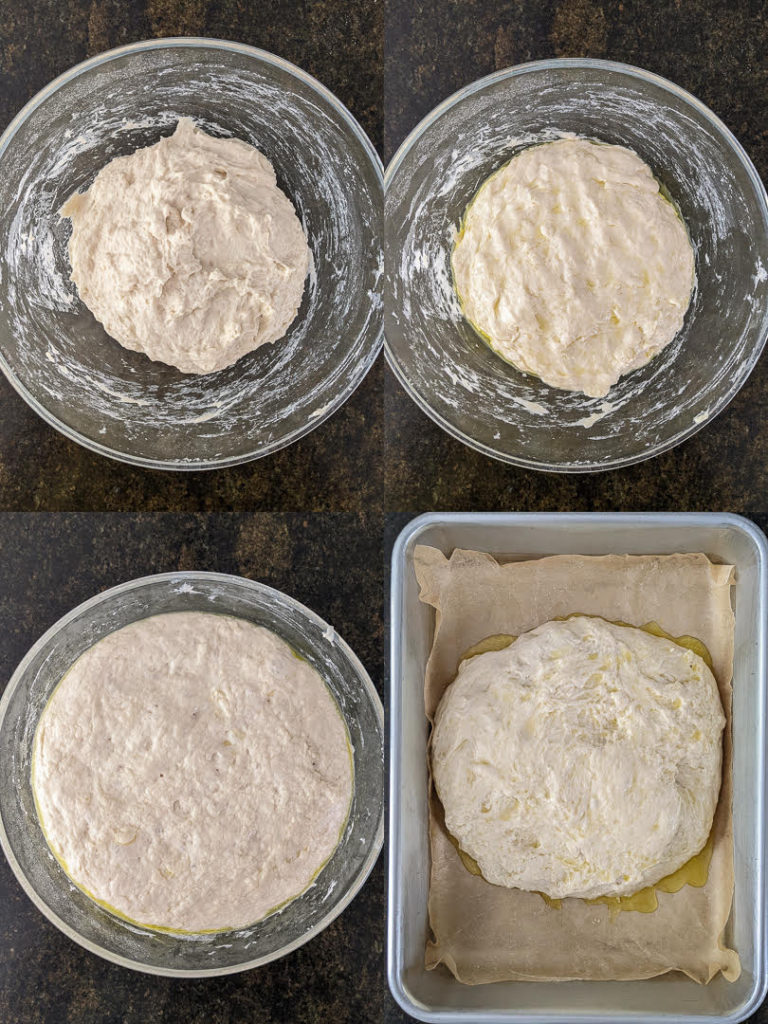
Step 1: Combine the ingredients for focaccia bread (flour, salt, and yeast). Whisk in a teaspoon of sugar.
Step 2: Add water and, with a spatula, mix until everything is blended, and you have a well-hydrated dough. It’ll be sticky and shaggy.
Step 3: Paint the dough surface with olive oil so that the top layer doesn’t become dry and crusty during the first rise.
Step 4: Cover the bowl with cling wrap or a kitchen towel. For those using a towel, I recommend securing it with a rubber band to keep it draft-free.
Step 5: Slide the bowl into the fridge and let it do its magic for 18 to 24 hours.
On day 2, bake the no-knead focaccia bread
Step 6: By the next day, the dough would have risen well. You’re now going to deflate it gently. First, oil your hands and then scrape the dough away from the edges.
Step 7: Next, turn the dough over in 4 parts. Hold a portion of the dough and fold it towards the center. Rotate the bowl a quarter turn and then fold over the dough again. Rotate the bowl and fold the dough 2 more times. This completes 1 cycle.
Step 8: Do the fold and rotate process one more time to form a rough ball.
Step 9: Now, prep your pan by greasing it well with olive oil. This particular pan of mine tends to be sticky, so I also lined it with parchment paper. After that, I poured some more oil smack-dab in the middle.
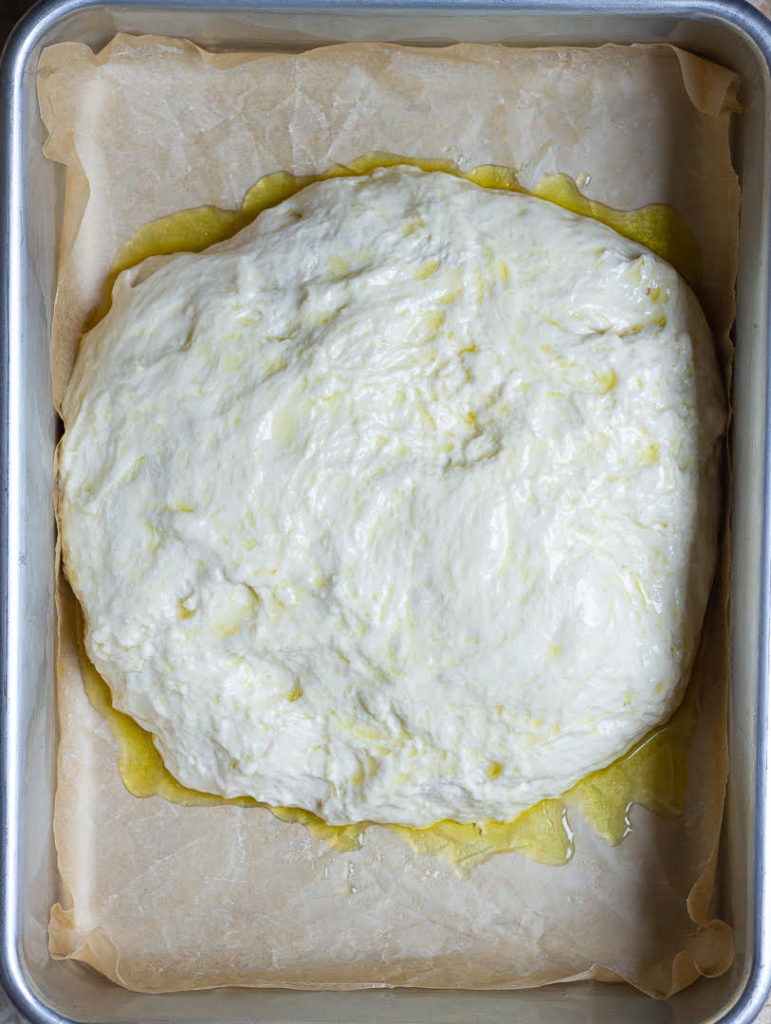
Step 10: Lift the dough off the bowl and plonk it over the olive oil in your baking dish.
Step 11: Let the focaccia dough proof a second time. Since it’s warm here, my rise took about an hour and a half.
Now, let’s bake the best focaccia bread
Step 12: Homemade focaccia bread needs a hot, hot, hot oven. So, preheat it to 220 °C or 425 °F.
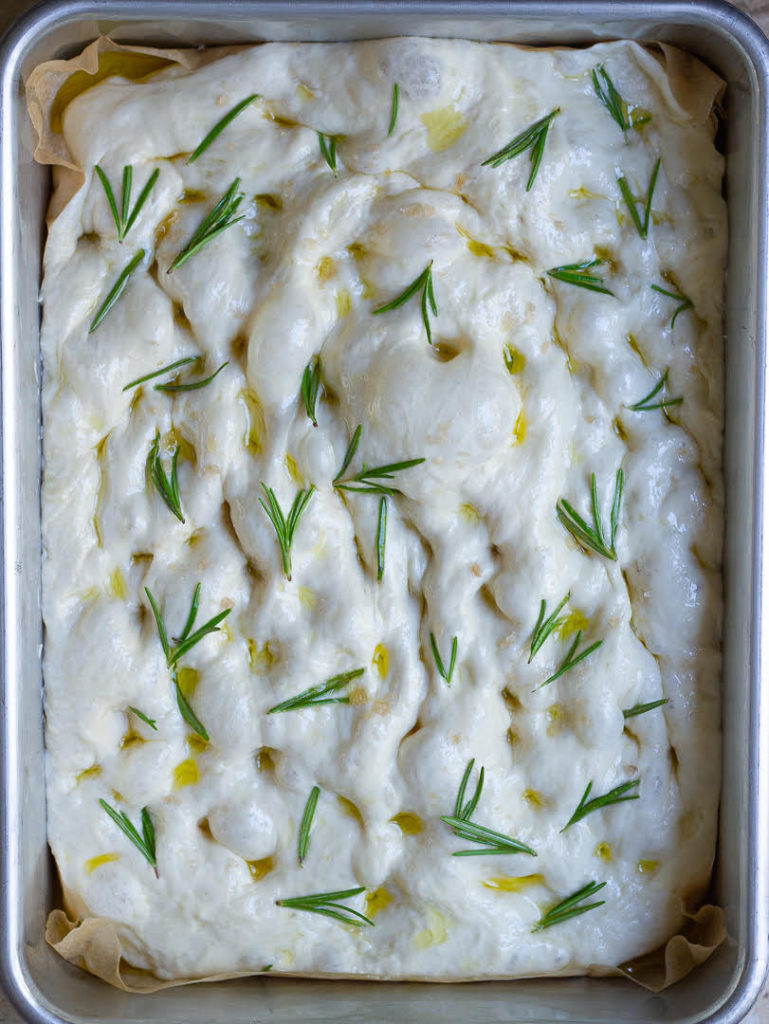
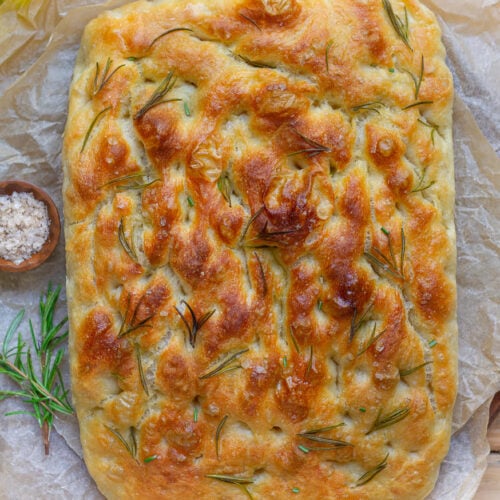
Step 13: While the oven preheats, get to the fun part. Scatter rosemary on the soft dough.
Step 14: Spread more olive oil on top, and then make dimples by shaping your fingers into claws and pressing them into the pillowy dough. The feeling is utterly satisfying, like sinking your hands in cotton.
Step 15: Sprinkle with sea salt immediately and bake for 25 to 30 minutes, until the crust is golden brown.
Final step: Let the no-knead focaccia cool a bit and serve.
My tips for homemade focaccia bread
- Make sure your dough is not too wet or too hard. The best way to achieve the right consistency is to measure your ingredients.
- I am a big fan of cup measurements as they’re very convenient, but this recipe for homemade focaccia needs accuracy. And, frankly speaking, cups are not precise. So, invest in a kitchen scale. Even a small battery-operated one will make all the difference.
- Use a 9 by 13" or 10 by 12" baking dish. If you don’t have either, opt for a 10" round pan. Or you can split the dough into two 9-inch pans.
- Always add all your focaccia toppings before the olive oil. The slick coating keeps them from getting burnt during baking.
- The only thing I’d do differently the next time I bake no-knead focaccia is to use more rosemary. At least half the amount more, if not double.
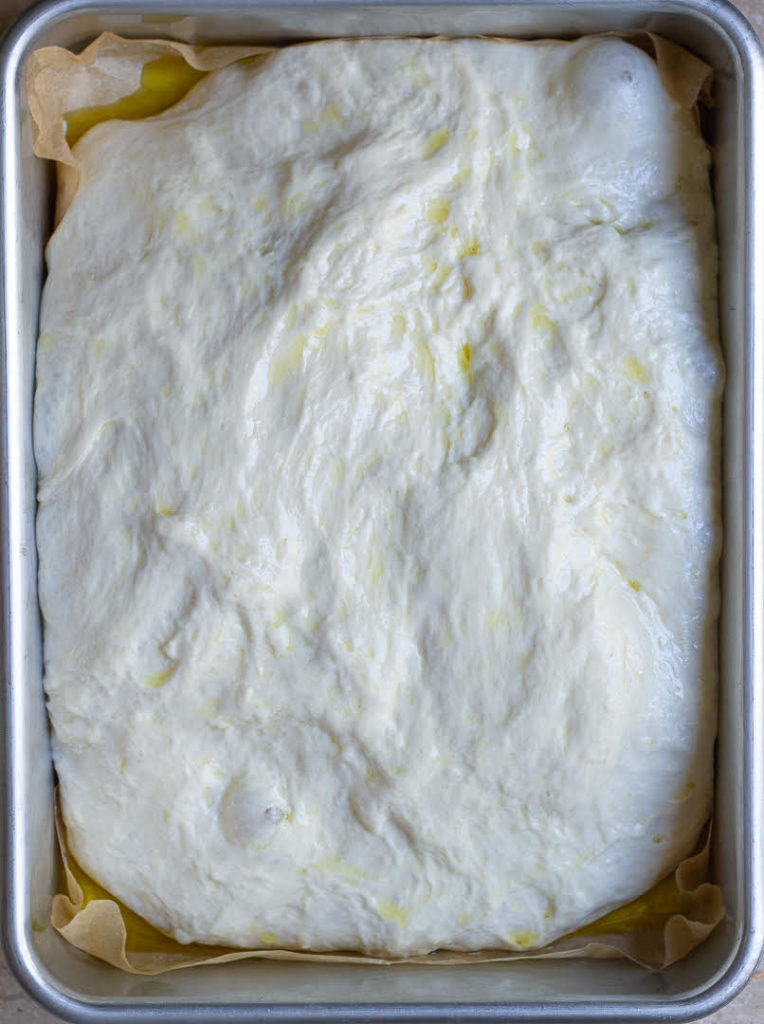
How do you know the dough is ready after the 2nd proof?
It’ll spread out to fill the pan and will be dotted with beautiful bubbles.
Why do you need to add olive oil to the baking dish?
Greasing the baking dish is the best way to ensure the cake, the bread, the brownie, or whatever else you’re baking doesn’t stick to it. With no-knead focaccia, we go a step further.
We’re not just coating the pan but also pouring the olive oil right in the center. It’s a hefty amount that allows the bottom of the bread to bake gorgeously, lending it that crunchy, chewy texture and complex flavor.
Focaccia variations you can try
Herbs: Rosemary is the classic choice for focaccia, but don’t let that stop you from experimenting. Any herb you prefer will be fantastic.
Toppings: From olives to cherry tomatoes, from sliced onions to figs, you can bake endless focaccia versions. Or go to town with toppings and create an entire Instagrammable gardenscape.
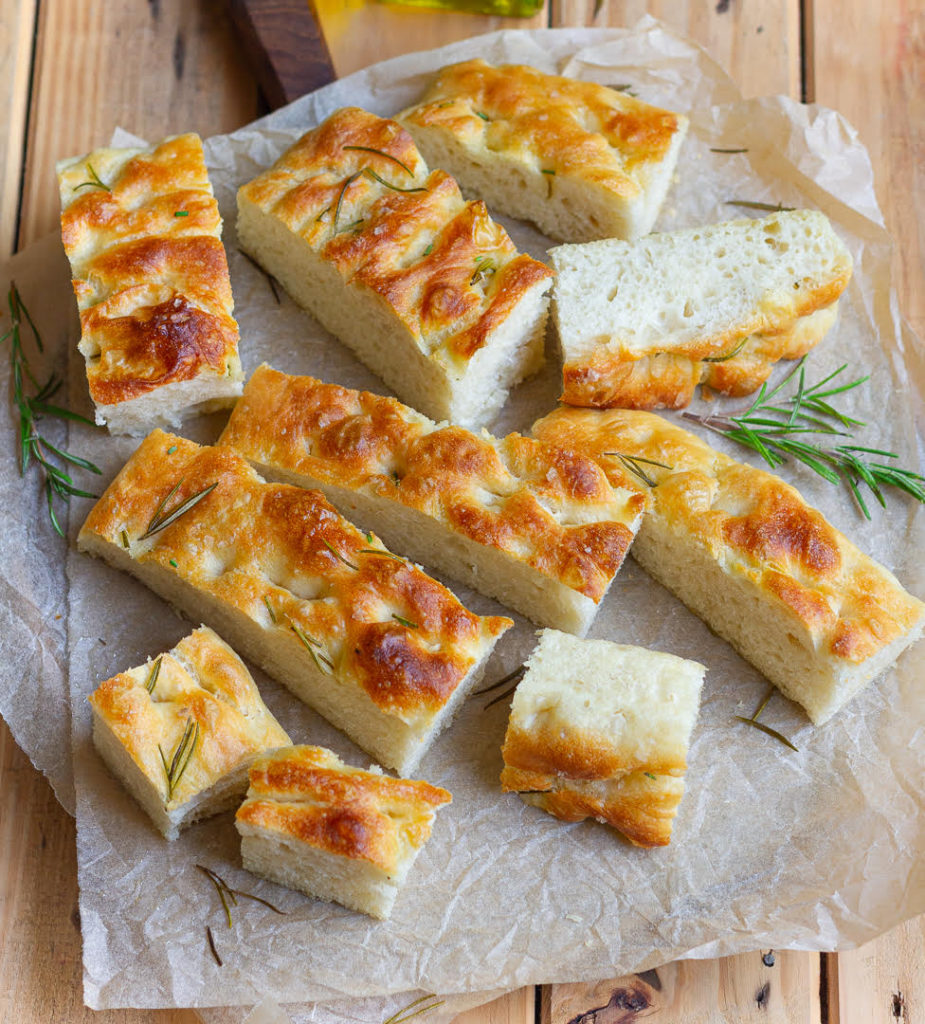
Serving the no-knead focaccia
Serve it warm, and the tender interior and crisp crust simply beg for a nibble.
Let it cool and serve it in slices as an easy snack or even an appetizer. And if there’s any leftover, although I hardly think so, use it for sandwiches.
📖 Recipe
Super Easy No-Knead Focaccia
Ingredients
- 4 cups All-purpose flour
- 2 tsp Yeast
- 1 tsp Salt
- 2 tsp Sugar
- 2 cups Lukewarm water
- 4 tbsp Olive oil
- Sea salt and Rosemary for sprinkling on top
Instructions
- Combine the flour, yeast, salt, and sugar in a large bowl.
- Pour over the lukewarm water. Mix well with a spatula until a sticky dough is formed.
- Pour a teaspoon or two of olive oil on the surface of the dough and rub it all over.
- Cover with plastic wrap and refrigerate for 18-24 hours. I kept it for 24 hours.
- When you're ready to bake, grease a 9" x 13" or 10" x 12" pan. Line the bottom with parchment paper. You may not need to do that if your pan is non-stick.I used a 10" x12" pan and lined it too.
- Take out the refrigerated dough. Oil your hands and gently bring the proofed dough in from the sides of the bowl.
- Fold the dough over itself. Turn the bowl a quarter of the way and fold the dough over itself again. Do 3 more quarter turns of the bowl with folding over the dough each time.Repeat this step once more.
- Pour 2 tablespoons of olive oil in the center of the prepared pan.
- Gently place the deflated dough on the olive oil. Roll it a couple of times to coat it well with oil.
- Cover this with plastic wrap or a kitchen towel and keep in a draft-free place for 2-4 hours or until the dough doubles and covers the pan.Mine doubled in 1.5 hours.
- Preheat the oven to 220 C.
- Sprinkle rosemary ( if using ) all over the surface of the dough.
- Pour over the remaining 2 tablespoons of olive oil on the dough and spread it all over. Dimple the dough using your fingers. Sprinkle the sea salt.
- Bake the bread at 220 C for 25-30 minutes, until the top is golden brown. The bottom of the bread should be crispy.
- Let the bread rest in the pan for 5 minutes before turning it out on a cooling rack. Slice warm or let it cool completely. Enjoy!
Video
Nutrition


Brandi Haase says
Made this recipe yesterday. Super easy and delicious. Very light bread. After taking out of the refrigerator, I put in parchment lined baking pan, drizzled some evoo, covered and put on my porch in warm for a several hours. I then punched down, added more evoo along with tomatoes, sliced peppers, rosemary and salt then baked and came out perfect! Will be making all summer long.
Natasha Minocha says
Thank you so much for your lovely feedback, Brandi! I love all the toppings you added, so flavorful and yum! I truly appreciate your support. Wish you a beautiful summer and happy baking!
Becky says
I am in the process of making this for a young Navy man who lives at our apartment complex . He just returned a couple weeks ago from a 6 month tour in Guam . He loves savory foods so I am making his with a cut medley of cherry & grape tomatoes with chopped garlic , sliced green onions , sliced pepperoni , crumbled bacon , diced pepperocini peppers italian seasoning and some fresh Parmesan cheese . I hope he likes it !
Natasha Minocha says
Hi Becky, what a sweet gesture! The toppings sound absolutely amazing...I hope he enjoyed the delicious bread.
Stella says
The Best and easiest To car is I've ever made. I prefer cooked tomatoes on mine. (It is Excellent and very Tasty. Thank you for sharing this wonderful recipe.
Natasha Minocha says
So so happy to hear this Stella! Thank you for your wonderful review ❤️
Ren J says
Can I use a sourdough starter to make this? I just made my first sourdough starter and I can't wait to use it! Will this recipe work for that or should I just follow the recipe as is?
Natasha Minocha says
Hello! Oh I know the feeling! I get super excited when my starter is ready and I want to use to for everything! But for this recipe, please follow it as-is since I have not tested it with a starter.:)