
We continue to celebrate apples with these gluten-free apple hand pies! Easy to make, fun to eat, and so full of all the fall flavors. The fresh apples pair with the warmth of cinnamon and nutmeg to create the most comforting dessert imaginable. Sweet with a hint of nuttiness - the goodness of classic apple pie is matchless.
There is something soul-stirring about a warm, freshly baked apple pie. It takes me back to my childhood when mom would bake one and serve it with a little pitcher of cream. We'd be watching our Sunday evening movie and chomping away happily. What a treat that was!
Lucky for us, it still is...she continues to bake them once in every while and now my kids run to her house to eat it straight out of the oven!
I, on the other hand, have grown partial to apple hand pies. I’ll sit with a plateful and enjoy them with a healthy dose of Netflix! They have a tender, buttery crust and are packed with flavor. Fresh apples and cinnamon are the quintessential Fall combination that makes everything cozy and wonderful.
Jump to:
How to Make Apple Hand Pies
I used buckwheat flour to make the perfect pie crust. Mix flour with a tiny bit of sugar and then cut with chilled cubes of butter. Add in ice-cold water and then bring it together into a smooth dough.
Because the flour is gluten-free, you don’t have to worry about overworking the dough, but the dough is quite fragile. Divide into two halves and cover with cling wrap. It's a good idea to let it rest in the refrigerator for at least an hour.
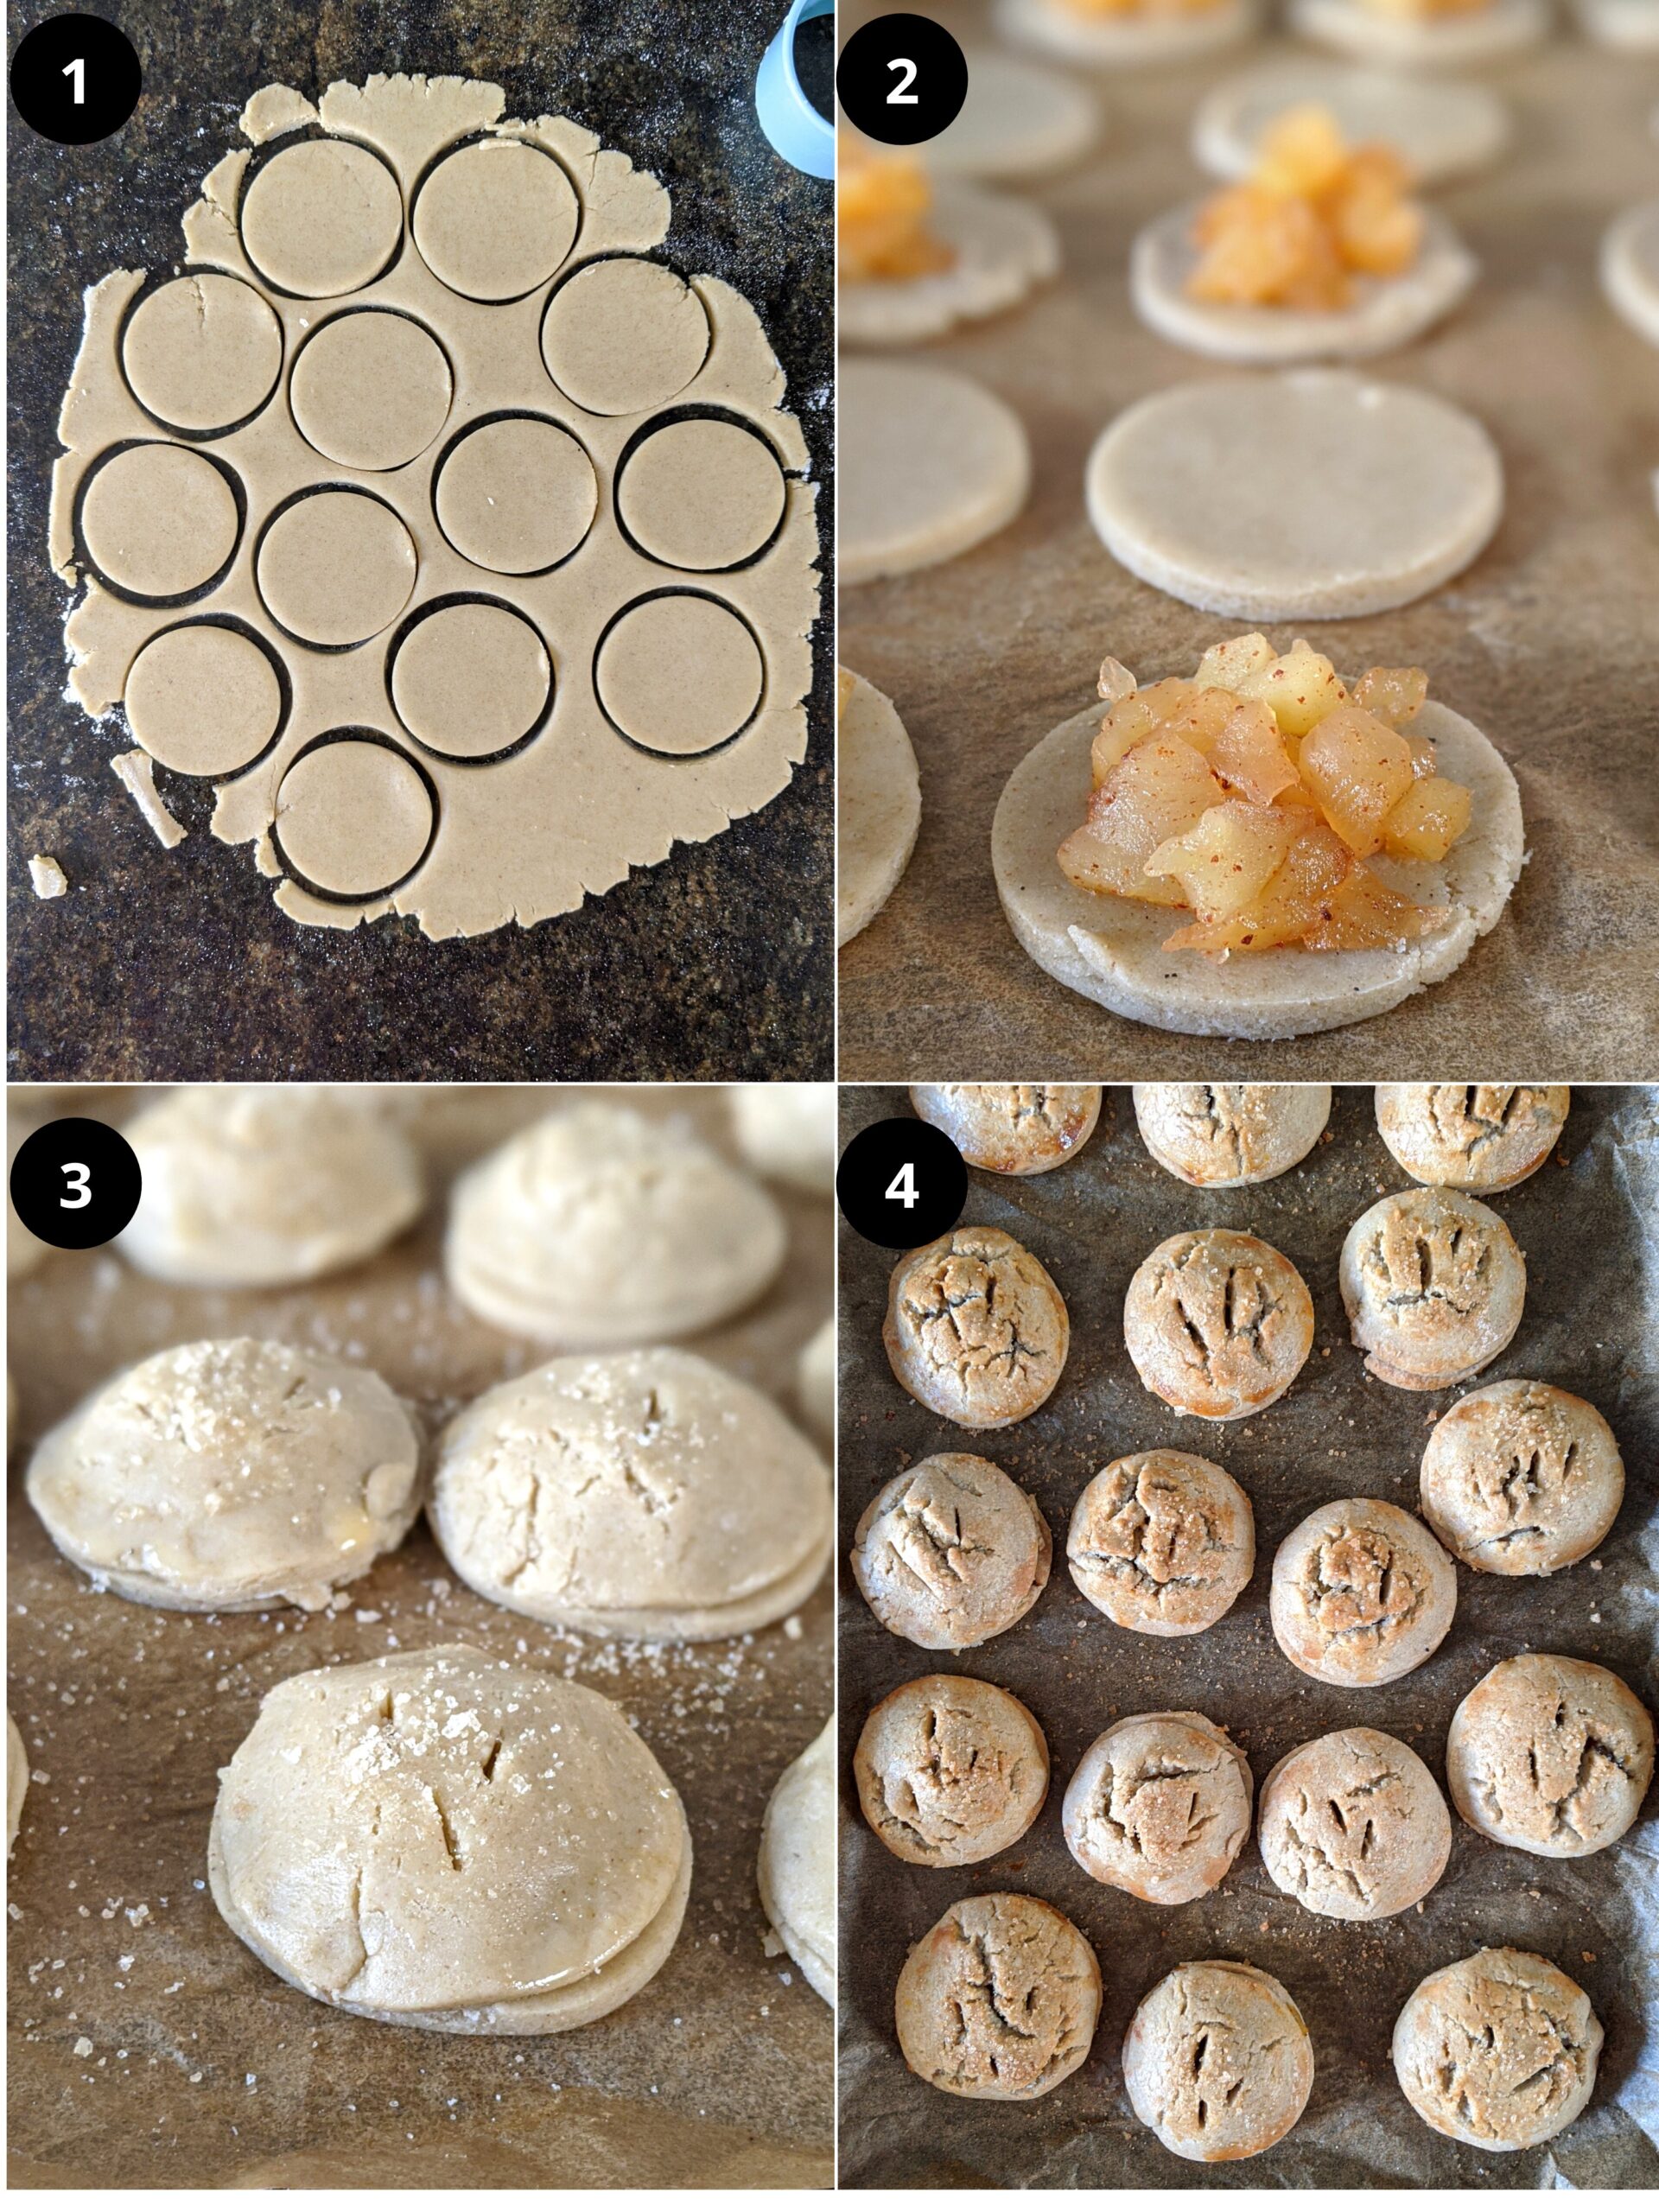
After the dough is chilled, working with one half at a time, roll it out into a rough circle. I prefer the 1/4" thickness. Using a 2- 2.5" round cookie cutter, cut into discs. Place on your parchment-lined baking tray and refrigerate for a little bit.
Assembling the Hand Pies
Plop a small teaspoon full of the lovely apple filling, wet the edges with water, and place the second disc carefully on top of the filling.
Rolling the dough out between two sheets of butter paper makes the task much easier and mess-free. However, I skipped that part this time and went straight to the flour-dusted kitchen counter.
Take your first disc and dampen it with water on one side, put a small teaspoon of filling in the center. Now place the second disc carefully on top of the filling.
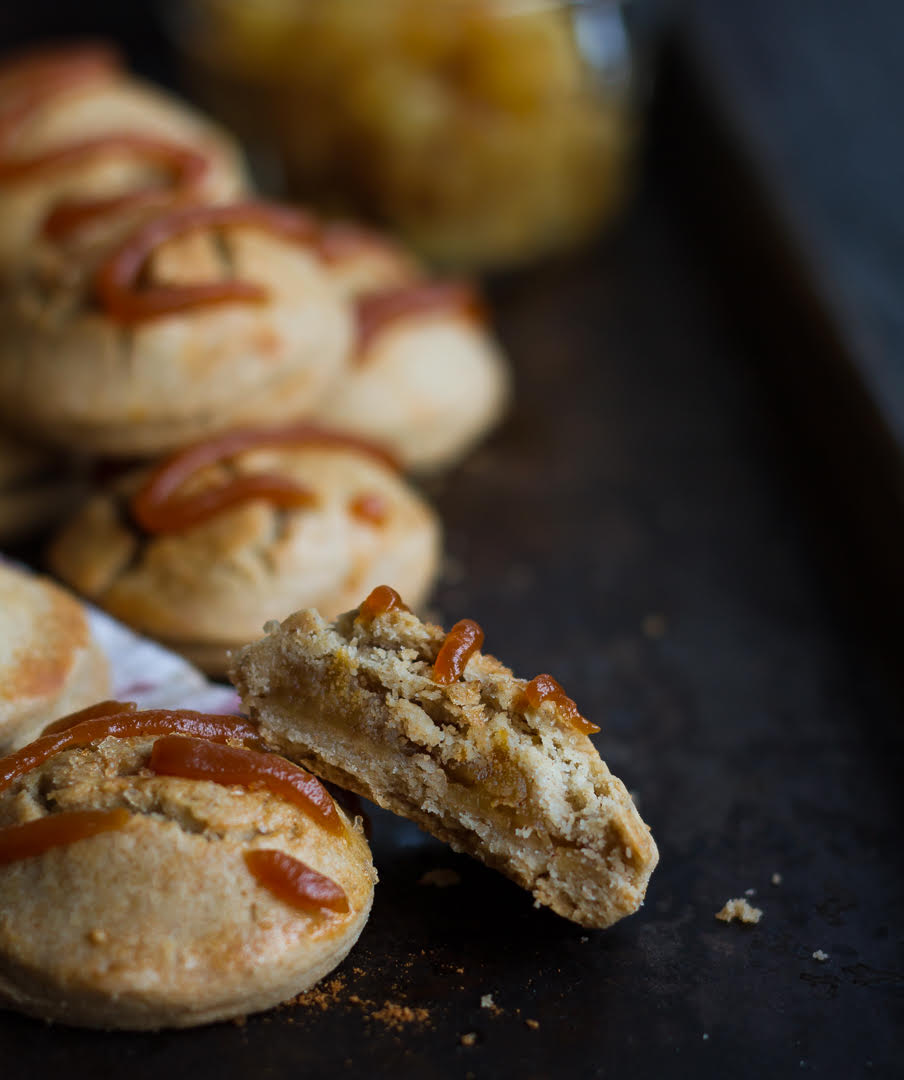
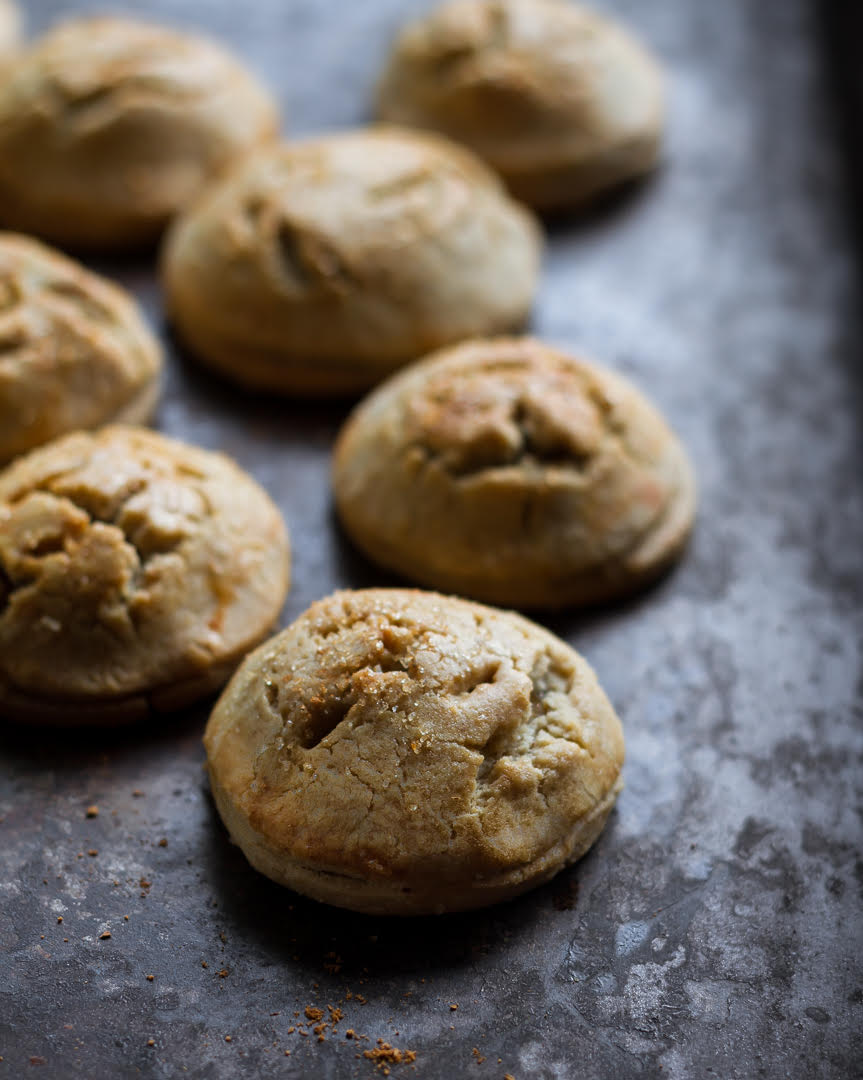
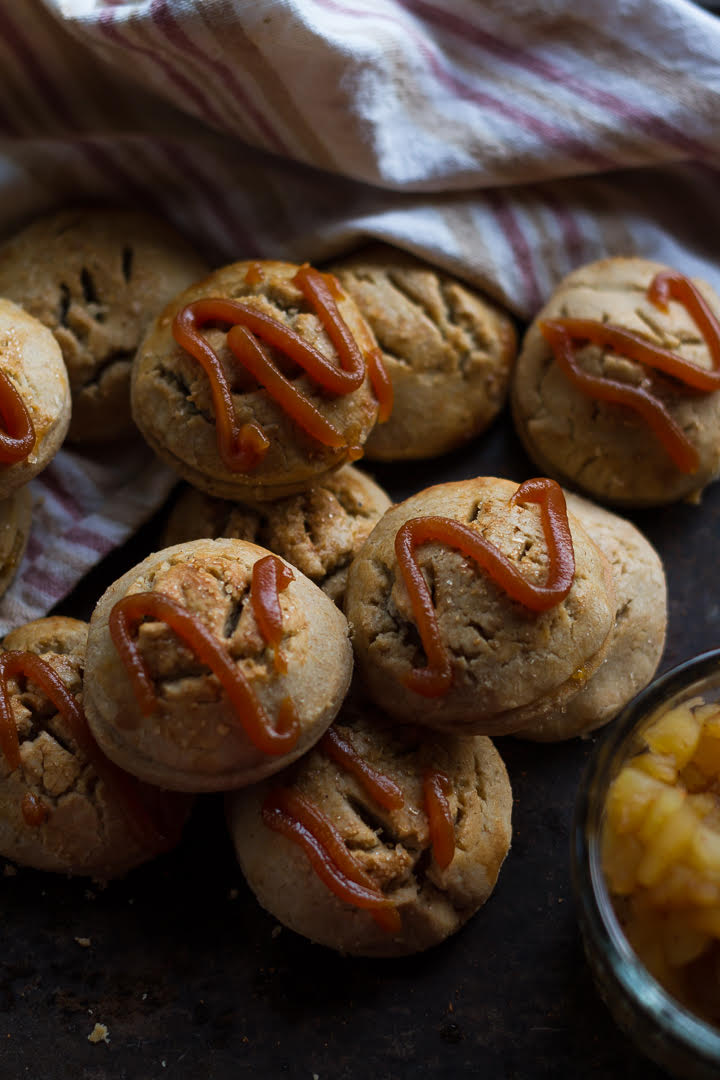
Press it down gently. Prick the surface with a knife or fork. This is to enable the steam to escape. Repeat with the rest of the discs till you have used up all of them.
Lightly brush with egg or milk. Sprinkle with some extra cinnamon or sugar if you'd like.
Baking the Hand Pies
When you're ready to bake the pies, preheat the oven to 180C and line a baking tray with Silpat or baking paper.
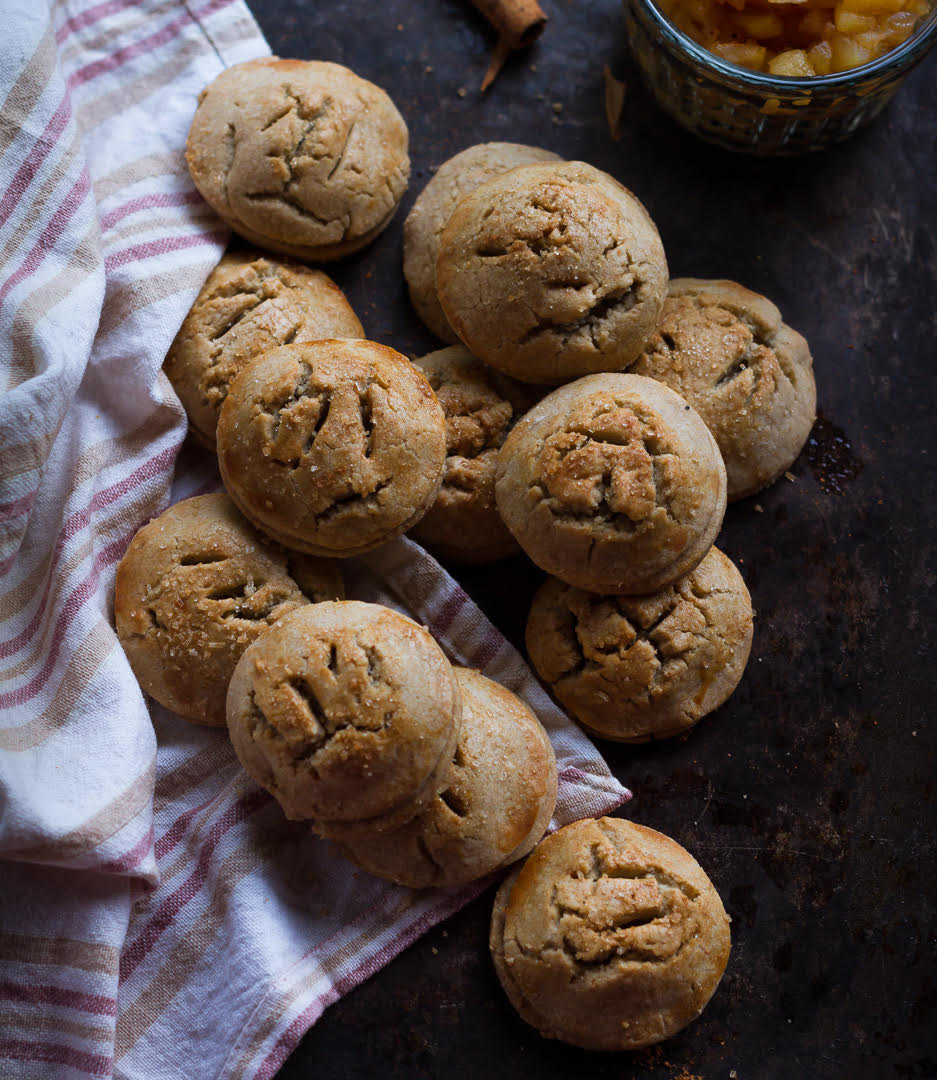
Bake them for 20 - 25 minutes until golden brown. When done baking, turn them onto a cooling rack for 10 - 15 minutes.
What you will soon have is a lovely crumbly, buttery, flaky pie crust filled with fragrant apple filling spiced with cinnamon and nutmeg. My kitchen smelled like heaven for hours after these were done baking!
Apple Hand Pie Recipe Notes
- When making the dough, the butter has to be chilled and cut into small cubes. The same goes for water as well. You can add ice cubes to the water to chill it.
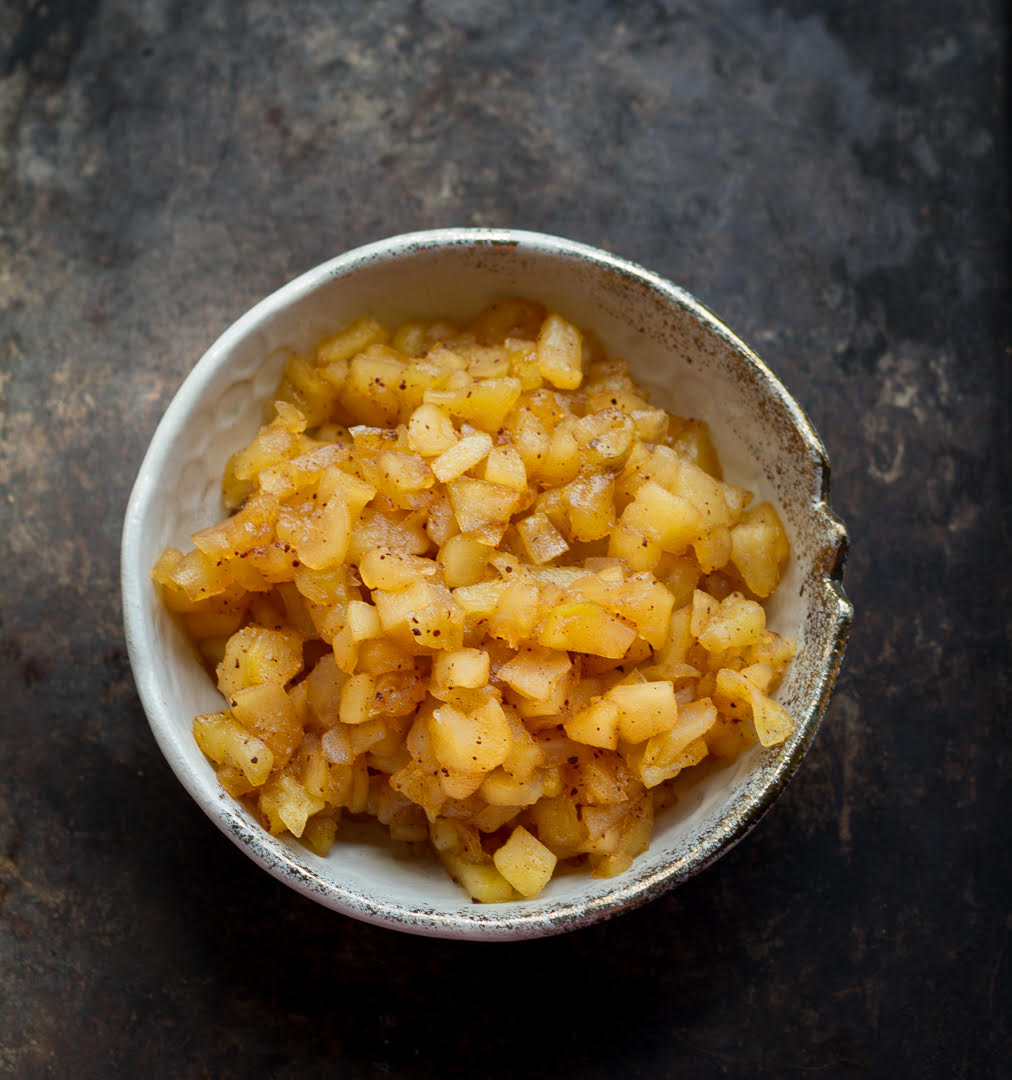
- You will have some of the gorgeous filling left over. You can use it to top toast, oatmeal, pancakes, paranthas, plain yogurt, or eat it as is... It's just simply delicious!
Variations
- In case you do not want to go the gluten-free route, you can substitute buckwheat flour for all-purpose flour or any flour you have on hand! The dough is incredibly simple to make.
- You can make these pies vegan, like my mulberry crumble pie. Just substitute butter for chilled coconut oil and brush the tops with plant-based milk/ cream.
- In case you do not have nutmeg, you can still make a fantastic filling. But if you want a little more flavor, you can use pumpkin pie spice or even a touch of chai masala instead.
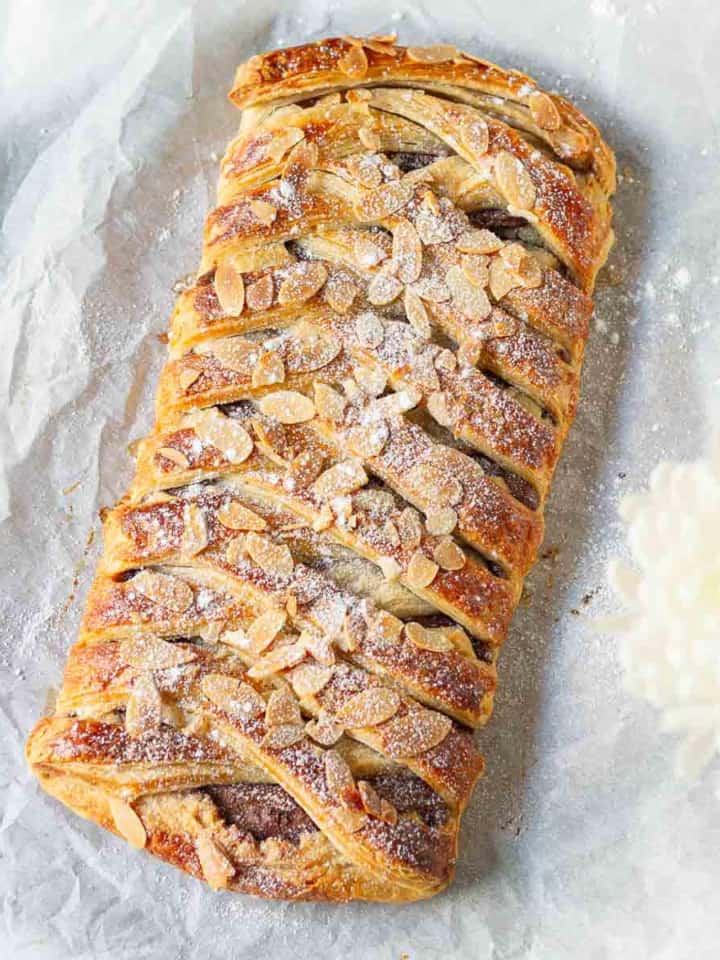
- You can use puff pastry to make these hand pies as I did for my strawberry turnovers!
Serving the Apple Hand Pies
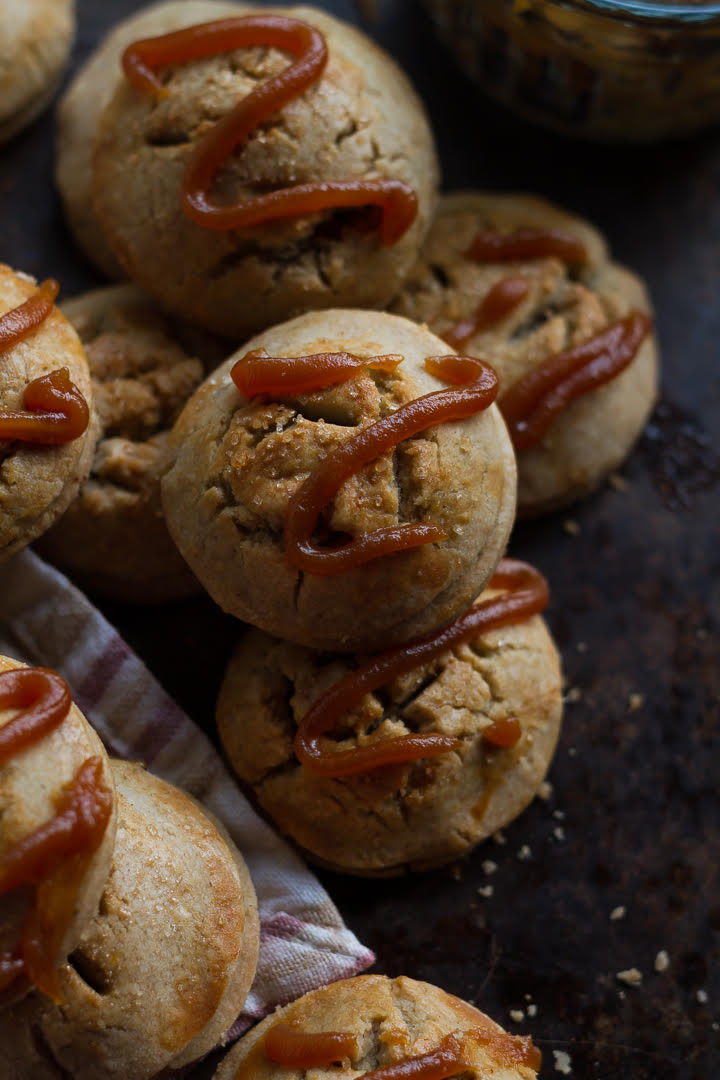
We just loved them as is. But for an extra touch of decadence, I drizzled some leftover caramel sauce from my chai-spiced apple cake!
These pies are my way of reminiscing with a twist. I made this gluten-free and turned them into cute little parcels. Easy to eat, easy to carry, great for snacking or as an after-dinner dessert, and especially fabulous when you want to sit down with your mum for a long chat over a cup of tea!
Half the joy of cooking is sharing it with others. That’s why I’m always eager to hear from you. So go right ahead & drop a comment or reach out on Instagram, Pinterest, YouTube, or Facebook. I hope you love these gluten-free apple hand pies as much as we do!
📖 Recipe

Gluten-free Apple Hand Pies
Ingredients
For the crust:
- 2 cups Buckwheat
- 2/3 cup Butter cold, cut into small cubes
- 1 Tbsp Icing sugar
- 4-6 tbsp Ice cold water
For the filling:
- 2 medium Apples peeled and diced finely
- 3 tbsp Raw sugar You may need more depending on the sweetness of your apples
- 1 tsp Cinnamon powder
- 1/4 tsp Nutmeg powder
- 1-2 tsp Water
- 1 tsp Lemon juice
- Beaten egg or Milk for brushing the pastry
Topping
- Caramel sauce Optional
Instructions
For the crust:
- Combine the flour and sugar in a large bowl. Rub the butter in the mixture, using your fingertips. When it resembles coarse breadcrumbs, add iced cold water, 1 Tbsp at a time, just enough to bind the dough. It can be a bit scraggy at this point but don’t worry, it will come together. Using the palm of your hand, push the dough away from you 4-5 times until its smooth.
- Roll into a ball and flatten it into a disk. Wrap in plastic wrap and refrigerate until ready to use. This should rest for at least an hour.
For the filling:
- Combine diced apples, sugar, cinnamon and nutmeg in a saucepan. Add one teaspoon of water. Cover and cook for about 20 minutes until the apples are soft and well cooked. Take it off the heat and stir in the lemon juice.
- Taste and adjust for sweetness. Let the mixture cool completely.
Assemble the pie:
- When you're ready to bake the pie, pre heat the oven to 180C and line a baking tray with silpat or baking paper.
- Roll out the pastry dough between two sheets of butter paper to a thickness of 1/4". Cut into 2.5" circles using a cookie cutter. Gather up the scraps and roll out again to get more circles. Place these discs on a tray and refrigerate for 10-15 minutes.
- Take your first disc and dampen it with water on one side, put a small teaspoon of filling in the center. Now place the second disc carefully on top of the filling. Press it down gently. Prick the surface with a knife or a fork. This is to enable the steam to escape. Repeat with the rest of the discs till you have used up all of them.
- Lightly brush with egg or milk. Sprinkle with some extra cinnamon or sugar if you'd like. Bake for 20-25 minutes or until golden brown.
- Turn out on a cooling rack and let cool for a few minutes.
- Drizzle with caramel sauce, if using and serve warm. Enjoy!
Nutrition


Ramya says
Just tried these today, so easy and tasty! Thanks ????
Natasha Minocha says
Yayyyy! Thank you so much for your feedback!xoxo