
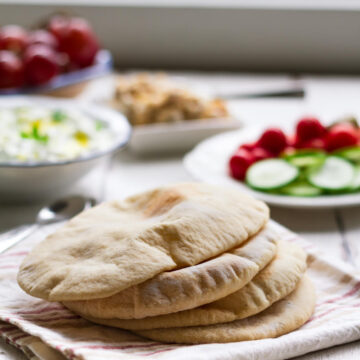
This homemade pita bread recipe is easy and quick and the best way to make soft, fluffy pita bread at home. The flatbread is golden, fresh, warm, and just so delicious. The best part? Pita bread pockets are great for filling in your favorite sandwich ingredients!
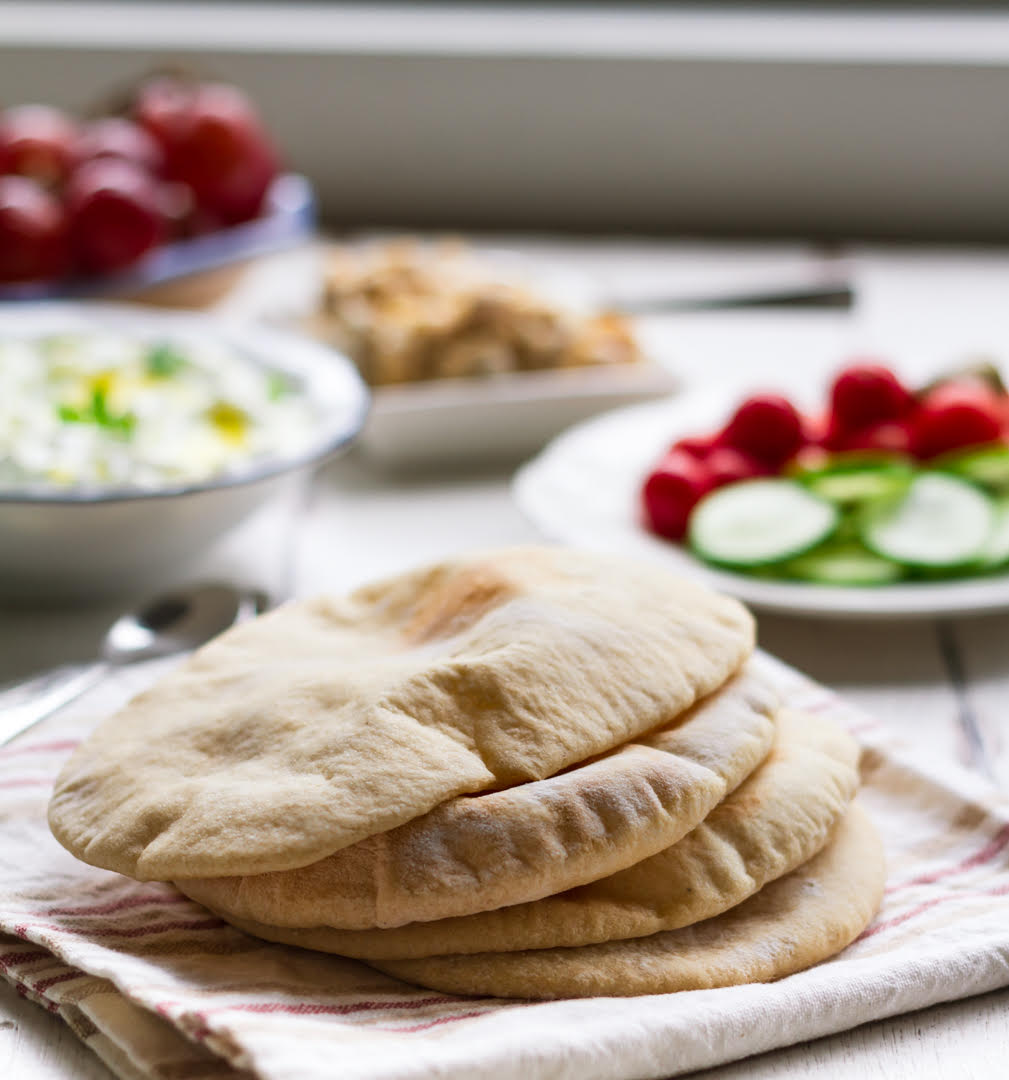
Soft, pillowy, and golden, Homemade pita bread is truly better than any store-bought one. A staple part of the Middle East and Mediterranean cuisine, pita bread puffs up beautifully when baked. It's perfect for scooping up dips and stuffing with delicious fillings!
Jump to:
Why You’ll Love This Recipe
Surprisingly easy and quick to make
You’ll love the thrill of seeing pita bread puff up!
The yeasty aroma that fills the kitchen is irresistible
Low effort, fun, and gives you a meal that you can relish with any dip like roasted carrot hummus, homemade labneh, and fillings like crispy air-fryer falafel!

Recipe Ingredients

Flour: I used half all-purpose flour and half whole wheat flour. Why? Because I love the nutty notes, whole wheat gives to the pita bread recipe. However, you can make the flatbread with 100% whole wheat or all-purpose flour.
Yeast: Use either dry active or instant yeast. Both work. Just make sure you bloom it in warm water (105°F or 40.5°C). Hot water will kill the yeast, and cold water will fail to activate it.
Salt: Enhances and rounds off the delicious bread flavor.
Sugar: Sugar helps the yeast activate.
Oil: Helps make soft pita bread. I prefer the fruity taste of olive oil. You can substitute it with any neutral-tasting vegetable oil.
See the recipe card for full information on ingredients and quantities.
How To Make Homemade Pita Bread?
Step 1: Mix warm water, yeast, and sugar. Stir thoroughly and let it rest till the yeast activates.
Step 2: In the meantime, sift and combine the dry ingredients of the pita bread recipe: all-purpose flour, whole wheat flour, and salt.
Step 3: When the yeast is frothy, pour it into the dry ingredients along with olive oil. As you mix, a shaggy mass will form.
Step 4: Knead the pita bread for about 8 to 10 minutes till you have a smooth but distinctly elastic dough.
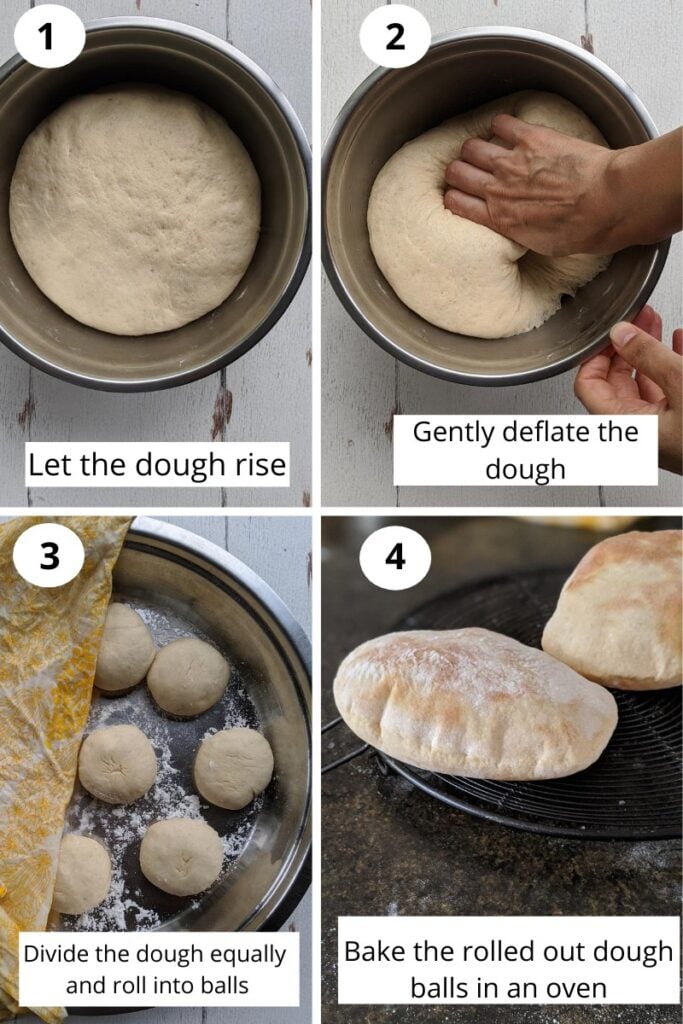
Step 5: Form a smooth ball, place it in a bowl, cover it with a damp cloth, and let it rise. My pita bread recipe doubled in less than 60 minutes, as it’s really warm here. It may take more time for you.
Step 6: Flour your prep area and then punch the dough gently to deflate. Cut it into equal portions and form them into balls. I had 9 dough balls.
Step 7: Transfer the balls into a floured tray, cover it, and set it aside for a few minutes. While you wait, preheat the oven to the maximum setting possible. That's 250 °C (or 480 °F) in my oven.
Step 8: Roll out the pita dough balls and place as many of them as you can on a Silpat or parchment-lined tray without overcrowding. (I could fit in 2 at a time.)
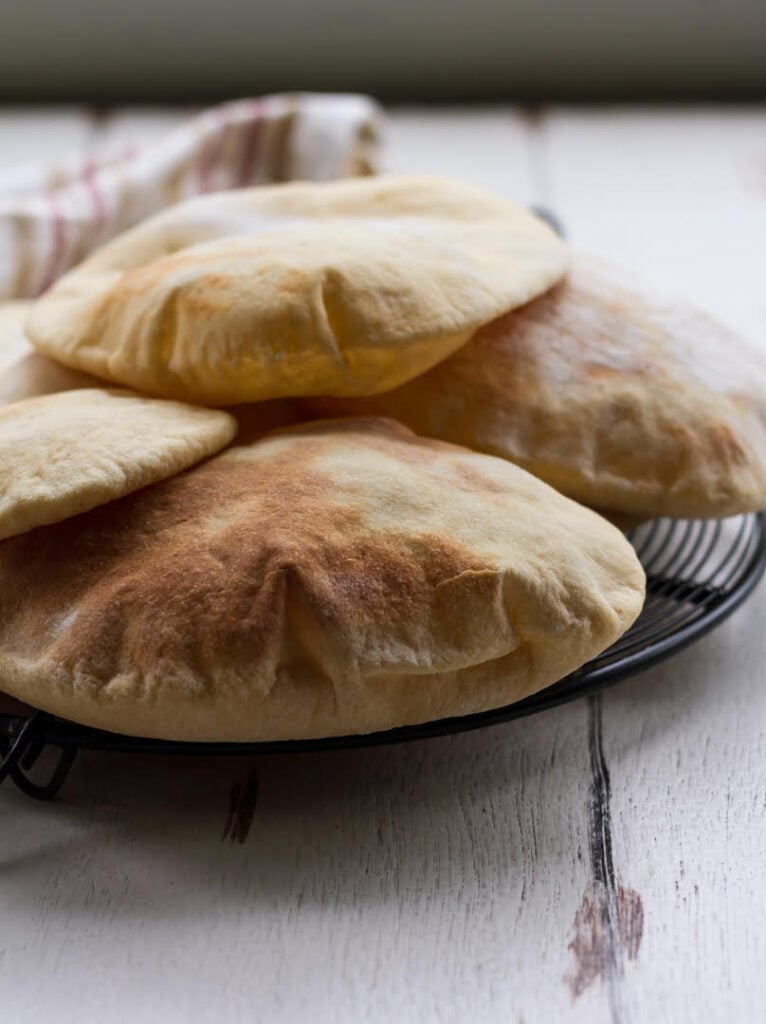
Step 9: Bake for 4-5 minutes. Take them out when they puff up. You don’t need to brown them. Bake them till the edges have a golden hue.
Final step: Serve and savor!
Pro Tips
The trick to a soft and fluffy homemade pita bread is to roll it evenly. Besides that:
- Keep the dough soft and slightly sticky. If it is too sticky, try adding a small amount of flour. Too dry, increase the amount of warm water, a tablespoon at a time.
- Roll a smooth disc. Tears in the dough act as a vent for the steam and the pita won’t puff up.
- Bake at high temperature. This helps the dough expand quickly to form the steam-filled pocket.
- The puffy pita does deflate as it cools, but once you cut it, you'll find the pockets remain.
- Baked the pita for a few extra minutes? Don’t worry. The bread will be brown on top, but crunchy and lovely!
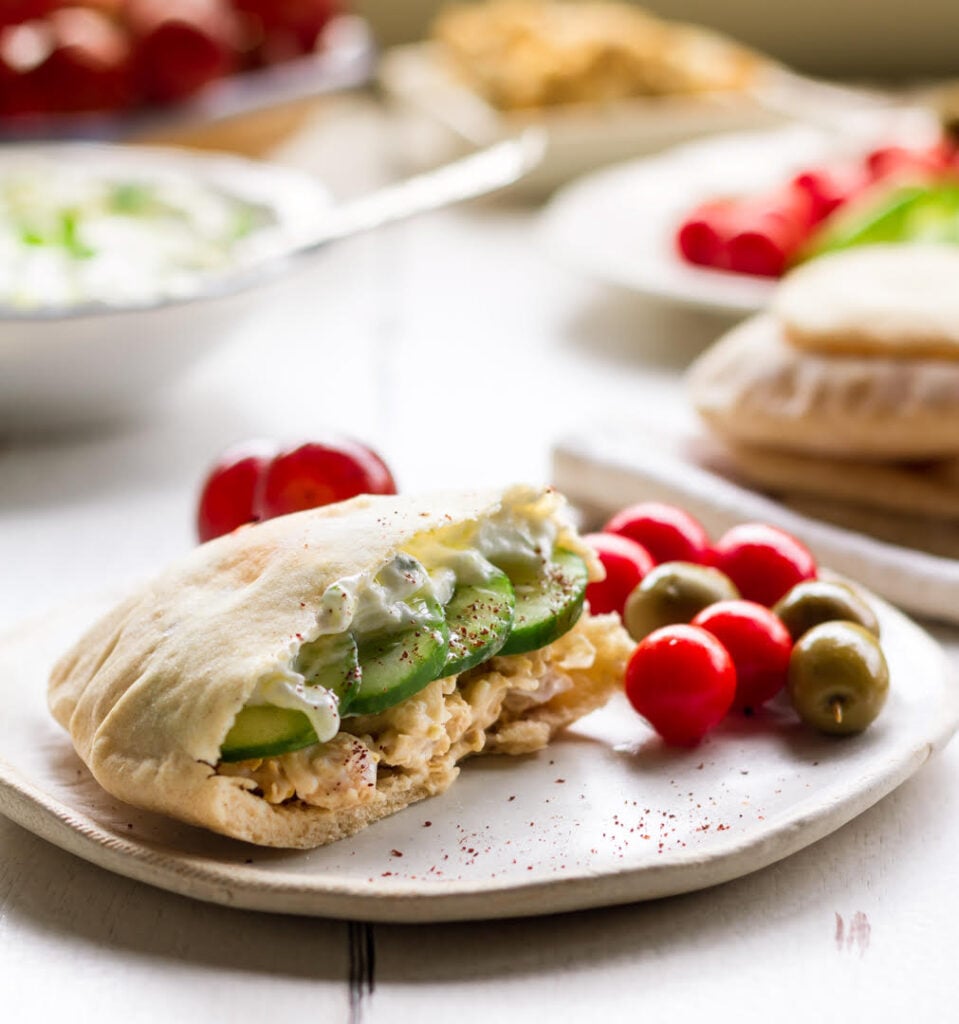
How To Serve
Stuff it, wrap it, dip it, scoop with it—the possibilities with the pita bread recipe are boundless. A creamy homemade hummus and pita bread is the traditional choice, but it will still knock your socks off.
- Tangy, refreshing tzatziki is another dip you can pair pita with.
- Pita bread sandwiches are a hit with everyone. Fill the pita bread pocket with smashed chickpea salad or avocado egg salad.
A few more pita bread lunch ideas? Stuff it with olives, cherry tomatoes, whipped feta dip, raw banana cutlets, or air fryer pumpkin. I love making pita pizzas too!
Pita Bread Recipe FAQS
Yes, you can make this pita bread recipe with just all-purpose flour. Adding whole-wheat flour makes the flatbread heartier. So, without it, the pita will be lighter.
If your pita bread didn’t puff up, it could be because your oven was not hot enough or there were tears in your rolled-out dough.
- Roll the pita bread evenly and without any tears, and it’ll trap the steam and puff up nicely.
- Make sure each pita disc is thin. I rolled out mine to about a quarter of an inch thickness.
- A soft, tacky-to-touch dough is easier to roll.
Yes, you can! Use a heavy-bottom pan or skillet. Heat at medium-high. Then cook the pita on the dry skillet for 30 to 40 seconds. Flip and cook the other side till it puffs up (2 to 3 minutes).
Store the pita wrapped in foil or plastic wrap, and it’ll keep well for 2 days. Reheat in a skillet or oven. The pita bread recipe is also freezer-friendly. Wrap it and store it in a Ziplock bag for up to a month. Thaw, reheat, and serve.

📖 Recipe
Homemade Pita Bread
Ingredients
- 1 cup All purpose flour
- 1 cup Wholewheat flour
- 1/2 tsp Salt
- 2 tsp Yeast
- 1/2 tsp Sugar
- 1 cup Warm water
- 1 tbsp Extra virgin Olive oil
Instructions
- In a small bowl, combine the warm water, yeast and sugar.
- Let this mixture rest for 5-10 minutes, until its frothy and bubbly.
- In a large bowl, combine both the flours and salt.
- Pour over the yeast mixture and olive oil.
- Knead the dough well for 8-10 minutes, until it's smooth and elastic.
- Place the ready dough in a lightly greased bowl and cover it with a kitchen towel.
- Let the dough rest and proof for 1 -2 hours, or until it's doubled in size. Mine was done in less than an hour.
- Gently deflate the dough. Divide into 9 equal- sized pieces.
- Form each dough piece into a ball. Place in a tray, cover with a kitchen towel. Let this rest for 10-15 minutes.
- In the meanwhile, preheat your oven to 250 C or 480 F.
- Line a tray with Silpat or parchment paper. You can use an unlined tray as well.
- Once the oven is preheated, start rolling out the dough balls into an oval or round shape. Roll evenly to about a quarter-inch thickness.
- Place on your baking tray and slide it in the oven. In 4-5 minutes, you'll see the pitas puffing up and turning light golden brown.
- Take them out and keep warm in a kitchen towel.
- Repeat with rest of the dough.
- Serve warm or at room temperature. These keep well, wrapped in foil or baking paper for 2-3 days in the refrigerator.


Karen says
This is a fantastic recipe, we have made pita at home twice using this! Thank you 🙂
Natasha Minocha says
Thanks so much Karen! So lovely to hear that:)