
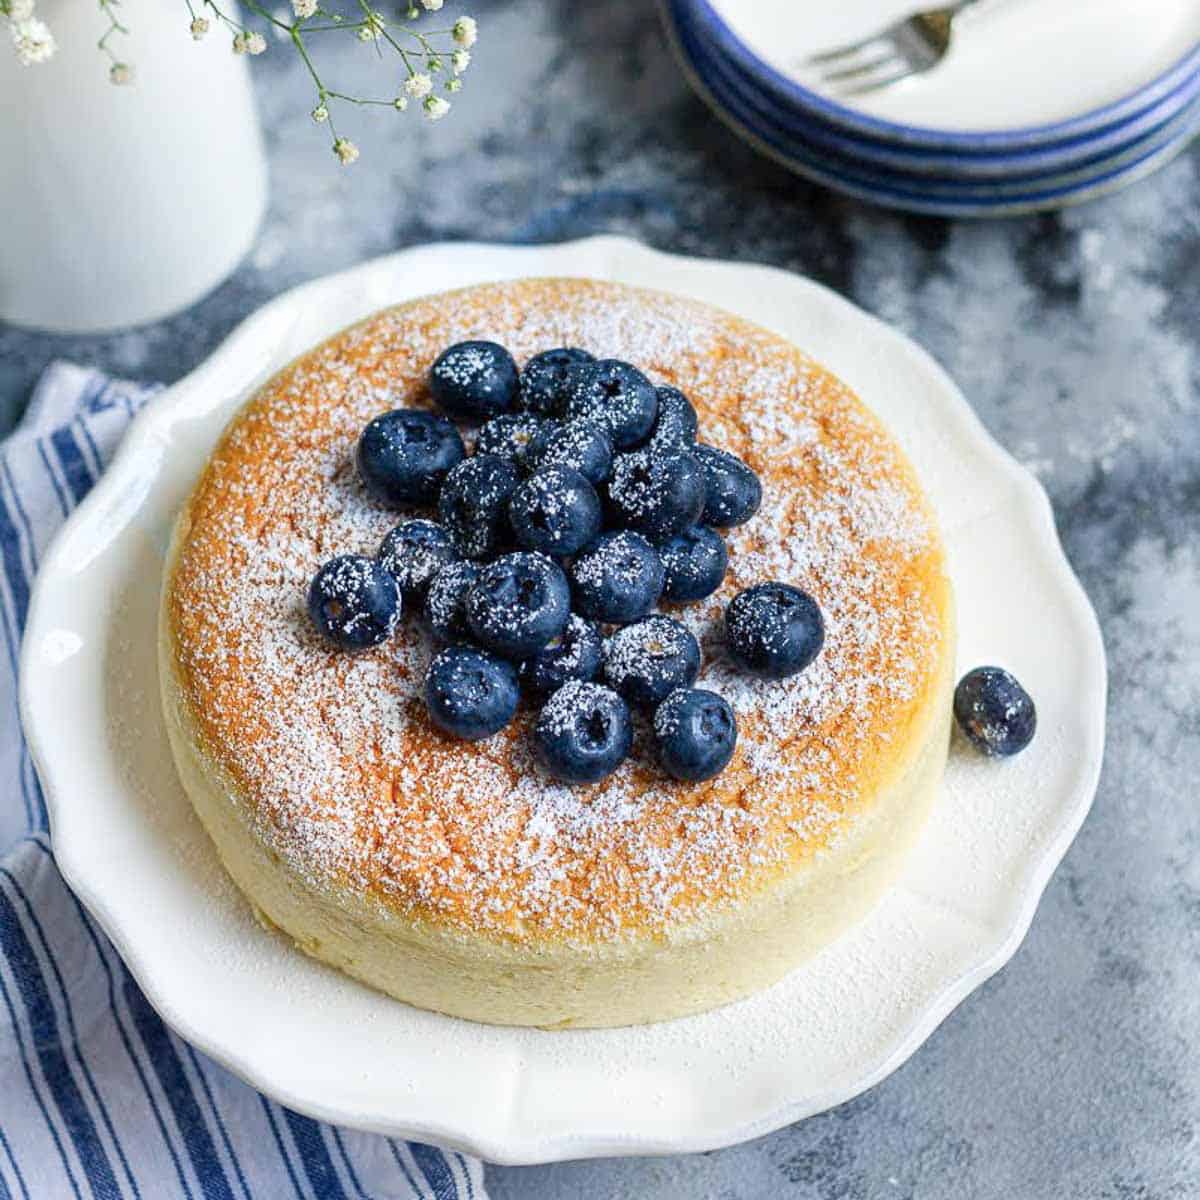
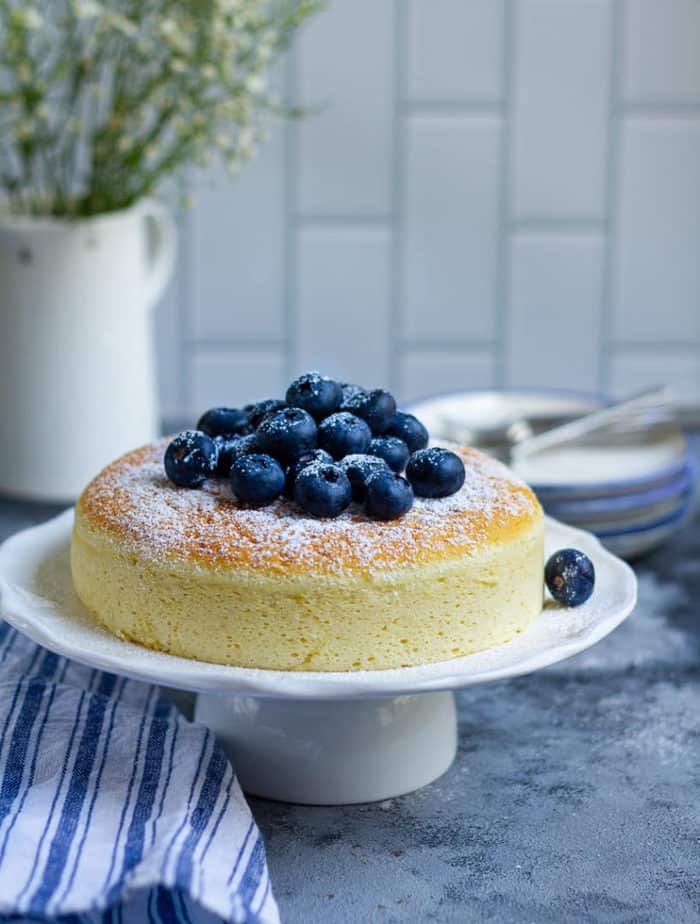
This Japanese cheesecake is as light as a cloud, delicately sweet, and melt-in-your-mouth soft! With a few basic ingredients and a couple of techniques, this soufflé-style cheesecake is easy to master!
Jump to:
Why You'll Love The Recipe
Japanese jiggly cheesecake has a souffle-like texture that's airy, tender, and like cotton!
Perfectly balanced sweetness with tangy cream cheese, this Japanese cheesecake is a delightful dessert that will please everyone!
Making this cheesecake requires a bit of technique and patience, but simple-to-follow instructions make it so worth the effort!
What Is Japanese Cheesecake?
Japanese cheesecake was created by Japanese chef Tomotaro Kuzono in the 1960s during his visit to Berlin. It's also known as cotton cheesecake or soufflé cheesecake, as it is a lighter, airier version of regular cheesecake. On the cake scale, it lies somewhere between a cheesecake and a chiffon cake. It's popular for its quintessential jiggle and fluffy texture!
It typically has less sugar and cream cheese as compared to New York-style cheesecake, making it less dense and so much softer!
How To Make Japanese Cheesecake
When I bake, I often use cups and spoons as measurements. However, for this Japanese cheesecake recipe, I insist on using the metric equivalent.
The recipe looks intimidating, but if you follow the instructions and measure out all the ingredients, it comes together easily. The rest of the magic is in the oven!
The cream cheese filling
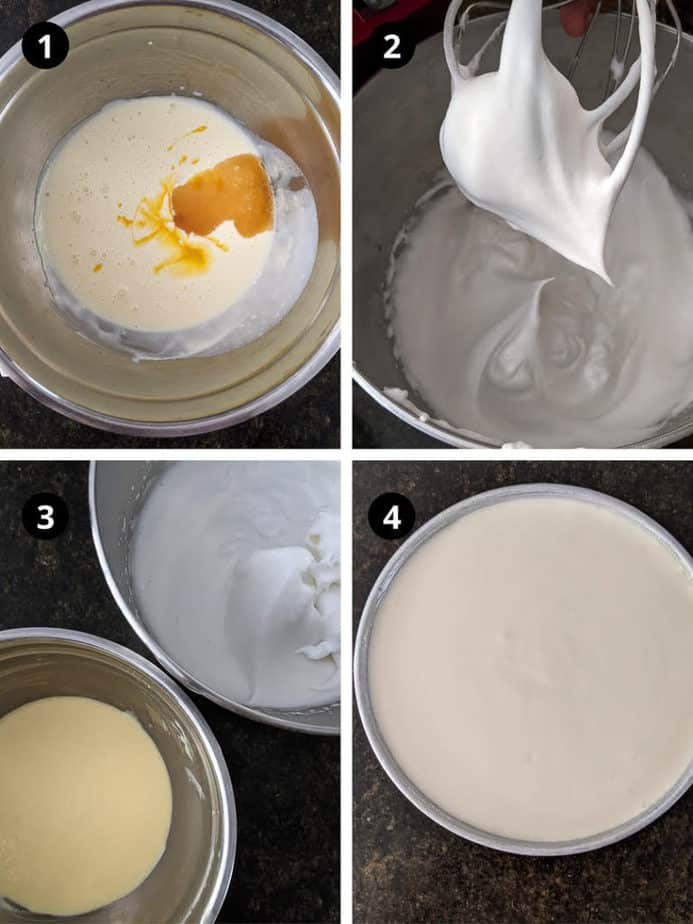
- In a double boiler, melt cream cheese, butter, and milk. Keep whisking constantly till everything is combined, and you have a smooth, homogeneous mixture.
- Take off the heat, let the mixture cool for about 10 minutes, then add the egg yolks with vanilla extract. Whisk it. (Cooling is important, else the yolks will get scrambled.)
- Sift in flour and cornstarch and whisk again.
Make the meringue
- In a very clean and dry bowl, beat the egg whites till they start looking like foam. (You can use either an electric beater or your stand mixer.)
- Now add in sugar and beat again for 3 to 4 minutes until you have soft peaks.
Prep the pan and the tray
Japanese cheesecake is baked in a water bath. That’s a fancy way of saying that the cake tin is placed on a tray of water inside the oven. To make the water bath:
- Use a tray that is deep enough to hold water and wide enough to fit the cake tin.
- Butter your cake tin liberally.
- Place parchment paper on the bottom of the pan.
- Butter the parchment, too. It’ll help take the cake out after it is baked.
Bake the jiggly Japanese cheesecake
One of the tricks to making a light and fluffy Japanese cheesecake is to mix the meringue and cream cheese filling in thirds. This makes sure that the small air pockets in the beaten egg white don’t deflate.
- Take a third of the meringue and fold it gently into the cream cheese.
- Pour in another third of the meringue and stir again using light circular motions.
- Mix in the last of the meringue till you see no white streaks.
- Transfer the batter into the prepared cake tin and place it inside the bigger tray.
- Pour hot water into the bigger tray. It should come up almost halfway up the sides of the cake pan.
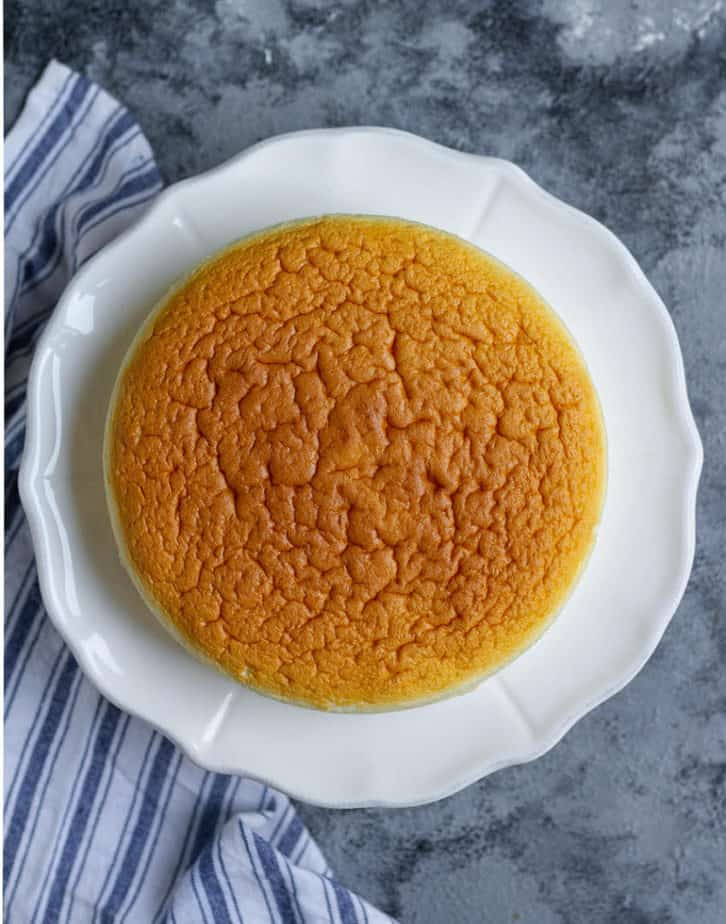
- Bake till the cake is light golden and jiggly in the center.
Top Tips
- Measure every ingredient and prep every piece of equipment beforehand. It will save you a lot of time.
- Please use a kitchen scale to measure the ingredients.
- The bowl you use to beat egg whites has to be clean and dry. Any grease or water will hamper the rise of meringue peaks.
- Before you beat the egg whites, add 1 teaspoon of lemon juice. It stabilizes the egg whites.
- Don’t overmix the meringue and cream cheese mixture or use a heavy hand. A few strokes of the spatula (or a balloon whisk) will do the job.
- To make sure no air is lost when mixing, use a very light circular motion. Also, move from top to bottom.
- I use a regular 8-inch tin and not a spring-bottom pan because I did not want to take any chance of water seeping in! If you grease the tin and the parchment liberally, the cake will slip out easily.
- Japanese cheesecake is baked at two temperatures. First at 225 °C (435°F) for 5 minutes and then at 160 °C (325°F) for 40-45 minutes. The high temperature gives the cake the initial rise and color.
How To Serve The Japanese Cheesecake
The rule of thumb with most cheesecakes is to leave them undisturbed in the oven till they cool. For this Japanese-style cheesecake, though, let it sit in the oven for 5 minutes, and then take it out.
Carefully invert the cake tin onto a plate, remove the parchment paper, and then flip it back right-side-up onto a wire rack.
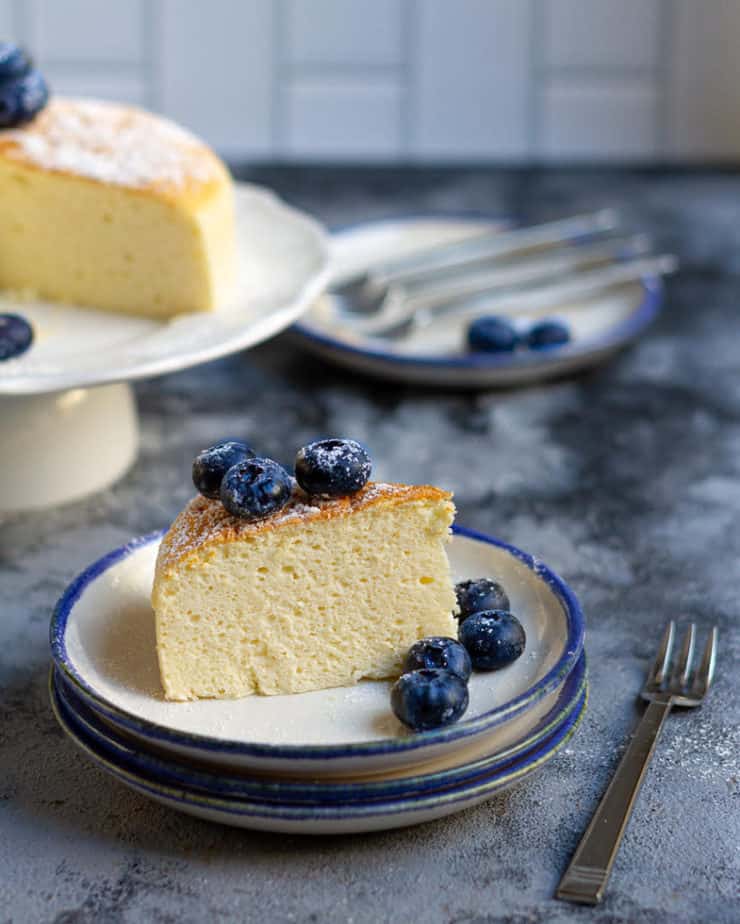
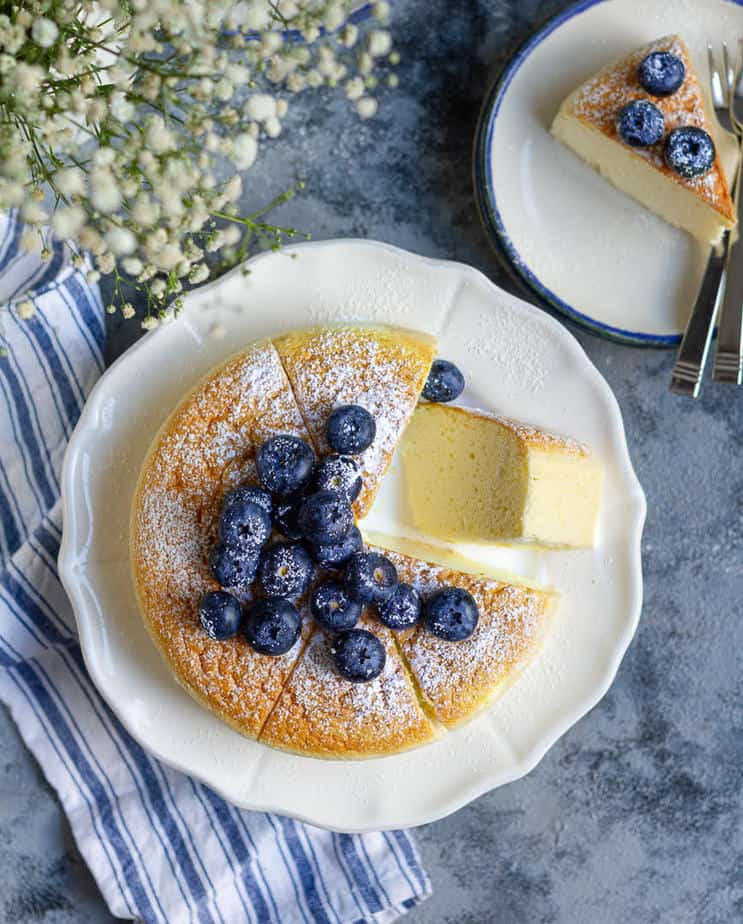
You can serve Japanese cheesecake warm or cold. It’s delicious either way. I recommend trying both because the texture changes with temperature. When it’s warm, the cake is fluffier, tastes more custardy, and every bite melts in your mouth.
When chilled, it is spongier and creamier. Plus, it's easier to cut neat slices. As the cheesecake cools, the top will get some wrinkles, this is perfectly normal.
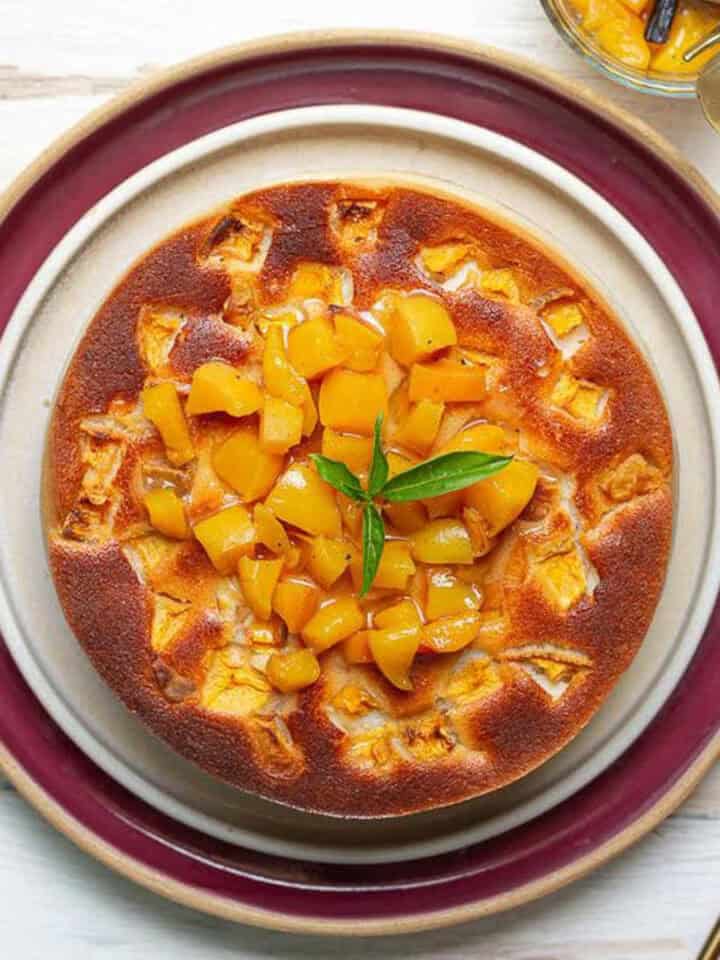
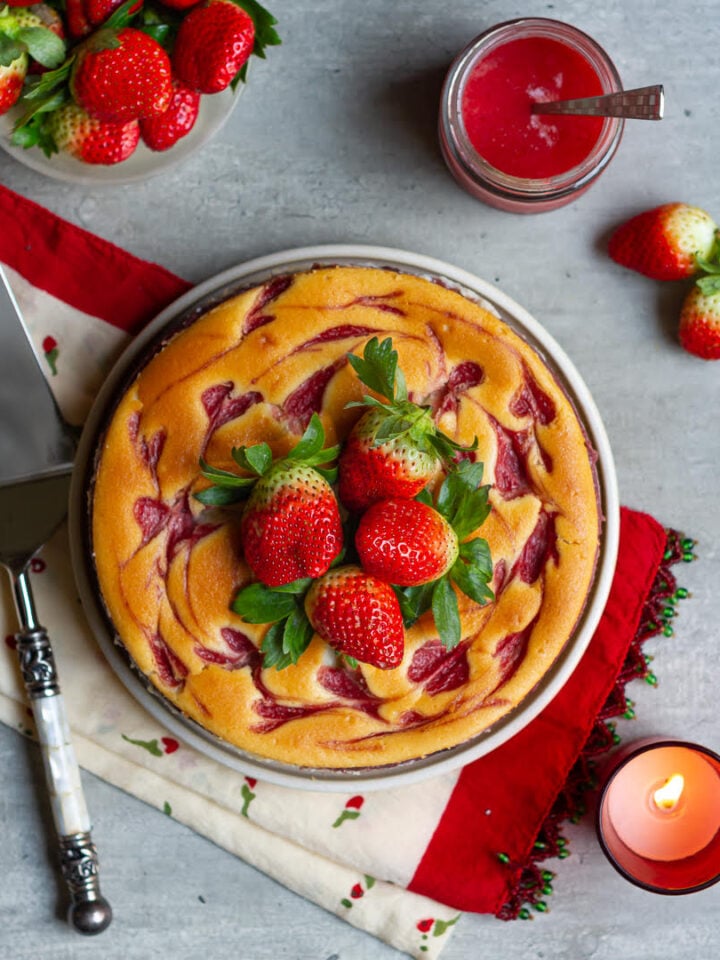
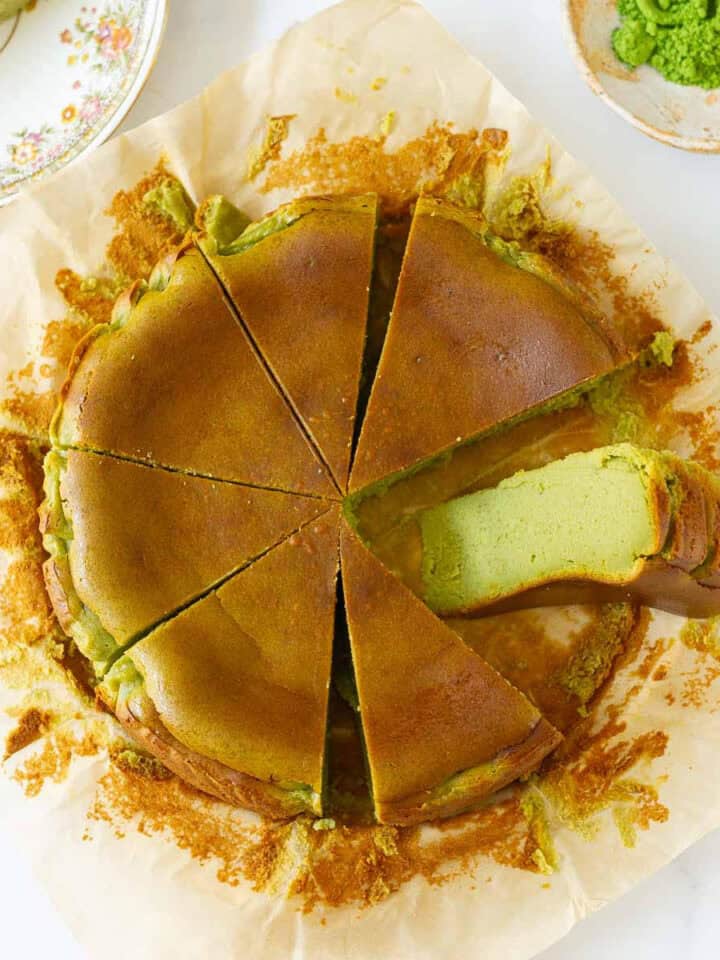
This jiggly Japanese cheesecake needs no toppings. But you can dust it with powdered sugar and top with some berries.
Recipe FAQs
The cheesecake is done when it's light golden on top and has a slight wobble in the center.
If you feel the cheesecake is not done and the 45-minute mark has crossed, loosely cover the top with foil. Bake for another 10-15 minutes.
High temperature of the oven causes the cheesecake to crack. We bake this cheesecake at a high temperature for just 5 minutes! After that, you need to bake at a lower temperature until it is baked.
The reason the cake is not airy and light is incorrectly beating the egg white mixture. The meringue has to be at the perfect soft to medium peak stage. Always make sure the meringue peaks start to bend over. That’s the point when they have enough air bubbles to give you a fluffy cheesecake.
📖 Recipe
Japanese Cheesecake
Ingredients
- 94 g Cream cheese
- 56 g Butter
- 94 ml Milk
- 130 g Egg whites, approximately 4
- 47 g Egg yolk, approximately 3
- 18 g All-purpose flour
- 9 g Cornstarch
- 63 g Sugar
- 1 tsp Vanilla extract
- 1 tsp Fresh lemon juice
- Powdered sugar and fresh berries for the topping Optional
Instructions
- Preheat your oven to 225 degrees Celsius or 435 degrees Fahrenheit.
- Grease an 8" cake tin. Line the bottom with parchment paper. Grease the parchment paper too.
- Keep a bigger baking tin handy. Your 8" cake tin should fit into that comfortably.
- Keep a kettle on for hot water for the water bath.
- Measure out all the ingredients.
- Separate the eggs. Keep the egg whites refrigerated until you're ready to use them.
- In a large bowl, combine the cream cheese, butter, and milk. Place the bowl over a pan of simmering water. 94 g Cream cheese,56 g Butter,94 ml Milk
- Once the butter has melted, take the bowl off the heat and whisk well. Let this mixture cool for about 10 minutes. This is important because we don't want the egg yolks getting scrambled in the hot mixture!
- Add egg yolks and vanilla extract. Sift in the flour and cornflour/cornstarch.47 g Egg yolk, approximately 3, 1 tsp Vanilla extract, 9 g Cornstarch, 18 g All-purpose flour
- Now, place the egg whites and lemon juice in the bowl of your stand mixer. You can also use a handheld electric beater. 130 g Egg whites, approximately 4, 1 tsp Fresh lemon juice
- Beat the egg whites until they are foamy. Add in the sugar. Beat until you just reach the stage of soft peaks.
- Fold in a third of the egg whites into the cream cheese mixture. Add another third, fold well and gently. Then add the remaining whites.
- The batter will be very light and airy.
- Pour into the prepared tin. Place the tin in the bigger baking tray and pour hot water almost halfway up the sides of the cake tin.
- Carefully place in the oven. Bake at 225 C (435 F) for 5 minutes. Then lower the temperature to 160 C (325 F)and continue baking for 40-45 minutes.The top of the cake should be lightly golden. The top and the sides should look cooked, but the cake should be slightly jiggly in the center.
- Take the cake out of the oven and let it cool in the tin for 5-10 minutes. Carefully invert the cake tin onto a plate, remove the parchment paper, and then flip it back right-side-up onto a wire rack. Place on a cake rack to cool completely.
- You can serve the cake at room temperature or chill it for a few hours. I prefer it chilled!
- Sprinkle some powdered sugar on top and serve. Enjoy!
Notes
- Measure every ingredient and prep every piece of equipment beforehand. It will save you a lot of time.
- Please use a kitchen scale to measure the ingredients.
- The bowl you use to beat egg whites has to be clean and dry. Any grease or water will hamper the rise of meringue peaks.
- Before you beat the egg whites, add 1/4 teaspoon of lemon juice. It stabilizes the beaten egg whites.
- Don’t overmix the meringue and cream cheese mixture or use a heavy hand. A few strokes of the spatula (or a balloon whisk) will do the job.
- To make sure no air is lost when mixing, use a very light circular motion. Also, move from top to bottom.
- I use a regular 8-inch tin and not a spring-bottom pan because I did not want to take any chance of water seeping in! If you grease the tin and the parchment liberally, the cake will slip out easily.
- Japanese cheesecake is baked at two temperatures. First at 225 °C (435°F) for 5 minutes and then at 160 °C (325°F) for 40-45 minutes. The high temperature gives the cake the initial rise and color.
Dharini Agrawal says
Hi, Natasha!
I was curious about why we're using cold egg whites instead of those at room temperature.
Natasha Minocha says
Hi Dharini, after many rounds of testing, I found that cold egg whites worked the best for this recipe 🙂
Priya says
A perfect japanese fluffy cake is my dream to bake. This looks heavenly Natasha...
Natasha Minocha says
Thank you so much, Priya! So wonderful to see you here xoxo