
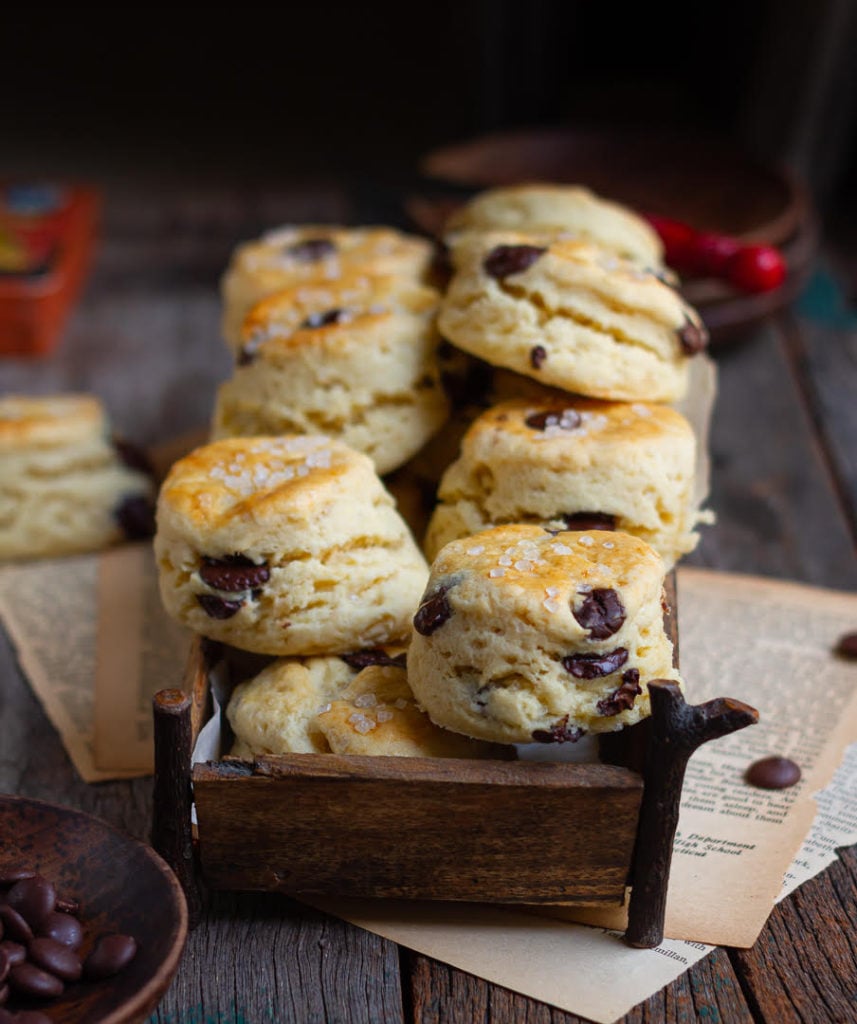
Buttery, tender, and flaky, these chocolate chip buttermilk scones are a perfect cozy bake that feels special but is so simple to make!

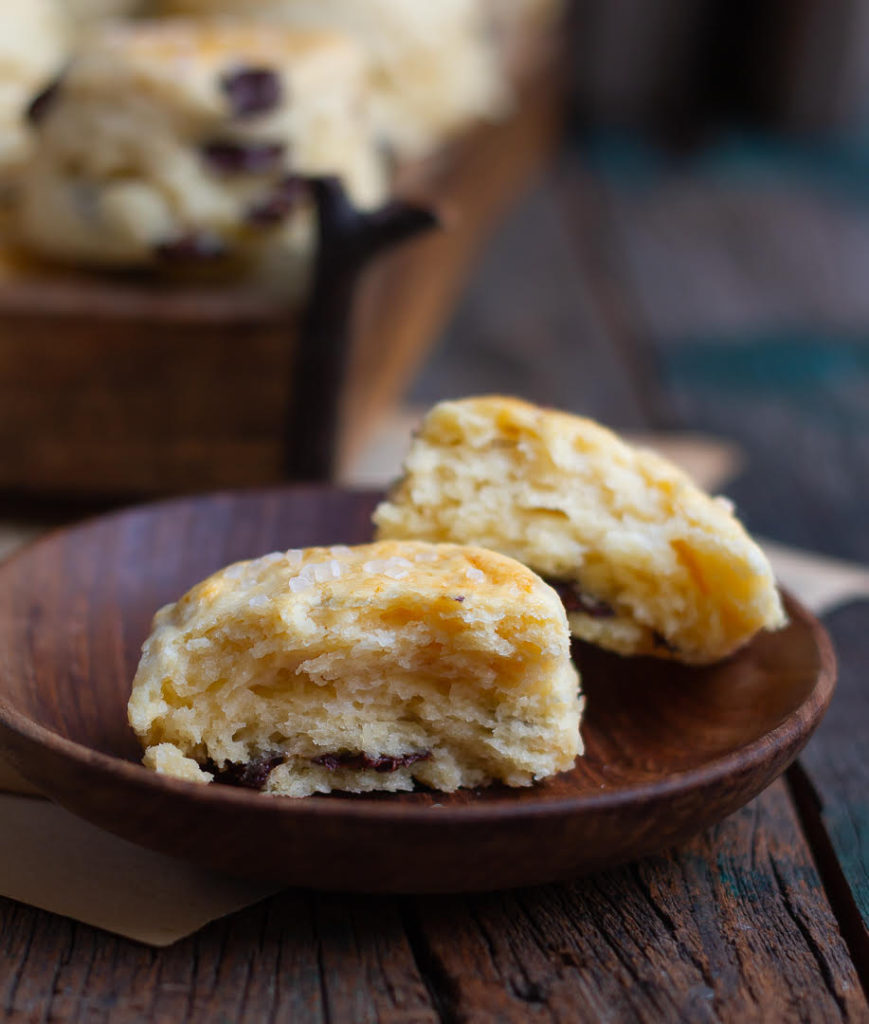
With all the earmarks of a classic scone, they melt in your mouth. Wonderfully light and so, so moist, it’s the delicate magic of buttermilk at work. Each bite has chocolatey hints playing hide and seek in golden layers.
Jump to:
Why You'll Love This Recipe
These chocolate chip scones are beautifully golden with perfectly crisp edges and flaky centers. Buttermilk gives them that dreamy light texture that keeps you reaching for just one more.
Pockets of melty chocolate make them totally irresistible!
They are perfect for a special breakfast or a cozy afternoon treat with a cup of tea or coffee. I love them with a tall glass of Vietnamese iced coffee or a strawberry matcha latte!
They are so easy to make and use simple pantry ingredients.
Make a big batch and freeze for those busy days! Just pop them in the oven for a few minutes and enjoy!

Recipe Ingredients
Flour: I've used all-purpose flour in this recipe. It gives a wonderful, soft, and tender result. But you can use wholewheat flour too, like I did for my cherry almond scones.
Sugar: White granulated sugar works well, though you can use raw or cane sugar as well.
Buttermilk: For an incredibly light and fluffy texture! You can use store-bought or homemade. You can easily swap with regular cream or full-fat milk.
Chocolate: Chocolate is the star of these scones, so good-quality dark chocolate is the ideal option. Since I lean towards very lightly sweetened treats as opposed to cloyingly so, my scones had 70%. But if all you have is 55%, 50%, or any other, use that. Just about any good baking chocolate will work here.
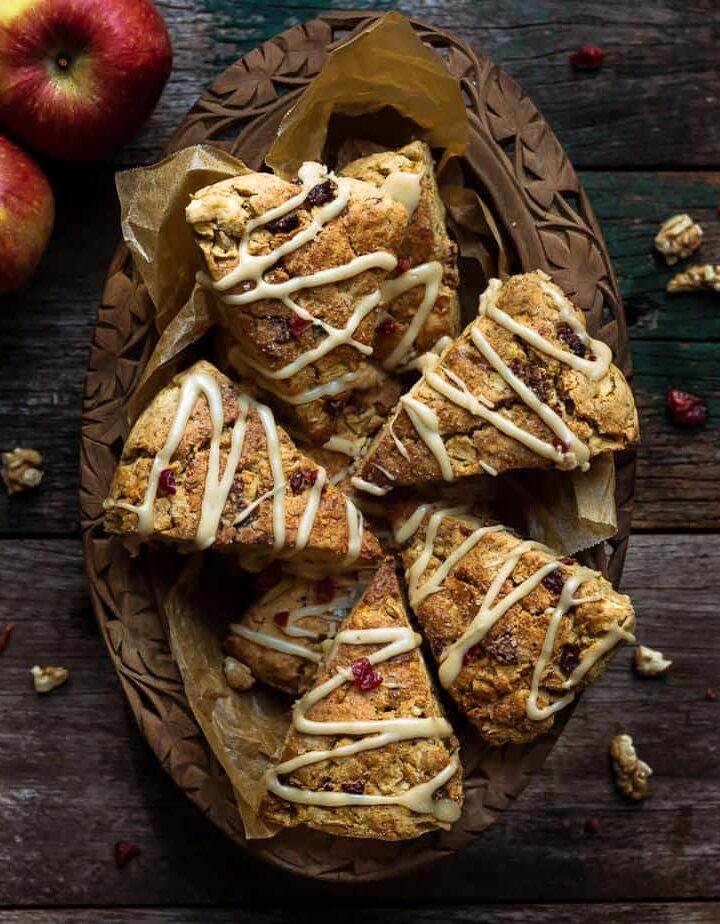
Other add-ins: Raisins and dates are two alternates you can whisk in with your eyes closed. Or just leave the buttermilk scones plain and enjoy them with a pat of butter or strawberry jam, or cherry jam. They are so delicious with a smear of cream cheese, too!
Please see the recipe card for full information about ingredients and quantities.
How To Make Chocolate Chip Buttermilk Scones
Step 1: Combine the milk and vinegar in a small bowl and set it aside for 5 minutes.
Step 2: In a large mixing bowl, whisk together the flour, baking powder, baking soda, salt, and sugar until no lumps remain.
Step 3: Add cubes of chilled butter and rub and crush them into the dry ingredients with either 2 forks, a pastry cutter, or your fingertips. This is called cutting the butter. Do this repeatedly till the mixture resembles bread crumbs.
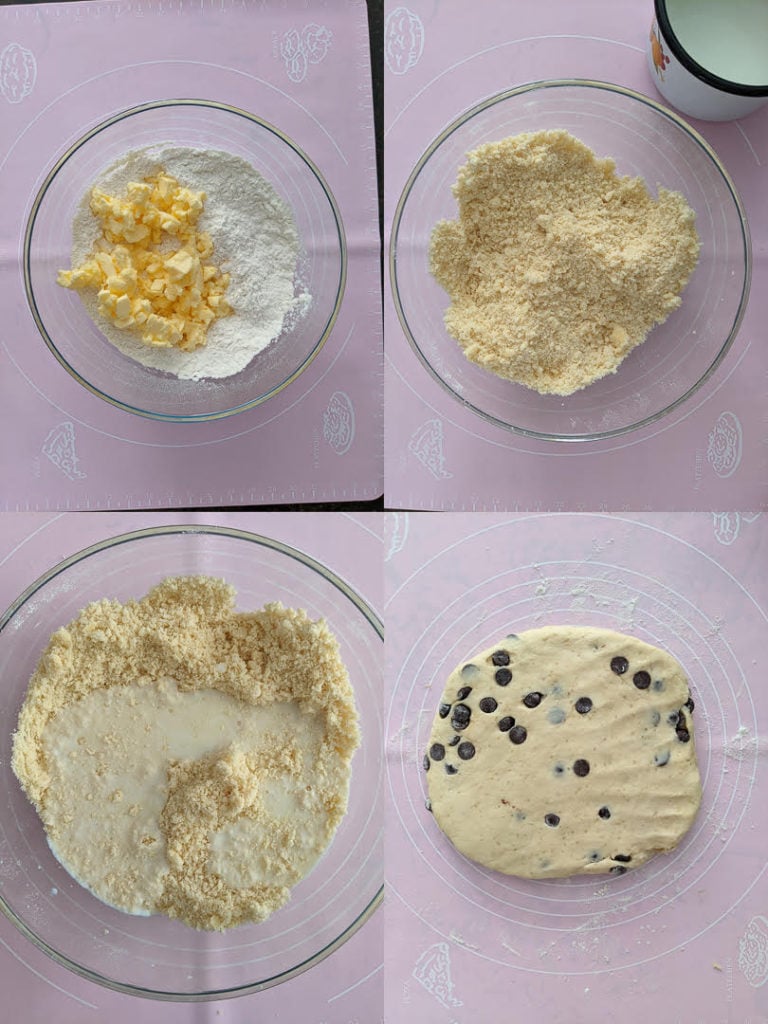
Step 4: By now, the buttermilk will be ready. Form a well in your dry ingredients and pour it in. With a fork, and using a circular motion, mix everything till you have a shaggy dough.
Step 5: Once it is combined, turn the dough out onto a lightly floured surface.
Step 6: Quickly and gently bring the dough together with your hands. It’ll take no more than a couple of minutes, and you won’t need to knead it.
Step 7: Flatten the dough with your hands and then sprinkle chocolate chips across the surface. Press them down so they are embedded in.
Step 8: With your pastry cutter, divide the dough into two. Then place one layer over the other with the side studded with chocolate facing upwards.
Step 9: Press the layers so they flatten a bit and stick to each other. Cut them in half once more and place one over the other. Press and then cut again. Essentially, you repeat the press-cut-place process 3 to 4 times till all your chocolate chips are uniformly distributed in the dough.
Step 10: Dust a little flour on the dough and then flatten it into an 8-inch sheet about 2.5 inches thick. You can use a rolling pin, but scone dough is so soft that you won’t need one.
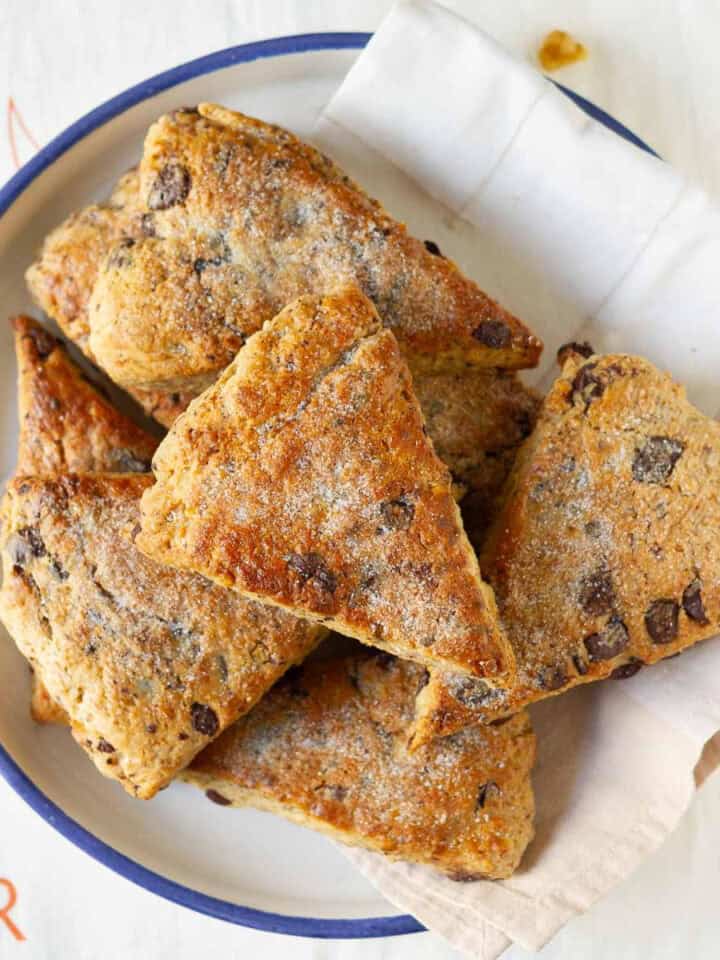
Step 11: Dip your cookie cutter in loose flour (so it doesn’t stick to the dough) and cut scones in the shape you prefer. I went with a round cookie cutter.
Step 12: Gently recombine any leftover dough. Roll it and cut out scones again. Repeat till no dough is left.
Step 13: Brush the scones with egg wash (1 egg beaten in a teaspoon of water).
Optional Step: Sprinkle granulated sugar on top for some amazing crunch.


Final step: Bake until risen and golden, about 19 minutes for me. Let them cool on the tray for 5 minutes, then transfer to a wire rack.

Top Tips
- Don’t overmix: Do not knead the dough. You simply push and pat till it comes together.
- Chill, chill, chill: The butter has to be (has to be) chilled. I cannot reiterate this enough. My tip? Cut the butter into cubes, then pop it in the freezer for a few minutes before you begin rubbing it into the flour.
- Work quickly: The faster you work, the less the chance the butter softens and spreads around. You don’t want that. So be quick and work steadily. It should take 3 to 4 minutes to cut the butter into the flour.
- Cool the dough: It’s 40 degrees Celsius here! Needless to say, the refrigerator was my best friend for this scone recipe. Instead of adding unnecessary flour, if your dough feels sloppy or just unmanageable, slide it into the fridge for 15 minutes.
- Don’t knead the add-ins: Stick to the folding method for the add-ins. If you knead the dough to evenly spread the chips, you’ll form a gluten network. And that will make your chocolate chip scones dense, not lighter than air.
Recipe FAQs
Generally, scones use milk or cream as the primary wet ingredient. But buttermilk makes the texture so flaky and tender!
It activates the leavening agent, baking powder, and creates steam, which makes the flaky layers rise beautifully. So, you have this utterly moist middle with pockets of gooey chocolate wrapped in the most tender crust. It’s hands down the best scone I’ve eaten!
You can use store-bought buttermilk for these chocolate chip buttermilk scones, but homemade works really well, too. Simply mix regular white vinegar into milk and let it rest for 5-10 minutes until the mixture curdles. Whisk and use.

📖 Recipe

Chocolate Chip Buttermilk Scones
Ingredients
- 3 cup All-purpose flour
- 1/3 cup Sugar
- 2.5 tsp Baking powder
- 1/2 tsp Baking soda
- 1/8 tsp Salt
- 3/4 cup Butter, cubed and chilled
- 1 cup Buttermilk Make your own buttermilk: Combine 1 cup milk + 1 tbsp vinegar and let sit for 5 minutes.
- 1/2 cup Dark chocolate chips I used 70% dark chocolate
Topping
- Egg wash - 1 egg beaten with 1 tsp water
- Granulated sugar Optional
Instructions
- Preheat your oven to 200 C. Line a baking tray with parchment paper.
- In a large bowl, whisk the dry ingredients – all-purpose flour, baking powder, baking soda, sugar, and salt.
- Rub in the chilled cubed butter, using your fingertips or a pastry cutter, until the mixture forms coarse crumbs.
- Pour over the buttermilk. Mix with a fork until the dry ingredients are just moistened.
- Combine the ingredients gently using your hands until they all come together and you can form a ball with the dough. Please don't knead the dough.
- Turn the dough on a floured surface and gently pat into an even circle, about 6" in diameter.
- Sprinkle the chocolate chips on the surface. Press them down slightly. Cut the dough in half and place one on top of the other. Press the dough slightly, and again cut in half.Place the halves on top of each other, press it slightly and repeat this process twice more.This helps the chocolate chips get dispersed evenly through the dough without overworking it. It also helps create flaky layers.
- Press into an 8" circle, about 2" in thickness. Use a cookie cutter to cut out into any shape you like. I used a 2" round cookie cutter. Gently place on the prepared tray.
- Brush lightly with egg wash and sprinkle some granulated sugar on top.
- Bake for about 20 minutes or until lightly golden and cooked through. Remove from the oven and allow to cool for a few minutes.
- Serve warm and enjoy!
Video
Notes
- Don’t overmix: Do not knead the dough. You simply push and pat till it comes together.
- Chill, chill, chill: The butter has to be (has to be) chilled. I cannot reiterate this enough. My tip? Cut the butter into cubes, then pop it in the freezer for a few minutes before you begin rubbing it into the flour.
- Work quickly: The faster you work, the less the chance the butter softens and spreads around. You don’t want that. So be quick and work steadily. It should take 3 to 4 minutes to cut the butter into the flour.
- Cool the dough: It’s 40 degrees Celsius here! Needless to say, the refrigerator was my best friend for this scone recipe. Instead of adding unnecessary flour, if your dough feels sloppy or just unmanageable, slide it into the fridge for 15 minutes.
- Don’t knead the add-ins: Stick to the folding method for the add-ins. If you knead the dough to evenly spread the chips, you’ll form a gluten network. And that will make your scones dense, not lighter than air.


Nitaa Kaur Chabra says
Can you please mention At what temperature do we bake the scones ?
Natasha Minocha says
Hi Nitaa, these get baked at 200 C. 🙂
caroline says
love these buttermilk scones! I made them without chocolate chips, but will try to add them next time. thanks for the recipe!
Natasha Minocha says
I'm so happy to hear that, Caroline! Thank you very much for the support and love. xx
Heidi says
Thank you for the tip about cubing the butter THEN freezing it. I’ve tried freezing the block before and it was a nightmare to deal with. I have left over butter milk and will make these today. They look delicious.
Natasha Minocha says
Oh thank you so much, Heidi! So glad you found the tip useful. Happy baking 🙂