

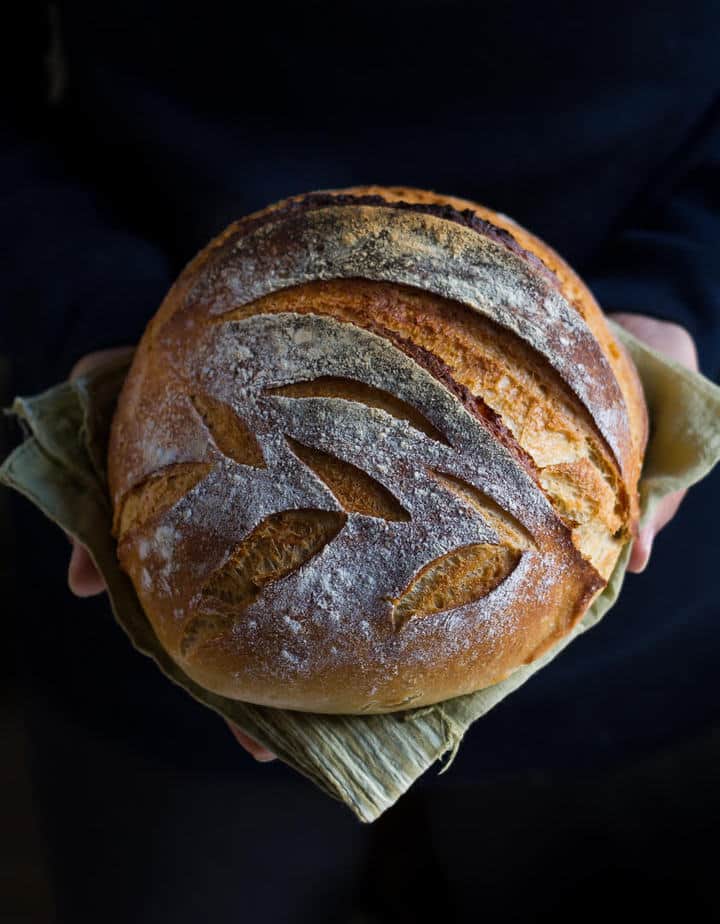
Making bread at home doesn’t have to be complicated. This soft and golden, easy everyday bread is proof! Quick to make, beginner-friendly, and super versatile, this recipe is a keeper!

A good loaf of everyday bread doesn’t require fancy equipment, exotic ingredients, or a lot of thought. All it asks for is a bit of your time to lead you into the wonderful world of yeasty things - golden on the outside and soft in the middle!
This everyday bread is an old favorite of ours. I’ve been making it for years, the recipe uses basic pantry items, and is ready in 3-4 hours (in the bread world, that's fast!).
Jump to:
Why You’ll Love This Recipe
✨ This bread is perfect for anyone to try out. For beginners, it's a simple one with basic ingredients and an easy technique for bread making.
✨ This recipe is wonderful for seasoned bakers, too. It is a blank canvas for experimenting with flavors!
✨ This simple homemade bread recipe is easily customizable. Add herbs, spices, cheese, seeds, nuts - make it your own every time!
✨ It delivers that bakery-style texture every single time! Soft on the inside with a golden crust, so satisfying!
✨ No complicated steps, no equipment, you can easily knead the dough by hand or simply let your stand mixer do the job.
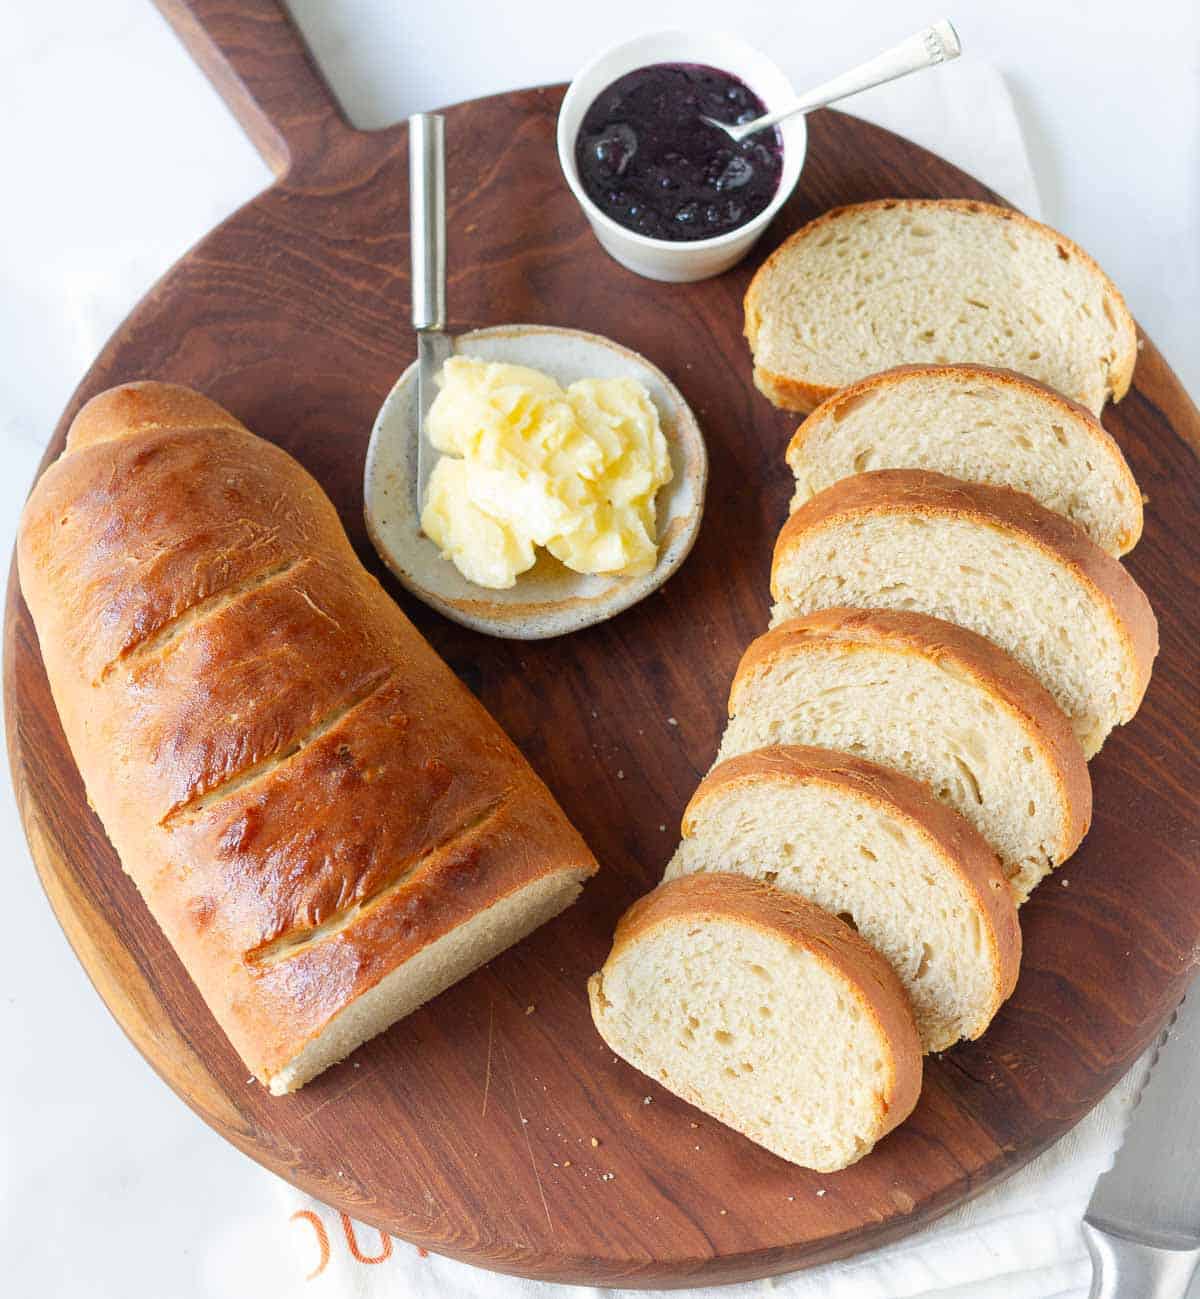
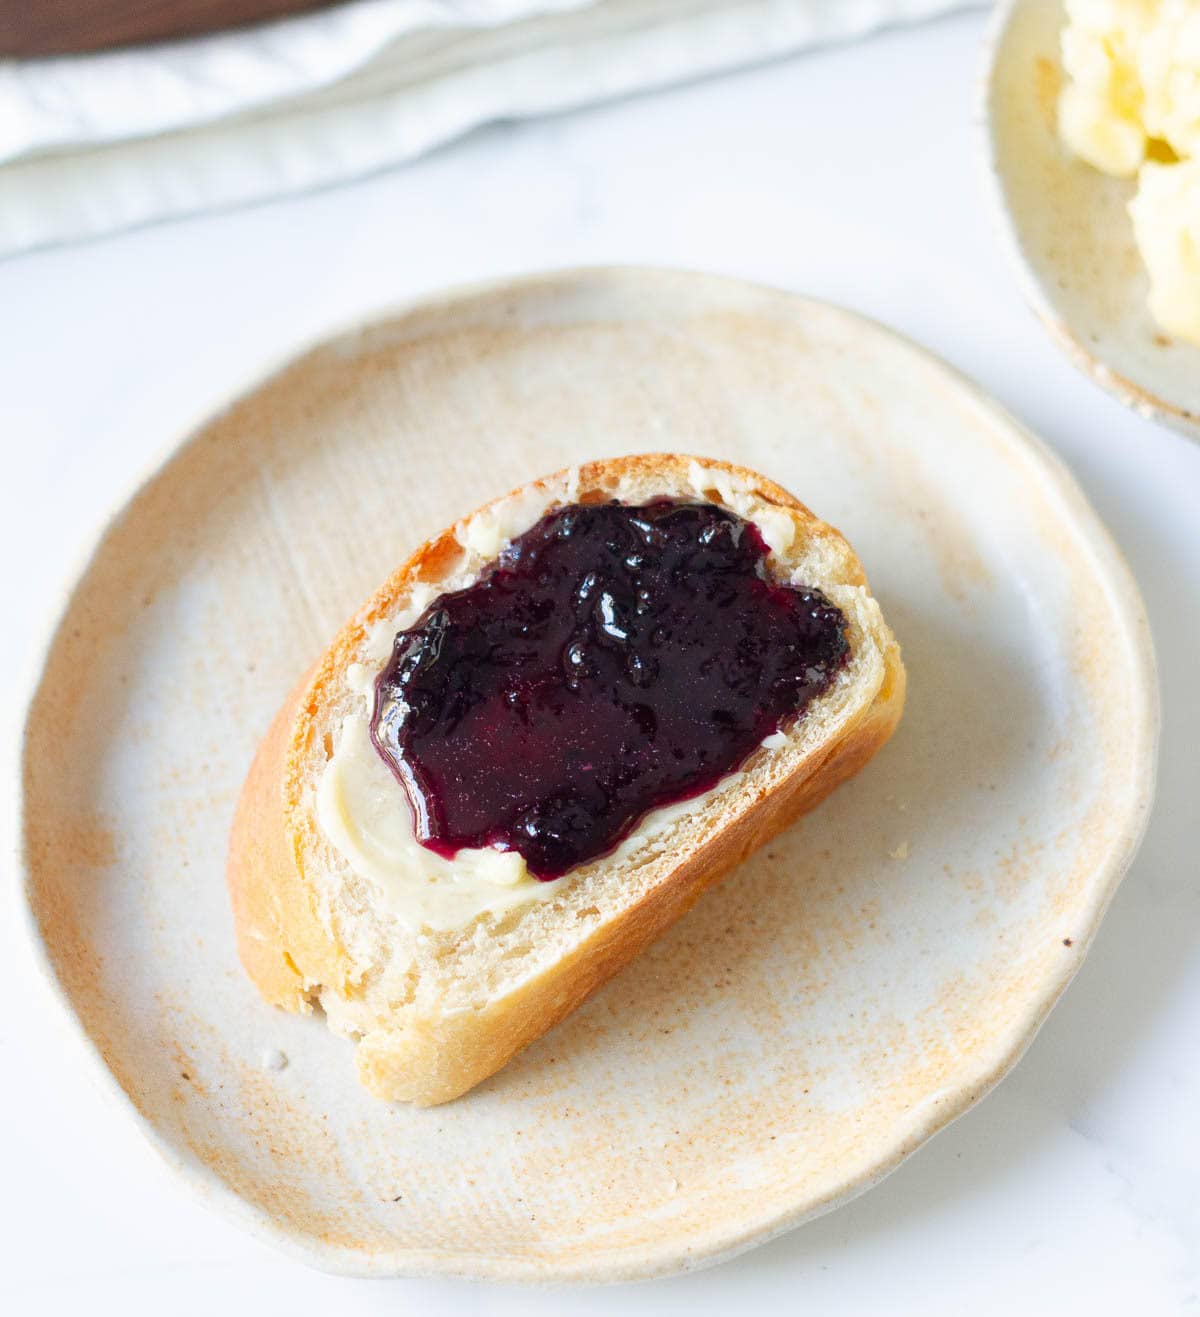
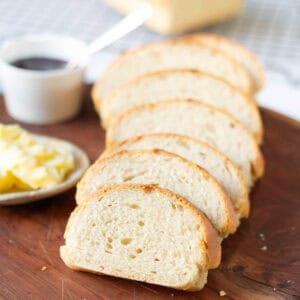
✨ Versatile for every meal- use it to make sandwiches, dip it in soup, or just enjoy with butter and jam!
✨ You can use the leftover bread to make crostini, classic French toast, or veggie breakfast casserole!
Reader Love ❤️
I made this both with AP and AP + WW flour, both times was really good! This is my new favorite bread recipe, thank youuu - Matt
I make this weekly, following your recipe to the T! Best bread, ever. Thank you so much for sharing! - Sandra
I made this with 100% AP flour, turned out so good! Thanks for the recipe, really simple to follow - Ayesha
Recipe Ingredients
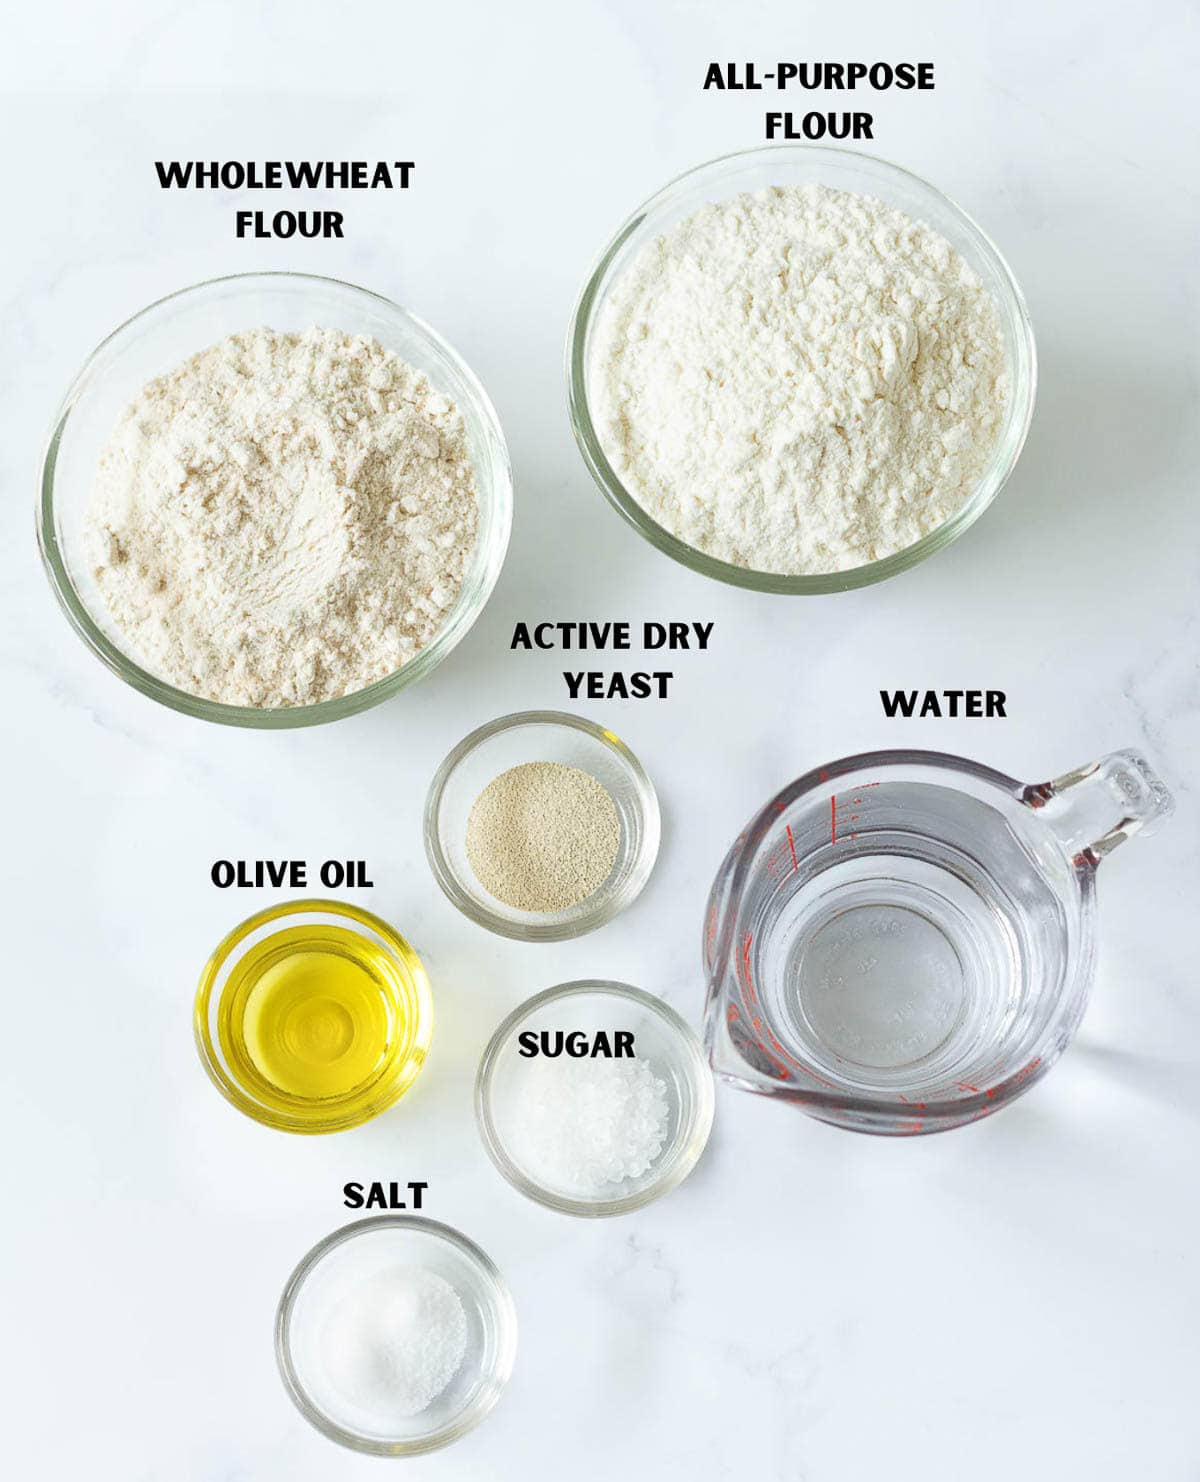
Flour: I use a combination of all-purpose and whole wheat flour in this recipe. But you can use 100% of either of the flours with great results!
Yeast: You can use active dry yeast or instant yeast to make this easy bread. Always test it to make sure it's fresh, though. Dissolve 1/2 a teaspoon in 1/2 cup of warm water. If it becomes frothy and bubbly, in 5 -10 minutes, the yeast is good to go!
Water: The ideal temperature at which yeast blooms is 105°F (40.5 °C). So, use warm water—not hot, not cold. Hot water will kill your yeast. Cold water will not activate it.
Salt: To add flavor to this artisanal bread!
Olive oil: I have used a small quantity of olive oil here for better flavor and to make a softer bread.
Please see the recipe card below for full information about ingredients and quantities.
Variations
This recipe is fabulously versatile!
You can add shredded cheese and chopped garlic to the dough. Or maybe some red chili flakes. Add some fresh herbs or even dried ones. Chop some olives and sundried tomatoes and mix them in.
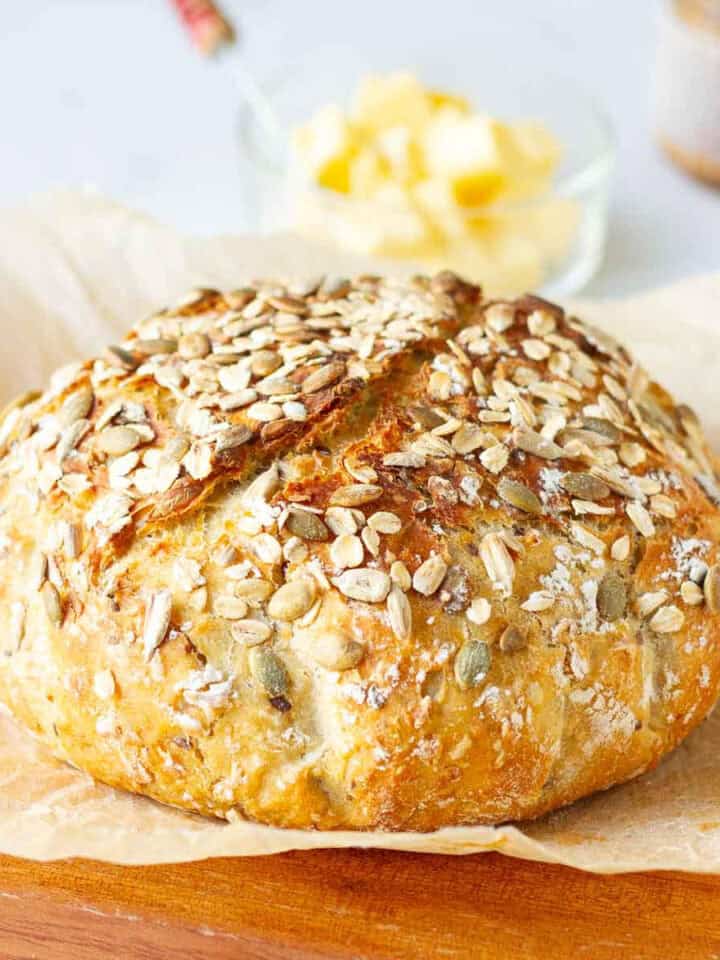
How about some seeds and finely chopped nuts? This bread holds up very well and produces great results every single time.
Note: Please add the nuts, cheese, olives, sundried tomatoes, or jalapenos after the first dough rise. But you can add the spices and herbs at the time of kneading the dough the first time.
How To Make Easy Everyday Bread

Step 1: In a small bowl, dissolve the yeast and sugar in the water. Let it stand for 10 minutes until foamy.
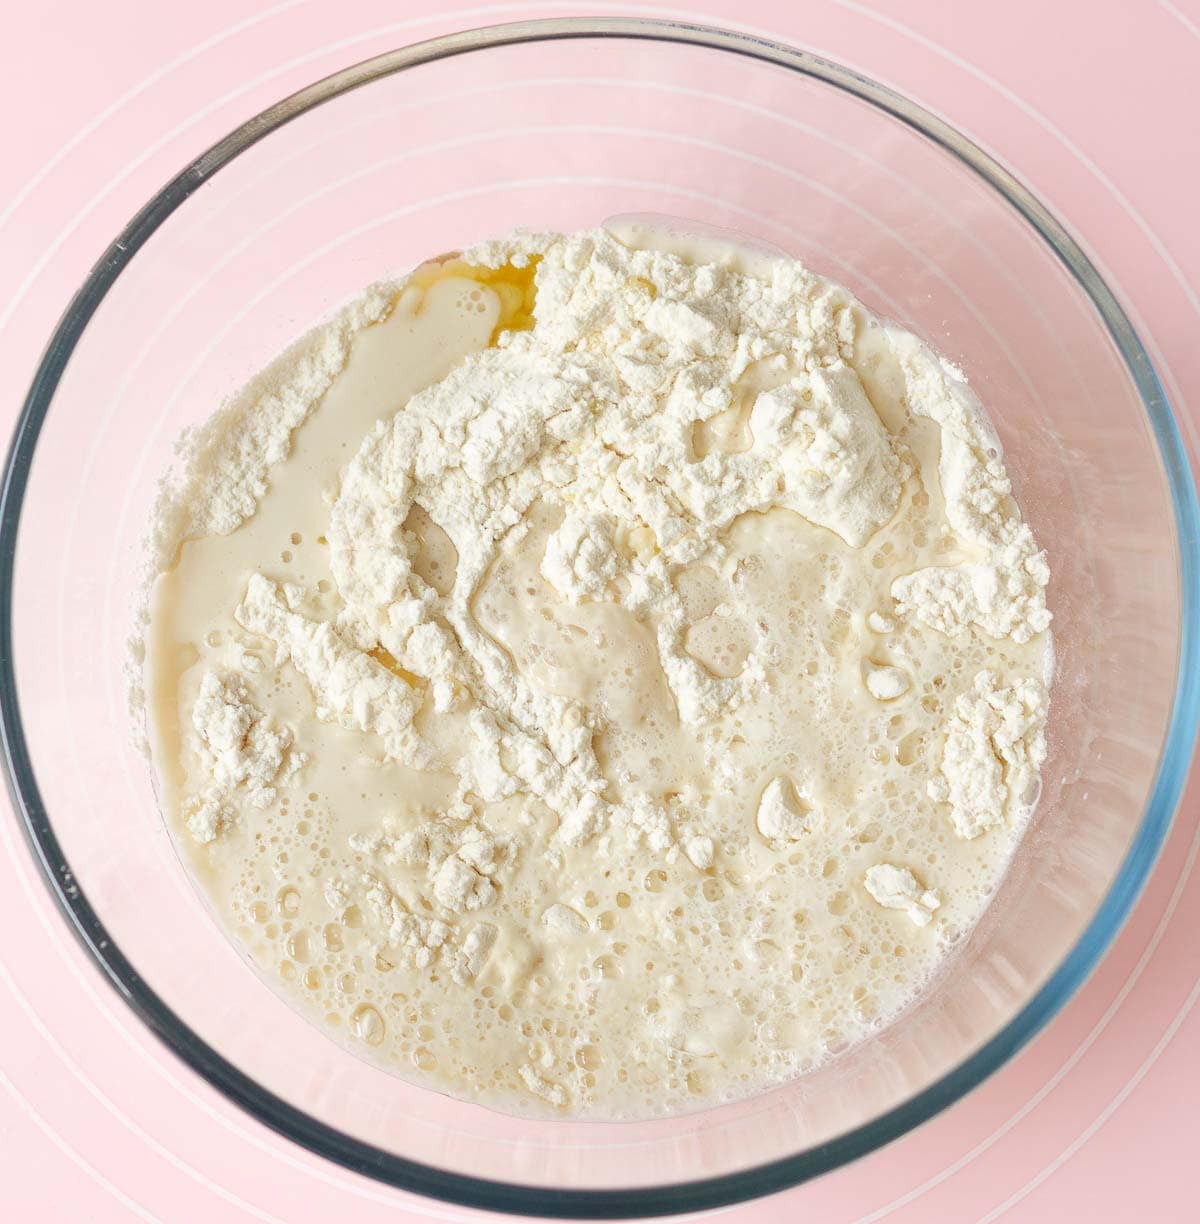
Step 2: In a large bowl, mix the flours and salt. Make a well in the center and add olive oil and the bubbly yeast mixture.
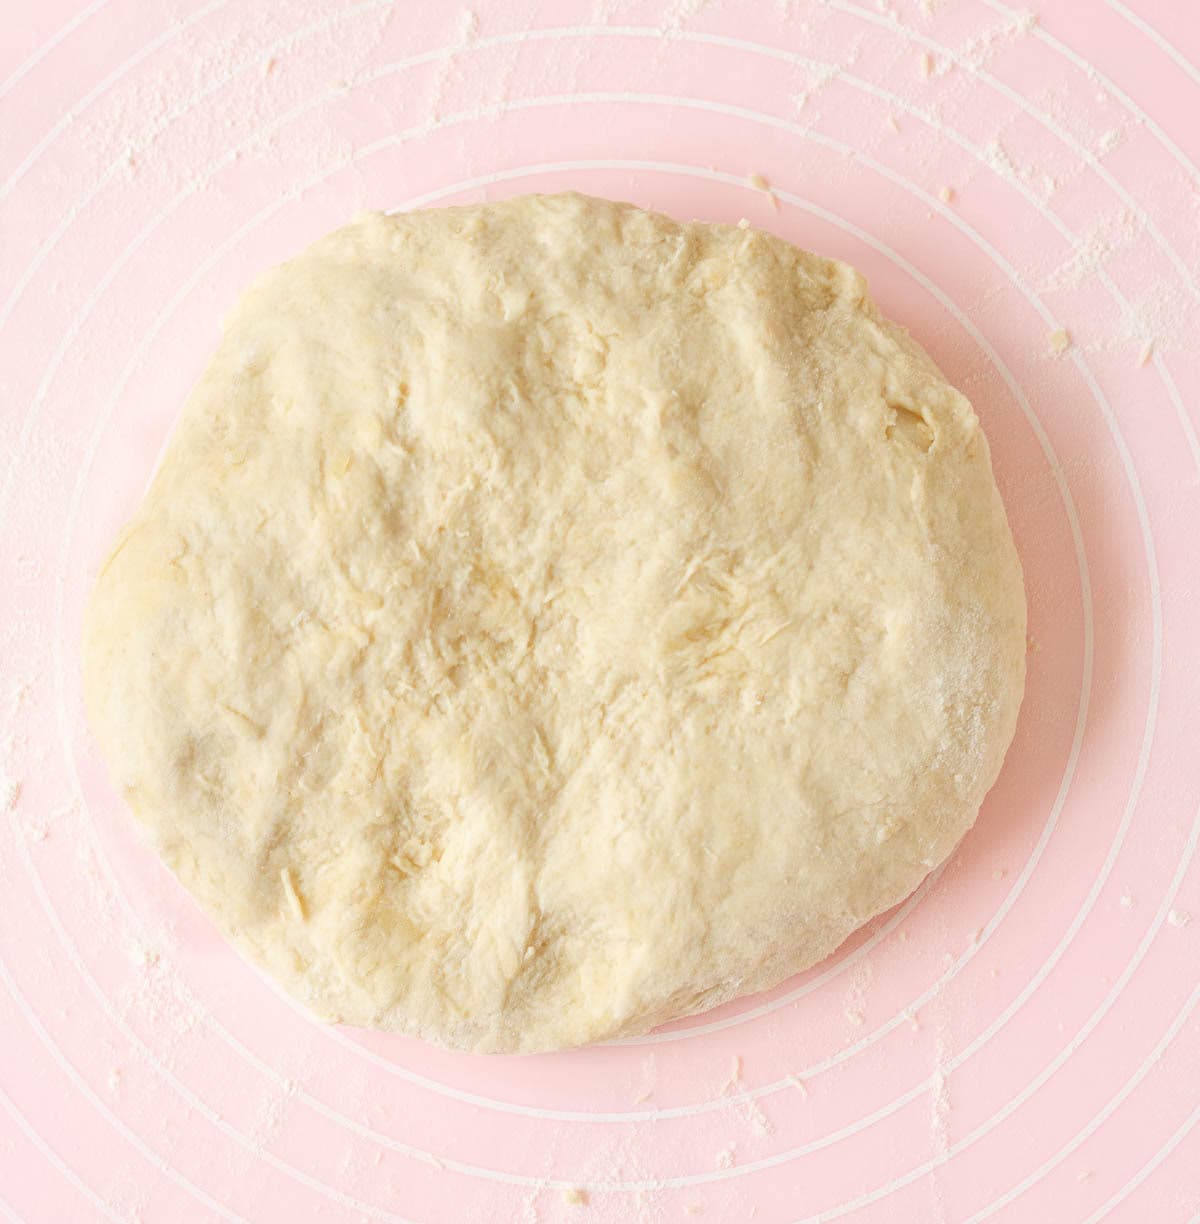
Step 3: Mix well with a fork or a dough whisk till a rough dough forms. Flour your work surface well, turn out the dough onto it.
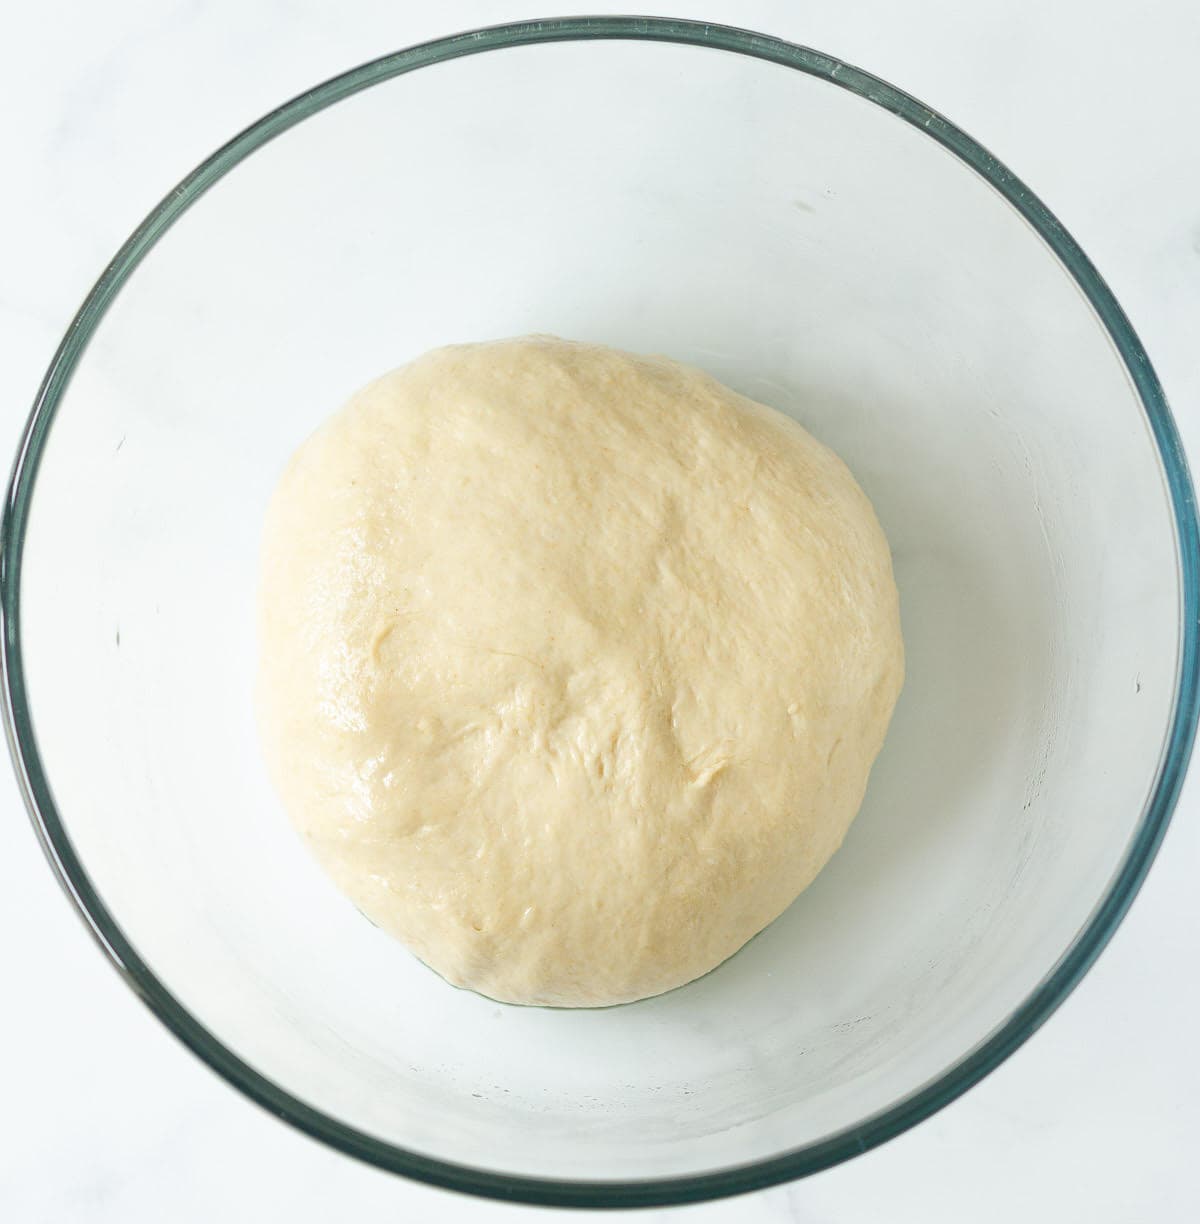
Step 4: Knead for 10-12 minutes until you get a smooth, soft, slightly sticky dough. Form the dough into a ball and transfer to a lightly oiled bowl.

Step 5: Cover and leave the dough to rise in a warm, draft-free spot for 1 -2 hours or until it doubles.
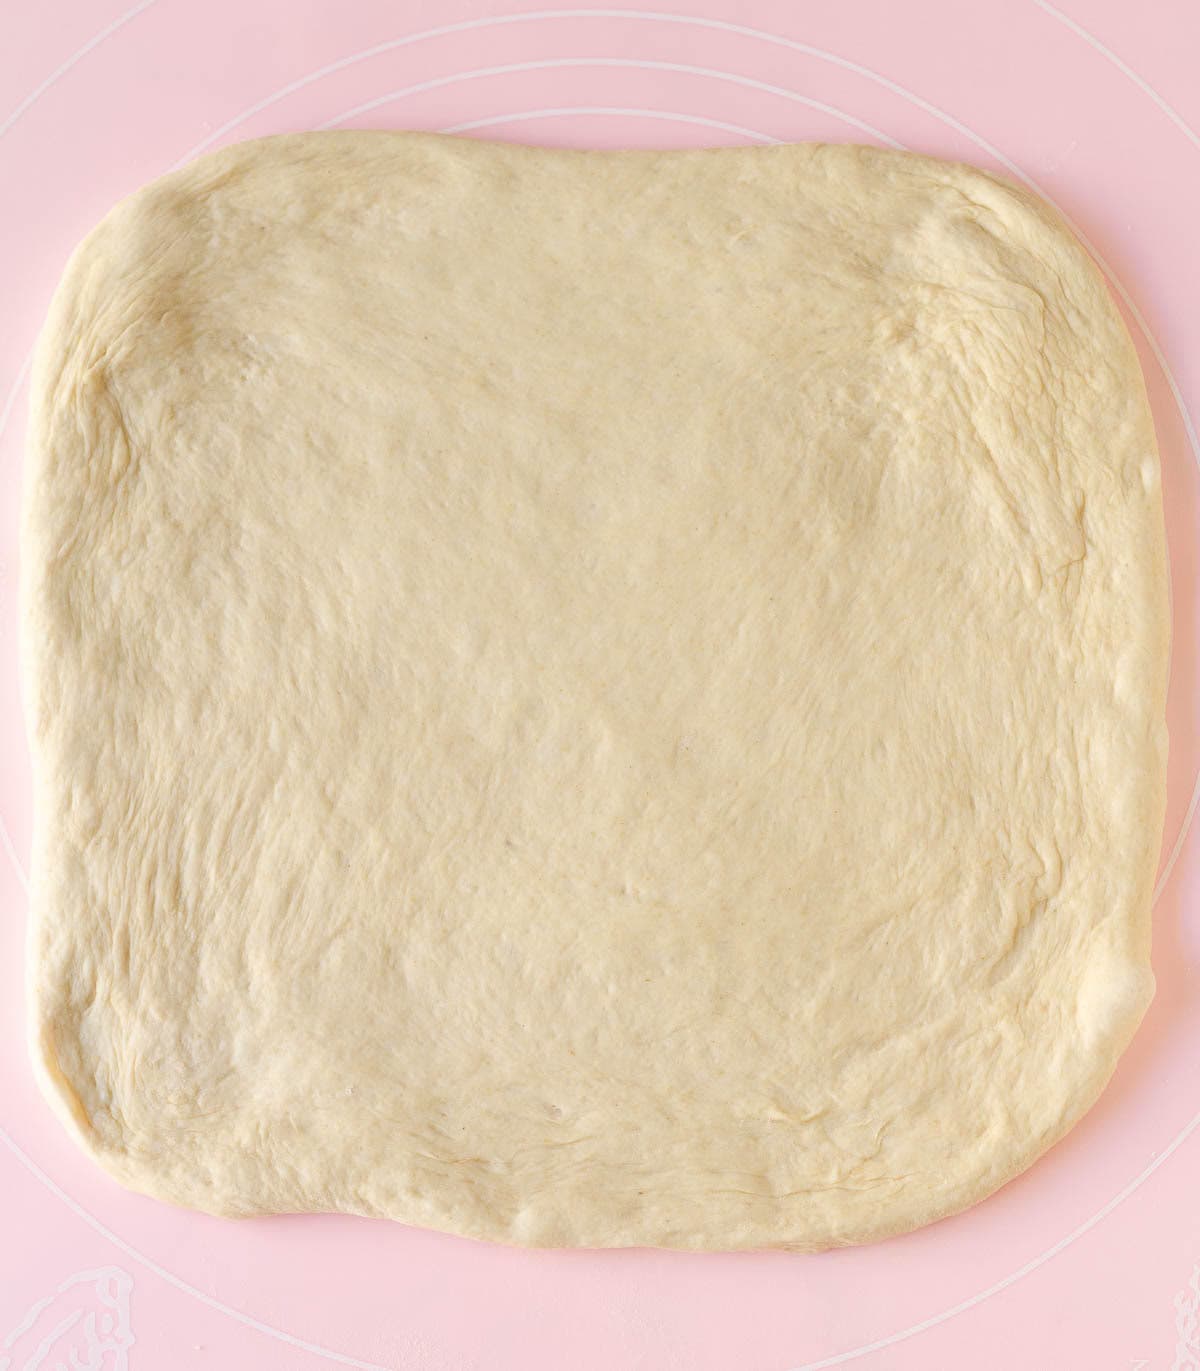
Step 6: Once it's doubled, punch the dough down and knead it again for about a minute on a lightly floured surface. Pat the dough to make a 12" square.
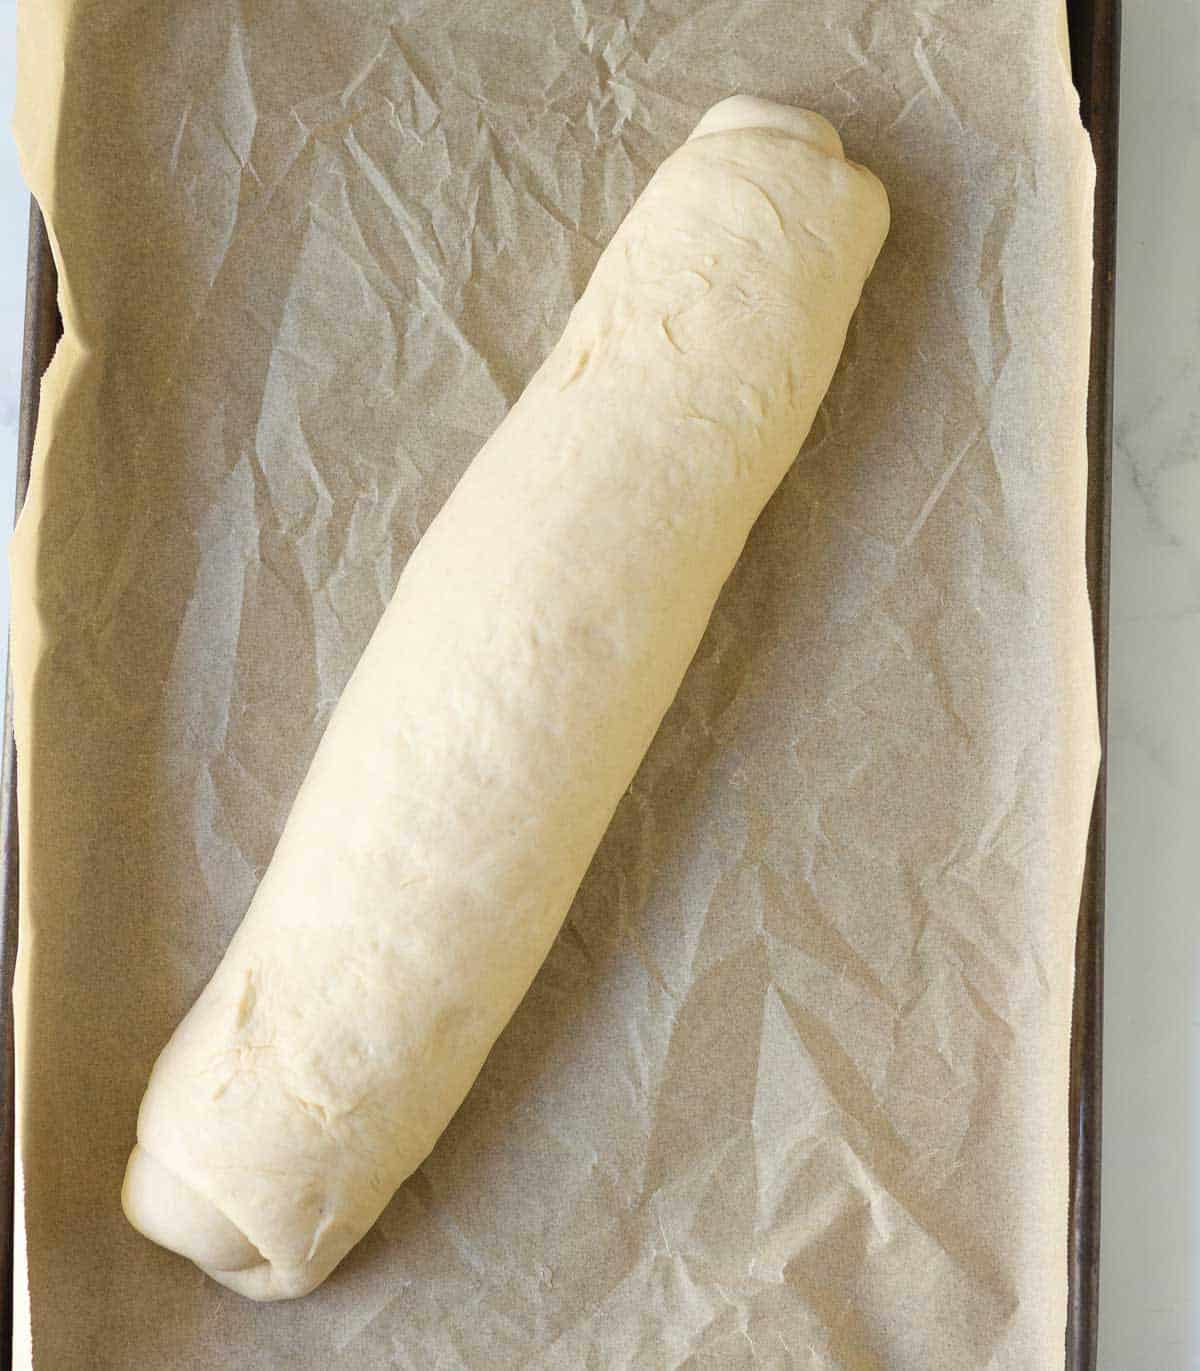
Step 7: Roll the dough into a tight log to make a baguette shape. Crimp the edges to seal. You can also use a rolling pin to roll out the dough. Place it on a baking paper-lined tray.
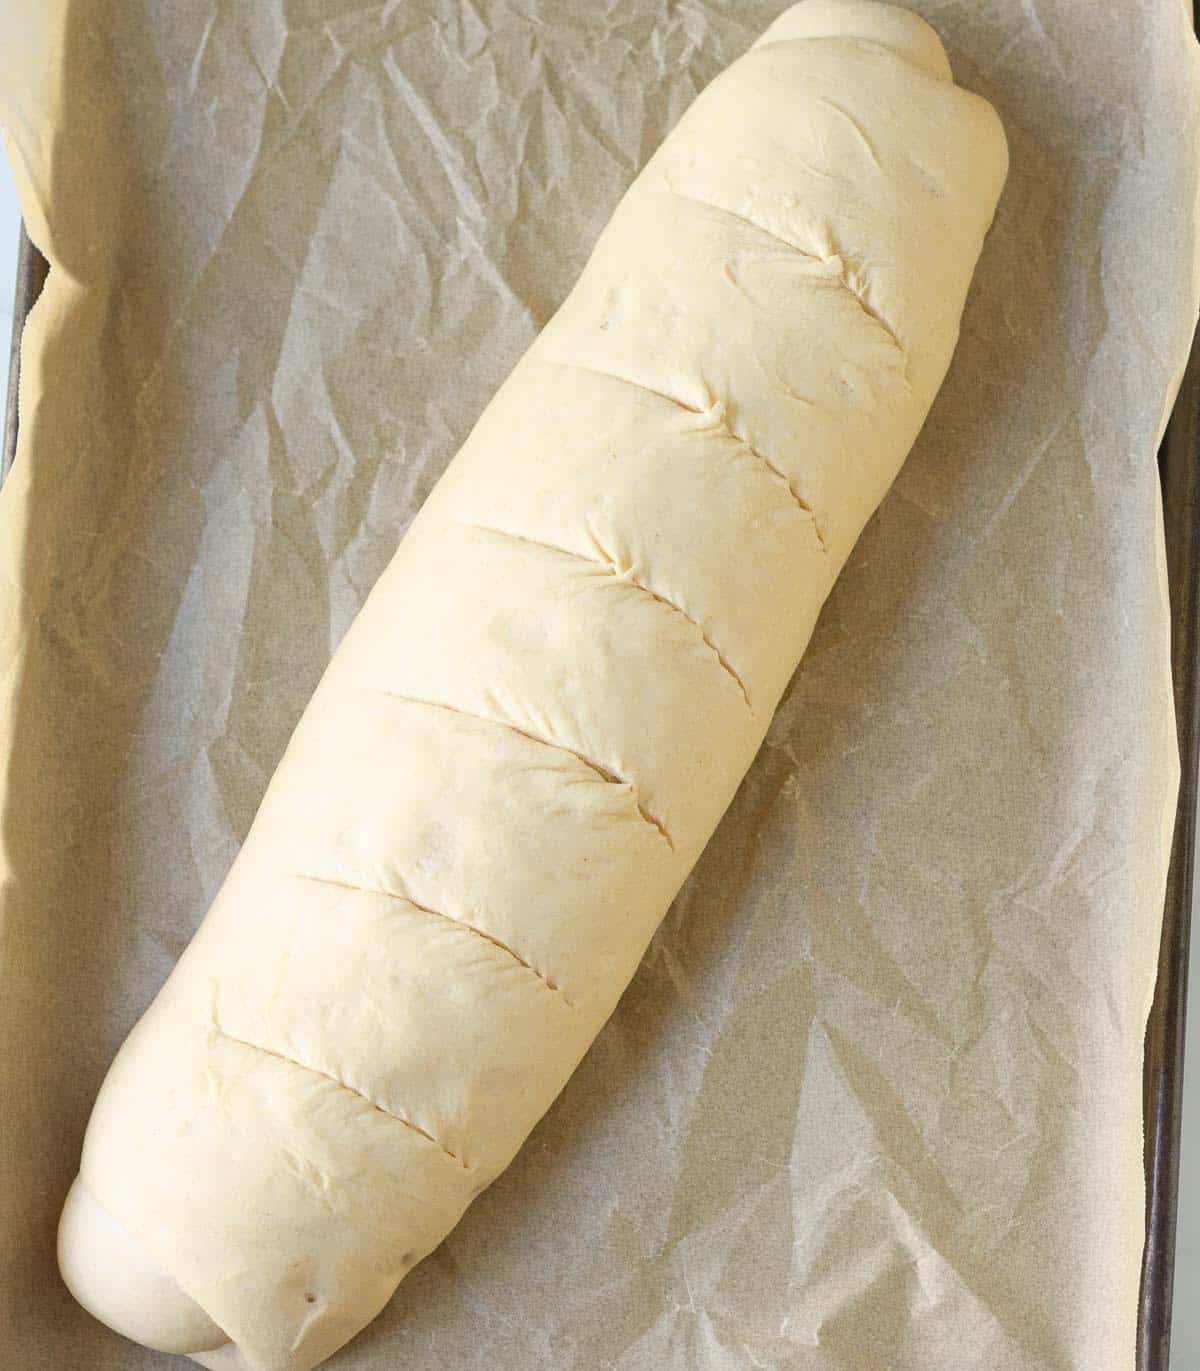
Step 8: Cover the loaf loosely with a kitchen towel and let it rise in a draft-free spot for 30-40 minutes until it doubles in size. Make 4-5 slashes with a sharp knife on the loaf.
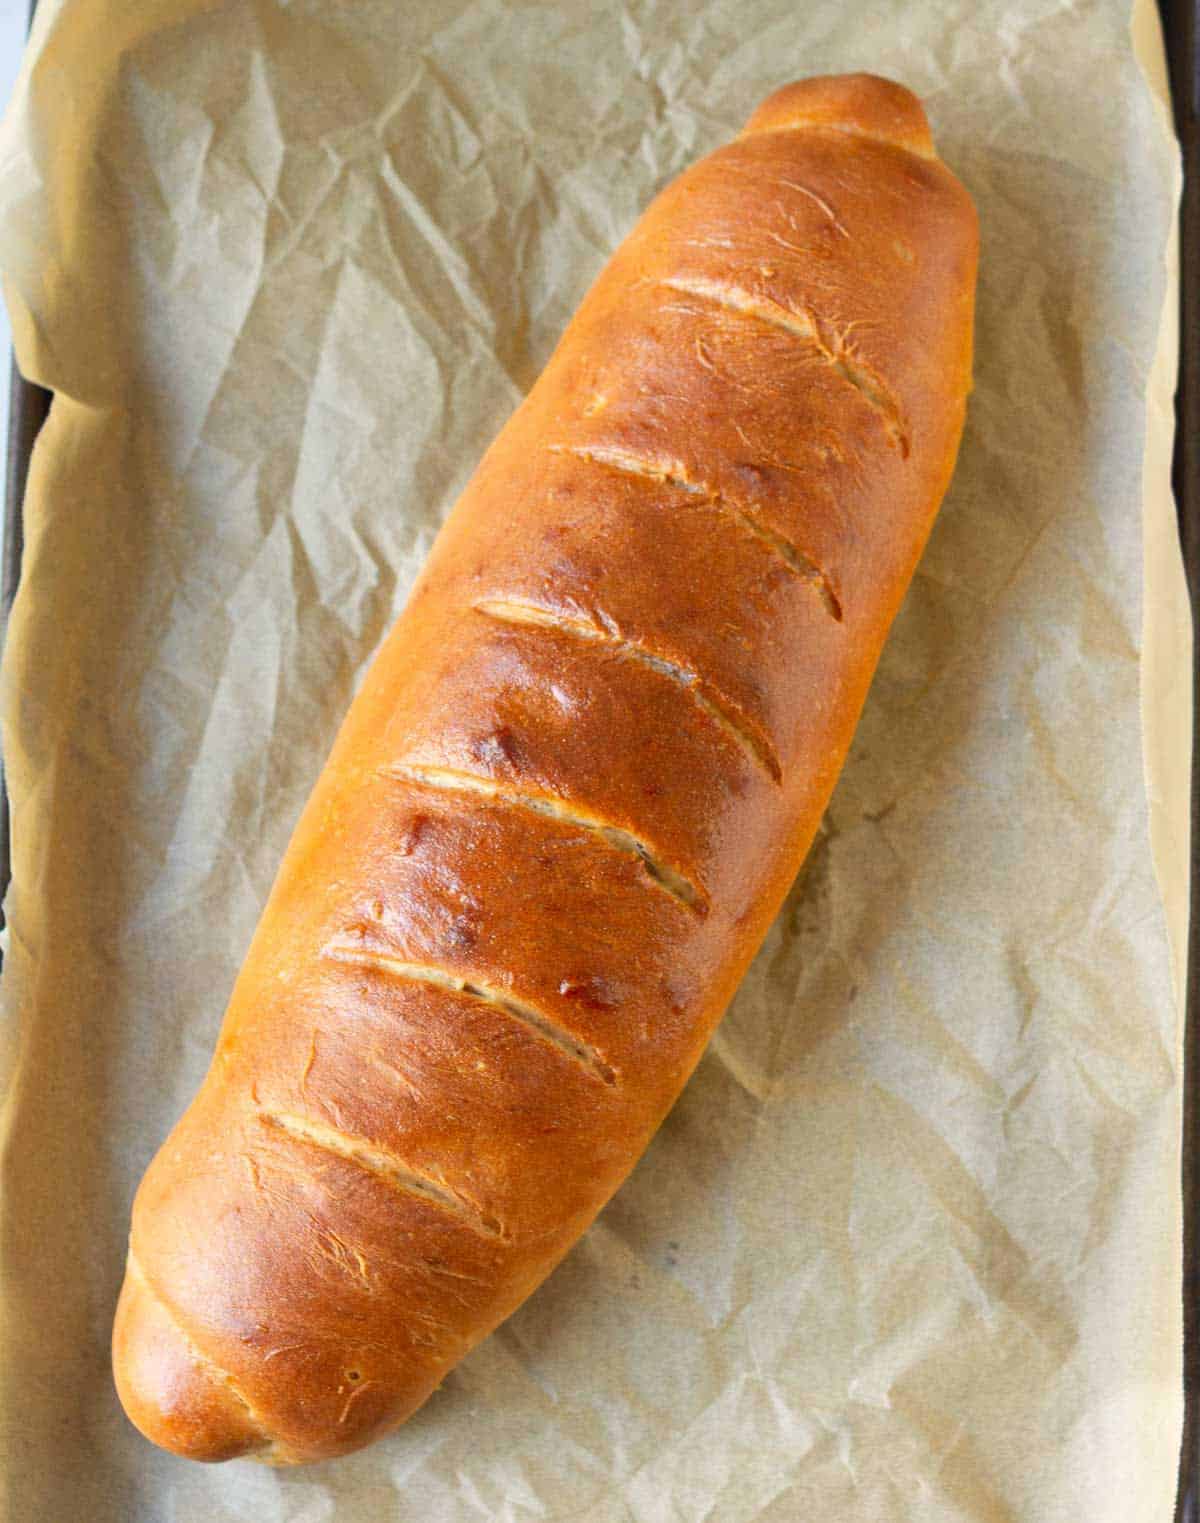
Step 9: Bake the loaf for 30-40 minutes or until it is golden brown and sounds hollow when tapped on the bottom. Cool the bread for at least 1 hour before slicing.
Top Tips
- Don’t use hot water. You want it slightly warm at about 105°F or 40.5 °C.
- Make sure the yeast you are using is active. How to check if it's active? Dissolve ½ tsp of yeast in half a cup of warm water with half a teaspoon of sugar. Stir and let it sit in a draft-free place for 10 minutes. If it's bubbly and foamy, it’s good to use!
- Do knead the dough for 10-12 minutes. The more you knead, the more gluten strands develop. A well-kneaded dough will give you a well-risen, softer, and fluffier bread.
- Avoid adding too much extra flour while kneading. Add just enough that will give a dough that is soft, supple, and slightly sticky to the touch.
- If you are kneading by hand and getting tired, you can cover the dough with a damp towel about halfway through and take a 5-6 minute break. Continue kneading till the dough is ready.
- You can also knead this dough in a stand mixer for 8-10 minutes.
- The bread dough is done when you poke it, and it springs back gradually. If the indentation stays, you need to keep kneading.
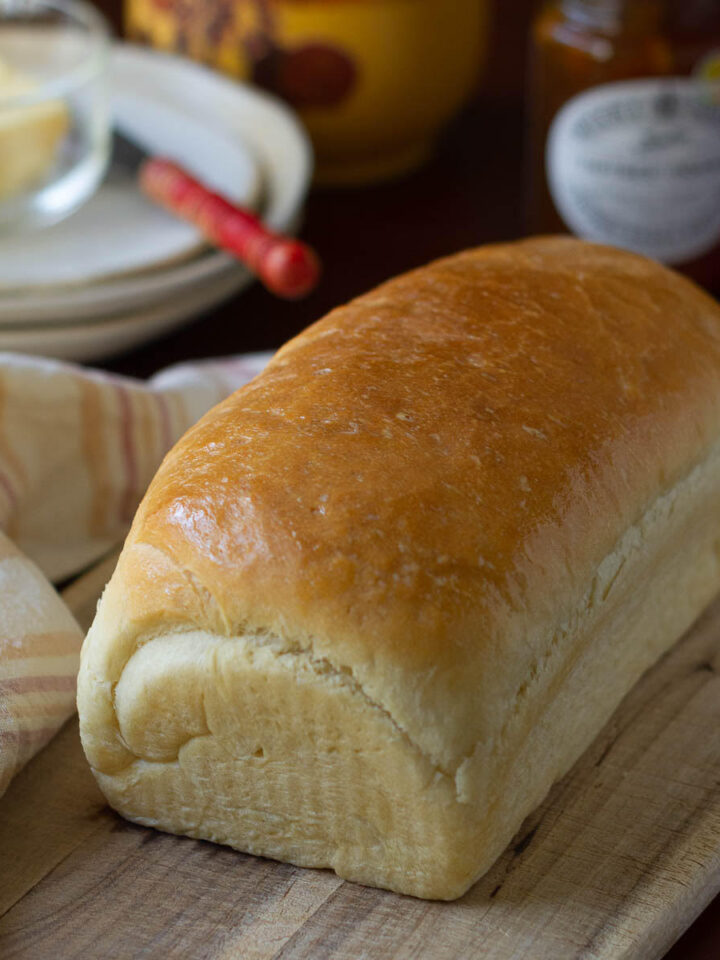
- This dough is supple and pliable enough to shape into any shape you like. For this bread, we like the baguette shape; however, you can shape it into a boule or even bake it in a 9-inch round baking tin.
- Brush the top with butter or olive oil to keep the crust soft. Let the bread cool on a cooling rack for at least an hour before slicing.
- Please use a kitchen scale to measure the ingredients. It’s a more accurate way to bake bread and will help you get better and consistent results every time.
How To Serve The Easy Everyday Bread
This is a lovely loaf that pairs well with soups and salads, and it’s perfect for mopping up curries and dals. Try it with my keema aloo curry, creamy roasted pumpkin soup, and smashed chickpea salad.
It makes for wonderful sandwiches and toasts - great for any time of the day.
It's also a fantastic bread to serve with olive oil and balsamic vinegar for dipping.
Serve it alongside fried pickle dip, creamy avocado dip, or some marinated tomatoes. So yum!
And of course, eating thick, warm slices with soft butter and jam is what we love doing. I don't know anyone who can resist this! Try this soft homemade bread with my homemade fig jam, strawberry chia jam, or apple butter.
Recipe FAQs
You can use active dry yeast or instant yeast for making bread. They can be used interchangeably. The important part here is to check if the yeast is active.
Sometimes we have forgotten packs of yeast lying at the back of our kitchen cabinets. Do check for expiry dates, and even if they are not expired, check if the yeast is active. How?
Add some yeast to just barely warm water with half a teaspoon of sugar. Stir and let it sit in a draft-free place for 10 minutes. If it bubbles up nicely, go ahead and use it.
Yes! This bread dough is very pliable, and while we love this everyday bread in a baguette form, you can easily shape it into a boule. You can also bake it in a 9-inch round cake pan. You can also shape it into buns or rolls if you like!
Here’s how you can knead dough by hand:
- Begin by pushing the dough away from you, using the heels of your hands. - - Then fold over half the dough towards you, press down, and again push outwards.
- Turn it sideways and continue with the kneading. Keep turning and kneading till the dough feels soft, elastic, and slightly tacky.
You are lengthening and strengthening the gluten strands in this process. This creates a structure for the gases to get trapped and the dough to rise.
This bread stays well in an air-tight container for up to 3 days on the countertop. You can also refrigerate it for up to 5 days.
This bread also freezes beautifully. Slice it and freeze it in an air-tight container or a bag for up to 1 month. Just pop the frozen bread slices in your toaster!

📖 Recipe
Easy Everyday Bread
Ingredients
- 1.5 tsp Active dry yeast
- 1 tsp Sugar
- 1 cup Warm water at 45C or 105F You may need more
- 1 cup Wholewheat flour
- 1 1/4 cup All-purpose flour
- 1 tsp Salt
- 1 tbsp Olive oil You can use melted butter or any neutral tasting oil
- Extra flour for dusting the surface
Instructions
- In a small bowl, dissolve the yeast and sugar in the water. Let it stand for 10 minutes until foamy.1.5 tsp Active dry yeast, 1 cup (240 ml) Warm water at 45C or 105F
- In a large bowl, mix both the flours and salt. 1 cup (130 g) Wholewheat flour, 1 1/4 cup (156 g) All-purpose flour, 1 tsp Salt
- Make a well in the center and add olive oil and the bubbly yeast mixture.1 tbsp Olive oil
- Mix well with a fork or your hand till a rough, shaggy dough forms.
- Flour your work surface well, turn out the dough onto it. Use the heels of your hands to push the dough away from you, then fold it over halfway, press it down, and push it away again. Turn the dough sideways and repeat this process. Keep turning and kneading until the dough is soft, supple, and just a tad sticky. This will take about 10-12 minutes.You can also knead the dough in a stand mixer for 8-10 minutes.
- Form the dough into a ball and transfer to a lightly oiled bowl. Cover and leave the dough to rise in a warm, draft-free spot for 1 -2 hours or until it doubles.
- Once it's doubled, punch the dough down and knead it again for about 1 minute.Roll out the dough into a rough 12" square. Roll it up tightly to make a baguette shape. Pinch the edges to seal.You can also shape it into a ball. You can also place the dough in a round baking pan.
- Place the shaped dough on a baking paper-lined tray.
- Cover the loaf loosely with a kitchen towel and let it rise in a draft-free spot for 30-40 minutes until it doubles in size.
- Preheat your oven to 250C/ 482 F. Make 4-5 slashes with a sharp knife on the loaf. Put the tray in the oven and lower the heat to 220C/ 430 F. Bake the loaf for 30-40 minutes or until it is golden brown and sounds hollow when tapped on the bottom.
- Brush the top with butter or olive oil to keep the crust soft. Let the bread cool on a cooling rack for at least an hour before slicing.
Video
Notes
- Don’t use hot water. You want it slightly warm at about 105°F or 40.5 °C.
- Make sure the yeast you are using is active. How to check if it's active? Dissolve ½ tsp of yeast in half a cup of warm water with half a teaspoon of sugar. Stir and let it sit in a draft-free place for 10 minutes. If it's bubbly and foamy, it’s good to use!
- Do knead the dough for 10-12 minutes. The more you knead, the more gluten strands develop. A well-kneaded dough will give you a well-risen, softer, and fluffier bread.
- Avoid adding too much extra flour while kneading. Add just enough that will give a dough that is soft, supple, and slightly sticky to the touch.
- If you are kneading by hand and getting tired, you can cover the dough with a damp towel about halfway through and take a 5-6 minute break. Continue kneading till the dough is ready.
- You can also knead this dough in a stand mixer for 8-10 minutes.
- The bread dough is done when you poke it, and it springs back gradually. If the indentation stays, you need to keep kneading.
- This dough is supple and pliable enough to shape into any shape you like. For this bread, we like the baguette shape; however, you can shape it into a boule or even bake it in a 9-inch round baking tin.
- Please use a kitchen scale to measure the ingredients. It’s a more accurate way to bake bread and will help you get better and consistent results every time.


Precilla Dsa says
Hi, Instead of 1 cup of wheat flour and 1 cup of All purpose flour, can i make it with 2 cups of wheat flour? any changes to the recipe?
Natasha Minocha says
Hi Precilla, yes absolutely! You may need to add a bit more water, but no other change is required. Happy baking! 🙂
Abiraamyshree says
Can use 100% wheat flour for ths recipe
Natasha Minocha says
Yes sure!
Abiraamyshree says
Can we use this recipe for dinner roll too?
Natasha Minocha says
Yes absolutely! 🙂
Matt King says
I made this both with AP and AP + WW flour, both times was really good! This is my new favorite bread recipe, thank youuu
Natasha Minocha says
I'm so glad to hear that, Matt! Thank you so much for sharing xx