
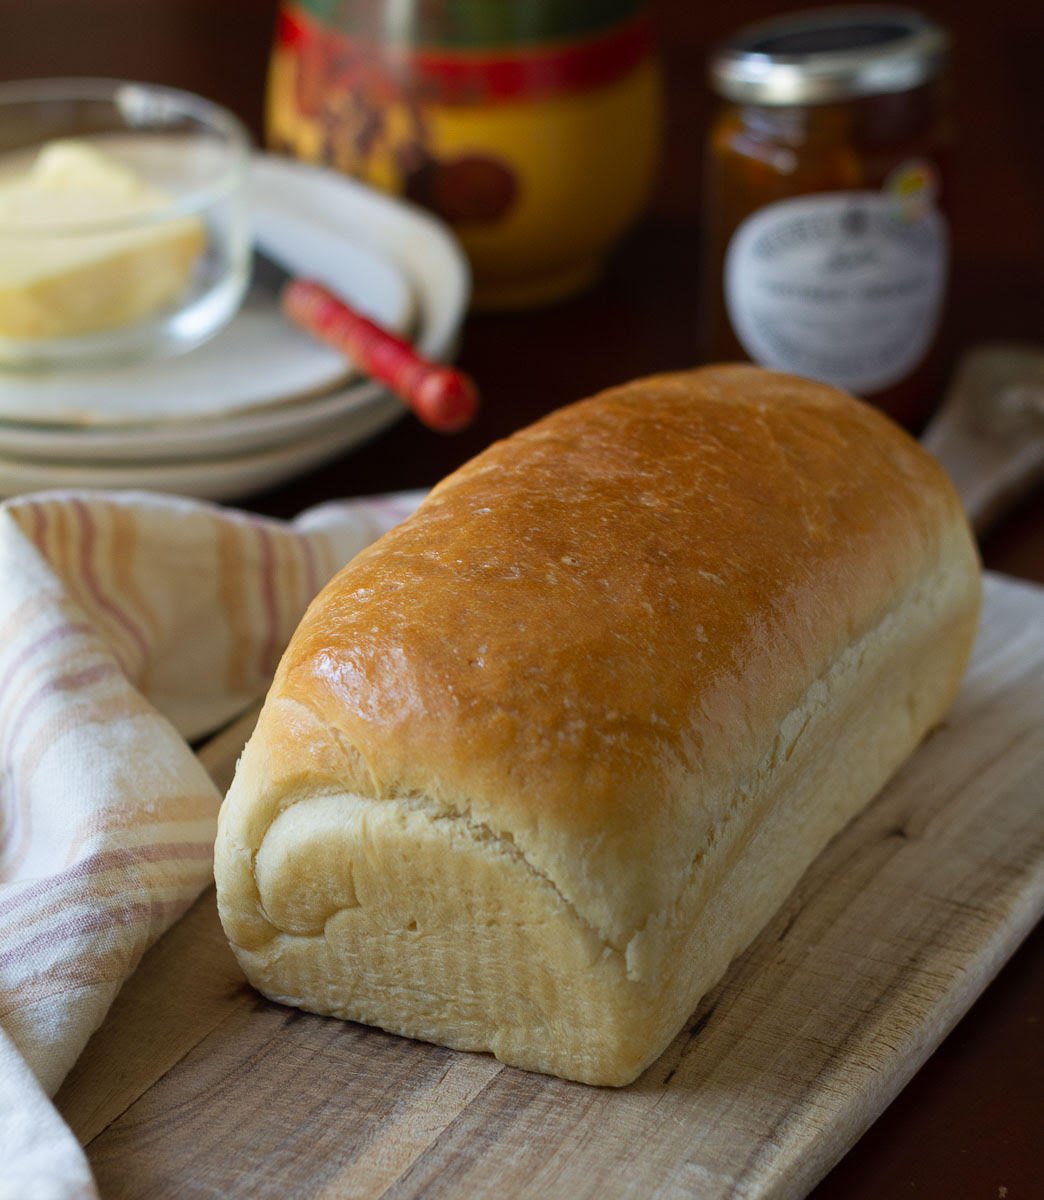
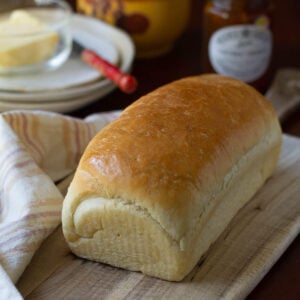
This is the best recipe for sandwich bread; it's easy to make, smells incredible, and tastes even better! So, if you’ve been looking for a beginner's bread recipe, start with this delightfully soft and light crumb loaf that still has enough heft to make the most satisfying sandwich on this god’s green earth!
A good sandwich bread needs three things. It should have flavor and texture, and it should look good because we eat with our eyes as much as we do with our mouths.
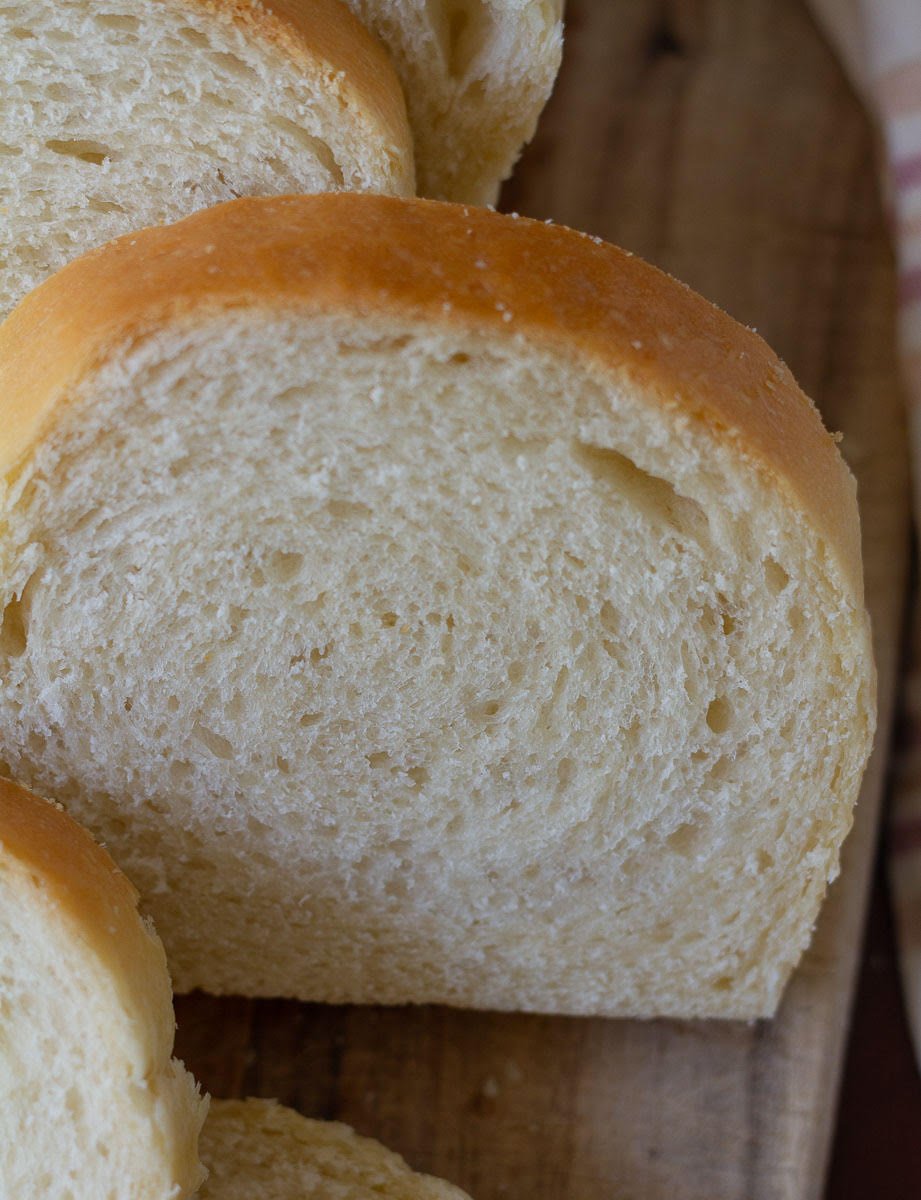
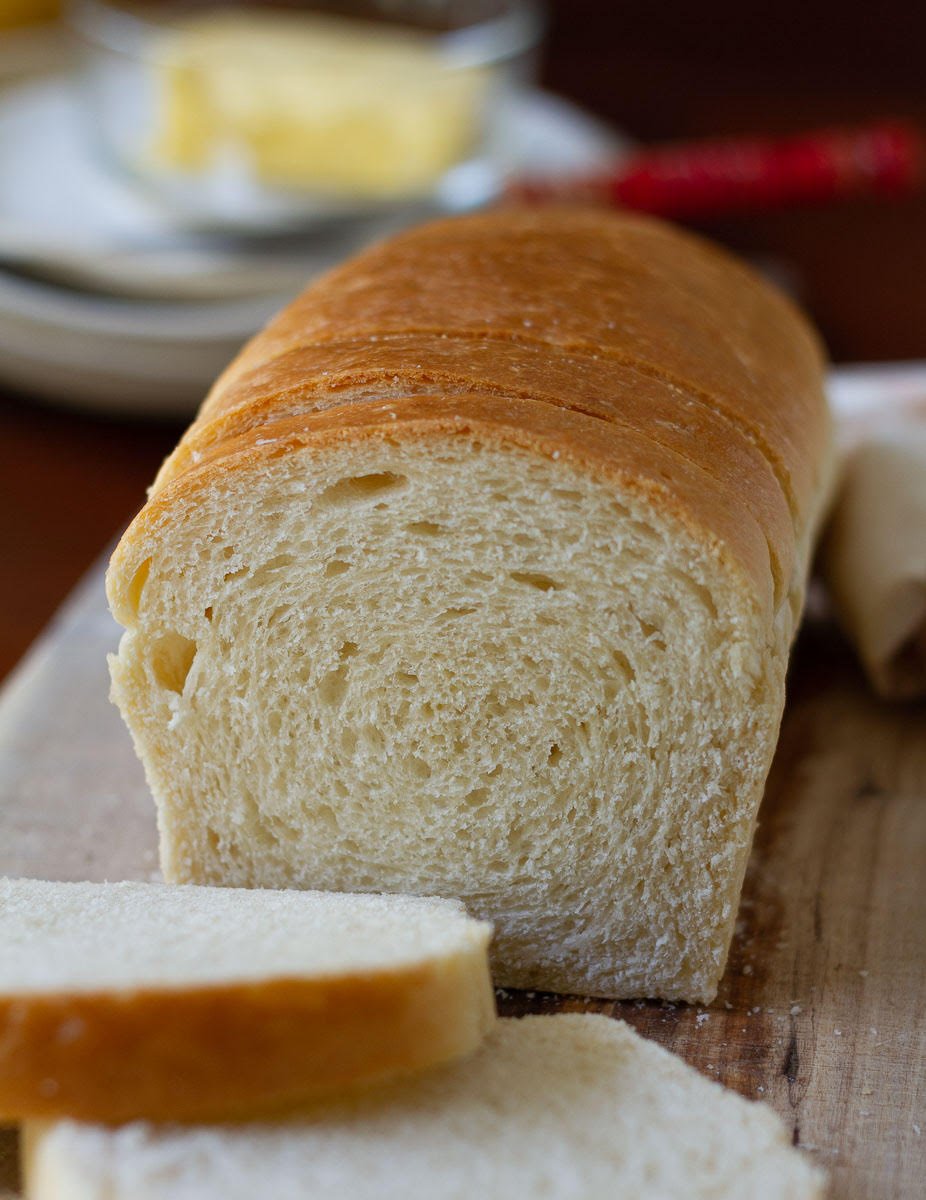
This basic and easy sandwich bread gives you both! It’s soft but doesn’t fall apart when you slice it, and it’s an eggless homemade bread recipe to boot!
Jump to:
WHY TRY THIS RECIPE FOR SANDWICH BREAD?
It’s soft, fluffy, and packed with flavor.
It’s a bread recipe for beginners.
The actual physical effort is barely 20 to 30 minutes. The rest is just waiting for the bread to rise and cool.
It’s mouthwatering & delicious as toast.
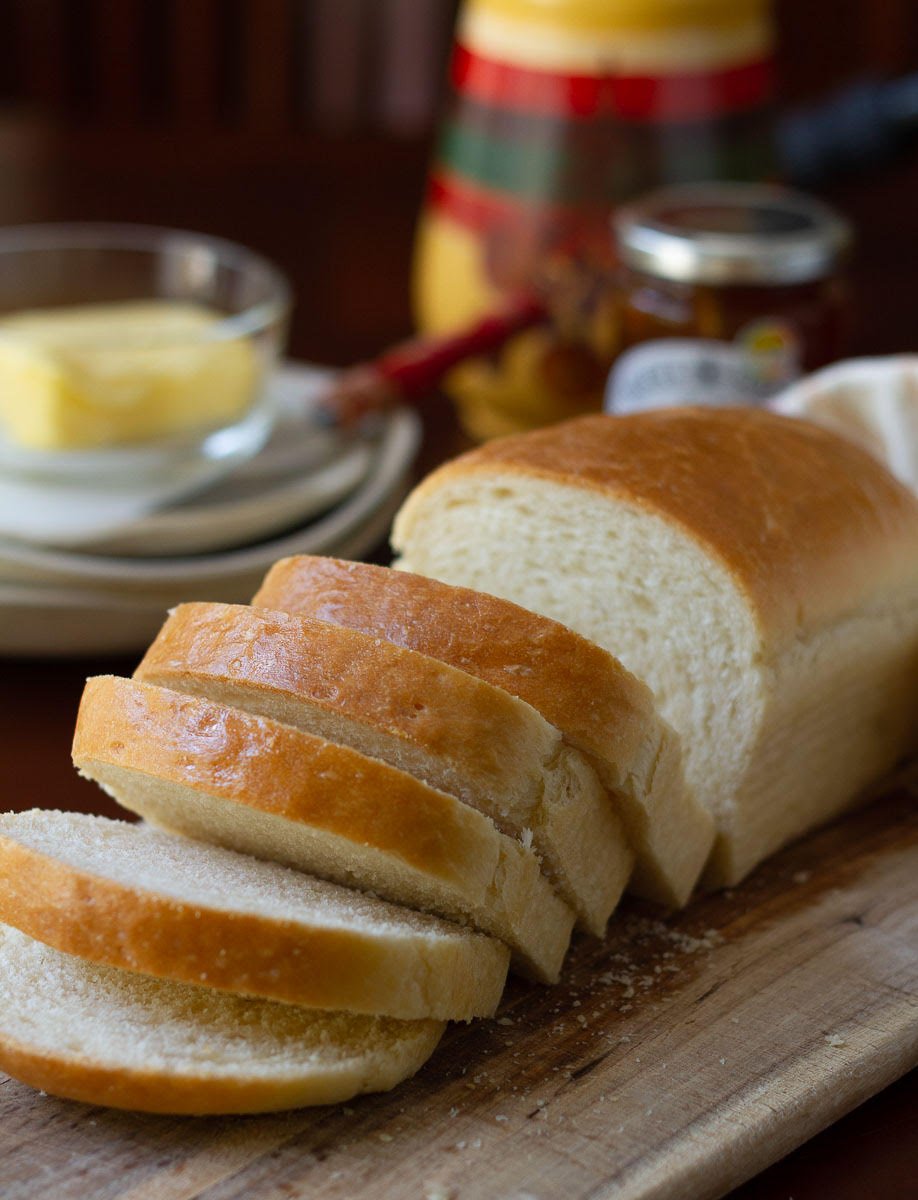
It tastes just as good when sliced thickly and enjoyed with your favorite sandwich fillings.
HOW TO MAKE SANDWICH BREAD?
Step 1: In a small bowl, combine yeast, sugar, and lukewarm water. Stir so everything dissolves, and then set the bowl in a draft-free corner until it is frothy. For me, it takes about 5 minutes, but if your yeast isn’t foamy, wait a few more minutes.
Step 2: In the bowl of your stand mixer, start kneading all-purpose flour, softened butter, salt, and the yeast mixture on low for about 2 to 3 minutes.
Step 3: Raise the speed to low-medium and knead the dough of this easy sandwich bread for 10 to 11 minutes. It should feel soft, smooth, and very slightly sticky.
Step 4: Take a bowl, grease it lightly, place the dough in it, swish it around, so it’s coated in oil, cover the bowl, and then let it rest in a draft-free corner of your kitchen for the first proof.
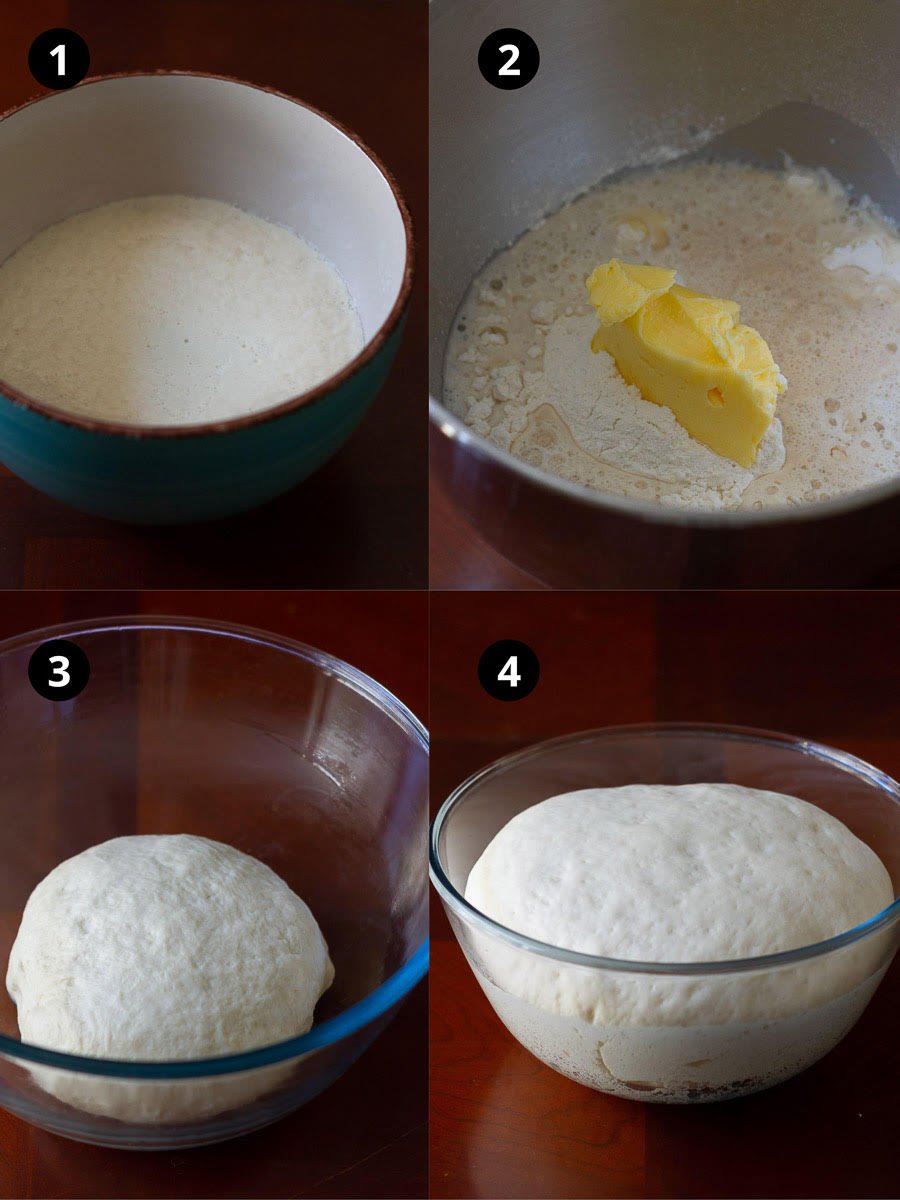
Step 5: When the dough is doubled in size (about an hour or an hour and a half for me), gently decant it on your work surface and shape it into a rough 14 by 10-inch rectangle. We’re not looking for precision here.
Step 6: Shape the sandwich bread into a log by folding it like a letter. Using the short side, take the top 1/3 and fold it over. Next, fold the bottom 1/3 to meet the first fold in the middle.
Step 7: Now flatten the dough, using a rolling pin, into a large rectangle, but make sure it’s not bigger than your baking tin. I used an 8 by 4.
Step 8: Roll the dough into a cylinder like you’re making a tight jelly roll, and then pinch the seams.
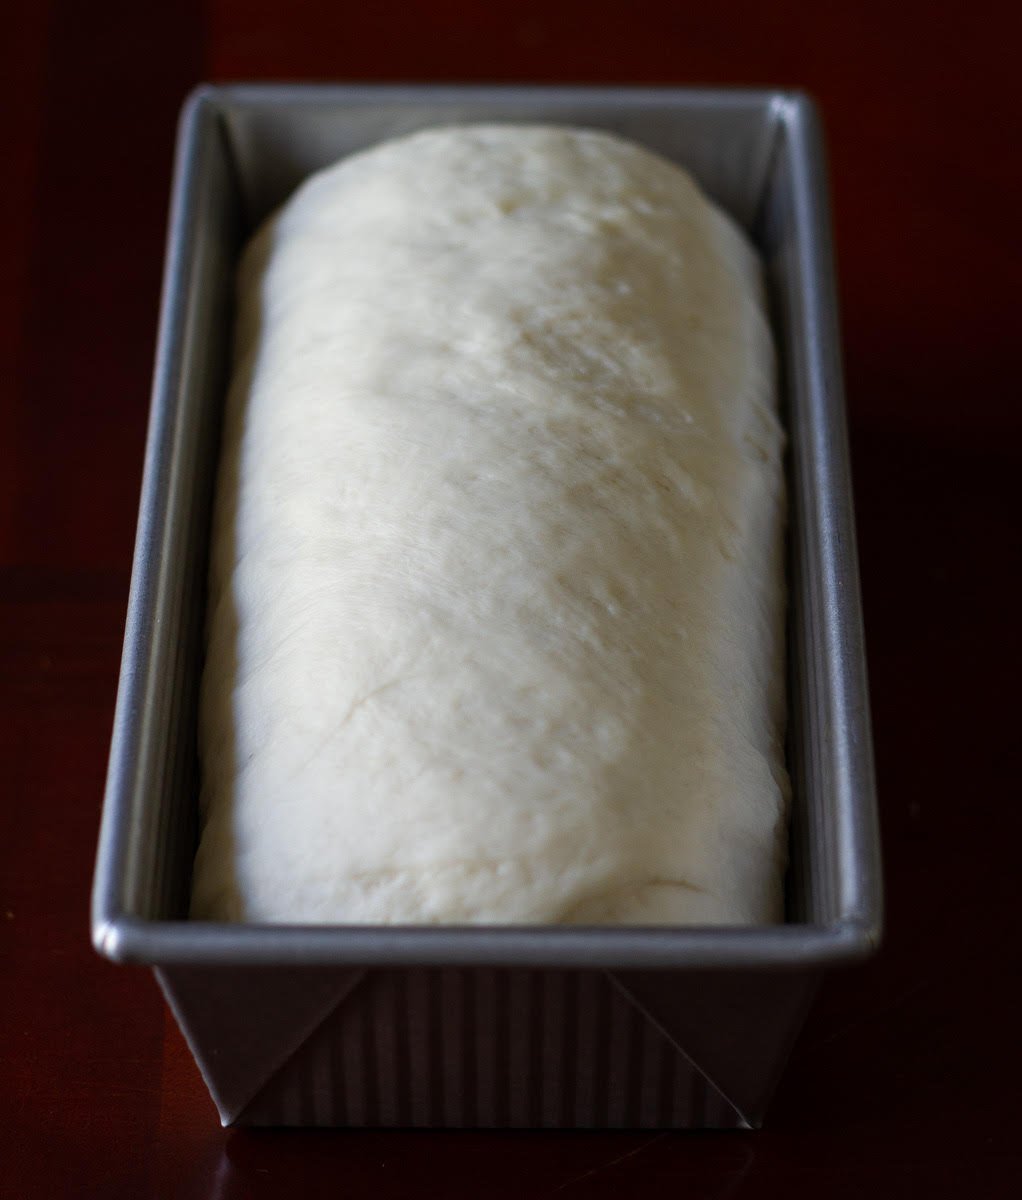
Step 9: Place the dough of the easy sandwich bread in your loaf tin (seam side down), cover it, and let it rest for 30–35 minutes or till it doubles in size.

Step 10: Once the second proof is complete, bake in a preheated oven for 30 to 35 minutes.
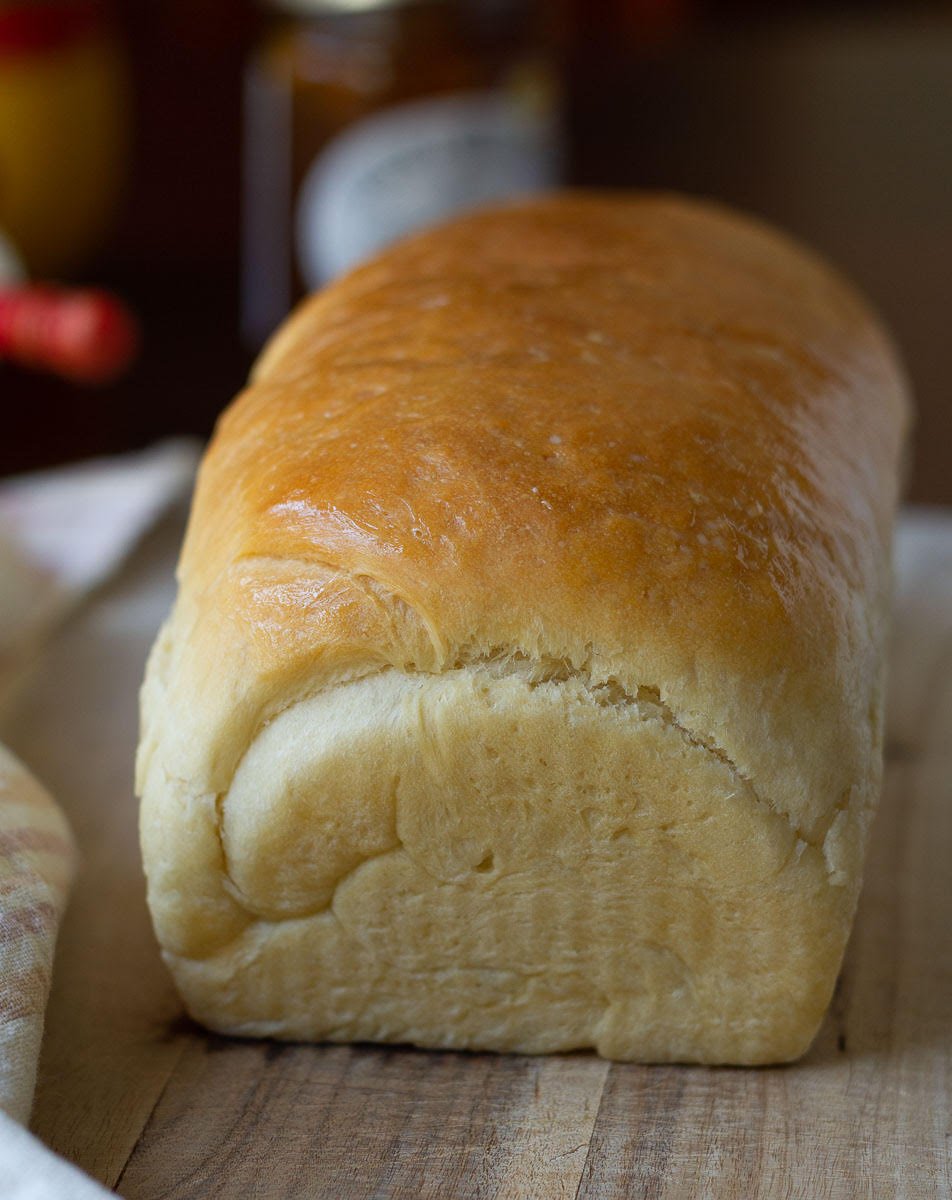
Step 11: Let it cool in the pan for a handful of minutes, and then turn over the wire rack.
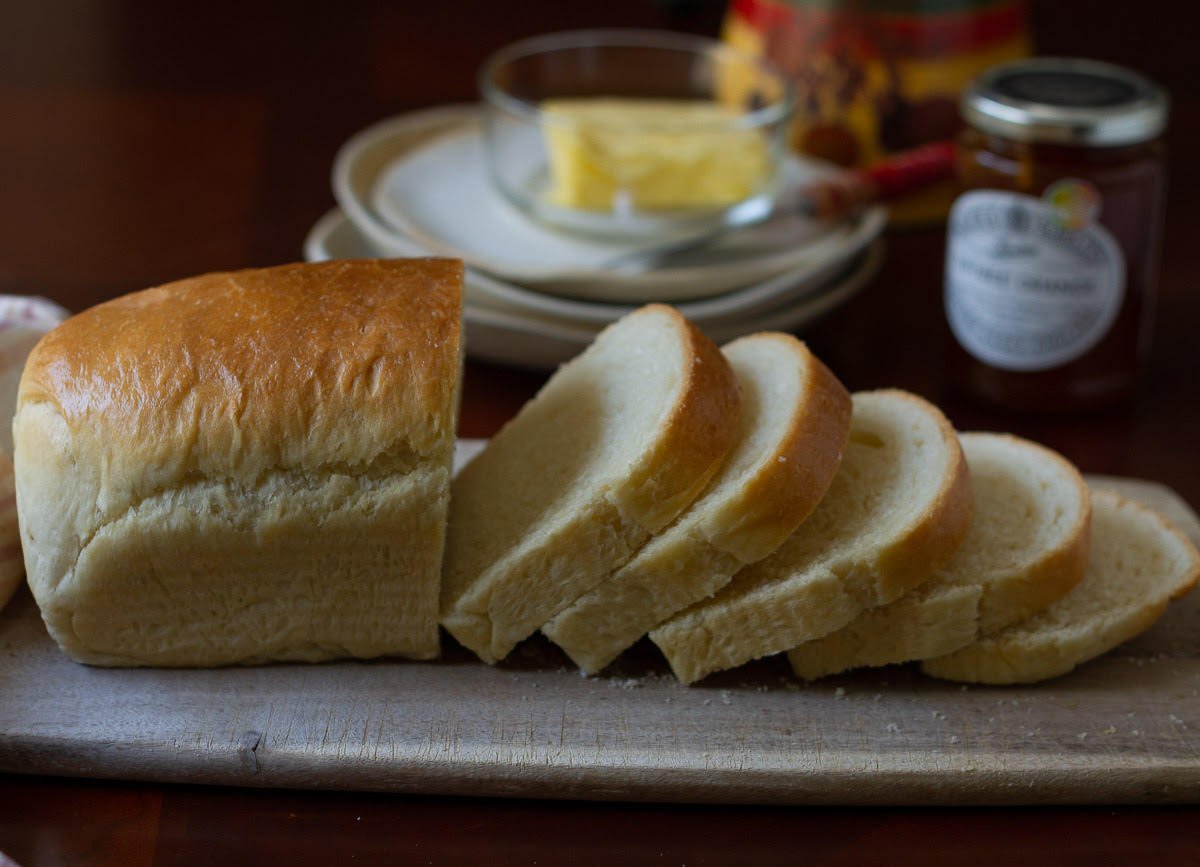
Final step: Cool completely (about 2 to 3 hours) before slicing and digging in!

MY NOTES ON HOMEMADE SANDWICH BREAD
Yeast: Don’t use hot water. You want it slightly warm, so it doesn’t kill the cells. Cold water won’t work because it won’t activate the yeast.
If your yeast mixture refuses to look nice and bubbly (like the top of a beer pint) in about 10 minutes, it's time to buy a new pack.
Kneading: The more you knead, the more gluten strands develop. Gluten is a rubber band-like protein that works like glue in breads, giving them structure, strength, and elasticity.
So, stay patient. And refrain from adding more dry flour. Sandwich bread recipes need moisture. Use more flour only if the dough is very, very sticky, making it hard to handle.
You don’t need a stand mixer for this one loaf of white bread; you can knead it by hand. Give it a good 12 to 14 minutes, and if you need tips on how to make homemade bread, use this easy everyday bread recipe.
What I really find helpful is covering the dough with a damp towel about halfway through and taking a break. It gives my hands a 5- to 6-minute rest, and it’s easier to knead.
The easy sandwich bread dough is done when you poke, and it springs back gradually.
Shaping: After the first proof, don’t knead the dough. Simply move it around to form the rectangle. Why? Because we don’t want the air pockets to escape, or you’ll end up with a dense sandwich bread loaf.
Proofing: The time may be more (or less) for you, depending upon how hot or cold your corner of the world is.
Baking: If your bread is browning too fast on top, loosely tent it with aluminum foil. But give it the full baking time. If you don't, the center will still be raw and have that yeasty smell.
How do I check if the sandwich bread is done? Tap the bottom. It should sound hollow. Also, the sides and the top will be a gorgeous light brown.
Softer crust: Right after you take the white homemade bread out of the oven, slather butter on top. Or you can cover it with a damp kitchen towel while you’re waiting for the loaf to cool. Both make the bread crust softer.
Cooling: For breads like brioche rolls or buns, cooling is not a big deal because you’re not slicing them. With sandwich bread, it’s not the same.
So, I always count the cooling period as part of the cooking time. Give this easy recipe for bread a few hours to cool. If you cut it while it’s still hot or warm, it will fall apart.
Storing: The loaf keeps well for 3 to 4 days, so long as you keep it tightly wrapped in the refrigerator. While I’m happy baking easy sandwich bread, the sun is trying to bake us, so storing it on the countertop is out of the question. You can also use the leftover bread to whip up a delicious savory breakfast casserole or even a French toast casserole!
CHANGES YOU CAN MAKE IN SANDWICH BREAD RECIPE INGREDIENTS
Flour: I did make this eggless white bread recipe with 100% whole-wheat flour and it turned out very well too. You will need to add extra water as the wholewheat absorbs more liquid.
You can also bake it with half all-purpose and half whole wheat flour, as I did for my everyday bread, a recipe that even 3 years later remains a reader favorite.
Butter: I used salted butter in this recipe. But you can use unsalted butter as well, you will need to increase the quantity of salt by 1/2 tsp.
Water: Milk is a good substitute for water if you’re craving a richer loaf of sandwich bread.
SOME MORE SIMPLE BREAD RECIPES
Half the joy of cooking is sharing it with others, which is why I’m always eager to hear from you. So go right ahead and drop a comment or reach out on Instagram, Pinterest, YouTube, or Facebook. I hope you love this easy sandwich bread as much as we do!
📖 Recipe
My Favorite Easy Sandwich Bread
Ingredients
- 3/4 cup Water, lukewarm
- 1 1/4 tsp Dried active yeast
- 1.5 tsp Sugar
- 2 3/4 cup All-purpose flour
- 1 tsp Salt
- 3 tbsp Butter, softened
Instructions
- Combine the water, yeast, and sugar in a small bowl. Stir and keep aside in a draft-free place for 5-10 minutes until frothy.
- Add the flour, salt, butter, and yeast mixture to the bowl of your stand mixer.Or to a large mixing bowl, if not using a stand mixer.
- Knead the dough at low speed for 2-3 minutes, then at medium speed for 8-9 minutes, until you get a smooth, soft, slightly sticky dough.
- Transfer the dough to a lightly greased bowl. Cover with a damp kitchen towel and let the dough rise for 1.5 hours or until doubled in size.
- Take the dough out on a work surface and gently degas it while patting it into a rough rectangle, about 12" * 8".
- Fold the top third over the bottom. Then fold the bottom third over the other layers.
- Using a rolling pin, roll out the dough into a large rectangle, approximately 16" x 8".
- Now roll the dough into a tight roll. Crimp the edges to seal. Pinch the side edges too to seal them well.
- Gently roll the shaped dough toward yourself to create surface tension for a better rise.
- Place the dough in a lightly greased 8" x4" loaf pan. Cover with a damp kitchen towel and let rise for 35-45 minutes until puffy.
- Meanwhile, preheat your oven to 250 C.
- Bake the risen dough at 180 C for 30-35 minutes or until the top is golden brown and the bottom sounds hollow when tapped.
- Let the bread cool for 2-3 hours, before slicing. Enjoy!
Storage
- This bread will stay well for 3-4 days in the refrigerator, tightly wrapped. If it's not too hot where you live, you can keep it on the countertop for 2-3 days too.


Linda says
The recipe came together really nicely. My only issue was the crust was very hard when it came out of the oven and I baked it for exactly 40 minutes.
Natasha Minocha says
Hi Linda, so glad the bread turned out well for you. Thank you for trying the recipe and sharing your feedback. So if the bread has a hard crust, and you want to make it soft, then you can do 2 things - 1. Cover the loaf with a kitchen napkin as soon as it comes out of the oven. 2. Brush the loaf immediately with melted butter. Both these tricks work very well for me. Hope this helps 🙂
Miller says
This is a nice, easy recipe. I made it 4 times so far. For me the first time dough was too stiff, i think it was too dry.. Next batch I added a few tablespoons of milk(just go one at a time) to get the right consistency. Finally I decided that it needs a full pack(2 1/4 teaspoons) of yeast. I don't like just using partial packs anyways. That one turned out best.
Natasha Minocha says
So happy you enjoy this recipe, Miller. I love that you were able to tweak the recipe and make good loaves of bread. I really appreciate your positive feedback. I'm sure many readers will also benefit from this and will feel confident in trying this out. Thank you very much. Happy baking 🙂