• Skip to main content
  • Skip to primary sidebar

menu icon
go to homepage
  • Summer Recipes
  • Recipe Index
  • About Natasha
  • Free E-Book
subscribe
search icon
Homepage link
  • Summer Recipes
  • Recipe Index
  • About Natasha
  • Free E-Book
×
Home > Recipes

Wholesome Barley Soup With Beans & Greens

January 27, 2016

White Bean, Barley & Mustard Greens Soup

This barley soup is chock-full of vegetables. Wholesome, hearty, and nutritious, pearl barley soup is as simple as tossing in white beans and mustard greens in a pot and letting it all simmer away. The recipe for vegetable barley soup is surely a keeper!

Wholesome Barley Soup With Beans & Greens

I'm yet to do the "sneak the vegetables in" kind of parenting. I think it's important that children know what they are eating, learn to distinguish one vegetable from another, and understand why they are part of a healthy diet.

They, of course, have their preferences, but so do we adults. Now that said, I find homemade soups and stews are a wonderful way to incorporate a ton of vegetables in one dish, especially the ones they are fussy about. They eat it all without any hoo-ha and happily tuck in seconds too, as was the case with this old-fashioned vegetable barley soup.

[feast_advanced_jump_to]

WHAT TO DO WITH MUSTARD GREENS?

Last winter, both my kids announced they would never touch sarson ka saag, a mustard greens dish extremely popular in India. It was heartbreaking!

So, I had to come up with another way of cooking the extremely nutritious, crunchy greens. I did a quick stir-fry with garlic, and they lapped it up.

This time I also had a pack of beautiful white beans and some pearl barley from a local organic farmer's market, so I decided on a mustard greens soup recipe. Why? Because vegetable soups are one of my favorite meals to cook.

White beans and mustard greens for barley soup

WHY TRY VEGETABLE BARLEY SOUP?

Can be easily prepped ahead.

It’s gloriously hearty and so healthy too, packed with protein, fiber, vitamins, and minerals.

Very versatile - use any kind of beans you like, dried or canned. Any kind of greens you have handy can be used as well.

A hot bowl of it is comforting and soothing in cold weather.

Leftover barley soup tastes even better the next day as the flavors get concentrated. 

Barley Soup With Beans & Greens

HOW TO MAKE BARLEY SOUP?

Step 1: Soak your white beans overnight. The next day, rinse and pressure-cook them in salted water. Drain and keep aside.

Step 2: Heat olive oil in a large pot. Add finely minced garlic and a bay leaf, and sauté for a couple of minutes.

Step 3: Add the diced onions and cook for another 3–4 minutes until translucent.

Step 4: Tip in barley, carrots, and beans and sauté them for 5–7 minutes.

Step 5: Season the mixture with duqqa (or dukkah), salt, and pepper.

Step 6: Add tomato purée and 2 cups of water. Let it come to a gentle boil, then cover and simmer for 20–25 minutes until the barley is cooked.

Step 7: Stir in the white beans, mustard greens, and the rest of the water. Cook for another 10–15 minutes, till the greens are done to your liking.

Step 8: Adjust seasoning. Garnish the barley soup.

Final step: Serve hot and savor!

 Barley Soup With Beans & Greens served with bread

BARLEY SOUP RECIPE NOTES

  • White beans cook very fast. I didn't let even one whistle go through completely.
  • You can use any kind of beans in this soup - kidney beans, black-eyed peas, garbanzo beans.
  • To avoid overcooking greens in soups, I add them right at the end. Mustard greens do take longer to cook than, say, spinach. About 10–15 minutes of cooking time was good enough.
  • After step 7, add more water to reach the consistency you want in the bean and barley soup.

WHAT IS DUQQA OR DUKKAH?

Dukkah is a warm, aromatic spice mix from the Middle East. It really steps up the game for this recipe for bean and barley soup. You can buy it online or make it at home.

  • Dry roast almonds. Set aside.
  • Roast white sesame and coriander seeds. Set aside
  • Roast cumin and black peppercorns. Keep aside.
  • Finally, roast red chilies.
  • Let everything cool completely and grind to a coarse powder.

Use dukkah in the barley soup with vegetables. Store the rest. It’s delicious on eggs, cheese toast, sandwiches, pasta, grilled or roasted veggies, fish, and chicken.

Barley Soup With Beans & Greens

HOW TO SERVE VEGETABLE BARLEY SOUP RECIPE

I like the play of textures in my food. I love how the intense garlic flavor and the sharp peppery bite from mustard greens are perfectly complemented by the rich buttery white beans, chewy nutty barley, and sweet carrots.

So, I didn’t want the seasoning to overwhelm the barley soup. I added some lemon juice. It is a mandatory addition to most of my soups. I stir some in just before serving with some crusty bread or simple everyday bread.

I also added a drizzle of good-quality olive oil and some shavings of Parmesan cheese. They do wonders in this recipe for vegetable barley soup. I used some sharp cheddar cheese for La Familia, as that's what I had in hand. But both are optional.

LOVED VEGETARIAN BARLEY SOUP? MAKE

Pumpkin Soup

Creamy Pea Soup

Roasted Carrot Lentil Soup

Roasted Sweet Potato And Pumpkin Soup

Half the joy of cooking is sharing it with others. That’s why I’m always eager to hear from you. So go right ahead and drop a comment or reach out on Instagram, Pinterest, YouTube, or Facebook. I hope you love this barley soup as much as we do!

📖 Recipe

Tried this recipe?Let us know how it was!
White Bean, Barley & Mustard Greens Soup

Wholesome Barley Soup With Beans & Greens

Natasha Minocha
This barley soup is chock-full of vegetables. Wholesome, hearty, and nutritious, pearl barley soup is as simple as tossing in white beans and mustard greens in a pot and letting it all simmer away. The recipe for vegetable barley soup is surely a keeper!
No ratings yet
Print Recipe Pin Recipe
Prep Time 30 minutes mins
Cook Time 50 minutes mins
Total Time 1 hour hr 20 minutes mins
Course Side Dish, Soup
Cuisine World
Servings 6 Servings
Calories 255 kcal

Ingredients


  • 3/4 cup White beans Soaked overnight
  • 1/2 cup Pearl Barley
  • 3 Carrots Diced
  • 1 Onion, large Diced
  • 8-10 cloves Garlic Finely minced
  • 5 Tomatoes Pureed
  • 1/2 cup Green beans Diced
  • 2 cups Mustard Greens Chopped finely
  • 2-3 cups Water
  • 2 Tbsp Olive oil
  • 1 Bay leaf
  • 1 Tbsp Dukkah
  • 1 Tbsp Lemon juice
  • Salt & Pepper to taste
  • Olive oil, Cheese for serving Optional

Dukkah

  • 1/4 cup Almonds
  • 2 Tbsp Coriander seeds
  • 1 Tbsp Cumin
  • 2 Tbsp White sesame
  • 3-4 Dried red chillis
  • 1 tsp Black peppercorns
  • 1 tsp Salt

Instructions
 

  • Rinse the soaked white beans and pressure cook them in salted water. I didn't let even one whistle go through completely. They cook very fast. Drain and keep aside.
  • Heat the olive oil, in a large pot. Add garlic and a bay leaf saute for a couple of minutes, add the onions and cook for another 3-4 minutes.
  • Tip in the barley, carrots and beans and saute them for 5-7 minutes. Season the mixture with dukkah, salt & pepper. Add the tomato puree and 2 cups of water. Let it come to gentle boil, cover and let it simmer for 20-25 minutes until the barley is cooked.
  • Now stir in the white beans, mustard greens and the remaining one cup of water. Let them cook for another 10-15 minutes, till the greens are cooked to your liking. Add more water according to the consistency you want.
  • Once the soup is cooked through. Taste and adjust for seasoning. Add the lemon juice. Drizzle with some extra olive oil if you wish and serve hot. Enjoy!!

Dukkah

  • Dry roast the nuts, seeds, spices and chillis separately.
  • Let cool completely and grind to a coarse powder.
  • This can used in a variety of ways- sprinkle on eggs, cheese toasts, sandwiches, pastas, grilled or roasted veggies, fish, chicken.

Nutrition

Serving: 1 ServingCalories: 255kcalCarbohydrates: 36gProtein: 9gFat: 10gSaturated Fat: 1gPolyunsaturated Fat: 2gMonounsaturated Fat: 6gTrans Fat: 0.002gSodium: 431mgPotassium: 831mgFiber: 10gSugar: 7gVitamin A: 6823IUVitamin C: 67mgCalcium: 155mgIron: 4mg

Pumpkin Mac and Cheese

October 27, 2015

Pumpkin macaroni cheese in a white pot with a wooden spoon on the side.

Cheesy, creamy, and cozy, this pumpkin mac and cheese is comfort food at its best! It's quick to make, full of flavor, and so satisfying. Perfect for a busy weeknight or a chilly evening, this dish always hits the spot!

Pumpkin macaroni cheese in a white pot with a wooden spoon on the side.

Oh, how I love sneaking pumpkin into my recipes, from pumpkin bread rolls to pumpkin muffins. But pumpkin in mac and cheese? Who would have thought! But, trust me, it’s amazing!

The caramelized roasted pumpkin makes the sauce so silky and gives a little sweetness that pairs beautifully with the smoky paprika and strong, robust thyme! Soft, tender pasta in a clingy, velvety "cheesy" sauce...totally irresistible!

[feast_advanced_jump_to]


Why You'll Love This Recipe

✨ With simple steps like roasting, blending, and stirring, this meal comes together quickly, making weeknight dinners easy and delicious! 

✨ It’s such a fun twist on the classic and ever-popular macaroni and cheese. Garlic, smoked paprika, and thyme add a ton of flavor, making this cozy and special.

✨ It’s a recipe kids and adults will love. It’s cheesy enough to be comfort food, but the pumpkin sneaks in a veggie boost.

✨ Great for meal prep! You can make this sauce ahead of time, refrigerate it, or freeze it. To serve, just heat and stir in the pasta!

✨ There are so many ways you can customize this pumpkin mac n cheese. Try it with different cheeses, crunchy breadcrumbs or bacon topping, or a drizzle of chili oil for a kick! You can even bake it for a golden bubbly finish!

Recipe Ingredients

labelled ingredients for making pumpkin mac and cheese.

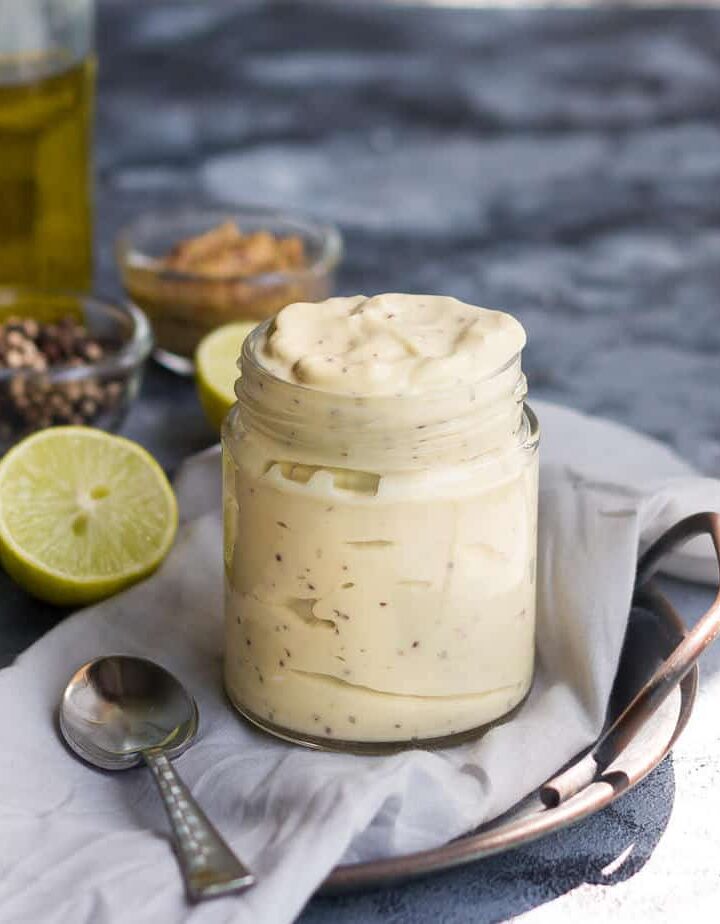
Pumpkin is the star of the dish. It gives the sauce a naturally creamy texture without making it pumpkin-y. You can use any variety of fresh pumpkin. I used a butternut squash. If you’re short on time, look for pure canned pumpkin purée or use a homemade one. A total lifesaver. I love keeping pumpkin puree on hand, whether for pumpkin bread or pumpkin basque cheesecake.

Pasta: Any small pasta shape would do here. I used the classic macaroni, but any small pasta will do - shells, penne, cavatelli, ziti. As long as the pasta has some nooks to hold the pumpkin cheese sauce, it will work beautifully.

Olive oil to roast the pumpkin. It imparts a fruity flavor, and I highly recommend it. But avocado oil or any vegetable oil you prefer will work like a charm.

Spices: Garlic and onion for a savory taste, black pepper, and red chili flakes for a little heat and spice.  Dried thyme and smoked paprika for an earthy and smoky flavor. 

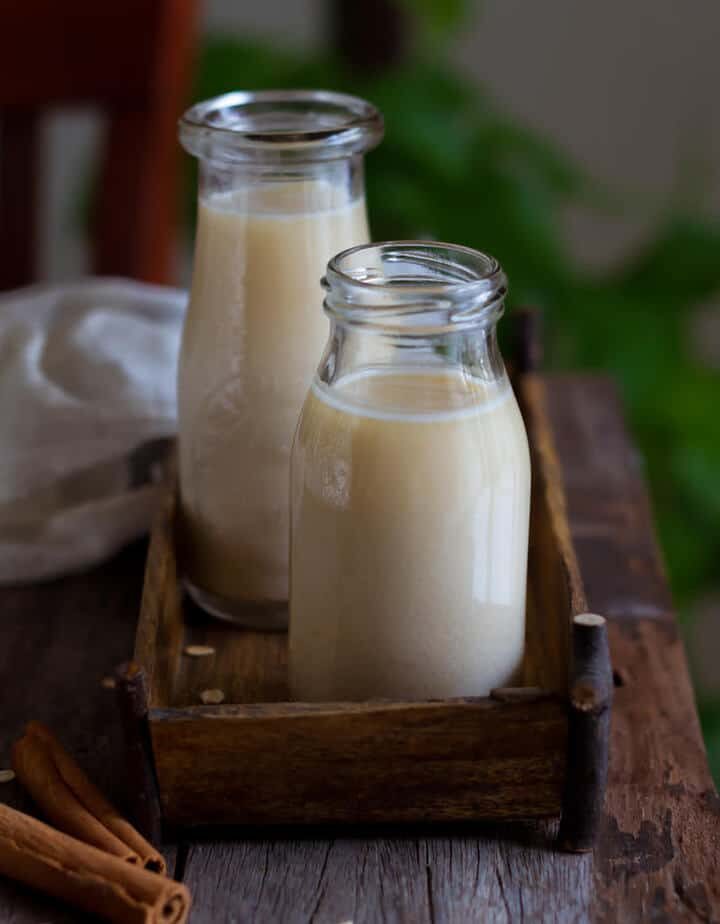
Coconut milk is rich and creamy, which is why I love it in vegan pumpkin mac and cheese. It makes the sauce silky-smooth and luscious, while keeping it lighter than cream. You can use any regular milk you prefer, or cashew milk or almond milk.

Nutritional yeast brings in that nutty, umami flavor. It’s a great trick to make any sauce “cheesy” even if you’re using real cheese. Don’t have it? Feel free to skip it. Or add parmesan!

Please see the recipe card below for full information about ingredients and quantities.

Variations

Bake it: Sprinkle some shredded cheese and breadcrumbs on top and bake till golden and bubbly.

Extra veggies: Stir in roasted broccoli, spinach, kale, or even peas for a veggie-packed version.

Spice it up: Love heat? Add more chili flakes, a pinch of cayenne, or drizzle some chili oil on top!

How To Make Pumpkin Mac and Cheese

Cubed pumpkin, garlic, and onions on a baking tray.

Step 1: Toss the pumpkin, onions, garlic, red chili flakes,salt, pepper, and dried thyme with olive oil. Spread out evenly on a baking sheet.

Roasted pumpkin, onion, and garlic on a baking tray.

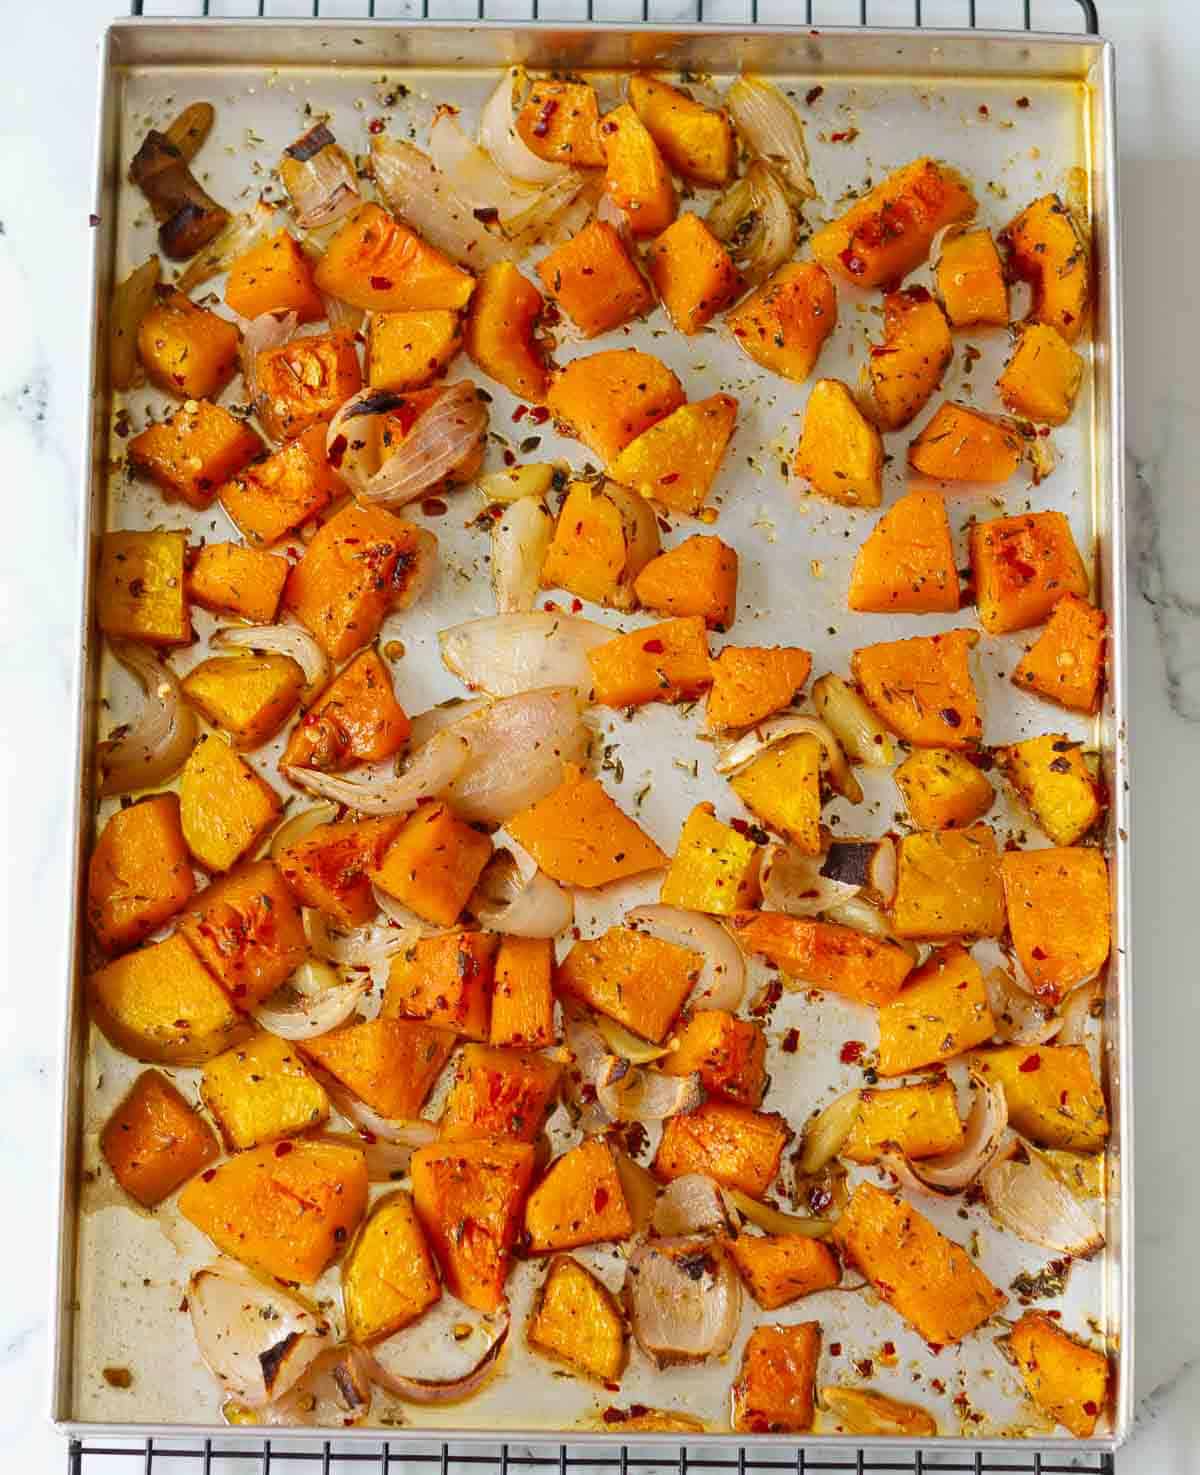
Step 2: Roast for about 25 minutes till the pumpkin is soft and cooked through.

Step 3: In the meantime, cook the macaroni till al dente in plenty of salted water. Drain well. Save a cup of pasta water for later use.

Pumpkin, onion, garlic, coconut milk in a blender jar.

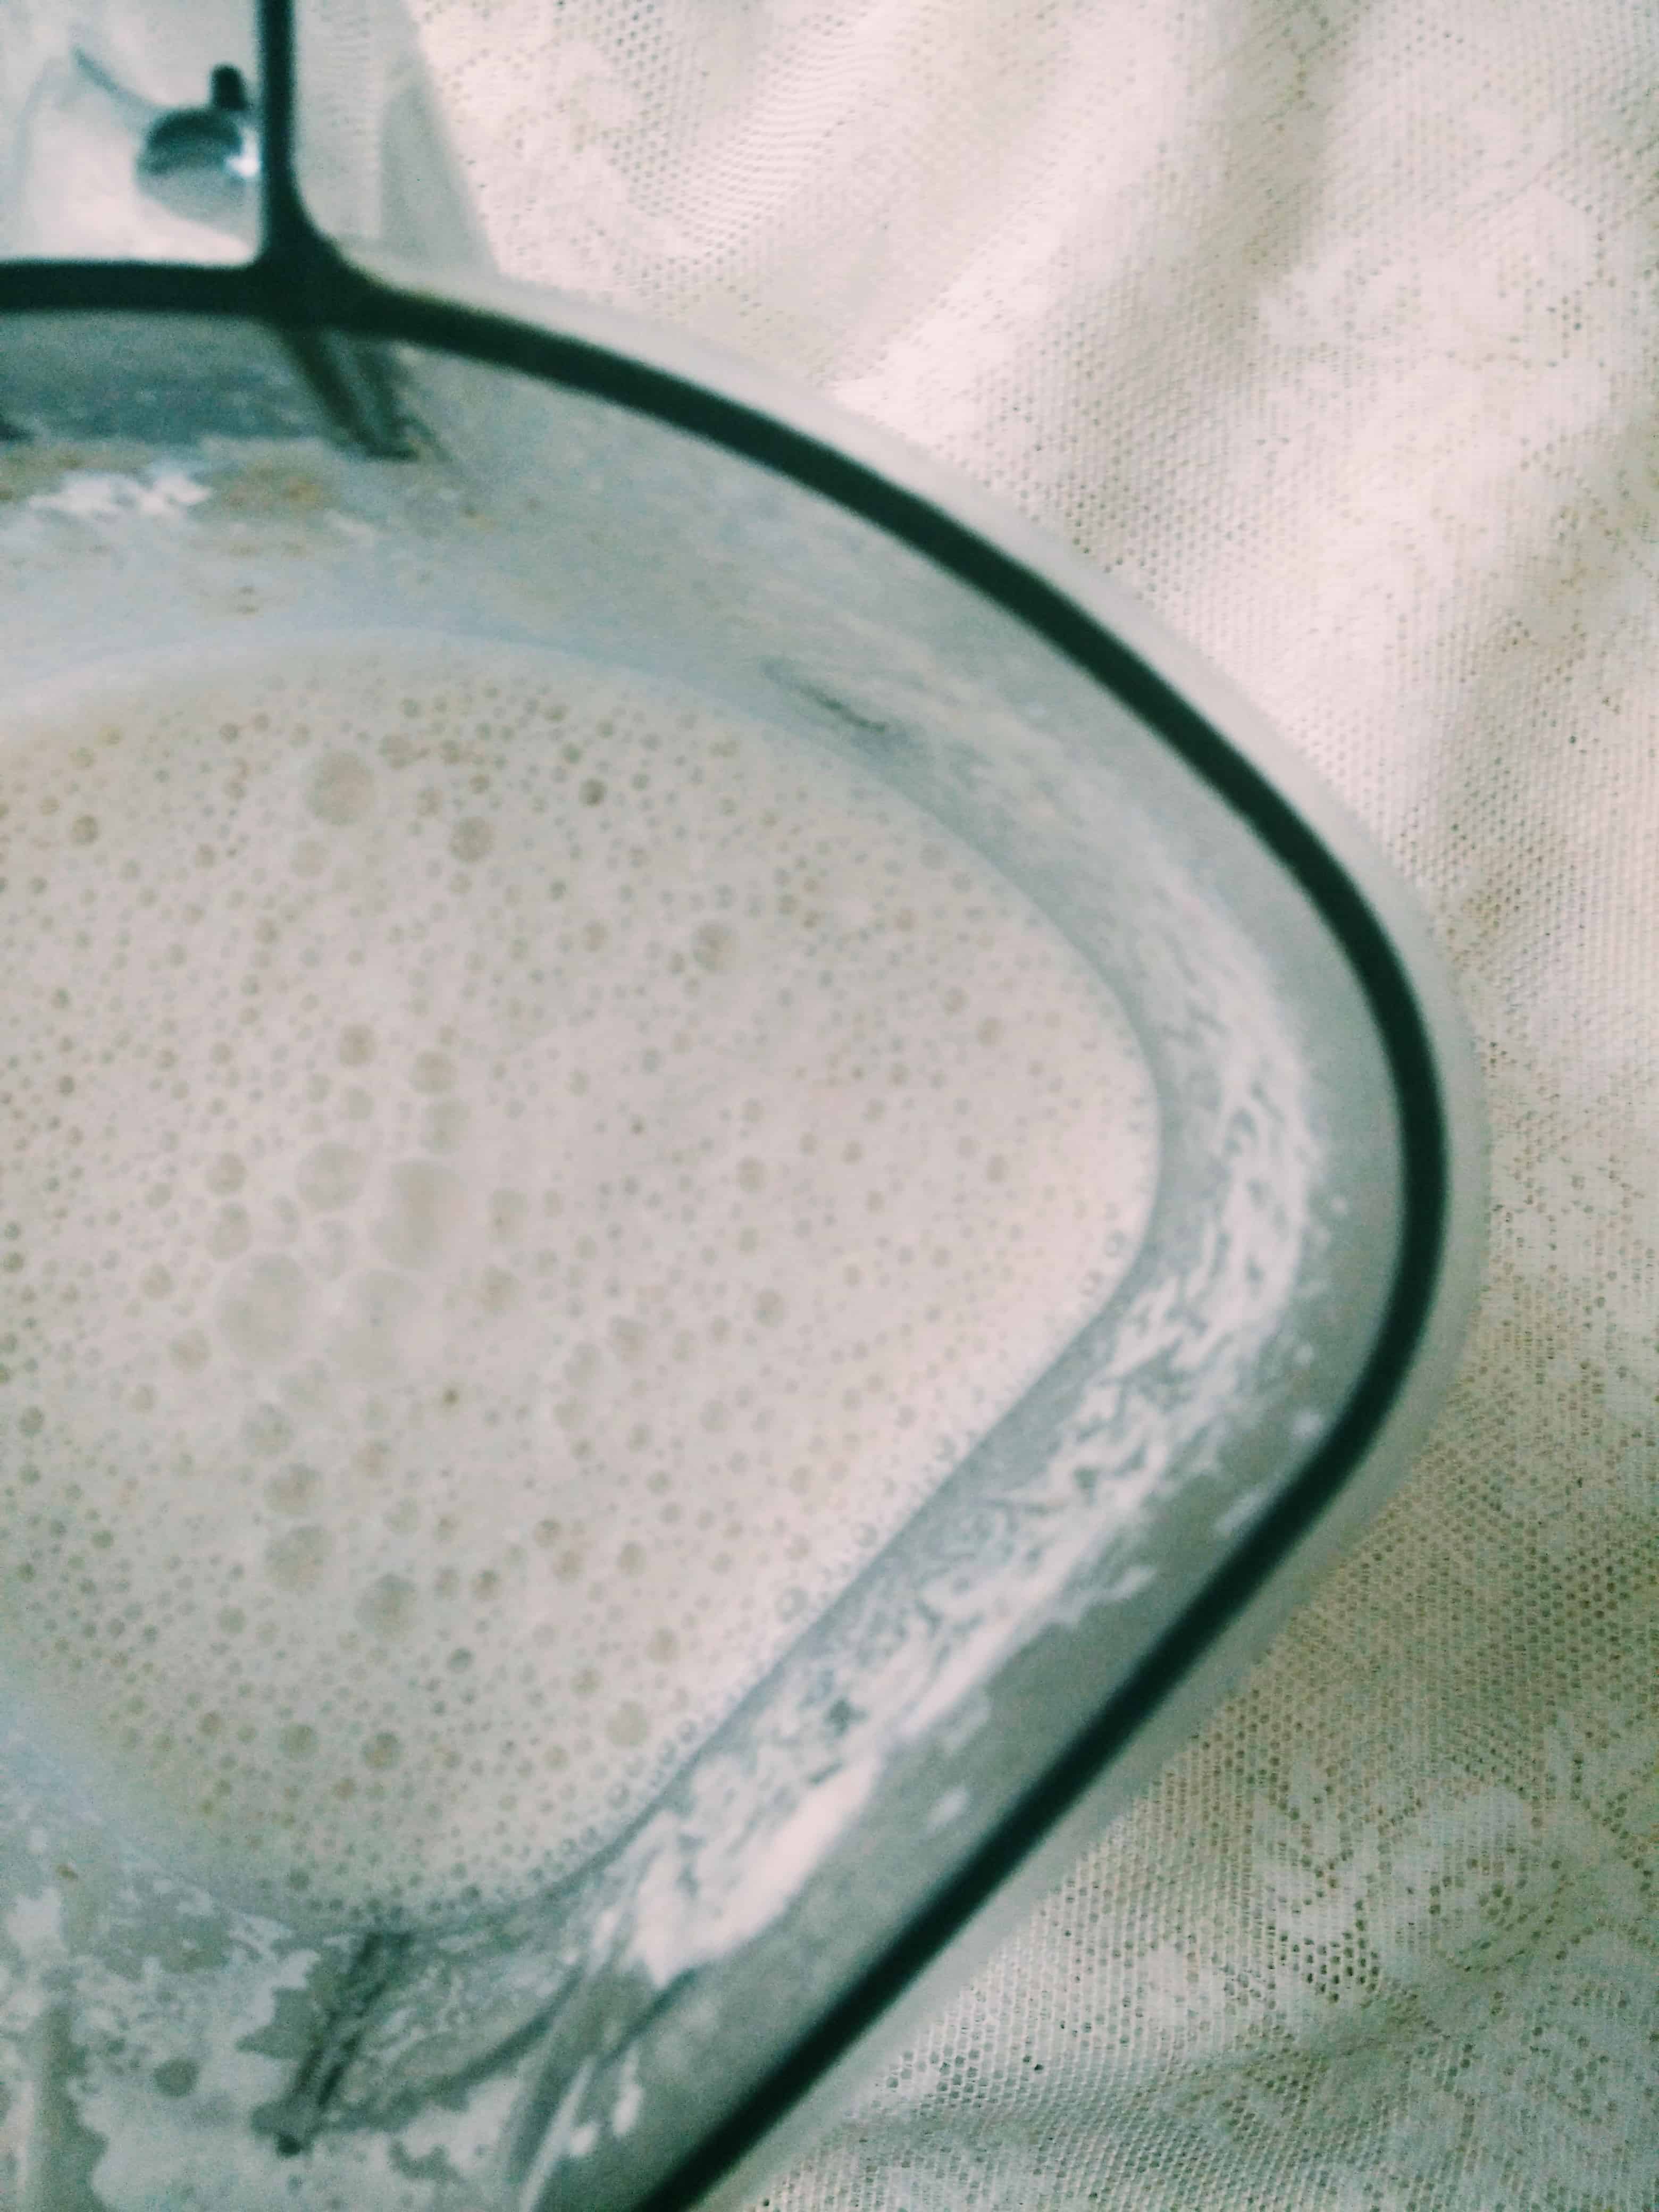
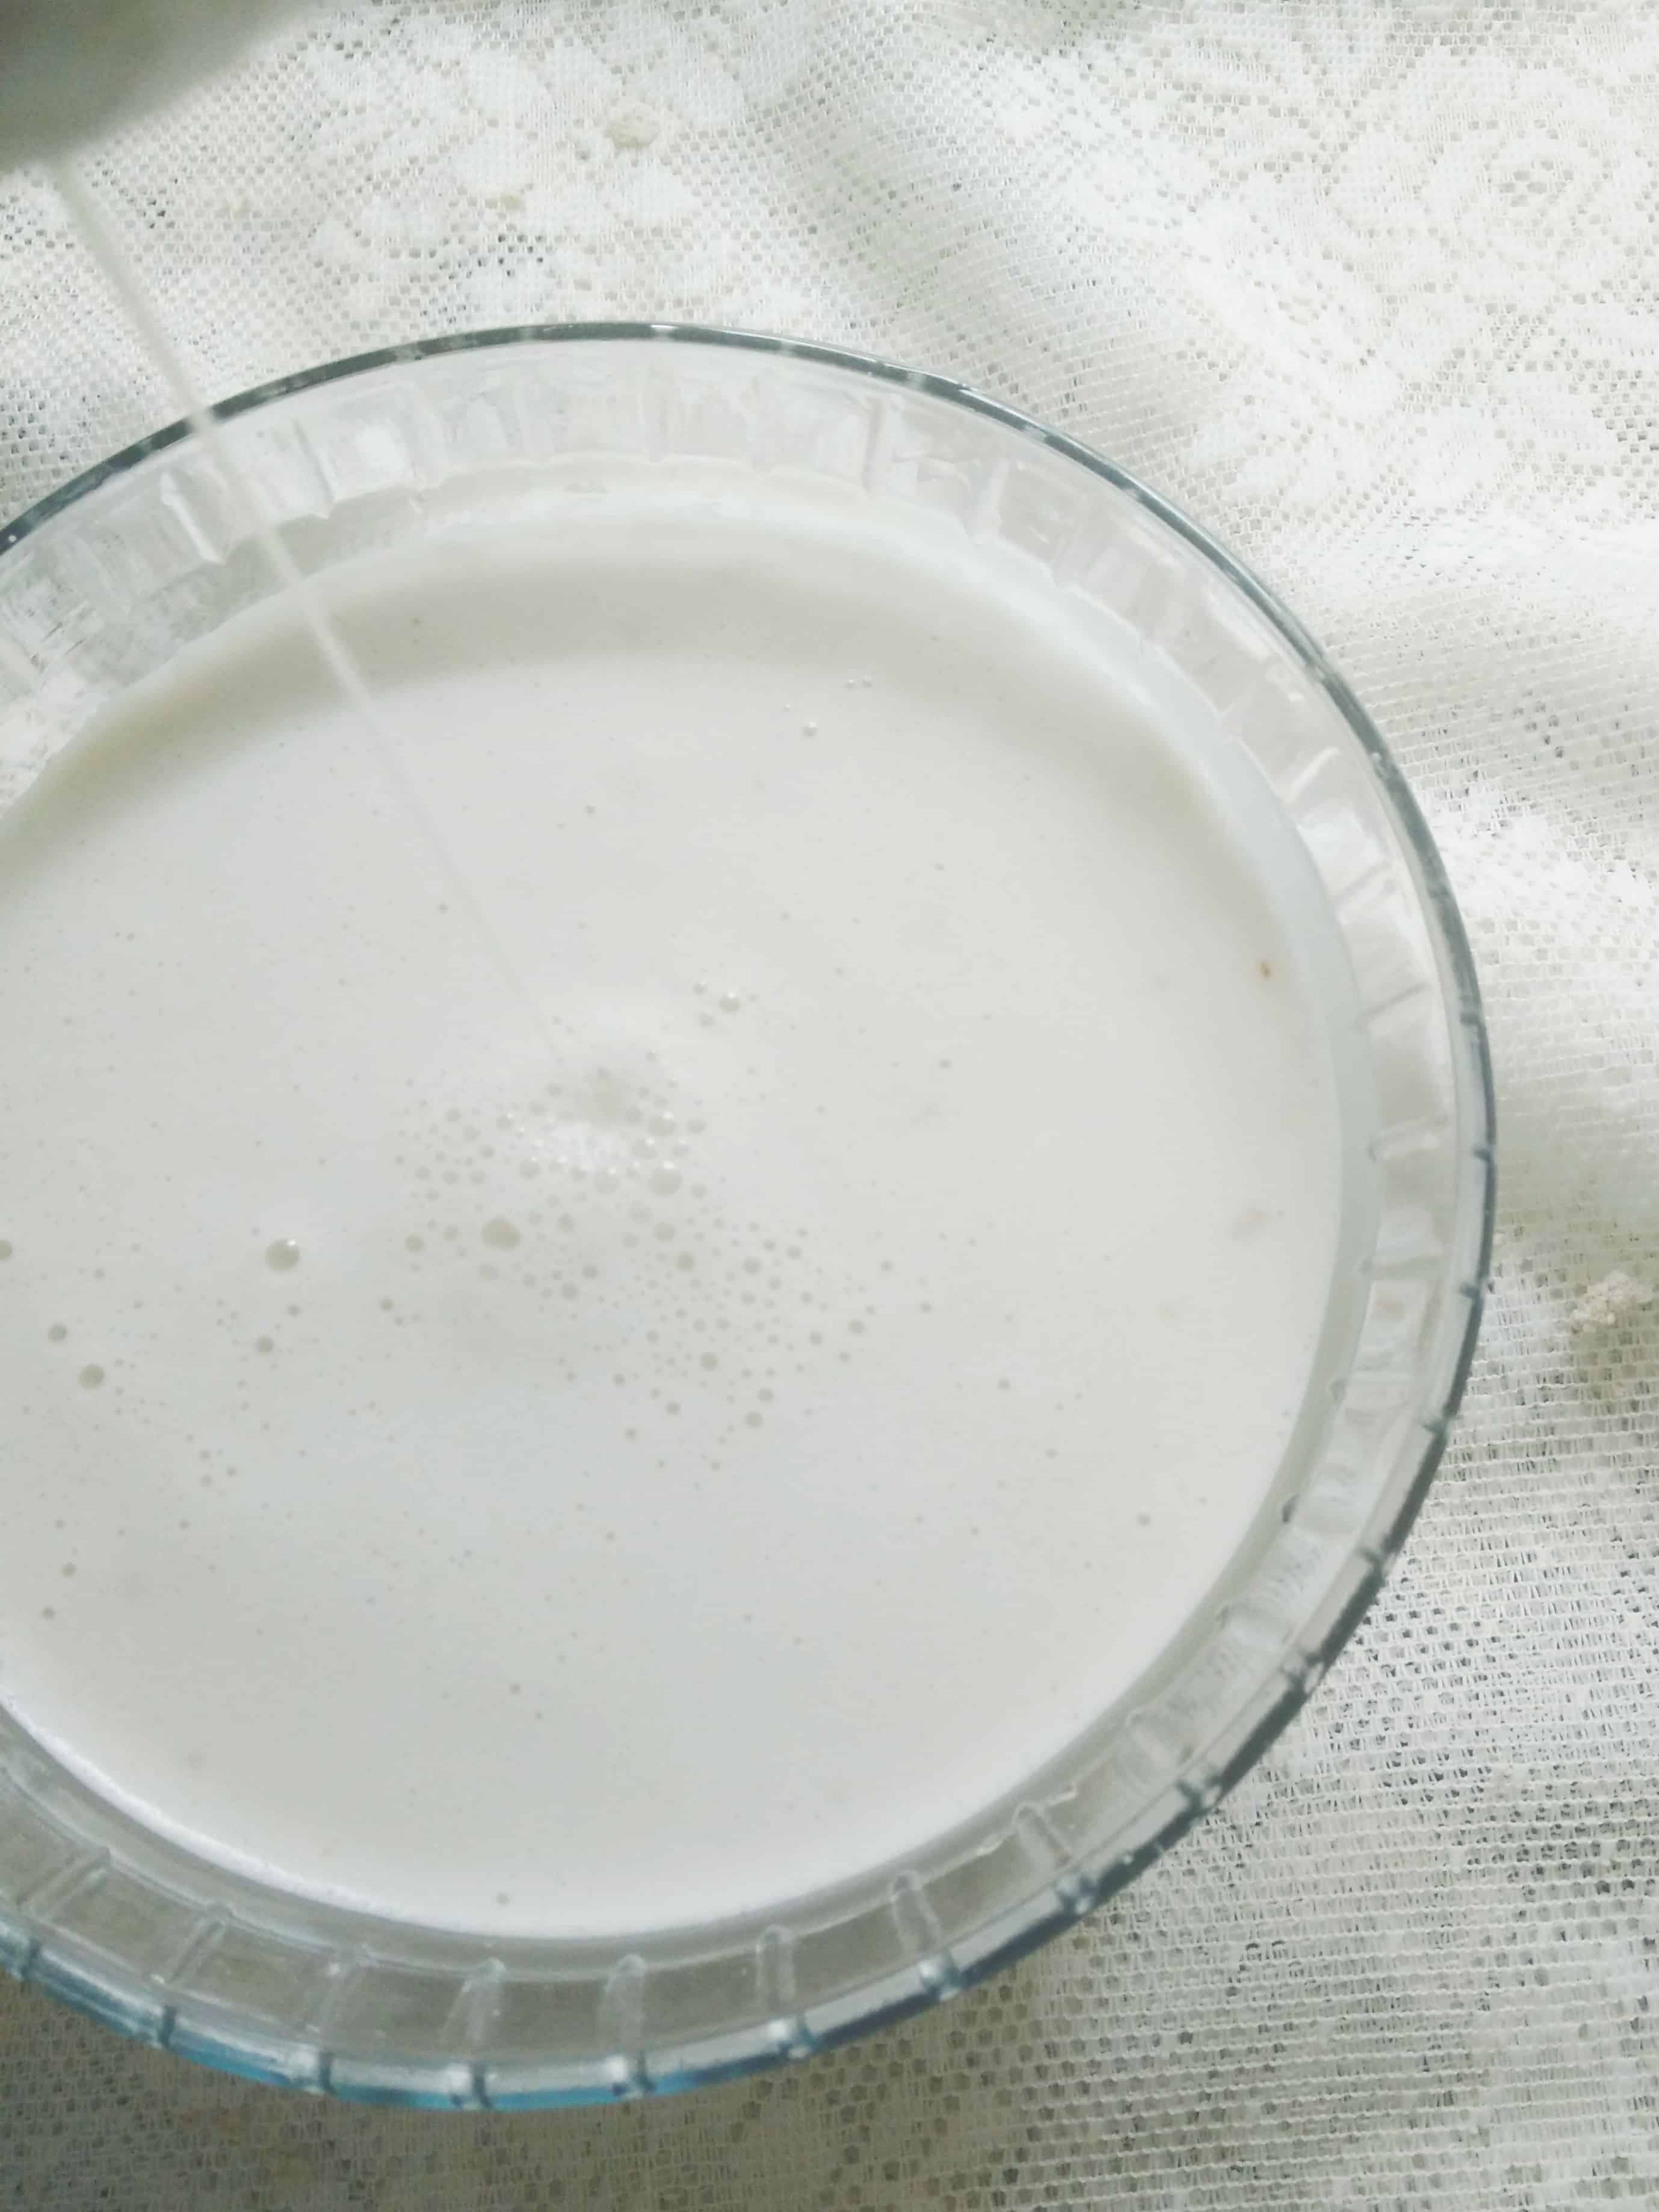
Step 4: Add the roasted veggies to a blender jar along with nutritional yeast, smoked paprika, and coconut milk.

Blended pumpkin sauce in a blender jar.

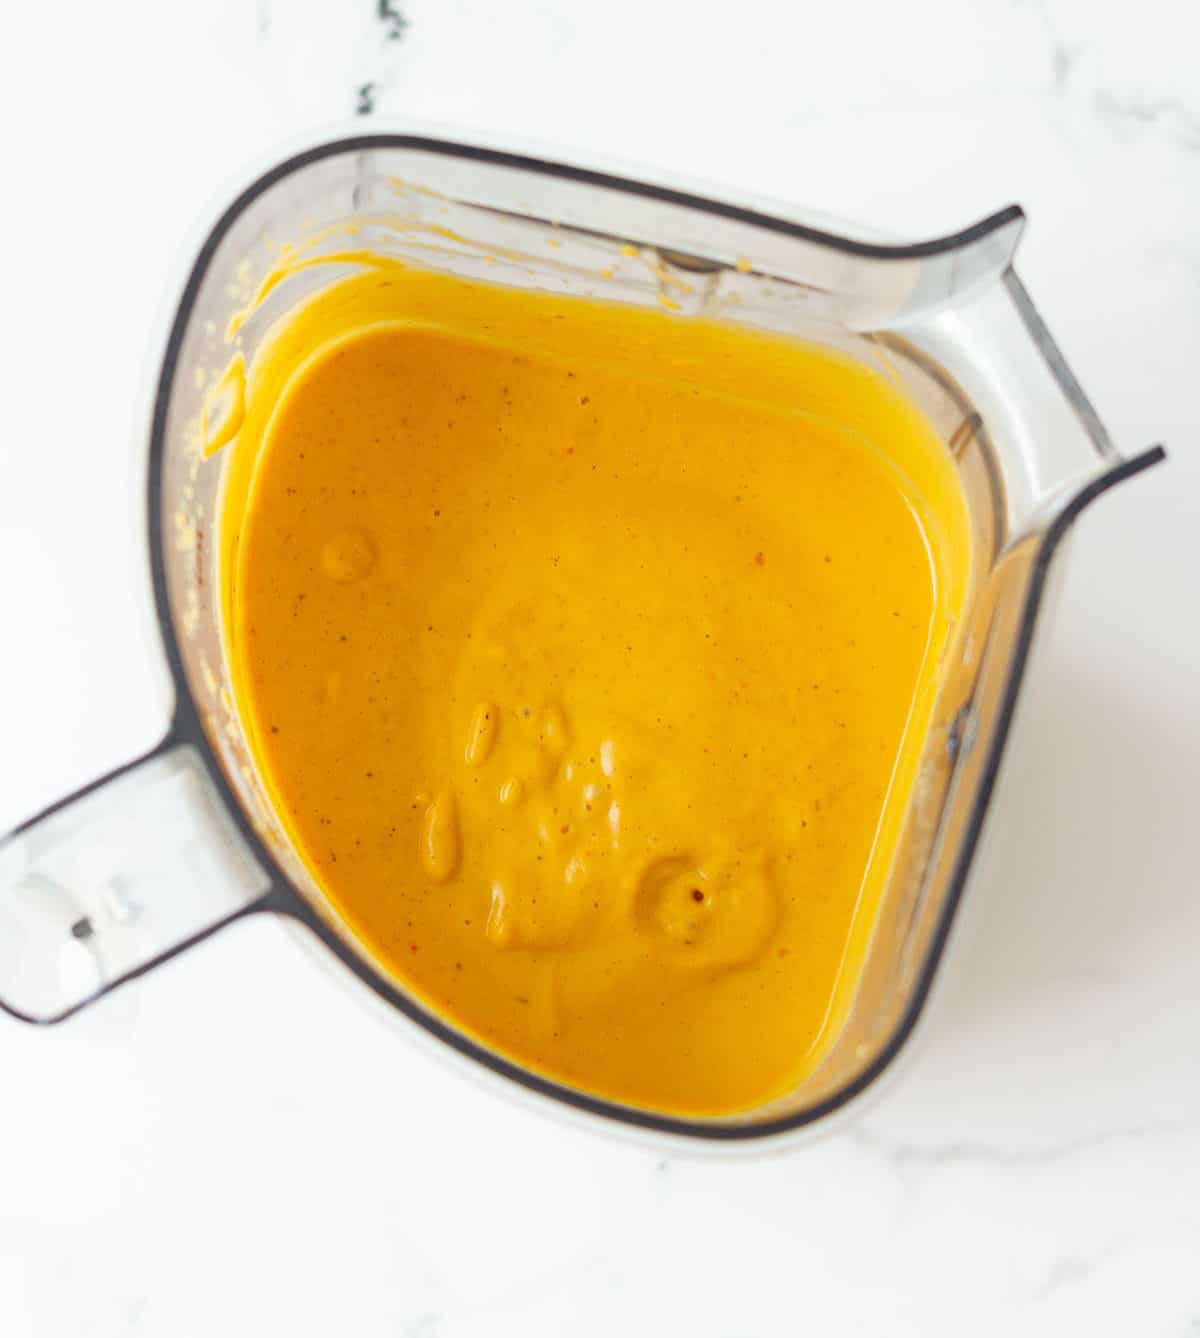
Step 5: Blend everything until smooth.

Pumpkin sauce in a white stock pot.

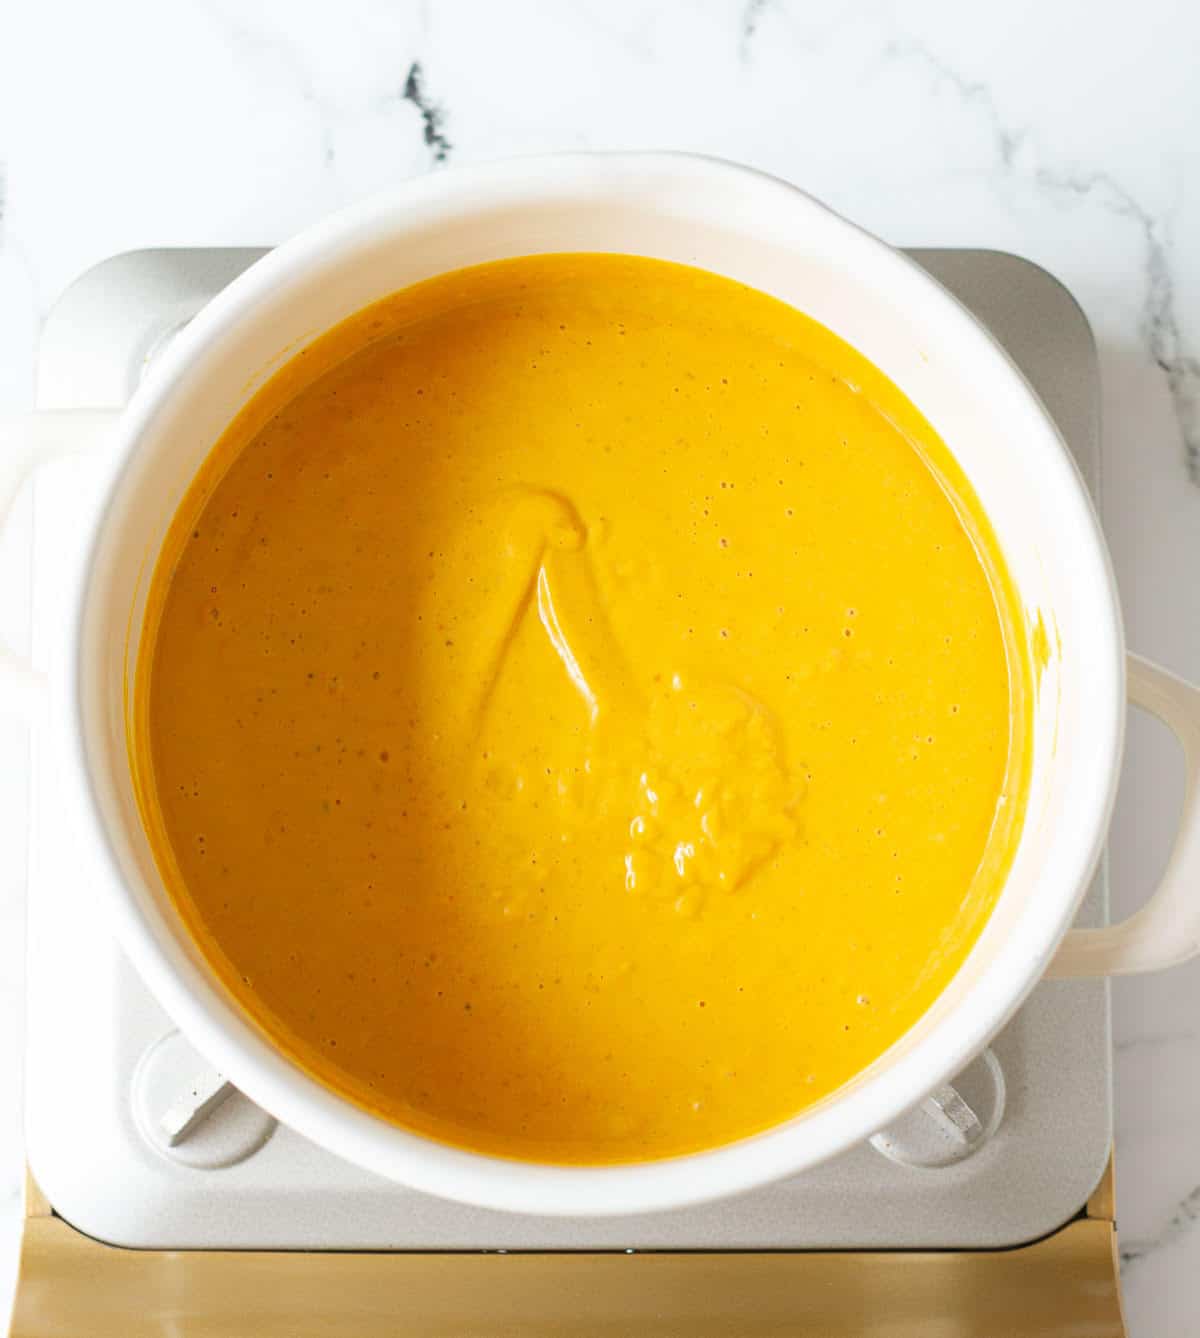
Step 6: Pour out the sauce in a stock pot and bring it to a gentle boil. Taste and adjust for seasoning.

Cooked pasta on top of pumpkin sauce in a white stock pot.

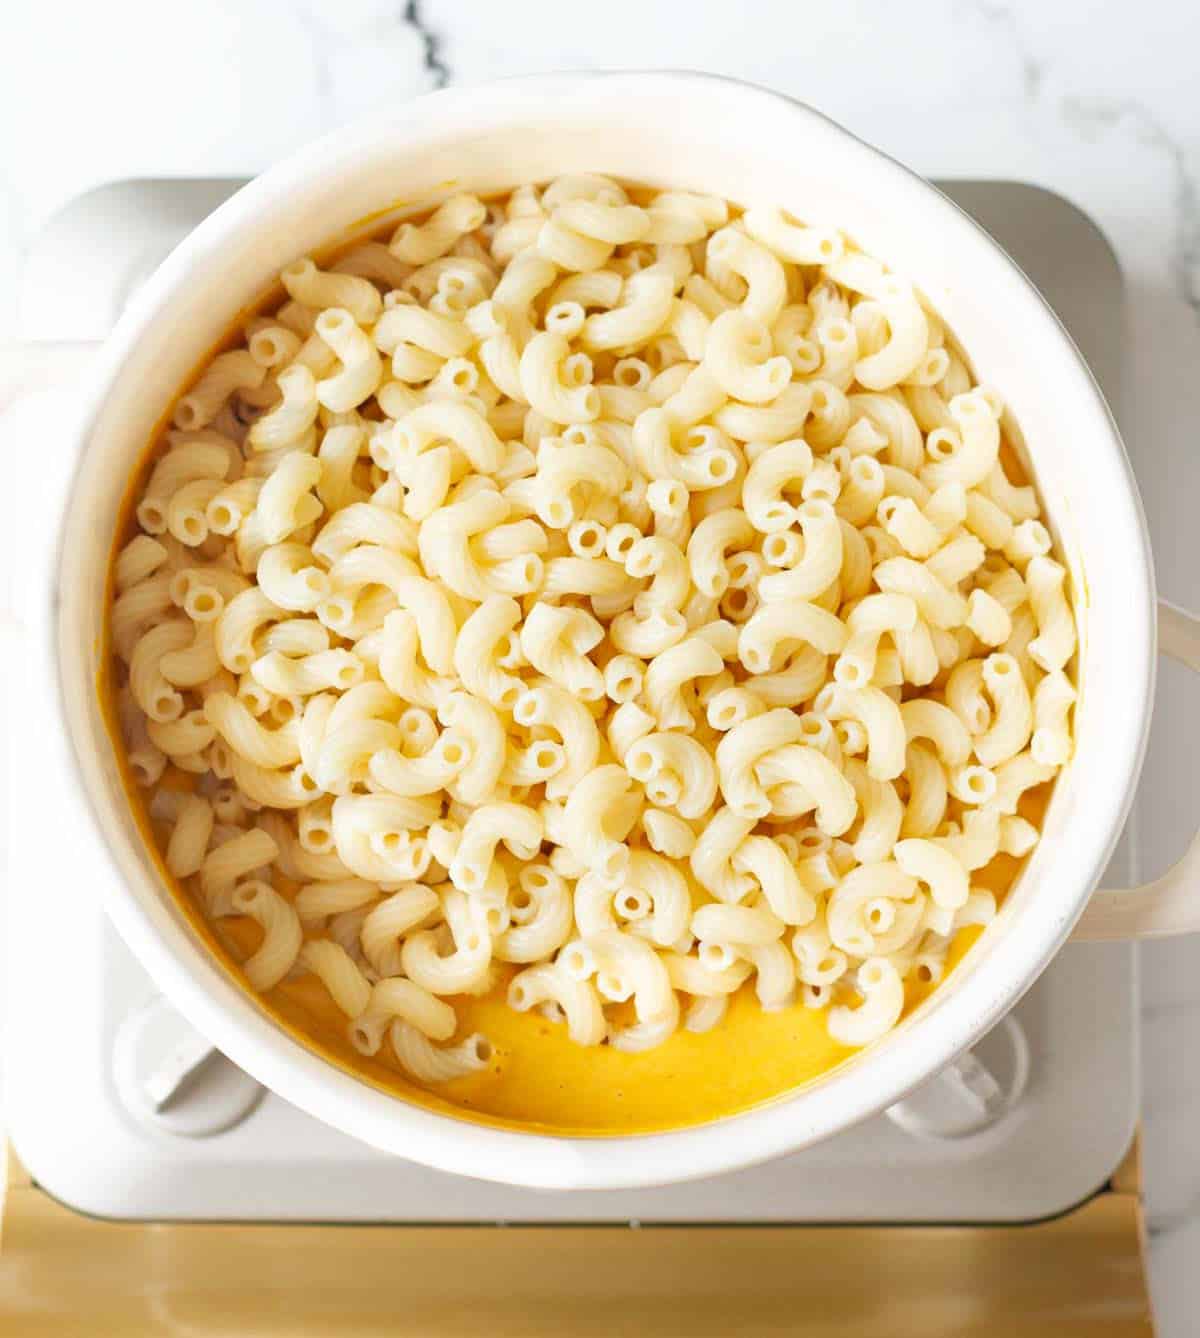
Step 7: Add the cooked pasta and cook for a further 4-5 minutes. If the sauce seems too thick, add some of that pasta water you'd saved. Taste again and adjust for seasoning.

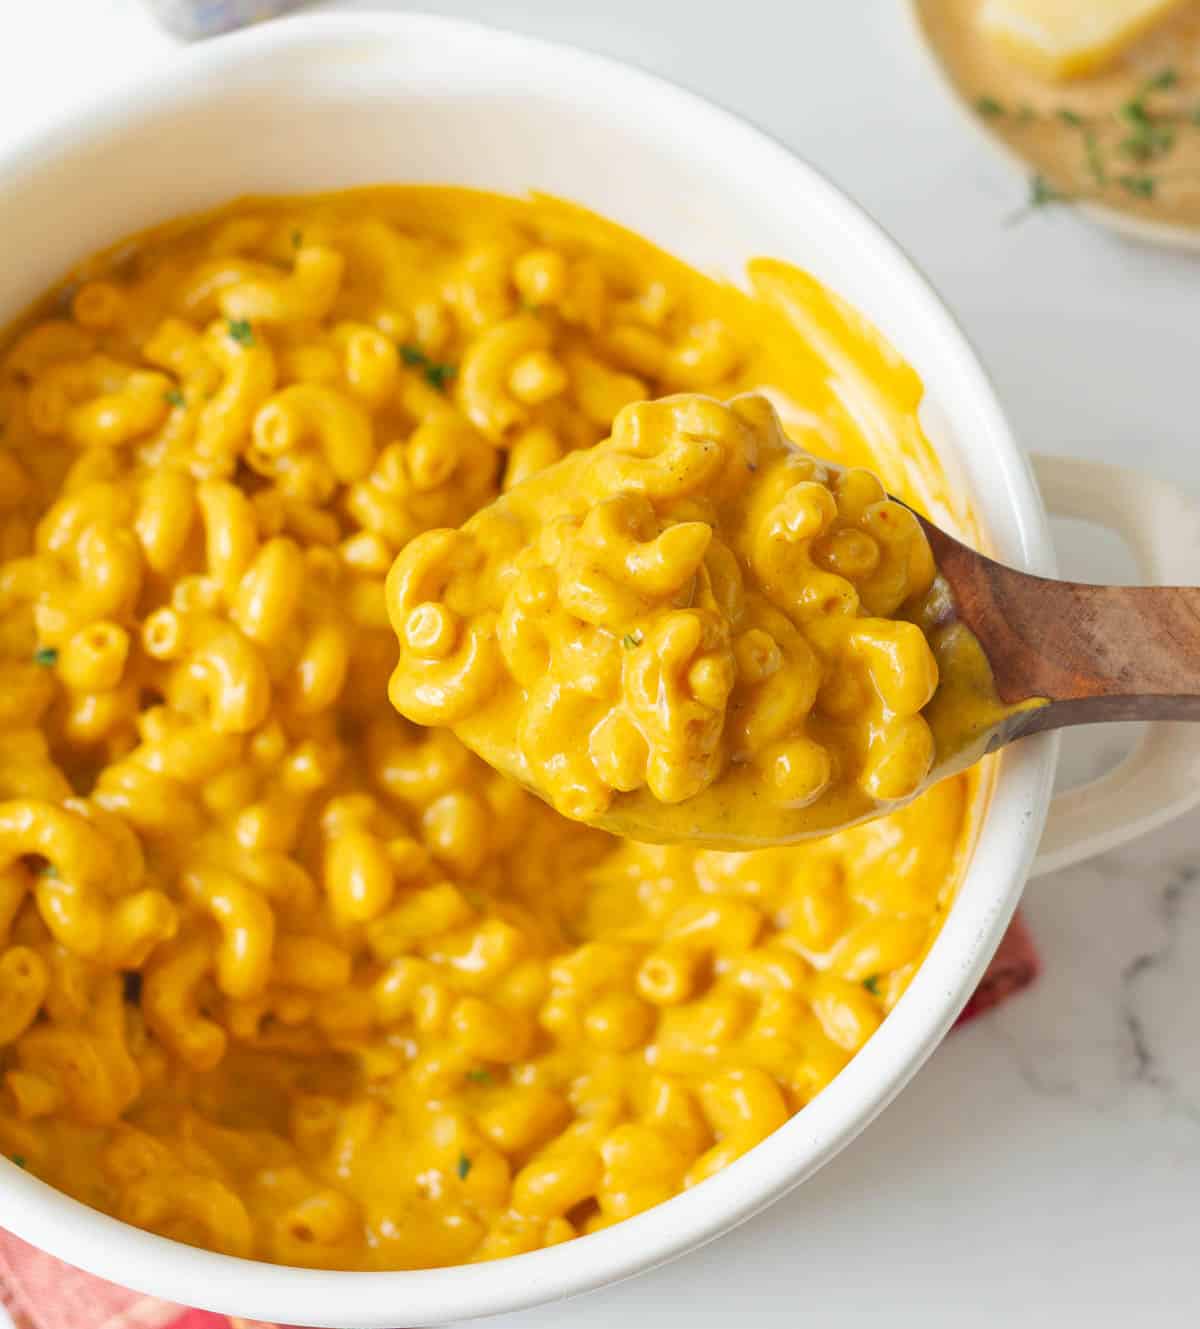
Step 8: Serve warm, top with grated parmesan if you wish!

A wooden serving spoon with pasta on top of a pot full of pasta.

Top Tips

  • Don't overcook the pasta. We want it cooked al dente, as it will continue cooking in the sauce as well. I find that cooking pasta for 1 or 2 minutes less than what's mentioned on the packet instructions works the best for me.
  • Save that pasta water! This starchy water will help loosen the sauce and make it creamy.
  • Balance the seasonings carefully. Season the veggies well, and taste as you go along. The butternut squash's natural sweetness goes well with savory thyme and smoked paprika.
  • This recipe is great for meal prep. You can make the sauce ahead of time. It will stay well in an air-tight container for 2-3 days in the refrigerator or for upto 1 month in the freezer. Heat well on a stove-top, then stir in the pasta and cook for another 4-5 minutes.
A plate of pasta with a fork with ingredients around.

How To Serve

I love serving pumpkin mac and cheese straight out of the pot while it’s still creamy and warm. Pile it into bowls and top with grated Parmesan, chili flakes, or fresh herbs! 

You can also pair it with grilled chicken, buttery garlic prawns, sauteed vegetables, oven-roasted carrots, spicy millet-stuffed tomatoes, or even cheesy bubble bread or pesto swirl rolls. A quick and easy Greek salad with avocado also goes well with this macaroni and cheese!

A plateful of pumpkin mac n cheese with a fork and ingredients around.

Recipe FAQs

What is nutritional yeast?

Nutritional yeast is different from the yeast we use for baking bread. This deactivated yeast looks like yellow flakes or powder and has a nutty and slightly savory flavor. It’s super popular in vegan and dairy-free cooking because it gives a naturally “cheesy” taste without any actual cheese.

Can I use canned pumpkin for this vegan mac n cheese recipe?

Absolutely. While I love making my own sauce, canned pumpkin is super convenient and works just as well. Just make sure it’s plain pumpkin purée, not pumpkin pie filling.

How do I store leftovers?

Pumpkin macaroni and cheese is great as a next-day lunch! Store your leftovers in an airtight container in the fridge. Just like my vegan gnocchi, it reheats beautifully. Add a splash of milk to get the sauce to the right consistency. 

Easy Recipes With Pumpkin

  • pumpkin snickerdoodle cookies stacked up on a plate.
    Pumpkin Snickerdoodle Cookies
  • Pumpkin Swirl Cheesecake Bars Recipe
    Pumpkin Swirl Cheesecake Bars Recipe
  • pumpkin bread rolls piled up in a wooden tray.
    Pumpkin Bread Rolls
  • Easy Air fryer Pumpkin
    Easy Air Fryer Pumpkin

Half the joy of cooking is sharing it with others. That’s why I’m always eager to hear from you. So go right ahead & drop a comment or reach out on Instagram, Pinterest, YouTube, or Facebook. I hope you love this pumpkin mac and cheese as much as we do!

📖 Recipe

Tried this recipe?Let us know how it was!
Pumpkin macaroni cheese in a white pot with a wooden spoon on the side.

Pumpkin Mac and Cheese

Natasha Minocha
Cheesy, creamy, and cozy, this pumpkin mac and cheese is comfort food at its best! It's quick to make, full of flavor, and so satisfying. Perfect for a busy weeknight or a chilly evening, this dish always hits the spot!
No ratings yet
Print Recipe Pin Recipe
Prep Time 20 minutes mins
Cook Time 35 minutes mins
Total Time 55 minutes mins
Course Main Course
Cuisine American
Servings 6 Servings
Calories 458 kcal

Ingredients


  • 21 oz Pumpkin, peeled and diced
  • 1 large Onion, cut into chunks Diced
  • 8 cloves Garlic
  • 1 tsp Salt
  • 1 tsp Black pepper, coarsely ground
  • 1 tsp Dried thyme
  • 1/2 tsp Red chili flakes
  • 2 Tbsp Olive oil
  • 1.5 cups Coconut milk
  • 1 tbsp Nutritional yeast
  • 2 tsp Smoked paprika
  • 12 oz Macaroni or any small pasta
  • Parmesan cheese Optional

Instructions
 

  • Preheat your oven to 200 C / 400 F.
  • Toss the pumpkin, onions, garlic, red chili flakes, dried thyme, salt, and pepper with olive oil.
    21 oz (600 g) Pumpkin, peeled and diced, 1 large Onion, cut into chunks, 8 cloves Garlic, 1 tsp Salt, 1 tsp Black pepper, 1 tsp Dried thyme, 1/2 tsp Red chili flakes, 2 Tbsp Olive oil
  • Spread out evenly on a baking sheet and roast for about 25 minutes at 200 °C/400°F, till the pumpkin is soft and cooked through.
  • For the sauce: Blend the roasted vegetables, smoked paprika, nutritional yeast, and coconut milk in a blender until smooth.
    1.5 cups (360 g) Coconut milk, 1 tbsp Nutritional yeast, 2 tsp Smoked paprika
  • Pour the sauce into a saucepan and let it come to a gentle boil. Taste and adjust for seasoning.
  • In the meantime, cook the macaroni till al dente in plenty of salted water. Drain well.
    Save one cup of pasta water for later use.
    12 oz (350 g) Macaroni or any small pasta
  • Add the cooked pasta and cook for a further 4-5 minutes.
    If the sauce seems too thick, add some of the saved pasta water. Taste and adjust for seasoning.
  • Serve warm, top with parmesan cheese if you like, and enjoy!

Video

Notes

    • Don't overcook the pasta. We want it cooked al dente, as it will continue cooking in the sauce as well. I find that cooking pasta for 1 or 2 minutes less than what's mentioned on the packet instructions works the best for me.
  •  
    • Save that pasta water! This starchy water will help loosen the sauce and make it creamy.
  •  
    • Balance the seasonings carefully. Season the veggies well, and taste as you go along. The butternut squash's natural sweetness goes well with savory thyme and smoked paprika.
  •  
    • This recipe is great for meal prep. You can make the sauce ahead of time. It will stay well in an air-tight container for 2-3 days in the refrigerator or for up to 1 month in the freezer. Heat well on a stove-top, then stir in the pasta and cook for another 4-5 minutes.

Nutrition

Serving: 1 ServingCalories: 458kcalCarbohydrates: 62gProtein: 11gFat: 20gSaturated Fat: 14gPolyunsaturated Fat: 1gMonounsaturated Fat: 4gSodium: 409mgPotassium: 728mgFiber: 6gSugar: 7gVitamin A: 10934IUVitamin C: 25mgCalcium: 88mgIron: 3mg


Homemade Almond Milk Recipe

July 13, 2015

Homemade Almond Milk Recipe

For those seeking a simple nut milk recipe, this homemade almond milk recipe is a great place to start! With just 2 ingredients, you have creamy, healthy & delicious vegan milk ready in no time.

almond milk in a glass pitcher with almonds in the background.

Like many others, I grew up drinking milk every day.  Summers meant tall glasses of cold coffee, fruit smoothies, and milkshakes.  Winter evenings always featured a big cosy mug of hot chocolate or milky chai. My love for milk continued unabated for many years to come...till I discovered I'm lactose intolerant.  Thank goodness for dairy-free alternatives which have allowed me to continue with my favourite foods!

[feast_advanced_jump_to]

Why Make Homemade Almond Milk?

Almond milk is delicious on its own, creamy, and slightly nutty in flavor.  You can add a sweetener to it if you like a sweeter version. It's a fabulous addition to your smoothies and shakes.  And yes, very healthy. Since it's lactose-free, it's also easy on the digestive system.

The fact that this plant-based milk is great tasting, versatile, and nutritionally dense is appealing to many people not just the ones following a vegan diet!

almond milk in a glass pitcher with almonds scattered around.

Why You'll Love This Recipe

  • While store-bought almond milk is convenient, it is laden with preservatives, artificial flavors, and unnecessary additives. But homemade almond milk has just 2 ingredients- almonds and fresh water—nothing more!
  • This nut milk recipe allows for a richer, creamier texture with a naturally nutty taste. And you can customize the consistency and sweetness to your preference!
  • Making almond milk at home is more economical and helps reduce waste by avoiding unnecessary packaging.
  • Making homemade nut milk couldn't be easier! The 3-step recipe is super effortless!
  • It’s perfect for making smoothies, coffee, oatmeal, or even dairy-free desserts—endless delicious possibilities!

How To Make Almond Milk

It's surprisingly easy to make nut milk at home.  We are talking about soaking almonds overnight and grinding them with water the next day, then strain and drink.  

Grinding and straining takes a few minutes, but that's about all the work you'll have to do.

Unprocessed, wholesome, and economical almond milk in 10 minutes tops!

Step 1: Start with soaking the almonds overnight for 8 - 12 hours. 

 soaked almonds in a bowl.

Step 2: Blend them with water for 3-4 minutes at high speed. 

blended almonds and water in a blender.

Step 3: Strain through a cheesecloth.

Almond milk getting strained in a glass bowl.

Step 4: Store in the refrigerator in a pitcher or bottle for up to 4 days. 

almond milk in a glass pitcher with almonds in the background.

Recipe Notes

  • You can peel the soaked almonds after rinsing them well and then grind with the water. You won't need to strain the mixture.
  • Save the leftover almond meal. Spread it out in a pan and roast in a 180C oven for about 20 minutes till dry and golden. Sprinkle on top of your smoothies, and cereal; add in your baking, or curries or even in place of breadcrumbs. No food waste!!

Flavor Variations For Homemade Almond Milk Recipe

  • Sweet almond milk - add 5-6 dates or 4 Tbsp honey, 1 tsp cinnamon, 1 tsp vanilla extract.
  • Chocolate almond milk - add 1 Tbsp of cocoa powder to sweet almond milk. Add additional sweetener if required.
  • Mango almond milk - add half a mango to a cup of almond milk. Blitz and enjoy.
flavored almond milk in glass bottles w/ lids and colorful paper straws in the background.

How To Use

Almond milk is super versatile. You can drink it as-is or add various flavors as mentioned above.

It's great for adding to your coffee, tea, and smoothies such as my pear blueberry smoothie!

I love using it for my baking as well! I have countless recipes on the blog with almond milk. For starters, you can try my eggless brioche recipe, vegan cinnamon rolls, baked cinnamon donuts, carrot cake baked oatmeal, and lemon poppyseed cupcakes!

More Plant-Based Recipes: 

  • oat milk | easy oat milk recipe| vegan dairy free healthy
    Oat Milk
  • cashew milk in a glass pitcher with some cashews in the background.
    How To Make Cashew Milk
  • vegan mayonnaise in a glass jar with a spoon and ingredients in the background.
    Homemade Vegan Mayonnaise
  • Homemade Coconut Condensed Milk | Easy vegan sweetened coconut condensed milk
    Homemade Coconut Condensed Milk

Half the joy of cooking is sharing it with others. That is why I’m always eager to hear from you. So go right ahead and drop a comment or reach out on Instagram, Pinterest, YouTube, or Facebook. I hope you love the homemade almond milk as much as we do!

📖 Recipe

Tried this recipe?Let us know how it was!
Homemade Almond Milk Recipe

Homemade Almond Milk Recipe

Natasha Minocha
For those seeking a simple vegan milk recipe, this homemade almond milk is a great place to start! With just 2 ingredients, you have creamy, healthy & delicious vegan milk ready in no time.
No ratings yet
Print Recipe Pin Recipe
Prep Time 8 hours hrs 10 minutes mins
Total Time 8 hours hrs 10 minutes mins
Course Drinks
Cuisine World
Servings 3 Cups
Calories 280 kcal

Ingredients


  • 1 cup Almonds
  • 3 cups Water

Instructions
 

  • Put the almonds in a bowl, pour over enough water to cover them. Soak them overnight ( 8 – 10 hrs)
  • Drain and rinse them well. Place them in a blender with the water.
  • Blend at high-speed for 3-4 minutes.
  • Place a cheese cloth over a large bowl and carefully pour the blended mixture over it.
  • Gently squeeze the cheesecloth to extract the last bit of milk.
  • You can blend the leftover almond meal with some more water and strain it again.
  • Pour the milk in a glass jar/ jug. It should keep well for up to 4 days in the refrigerator.

Video

Notes

  • You can peel the soaked almonds after rinsing them well, then grind them with water. No straining is required!
  • Save the leftover almond meal. Spread it out in a pan and roast in a 180C oven for about 20 minutes till dry and golden. Sprinkle on top of your smoothies, and cereal; add in your baking, or curries or even in place of breadcrumbs. No food waste!!

Nutrition

Serving: 1 CupCalories: 280kcalCarbohydrates: 10gProtein: 10gFat: 24gSaturated Fat: 2gPolyunsaturated Fat: 6gMonounsaturated Fat: 15gTrans Fat: 0.01gSodium: 12mgPotassium: 354mgFiber: 6gSugar: 2gVitamin A: 0.5IUCalcium: 137mgIron: 2mg

Feta and Spinach Muffins

June 27, 2015

A napkin lined basket of feta spinach muffins.

Savory, satisfying, and packed-with-flavor feta and spinach muffins make busy mornings a breeze. They are simple to make and are great for meal prep! 

A basket of spinach muffins with one muffin cut in half.

These spinach feta muffins are lip-smacking good. And a wonderful, quick breakfast option. Cheesy, nourishing, and tasty, you’ll want to eat them straight from the pan!

They’re also perfect for lunch boxes, picnic baskets, or after-school snacks. I love to have them with roasted carrot lentil soup for a light lunch.

[feast_advanced_jump_to]

Why You'll Love This Recipe

The muffins have simple, wholesome ingredients. Nothing fancy. Just good stuff that tastes amazing when baked up golden and fluffy.

Need an easy snack? Want to get more veggies into your day? Looking for things for kids’ lunches? These healthy spinach and feta muffins are it! The savory muffins have enough cheese to keep kids interested.

It’s also the perfect recipe for something quick and easy (like a jar of tiramisu overnight oats). You just have to reach into the fridge and warm the muffins up! 

Recipe Ingredients

Ingredients for making feta spinach muffins.

Flour: All-purpose flour is light, simple, and perfect for holding everything together. I’ve made them with whole wheat flour before. You can also do half whole wheat and half all-purpose flour. 

Spinach: I used fresh baby spinach. Frozen works here! Thaw it completely and squeeze out the excess water. Chop it small so it mixes in easily.

Feta: Tangy feta cheese is delicious here. It pairs beautifully with spinach. Use block feta,  cut into small pieces. Crumbled feta will just melt and disappear into the muffin. You want the cheese to hold its shape, texture, and of course, its great salty flavor.

Cheddar cheese: I use shredded cheddar cheese. This adds a wonderful umami flavor and makes these muffins just a bit more cheesier!

Milk: I used regular cow’s milk, but feel free to substitute in a plant-based option like oat milk, almond milk, or cashew milk if needed.

Olive oil keeps the muffins moist and adds a lovely fruity flavor that goes so well with feta and spinach. Any vegetable oil of your choice will also work.

Egg: It helps bind everything together and gives these muffins structure.

Add-ins: Sun-dried tomatoes and olives are fantastic in this easy spinach and feta muffin recipe. They add so much zing to the muffins.  I always choose sun-dried tomatoes preserved in oil over plain ones as they are softer and have a better flavor. Both are optional, but they add so much zing to the muffins. 

See the recipe card for full information on ingredients and quantities.

Variations

While I love the flavor of cheddar cheese in these spinach muffins, parmesan also works very well here. Remember to grate the cheese at home, the pre-shredded ones have too many additives added to them.

Feeling adventurous? Toss in some chopped walnuts or buttery pine nuts for crunch. Bell peppers (roasted or raw) or a few slices of jalapeño bring a fun kick. 

Make it spicy - adding cayenne, smoked paprika, or cracked black pepper will definitely wake things up!

How To Make Feta and Spinach Muffins

Preheat oven to 200 c / 400 f. Grease and flour a 12-cup muffin tray.

Dry ingredients for the muffins in a mixing bowl.

Step 1: In a large bowl, add the flour, salt, baking powder, chopped spinach, olives, sun-dried tomatoes, and cheddar cheese. Mix well.

Mixture of egg, milk, oil in a measuring cup.

Step 2: In another bowl, whisk together milk, egg, and oil.

Wet ingredients poured on top of dry ingredients in a mixing bowl.

Step 3: Pour the wet ingredients over the flour mixture. Stir well. Don't overmix the batter.

Cubed feta cheese on top of the muffin batter.

Step 4: Fold in the feta cheese.

Muffin batter topped with shredded cheese in a muffin tray.

Step 5: Scoop the batter into the muffin tin. Sprinkle some more shredded cheddar cheese on top.

Baked feat spinach muffins in a baking tray.

Step 7: Bake for 20-25 minutes or until a skewer inserted into the center comes out clean.

Allow the muffins to cool in the pan for 10-15 minutes before turning them out on a wire rack to cool completely. Serve warm or at room temperature.

Spinach feta muffins in a basket.

Pro Tips

  • A kitchen scale is your best friend! Use it to measure the ingredients for the best baking results.
  • You must grease and flour the muffin cavities well. Trust me, I learned the hard way.....It's no fun trying to take out muffins stuck in a pan!
  • Use a knife to loosen the edges before turning them out.  As the bottom of these muffins can be a bit soft, place them upside down on the cooling rack.
  • The batter for these muffins is thick, so avoid adding more liquid. The spinach releases enough water during the baking process to make perfectly soft and moist muffins.
  • If using frozen spinach, please thaw it and squeeze out the extra water before using it.

How To Store

Spinach and feta egg muffins are great for meal prep.  Make a batch at the start of the week, and you’ve got breakfast or snacks ready to go for up to  5 days. They keep really well in the fridge!

 You can even pop them in the freezer in an airtight container or a freezer bag for 2 months. Just thaw them in the fridge overnight, then reheat in the oven or air fryer until warm and toasty.

A feta spinach muffin cut into half on a small plate.

How To Serve Spinach Feta Muffins

They also make a great grab-and-go breakfast with a cup of coffee or tea. Hosting a brunch? Set out a basket of these muffins alongside a veggie casserole, air fryer pumpkin, roasted sweet potato salad, or shakshuka. They shine on a brunch table. 

Eat these spinach and feta muffins straight out of the oven, and they’re delicious. Cut in half and slather some butter. I love pairing them with a bowl of creamy pea soup or a fresh green Greek salad for a light lunch. 

More Easy Breakfast Recipes

  • breakfast casserole with eggs and veggies in a baking dish on a metal trivet.
    Veggie Breakfast Casserole    
  • The Best French Toast Casserole Recipe
    The Best French Toast Casserole Recipe
  • Carrot Cake Baked Oats Recipe
    Carrot Cake Baked Oats Recipe
  • Banana Baked Oatmeal | Easy vegan baked oatmeal recipe
    Banana Baked Oatmeal

Half the joy of cooking is sharing it with others. That’s why I’m always eager to hear from you. So go right ahead & drop a comment or reach out on Instagram, Pinterest, YouTube, or Facebook. I hope you love these feta and spinach muffins as much as we do!

📖 Recipe

Tried this recipe?Let us know how it was!
A napkin lined basket of feta spinach muffins.

Feta and Spinach Muffins

Natasha Minocha
These spinach feta muffins are super easy to make and taste divine! They are great for meal prep and a quick breakfast or snack. They are wonderful served as a side to soups and salads. This recipe is a winner!
No ratings yet
Print Recipe Pin Recipe
Prep Time 15 minutes mins
Cook Time 25 minutes mins
Course Appetizer, Bread, Side Dish, Snack
Cuisine American
Servings 12 Muffins
Calories 247 kcal

Ingredients


  • 2 3/4 cups All-purpose flour
  • 2 tsp Baking powder
  • 1 tsp Salt
  • 7 oz Spinach, chopped
  • 1/2 cup Sun-dried tomatoes Chopped finely
  • 1/3 cup Olives Chopped finely
  • 1 1/4 cup Milk
  • 1/2 cup Olive oil
  • 1 large Egg
  • 7 oz Feta cheese Cut into small pieces
  • 3 tbsp Shredded cheddar cheese Plus extra for sprinkling on top

Instructions
 

  • Preheat oven to 200 c / 400 f. Grease and flour a 12-cup muffin tray. You can also use muffin liners.
  • In a large bowl, add the flour, salt, baking powder, chopped spinach, olives, sun-dried tomatoes, and cheddar cheese. Mix well.
    2 3/4 cups (330 g) All-purpose flour, 2 tsp Baking powder, 1 tsp Salt, 7 oz (200g) Spinach, chopped, 1/2 cup (60 g) Sun-dried tomatoes, 1/3 cup (50 g) Olives, 3 tbsp Shredded cheddar cheese
  • In another bowl, whisk together milk, egg, and oil.
    1 1/4 cup (300 g) Milk, 1/2 cup (100 ml) Olive oil, 1 large Egg
  • Pour over the flour mixture. Stir well. Don't overmix the batter.
  • Fold in the feta cheese. This is a thick batter, but there is enough spinach to make these soft and moistt!
    7 oz (200 g) Feta cheese
  • Scoop the batter into the muffin tin. Sprinkle some more shredded cheddar cheese on top.
  • Bake for 20-25 minutes or until a skewer inserted into the center comes out clean.
  • Allow the muffins to cool in the pan for 10-15 minutes before turning them out on a wire rack. to cool completely.
    Serve warm or at room temperature. Enjoy!

Video

Notes

  • A kitchen scale is your best friend! Use it to measure the ingredients for the best baking results.
  • You must grease and flour the muffin cavities well. Trust me, I learned the hard way.....It's no fun trying to take out muffins stuck in a pan!
  • Use a knife to loosen the edges before turning them out.  As the bottom of these muffins can be a bit soft, place them upside down on the cooling rack.  Don't worry, 10 minutes of these firms them up nicely.
  • The batter for these muffins is thick, so avoid adding more liquid. The spinach releases enough water during the baking process to make perfectly soft and moist muffins.
  • If using frozen spinach, please thaw it and squeeze out the extra water before using it.
 

Nutrition

Serving: 1 ServingCalories: 247kcalCarbohydrates: 27gProtein: 8gFat: 12gSaturated Fat: 4gPolyunsaturated Fat: 1gMonounsaturated Fat: 6gTrans Fat: 0.02gCholesterol: 34mgSodium: 546mgPotassium: 284mgFiber: 2gSugar: 3gVitamin A: 1729IUVitamin C: 6mgCalcium: 194mgIron: 2mg

Cherry Frozen Yogurt

May 30, 2015

Cherry Frozen Yogurt summer treat healthy delicious fresh

Celebrating the irresistible goodness of fresh cherries with this Cherry Frozen Yogurt. Is there anything as lovely as glistening sweet-tart cherries?  When they're in season, I buy them by the cartload.

cherry frozen yogurt scoops in 2 bowls.

Making frozen treats does not have to be complicated at all.  Keep the ingredients simple, play around with the recipe a bit till you get what you enjoy.  An ice cream maker is a great appliance to have for making ice creams and frozen yogurts. But not to worry, if you don't have one, use a blender or good ol' elbow grease!

Cherry Frozen Yogurt summer treat healthy delicious fresh
[feast_advanced_jump_to]

Why We Love Frozen Cherry Yogurt

Frozen yogurts are so fabulous.  Creamy and sweet, they make for a perfect low-calorie, healthy dessert.  Let the delicious, in-season fruit do all the talking. Add more fruit to intensify the flavor, and add more yogurt to enhance the smoothness. They are easier to make than ice creams, but taste just as sensational!

How To Make

This is really one easy peasy lovely light dessert for those hot summer days. Tangy thick yogurt, sweet fat juicy cherries, and some honey to sweeten the deal. That's all you need here. The chocolate chips are optional, but they add a touch of indulgence, that we all love. Cherries and chocolate make a beautiful combination, a classic. You could add any nuts of your choice here too, for that extra crunch.

  • Put the yogurt, cherries, and honey in a blender. Whiz until smooth. Taste, and adjust for sweetness.
  • Chill the mixture well and freeze in your ice cream maker according to the manufacturer’s instructions.
  • Add the cherries and chocolate chips ( if using) to the churning mixture in about ten minutes. Continue with the ice cream maker's instructions.
  • Once the frozen yogurt is ready, you can serve it immediately or turn it out in a pan and freeze it for 6- 8 hours to get a slightly harder/ scoopable consistency.

This recipe is a keeper, trust me. Make this once, and you'll keep going back to it!

Cherry Frozen Yogurt summer treat healthy delicious fresh

Enjoy your summer folks! Our wonderful summer fruit bounty is what makes this scorching heat bearable.

More Easy Frozen Desserts

  • Vegan Coffee Ice Cream
  • Chocolate Almond Ice Cream
  • Vegan Jamun Ice Cream

Half the joy of cooking is sharing it with others. That’s why I’m always eager to hear from you. So go right ahead & drop a comment or reach out on Instagram, Pinterest, YouTube, or Facebook. I hope you love this cherry frozen yogurt as much as we do!

📖 Recipe

Tried this recipe?Let us know how it was!
cherry frozen yogurt scoops in 2 bowls.

Cherry Frozen Yogurt

Natasha Minocha
Bringing my summer special Cherry Frozen Yogurt with chocolate chips! So refreshing with the burst of cherries in every bite and its super easy to make!
No ratings yet
Print Recipe Pin Recipe
Prep Time 25 minutes mins
Chilling Time 8 hours hrs
Total Time 8 hours hrs 25 minutes mins
Course Dessert, Ice cream
Cuisine World
Servings 4 Servings
Calories 194 kcal

Ingredients


  • 14 oz Plain Greek Yogurt
  • 7 oz Cherries, pitted
  • 2 tbsp Honey
  • 2 oz Cherries, pitted
  • 1/4 cup 70% dark chocolate chips/chunks

Instructions
 

  • Put the yogurt, cherries (7 oz/ 200 gms) and honey in a blender. Whiz until smooth. Taste, and adjust for sweetness.
  • Chill the mixture well and freeze in your ice cream maker according to manufacturer’s instructions.
  • Add the remaining cherries and chocolate chips ( if using) to the churning mixture in about ten minutes. Continue with the ice cream maker's instructions.
  • Once the icecream is ready, in about 20 minutes, you can serve it immediately or turn it out in a pan and freeze it for 6- 8 hours to get a slightly harder/ scoopable consistency. Scoop into bowls/ cones, serve immediately. Enjoy!

Nutrition

Serving: 1 ServingCalories: 194kcalCarbohydrates: 29gProtein: 12gFat: 4gSaturated Fat: 3gPolyunsaturated Fat: 0.1gMonounsaturated Fat: 0.1gTrans Fat: 0.01gCholesterol: 5mgSodium: 48mgPotassium: 359mgFiber: 2gSugar: 24gVitamin A: 46IUVitamin C: 5mgCalcium: 154mgIron: 0.5mg

Mulberry Jam Recipe

April 6, 2015

Mulberry jam in a glass jar with a red knife on the side.

The Mulberry jam recipe is a 3-ingredient, super-easy, and quick homemade jam recipe. The chia seed jam is delicious and healthy. It is made with ingredients that make you feel great eating it!

Mulberry jam in a glass jar on a small plate.

Mulberries have a short season and an even shorter shelf life. But being an overly enthusiastic mulberry lover, I never miss a chance to use the berry in different recipes. From a refreshing mulberry sharbat to a delightful gluten-free mulberry crumble pie, I’ve made it all, so this time, when my refrigerator was overstocked with them, I decided to make mulberry jam.

[feast_advanced_jump_to]

Why You'll Love This Recipe

This mulberry chia jam needs no complicated steps, no long cooking times. Just a handful of ingredients, some stirring on the stovetop, and you have homemade jam ready in minutes!

Slightly sweet, slightly tart, and an absolute treat for the taste buds, without a ton of sugar. Just pure, juicy goodness in every spoonful!

Thanks to chia seeds, this jam is naturally thickened, so we don't even need pectin!

If you love mulberries and want to enjoy them beyond their short season, this jam is the perfect way to make the most of them!

A perfect healthy, tasty addition to your breakfast table: spread it on toast, drizzle over pancakes, swirl it into your yogurt bowl. You can also add some to your cake batter like in this strawberry jam cake recipe!

Mulberry Jam Ingredients

Ingredients for making mulberry chia jam.

Mulberries: Wash the mulberries well. They have soft green stems, which you can leave on if you prefer. I snip them off using kitchen scissors. You can use frozen mulberries if fresh ones aren't available.

Chia seeds: Chia seeds don’t have any flavor of their own and expand to almost 10 times their size when mixed with any liquid. They help thicken and set the mulberry jam without pectin. You can use chia seed powder as well. These little guys pack a nutritional punch too. Making this jam healthy and wholesome.

Honey: I love the mild floral notes of honey in this mulberry chia seed jam. You can also use maple syrup, agave syrup, or sugar. You can play around with the quantity based on how sweet your mulberries are.

Please see the recipe card for full information on ingredients and quantities.

How To Make Mulberry Chia Seed Jam

Mulberries with honey and water in a saucepan.

Step 1: Place your washed mulberries in a thick-bottomed pan with honey and a splash of water.

Bubbling mulberry jam mixture in a saucepan.

Step 2: Cook for about 10–15 minutes till the berries are soft and mushy.

Chia seeds on top of the soft, cooked mulberries in a saucepan.

Step 3: Add the chia seeds and continue cooking for another 10–15 minutes.

Cooked mulberry chia seed jam in a saucepan.

Step 4: Taste and adjust for sweetness.

Mulberry jam in a glass jar placed on a small plate.

Step 5: Let the homemade chia jam cool completely, then transfer it to an airtight jar and refrigerate.

Pro Tips

  • Add a splash of water if your mulberry chia seed jam is getting too thick while cooking.
  • Stir the jam frequently so the fruit doesn't burn.
  • The amount of honey you add to the jam will depend on the sweetness of the berries. Feel free to adjust the sweetness accordingly.
  • Add some lemon juice right at the end if you'd like a touch of bright citrus flavor. A teaspoon of vanilla extract will be great if you want a richer flavor.
  • This jam will stay well in an air-tight container or jar in the refrigerator for up to 2 weeks. You can follow the proper canning process to make it last longer.

How To Serve Mulberry Jam

My favorite way to enjoy this easy mulberry chia jam is on hot buttered toast! Try it on my easy everyday bread, Irish soda bread, or homemade vegan English muffins. So so good!

You can swirl into your yogurt or chia puddings like this strawberry chia pudding!

It's wonderful on top of fluffy pancakes or crispy sourdough waffles.

Jam spread on top of toast on a small plate.

Recipe FAQS

How long does chia jam last?

It keeps well for up to 2 weeks when stored in an airtight jar in the fridge. For longer storage, please use proper canning process.

Can I make healthy chia jam with other fruits?

Yes, you can! This easy chia jam recipe works with any berries, even peaches and apricots. Use whatever juicy fruit is in season. Try my persimmon chia jam and strawberry chia jam recipes.

More Homemade Jam Recipes

  • 2 jars of strawberry chia jam with flowers and strawberries around.
    Strawberry Chia Jam
  • Homemade Fig Jam Recipe
    Homemade Fig Jam Recipe
  • persimmon chia jam in a glass jar with a wooden spoon on a small plate.
    Persimmon Jam
  • A jar with cherry jam on a wooden surface with a spoon on the side.
    Cherry Jam Recipe

Half the joy of cooking is sharing it with others. That’s why I’m always eager to hear from you. So go right ahead & drop a comment or reach out on Instagram, Pinterest, YouTube, or Facebook. I hope you love this mulberry jam as much as we do!

📖 Recipe

Tried this recipe?Let us know how it was!
Mulberry jam in a glass jar with a red knife on the side.

Mulberry Jam Recipe

Natasha Minocha
Mulberry jam is a 3-ingredient, super-easy, and super quick homemade jam recipe. The chia seed jam is delicious and healthy, made with ingredients you feel great eating!
5 from 1 vote
Print Recipe Pin Recipe
Prep Time 5 minutes mins
Cook Time 25 minutes mins
Total Time 30 minutes mins
Course Condiment
Cuisine World
Servings 10 Servings
Calories 37 kcal

Ingredients


  • 2 cups Mulberry/Shahtoot
  • 2-3 tbsp Honey
  • 1-2 tbsp Water
  • 2 tbsp Chia Seeds

Instructions
 

  • Wash the mulberries well. Remove their green stems.
  • Place them in a thick-bottomed pan with honey and a splash of water. Cook them for about 10/15 mins till the fruit is soft and mushy.
  • Add in the chia seeds and continue cooking for another 10/15 minutes.
    Add a tablespoon or two of water if the mixture is getting too thick.
    Taste and adjust for sweetness.
  • Let it cool completely, transfer it to an airtight jar, and refrigerate. This should last up to 2 weeks. Enjoy!

Video

Notes

  • Add a splash of water if your mulberry chia seed jam is getting too thick while cooking.
  • Stir the jam frequently so the fruit doesn't burn.
  • The amount of honey you add to the jam will depend on the sweetness of the berries. Feel free to adjust the sweetness accordingly.
  • Add some lemon juice right at the end if you'd like a touch of bright citrus flavor. A teaspoon of vanilla extract will be great if you want a richer flavor.
  • This jam will stay well in an air-tight container or jar in the refrigerator for up to 2 weeks. You can follow the proper canning process to make it last longer.

Nutrition

Serving: 1ServingCalories: 37kcalCarbohydrates: 7gProtein: 1gFat: 1gSaturated Fat: 0.1gPolyunsaturated Fat: 1gMonounsaturated Fat: 0.1gTrans Fat: 0.003gSodium: 3mgPotassium: 67mgFiber: 1gSugar: 6gVitamin A: 8IUVitamin C: 10mgCalcium: 26mgIron: 1mg
  • « Go to Previous Page
  • Page 1
  • Interim pages omitted …
  • Page 14
  • Page 15
  • Page 16

Primary Sidebar

New-Cover-4-1024x934

I’m Natasha! I’m a self-taught baker and cook, sharing easy, fuss-free recipes that anyone can make with confidence. From breads and cookies to decadent desserts to simple meals, I hope you’ll find your next favorite recipe here.

More about me →

Add us as a Trusted Site

Sign Up For Email Updates

Get A Free E-Book With 8 Easy Bread Recipes For Beginner Bakers!

Popular Recipes

  • mushroom quiche on a platter with ingredients in the background.
    Mushroom Quiche
  • chocolate fudge squares stacked on top of each other on small plate.
    Chocolate Fudge With Condensed Milk
  • Easiest Homemade Cream Cheese | Homemade Cream Cheese Recipe
    Easiest Homemade Cream Cheese
  • Cinnamon Bread Pudding
    Cinnamon Bread Pudding
  • Korean Corn Cheese in a cast iron skillet.
    Korean Corn Cheese Recipe
  • Best Condensed Milk Bread Rolls (Soft & Fluffy)
    Best Condensed Milk Bread Rolls (Soft & Fluffy)

Summer Recipes

  • Mango Tres Leches Cake
    Mango Tres Leches Cake
  • Strawberry cream cheese rolls stacked on a cake stand with strawberries on the side.
    Strawberry Cream Cheese Rolls
  • cherry bread pudding in 3 ramekins with spoons on the side on a wooden board.
    Cherry Bread Pudding
  • Frozen Yogurt Bark on a white platter.
    Frozen Yogurt Bark - Easy Summer Recipe
  • Sliced lemon blueberry bread on a white platter.
    Blueberry And Lemon Bread
  • Mango Mousse
    The Best Mango Mousse Recipe! (3 Ingredients)

See More Summer Recipes →

Footer

↑ back to top

Sign Up For Email Updates

Get A Free E-Book With 8 Easy Bread Recipes For Beginner Bakers!

Tasha’s Artisan Foods

About

Work With Me

Connect With Me

Browse Recipes

Desserts
Snacks
Breads
Cakes
Baking Guides

Published with WordPress

PRIVACY POLICY

COPYRIGHT © 2026 TASHA'S ARTISAN FOODS

Rate This Recipe

Your vote:


A rating is required
A name is required
An email is required