• Skip to main content
  • Skip to primary sidebar

menu icon
go to homepage
  • Summer Recipes
  • Recipe Index
  • About Natasha
  • Free E-Book
subscribe
search icon
Homepage link
  • Summer Recipes
  • Recipe Index
  • About Natasha
  • Free E-Book
×
Home > Recipes

Cherry Gin and Tonic

July 2, 2019

Cherry gin and tonic in a glass with a slice on lemon.

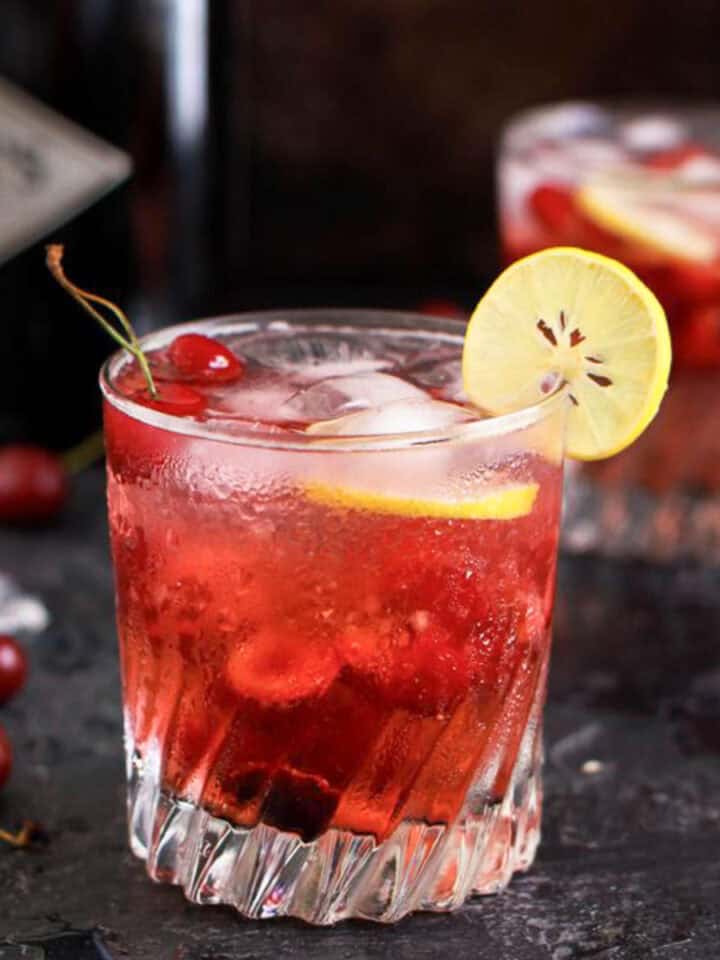
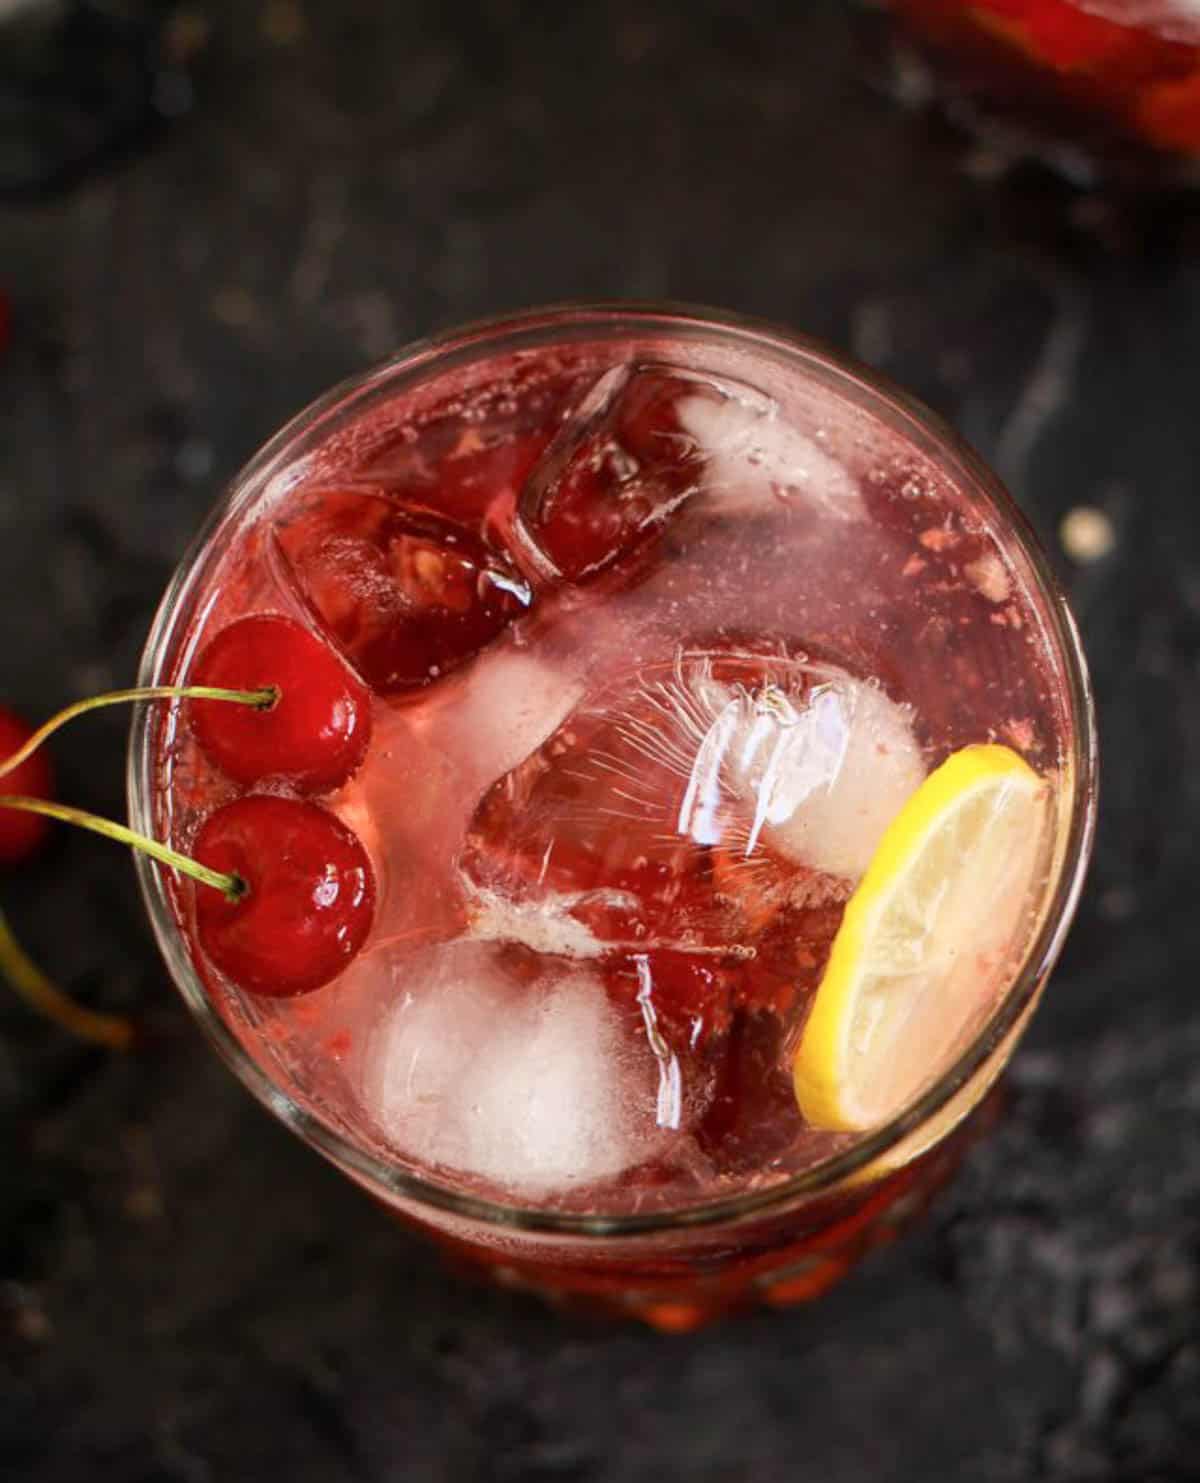
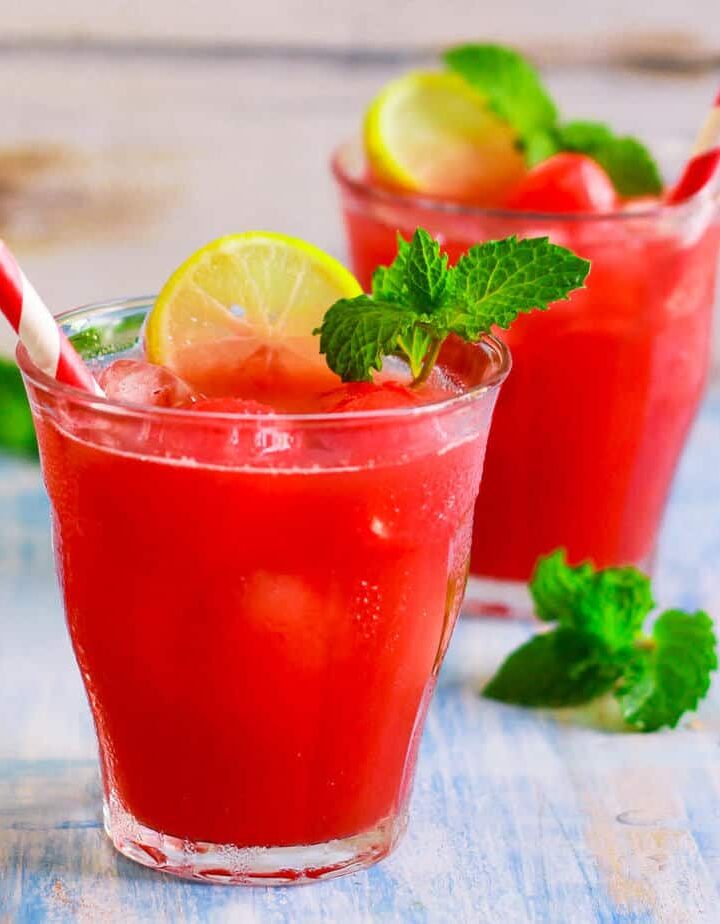
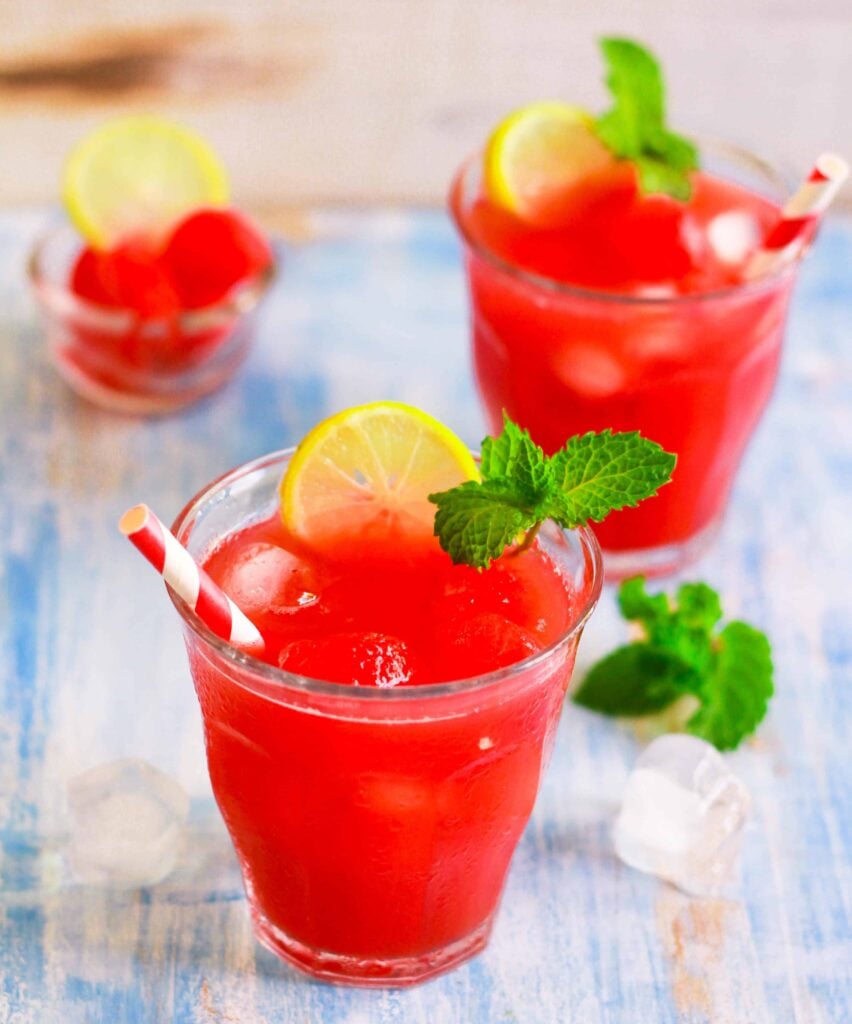
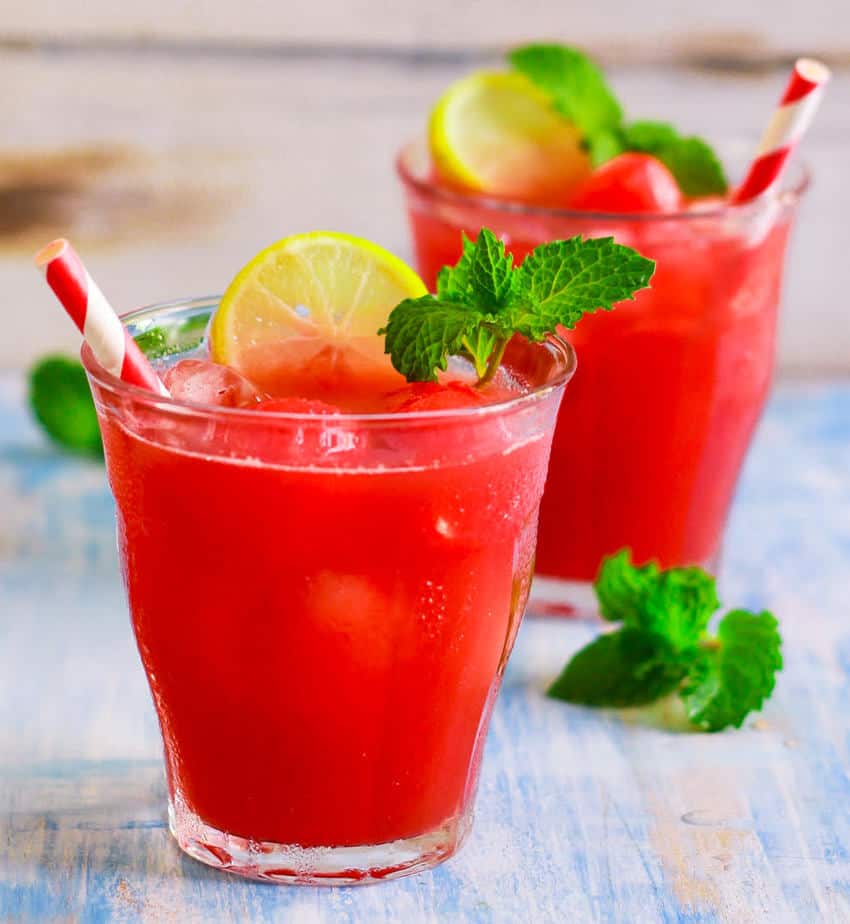
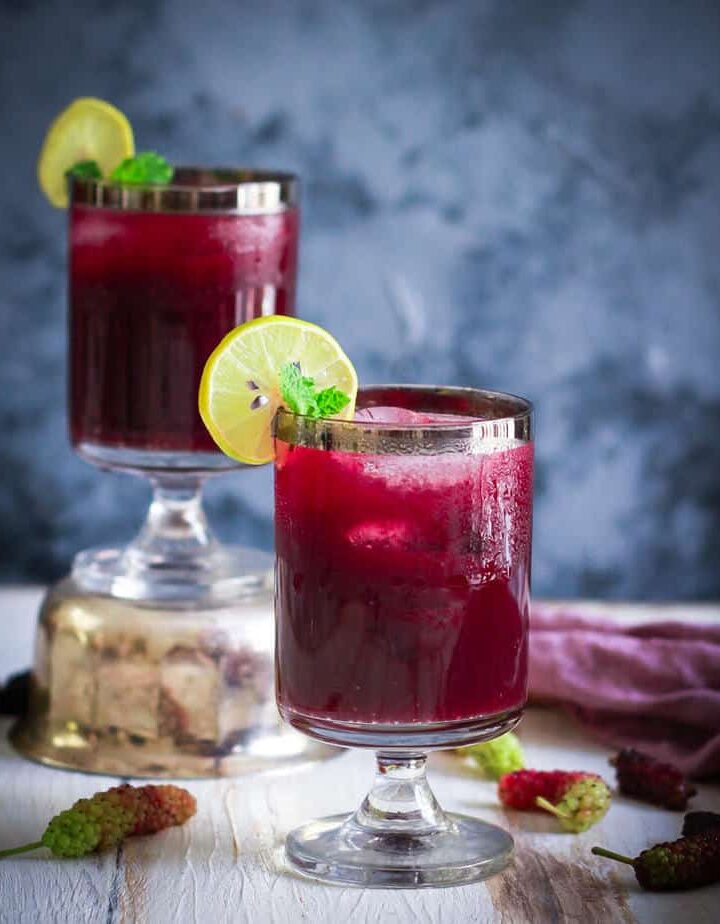
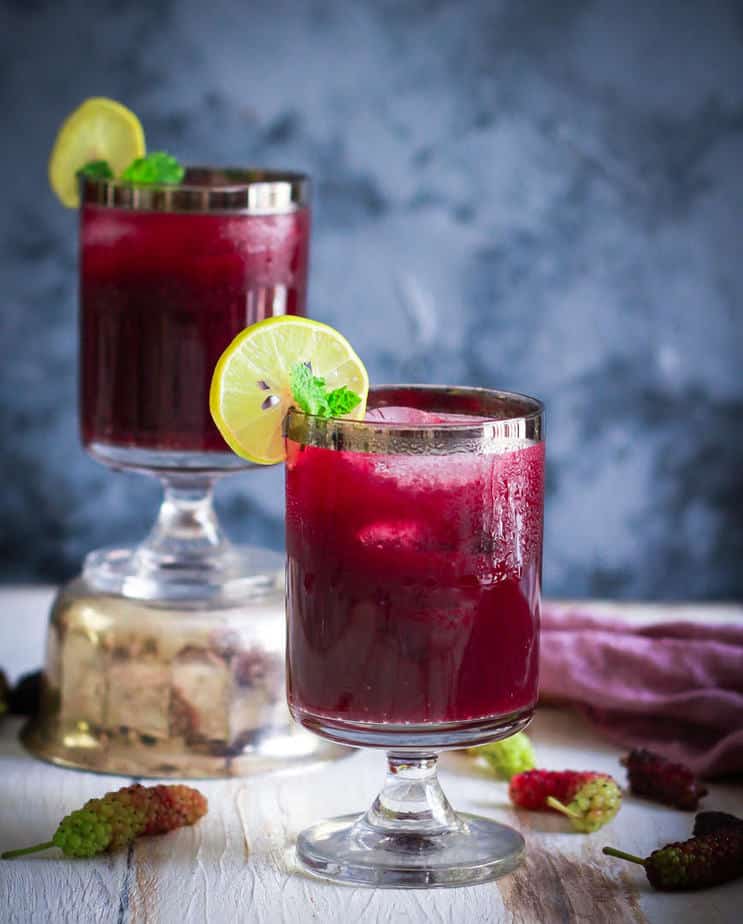
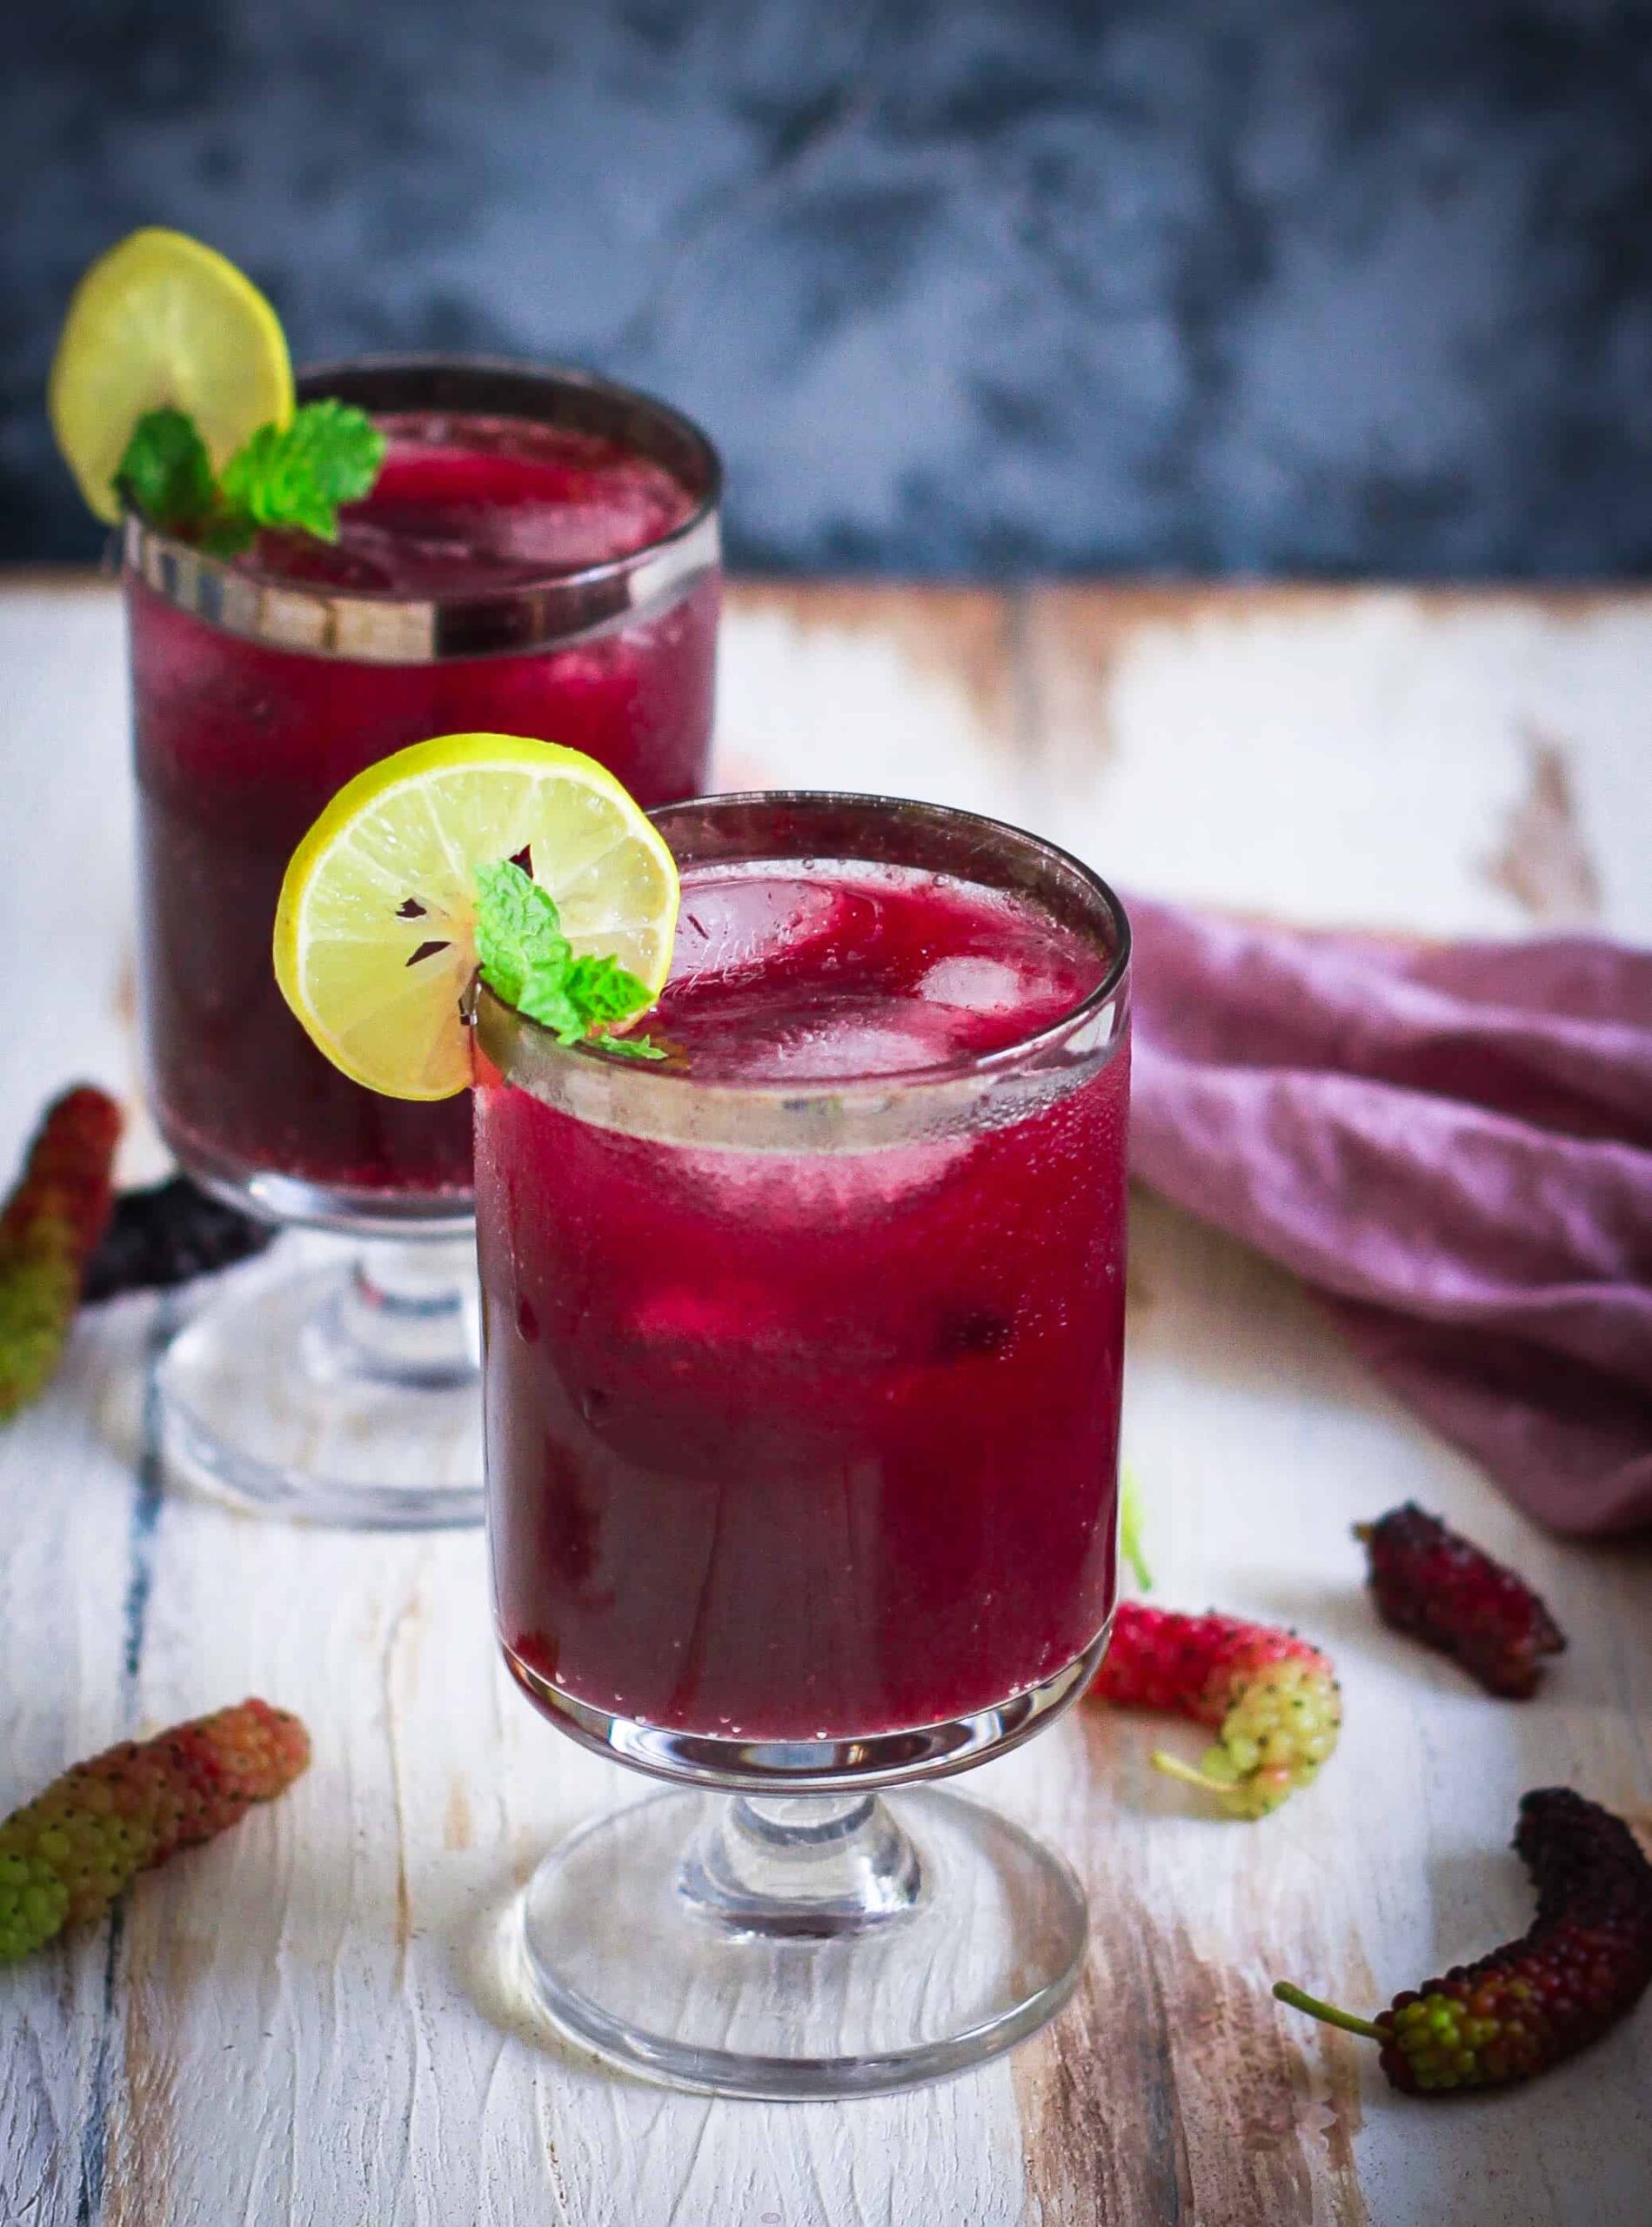
Sweet and sour, crisp and refreshing! Think a classic summer gin and tonic cocktail, but made bright with a pretty pop of red. Enter: this very special but simple cherry gin and tonic!

Cherry gin and tonic in a glass with a slice on lemon.

Crisp gin, refreshing lemon- we all know how a classic gin and tonic tastes. The tart sweetness of cherries is just a way to take it to the next level. Summer cookouts, 4th of July parties, sunny picnics: this is one cherry drink for them all. You simply have to try it! 
Love cherries? Try my cherry yogurt popsicles, cherry mango frozen yogurt, or this easy frozen yogurt bark. Perfect for beating the heat!

[feast_advanced_jump_to]
2 glasses of cherry gin cocktail with fresh cherries.

Why You'll Love This Recipe

✨A fun twist on a celebrated classic! What’s not to love about sweet, juicy cherries, adding a refreshing note to familiar gin and tonic flavors? 

✨This gin cocktail comes together in minutes with just 4 ingredients!

✨Simple, easy, and fuss-free, this gorgeous drink is perfect for when you are entertaining or for a quiet evening at home. It pairs beautifully with my sweet potato crackers, cranberry brie puff pastry bites, and masala roasted nuts!

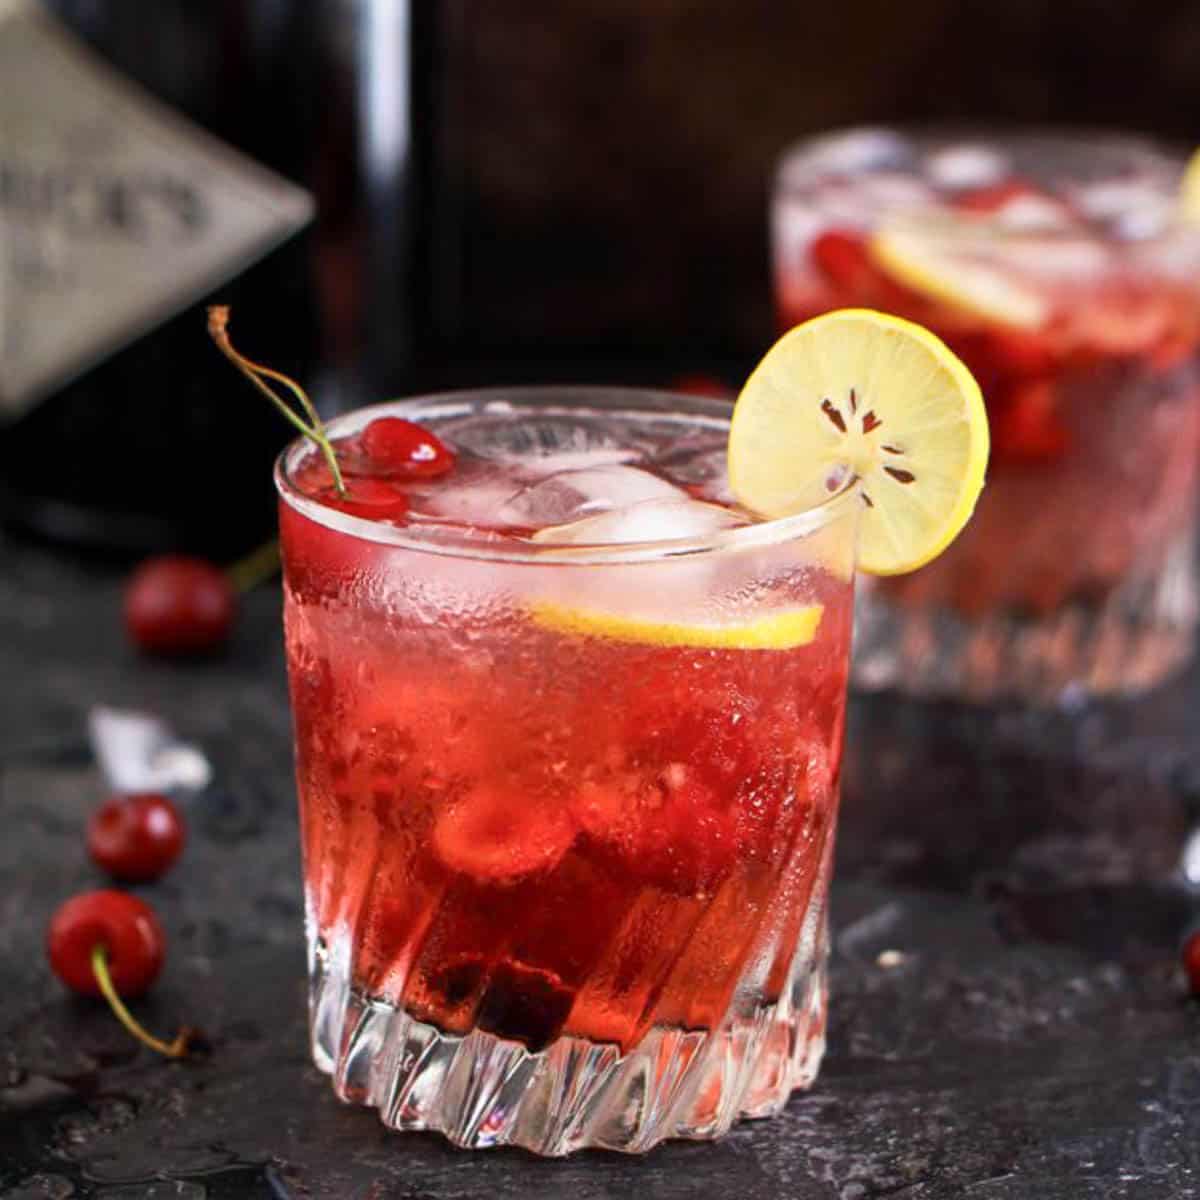
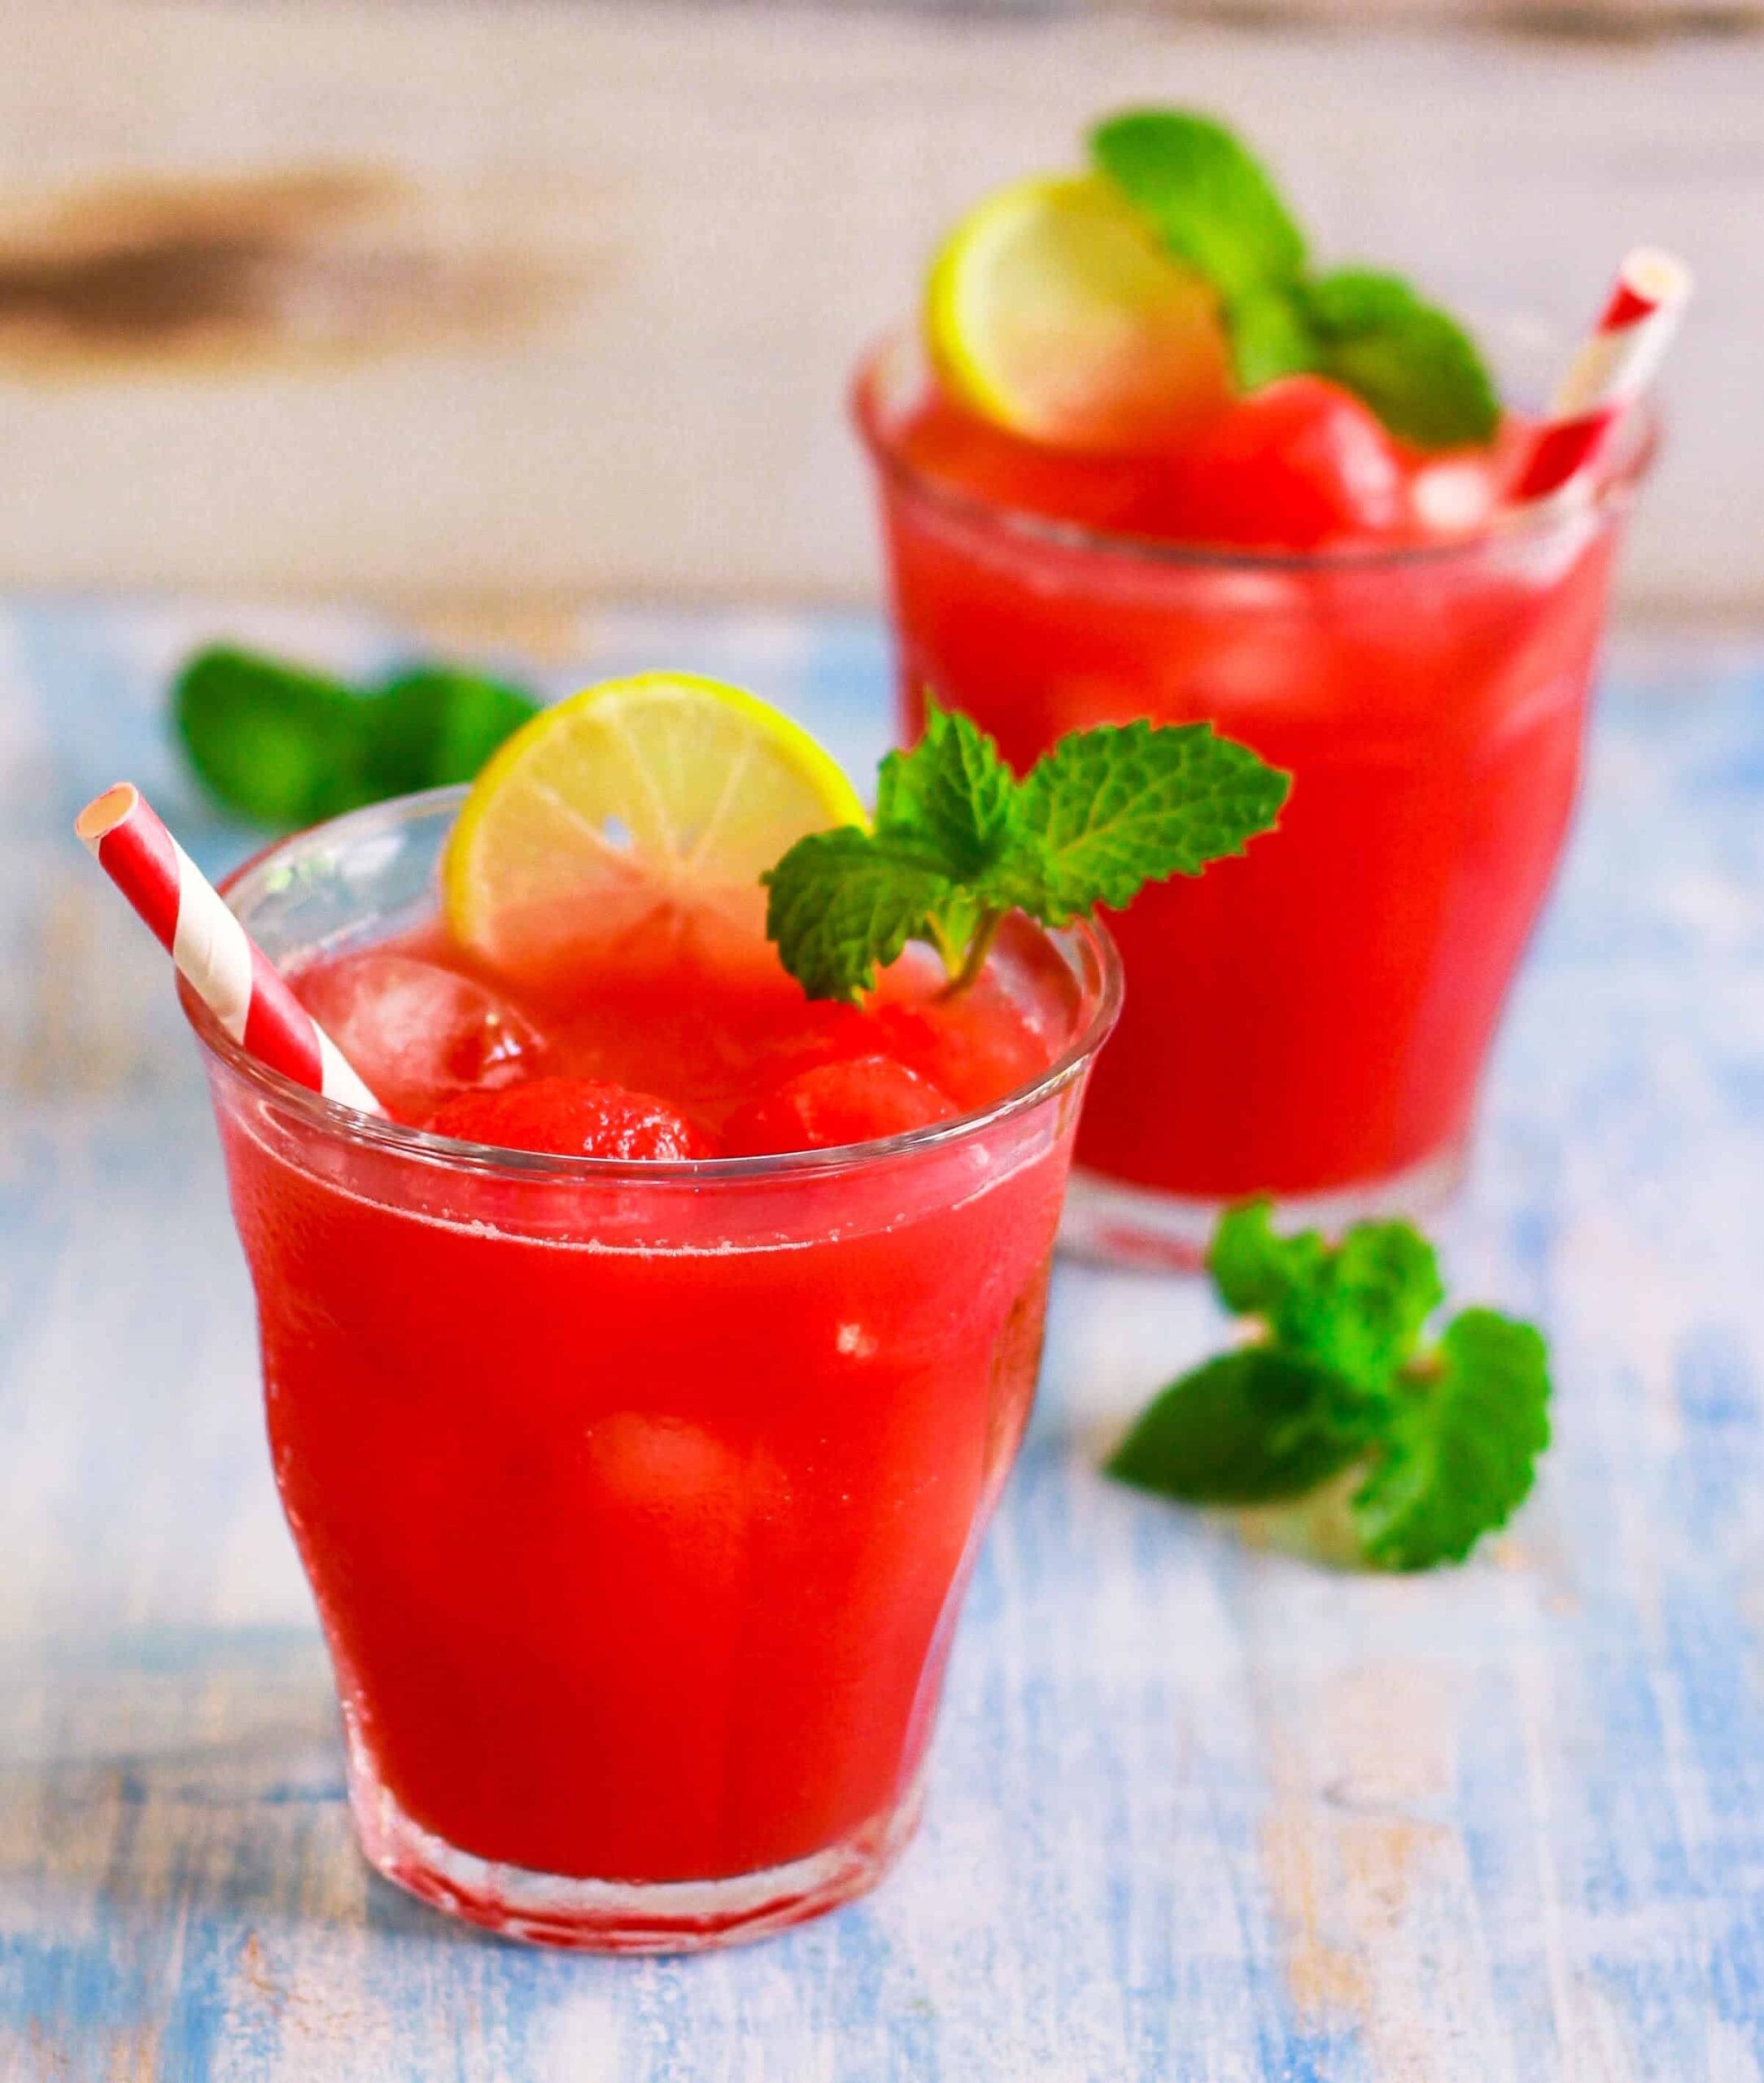
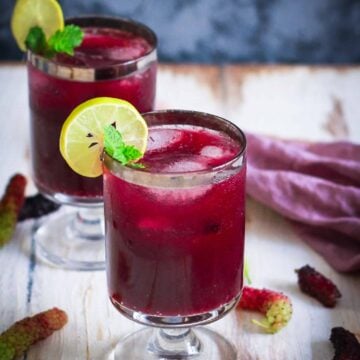
✨With its stunning red hues and fresh flavors, this cocktail is an effortless showstopper! 
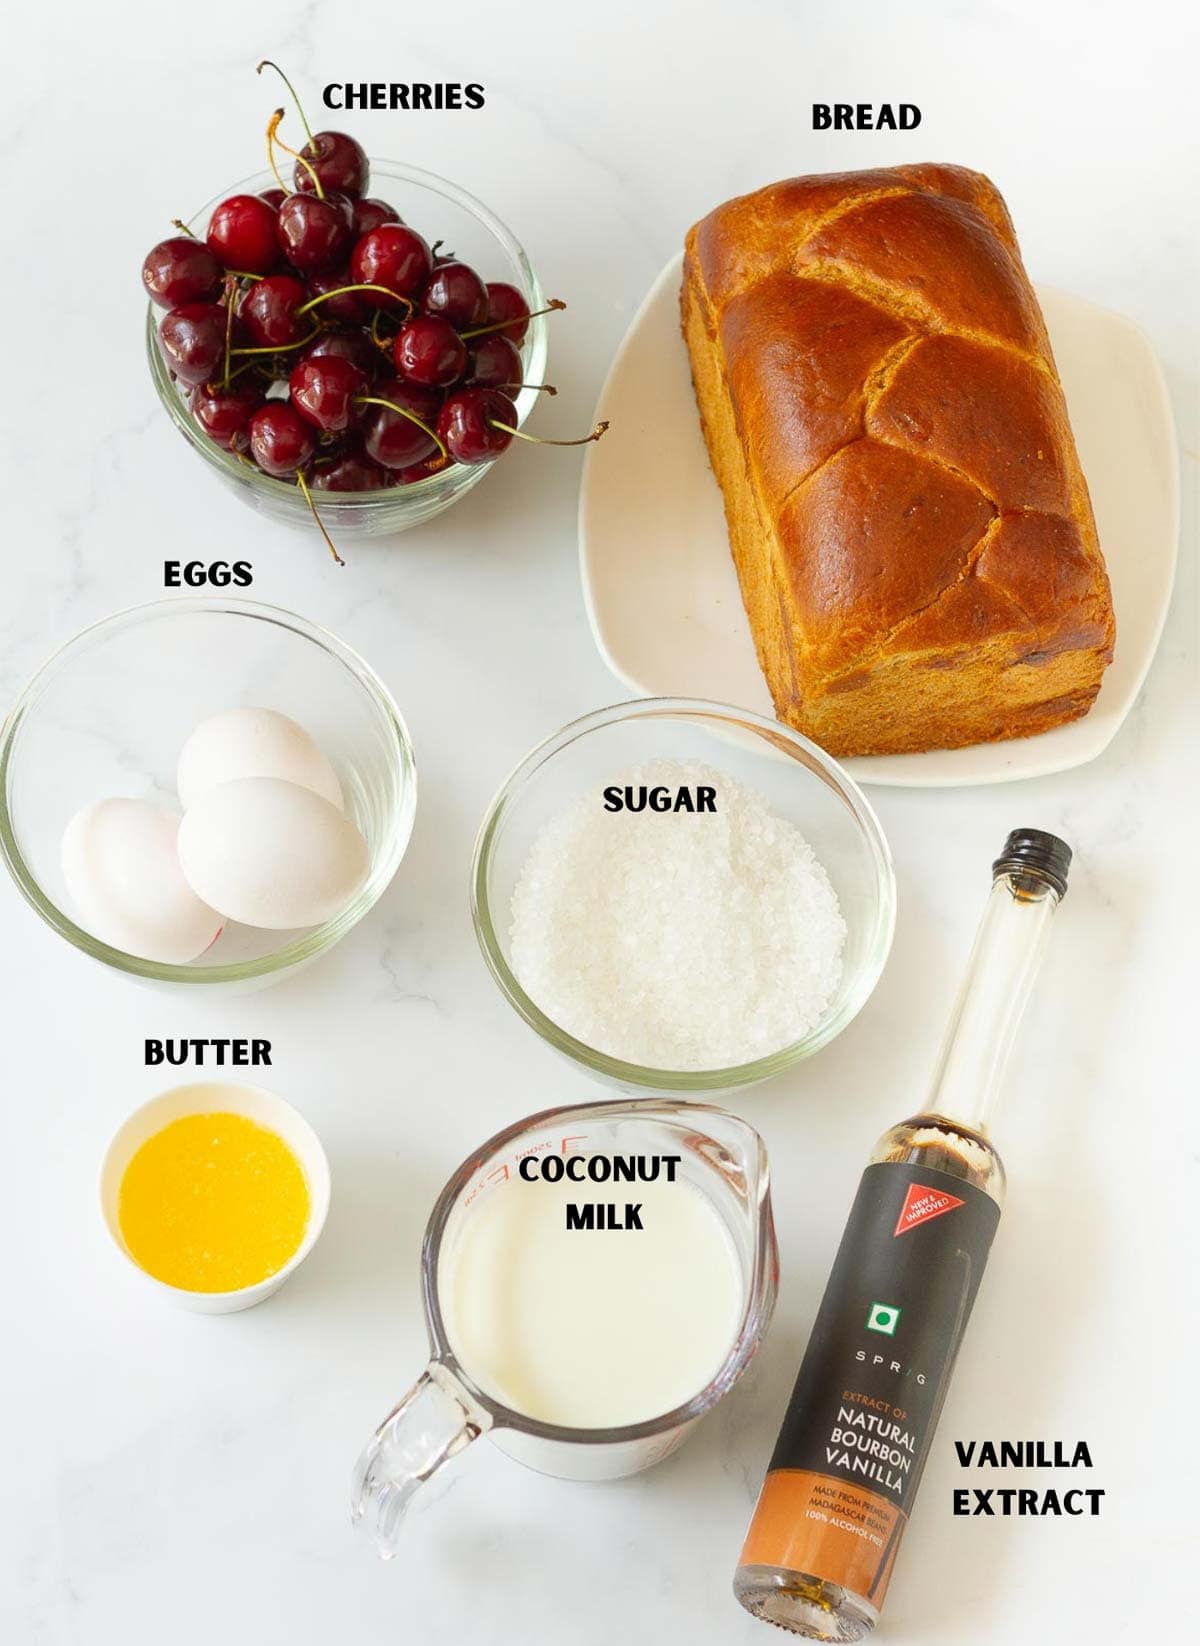
Recipe Ingredients

Ingredients for making cherry gin and tonic.

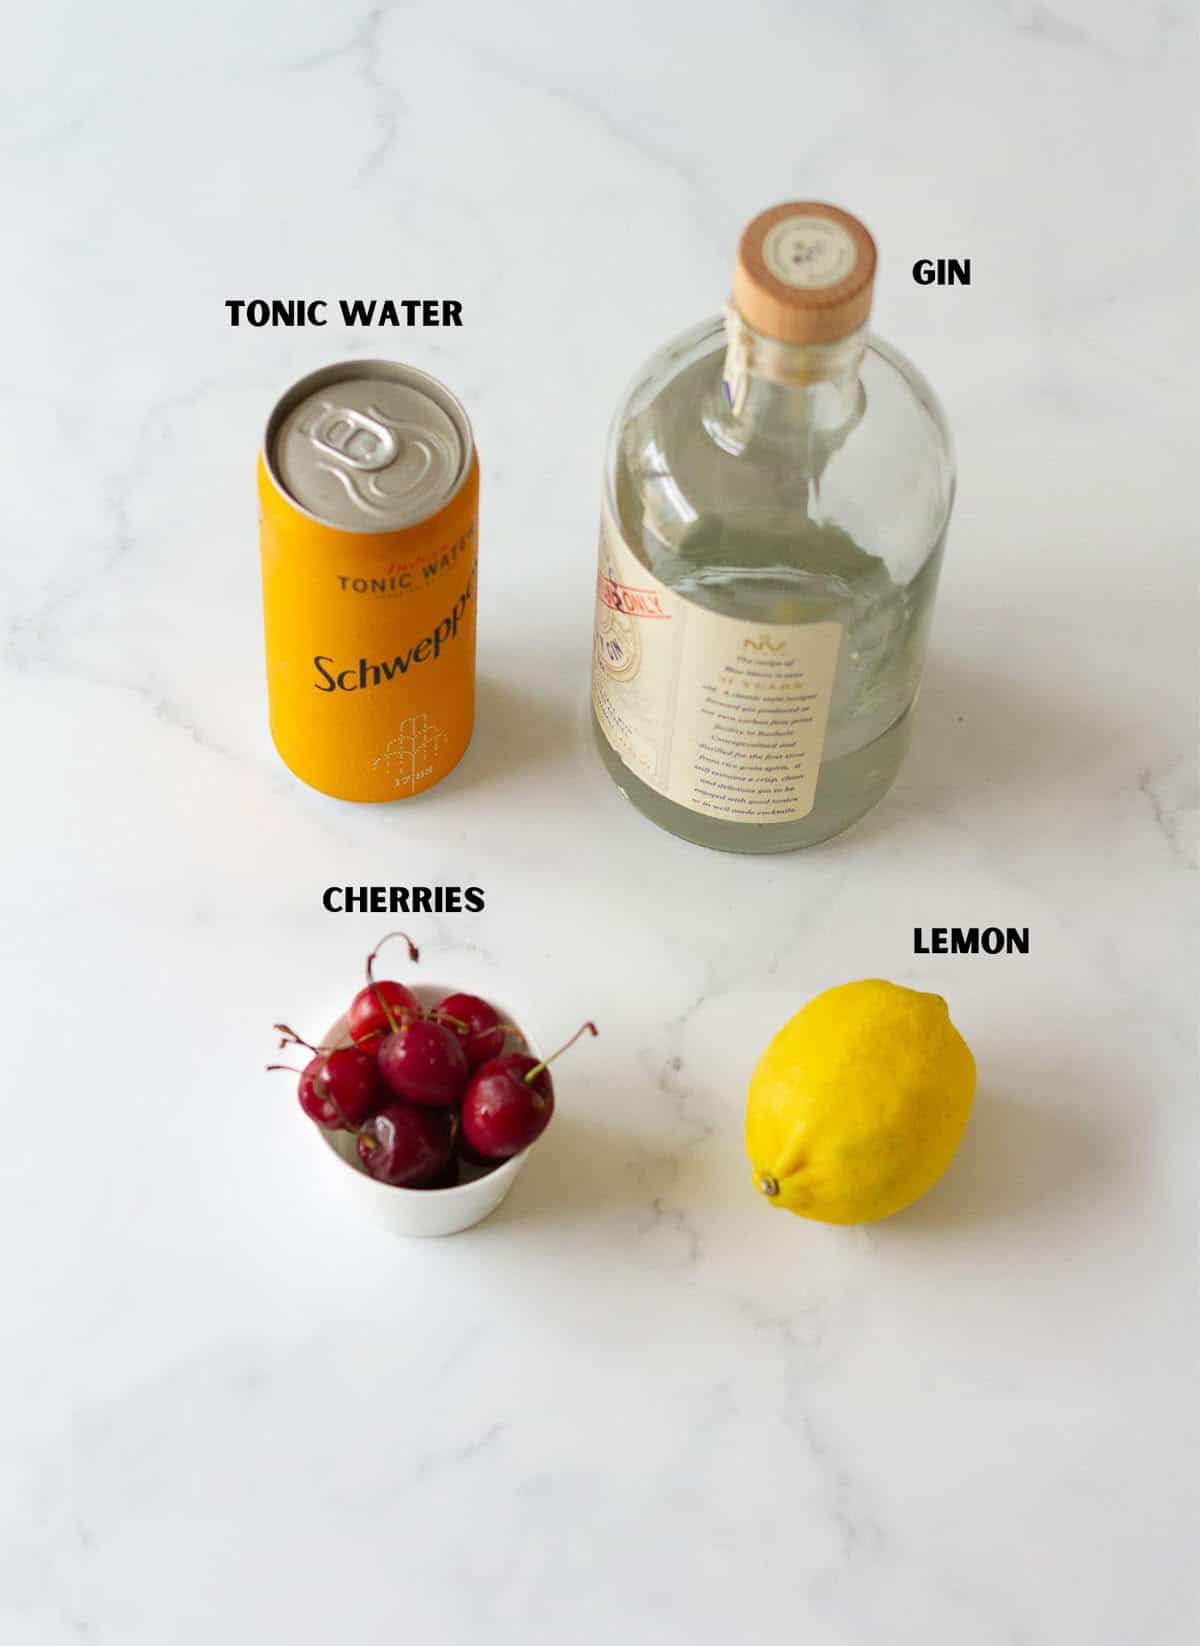
Cherry: Use fresh for the perfect fruity touch. You could use frozen ones, too, but fresh cherries will give you the best flavor!

Gin: I do like Hendricks and Blue Moon gin for its refreshing taste, or Roku for its subtle Juniper notes. For this recipe, any mid-to-high shelf gin is good to go! 

Tonic water: I used Schwepps, but really any will do. It’s always nice to use your favourite if you have one.

Lime/Lemon: Nothing like a fresh zingy lemon to add a refreshing note to a cocktail!

Please see the recipe card for full information about ingredients and quantities.

How To Make a Cherry Gin And Tonic

Making this cherry gin cocktail couldn't be simpler!

Step 1: Pit the cherries. Place them in a glass and muddle them using a wooden spoon.

Step 2: Pour in the gin and lemon juice.

a hand squeezing lemon juice into a glass of gin and tonic.

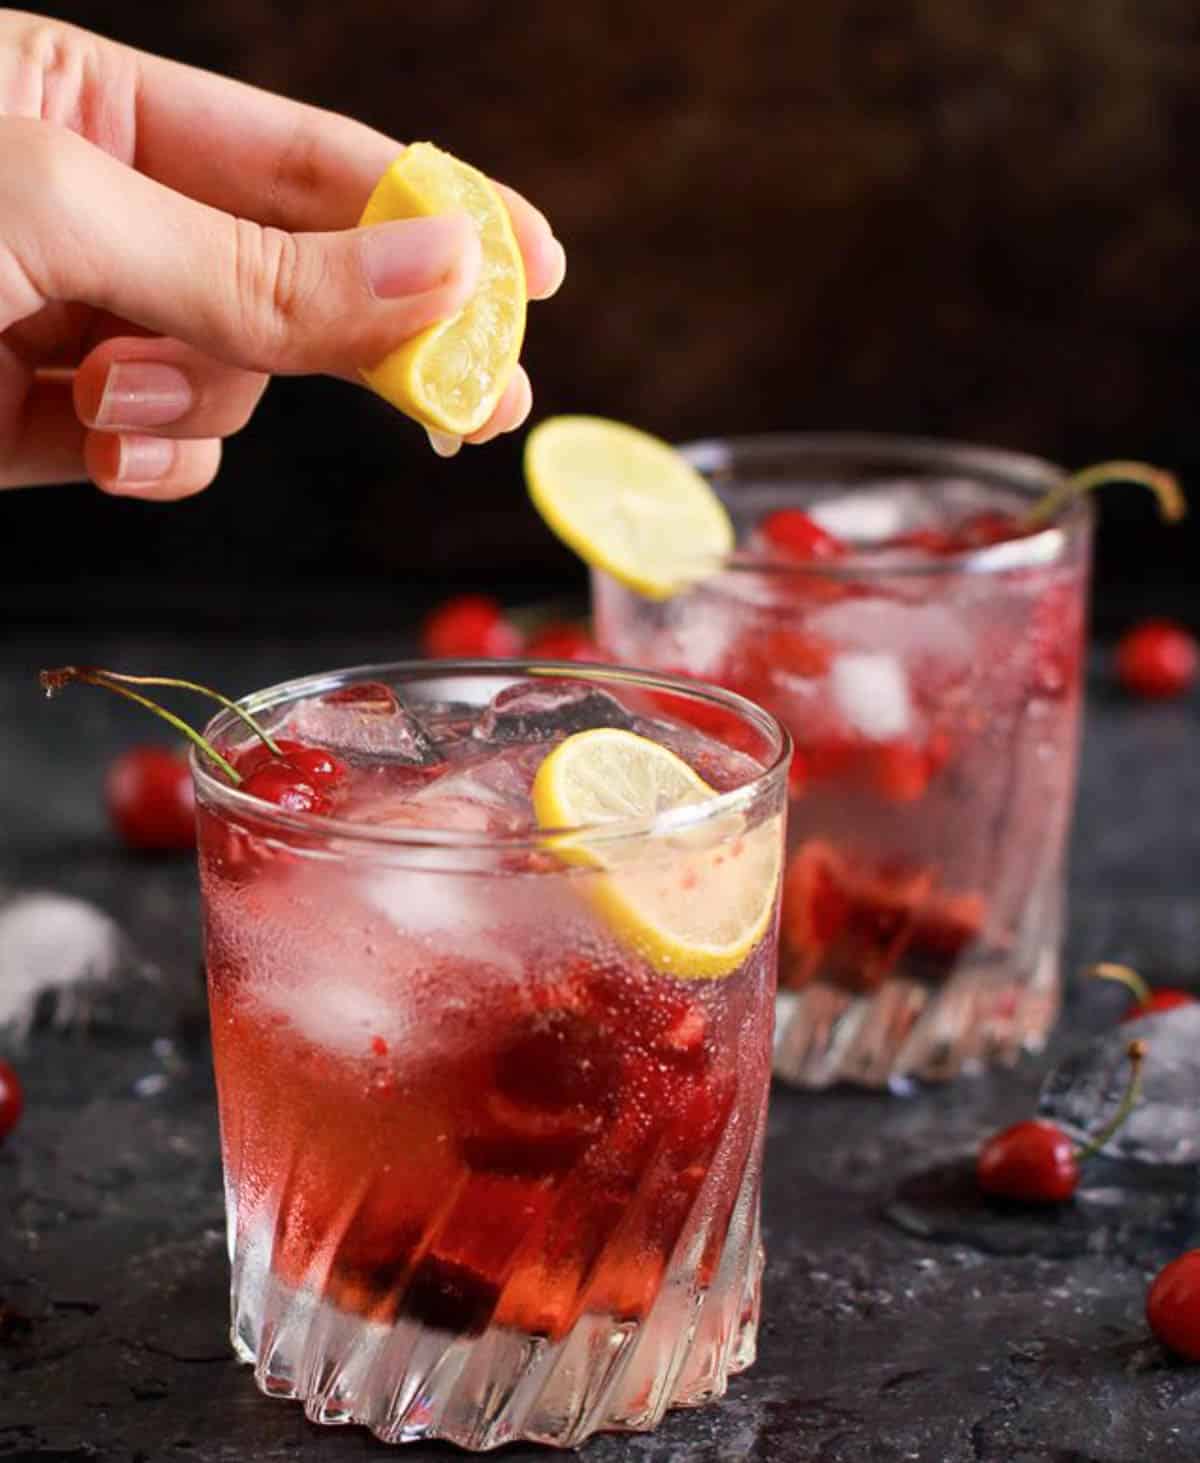
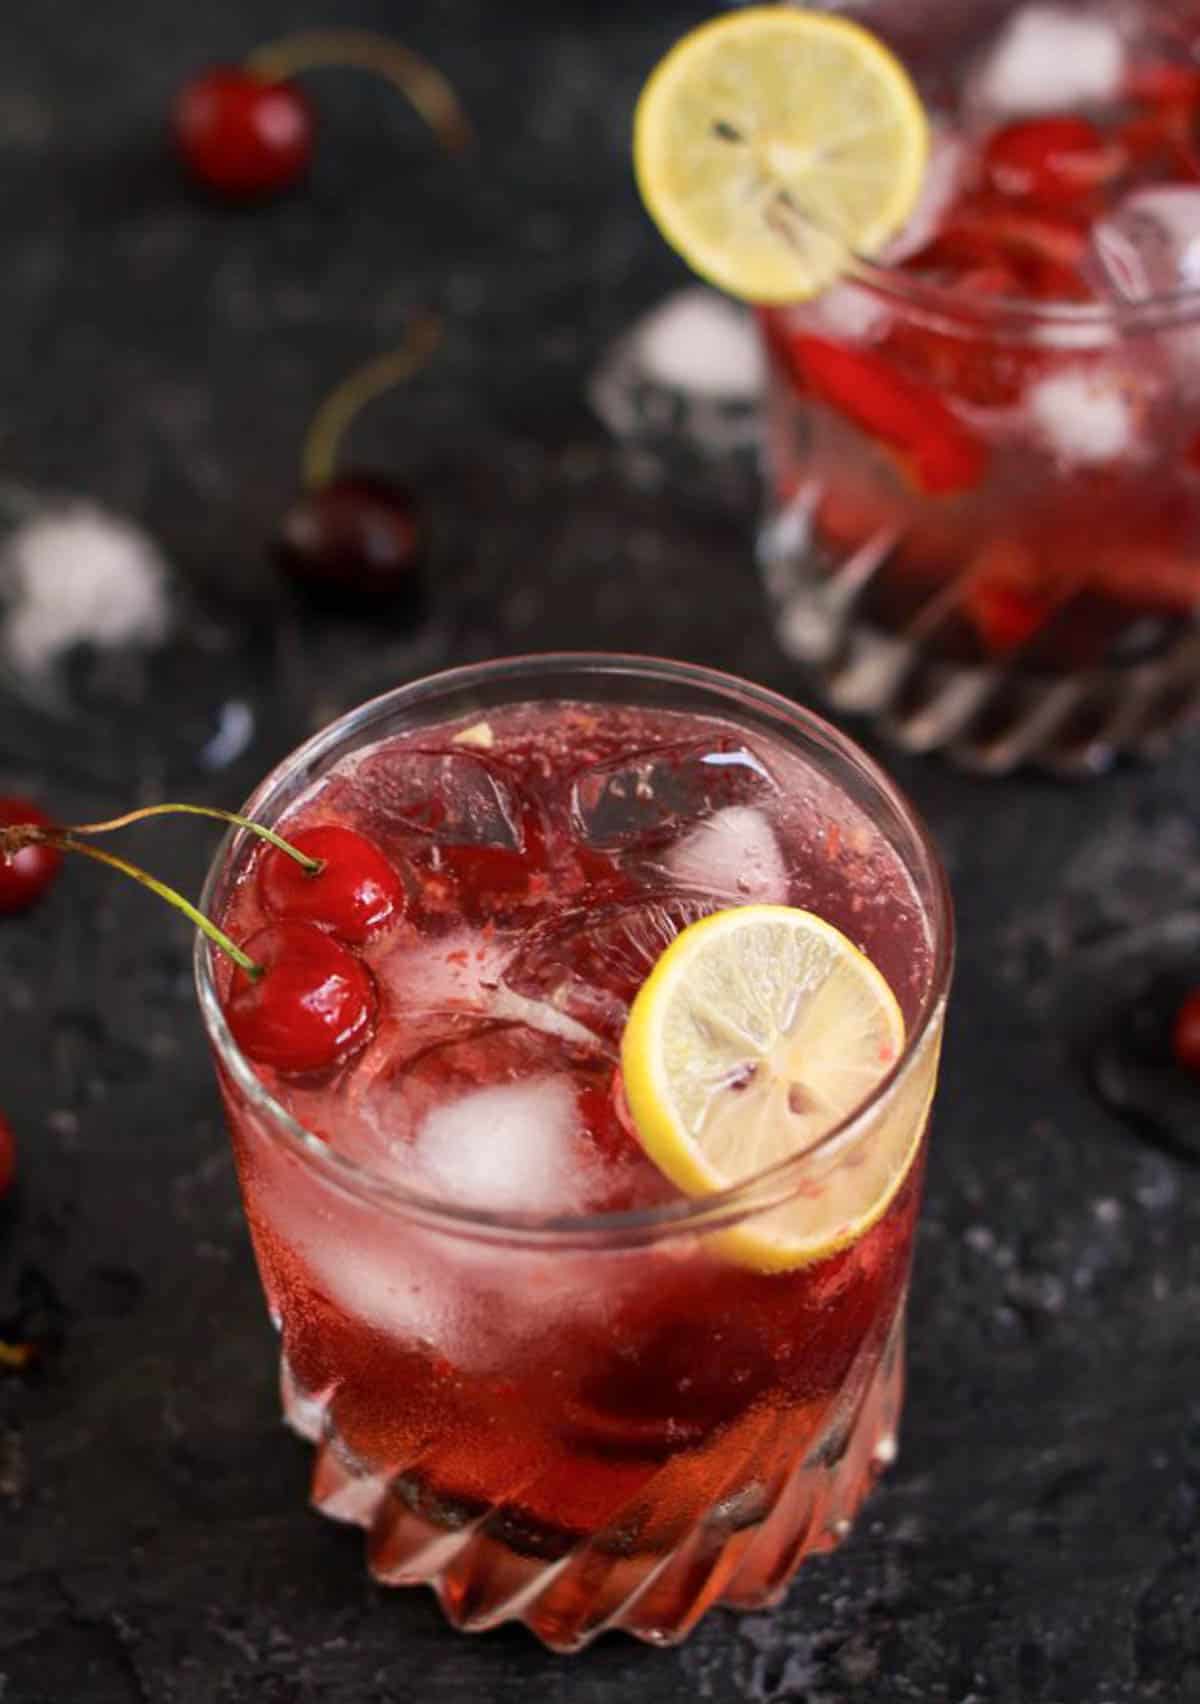
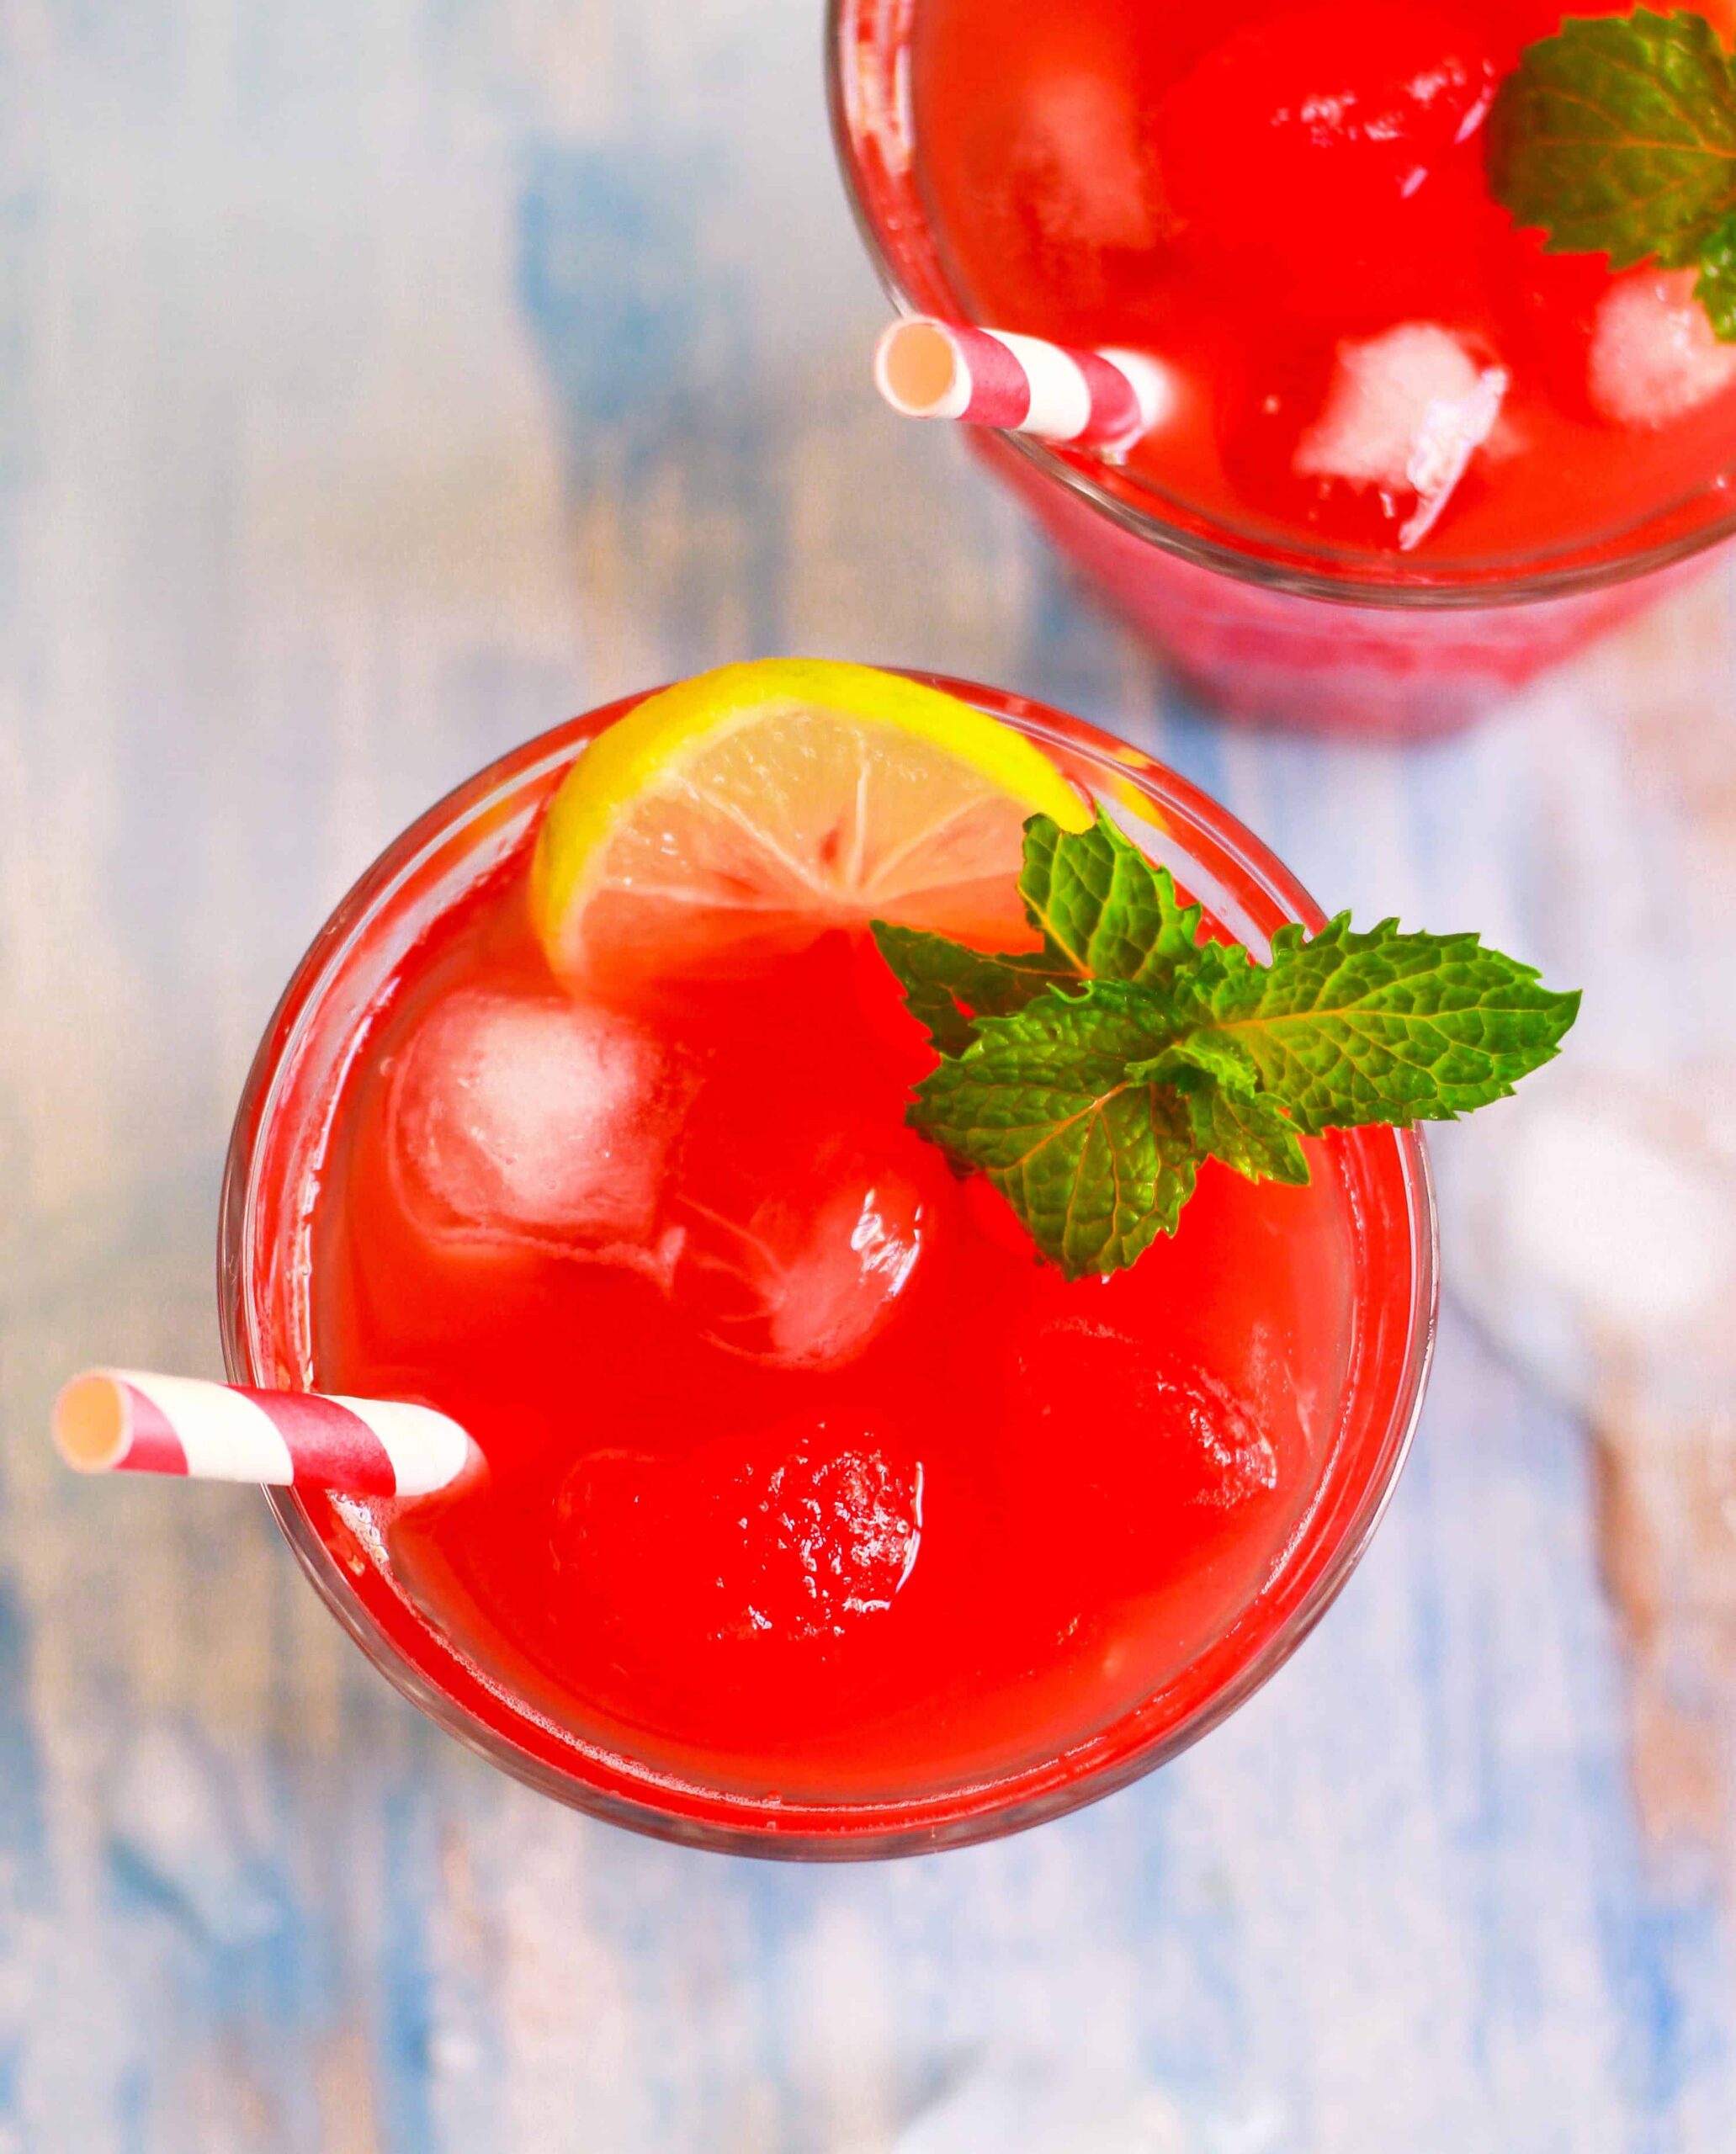
Step 3: Add the ice and some tonic water. Stir well, garnish with a slice of lime, and serve. Serve immediately and enjoy!

Pro Tips

  1. Add some prosecco and make it a cherry gin and prosecco cocktail for a dainty brunch vibe. There are no rules here! 
  2. If you have a favourite sparkling water, you can always play around with that instead of tonic to get a cherry gin fizz.
  3. A sprig of rosemary will push this drink into bartender levels of fancy!
A glass of gin and tonic with cherries, ice, and lemon slice.

Recipe FAQs

Does cherry go well with gin?

Definitely! The neutral herbal undertone in gin is nicely balanced with the sweetness of cherries. A dash of lime just helps bring it all together. And cherry red is just so pretty in a drink. 

Does the gin I use change how the gin and tonic tastes?

Yes, but nominally. As a general rule of thumb, all gin goes well with fruit. The gin doesn’t change the drink too much, especially if you've added some fruit to it, cherries in this case. 

Can I make this when it’s not cherry season?

Although I love using my fruits seasonally, cherry juice or frozen cherries work just as well for this beautiful drink. 

More Fun Drink Recipes!

  • Pomegranate Mimosa: Sparkling Wine Cocktail
    Pomegranate Mimosa: Sparkling Wine Cocktail
  • Pomegranate mojito in a glass garnished with mint and lime.
    Pomegranate Mojito
  • 2 glasses of mango margarita with ice, lemon, and mint.
    3 Ingredient Mango Margarita
  • Watermelon Iced Tea cold brewed
    Watermelon Iced Tea | Cold Brewed

Half the joy of cooking is sharing it with others. That’s why I’m always eager to hear from you. So go right ahead & drop a comment or reach out on Instagram, Pinterest, YouTube, or Facebook. I hope you love this cherry gin and tonic as much as we do!

📖 Recipe

Tried this recipe?Let us know how it was!
Cherry gin and tonic in a glass with a slice on lemon.

Cherry Gin And Tonic

Natasha Minocha
A sweet brisk cocktail to kick-start your weekend! This delightful Cherry Gin and Tonic just needs 4 ingredients and a big glass!
No ratings yet
Print Recipe Pin Recipe
Prep Time 10 minutes mins
Total Time 10 minutes mins
Course Drinks
Cuisine American, World
Servings 1 Serving
Calories 161 kcal

Ingredients
  

  • 5-6 Fresh cherries, pitted
  • 40 ml Gin
  • 1.5 -2 tsp Fresh lemon/ lime juice
  • 120 ml Tonic water
  • Ice
  • Lime slices for garnish

Instructions
 

  • Place the pitted cherries in a glass and muddle them using a wooden spoon.
  • Pour in the gin and lemon juice.
  • Add the ice and some tonic water. Stir well, garnish with a slice of lime and serve. Enjoy!

Notes

  • You can easily adjust the quantity of gin and tonic water according to your taste.
  • Add some prosecco and make it a cherry gin and prosecco cocktail for a dainty brunch vibe. There are no rules here!
  • If you have a favourite sparkling water, you can always play around with that instead of tonic to get a cherry gin fizz.
  • A sprig of rosemary will push this drink into bartender levels of fancy!

Nutrition

Serving: 1 ServingCalories: 161kcalCarbohydrates: 17gProtein: 0.4gFat: 0.1gSaturated Fat: 0.02gPolyunsaturated Fat: 0.02gMonounsaturated Fat: 0.02gSodium: 15mgPotassium: 95mgFiber: 1gSugar: 16gVitamin A: 26IUVitamin C: 5mgCalcium: 7mgIron: 0.2mg

Walnut & Fig Banana Bread

June 21, 2019

Walnut & Fig Banana Bread easy wholegrain baking

Warm, moist, and so soft, this homey walnut & fig banana bread spells comfort. A slice of this freshly baked banana bread will make you feel all is well with the world!

Stacked slices of Walnut & Fig Banana Bread with caramel sauce.

This walnut & fig banana bread is very basic and simple. It is a one-bowl recipe. There is no need to get your mixer out. No separating eggs, beating the whites till stiff. Simply dump everything in a bowl, one after another, and mix.

[feast_advanced_jump_to]

Why We Love This Recipe

All you need is a bowl, a fork, and ripe bananas.

Adding walnuts to banana bread gives it a lovely crunch.

This walnut & fig walnut bread is a keeper, I promise you.

Recipe Ingredients

Bananas: Spotty bananas are the sweetest, so use the ripest ones.

Oil: Pick your favorite or any neutral-tasting vegetable oil.

Eggs: Make sure they are at room temperature.

Flour: I used whole wheat flour for this fig banana bread, but all-purpose flour will work too, or use half-and-half of both.

Sugar: I love adding brown sugar to my fall banana breads. Feel free to replace it with regular, raw, or any other sugar you love.

Walnuts: They add a wonderful nutty flavor and texture.

Figs: This recipe works great with dried figs. Fresh figs would be wonderful here too.

Spices: A splash of homemade vanilla extract, and some cinnamon powder give the fig and walnut bread all the flavor it needs.

See the recipe card for full information on ingredients and quantities.

loaf of walnut banana bread with a knife on a trivet.

How To Make Walnut & Fig Banana Bread

Step 1: Set your oven to preheat and then grease your loaf pan. I used an 8 by 4 inch one.
Step 2: In a large bowl, add the ripe bananas and mash with a fork.
Step 3: Mix in the oil, vanilla extract, and eggs. Add the brown sugar and mix well.
Step 4: Sift in the flour, salt, cinnamon powder, and baking soda.
Step 5: Combine everything until just moistened. Don’t overmix.
Step 6: Fold in chopped walnuts and figs.
Step 7: Pour the walnut banana fig bread batter into the prepared pan.
Step 8: Bake for about 45–50 minutes until a toothpick inserted in the center of the bread comes out clean.
Turn the walnut and fig banana cake out onto a cooling rack.

Pro Tips

  • It’s easier to mix everything when all the fig banana bread ingredients are at room temperature.
  • Sift your dry ingredients. It breaks any big lumps and makes for a smoother batter.
  • Use those browning bananas. They make the bread sweeter. Don’t have any? I share an easy trick to ripen bananas quickly in my delicious strawberry banana bread recipe.
  • If the walnut & fig banana bread starts to brown on the top, cover it loosely with a piece of foil.
Sliced walnut & fig bread on a black trivet.

How to serve

Warm or at room temperature, walnut & fig banana bread is a total winner.

  • It's great for snacking and keeps well in the lunch box, too.
  • Drizzle it with this vegan caramel sauce to turn this simple banana bread loaf into a decadent dessert.
  • Serve it warm with a scoop of vanilla ice cream, and you'll have fans for life!
  • Toast and slather with easy apple butter or homemade cinnamon honey butter!

Recipe FAQs

Can you use fresh figs for this banana bread recipe?

Yes, you can make fresh fig and walnut banana bread. Chop up the fruit. Toss it in a bit of flour (so it doesn’t sink to the bottom of the loaf) and then add it to the batter. You can also see how I used fresh figs to make my quick fig bread!

How long does walnut banana bread last?

On the countertop, the bread will last for up to 3 days. Keep it in the fridge for longer storage. Always use an airtight container.

What is a good walnut substitute for banana bread?

Don’t get me started on what other nuts you can use in place of walnuts! Pecans, macadamias, hazelnuts, cashews—anything works.

More banana bread recipes

  • Hawaiian Banana Bread with Pineapple and Coconut
    Hawaiian Banana Bread With Pineapple And Coconut
  • Biscoff Banana Bread - Easiest Recipe!
    Biscoff Banana Bread
  • Banana Carrot Bread | Eggless banana carrot bread
    Banana Carrot Bread
  • Cream Cheese Swirl Banana Bread | Easy Banana Bread with Cream Cheese
    Cream Cheese Swirl Banana Bread

Half the joy of cooking is sharing it with others. That’s why I’m always eager to hear from you. So go right ahead & drop a comment or reach out on Instagram, Pinterest, YouTube, or Facebook. I hope you love this walnut & fig banana bread as much as we do!

📖 Recipe

Tried this recipe?Let us know how it was!
Walnut & Fig Banana Bread easy wholegrain baking

Walnut & Fig Banana Bread

Natasha Minocha
Warm and moist this homey Walnut & Fig Banana Bread spells comfort. A slice of this freshly baked bread will make you feel all is well with the world!
5 from 3 votes
Print Recipe Pin Recipe
Prep Time 15 minutes mins
Cook Time 45 minutes mins
Course Bread, Cakes, Snack
Cuisine American
Servings 8 Servings
Calories 325 kcal

Ingredients


  • 3 Bananas, very ripe
  • 1/3 cup Oil
  • 2 Eggs
  • 1 tsp Vanilla extract
  • 1/2 cup Brown sugar
  • 1 1/2 cups Wholewheat flour
  • 1 tsp Baking soda
  • 1/4 tsp Salt
  • 1 Tsp Cinnamon powder
  • 1/3 cup Walnuts, roughly chopped
  • 1/4 cup Diced dried figs

Instructions
 

  • Preheat your oven to 180C. Grease a loaf pan 8" x 4".
  • In a large bowl, add the bananas and mash with a fork. Mix in the oil, vanilla extract, and eggs.
    3 (300 g) Bananas, 1/3 cup (65 g) Oil, 2 Eggs, 1 tsp Vanilla extract
  • To this mixture, add the brown sugar and mix well.
    1/2 cup (110 g) Brown sugar
  • Now stir in the flour, salt, cinnamon powder, and baking soda. Mix until just moistened.
    1 1/2 cups (195 g) Wholewheat flour, 1 tsp Baking soda, 1/4 tsp Salt
  • Fold in the walnuts and figs.
    1/3 cup (45 g) Walnuts, 1/4 cup (40 g) Diced dried figs
  • Pour the batter in the prepared pan and bake for about 45 - 50 minutes until a toothpick inserted in the center of the bread comes out clean. If the cake starts to brown a lot on the top, cover it loosely with a piece of foil.
  • Turn the cake out onto a cooling rack. Serve warm or at room temperature. Enjoy!

Nutrition

Serving: 1 ServingCalories: 325kcalCarbohydrates: 46gProtein: 5gFat: 14gSaturated Fat: 1gPolyunsaturated Fat: 5gMonounsaturated Fat: 7gTrans Fat: 0.04gCholesterol: 41mgSodium: 231mgPotassium: 273mgFiber: 3gSugar: 21gVitamin A: 90IUVitamin C: 4mgCalcium: 39mgIron: 2mg

Vietnamese Iced Coffee Recipe

June 11, 2019

2 cups of Vietnamese iced coffee with ingredients in the background.

Strong, sweet, and icy cold, Vietnamese iced coffee is bold and unforgettable. It takes just 10 minutes and is the perfect summer drink!

2 cups of iced coffee with ingredients in the background.

Vietnamese iced coffee is not your usual cup of coffee. It’s rich, creamy, and a pick-me-up when you want something different. My Vietnamese coffee recipe doesn’t use a traditional filter, yet it tastes delicious.

So even if you don’t have an authentic Phin filter, still go ahead and make it. It’s like a creamy coffee dessert with the perfect balance of sweetness and intense coffee, almost to the point of being addictive.

[feast_advanced_jump_to]

What Is Vietnamese Coffee

Vietnamese coffee is made with dark roast coffee and sweetened condensed milk. The result is a rich, creamy drink with deep flavor. The most popular version is called cà phê sữa đá—iced coffee with milk. It’s served cold, over ice, and tastes like a dessert in a glass. The hot version of this coffee, called cà phê nóng, is usually had in the morning.

The coffee is traditionally brewed using a Phin filter (aka Vietnamese press or Vietnamese dripper), which is a small metal drip filter that slowly drips hot water through ground coffee. The Phin makes a stronger cup than a drip machine and has a smoother taste than a French press. It takes a few minutes, but the flavor is worth the wait.

Why You'll Love This Recipe

✨Refreshingly sweet with a strong coffee kick, this Vietnamese-style iced coffee is a keeper!

✨This Viet iced coffee is the best summer workday companion, guaranteed to drive your afternoon slump away!

✨Super easy to make. This really takes no effort at all!

✨So versatile! You make it using any kind of coffee, and adjust the sweetness according to your taste.

✨This iced coffee is so addictive and well-loved by everyone!

✨Leave out the ice, and you can easily serve this hot.

Vietnamese Iced Coffee Recipe Ingredients

Ingredients for making Vietnamese iced coffee.

Coffee: Traditionally, it’s made with dark roast, and the most popular Vietnamese coffee brand for it is Trung Nguyen. If you’re using a Phin filter, go for a medium-coarse grind. If it’s too fine, it might slip through.

I used a medium-dark roast and brewed it in my Moka pot, and it turned out great. You can use a coffee maker, a French press, or instant coffee to make Vietnamese iced coffee. Espresso machine works just as well too. Use espresso shots instead of brewed coffee. Just remember: better beans = better coffee. Always.

Condensed milk adds all the sweetness and creaminess. Homemade, store-bought, or a plant-based one, like coconut condensed milk if you prefer vegan coffee.

Ice: Lots of it to chill the coffee!

See the recipe card for full information about the ingredients and quantities.

How To Make Vietnamese Iced Coffee

Sweetened condensed milk in a cup placed on a wooden saucer.

Step 1: Spoon in sweetened condensed milk into a cup.

Ice cubes on top of condensed milk in a cup.

Step 2: Top it with lots of ice.

Brewed coffee on top of the ice and condensed milk in a cup.

Step 3: Pour the brewed coffee into the cup.

Vietnamese iced coffee in 2 cups with a spoon in one cup.

Step 4: Stir well and enjoy!

Top Tips

  • While I didn't use the traditional Vietnamese coffee filter and coffee, both are easily available online.
  • You can brew coffee using a French press,
  • You can leave out the ice to make a hot Vietnamese coffee.
  • Adjust the quantity of sweetened condensed milk according to your taste.
Iced coffee in a cup with an orange spoon.

How To Serve Vietnamese Iced Coffee

Poured over a tall glass filled with ice, Vietnamese condensed milk coffee is just a fantastic pick-me-up. With a small scoop of vanilla ice cream, coffee ice cream, or chocolate ice cream? It becomes an indulgent treat. You can serve it with coffee hazelnut madeleines, banana bread scones, or simple cream cheese pound cake.

Mocha gingerbread biscotti are great for dunking into iced coffee. Oatmeal raisin cookies give a chewy, spiced contrast to the creamy drink. Rich, crumbly, and melt-in-your-mouth butter cookies or strawberry cream cheese buns are fantastic with it. Sweet, sticky cinnamon rolls or Mallorca sweet bread will be delicious with Vietnamese coffee.

Recipe FAQs

What is different about Vietnamese coffee?

If you make Vietnamese coffee the traditional way—that is, with a Phin filter and Robusta beans—then it has higher caffeine content and a deep, intense taste. What also makes Vietnamese iced coffee different is that instead of milk or cream, it’s mixed with sweetened condensed milk, making it rich, creamy, and sweet.

Why is Viet iced coffee so addictive?

The coffee is addictive because it hits all the right notes. It’s strong, it’s sweet, and it’s creamy. It’s that mix of strong coffee and sweet creaminess that keeps you coming back for more.

Is Vietnamese coffee the strongest?

It’s not the strongest, but it is definitely one of them when made with Robusta beans and a Phin filter. The filter drips slowly and creates a concentrated brew. If you’re looking for strong iced coffee, Vietnamese coffee delivers.

More Coffee Recipes

  • Sliced coffee banana cake on parchment paper.
    Coffee Banana Cake
  • Coffee ice cream in a pan with one scoop in an ice cream scoop.
    Vegan Coffee Ice Cream
  • Perfect Soft Coffee Cinnamon Rolls !
    Perfect Soft Coffee Cinnamon Rolls!
  • oatmeal latte in a clear glass mug on a small plate with a spoon.
    Oatmeal Latte

Half the joy of cooking is sharing it with others. That’s why I’m always eager to hear from you. So go right ahead & drop a comment or reach out on Instagram, Pinterest, YouTube, or Facebook. I hope you love this Vietnamese Iced Coffee as much as we do!

📖 Recipe

Tried this recipe?Let us know how it was!
2 cups of Vietnamese iced coffee with ingredients in the background.

Vietnamese Iced Coffee Recipe

Natasha Minocha
This incredibly refreshing pick -me -up Vietnamese Iced Coffee is the best summer workday companion! Perfect pick me up for the afternoon slump!
No ratings yet
Print Recipe Pin Recipe
Prep Time 10 minutes mins
Total Time 10 minutes mins
Course Drinks
Cuisine Vietnamese
Servings 1 Serving
Calories 131 kcal

Ingredients
  

  • 2 tbsp Sweetened condensed milk
  • 1 cup Freshly Brewed Coffee I used 1 cup water and 3 tbsp ground coffeebeans for my brew
  • Ice

Instructions
 

  • Spoon in sweetened condensed milk into a cup.
  • Top it with ice.
  • Pour the freshly brewed coffee and stir well.
  • Enjoy!

Video

Notes

  • While I didn't use the traditional Vietnamese coffee filter and coffee, both are easily available online.
  • You can brew coffee using a French press,
  • You can leave out the ice to make a hot Vietnamese coffee.
  • Adjust the quantity of sweetened condensed milk according to your taste.

Nutrition

Serving: 1 ServingCalories: 131kcalCarbohydrates: 22gProtein: 3gFat: 4gSaturated Fat: 2gPolyunsaturated Fat: 0.1gMonounsaturated Fat: 1gCholesterol: 14mgSodium: 56mgPotassium: 266mgSugar: 22gVitamin A: 107IUVitamin C: 1mgCalcium: 118mgIron: 0.1mg

Cherry Bread Pudding

June 7, 2019

cherry bread pudding in 3 ramekins with spoons on the side on a wooden board.

Turn your day-old bread and summer cherries into this luscious cherry bread pudding! A soft, rich, custardy base, studded with juicy, jammy cherries and golden crisp edges, so simple and comforting! 

Cherry bread pudding with almonds and fresh cherry in a white ramekin.

Bread and butter pudding is a childhood favorite. It's an easy recipe that’s also very versatile. This cherry bread pudding is old-school comfort at its best. Simple, hearty, and full of nostalgia. It’s the kind of no-fuss dessert that feels like a warm hug from the oven.

[feast_advanced_jump_to]

Why You’ll Love This Recipe

✨A comforting pudding that everyone loves! Buttery, custardy, and full of cherries, what’s not to love!

✨It’s the most delicious way to give stale bread a second life. The custard-soaked bread turns beautifully soft and rich on the inside, with crispy, golden edges on top.

✨It’s great for gatherings and is make-ahead friendly. You can serve it warm straight from the oven, and it’s even better the next day. Just reheat and dig in!

✨A super simple recipe with no technique, this recipe just needs 15 minutes of prep, a bit of waiting time, then bake and eat!

✨Serve it warm with ice cream or eat it cold, straight from the fridge. This yummy bread pudding gets rave reviews, always!

Recipe Ingredients

Ingredients for making cherry bread pudding.

Bread: Use stale bread as it will soak up the custard like a dream. Enriched breads like brioche or challah are wonderful for this recipe. Sourdough or French bread also works well. But if regular white bread is all you have, use it, as I did for my chocolate chip bread pudding. Just reduce the soaking time to 15 minutes so it doesn’t get too soggy.

Butter adds richness to the pudding and makes the top golden and crunchy!

Milk: I used coconut milk for its subtle sweetness. And because it’s gentle on my lactose-intolerant tummy! But feel free to use any milk you like. Or go for a dairy-free version using almond milk, cashew milk, or oat milk.

Eggs: For that luscious, custardy texture. They also provide structure to the pudding.

Cherries: Fresh or frozen, both work, but I highly recommend using fresh if they’re in season for you.

Vanilla extract gives the cherry bread pudding so much warmth and depth. You can use homemade vanilla extract or store-bought.

Please see the recipe card for full information about ingredients and quantities.

Variations

Bread pudding with cherries is a wonderful blank slate to which you can add pretty much any ingredients and flavors.

  • Add some chocolate chips to the mixture or the zest of a lemon. Some cinnamon powder, like I did for my cinnamon bread pudding!
  • I finished mine with toasted almonds for texture and crunch. It’s totally optional, but so worth it.
  • You can make it with any stale bread you have lying around - sandwich bread, challah, brioche, croissants, or even leftover condensed milk buns.
  • Swap cherries for any fruit that’s in season - blueberries, strawberries, peaches, apples. You can also sandwich the bread slices with strawberry jam or homemade cherry jam. Cut into pieces and use in the recipe!

How To Make Cherry Bread Pudding

Lightly grease 6 ramekins or an 8" baking dish.

Bread cubes and pitted cherries in a large bowl.

Step 1: Add the bread cubes and chopped cherries to a large bowl. Mix well.

Eggs, milk, sugar, and vanilla extract in a bowl.

Step 2: In a separate bowl, whisk together the milk, eggs, sugar, and vanilla extract. 

Mixture of bread and custard in a mixing bowl.

Step 3: Pour over the bread. Press the bread down a bit so it absorbs the custard mixture well.

Bread pudding mixture in 6 ramekins on a black tray.

Step 4: Divide the mixture into the 6 ramekins. Let the mixture stand for at least 30 minutes so most of the custard gets soaked.

Baked bread pudding in 6 ramekins on a black tray.

Step 5: Preheat your oven to 180 °C / 350°F. Place the ramekins on a baking tray. Spoon a teaspoon of the melted butter on top of the bread pudding in each ramekin. Bake for 25- 30 minutes till the pudding looks golden brown on top and the custard is set.

Garnish with toasted almond flakes. Serve warm with a scoop of ice cream. Enjoy!

3 white ramekins with cherry bread pudding with 3 spoons.

Pro Tips

  • Stale bread means better pudding because it’s dry, and that keeps the pudding from being soggy. I used a loaf that was 1 day old.
  • If you're working with fresh bread, cube it and bake in the oven at 150 °C / 300°F for 10-15 minutes. Or leave it out for three to four hours.
  • Allow the bread to soak in the egg mixture for at least 30 minutes. This will ensure a soft, gooey texture inside.  
  • You can use fresh or frozen cherries. If using frozen cherries, thaw them and drain the excess liquid. Don’t skimp on the cherries though! They add so much lovely fruity flavor to the bread pudding.

How To Serve

You can serve the cherry almond bread pudding as is. And some toasted almonds on top or a sprinkle of powdered sugar. 

I love serving this cherry bread pudding, warm with a big scoop of vanilla or coffee ice cream.  Chocolate ice cream, whipped cream, a drizzle of custard, or caramel sauce—all make the pudding tastier and yummier!

bread pudding with a scoop of vanilla ice cream.

Recipe FAQs

What is bread pudding?

It is bread soaked in a rich, eggy custard and baked to pudding-like perfection. It might have begun as a clever way to use up stale bread. But now? It’s a beloved dessert.

How do you know when cherry bread pudding is done?

The top and edges should be golden and slightly crisp, while the center is set. Cherry juices should be bubbling. A knife or toothpick inserted in the middle should come out mostly clean with just a few moist crumbs attached, no runny custard.

What is bread and butter pudding?

It’s the British cousin of bread pudding! The idea is the same, but the technique is slightly different. Slices of buttered bread (often with raisins or other dried fruit) are layered in a dish, soaked in custard, and baked.

More Easy Pudding Ideas

  • Vegan Sticky Toffee Pudding Glutenfree Dairyfree Refined Sugarfree Dessert
    Vegan Sticky Toffee Pudding
  • Easy 2 Ingredient Chocolate Pudding vegan glutenfree recipe
    Easy 2-Ingredient Chocolate Pudding
  • bowls of chocolate pudding with peanut butter drizzled on top.
    Chocolate Peanut Butter Pudding
  • Chilli Chocolate Pudding vegan glutenfree refined sugarfree easy dessert
    Chilli Chocolate Pudding

Half the joy of cooking is sharing it with others. That’s why I’m always eager to hear from you. So go right ahead & drop a comment or reach out on Instagram, Pinterest, YouTube, or Facebook. I hope you love this cherry bread pudding as much as we do!

📖 Recipe

Tried this recipe?Let us know how it was!
cherry bread pudding in 3 ramekins with spoons on the side on a wooden board.

Cherry Bread Pudding

Natasha Minocha
Turn your day-old bread and summer cherries into this luscious cherry bread pudding! A soft, rich, custardy base, studded with juicy, jammy cherries and golden crisp edges, so simple and comforting! 
No ratings yet
Print Recipe Pin Recipe
Prep Time 15 minutes mins
Cook Time 30 minutes mins
Resting Time 30 minutes mins
Course Dessert
Cuisine American, British
Servings 6 Servings
Calories 401 kcal

Ingredients


  • 10- 12 slices Bread, preferably stale, cut into cubes
  • 1 cup Coconut milk You can use any milk of your choice
  • 3 Eggs
  • 2/3 cup Sugar
  • 8 oz Cherries, pitted and halved
  • 2 tsp Vanilla extract
  • 2 Tbsp Butter, melted
  • Almond flakes for topping Optional

Instructions
 

  • Lightly grease 6 ramekins. You can also use an 8" baking dish.
  • Combine the bread cubes and cherries in a large bowl.
    10- 12 slices Bread, preferably stale, cut into cubes, 8 oz (250 g) Cherries, pitted and halved
  • In a separate bowl, whisk together the milk, eggs, sugar, and vanilla extract.
    1 cup (240 g) Coconut milk, 3 Eggs, 2/3 (130 g) cup Sugar, 2 tsp Vanilla extract
  • Pour over the bread. Press the bread down a bit so it absorbs the custard mixture well.
  • Divide equally amongst the ramekins.
  • Let the mixture stand for at least 30 minutes so most of the custard gets soaked.
  • Preheat your oven to 180 C / 350 F.
  • Spoon a teaspoon of the melted butter on top of the bread pudding in each ramekin.
    2 Tbsp Butter, melted
  • Place the ramekins on a baking tray and bake for 25- 30 minutes till the pudding looks golden brown on top and the custard is set.
    Garnish with toasted almond flakes. Serve warm as-is or with a scoop of vanilla ice cream. Enjoy!

Video

Notes

  • Stale bread means better pudding because it’s dry, and that keeps the pudding from being soggy. I used a loaf that was 1 day old.
  • If you're working with fresh bread, cube it and bake in the oven at 150 °C / 300°F for 10-15 minutes. Or leave it out for three to four hours.
  • Allow the bread to soak in the egg mixture for at least 30 minutes. This will ensure a soft, gooey texture inside.  
  • You can use fresh or frozen cherries. If using frozen cherries, thaw them and drain the excess liquid. Don’t skimp on the cherries though! They add so much lovely fruity flavor to the bread pudding.

Nutrition

Serving: 1 ServingCalories: 401kcalCarbohydrates: 53gProtein: 9gFat: 18gSaturated Fat: 12gPolyunsaturated Fat: 1gMonounsaturated Fat: 2gTrans Fat: 0.2gCholesterol: 92mgSodium: 288mgPotassium: 290mgFiber: 4gSugar: 32gVitamin A: 261IUVitamin C: 4mgCalcium: 84mgIron: 3mg

Chocolate Cherry Mug Cake

June 3, 2019

Chocolate cherry mug cake in a blue cup, topped with fresh cherries and chocolate.

This 5-minute chocolate cherry mug cake is one of my favorite quick dessert recipes! Easy, delicious, fluffy cake with the flavors of a fun black forest cake, without the effort- what’s not to love? 

Chocolate cherry mug cake in a blue cup, topped with fresh cherries and chocolate.

Soft and gooey, studded with pools of melting chocolate and juicy, sweet cherries, this dark, moist chocolate mug cake hits all the right spots! And it is ridiculously easy to make, with the microwave doing all the heavy lifting!

And, if this recipe takes you into a mug cake-making spree, my oats banana mug cake and easy brownie in a mug are just the thing! 

[feast_advanced_jump_to]

Why You'll Love This Recipe

✨This recipe is blackforest goodness in a mug! Nostalgic, friendly, comforting - a warm hug for your sweet tooth.

✨Rich, decadent chocolate with sweet, luscious cherries makes for a flavor riot of simple indulgence! 

✨This dairy-free chocolate cherry mug cake recipe can be easily made gluten-free, making it very versatile to suit any dietary restrictions! 

✨With its seasonal freshness and quick cooking time, this chocolate mug cake with cherries is the perfect midnight craving recipe!

✨Don’t have cherries? You can always pair the chocolate with another comforting flavor (strawberry mug cake, anyone?) and it will be just as comforting and delectable. 

Recipe Ingredients

Ingredients for making chocolate cherry mug cake.

Cherries: I prefer to use fresh ones to make the most of cherry season, but you can always use frozen. 

Chocolate: I love using dairy-free dark chocolate, but you can use any chocolate you love. Always fun to add more, especially to sprinkle on top! 

Cocoa powder: For that deep chocolate flavor. Use any kind you have. My current favorite is Van Houten.

Flour: I used all-purpose flour for this recipe, but have very successfully made this chocolate cherry mug cake with finger millet/ragi flour also. This is a very easy recipe that allows you to use any flour of your choice.

Milk: I use coconut milk, but you’re free to use almond milk or oat milk, or even regular dairy milk if that’s your preference! 

Oil: Coconut oil is my favorite for baking. Feel free to use any vegetable oil of your choice.

Sugar: Regular granulated sugar works well here. But you can easily swap it with brown sugar or muscovado sugar.

Vanilla Extract: Any brand will do. Of course, the higher the quality better the flavor profile. You can also use homemade vanilla extract. This is not a fussy recipe, so use what you have at your disposal! 

Please see the recipe card for full information about the ingredients and quantities.

Chocolate cherry mug cake with fresh cherries on top.

How To Make Chocolate Cherry Mug Cake

Step 1: Whisk together the dry ingredients - flour, baking powder, baking soda, cocoa powder, sugar, and salt. Use a fork to break up any lumps. 

Step 2: Stir in the coconut oil, milk, and vanilla extract. Mix well till you have a thick batter. Add another tablespoon of milk if it seems too dry. 

Step 3: Fold in the cherries and chocolate chips!

Step 4: Pour the mixture into your favorite microwave-friendly mug or ramekin. Cook for 1 minute 15 seconds. An extra 30 seconds may be required depending on your microwave model. 

Step 5: Let it cool for a couple of minutes and enjoy it fresh and warm! 

Top Tips

  • Mix the cake batter just until all ingredients are combined for a light and tender cake. Overmixing can make the cake dense.
  • Place a plate underneath the mug in the microwave to catch any spillover.
  • Microwave immediately after mixing the batter to ensure a fluffy texture.
  • Use a big mug so the cake can rise gloriously! 
  • Serve with ice cream for an added layer of indulgence. Is there anything better than the combination of warm cake and cold ice cream? 

Mug cake with a scoop of vanilla ice cream and fresh cherries on top.

Recipe FAQs

I don’t have cherries, can I use strawberries?

Any berries would work well here. The key is to indulge your craving, so use what you have!

Can I make a cherry chocolate mug cake in the oven?

Yes! Bake in a greased ramekin for 10-15 minutes at 180°C or 350°F.

How do I serve a chocolate mug cake with cherries?

Mug cakes are best eaten fresh and warm. Do wait for a few minutes for the cake to cool down before digging in. You can eat it as-is, or top it with more chocolate chips or a scoop of vanilla ice cream! So good!

Mug cake with vanilla ice cream and bite taken out in a spoon.

More Mug Cake Recipes

  • Easy Strawberry Mug Cake
    Easy Strawberry Mug Cake
  • Gingerbread Mug Cake | Easy Holiday Mug Cake Recipe
    Gingerbread Mug Cake
  • Vegan Oats Banana Mug Cake | Easy Kid Friendly Recipe
    Oats Banana Mug Cake
  • pumpkin mug cake with chocolate chips and whipped cream on a plate.
    Pumpkin Mug Cake

Half the joy of cooking is sharing it with others. That’s why I’m always eager to hear from you. So go right ahead & drop a comment or reach out on Instagram, Pinterest, YouTube, or Facebook. I hope you love this chocolate cherry mug cake as much as we do!

📖 Recipe

Tried this recipe?Let us know how it was!
Chocolate cherry mug cake in a blue cup, topped with fresh cherries and chocolate.

Chocolate Cherry Mug Cake

Natasha Minocha
This chocolate cherry mug cake is rich, fudgy, and bursting with juicy cherries- ready in just minutes! A quick, eggless dessert perfect for late-night cravings or an easy treat!
5 from 1 vote
Print Recipe Pin Recipe
Prep Time 5 minutes mins
Cook Time 2 minutes mins
Total Time 7 minutes mins
Course Cakes, Dessert
Cuisine American
Servings 1 Serving
Calories 667 kcal

Ingredients
  

  • 4 tbsp All-purpose flour
  • 1/4 tsp Baking powder
  • 1/8 tsp Baking soda
  • 1/8 tsp Salt
  • 1.5 tbsp Sugar
  • 1 tbsp Cocoa powder
  • 2 tbsp Coconut oil
  • 2 tbsp Coconut milk
  • 1 tsp Vanilla extract
  • 2 tbsp Dairy free chocolate or Dark chocolate (70%) chips Of course you can add more!!
  • 8-10 Cherries, pitted and halved

Instructions
 

  • Combine all the dry ingredients - flour, baking powder, baking soda, sugar, salt, and cocoa powder in a small bowl.
    Whisk with a fork to break up all lumps.
  • Stir in the wet ingredients - coconut oil, milk, vanilla extract. Mix well. You should have a thick batter.
    If the batter seems too dry, add another tablespoon of milk.
  • Fold in the chocolate chips and cherries.
  • Transfer the mixture into a microwave-friendly mug or ramekin. Place a plate underneath ( to catch any overflow).
    Sprinkle some chocolate chips if you like.
    Set the plate in your microwave and cook for 1 minute and 15 seconds. You may have to cook for another 30 seconds, depending on your microwave.
  • Let the cake cool down for a few minutes and then serve it warm, with or without ice cream! Enjoy!

Notes

  • Mix the cake batter just until all ingredients are combined for a light and tender cake. Overmixing can make the cake dense.
  • Place a plate underneath the mug in the microwave to catch any spillover.
  • Microwave immediately after mixing the batter to ensure a fluffy texture.
  • Use a big mug so the cake can rise gloriously! 
  • Serve with ice cream for an added layer of indulgence. Is there anything better than the combination of warm cake and cold ice cream? 

Nutrition

Serving: 1 ServingCalories: 667kcalCarbohydrates: 73gProtein: 8gFat: 39gSaturated Fat: 12gPolyunsaturated Fat: 8gMonounsaturated Fat: 18gTrans Fat: 0.1gCholesterol: 3mgSodium: 582mgPotassium: 489mgFiber: 5gSugar: 39gVitamin A: 75IUVitamin C: 5mgCalcium: 206mgIron: 3mg


Buckwheat Tabbouleh Salad

May 29, 2019

Buckwheat Tabbouleh Salad vegan glutenfree recipe

Buckwheat Tabbouleh Salad - the perfect summer salad that's light on the stomach yet very satisfying, healthy, and wholesome!

Buckwheat Tabbouleh Salad vegan glutenfree recipe

Hot Indian summers call for fresh, light foods that are easy to digest and are also very nourishing. This Buckwheat Tabbouleh Salad ticks all the boxes. It's very simple to prepare and tastes fabulous. You can eat it on its own, or pair it with some grilled paneer or chicken and serve it with pita for a bigger heartier meal.

 Also known as Tabouli, this is a Middle Eastern vegetarian salad made with Bulgar wheat, fresh tomatoes, onions, cucumbers, and loads of parsley and mint. The dressing is simply olive oil and lemon juice. This salad truly celebrates the fresh green herbs. There are variations of this salad with couscous too. Here, I've used buckwheat groats which I absolutely love.

Buckwheat Tabbouleh Salad vegan glutenfree recipe

Buckwheat is not related to wheat as does not grow on grass. It's a pseudocereal with a variety of healthful properties. It’s an excellent plant source of easily digestible protein and contains all eight essential amino acids, which is wonderful for vegetarians.  Buckwheat is also high in fiber and B Vitamins. Since it's gluten-free, it's a perfect substitute for grain for all those with gluten sensitivity.

Buckwheat Groats
Cooked Buckwheat Groats

While I use buckwheat flour extensively for baking, I enjoy the groats too. They taste so deliciously nutty and have a slightly chewy texture, somewhat like barley. This makes the dishes they are added to fairly hearty, yet not heavy at all.

Buckwheat Tabbouleh Salad vegan glutenfree recipe

This really is a no-fuss recipe. Once the buckwheat groats are rinsed and drained, you cook them, very much like rice. And while the buckwheat is cooking, you get to the chopping part. To get the right texture, all the vegetables need to be chopped as finely as possible. A sharp knife is your best friend here! Add as much parsley and mint as you'd like. Gently mix in the cooled groats... A splash of olive oil, lemon juice, salt, and pepper to taste and your salad is ready!

Half the joy of cooking is sharing it with others. That’s why I’m always eager to hear from you. So go right ahead & drop a comment or reach out on Instagram, Pinterest, YouTube, or Facebook. I hope you love this buckwheat tabbouleh salad as much as we do!

📖 Recipe

Tried this recipe?Let us know how it was!
Buckwheat Tabbouleh Salad vegan glutenfree recipe

Buckwheat Tabbouleh Salad

Natasha Minocha
Buckwheat Tabbouleh Salad - the perfect summer salad that's light on the stomach yet very satisfying, healthy and wholesome!
No ratings yet
Print Recipe Pin Recipe
Prep Time 15 minutes mins
Cook Time 15 minutes mins
Chilling Time 40 minutes mins
Course Salad, Side Dish
Cuisine Middle Eastern
Servings 6 Servings
Calories 173 kcal

Ingredients
  

  • 1 cup Buckwheat groats
  • 1 3/4 cup Water
  • 1/2 tsp Salt
  • 3 small Tomatoes, deseeded, chopped finely
  • 1 medium Onion chopped finely
  • 2 Cucumber, chopped finely
  • 1 cup Parsley, chopped finely
  • A small handful of Mint, chopped finely
  • 3-4 tbsp Fresh lemon juice
  • 2-3 tbsp Extra virgin Olive oil
  • Salt & Pepper to taste

Instructions
 

  • Rinse and drain buckwheat well.
  • Place in a medium saucepan with 1 3/4 cup water and 1/2 tsp salt. Bring it to a boil, lower the heat, cover and let cook for about 15 minutes. Once cooked, gently fluff up the groats with a fork. Let them cool completely.
  • In a large bowl, combine the chopped vegetables and herbs. Mix in the cooked buckwheat.
  • Now stir in the olive oil, lemon juice, salt, and pepper. Taste and adjust for seasoning.
  • Let the salad sit for about 30-40 minutes in the refrigerator before serving. Enjoy!

Nutrition

Serving: 1 ServingCalories: 173kcalCarbohydrates: 27gProtein: 5gFat: 6gSaturated Fat: 1gPolyunsaturated Fat: 1gMonounsaturated Fat: 4gSodium: 208mgPotassium: 467mgFiber: 5gSugar: 4gVitamin A: 1306IUVitamin C: 27mgCalcium: 45mgIron: 2mg

Watermelon Iced Tea | Cold Brewed

May 25, 2019

Watermelon Iced Tea cold brewed

Watermelon Iced Tea - what a refreshing summer cooler this drink is! This watermelon drink is really easy to make and is absolutely delicious.

Watermelon Iced Tea easy cold brewed summer recipe

I love making my own iced teas, lemonades, and other beverages at home instead of picking up bottles or packs of readymade ones from supermarkets.

Making them from scratch hardly takes any time and you are guaranteed fresh, delicious, and healthier drinks every time.

Last year I learned about making iced tea using the cold-brewed method. My Peach Iced Tea was such a success at home that this has stayed on as my preferred method from then on. It's really simple and a great cool drink to have on hand at home.

Watermelon Iced Tea cold brewed
[feast_advanced_jump_to]

What is cold brew tea?

It's simply tea brewed in room temperature water for an extended time. In this method, you rely on time and not temperature to make the tea. What you get is a very flavorful concoction, without any bitterness, but with all the health benefits of the tea. The amount of caffeine in these is also less compared to the traditionally steeped ones. 

What kind of teas can be used for cold brews?

Broken Orange Pekoe ( that's what I have used here), Oolong, White Tea, Jasmine Green Tea, and Earl Grey are wonderful for cold brewing. I find that Assam and Darjeeling get a tad bitter when steeped for a long period. You can also try this method with herbal teas like Tulsi, Sweet Rose, or Chamomile.

Watermelon Iced Tea cold brewed

How to make watermelon cold brew tea?

Step 1: Add 4 teaspoons of tea to 4 cups of water at room temperature. Stir it well and keep it in your refrigerator for 8 hours up to 12 hours.

I like to add a couple of mint leaves at this point for that extra special flavor. 

Step 2: Strain the tea into a pitcher, discard the mint leaves, and stir in 2 cups of pureed watermelon.

Step 3: Mix in honey or simple sugar syrup to taste. A dash of lemon juice is optional, but it really brightens up the tea. 

Step 4: Pour the chilled watermelon iced tea in a glass, garnish with mint leaves, and serve!

Watermelon Iced Tea cold brewed

Moe easy summer beverage recipes

  • Peach Iced Tea
  • Blue Pea Flower Tea
  • Vietnamese Iced Coffee
  • Mixed Berry Smoothie
  • Mango Matcha Latte

Half the joy of cooking is sharing it with others. That’s why I’m always eager to hear from you. So go right ahead & drop a comment or reach out on Instagram, Pinterest, YouTube, or Facebook. I hope you love this Watermelon Iced Tea as much as we do!

📖 Recipe

Tried this recipe?Let us know how it was!
Watermelon Iced Tea easy cold brewed summer recipe

Watermelon Iced Tea

Natasha Minocha
Watermelon Iced Tea - what a refreshing summer cooler this drink is! Cold brewing the tea makes it so easy and absolutely delicious!
No ratings yet
Print Recipe Pin Recipe
Prep Time 10 minutes mins
Brewing Time 8 hours hrs
Total Time 8 hours hrs 10 minutes mins
Course Drinks
Cuisine World
Servings 6 servings
Calories 16 kcal

Ingredients


  • 4 tsp Broken Orange Pekoe Tea/ Oolong
  • 4 cups Water, room temperature
  • 4-5 Mint leaves
  • 2 cups Watermelon pureed and strained
  • Simple syrup or Honey to taste Simple syrup - combine 1/4 cup sugar and 1/4 cup water in a small saucepan. Bring to a boil,and let the sugar dissolve in the water.
  • 1-2 tbsp Lemon juice Optional
  • Mint for garnish
  • Frozen scoops of watermelon balls for garnish Optional

Instructions
 

  • Stir in the tea in the water. Add the mint leaves. Refrigerate for 8 hours up to a maximum of 12 hours.
  • Strain the tea, discard the mint leaves. Mix in the fresh watermelon puree. Add honey or simple syrup to taste. Stir in some lemon juice if you like.
  • Garnish with mint and some frozen watermelon balls. Serve chilled. Enjoy!

Nutrition

Serving: 1 ServingCalories: 16kcalCarbohydrates: 4gProtein: 0.3gFat: 0.1gSaturated Fat: 0.01gPolyunsaturated Fat: 0.03gMonounsaturated Fat: 0.02gSodium: 9mgPotassium: 65mgFiber: 0.3gSugar: 3gVitamin A: 321IUVitamin C: 5mgCalcium: 10mgIron: 0.2mg
Watermelon Iced Tea cold brewed

Shakshuka Recipe

May 20, 2019

Shakshuka easy egg dish brunch

Eggs have never looked better! This easy Shakshuka recipe guarantees love at first bite! This is an easy one-pan dish that features vegetables and eggs cooked in a hearty tomato sauce. A delicious, wholesome dish that's great for brunch or dinner!

Shakshuka easy egg dish brunch

We reached a bit of a vegetable saturation at home the other day. There were too many consecutive veggie dishes, and my carnivorous family was not pleased! But then those very same vegetables were transformed into Shakshuka (with the help of some eggs), and happiness returned to our table!

If you are new to Shakshuka, it’s a traditional North African and Middle Eastern dish of poached eggs cooked in a tomato-vegetable sauce. Served with some lovely bread, like my copycat Olive Garden bread sticks to mop up that sauce, it's impossible to not love this healthy and hearty dish.

Shakshuka easy egg dish brunch

Shakshuka is a one-skillet dish and is fabulously simple! Your everyday ingredients are the stars here – tomatoes, onions, bell peppers, and eggs. The rest is up to you to season and change according to your taste!

In my version, my easy tomato sauce came in handy. It's got plenty of garlic and oregano, which takes care of most of the seasoning. I added a little bit of cumin and chili flakes. A generous amount of red and yellow peppers, along with some homegrown purslane, made it veggie-loaded, and so more wholesome and nutritious!

Shakshuka easy egg dish brunch

A sprinkling of feta cheese gives you delicious creamy bites that make this recipe even better. The eggs are easy enough to incorporate. All it takes is creating little indents in the stew and adding them in.

The result is a gorgeous dish that will leave everyone with happy bellies! It’s a versatile meal that can be enjoyed at any time and is so comforting with its rustic, classic flavors.

Half the joy of cooking is sharing it with others. That’s why I’m always eager to hear from you. So go right ahead & drop a comment or reach out on Instagram, Pinterest, YouTube, or Facebook. I hope you love this Shakshuka recipe as much as we do!

📖 Recipe

Tried this recipe?Let us know how it was!
A cast iron pan with tomato sauce and cooked eggs with ingredients around.

Shakshuka Recipe

Natasha Minocha
Eggs have never looked better, this easy Shakshuka recipe guarantees love at first bite! Its absolutely wonderful for a weekend brunch or even dinner.
No ratings yet
Print Recipe Pin Recipe
Prep Time 15 minutes mins
Cook Time 20 minutes mins
Course Main Course
Cuisine Middle Eastern
Servings 2 Servings
Calories 205 kcal

Ingredients
  

  • 1.5 tsp Olive oil
  • 1/2 tsp Cumin seeds
  • 1 cup Tomato sauce
  • 1/2 Yellow pepper, diced
  • 1/2 Red pepper, diced
  • 1 cup Purslane, chopped You can use spinach or kale as well
  • 1/2 tsp Cumin powder
  • 1 tsp Chilli flakes Add more if you prefer
  • Salt & Pepper to taste
  • 4 Eggs
  • Feta cheese crumbled, roasted pine nuts , Fresh Cilantro for sprinkling on top

Instructions
 

  • Heat the olive oil in a cast iron skillet. Add the cumin seeds.
  • Add the bell peppers and cook for a couple minutes. Now stir in the tomato sauce.
  • Mix in the cumin powder, chilli flakes, salt and pepper. Cook for another 2-3 minutes.
  • Stir in the chopped purslane and let it all cook and thicken, about 4-5 minutes.
  • Create little wells or indentations in the sauce and gently crack the eggs into the sauce. Make sure the eggs are evenly spaced.
  • Cover the pan till the eggs are almost cooked. Now place the skillet under the broiler for 2-3 minutes to finish the eggs. You may finish cooking them on the stove top too.
  • Sprinkle the feta cheese on the hot eggs immediately and serve with cilantro and nuts on top. Eat warm with hot buttered toast. Enjoy!

Nutrition

Serving: 1 ServingCalories: 205kcalCarbohydrates: 12gProtein: 13gFat: 12gSaturated Fat: 3gPolyunsaturated Fat: 2gMonounsaturated Fat: 6gTrans Fat: 0.04gCholesterol: 327mgSodium: 734mgPotassium: 654mgFiber: 3gSugar: 6gVitamin A: 2313IUVitamin C: 101mgCalcium: 85mgIron: 4mg


Tahini Chocolate Chip Cookies Done Right

May 15, 2019

Chocolate Chip Tahini Cookies vegan eggless easy recipe

These delectable one-bowl tahini chocolate chip cookies are easily one of the best cookies I’ve ever made. Soft, chewy, slightly crispy, and oozing chocolate, they are out-of-this-world good!

Chocolate Chip Tahini Cookies done right

I thought I couldn’t possibly love chocolate chip cookies anymore. Flour, sugar, butter, and pools of chocolate—does it get better than that?

Apparently, it does. 

All it took was turning them into tahini desserts. I simply added tahini to the regular chocolate chip cookie recipe, and within minutes of coming out of the oven, I was 30 cookies down. I think it’s safe to say the whole family is hooked on these chocolate chip cookies with tahini.

[feast_advanced_jump_to]
Chocolate Chip Tahini Cookies vegan eggless easy recipe

What Is Tahini?

For those not familiar with tahini, it is a paste or butter made from sesame seeds. It has a marvelous nutty flavor that’s more of a back note in these cookies. What it really does is give the tahini cookies a wonderfully smooth, buttery texture. So, they stay soft for DAYS.

The soft, buttery paste is more than an incredible source of calcium and iron; it is chock-full of vitamin B1. It's an excellent, healthy food to introduce to your diet.

Chocolate Chip Tahini Cookies vegan eggless easy recipe

Why We Love This Recipe

Soft, chewy, dangerously addictive, and vegan to boot!

The tahini, chocolate, and sea salt make the cookies rich, thick, and so, so moreish!

You bite into bliss. The faintly nutty taste is a sweet surprise that kicks your cookie game up a notch.

Recipe Ingredients

Tahini: It doesn’t have an overwhelming presence. It merely brings a faintly nutty taste, there-but-not-there, to the chocolate chip cookies. It's not too different from adding a few tablespoons of peanut butter. So don’t be hesitant about buying it.

Chocolate: I like to use a mix of chocolate chips and chunks in chocolate chip cookies with tahini. That’s how you get the complete gooey chocolate experience. Be liberal. That said, you can stick to just chunks or chips.

Sea salt: I can’t resist adding a personal touch to any recipe. For these tahini chocolate chip cookies, it is sea salt. The salted tahini chocolate chip cookies recipe is simply next level, truly accentuating the rich chocolate flavor.

Eggs: I left eggs out of the equation to keep the tahini chocolate chip cookies vegan. If you are worried about the loss of taste and texture, don’t. Thanks to all the tahini, these cookies are ready to melt in the mouth as they come out of the oven.

How to Make Tahini Chocolate Chip Cookies

Step 1: In a bowl, sift and mix all the dry ingredients (flour, baking powder, baking soda, salt, and raw sugar).

Step 2: Stir in tahini, milk, coconut oil, and vanilla extract to the dry ingredients.

Step 3: Fold in the chocolate chips or chunks into the tahini chocolate chip cookie dough.

Step 4: Scoop out tablespoon-sized balls using an ice cream scoop or a couple of tablespoons on a silpat or parchment paper-lined tray.

Step 5: Bake for 12–15 minutes, until lightly golden brown.

Step 6: Sprinkle some sea salt on top as soon as the vegan tahini chocolate chip cookies come out of the oven.

Step 7: Let them cool on the baking tray for a few minutes before turning them out on a cooling rack.

Final step: Serve still warm from the oven and savor!

Chocolate Chip Tahini Cookies vegan eggless easy recipe

More Easy Cookie Recipes To Try

  • A plate of chocolate cookies with a glass of milk.
    Eggless Double Chocolate Chip Cookies
  • Family Favorite Oatmeal Raisin Cookies Recipe
    Family Favorite Oatmeal Raisin Cookies Recipe
  • Pumpkin Chocolate Chip Cookies vegan glutenfree baking
    Soft Pumpkin Chocolate Chip Cookies Recipe
  • BEST EVER Eggless Chocolate Chip Cookies Recipe
    Best Ever Eggless Chocolate Chip Cookies Recipe

Half the joy of cooking is sharing it with others. That’s why I’m always eager to hear from you. So go right ahead and drop a comment or reach out on Instagram, Pinterest, YouTube, or Facebook. I hope you love these tahini chocolate chip cookies as much as we do!

📖 Recipe

Tried this recipe?Let us know how it was!
Chocolate Chip Tahini Cookies vegan eggless easy recipe

Chocolate Chip Tahini Cookies

Natasha Minocha
These delectable one-bowl tahini chocolate chip cookies are easily one of the best cookies I’ve ever made. Soft, chewy, slightly crispy, and oozing chocolate, they are out-of-this-world good!
No ratings yet
Print Recipe Pin Recipe
Prep Time 15 minutes mins
Cook Time 15 minutes mins
Total Time 30 minutes mins
Course Cookies, Dessert
Cuisine American
Servings 15 cookies
Calories 192 kcal

Ingredients
  

  • 1 cup Wholewheat flour
  • 3/4 cup All purpose flour
  • 1 tsp Baking powder
  • 1/2 tsp Baking soda
  • 1/8 tsp Salt
  • 1/2 cup + 1 tbsp Raw sugar You can use regular sugar too.
  • 1/3 cup Tahini
  • 1/2 cup scant Almond milk You can use any milk of your choice
  • 1/2 cup Coconut oil, melted
  • 1 tsp Vanilla extract
  • 1/2-3/4 cup Dairy free chocolate or Dark chocolate (70%)
  • Sea salt for sprinkling on top

Instructions
 

  • Preheat your oven to 180C. Line a baking tray with silpat or baking paper.
  • Combine the flours, baking powder, baking soda, salt and raw sugar in a large bowl.
  • Stir in the tahini, milk, coconut oil and vanilla extract.
  • Now mix in the chocolate chips/ chunks. I like to use a mix of both. You can refrigerate the dough at this point for a couple of hours for later use.
  • Scoop out tablespoon sized balls using an ice cream scoop or a couple of tablespoons. Place them at least an inch apart as these cookies will spread.
  • Bake for 12-15 minutes at 180 C until lightly golden brown. Sprinkle some sea salt on top as soon as they come out of the oven.
    Let cool on the baking tray for a few minutes before turning them out on a cooling rack.
    Best eaten warm fresh out of the oven. Enjoy!

Nutrition

Serving: 1 CookieCalories: 192kcalCarbohydrates: 17gProtein: 3gFat: 14gSaturated Fat: 9gPolyunsaturated Fat: 2gMonounsaturated Fat: 3gSodium: 97mgPotassium: 41mgFiber: 1gSugar: 3gVitamin A: 4IUVitamin C: 0.2mgCalcium: 35mgIron: 1mg
Chocolate Chip Tahini Cookies vegan eggless easy recipe

Dutch Baby

May 6, 2019

Dutch Baby Easy Glutenfree Recipe

Best served piping hot, this Dutch Baby is like a pancake pudding – perfect for any occasion! It’s an easy and quick bake, guaranteed fluffy and golden goodness!

Dutch Baby pancake in a cast iron skillet.

Contrary to their name, ‘Dutch Baby’ pancakes have a German and American origin! They are not even the same as Dutch pancakes (pannenkoeken). Also known as Bismark, these pancakes were first found in the USA in the 1900s. The owners of a family restaurant called ‘Manaca’s Café” coined the name, Dutch Baby, for the dish that was of German origin!

Dutch Baby Easy Glutenfree Recipe

I’d compare this delightful treat to a very thick pancake or crepe. By baking it for a few extra minutes, you can get wonderful crispiness on the base as well as around the edges! The crisp contrasted with the soft center, that is perfectly gooey with a generous serving of syrup – making these a new favorite at my place.

Dutch Baby Easy Glutenfree Recipe

I love this recipe for its simplicity. It only requires a few basic ingredients - flour, eggs, sugar, milk, cinnamon, and vanilla. The mixture is then baked for 15-20 minutes. Dutch Babies are traditionally served fresh out of the oven with powdered sugar and syrup. Just leave out the sugar from the recipe and they can also be made savory. The savory ones are excellent with caramelized onion, bacon, cheese, and potatoes – anything you’d enjoy on a crepe!

Dutch Baby Easy Glutenfree Recipe

There is no time of day when Dutch Babies are not welcome! Whether it's made for breakfast, lunch or dinner, this German pancake is a sure shot. One of the few things my entire family agrees upon is breakfast for dinner. Those three words bring harmony and happiness that nothing else can! Since my kids devour pancakes at a rate that almost frightens me, I
attempted to make these a little healthier using buckwheat flour! It does change how the pancakes rise, but I promise they are still delicious. My kids enjoyed them nonetheless, topped with a healthy dose of maple syrup and powdered sugar! The warm Dutch Baby paired beautifully with some fresh mango and blueberries.

Dutch Baby Easy Glutenfree Recipe

Half the joy of cooking is sharing it with others. That’s why I’m always eager to hear from you. So go right ahead & drop a comment or reach out on Instagram, Pinterest, YouTube, or Facebook. I hope you love these apple pancakes as much as we do!

📖 Recipe

Tried this recipe?Let us know how it was!
Dutch Baby pancake in a cast iron skillet.

Dutch Baby

Natasha Minocha
Best served piping hot, this Dutch Baby is like a pancake pudding – perfect for any occasion! It’s an easy & quick bake, guaranteed fluffy & golden goodness!
No ratings yet
Print Recipe Pin Recipe
Prep Time 5 minutes mins
Cook Time 20 minutes mins
Course Breakfast
Cuisine American, German
Servings 2 Servings
Calories 252 kcal

Ingredients
  

  • 1/3 cup Buckwheat flour
  • 1/3 cup Milk
  • 3 Eggs Eggs should be at room temperature
  • 1.5 tsp Sugar
  • 1 tsp Cinnamon powder
  • 1 tsp Vanilla extract
  • 1 Tbsp Butter

Instructions
 

  • Preheat your oven to 220 C. Place an 8" cast iron skillet in the oven. If you don't have an oven proof pan, you can use a baking dish of the same size too.
  • While the oven is getting preheated, blend together the flour, milk, eggs, sugar, vanilla and cinnamon powder in a blender until smooth.
  • Once the oven is preheated, remove the hot skillet carefully from the oven and drop the butter in it. Swirl the pan around to coat the butter all over the base and the sides. Do this carefully as the pan will be very hot.
  • Pour the pancake batter in the pan and put it back in the oven for 15-20 minutes until it's puffy and golden. Serve hot, topped with powdered sugar and fruits. Enjoy!

Nutrition

Serving: 1 ServingCalories: 252kcalCarbohydrates: 21gProtein: 12gFat: 13gSaturated Fat: 6gPolyunsaturated Fat: 2gMonounsaturated Fat: 4gTrans Fat: 0.3gCholesterol: 264mgSodium: 160mgPotassium: 273mgFiber: 3gSugar: 6gVitamin A: 575IUVitamin C: 0.1mgCalcium: 105mgIron: 2mg

Mulberry Sharbat

May 2, 2019

Mulberry Sharbat

A sweet and chilled mulberry sharbat will be your best friend on a hot summer day! With just 3 ingredients, the fruit juice recipe is easy and satisfying and is the best mulberry recipe you'll ever make.

Mulberry Sharbat

This mulberry drink recipe couldn't be easier. All you do is cook the mulberries, salt, and jaggery powder in some water. Blend, strain, refrigerate, and serve chilled. Trust me, a mulberry drink with ice is the much-needed reprieve you need from this boiling heat!

Mulberry Sharbat
[feast_advanced_jump_to]

WHY YOU'LL LOVE MULBERRY FRUIT JUICE?

Quick and easy to make

Perfect for quenching thirst 

A simple everyday refresher and for entertaining

MULBERRY DRINK INGREDIENTS

Water serves as the base for our summer drink and to blend all the ingredients together.

Rock Salt: Often referred to as Himalayan pink salt, it balances the sweetness and tartness of the mulberries, creating a more rounded flavor.

Jaggery Powder: A healthier alternative to refined sugar, it imparts a deep, rich sweetness with a caramel and molasses undertone.

Mulberries: I used juicy purple-black mulberries, which have a wonderful sweetness and tartness.

Mulberry Sharbat

HOW TO MAKE MULBERRY SHARBAT?

Step 1: Rinse the mulberries thoroughly to remove any dirt or debris. You can also remove the stems if desired.

Step 2: Make the base by combining mulberries, rock salt, and jaggery powder in a small saucepan. Add water.

Step 3: Bring the mixture to a boil and let it simmer on low heat for 15 minutes.

Step 4: Cool the mulberry drink mixture to room temperature.

Step 5: Blend it into a smooth consistency—strain it into a pitcher/jar.

Step 6: Let the mulberry sharbat cool in the fridge for a few hours.

Final step: Serve with ice and savor.

Mulberry Sharbat

TOP TIPS FOR INDIAN SHARBAT RECIPE

  • Dilute with water: The sharbat this mulberry fruit recipe makes is concentrated. It’s almost syrupy. Before you serve, add water to the sharbat and ice as per your taste and the texture you want. Feel free to thin it with more water or keep it thick.
  • Adjust Sweetness: Depending on the natural sweetness of your mulberries and your personal preference, you can adjust the amount of jaggery powder. If you like your drinks less sweet, start with a smaller amount and add more to taste.
  • Experiment with Flavors: Feel free to experiment by adding other ingredients, such as a splash of lemon juice for an extra tang, a hint of ginger for a spicy kick, or even some fresh basil leaves for an aromatic twist.
  • Serve fresh: This mulberry drink is best enjoyed fresh. If you need to store it, keep it in the refrigerator and consume it within 1–2 days for optimal taste and freshness.

FAQs

What is sharbat?

Sharbat (also spelled sherbet or sherbat) is a popular drink in India, usually made with fruits or flower petals and served chilled. I like to make the drink with seasonal fruits and natural sweeteners. For those new to Sharbat, this podcast explains beautifully how the refreshing fruit juice is the ancestor of sorbet and sherbet.
I (and most kids in India) grew up drinking a cold glass of sharbat after school during the summers. It never failed to melt away my irritation with the heat. Now, even with my ever-growing arsenal of summer coolers, there is nothing I find more delicious and cooling than a fruit sharbat.

What are mulberry juice benefits?

Nutritionally, mulberries are a powerhouse. They are rich in vitamin K, iron, and antioxidants, which contribute to their health benefits. Fruits and vegetables, like mulberries, that reduce oxidative stress help with:
Anti-aging
Better digestion
Reducing inflammation
Mulberries are also a potent source of vitamin C, which is important for skin health and immunity.

mulberry sharbat ( fruit juice)

So, next time you come across mulberries at a farmer's market or in a grocery store, don’t hesitate to grab a handful to make healthy mulberry recipes. Whether you try a mulberry drink recipe or add them to your morning cereal, the fruit will bring a ton of flavor and health benefits.

MORE MULBERRY FRUIT RECIPES

Mulberry crumble pie

Mulberry smoothie

Mulberry jam

Half the joy of cooking is sharing it with others. That’s why I’m always eager to hear from you. So go right ahead and drop a comment or reach out on Instagram, Pinterest, YouTube, or Facebook. I hope you love this mulberry sharbat as much as we do! 

📖 Recipe

Tried this recipe?Let us know how it was!
Mulberry Sharbat

Mulberry Sharbat ( Fruit Juice)

Natasha Minocha
This sweet and chilled Mulberry Sharbat will be your best friend on a hot summer day! With just 3 ingredients, it is an easy and satisfying recipe!
No ratings yet
Print Recipe Pin Recipe
Prep Time 5 minutes mins
Cook Time 15 minutes mins
Course Drinks
Cuisine Indian
Servings 6 servings
Calories 106 kcal

Ingredients


  • 17 oz Mulberries I used purple and black mulberries
  • 2 cup Water
  • 1/2 cup Jaggery Powder
  • 1 tsp Rock Salt

Instructions
 

  • Combine the mulberries, rock salt, and jaggery powder in a small pan. Add water.
  • Bring the mixture to a boil and let it simmer on low heat for 15 minutes.
  • Let the mixture cool to room temperature, then blend it.
  • Once blended into a smooth consistency, strain the mixture into a pitcher/jar.
  • Cool the strained mixture in the fridge for a few hours. To serve, combine the sharbat/syrup with water and ice per glass, according to taste. Enjoy!

Nutrition

Serving: 1 ServingCalories: 106kcalCarbohydrates: 25gProtein: 1gFat: 0.3gSaturated Fat: 0.02gPolyunsaturated Fat: 0.2gMonounsaturated Fat: 0.03gSodium: 400mgPotassium: 156mgFiber: 1gSugar: 24gVitamin A: 20IUVitamin C: 29mgCalcium: 40mgIron: 2mg
Mulberry Sharbat

Vegan Hot Cross Buns

April 18, 2019

Vegan hot cross buns placed on plate with a napkin on the side.

These vegan hot cross buns have all the classic flavors: sweet cinnamon, cozy spices, and juicy raisins. All without any dairy or eggs. And so much better than the store-bought ones! Soft, lightly golden, and with a little cinnamon honey butter, they’re perfect for Easter brunch or any occasion! 

Hot cross buns stacked up on a plate.

I always find store-bought hot cross buns either too dry, too sweet, or just too doughy. So, I love to bake them at home around Easter. My recipe is vegan, easy, and fills the kitchen with an aroma that’s just irresistibly delicious! And if you’re in the mood for indulgence, make a whole other batch of chocolate hot cross buns!

If you're planning your Easter menu, you'll love these easy Easter recipes!

[feast_advanced_jump_to]

Why You’ll Love This Recipe 

Once you try these, you’ll never need another hot cross bun recipe again. Vegan or not!

Nothing says spring like a batch of warm, fluffy buns fresh from the oven. Just try them slathered with butter, and you'll be hooked!

They’re easy to make. Simple ingredients and step-by-step instructions make the recipe totally doable.

Traditionally made for Easter, but honestly, they’re so good they’re great for any occasion.

Hot Cross Buns Recipe Ingredients

Ingredients for making vegan hot cross buns.

Flour: A mix of all-purpose and whole wheat flour gives these buns the perfect balance of softness and a little heartiness. You can use just all-purpose or whole wheat flour, too.

Yeast makes the dough rise into soft, fluffy buns. I prefer dried active yeast, but instant yeast works just as well. Irrespective of which one you use, always test it before adding to the ingredients. 

Spices: Cinnamon, nutmeg, and clove powder are the perfect trio to make these eggless hot cross buns taste like pure comfort.

Oil keeps the vegan hot cross buns tender and moist. Feel free to use sunflower oil, coconut oil, or even softened butter.

Dried fruits: Typically, hot cross bun recipes have raisins and currants. These classic additions add bursts of sweetness. I soaked my dried currants in warm water to make them plump and juicy. You can use orange juice to add more flavor. Just drain them before you mix them in.

Lemon zest for a hint of brightness. It lifts the taste with a fresh, citrusy twist. I highly recommend adding it.

See the recipe card for full information on ingredients and quantities.

Variations

Flour Paste: The cross in hot buns is piped with a thick paste of flour and water before baking. For a different taste, you can also use cream cheese frosting, lemon icing, or melted white chocolate on the baked buns to make the cross.

Glaze: Most vegan hot cross bun recipes use apricot jam glaze. I prefer maple syrup mixed with warm water. You can also use honey instead.

Addins: Whilst raisins and dried currants are the most popular, you can also add mixed peel or cranberries.

How To Make Vegan Hot Cross Buns

Bubbly yeast and water mixture in a cup.

Step 1: Combine water and yeast in a cup, along with a pinch of sugar. Keep aside for 5-7 minutes till frothy.

Dry ingredients for hot cross buns in a stand mixer bowl.

Step 2: In the bowl of a stand mixer, add all-purpose and wholewheat flours, salt, sugar, lemon zest, cinnamon powder, nutmeg powder, and clove powder. Mix it all well.

Yeast mixture on top of the dry ingredients in a mixer bowl.

Step 3: Add the yeast mixture and oil to the dry ingredients and knead for 2 minutes until all the ingredients come together into a rough, shaggy dough.

Raisins and currants on top of the dough in a stand mixer bowl.

Step 4: Mix in the raisins and currants.

Kneaded hot cross buns dough in a stand mixer bowl.

Step 5: Knead for another 10 minutes till the dough is smooth, slightly sticky to the touch, and clearing the sides of the bowl.

Proofed dough in a glass bowl.

Step 6: Transfer the dough to a lightly greased bowl, cover with cling wrap, and let rise at room temperature until doubled in size. 

 9 dough balls on a parchment-lined tray.

Step 7: Take the dough out on a lightly floured surface and lightly punch it down. Divide the dough into 9 equal-sized pieces. Cover lightly with a tea towel and place in a draft-free warm place to let the double in size.

9 dough balls marked with a flour paste cross on a parchment paper lined tray.

Step 8: Make a thick paste with the flour and water. Transfer to a piping bag, snip off the end, and pipe a cross on each of the buns.

Baked hot cross buns on a paper-liner tray.

Step 9: Bake for about 20 minutes or till the buns are golden brown.

Hot cross buns with glaze.

Step 10: Make a glaze with maple syrup and warm water. Brush it over the buns while they are warm.

Transfer the rolls onto a cooling rack. Allow to cool for 10-15 minutes, and serve them warm!

One hot cross bun halved  on a plate with butter on one half.

Top Tips

  • It's best to use a kitchen scale to measure the ingredients. This ensures better and consistent results.
  • You can soak the raisins and dried currants in orange juice for 30 minutes, then drain and use. This adds another layer of flavor to the buns.
  • Check your yeast before using. Dissolve 1/2 teaspoon with a pinch of sugar in 1/2 a cup of warm water. Leave aside for 5-10 minutes. If the mixture gets bubbly and frothy, your yeast is good to use!
  • The softer and stickier the dough, the better texture your hot cross buns will have. So add extra flour cautiously, you just enough to get the dough to leave the sides of the mixing bowl.
  • Since this dough is quite sticky, its most convenient to use a stand mixer to knead. That said, I have kneaded this dough by hand, too. It does take a bit more time and elbow grease, though!

How To Serve

Freshly baked Easter hot cross buns are best enjoyed warm. Soft, slightly sweet, and full of cozy spices. They are wonderful served for brunch or an afternoon snack! You can slice them in half and spread them with apple butter, strawberry jam, or orange marmalade.

They’re fantastic toasted, with a crisp exterior and a soft, warm center. A pat of butter and a drizzle of honey takes them to the next level! Pair them with a cup of tea, strawberry latte, or hot chocolate.

Hot cross buns stacked up on a plate.

Recipe FAQS

How do I test if yeast is alive?

Before baking these vegan hot cross buns, it’s always a good idea to check if your yeast is active. In a small bowl, stir a pinch of sugar into half a cup of warm water (about 100–110°F). Sprinkle a half teaspoon of yeast and give it a quick stir. Let it sit for 5–10 minutes. 
If the yeast is alive, it will start to bubble and foam. No bubbles? The yeast is probably expired and won’t help your dough rise. Time for a fresh batch!

How long do hot cross buns last?

Freshly baked hot cross buns taste best the day they’re made. They’ll stay soft for up to 2 days. Just store them in an airtight container to keep them from drying out. They’ll last longer in the fridge. Warm them up in the microwave or toaster oven.

Can you freeze vegan hot cross buns?

Hot cross buns freeze beautifully! Store them in a freezer-safe bag or airtight container for a month. When ready to eat, thaw at room temperature or pop them in the oven for a few minutes.

More Easter Treats

  • Simple Chocolate Hot Cross Buns
    Simple Chocolate Hot Cross Buns
  • carrot cake madeleines on a cake stand with a candle and teapot in the background.
    Carrot Cake Madeleines
  • Carrot Cake Cookies with Cream Cheese Frosting
    Carrot Cake Cookies with Cream Cheese Frosting
  • Carrot Cake Baked Oats Recipe
    Carrot Cake Baked Oats Recipe

Half the joy of cooking is sharing it with others. That’s why I’m always eager to hear from you. So go right ahead & drop a comment or reach out on Instagram, Pinterest, YouTube, or Facebook. I hope you love these hot cross buns as much as we do!

📖 Recipe

Tried this recipe?Let us know how it was!
Vegan hot cross buns placed on plate with a napkin on the side.

Vegan Hot Cross Buns

Natasha Minocha
These vegan hot cross buns have all the classic flavors: sweet cinnamon, cozy spices, and juicy raisins. Soft, fluffy, and gorgeously golden, they’re perfect for Easter brunch or any occasion! 
5 from 2 votes
Print Recipe Pin Recipe
Prep Time 2 hours hrs 30 minutes mins
Cook Time 20 minutes mins
Total Time 2 hours hrs 50 minutes mins
Course Bread, Breakfast, Snack
Cuisine British, World
Servings 9 Buns
Calories 218 kcal

Ingredients


  • 1 1/4 cup All purpose flour
  • 1 cup Wholewheat flour
  • 1/4 tsp Salt
  • 1/4 cup Sugar
  • 1 tsp Cinnamon powder
  • 1/4 tsp Nutmeg powder
  • 1/4 tsp Clove powder
  • Zest of 1 lemon
  • 2 tsp Dried active yeast
  • 3/4 cup Water, lukewarm You may need more
  • 3 Tbsp Oil
  • 1/4 cup Raisins
  • 1/4 cup Dried currants Soaked in warm water then drained

Flour Paste

  • 2 tbsp All-purpose flour
  • 2 tbsp Water

Glaze

  • 1 tbsp Maple syrup
  • 2 tsp Hot water

Instructions
 

  • Combine water and yeast in a cup, along with a pinch of sugar. Keep aside for 5-7 minutes till frothy.
    3/4 cup Water, lukewarm, 2 tsp dried active yeast
  • In the bowl of a stand mixer, add both the flours, salt, sugar, lemon zest, cinnamon powder, nutmeg powder, and clove powder.
    Mix well.
    1 1/4 cup All-purpose flour, 1 cup Wholewheat flour, 1/4 tsp Salt, 1/4 cup Sugar,1 tsp Cinnamon powder, 1/4 tsp Nutmeg powder, 1/4 tsp Clove powder, Zest of 1 lemon,
  • Now add the yeast mixture and oil to the dry ingredients and knead for 2 minutes until all the ingredients come together into a shaggy dough.
    Mix in the raisins and currants. Knead for another 10 minutes till the dough is smooth, slightly sticky to the touch, and clearing the sides of the bowl.
    You may need to add some extra flour if the dough is too sticky.
    1/4 cup Raisins, 1/4 cup Dried currants
  • Transfer the dough to a lightly greased bowl, cover with cling wrap, and let rise at room temperature until doubled in size. This will take about 1.5 hours.
  • Keep a baking tray ready, lined with baking/parchment paper. Take the dough out on a lightly floured surface and lightly punch it down.
    Divide the dough into 9 equal-sized pieces.
  • Roll each piece into a ball and place on the tray. Make sure there is space between them to rise.
    Cover lightly with a tea towel and place in a draft-free warm place to let the double in size.
  • Preheat your oven to 190 C / 375 f.
    Make a thick paste with the flour and water. Transfer to a piping bag, snip off the end, and pipe a cross on each of the buns.
    2 tbsp All-purpose flour, 2 tbsp Water
  • Bake for about 20 minutes or till the buns are golden brown. Brush them with the maple syrup glaze while they are hot.
  • Transfer the rolls onto a cooling rack. Allow to cool for 10-15 minutes, and serve them warm. Enjoy!

Glaze

  • Combine the maple syrup and hot water in a small bowl. Use this glaze to brush on the hot buns.
    1 tbsp Maple syrup, 2 tsp Hot water

Video

Notes

  • It's best to use a kitchen scale to measure the ingredients. This ensures better and consistent results.
  • You can soak the raisins and dried currants in orange juice for 30 minutes, then drain and use. This adds another layer of flavor to the buns.
  • Check your yeast before using. Dissolve 1/2 teaspoon with a pinch of sugar in 1/2 a cup of warm water. Leave aside for 5-10 minutes. If the mixture gets bubbly and frothy, your yeast is good to use!
  • The softer and stickier the dough, the better texture your hot cross buns will have. So add extra flour cautiously, you just enough to get the dough to leave the sides of the mixing bowl.
  • Since this dough is quite sticky, its most convenient to use a stand mixer to knead. That said, I have kneaded this dough by hand, too. It does take a bit more time and elbow grease though!

Nutrition

Serving: 1 ServingCalories: 218kcalCarbohydrates: 39gProtein: 4gFat: 5gSaturated Fat: 0.4gPolyunsaturated Fat: 1gMonounsaturated Fat: 3gTrans Fat: 0.02gSodium: 70mgPotassium: 114mgFiber: 2gSugar: 10gVitamin A: 4IUVitamin C: 0.4mgCalcium: 16mgIron: 2mg

Mango Coconut Panna cotta

April 15, 2019

Mango Coconut PannaCotta vegan glutenfree dessert

Mango Coconut Panna Cotta -  A simple, elegant, uncomplicated dessert with a velvety creamy texture that just melts in the mouth!

Mango Coconut PannaCotta vegan glutenfree dessert

It was a call from Foodhall India a couple of weeks ago, inviting me to hold a workshop in their beautiful store. And the theme was Mango Mania! Mango Coconut Panna Cotta is what I zeroed in on. It's a no-fuss, simple recipe. There is no baking, rolling, kneading, nothing really! And the result is a superb-looking, insanely creamy, delicious, and refreshing summer dessert. 

Mango Coconut PannaCotta vegan glutenfree dessert

Panna Cotta is an Italian dessert, that means" cooked cream". Think of creamy jelly, flavored with the King of all fruits - mangoes! It's usually served on little plates, unmoulded from its cup. I prefer to serve in pretty glass dishes, garnished with fruits, and edible flowers.

Mango Coconut Panna Cotta, A vegan & glutenfree dessert.

I wanted to make a vegan mango panna cotta, so I used coconut milk and agar-agar, also known as China Grass. Derived from red algae, agar is a common alternative to gelatin for vegetarians and vegans. It doesn't melt at warm temperatures unlike gelatin and doesn't require refrigeration for the setting. However, for this recipe, I highly recommend refrigeration!

Mango Coconut Panna Cotta, A vegan & glutenfree dessert.

Now to everyone's favorite- Mangoes!  They are one of the most delightful and healthful elements of the Ayurvedic diet. This fruit is rich in vitamins such as vitamin A, vitamin B6, vitamin C, and vitamin E. It thus has antioxidant properties, is good for vision; also helps the body in developing good resistance power, and is good for the heart. It is rich in pre-biotic dietary fiber that aids in digestion. All the reasons to dig into this sweet juicy fruit!

NOTE:

I used Pairi mangoes for this mango panna cotta recipe. They are very sweet, with a tinge of sour, and have a wonderful aroma and flavor. It's best to use them quickly as they don't keep very well.

Mango Coconut PannaCotta vegan glutenfree dessert

I hope this sublime Mango Coconut Panna Cotta makes it to your dessert table this summer! It's a great make-ahead dessert that's sure to please everyone!

Half the joy of cooking is sharing it with others. That’s why I’m always eager to hear from you. So go right ahead & drop a comment or reach out on Instagram, Pinterest, YouTube, or Facebook. I hope you love this mango coconut panna cotta as much as we do!

📖 Recipe

Tried this recipe?Let us know how it was!
Mango Coconut PannaCotta vegan glutenfree dessert

Mango Coconut Panna Cotta

Natasha Minocha
Mango Coconut Panna Cotta -  A simple, elegant, uncomplicated dessert with a velvety creamy texture that just melts in the mouth!
4 from 1 vote
Print Recipe Pin Recipe
Prep Time 10 minutes mins
Cook Time 10 minutes mins
Chilling Time 5 hours hrs
Total Time 5 hours hrs 20 minutes mins
Course Dessert
Cuisine Italian
Servings 6 servings
Calories 231 kcal

Ingredients
  

  • 400 ml Coconut milk, full fat
  • 1/3 cup Sugar You may need to adjust the sugar if your mangoes aren't sweet enough.
  • 2 tsp Agar Agar
  • 300 gms Fresh Mango Puree 2 mangoes
  • 1 tsp Vanilla extract
  • Pomegranates, mango, edible flowers for topping

Instructions
 

  • In a medium-sized saucepan, bring the coconut milk and sugar to a gentle boil.
  • Take off the heat. Whisk in the agar agar.
  • Bring back to a gentle simmer. Pour the mixture through a sieve to ensure there are no lumps.
  • Let the mixture cool for 4-5 minutes and then add mango puree and vanilla extract.
  • Pour into serving bowls and refrigerate to set for 4-5 hours. You can even let it set overnight.
  • Top with fruits, edible flowers, and basil/ mint and serve cold. Enjoy!

Nutrition

Serving: 1 ServingCalories: 231kcalCarbohydrates: 23gProtein: 2gFat: 16gSaturated Fat: 14gPolyunsaturated Fat: 0.2gMonounsaturated Fat: 1gSodium: 11mgPotassium: 263mgFiber: 2gSugar: 20gVitamin A: 541IUVitamin C: 20mgCalcium: 17mgIron: 1mg
Mango Coconut Panna Cotta, A vegan & glutenfree dessert.

Kuttu Aloo Paratha

April 12, 2019

Kuttu Aloo Paratha | vrat ka Khana | Indian fasting food | glutenfree vegetarian healthy recipe

Kuttu Aloo Paratha - another recipe in my Vrat Ka Khana series. A soft, very filling, wholesome paratha/ flatbread which makes for a complete meal. Everyone's favorite aloo paratha made using kuttu/ buckwheat flour, potatoes, and spices gets a gluten-free makeover in this recipe!

Kuttu Aloo Paratha | Vrat ka Khana | Indian fasting food | glutenfree vegetarian healthy recipe

Kuttu flour is derived from buckwheat.  Usually, black buckwheat flour is used to make these Kuttu Aloo Parathas. I used hulled buckwheat as that's what I had at home. It has warming properties hence its consumption with yogurt balances out the warm potency of this food. In fact, in areas of severe cold, it is regularly consumed as it helps in keeping the body warm internally.  

Buckwheat is a  great source of high quality, easily digestible protein, and the eight essential amino acids.  Being gluten-free, it's suitable for those with wheat allergies.  The high content of B vitamin and magnesium in buckwheat promotes cardiovascular health.  Being rich in dietary fiber, it helps control blood sugar, aids in digestion, and building lean muscle mass. Enough reason for us to include kuttu ka atta/buckwheat flour in our daily diet! 

Buckwheat flour spoils easily so it should be bought in small quantities and refrigerated for longer shelf life.

Kuttu Aloo Paratha | vrat ka Khana | Indian fasting food | glutenfree vegetarian healthy recipe

Kuttu aloo parantha is a staple food during fasts. It's delicious and easy enough to be prepared on regular days as well. This dough is excellent for making pooris and rotis too. Kuttu Atta/Buckwheat flour is devoid of gluten so potatoes are used to bind it. Alternatively, arbi / taro root or sweet potatoes may also be used. 

These parathas are quite straightforward to make. I kneaded in a couple of teaspoons of ghee to ensure the parathas stay soft. Plus the flavor it adds is always fabulous! Do make sure the dough isn't too soft, otherwise, you won't be able to roll it out. Its easiest, in my opinion, to roll the dough in between two sheets of parchment or butter paper. Do remember to sprinkle some flour on the paper though!

Kuttu Aloo Paratha | Vrat ka Khana | Indian Fasting Food

These Kuttu Aloo Parathas turned out so soft, flavourful and very scrumptious. The fussy fam, fortunately, lapped them up happily with requests to make more! There you go - Its a winner!!

NOTE:

If making it for fasting, follow the Kutta Aloo Paratha recipe as it is except add sendha namak  (Himalayan rock salt) in place of salt.

Half the joy of cooking is sharing it with others. That’s why I’m always eager to hear from you. So go right ahead & drop a comment or reach out on Instagram, Pinterest, YouTube, or Facebook. I hope you love these kuttu aloo parathas as much as we do!

📖 Recipe

Tried this recipe?Let us know how it was!
Kuttu Aloo Paratha | vrat ka Khana | Indian fasting food | glutenfree vegetarian healthy recipe

Kuttu Aloo Paratha

Natasha Minocha
Everyone's favorite aloo paratha made with a twist! Buckwheat flour, potatoes & spices give a gluten-free makeover in this Kuttu Aloo Paratha recipe!
4.67 from 3 votes
Print Recipe Pin Recipe
Prep Time 30 minutes mins
Cook Time 10 minutes mins
Course Bread, Main Course, Side Dish
Cuisine Indian
Servings 6 Parathas
Calories 182 kcal

Ingredients


  • 1 3/4 cup Buckwheat flour/ Kuttu ka atta You will need a little extra for rolling out the dough
  • 2 small Potatoes, boiled and mashed
  • 1/3 cup Fresh coriander, chopped finely
  • 2-3 Green chilies, finely chopped
  • 1 tsp Ajwain/ carom seeds
  • 3/4 tsp Coriander / dhania powder
  • Salt to taste
  • 1/4 cup Lukewarm water You may need more
  • 1.5 tsp Ghee /oil Plus extra for cooking the parathas

Instructions
 

  • In a large bowl, combine kuttu ka atta ( buckwheat flour), mashed potatoes, fresh coriander, green chillies, ajwain, dhania powder, and salt.
  • Now add water and ghee /oil and knead the dough to make a soft ( but not too soft) pliable dough. The dough comes together quite quickly. Cover with a tea towel and let it rest for 10-15 minutes.
  • Divide the dough into 6-7 balls. Take 2 sheets of parchment/ butter paper. Sprinkle some kuttu ka atta on them. Place a dough ball between the 2 sheets and press the dough with your fingers to flatten it into a disc.
  • Carefully lift it off the paper and cook on a hot griddle / tava with a little bit of ghee /oil on both sides of the paratha. Once the paratha is golden brown on both sides, it's ready.
  • Continue with the remaining dough. Serve warm with yogurt. Enjoy!

Nutrition

Serving: 1 ServingCalories: 182kcalCarbohydrates: 36gProtein: 6gFat: 3gSaturated Fat: 1gPolyunsaturated Fat: 0.4gMonounsaturated Fat: 1gCholesterol: 3mgSodium: 58mgPotassium: 451mgFiber: 6gSugar: 2gVitamin A: 62IUVitamin C: 13mgCalcium: 24mgIron: 2mg

Raw Banana & Millet Cutlets

April 10, 2019

Raw Banana & Millet Cutlet vrat ka khana Indian fasting food vegan glutenfree healthy recipe

Continuing with my Vrat ka Khana series, here are Raw Banana & Millet Cutlets. So easy to put together, healthy, and delectable, these are a treat whether you're fasting or not!

Raw Banana & Millet Cutlet vrat ka khana Indian fasting food vegan glutenfree healthy recipe

For this  Raw Banana & Millet Cutlets recipe, I used homegrown raw bananas/ plantains/ kacche Kele and Sama ke chawal, also known as Barnyard millet.

Raw bananas are close relatives of bananas, but starchier and have low sugar content. They are a fabulous cooking ingredient - from chips to curries, they can be baked, grilled, or roasted.  They are a great source of potassium hence helping in regulating high blood pressure, and lowering the risk of stroke and osteoporosis. Being rich in fiber, raw bananas also aid in better digestion and controlling blood sugar levels.

Raw Banana & Millet Cutlets vrat ka khana Indian fasting food vegan glutenfree healthy recipe

Barnyard millet ( sama ke chawal) is a popular, healthy alternative for rice during Navratri fasting. This millet is a nutritionally dense food, low in carbohydrates, and high in digestible protein and fiber. It's a good source of iron and is gluten-free, making it ideal for people with gluten allergies. And it's a wonderful grain to add to your everyday diet.

Raw Banana & Millet Cutlets vrat ka khana Indian fasting food vegan glutenfree healthy recipe

How Can I Make These Cutlets

Back to the recipe, this is a simple one. The only bit of prep work is in pressure cooking the raw bananas and cooking the millets.

Barnyard millet cooks rather fast. I cook them in a pan like rice. The cooked grains are sticky and a bit soggy. This helps bind the mashed raw bananas very well.

These cutlets are flavored simply with regular spices from your masala box, green chilies, and loads of fresh coriander and coated with crushed peanuts. This coating makes them so crunchy and adds another dimension to the flavor profile.

Raw Banana & Millet Cutlet vrat ka khana Indian fasting food vegan glutenfree healthy recipe

Served with a spicy green coriander mint green chutney these raw banana & millet cutlets are perfect for any time snacking -  crunchy, hearty, healthy, and satiating.

My kids love these, as a meal - served smashed on top of rotis/ flatbreads, smothered with chutney or ketchup, and rolled up... Indianised taco, if you please!

Raw Banana & Millet Cutlets vrat ka khana Indian fasting food vegan glutenfree healthy recipe

NOTE:

If making it for fasting, follow the Raw Banana & Millet Cutlet recipe as it is except add sendha namak  (Himalayan rock salt) in place of salt.

Here Are Some More Millet Recipes For You To Try

Spicy Millet Stuffed Tomatoes

Sweet Potato Millet Cutlets

Lentil Millet Salad

Half the joy of cooking is sharing it with others. That’s why I’m always eager to hear from you. So go right ahead and drop a comment or reach out on Instagram, Pinterest, YouTube, or Facebook. I hope you love these raw banana and millet cutlets as much as we do!

📖 Recipe

Tried this recipe?Let us know how it was!
Raw Banana & Millet Cutlet vrat ka khana Indian fasting food vegan glutenfree healthy recipe

Raw Banana & Millet Cutlets

Natasha Minocha
Raw Banana & Millet Cutlets. So easy to put together, healthy, crunchy, hearty and delectable, these are a treat whether you're fasting or not!
No ratings yet
Print Recipe Pin Recipe
Prep Time 25 minutes mins
Cook Time 20 minutes mins
Total Time 45 minutes mins
Course Appetizer, Side Dish, Snack
Cuisine Indian
Servings 12 Cutlets
Calories 175 kcal

Ingredients
  

  • 6 small Raw Bananas/ Plantains
  • 1 cup Barnyard millet/ Sama ke chawal, cooked
  • 3/4 tsp Salt
  • 1 tsp Garam Masala
  • 1 tsp Coriander
  • 1 tsp Cumin powder
  • 1 -1.5 tsp Chaat masala
  • 2-3 Green chilies, finely chopped
  • Hefty handful of fresh coriander/ cilantro, chopped
  • 1/3 cup Crushed peanuts
  • Oil for pan frying

Instructions
 

  • Pressure cook the raw bananas, with their skin on, till very soft. Cool a bit, peel and mash them.
  • Add the cooked millets and all the spices, green chilies, and coriander to the mashed raw bananas. Mix it all very well. Taste and adjust for seasoning.
  • Form into 12 equal sized balls, roll in crushed peanuts. Press them slightly to flatten them.
  • Heat oil in a pan and cook the cutlets for 6-8 minutes each side till crispy and browned on both sides, Serve hot with any chutney/ sauce of your choice. Enjoy!

Nutrition

Serving: 1CutletCalories: 175kcalCarbohydrates: 42gProtein: 3gFat: 1gSaturated Fat: 0.004gPolyunsaturated Fat: 0.01gMonounsaturated Fat: 0.05gSodium: 175mgPotassium: 441mgFiber: 2gSugar: 16gVitamin A: 1013IUVitamin C: 17mgCalcium: 10mgIron: 2mg

Sweet Potato Gnocchi

April 1, 2019

Sweet Potato Gnocchi Glutenfree Eggless Healthy Recipe

I made gnocchi! Sweet Potato Gnocchi! And it turned out delicious, soft, and pillowy, even though it's gluten-free and eggless. One more item ticked off my bucket list!!

Sweet Potato Gnocchi Glutenfree Eggless Healthy Recipe

Gnocchi has been on my mind for a long long while, yet this recipe came about quite accidentally. Last week I somehow managed to overcook my sweet potatoes while roasting them.  Since I just can't waste food, one look at the sorry veggies got me mashing them and mixing them in the flour in no time!

As I was in the full experimental mood, I decided to go with buckwheat flour and leave out the egg, though they were kept handy on standby mode.

Sweet Potato Gnocchi Glutenfree Eggless Healthy Recipe

The dough for this Sweet Potato Gnocchi came together fairly quickly and pretty well. I did need to add some extra flour for binding it....my sweet potatoes were quite wet! A bit of freshly grated parmesan cheese, a spoonful of turmeric ( more for colour), a pinch of nutmeg and some salt was all that went in. Easy and simple.

Sweet Potato Gnocchi Glutenfree Eggless Healthy Recipe

Gnocchi simply put,  is an Italian dumpling, traditionally made with potatoes, flour, and egg. A lot of the recipes use cheese too, especially Ricotta. Soft and plump, these babies cook up in no time.  Once cooked, you can plonk them straight into any sauce of your choice.

Sweet Potato Gnocchi Glutenfree Eggless Healthy Recipe

Be it a light  Tomato Sauce or any meaty sauce. They are wonderful tossed simply with browned butter and sage too. The ridges on the gnocchi ( made with the tines of a fork) help in making the sauce adhere to the surface.  I went with a really easy and quick white wine sauce. Needless to say, this Sweet Potato Gnocchi dish was a winner at home! And I can't wait to make more meals with this gnocchi!

Sweet Potato Gnocchi Glutenfree Eggless Healthy Recipe

Half the joy of cooking is sharing it with others. That’s why I’m always eager to hear from you. So go right ahead and drop a comment or reach out on Instagram, Pinterest, YouTube, or Facebook. I hope you love this sweet potato gnocchi as much as we do!

📖 Recipe

Tried this recipe?Let us know how it was!
Sweet Potato Gnocchi Glutenfree Eggless Healthy Recipe

Sweet Potato Gnocchi

Natasha Minocha
Sweet Potato Gnocchi! So delicious, soft and pillowy, even though it's glutenfree and eggless. Absolutely wonderful with a creamy white wine sauce!
No ratings yet
Print Recipe Pin Recipe
Prep Time 1 hour hr 30 minutes mins
Cook Time 30 minutes mins
Total Time 2 hours hrs
Course Main Course
Cuisine Italian
Servings 6 Servings
Calories 280 kcal

Ingredients
  

Sweet Potato Gnocchi

  • 1.5 cups Buckwheat flour You can use all-purpose flour.
  • 3 Sweet Potatoes, scrubbed clean
  • 1/4 tsp Nutmeg, freshly grated
  • 1 tsp Turmeric powder
  • 3/4 tsp Salt
  • 2 tbsp Parmesan cheese, freshly grated

White Wine Sauce

  • 1 Tbsp Butter
  • 2 Tbsp Extra virgin Olive oil
  • 2-3 cloves Garlic, finely minced
  • 1.5 tsp All-purpose flour or arrowroot flour
  • 1/3-1/2 cup White wine
  • Salt & Pepper to taste
  • Fresh herbs and nuts for topping

Instructions
 

Sweet Potato Gnocchi

  • Preheat your oven to 200 C. Prick the sweet potatoes all over with a fork, wrap them in foil, and bake for about 35-40 minutes, until cooked through and soft.
  • Let the sweet potatoes cool. Then scoop the flesh out and mash well. Combine with the flour, turmeric, salt and nutmeg.
  • Use a fork to pull all the ingredients together. Once you have a scraggy, moistened dough, use your hands to gently knead it. Don't overwork the dough. You may need to add more flour if your dough is too sticky.
  • Once the dough is easy to handle, form it into a disc. Cut into quarters.
  • Roll each portion into a long rope. Cut into small bite sized pieces. This is your gnocchi.
  • You can roll it over the tines of a fork to get ridges. Your gnocchi is ready to cook.
  • Bring a large pot of water to boil. Add salt to it. Drop your gnocchi, when it comes up to the surface, it's ready. Remove with a slotted spoon, drain, and mix into any sauce of your choice.
    Serve immediately. Enjoy!

White Wine Sauce

  • In a saucepan, heat the butter and olive oil. Add the finely minced garlic. Cook for 30 seconds. Add the flour, whisk well for 1 minute. Add the white wine. Let it come to a gentle boil, keep whisking it to prevent any lumps from forming.
  • Add salt and pepper to taste. Add some of the starchy gnocchi cooking liquid to loosen the sauce a bit. Add the gnocchi, cook for a couple minutes and toss with some fresh herbs. Sprinkle some nuts on top and serve immediately.

Notes

NOTE:
You can freeze the gnocchi at this point for later use. Toss lightly with olive oil, spread them out evenly on a tray and freeze. Once frozen, transfer to a freezer safe container.

Nutrition

Serving: 1 ServingCalories: 280kcalCarbohydrates: 46gProtein: 6gFat: 8gSaturated Fat: 2gPolyunsaturated Fat: 1gMonounsaturated Fat: 4gTrans Fat: 0.1gCholesterol: 6mgSodium: 399mgPotassium: 581mgFiber: 7gSugar: 6gVitamin A: 16103IUVitamin C: 3mgCalcium: 71mgIron: 2mg

Cheesy Bubble Bread

March 22, 2019

Cheesy bubble bread in a baking dish.

Soft and fluffy, this homemade cheesy bubble bread is fun to make and eat! It comes together easily, with simple pantry staples. The buttery, herby bubble bread, baked to golden perfection, is the ultimate crowd-pleasing snack or side.

Cheesy Bubble Bread easy wholegrain baking

I love baking breads that are fun to pull apart and share, like my pull-apart garlic bread or pizza pull-apart bread. This cheesy bubble bread is a simpler take on those favorites. Each little ball of dough is soft, fluffy, and filled with gooey melted cheese. The recipe is wonderfully forgiving, and the result is a warm, pillowy loaf that’s perfect for tearing into at the table!

[feast_advanced_jump_to]

Why You’ll Love This Recipe

✨ Cheese bubble bread recipe is the one you’ll want to serve at every gathering. This is the kind of bake that disappears faster than you can say “just one more piece.”

✨ The versatile bread gives you endless scope to play around with flavors, making it a fun kitchen project to do with kids, too.  They can pick their fillings and toppings, roll the dough, do the dipping and layering!

✨ It’s a total crowd-pleaser. Perfect for game day snacks, family dinners, or holiday spreads - as an appetizer, a side to your mains, or an anytime snack.  

✨ It pairs beautifully with everything. Serve it with marinara or pizza tomato sauce for dipping, alongside a hearty barley soup with beans, with a fresh salad, or simply on its own (because honestly, cheesy bubble bread is that good).

Reader Love ❤️


5 stars

Made this today with olive oil instead of butter and using parmesan cheese. Turned out SO good, we're addicted to it! Will add some more cheese next time since we like extra - Joshua

Cheese Bubble Bread Ingredients

labelled ingredients for making cheese bubble bread.

Flour: I love using all-purpose flour for the soft, light crumb. You can swap in whole wheat flour. Bread flour will give you a chewier and fluffier loaf.

Yeast: Active dry yeast or instant yeast, either works to give the bread its rise. Ensure it’s active before adding it to the ingredients. Mix it in warm water. Think “baby’s bath” warm, not hot (about 40°C/105°F) so you don’t kill the yeast.

Oil: Olive oil makes the bread rich. You can use melted butter, too.

Cheese: I used cheddar for its sharp, melty goodness, but any hard cheese will do. Parmesan, Gouda, or even pepper jack would be fantastic.

Seasoning: Black pepper for gentle heat and Italian seasoning for a fragrant mix of herbs.

Butter to dip each dough ball before baking. Salted butter wins on taste for me.

Please see the recipe below for full information about the ingredients and quantities.

Variations

One of the best things about cheesy bubble bread is how endlessly customizable it is.

  • Cheese options: Go for mozzarella if you’re chasing that epic cheese pull, cheddar for sharpness, gouda for smokiness, or mix and match for a rich, complex flavor profile.
  • More flavor: Swirl in garlic butter, toss in fresh herbs, or sprinkle a pinch of chili flakes for a little kick.
  • Mix-ins: Knead in bacon bits, caramelized onions, finely chopped olives, jalapenos, or even sun-dried tomatoes
  • Once you’ve dipped the dough balls in butter, you can sprinkle on any topping you like - sesame seeds, extra cheese, chopped herbs, and make it your own.
  • Or make a sweet version of bubble bread like I did with my cinnamon monkey bread.

How To Make Bubble Bread

Bubbly yeast mixture in a cup.

Step 1: Stir yeast and sugar into warm water. Let it sit 5–10 minutes until foamy.

Flour, oil, yeast mixture in a bowl.

Step 2: In a large bowl, combine the flour, pepper, and salt. Pour the yeast mixture and olive oil into the dry mix. Stir with a wooden spoon or a spatula until a rough dough forms.

Kneaded bread dough in a bowl.

Step 3: Knead the dough by hand for 10-12 minutes or in a stand mixer for 8-10 minutes until smooth, elastic, and slightly sticky.

Proofed dough in a bowl.

Step 4: Shape the dough into a ball and place it in a lightly oiled bowl. Cover and let rise in a warm, draft-free spot until doubled, about 1 or 1½ hours.

Shredded cheese on bread dough.

Step 5: Punch the dough down. Turn it out and gently knead in shredded cheese until evenly distributed. Let rest, covered, for 15 minutes.

Bread dough rolled into small balls on a silicone mat.

Step 6: Break the cheesy bubble bread dough into 1.5" pieces. Roll each piece into a smooth ball. I made about 24 balls. You can make smaller 1" balls too.

Step 7: Meanwhile, grease an 8" × 4" loaf pan or casserole. Put melted butter in one bowl and Italian seasoning in another.

A dough ball dipped in melted butter.

Step 7: Grease an 8" × 4" loaf pan or baking dish. Combine melted butter and Italian seasoning in a small bowl. Dip each ball in the melted butter mixture.

Bread dough balls in a red baking dish.

Step 8: Place the balls snugly in the prepared pan.

Proofed bread dough in a red baking dish.

Step 9: Cover the pan and let the dough rise again in a warm spot for 45 to 50 minutes, until the loaf has roughly doubled.

Bubble bread in a baking dish.

Step 10: Bake the loaf in a preheated oven for 40 to 45 minutes until the top is golden. Allow the bread to cool for at least 1 hour, then dig in!

Pro Tips

  • Avoid adding too much extra flour. The dough should be soft, supple, and slightly tacky to the touch.
  • Mix the shredded cheese gently into the dough. You can fold it in by stretching the dough out and folding it over the cheese. Do this 2-3 times until the cheese is evenly dispersed in the dough.
  • I made about 24 dough balls, approximately 1.5" in size. You can make them smaller, 1" in size, or even smaller. The smaller the dough balls, the more "bubbly" your baked bread will look!
  • Brush the warm bread with melted butter or olive oil for extra sheen and flavor!
  • Please use a kitchen scale to measure the ingredients for better and consistent results.
A piece bread in a hand.

How To Store

This cheesy bubble bread is best enjoyed fresh from the oven when it's all nice and warm, gooey, and soft! Store the leftovers in an airtight container or wrapped well in foil for 2-3 days. Reheat in the microwave or toaster oven to refresh the texture.

For longer storage, keep in the refrigerator for up to 4 days. Or freeze the cooled bread for 1 month. Thaw in the fridge and warm in the oven.

How To Serve

This delicious cheesy bread is so so good on its own! But you can also serve it as an appetizer along with a simple tomato sauce, pistachio pesto, Yum Yum sauce, or whipped goat cheese dip!

It's fabulous served with stews and curries, like my Moroccan vegetable stew and spicy keema curry.

Serve it with a soup, like my creamy pumpkin soup and pea soup, for a light and comforting meal. Add a smashed chickpea salad or Italian tortellini salad to make the meal heartier.

Bubble bread in a red casserole dish.

Recipe FAQs

What is bubble bread?

Bubble bread is a type of pull-apart bread made by cutting bread dough into bite-sized pieces, piling them together, and baking. Each piece is soft, fluffy, and easy to pull apart with your fingers.

Bubble bread vs monkey bread: what’s the difference?

Don’t confuse this cheesy bubble bread with monkey bread. While they’re similar, they are not the same. Monkey breads are usually sweet and are baked in bundt pans. Bubble breads are usually savory, though they can be sweet too. They are usually baked in loaf pans, cake tins, or casserole dishes.

More Bread Recipes

  • Easy Olive Bread
    Easy Olive Bread
  • Sliced bread with butter and jam on a wooden board.
    Easy Everyday Bread
  • Tiger Bread Recipe | Dutch Crunch Bread
    Tiger Bread Recipe
  • Braided pesto bread on parchment paper with ingredients around.
    Braided Pesto Bread

Half the joy of cooking is sharing it with others. That’s why I’m always eager to hear from you. So go right ahead & drop a comment or reach out on Instagram, Pinterest, YouTube, or Facebook. I hope you love this cheesy bubble bread as much as we do!

📖 Recipe

Tried this recipe?Let us know how it was!
Cheesy bubble bread in a baking dish.

Cheesy Bubble Bread

Natasha Minocha
Fun, easy, and versatile, this soft and flavorful cheesy bubble bread is perfect for snacking and easy entertaining! It's a total crowd pleaser!
5 from 1 vote
Print Recipe Pin Recipe
Prep Time 20 minutes mins
Cook Time 45 minutes mins
Proofing Time 3 hours hrs
Total Time 4 hours hrs 5 minutes mins
Course Appetizer, Bread, Side Dish, Snack
Cuisine American
Servings 8 Servings
Calories 164 kcal

Ingredients


  • 1.5 tsp Active dry yeast
  • 1 tsp Sugar
  • 1/2 cup Water, warm
  • 1.5 cup All-purpose flour
  • 1/2 tsp Salt
  • 1 Tbsp Black pepper, coarsely ground
  • 1 Tbsp Extra virgin Olive oil
  • 1/2 cup Shredded cheese I used cheddar cheese
  • 2 Tbsp Butter, melted You can also use olive oil
  • 2 Tbsp Italian seasoning You can use any herbs /seeds/spices of your choice

Instructions
 

  • Stir the yeast and sugar in the warm water. Keep aside for 5-10 minutes till bubbly.
    1.5 tsp Active dry yeast, 1 tsp Sugar, 1/2 cup Water, warm
  • Combine flour, pepper, and salt in the bowl of a stand mixer.
    Add the yeast mixture and oil, stir with a spatula or a wooden spoon until a rough dough forms.
    1.5 cup All-purpose flour, 1/2 tsp Salt, 1 Tbsp Black pepper, coarsely ground
    1 Tbsp Extra virgin Olive oil
  • Knead the dough in your stand mixer for 8-10 minutes until the dough is soft, smooth, and a little sticky.
    You can also knead the dough by hand. Flour your work surface well, turn out the shaggy dough onto it. Knead it till it's smooth and elastic, for about 10-12 minutes.
  • Form the dough into a ball and transfer to a lightly oiled bowl. Cover and leave the dough to rise in a warm, draft-free spot until it doubles, 1 -1.5 hours
  • Punch down the dough and turn it out on a floured surface. Fold the shredded cheese till well distributed.
    Let rest, covered, for 15 minutes.
    1/2 cup Shredded cheese
  • Grease an 8"x 4" loaf pan or baking dish.
  • Combine melted butter and Italian seasoning in a bowl. The Italian seasoning in another bowl.
    2 Tbsp Butter, melted, 2 Tbsp Italian seasoning
  • Break the dough into small 1.5" pieces, and roll into balls. Once all the dough has been used up, dip each ball in the melted butter mixture.
    Place in the prepared dish. Cover with a towel and let them rise in a draft-free spot for 45-50 minutes until the loaf has doubled in size.
  • While the bread dough is rising, preheat your oven to 220 C/ 430 F.
    Once the dough has doubled in size, bake for 35-40 minutes until the top is golden.
  • If the bread is browning too fast, cover loosely with a piece of foil.
  • Let the bread cool for at least an hour before serving. Serve the bread in your baking dish or turn it out on a cooling rack. Enjoy warm!

Video

Notes

  • Avoid adding too much extra flour. The dough should be soft, supple, and slightly tacky to the touch.
  • Mix the shredded cheese gently into the dough. You can fold it in by stretching the dough out and folding it over the cheese. Do this 2-3 times until the cheese is evenly dispersed in the dough.
  • I made about 24 dough balls, approximately 1.5" in size. You can make them smaller, 1" in size, or even smaller. The smaller the dough balls, the more "bubbly" your baked bread will look!
  • Brush the warm bread with melted butter or olive oil for extra sheen and flavor!
  • Please use a kitchen scale to measure the ingredients for better and consistent results.
  • If the bread is browning too fast, cover loosely with a piece of foil.
 

Nutrition

Serving: 1 ServingCalories: 164kcalCarbohydrates: 20gProtein: 5gFat: 7gSaturated Fat: 3gPolyunsaturated Fat: 0.5gMonounsaturated Fat: 3gTrans Fat: 0.1gCholesterol: 15mgSodium: 217mgPotassium: 63mgFiber: 2gSugar: 0.4gVitamin A: 185IUVitamin C: 0.03mgCalcium: 79mgIron: 2mg

Orange Muffins

February 27, 2019

Muffins topped with chocolate chips on a white tray with a candle and oranges around.

Bright, citrusy, and so moist, these orange muffins are full of fresh orange zest, orange juice, candied oranges, and delicious dark chocolate! Perfect with morning coffee or as an afternoon pick-me-up, the eggless muffins come together in about 30 minutes with simple ingredients.

Delicious quinoa orange muffins with chocolate chips, perfect for a healthy breakfast or snack.

Made with wholewheat flour, these easy orange muffins are soft, fluffy, and so wholesome. And the combination of orange and chocolate? Chef's kiss. The slight bitterness against the bright citrus is so addictive! 

If you love baking with oranges as much as I do, you’ll also enjoy my orange upside-down cake, orange Basque cheesecake, and orange brioche rolls.

[feast_advanced_jump_to]

Why You’ll Love This Recipe

✨ Simple to make, the recipe is eggless, and the muffins turn out soft and moist. Thanks to the combination of orange juice and oil, these vegan muffins remain tender for days.

✨ You’ll also love how adaptable these orange and dark chocolate muffins are. I’ve made them with a mix of whole-wheat and quinoa flours, with all-purpose flour… all variations are just delightful!

✨ This orange muffin recipe also hits the balance of wholesome and “definitely a treat." The mix of zest, juice, and chewy bits of candied orange gives it maximum flavor.

Orange Chocolate Muffins Ingredients

Labelled ingredients for making orange muffins.

Flour: I use whole wheat flour. It gives the muffins structure and a slightly nutty flavor. You can swap with all-purpose flour. To make gluten-free orange muffins, use your preferred gluten-free flour.

Fresh Oranges: You’ll need the zest and the juice for that lovely citrusy flavor!

Sugar: Regular granulated sugar works well. But feel free to swap with raw sugar or cane sugar.

Coconut oil: I prefer oil over melted butter here because it keeps the muffins moist and soft.

Flax egg: Mix 1 tablespoon flaxseed powder with 3 tablespoons water. Let it sit for 5 minutes until gelatinous.

Milk: You can use any milk (dairy, oat milk, or cashew milk). I used homemade almond milk for this recipe.

Chocolate: I prefer dark chocolate chips - 55% or 70%. These are what make orange chocolate chip muffins completely irresistible!

Candied oranges are totally optional but highly recommended. I love using my homemade candied orange slices chopped into small bits. They add a chewy texture and so much flavor. You can, of course, just buy them off the shelf.

Walnuts: Chopped small for a little nutty crunch. This is also optional, but I love the texture it adds. You can add cashews, hazelnuts, almonds, or even pecans.

Please see the recipe card below for full information about the ingredients and quantities.

Variations

These orange and chocolate chip muffins are endlessly customizable.

  • A combination that everyone loves is orange and cranberries. It’s a match made in heaven, just like in my orange cranberry bread. Use fresh or dried cranberries.
  • Fresh blueberries are another fantastic option.
  • Add vanilla extract for an extra layer of warm, cozy flavor.
  • Boost the orange flavor by adding a few drops of orange extract, especially if you don’t have enough fresh juice or just want a more intense citrus punch.
  • Poppy seeds are a classic with citrus baked goods. You can take inspiration from my lemon poppy seed bread and add a tablespoon of poppy seeds to the batter.
  • Make chocolate and orange muffins by adding cocoa powder, as I did with my chocolate pumpkin swirl muffins.

How To Make Orange Muffins

Recipe Video

Step-By-Step Instructions

Mixture of water and flaxmeal in a small bowl.

Step 1: Combine flaxseed powder and water in a small bowl. Set aside for 5 minutes until thick and gelatinous.

Mixture of orange zest and sugar in a bowl.

Step 2: Mix the sugar and orange zest in a bowl with your fingertips.

Dry ingredients for making muffins in a bowl.

Step 3: Sift together the flour, baking powder, baking soda, and salt into a large bowl. Whisk in the orange-sugar.

Wet ingredients for making muffins in a glass measuring cup.

Step 4: In another bowl, mix the flax egg, milk, oil, and orange juice.

Batter for muffins in a mixing bowl.

Step 5: Pour the wet ingredients over the dry ones and mix just until moistened.

Chopped walnuts, chocolate chips, and candied oranges on top of batter in a bowl.

Step 6: Toss the chocolate chips, walnuts, and candied oranges in 1 teaspoon of flour and fold into the muffin batter.

Muffin batter in a muffin tray topped with chocolate chips.

Step 7: Spoon the batter into the prepared muffin cups, filling them about ¾ full.

Baked muffins in a 12-cup muffin tray.

Step 8: Bake the muffins for 5 minutes at 220 °C/425°F. Then turn the temperature down to 180 °C/ 350°F and bake for about 15-18 minutes.

7 muffins with chocolate chips on top on a white tray.

Step 9: Let cool in the pan for 5 minutes before turning them out on a cooling rack. Enjoy warm!

Pro Tips

  • Toss the chocolate chips, walnuts, and candied oranges in flour. This prevents them from sinking to the bottom of the muffins.
  • Don’t over-mix the batter. It’s the secret to soft, moist muffins. When you combine wet and dry ingredients, stir just enough to bring everything together.
  • Bake the muffins at a high temperature for a few minutes initially. This creates air bubbles that expand the batter, helping to get tall bakery-style muffins!
  • Don't overbake the orange muffins. If a skewer inserted in the center comes out clean with just a few moist crumbs attached, the muffins are done!
  • Please use a kitchen scale to measure your ingredients. This ensures better and more consistent results every time.

How To Serve

These easy orange muffins are great on their own, but if you love to go the extra mile, I’d recommend sprinkling them with coarse sugar right before you put them to bake. The top becomes sweet and crunchy. A drizzle of orange glaze, similar to my cranberry pound cake, makes them really pretty.

  • Serve them for breakfast or brunch with a veggie breakfast casserole. For a lighter fare, serve it alongside my granola breakfast tarts.
  • Enjoy one (or two, no judgment here) with a cup of Vietnamese iced coffee, a cold blueberry matcha latte, or a warming vegan oatmeal latte.
  • The muffins are so good with a glass of pineapple strawberry smoothie or easy Korean strawberry milk.
A muffin cut in half on a small plate.

Recipe FAQs

Can I skip the candied oranges?

You can, but I do highly recommend them! The candied oranges add a concentrated orange flavor and a chewy texture that really makes them addictive.

What if I don't have flax seeds?

Since this is an eggless orange muffin recipe, the flax egg is the binder. You can use chia seeds, psyllium husk, or one egg instead. 

Can I use packaged orange juice instead of fresh?

You can! For best results, use 100% juice without any preservatives.

How do I store orange muffins?

Store in an airtight container at room temperature for 2- 3 days. For longer storage, refrigerate for 4-5 days. Reheat in the microwave for a few seconds.

More Easy Muffins

  • Chocolate Chip Muffins on a round wire rack.
    Chocolate Chip Muffins Recipe
  • Strawberry Banana Muffins
    Strawberry Banana Muffins
  • 7 Peanut butter apple muffins with cinnamon glaze on a round wire rack.
    Peanut Butter Apple Muffins
  • Eggless Chocolate Protein Muffins
    Eggless Chocolate Protein Muffins

Half the joy of cooking is sharing it with others. That’s why I’m always eager to hear from you. So go right ahead & drop a comment or reach out on Instagram, Pinterest, YouTube, or Facebook. I hope you love these easy orange muffins as much as we do!

📖 Recipe

Tried this recipe?Let us know how it was!
Muffins topped with chocolate chips on a white tray with a candle and oranges around.

Orange Muffins

Natasha Minocha
Bright, citrusy, and so moist, these orange muffins are full of fresh orange zest, orange juice, candied oranges, and delicious dark chocolate! Perfect with morning coffee or as an afternoon pick-me-up, the eggless muffins use simple ingredients and are super easy to make!
5 from 1 vote
Print Recipe Pin Recipe
Prep Time 15 minutes mins
Cook Time 18 minutes mins
Total Time 33 minutes mins
Course Breakfast, Cakes, Snack
Cuisine American
Servings 12 Muffins
Calories 214 kcal

Ingredients


  • 1 tbsp Flaxseed powder
  • 3 tbsp Water
  • 1/2 cup Sugar
  • Zest of 1 orange
  • 2 cups Wholewheat flour
  • 1.5 tsp Baking powder
  • 1 tsp Baking soda
  • 1/4 tsp Salt
  • 1/3 cup Coconut oil, melted
  • 1/3 cup Orange juice, freshly squeezed
  • 3/4 cup Almond milk
  • 1/3 cup Dark chocolate chips
  • 3 tbsp Candied oranges, chopped into small bits
  • 1/4 cup Walnuts, chopped into small bits
  • 2 tsp All-purpose flour

Instructions
 

  • Preheat your oven to 220 C/ 425 F. Line your muffin tray cavities with paper liners.
  • In a small bowl, mix the flaxseed powder and water. Keep aside for 5 minutes, until thick and gelatinous. This is your flax egg.
    1 tbsp Flaxseed powder, 3 tbsp Water
  • Using your fingertips, mix the sugar and orange zest in a small bowl. This is your orange sugar.
    1/2 cup Sugar, Zest of 1 orange
  • Sift together the flour, baking powder, baking soda, and salt in a bowl.
    2 cups Wholewheat flour, 1.5 tsp Baking powder, 1 tsp Baking soda, 1/4 tsp Salt
  • Whisk in the orange sugar.
  • In another bowl, mix the melted coconut oil, flax egg, orange juice, and almond milk.
    1/3 cup Coconut oil, melted, 1/3 cup Orange juice, freshly squeezed, 3/4 cup Almond milk
  • Pour the wet ingredients over the dry ones and mix just until moistened.
  • Toss all the candied oranges, chocolate chips, and walnuts in 1 teaspoon of flour. Fold into the muffin batter.
    Please don't overmix.
    1/3 cup Dark chocolate chips, 3 tbsp Candied oranges, chopped into small bits, 1/4 cup Walnuts, chopped into small bits, 2 tsp All-purpose flour
  • Divide the batter into the 12 muffin cavities and bake at 220 C / 425 F for 5 minutes.
    Then reduce the temperature to 190 C / 375 F for 12-15 minutes or until a skewer inserted in the center comes out clean.
  • Let cool in the pan for a few minutes before turning them out on a cooling rack. Enjoy warm and fresh!

Video

Notes

  • Toss the chocolate chips, walnuts, and candied oranges in flour. This prevents them from sinking to the bottom of the muffins.
  • Don’t over-mix the batter. It’s the secret to soft, moist muffins. When you combine wet and dry ingredients, stir just enough to bring everything together.
  • Bake the muffins at a high temperature initially for a few minutes. This creates air bubbles that expand the batter to help get tall bakery-style muffins!
  • Don't overbake the orange muffins. If a skewer inserted in the center comes out clean with just a few moist crumbs attached, the muffins are done!
  • Please use a kitchen scale to measure your ingredients. This ensures better and consistent results every time.

Nutrition

Serving: 1MuffinCalories: 214kcalCarbohydrates: 29gProtein: 3gFat: 10gSaturated Fat: 7gPolyunsaturated Fat: 2gMonounsaturated Fat: 1gCholesterol: 0.1mgSodium: 220mgPotassium: 85mgFiber: 1gSugar: 11gVitamin A: 15IUVitamin C: 4mgCalcium: 72mgIron: 1mg

Strawberry Rose Chia Pudding

February 11, 2019

strawberry rose chia pudding garnished with strawberries,pistachios in a dessert glass.

Strawberry rose chia pudding is a breakfast recipe that takes no time at all to make. The creamy chia pudding needs 5 simple ingredients and is a wholesome, healthy, and refreshing start to the day!

strawberry rose chia pudding in a dessert glass with a spoon.

I love chia puddings. From date and cinnamon chia pudding to strawberry chia pudding to chocolate orange chia pudding. I’ve made dozens of them.

They’re a wonderful, hearty, and refreshing breakfast, and I always feel my day has gone off to a great start! And of course, I love it as a quick little dessert pudding too!

[feast_advanced_jump_to]

Why You’ll Love The Recipe

Refreshing taste: This chia pudding is literally popping with juicy fresh strawberries! Rose water and strawberries give this pudding a wonderful refreshing taste...makes you think of Spring!

Convenient: make it the night before and grab it on your way out. It's a great one for meal prepping!

Just sweet enough: Chia seed pudding with strawberries and rosewater has a lovely creamy texture and is mildly sweet.

Perfect pick me up: as an afternoon snack and delicious as an after-dinner dessert.

Strawberry Rose Chia Pudding Ingredients

ingredients for making strawberry rose chia pudding.

Chia seeds: The world calls them a superfood. I just love them for their mild taste and versatility. From homemade strawberry jam to chocolate chia pudding, they’re easy-to-use ingredients that pack a punch of health.

Strawberries: Fresh are really the best bet for this chia pudding recipe, but frozen strawberries will work in a pinch too. Blend to make a purée.

Rose water: I just adore rosewater in my desserts. Just a few drops for that delicate floral aroma and flavor!

Sweetener: Maple syrup or honey—use whatever you have at hand.

Yogurt: I prefer using plain Greek yogurt for my chia puddings. It makes the pudding creamier. Homemade yogurt also works well.

Add-ons: Chopped pistachios, popped amaranth, pumpkin seeds, and rose petals. These are optional, and I use them just to top up the pudding.

How To Make

Step 1: Combine yogurt and chia seeds in a small bowl. Cover and chill overnight in the refrigerator.

Step 2: Add in the strawberry purée, rose water, and your choice of sweetener the next morning. Stir well.

ready chia pudding in a square glass dish.

Step 3: Taste and adjust for sweetness and rose flavor.

Step 4: Spoon the rose water chia pudding into a serving bowl or glasses.

Step 5: Garnish with dried rose petals, chopped strawberries, nuts, and seeds.

Final step: Serve and enjoy!

chia pudding with strawberry, pistachio, and rose petal toppings in a dessert glass.

Pro Tips

  • Keep the strawberry purée chunky or smooth. It’s your choice.
  • Dried rose petals simply give the easy chia pudding a charm.
  • Keep the strawberry rose chia pudding recipe refrigerated till you’re ready to serve.
  • Stir in milk or more yogurt if the chia pudding's consistency is too thick for you.

Chia Pudding Recipe FAQs

Where else can you use chia seeds?

Because of their neutral taste, chia seeds are very versatile. Sprinkle them on salads like on this roasted sweet potato salad, add them to smoothies like in this pineapple strawberry smoothie, and stir a spoonful in banana milk or this strawberry milk. Chia seeds are fantastic in your baked goodies. They bring so much texture to homemade jams like mulberry jam and persimmon jam.

What does chia pudding taste like?

Chia has a mild, slightly nutty flavor. But they take on the taste of the liquid and sweeteners you use. So, chia pudding mostly tastes like whatever you mix in it.

Can you make strawberry rose chia pudding with frozen fruit?

Yes, you can! Using frozen strawberries for chia pudding works wonderfully.

More Quick Breakfast Recipes

  • pear blueberry ginger smoothie vegan refined sugarfree healthy breakfast
    Pear Blueberry Ginger Smoothie
  • mango chia pudding topped with coconut, mangoes, and blueberries in a glass.
    Mango Chia Pudding With Coconut Milk
  • matcha chia pudding in a glass cup topped with pomegranates and chocolate bits.
    Matcha Chia Pudding
  • Tiramisu Overnight Oats Recipe
    Tiramisu Overnight Oats Recipe For Easy Mornings

Half the joy of cooking is sharing it with others. That’s why I’m always eager to hear from you. So go right ahead & drop a comment or reach out on Instagram, Pinterest, YouTube, or Facebook. I hope you love this strawberry rose chia pudding as much as we do!

📖 Recipe

Tried this recipe?Let us know how it was!
Strawberry Rose Chia Pudding glutenfree easy healthy recipe

Strawberry Rose Chia Pudding

Natasha Minocha
Strawberry Rose Chia Pudding - A refreshing, healthy start to the day! This is a simple 5-ingredient chia pudding that looks as alluring as it tastes!
5 from 1 vote
Print Recipe Pin Recipe
Prep Time 5 minutes mins
Resting Time 8 hours hrs
Total Time 8 hours hrs 5 minutes mins
Course Breakfast, Dessert, Snack
Cuisine American
Servings 2 Servings
Calories 258 kcal

Ingredients
  

  • 1 cups Plain Greek yogurt You can use hung yogurt too
  • 3 Tbsp Chia seeds
  • 1/3 cup Fresh strawberry puree You can keep the puree a bit chunky if you prefer
  • 3-4 tbsp Maple syrup / Honey
  • 1 tsp Rose water

Toppings

  • Strawberries, chopped into small pieces
  • Chopped Pistachio, Popped amaranth, Pumpkin seeds for topping
  • Dried rose petals

Instructions
 

  • In a small bowl, combine the Greek yogurt and chia seeds. Cover and chill in the refrigerator overnight.
  • Stir in the strawberry puree, rose water, and maple syrup the next morning. Stir well. Taste and adjust for sweetness and rose flavor.
  • Spoon into your serving glasses, and top with some strawberries, chopped pistachios, and dried rose petals. Serve and enjoy!

Notes

  • Keep the strawberry purée chunky or smooth. It’s your choice.
  • Dried rose petals simply give the easy chia pudding a charm.
  • Keep the strawberry rose chia pudding recipe refrigerated till you’re ready to serve.
  • Stir in milk or more yogurt if the chia pudding's consistency is too thick for you.

Nutrition

Serving: 1 ServingCalories: 258kcalCarbohydrates: 40gProtein: 14gFat: 6gSaturated Fat: 1gPolyunsaturated Fat: 4gMonounsaturated Fat: 0.5gTrans Fat: 0.03gCholesterol: 5mgSodium: 41mgPotassium: 293mgFiber: 7gSugar: 31gVitamin A: 18IUVitamin C: 24mgCalcium: 234mgIron: 2mg

Mocha Cupcakes With Chocolate Frosting

February 9, 2019

Mocha Cupcakes with Chocolate Cream Cheese Frosting infused with Baileys Glutenfree

Mocha cupcakes is the homemade cupcake recipe every chocolate, coffee, or mocha lover needs and needs now! Simple, easy, and addictive, these coffee chocolate cupcakes have an Irish touch with frosting spiked with Baileys.

Mocha Cupcakes With Chocolate Frosting

I have been dodging umpteen requests for homemade cupcakes with exciting new flavors for a very long time. So, when we got stuck indoors on a hail-stormy evening, I decided to bake some mocha cupcakes and make them happy.

I went all out and gave them a chocolate frosting. Seriously, the one thing that can make coffee even better is chocolate. That’s why I call mocha, a marriage made in heaven between the two.

To give the deep earthy taste of the mocha chocolate cupcakes some balance, I whipped up chocolate cream cheese frosting, infusing it with Baileys! The mocha flavor of the Irish coffee cupcake and the silky, smooth, luscious frosting blend together beautifully. 

WHY TRY THE COFFEE CUPCAKES RECIPE?

For true mocha lovers, these cupcakes are a dream come true.

The cream cheese gives the homemade cupcake recipe a lovely, light texture and balances the sweetness really well.

And hello, don’t forget the Baileys! I mean, can it get better than this? I don't think so!

Mocha Cupcakes With Chocolate Frosting

HOW TO MAKE MOCHA CUPCAKES?

Step 1: Preheat your oven to 180 °C. Line a muffin tray with paper liners.

Step 2: Mix instant coffee powder with boiling water. Add cocoa powder to it, and then set it aside to cool a bit.

Step 3: In another bowl, sift and mix buckwheat flour, baking powder, baking soda, and salt.

Step 4: In a separate bowl, beat eggs and sugar till thick and creamy. Add vanilla extract and oil.

Step 5: Add part of the cocoa coffee mixture to the dry ingredients and mix gently.

Step 6: Add the beaten egg mixture to this. Mix until just combined.

Step 7: Fill each cavity of the prepared muffin tray with mocha cupcake batter 3/4 of the way.

Step 8: Bake for 18–20 minutes, or until a skewer inserted in the center comes out clean with just a few moist crumbs attached.

Step 9: Let the coffee chocolate cupcakes cool while you make the frosting.

Final step: Frost, serve, and savor!

Mocha Cupcakes

CREAM CHEESE FROSTING WITH BAILEYS AND COFFEE CUPCAKES

The thick, luxurious topping of whipped cream cheese frosting with dark chocolate and Baileys Irish cream was divine. I swear, I can eat it straight from the mixing bowl by the spoonful! The chocolate frosting is very stable, and pipping it in beautiful swirls is easy-peasy, almost therapeutic. To make:

  • I melted 70% dark chocolate.
  • While the chocolate cools slightly, beat the cream cheese and icing sugar until light and fluffy.
  • Pour in Baileys and mix well.
  • Now add in the cooled chocolate. Beat everything together until you have a shiny, smooth chocolate frosting.

You want a thick, piping consistency. If needed, add more sugar, chocolate, or Baileys to reach the taste you like. Transfer to a piping bag or Ziplock bag to make swirls of mocha cupcake frosting. 

Mocha Cupcakes With Chocolate Frosting

NOTES FOR THE BEST MOCHA CUPCAKES

  • Eggs must be at room temperature. It makes all the difference to the cupcake crumb.
  • Don’t lose patience when beating eggs, or you’ll end up with dense mocha cupcakes. Give it time. It has to lighten in color and increase in volume for a fluffy crumb.
  • The cream cheese for the cupcake frosting has to be slightly softened.
  • Don’t have a piping bag? Use a knife to thickly smear the chocolate frosting on the mocha cupcakes.
Mocha Cupcakes With Chocolate Frosting

MOCHA CUPCAKE RECIPE INGREDIENTS & SWAPS

Flour: My homemade cupcake recipe uses buckwheat flour. It is gluten-free, extremely nutritious, and gives an interesting twist to the cupcake texture. It is well known in most northern and western states of India and is consumed on particular fasting days. 

It's a great favorite of mine for baking, and the kids have taken to it exceptionally well. That said, all-purpose flour works fantastically in this cupcake recipe too.

Eggs: You can easily replace eggs with flax eggs in this recipe.

1 tbsp of flaxseed powder + 3 tbsp water is equivalent to 1 egg.

Sugar: I used granulated sugar. You can use raw or cane sugar. Brown sugar works well in this recipe.

Oil: Any neutral-tasting oil will work here.

Coffee: Regular instant coffee is what I used in these mocha cupcakes. Freshly brewed coffee will be wonderful too.

Cocoa powder: Natural unsweetened cocoa powder is what is used in this recipe. Any brand you prefer is good here.

Frosting: Baileys Irish cream is entirely optional. I just wanted to give these coffee chocolate cupcakes a little boozy kick. Don’t love dark chocolate? Use any you love, 55% or even lighter. Make the mocha cupcake recipe your OWN!

Mocha Cupcakes With Chocolate Frosting

SERVE COFFEE AND CUPCAKES

These mocha cupcakes with chocolate cream cheese frosting were an art. A treat for all the senses! The homemade cupcakes went perfectly with after-dinner coffee and were wiped out faster than you could even say their full name.

MORE HOMEMADE CUPCAKE & MUFFIN RECIPES

Lemon Cupcakes

Nutella Banana Muffins

Easy Orange Muffins

Plum & Cardamom Muffins

Half the joy of cooking is sharing it with others. That’s why I’m always eager to hear from you. So go right ahead and drop a comment or reach out on Instagram, Pinterest, YouTube, or Facebook. I hope you love these mocha cupcakes as much as we do!

📖 Recipe

Tried this recipe?Let us know how it was!
Mocha Cupcakes With Chocolate Frosting

Mocha Cupcakes with Chocolate Frosting

Natasha Minocha
Mocha cupcakes is the homemade cupcake recipe every chocolate, coffee, or mocha lover needs and needs now! Simple, easy, and addictive, these coffee chocolate cupcakes have an Irish touch with frosting spiked with Baileys.
No ratings yet
Print Recipe Pin Recipe
Prep Time 20 minutes mins
Cook Time 20 minutes mins
Total Time 40 minutes mins
Course Cakes, Dessert
Cuisine American
Servings 12 Cupcakes
Calories 264 kcal

Ingredients
  

Mocha Cupcakes

  • 1/2 cup Cocoa powder
  • 1 cup Boiling hot coffee Mix 1.5 tbsp coffee in boiling hot water
  • 1 1/3 cup Buckwheat flour You can use all purpose flour too
  • 1 tsp Baking powder
  • 1/4 tsp Baking soda
  • 1/8 tsp Salt
  • 1/2 cup Oil
  • 1/2 cup Sugar
  • 2 Eggs room temperature
  • 1 tsp Vanilla extract

Chocolate Cream Cheese Frosting

  • 1/2 cup Cream cheese, slightly softened
  • 1/3 cup Icing sugar
  • 1/3 cup 70% dark chocolate
  • 2 Tbsp Baileys, more if you like optional

Instructions
 

Cupcakes

  • Preheat your oven to 180C. Line a muffin tray with paper liners.
  • Mix the cocoa powder and boiling hot coffee in a small bowl. Leave aside to cool a bit.
  • In another bowl, combine the buckwheat flour, baking powder, baking soda and salt.
  • In a separate bowl, beat eggs and sugar till thick and creamy. Add vanilla extract and oil.
  • In 2 batches, gently mix in the dry ingredients and the cocoa coffee mixture. Mix until just combined.
  • Fill each cavity of the prepared muffin tray 3/4 of the way and bake for 18-20 minutes at 180 C until a skewer inserted in the center comes out clean with just a few moist crumbs attached.
  • Cool the cupcakes while you are preparing the frosting.

Frosting

  • Melt the dark chocolate. Keep aside to cool slightly.
  • Beat the cream cheese and icing sugar till fluffy. Add Baileys, mix well.
  • Slowly add the cooled melted chocolate, beat till smooth and shiny. We are looking for a thick, piping consistency. Taste and adjust for sweetness, for more chocolate flavour and more Baileys, as per your preference.
  • Spoon into a piping bag attached with a star nozzle. Pipe on the cupcakes. Alternatively, you could thickly smear the frosting on the cupcakes with a knife. Enjoy!

Notes

This cupcake recipe has been adapted from Joy Of Baking.

Nutrition

Serving: 1CupcakeCalories: 264kcalCarbohydrates: 27gProtein: 4gFat: 17gSaturated Fat: 5gPolyunsaturated Fat: 3gMonounsaturated Fat: 8gTrans Fat: 0.04gCholesterol: 37mgSodium: 126mgPotassium: 167mgFiber: 3gSugar: 15gVitamin A: 168IUCalcium: 44mgIron: 1mg

Sambal Oelek Recipe

February 1, 2019

Sambal Oelek sauce in a glass jar with a spoon on a wooden plate.

Sambal Oelek recipe takes just 20 minutes and is so easy to make. Blend, cook, and cool. And because it packs a punch of spicy, fresh, and bright flavors, the sambal oelek is a do-it-all sauce.

sambal oelek chili sauce in a glass jar with a spoon.

We’ve been getting loads of fresh red chilies in the market. And while I’m not much of a fan of fiery foods, it’s hard to resist the vibrant beauties. So, I bought a bunch and decided to make a couple of jars of sambal oelek chili sauce. The delicious chili paste is great as a dip, marinade, garnish, or cooking ingredient for everyday recipes like sweet potato soup or spicy mutton curry.

[feast_advanced_jump_to]

What Is Sambal Oelek

Sambal Oelek (or ulek) is a popular Indonesian chili sauce/paste. The hot sauce is also a staple in Malaysian and Thai cuisine. Made with simple everyday ingredients like red chilies, salt, and vinegar, freshly ground Sambal paste is ready in minutes and barely takes any effort. The results are way better than any bottled sauce you may have tried.

Why You’ll Love This Recipe

Fiesty and punchy, this vegan sambal oelek is so simple to make! You just need 7 basic ingredients. Make it in a mortar pestle or in a blender, whatever you prefer!

It takes only 20 minutes to make. And you can customize the flavors according to your taste.

It is the perfect kick for any dish like this spicy tofu stir-fry. It’s versatile. Use it as a dip, marinade, or topping to add an exotic flair to your meals.

What Is In Sambal Oelek

ingredients for making sambal oelek chili sauce.

While the basic sambal is made with just red chilies, salt, and vinegar. My version also has ginger, garlic, lemongrass, and sugar!

Red Chili Peppers: I did deseed most of the chilies, but you can keep them intact if you prefer a fierier version. You can use any variety you prefer - red bird's eye chilies ( for super spicy flavor!), red serrano peppers, or red jalapeno peppers.

Vinegar gives the sauce its characteristic zing. I used rice wine vinegar.

Sugar brings out the natural sweetness in chilies, making the overall taste richer and more complex.

Salt to balance all the ingredients of the sambal oelek recipe.

Add-ins: Garlic, ginger, and lemongrass to give the sambal paste more flavor. Don't have lemongrass? Add a squeeze of lemon juice and some zest too.

See the recipe card for full information on ingredients and quantities.

How to Make

Step 1: Combine the red chilies, garlic, ginger, lemongrass, and vinegar in a food processor. Blend.

Ingredients for chili sauce in a blender jar.

Step 2: Transfer the sambal paste to a small saucepan. Add sugar and salt and simmer on medium heat for 10 minutes, stirring occasionally.

Cooked sambal oelek in a white saucepan.

Step 3: Taste and adjust for seasonings.

Step 4: Let the sambal oelek chili paste cool completely.

Step 5: Transfer to a jar and refrigerate.

Final step: Serve and savor!

Cooked chili sauce in a glass jar on a small plate.

Pro Tips

  • Sambal oelek keeps well in the refrigerator for a week.
  • Blend to the consistency you like. I prefer a slightly chunky sambal oelek recipe.  
  • You can use a mortar and pestle to make a paste of all the ingredients.
  • Add water while cooking the sambal chili sauce if it feels too thick to you.

Recipes With Sambal Oelek

I love how versatile sambal chili paste is. You can use it as a dipping sauce for serving alongside your meal as a chutney.

  • A couple of spoonfuls add pizzazz to fried rice and Thai peanut noodles.
  • Kick up your mayonnaise and yogurt dip a notch by mixing in some Sambal Oelek!
  • Make a simple side dish like millet-stuffed tomatoes spicy by stirring in the feisty sauce.
  • Marinate chicken, fish, paneer, or tofu for about 10 minutes with a mixture made with Sambal Oelek, soy sauce, salt, pepper, and sesame oil. Then pan fry it in a cast-iron skillet to get that crispy crust. Make extra marinade to drizzle atop!

Recipe FAQs

Sambal Oelek vs. Sriracha: the difference?

Both Sriracha and Sambal Oelek are great staples to have in the pantry. Sriracha has a tangy, garlicky, and sweet kick. It’s also milder than sambal oelek, which is why I love it as a vinaigrette in red rice and mango salad or sauce for sticky sweet potatoes.

What’s the difference between sambal oelek and chili garlic sauce?

Typically, sambal paste doesn’t have garlic. Yes, my sambal oelek recipe does! Sambal sauce is also chunkier, while chili garlic sauce is slightly smoother. Sambal has more heat. Chili garlic is slightly sweeter thanks to the garlic. Finally, sambal is far more versatile than garlic sauce, which is best as a condiment.

Sambal Oelek vs. Gochujang: which is better?

Honestly, the answer is both. Sambal brings instant heat. A homemade gochujang adds depth and is just fantastic. The Korean hot pepper paste is delicious as a glaze on crispy braised potatoes. If you want a sharp, spicy taste to a meal, use sambal oelek. If you want a rich umami flavor, opt for gochujang.

Other Sauces To Try

  • A white stockpot with tomato sauce topped with basil leaves with ingredients around.
    Simple Tomato Sauce
  • Cashew Roasted Red Pepper Sauce vegan dairyfree healthy
    Easy Cashew Roasted Red Pepper Sauce
  • Vegan Caramel Sauce
    Vegan Caramel Sauce
  • Mint Chutney | Pudina chutney| Mint Coriander chutney
    Mint Chutney

Half the joy of cooking is sharing it with others. That’s why I’m always eager to hear from you. So go right ahead & drop a comment or reach out on Instagram, Pinterest, YouTube, or Facebook. I hope you love this sambal oelek recipe as much as we do!

📖 Recipe

Tried this recipe?Let us know how it was!
Sambal Oelek sauce in a glass jar with a spoon on a wooden plate.

Sambal Oelek Recipe

Natasha Minocha
Easy to make, this delicious, fiery chili sauce - Sambal Oelek packs a mega punch of flavor. Use it as a dipping sauce or a marinade, this will surely become a staple in your fridge!
No ratings yet
Print Recipe Pin Recipe
Prep Time 10 minutes mins
Cook Time 10 minutes mins
Total Time 20 minutes mins
Course Condiment
Cuisine Indonesian
Servings 10 Servings
Calories 15 kcal

Ingredients
  

  • 7 oz / 200 gms Red Chilies, sliced
  • 5 cloves Garlic, peeled
  • 1.5 inch Fresh ginger, sliced
  • 2 Lemongrass stalks, only the white part, sliced
  • 4 tbsp Rice wine vinegar
  • 1-2 tsp Sugar
  • Salt per taste

Instructions
 

  • Combine the red chilies, garlic, ginger, lemongrass, and vinegar in a food processor. Blend until you get the consistency you like.
    I kept it slightly chunky. You can even use a mortar & pestle for this step.
  • Transfer the mixture to a small saucepan, add sugar and salt, and simmer on medium heat for 10 minutes, stirring occasionally.
    If the sauce gets too thick, add a little water while it's getting cooked.
  • Taste and adjust for seasonings per your taste.
    Let the sauce cool completely before transferring it into a jar. Store in the refrigerator. This should be good for 7 days.

Notes

    • Sambal oelek keeps well in the refrigerator for a week.
    • Blend to the consistency you like. I prefer a slightly chunky sambal oelek recipe.  
    • You can use a mortar and pestle to make a paste of all the ingredients.
    • Add water while cooking the sambal chili sauce if it feels too thick to you.

Nutrition

Serving: 1 ServingCalories: 15kcalCarbohydrates: 3gProtein: 1gFat: 0.1gSaturated Fat: 0.01gPolyunsaturated Fat: 0.1gMonounsaturated Fat: 0.01gSodium: 2mgPotassium: 82mgFiber: 0.4gSugar: 1gVitamin A: 191IUVitamin C: 29mgCalcium: 7mgIron: 0.3mg

Savory Cheese Waffles

January 6, 2019

Savory Cheese Waffles

We've been inhaling these easy cheese waffles for all meals in our house. Crunchy on the outside and soft on the inside, these savory waffles are incredibly simple to make and fabulous to taste. The perfect savory waffles recipe for any time of the day!

Savory Cheese Waffles

I think, by now, you know how much my kids love to wake up to pancakes and waffles. Since they got introduced to the savory sweet potato waffles, there has been no looking back. So when the gracious and wonderful team at Mother Dairy invited me to create an easy cheese waffle recipe as part of the #EatCheeseRepeat #FunBhiFillingBhi campaign, I jumped at the chance.

Do tune in for my #InstaCookingClass with Mother Dairy on Instagram or on the Mother Dairy Fresh Delights Facebook Page later this week to see the recipe video. I promise you’ll have so much fun making these crispy cheese waffles!

[feast_advanced_jump_to]

WHY TRY THIS SAVORY WAFFLE RECIPE

Irresistible, cheesy goodness: Crispy, golden waffles with gooey cheese in every bite. It's a flavor explosion that's impossible to resist!

Versatility on your plate: Cheese waffles aren't just for breakfast. They can be enjoyed for brunch, lunch, or even dinner.

Easy and fun: With a good waffle maker, making waffles at home is a breeze.

Savory Cheese Waffles

HOW TO MAKE CHEESE WAFFLES?

Step 1: Set the waffle maker to preheat according to the manufacturer's instructions.

Step 2: Sift and mix the dry ingredients in a bowl - wholewheat flour, baking powder, baking soda, salt, paprika, and black pepper.

Step 3: In another bowl, whisk well the milk, eggs, and olive oil.

Step 4: Add the wet ingredients to the dry ingredients.

Step 5: Mix well till you get a smooth, lump-free mixture.

Step 6: Add grated cheese, green onions, and minced garlic to the savory waffle batter.

Step 7: Grease the waffle maker cavities well and pour a ladleful of batter on them.

Step 8: Let the cheese waffle cook for 5–6 minutes, or until it’s golden and crisp.

Step 9: Repeat for the rest of the cheese waffles batter.

Final step: Serve warm and savor!

Savory Cheese Waffles

NOTES ON CRISPY CHEESE WAFFLES

  • All your ingredients for cheese waffles should be at room temperature, especially the milk and egg. It’s just so much easier to make a smooth batter this way. Cold eggs are really hard to incorporate and mix with other ingredients, which makes for an uneven batter.
  • Coarsely grind the black pepper.
  • Your garlic needs to be finely minced, and your onions need to be finely chopped.
  • Grease the waffle iron really well, and make sure it is sizzling hot. That’s how you get a crunchy, crispy cheese waffle crust.

SAVORY CHEESE WAFFLE INGREDIENTS

Flour: I used whole wheat for these savory waffles. Feel free to switch to all-purpose flour or a gluten-free flour of your choice.

Milk: Plant-based or regular, use what you have at hand. This recipe for cheese waffles is very adaptable.

Spices: I love smoked paprika. You can use any red chili powder.

Cheese: I wanted to give the batter for these cheesy waffles an extra dose of deliciousness. That’s why I picked Mother Dairy's cheese cubes. It’s got a lovely, mild flavor that pairs perfectly with anything savory. It melts beautifully. You'll never get a rubbery, stringy texture from this cheese. Ever.

I simply shredded the cheese. 

When you make cheese waffles at home, you can customize the cheese blend to your liking, whether it's sharp cheddar cheese, creamy mozzarella, or a mix of your favorites. You can use vegan cheese as well.

Savory Cheese Waffles

SERVE SAVORY WAFFLES FOR DINNER (OR ANY MEAL)

Who knew cheese and waffles would make such a delicious pairing? But they do!  The cheese waffle snack is addictive as-is. 

But where’s the fun in that, right? 

So, here are my ideas for savory waffles toppings, especially if you want to make a whole meal out of them:

  • Crispy bacon
  • Some grilled veggies
  • Add a sunny-side-up egg.
  • For me, a simple tomato salad worked the best.
  • Or chicken nuggets, perhaps if you’re making the savory waffles for kids.

Top them with a drizzle of maple syrup for a sweet-savory twist that will leave your taste buds dancing. And, oh, do try making a grilled cheese sandwich with them. It's superb!

CHECK OUT THESE SAVORY WAFFLE IDEAS

Sourdough Waffles

Beetroot Waffles

Sweet Potato Waffles

Half the joy of cooking is sharing it with others. That’s why I’m always eager to hear from you. So go right ahead and drop a comment or reach out on Instagram, Pinterest, YouTube, or Facebook. I hope you love these cheese waffles as much as we do!

📖 Recipe

Tried this recipe?Let us know how it was!
Savory Cheese Waffles

Savory Cheese Waffles

Natasha Minocha
Crunchy on the outside & soft on the inside, these Savory Cheese Waffles are incredibly simple to make and fabulous to taste, perfect for any meal of the day!
No ratings yet
Print Recipe Pin Recipe
Prep Time 10 minutes mins
Cook Time 6 minutes mins
Course Breakfast, Main Course, Side Dish
Cuisine American, World
Servings 10 Waffles
Calories 163 kcal

Ingredients
  

  • 1.5 cups All-purpose flour
  • 1 tsp Baking powder
  • 1 tsp Baking soda
  • 1 tsp Salt
  • 1.5 tsp Smoked paprika You can use any red chilli powder
  • 1 tsp Black pepper, coarsely ground
  • 2 Eggs, room temperature
  • 1 1/4 cups Milk, room temperature
  • 2 Tbsp Extra virgin Olive oil
  • 3/4 cup Shredded cheddar cheese
  • 1/4 cup Green Onion, finely chopped
  • 1 clove Garlic, finely minced
  • Extra oil for greasing the waffle iron

Instructions
 

  • Combine the dry ingredients - flour, baking powder, baking soda, salt, paprika, and black pepper, in a bowl.
  • In another bowl, whisk well the milk, eggs and olive oil. Add the wet ingredients to the dry ingredients. Mix well till you get a smooth, lump-free mixture.
  • Add the shredded cheese, green onions, and minced garlic to the batter.
  • Preheat the waffle iron according to the manufacturer's instructions. Grease the waffle cavities well and pour a ladleful of batter in the lump free. Let the batter cook for 5-6 minutes, until golden and crisp.
  • Repeat with the rest of the batter. Serve warm. Enjoy!

Nutrition

Serving: 1 ServingCalories: 163kcalCarbohydrates: 17gProtein: 6gFat: 8gSaturated Fat: 3gPolyunsaturated Fat: 1gMonounsaturated Fat: 3gTrans Fat: 0.003gCholesterol: 45mgSodium: 466mgPotassium: 103mgFiber: 1gSugar: 2gVitamin A: 358IUVitamin C: 1mgCalcium: 134mgIron: 1mg
Savory Cheese Waffles

Velvety Green Creamy Pea Soup

November 23, 2018

Creamy Pea Soup vegan dairyfree glutenfree healthy easy recipe

Creamy pea soup is a quick, simple, 6-ingredient recipe, or what I call the best homemade soup recipe. Hearty yet light, the green pea recipe is easy to prep and comfort food at its best.

Velvety Green Creamy Pea Soup

Cool-weather calls for warm, comforting bowls of food, right? And we somehow always have some green peas at hand. Frozen, fresh, or split peas—everything works in this creamy green pea soup recipe. Add onion and garlic, and that's all it needs to bring out the most delicious sweet and savory flavors.

[feast_advanced_jump_to]

Why We Love This Recipe

Pretty straightforward and foolproof recipe.

Comfort food with the bare minimum effort.

Green pea soup is wonderful for lunch. It will fill you up without weighing you down.

Fantastic for when you've run out of ideas for dinner.

Pea Soup Ingredients

Peas: Fresh peas are flooding the market right now, and they are superbly sweet and delicious, so that’s what I used. That said, frozen will do just as well if you don't have any at home.

Mint brightens up the split pea soup with its unique, cool flavor. Though I strongly recommend using fresh mint, I will not judge you if you stir in some dried leaves instead!

The cream gives the soup a richer texture, a touch of sweetness, and that velvety finish. You can use regular cream instead of coconut cream.

Add-ins: Throw in some parsley, basil, or cilantro if you prefer. A small bit of herb goes a long way toward "waking up" the soup. My creamy pea soup is vegetarian, but you can add ham or bacon to it too.

Velvety Green Creamy Pea Soup

How To Make Creamy Pea Soup

Step 1: Heat oil in a medium-sized saucepan or pressure cooker.

Step 2: Add the chopped garlic and onions. On medium heat, sauté till translucent (3–4 minutes).

Step 3: Add green peas, dried oregano, mint leaves, salt, and pepper. Cook for 2-3 minutes.

Step 4: Add water or vegetable broth, mix well, and cover. Leave the pea soup in the crock pot for 20–30 minutes, or until the vegetables are softened and cooked through.

Step 5: Let the pea soup cool.

Step 6: Blend till you have a smooth pea purée soup.

Step 7: Taste and adjust the creamy pea soup seasoning.

Final step: Garnish, serve hot, and savor!

Creamy Pea Soup

Pro Tips

  • If you’re making pea soup in a pressure cooker, cook it for 2 whistles. Open the lid when the steam is completely released.
  • If making the soup in a covered pan, let it cook on a gentle simmer.
  • If the cream of pea soup is too thick for you in step 6, add some more water or broth to get the consistency you prefer.

Can You Make Pea Soup With Frozen Peas?

For sure! You can make pea soup from frozen peas or fresh peas. Frozen peas are a convenient option and work well in creamy pea soup recipes. When using frozen peas, simply thaw them before adding them, or you can even add them directly to the soup pot if you prefer.

Creamy Pea Soup

How To Serve

I topped the creamy pea soup with some pan-roasted nuts and a swirl of coconut cream to keep it dairy-free. Serve with soft and fluffy challah bread, Parker house rolls, or crusty salted bread rolls.

Creamy Green Pea Soup Recipe

Loved Green Pea Soup? Try:

  • roasted pumpkin soup in a white soup mug with a spoon on a red check napkin.
    Creamy Roasted Pumpkin Soup
  • A bowl of roasted carrot soup garnished with almonds on a tray.
    Roasted Carrot Lentil Soup
  • Moroccan Vegetable Stew vegan, colourful, easy recipe, vegetables, chickpeas, protein
    Moroccan Vegetable Stew
  • White Bean, Barley & Mustard Greens Soup
    Wholesome Barley Soup With Beans & Greens

Half the joy of cooking is sharing it with others. That’s why I’m always eager to hear from you. So go right ahead & drop a comment or reach out on Instagram, Pinterest, YouTube, or Facebook. I hope you love this creamy pea soup as much as we do!

📖 Recipe

Tried this recipe?Let us know how it was!
Creamy Pea Soup vegan dairyfree glutenfree healthy easy recipe

Velvety Green Creamy Pea Soup

Natasha Minocha
Easy to make, this 6 ingredient Creamy Pea Soup is pure deliciousness! Hearty and comforting, its perfect for the cold weather!
No ratings yet
Print Recipe Pin Recipe
Prep Time 10 minutes mins
Cook Time 40 minutes mins
Course Side Dish, Soup
Cuisine American, World
Servings 4 servings
Calories 158 kcal

Ingredients
  

  • 500 gms Fresh or Frozen Peas
  • 1 Onion, roughly chopped
  • 4-5 Garlic cloves, chopped
  • 1 tsp Dried Oregano
  • 15-20 Fresh mint leaves
  • 1 tbsp Extra virgin Olive oil
  • 500 ml Water or Vegetable broth You may need more
  • Coconut cream/ Roasted nuts for garnish You can use regular cream too

Instructions
 

  • Heat the oil in a medium size saucepan or pressure cooker.
  • Add the chopped garlic and onions, saute till translucent, about 3-4 minutes on medium heat.
  • Add the peas, dried oregano, mint leaves, salt and pepper. Cook for 2-3 minutes.
  • Add water (or broth), mix well, and let it cook for 20-30 minutes until the vegetables are softened and cooked through.
    If using a pressure cooker, let this cook for 2 whistles. Open the lid when the steam is completely released.
  • Allow the soup to cool a bit and then puree it till smooth. If the soup is too thick for you, add some more water to get the consistency you prefer.
  • Taste and adjust for seasoning. Garnish with some cream and nuts, serve hot. Enjoy!

Nutrition

Serving: 1 ServingCalories: 158kcalCarbohydrates: 24gProtein: 7gFat: 4gSaturated Fat: 1gPolyunsaturated Fat: 1gMonounsaturated Fat: 3gSodium: 506mgPotassium: 385mgFiber: 8gSugar: 9gVitamin A: 1389IUVitamin C: 54mgCalcium: 60mgIron: 2mg

Lavender Chocolate Truffles

November 20, 2018

Lavender Chocolate Truffles vegan glutenfree dairyfree no bake recipe

Just 3 ingredients and a little bit of your time... that's all you need to make the most exquisite vegan Lavender Chocolate Truffles! All your chocolate cravings end here, I promise!

Lavender Chocolate Truffles on a plate.

This is no empty promise. The loveliest chocolates can be made right in your kitchen. And truffles are the easiest to start with. There is just one ratio you need to keep in mind- 2 parts chocolate and 1 part cream. Since this recipe has only three ingredients, we must use the best quality ones.

Nowadays, procuring excellent chocolate is not a difficult task. Most of the supermarkets and online stores carry wonderful brands, international as well as domestic. I particularly enjoy the vegan Indian brands in the market now. You can use any of your choice. The other ingredient here is cream. I just go with any of the known local brands. They work very well here. In this recipe though, I went dairy-free with coconut cream. Thanks to all the infused lavender, there is no coconut flavor at all.

Lavender Chocolate Truffles vegan glutenfree dairyfree no bake recipe

Dried lavender is a delight! Its distinctive, soft floral notes brighten up any confection. It's wonderful for making infused waters, tea, salad dressings, jellies, ice creams...and with chocolate, it works like a charm! You can buy it easily online and if you're in the Delhi/Gurgaon area, do look up Mittal Teas in Sundar Nagar. They keep a stock of this too.

Lavender Chocolate Truffles vegan glutenfree dairyfree no bake recipe

You can play around with any flavoring of your choice. Add some coffee, chai masala, pumpkin spice, and maybe even some peanut or almond butter. You can roll them in cocoa powder, ground almonds/hazelnuts/pistachios, dip them in chocolate, or just eat them plain. They are rich, decadent, and absolutely irresistible! Perfect as a fuss-free dessert when entertaining or for gifting.

Lavender Chocolate Truffles vegan glutenfree dairyfree no bake recipe

Half the joy of cooking is sharing it with others. That’s why I’m always eager to hear from you. So go right ahead & drop a comment or reach out on Instagram, Pinterest, YouTube, or Facebook. I hope you love these lavender chocolate truffles as as much as we do!

📖 Recipe

Tried this recipe?Let us know how it was!
Lavender Chocolate Truffles vegan glutenfree dairyfree no bake recipe

Lavender Chocolate Truffles

Natasha Minocha
Just 3 ingredients & a little bit of your time... that's all you need to make the most exquisite vegan Lavender Chocolate Truffles! All your chocolate cravings end here, I promise!
No ratings yet
Print Recipe Pin Recipe
Prep Time 1 hour hr
Cook Time 15 minutes mins
Total Time 1 hour hr 15 minutes mins
Course Dessert
Cuisine American
Servings 20 Truffles
Calories 179 kcal

Ingredients
  

  • 200 gms Coconut Cream You can use regular cream too.
  • 2 tbsp Dried Lavender
  • 400 gms Dark chocolate chips - dairyfree or 70% room temperature
  • 100 gms Dark chocolate chips - dairyfree or 70% melted

Instructions
 

  • Combine the cream and dried lavender in a small saucepan. On low heat, bring to a gentle simmer. Take off the heat immediately and let the mixture cool for 10 -15 minutes. This process helps the lavender get infused in the cream.
  • Strain the cream lavender mixture. Make sure you get the last bit of cream out of the lavender. That's the good bit.
  • Add the warm cream to the chocolate chips in a medium-size bowl. Gently stir till the chocolate is all melted and smooth.
  • Pour the ganache into a shallow pan and refrigerate for 30-40 minutes. Use a small cookie scoop or a tablespoon to make balls. 
  • I like to refrigerate the ganache balls for 10-15 minutes again. Roll into smooth balls. Refrigerate again for a few minutes.
    Dip in melted chocolate and refrigerate for a couple of hours till completely set. 
  • Store in the refrigerator. Enjoy!

Nutrition

Serving: 1TruffleCalories: 179kcalCarbohydrates: 21gProtein: 2gFat: 10gSaturated Fat: 9gPolyunsaturated Fat: 0.1gMonounsaturated Fat: 0.1gCholesterol: 0.3mgSodium: 32mgPotassium: 158mgFiber: 1gSugar: 15gVitamin A: 7IUVitamin C: 0.3mgCalcium: 79mgIron: 0.4mg

Easy Cashew Roasted Red Pepper Sauce

October 23, 2018

Cashew Roasted Red Pepper Sauce vegan dairyfree healthy

This Easy Cashew Roasted Red Pepper Sauce hits all the right spots! Its velvety, smoky, and finger-lickin' good! Its so rich and creamy that you won't believe its dairy free!

Cashew Roasted Red Pepper Sauce in a bowl.

 This vegan sauce is a 5 ingredient wonder, not counting salt and pepper! And how versatile is it? Use it as pasta sauce, in sandwiches and wraps, as a salad dressing, or even just as a dip with crackers. Don't you just love making all-purpose condiments? One jar goes a long way in making your dishes so groovy!

 Easy Cashew Roasted Red Pepper Sauce vegan dairyfree healthy

This sauce does need a little planning. The cashews need to be soaked overnight. But here's a shortcut, you can always soak them for 2-3 hours in hot water to soften them up. And once your red peppers and garlic are roasted and cooled, this recipe takes just a few minutes to come together.

Easy Cashew Roasted Red Pepper Sauce vegan dairyfree healthy

Cashews provide the perfect creamy decadent texture. They impart a mild nutty flavor and are very receptive to any seasoning of your choice. You can make it as spicy and zesty as you like and add whatever herbs you prefer.

Easy Cashew Roasted Red Pepper Sauce vegan dairyfree healthy

Roasted red peppers and garlic bestow a lovely smoky-sweet taste that is so addictive. As a time saver, I usually roast 3-4 red peppers with garlic cloves and keep them refrigerated. These can be pureed and added to yogurt for a quick dip, tossed in pasta, or a grilled sandwich. You can even use these to jazz up a simple pizza or omelet.

Half the joy of cooking is sharing it with others. That’s why I’m always eager to hear from you. So go right ahead & drop a comment or reach out on Instagram, Pinterest, YouTube, or Facebook. I hope you love this cashew roasted red pepper sauce as much as we do!

📖 Recipe

Tried this recipe?Let us know how it was!
Cashew Roasted Red Pepper Sauce vegan dairyfree healthy

Easy Cashew Roasted Red Pepper Sauce

Natasha Minocha
This Easy Cashew Roasted Red Pepper Sauce hits all the right spots! Its velvety, smoky and fingerlickin' good! Its so rich and creamy that you won't believe its dairy free!
No ratings yet
Print Recipe Pin Recipe
Prep Time 15 minutes mins
Cook Time 25 minutes mins
Course Condiment
Cuisine American, World
Servings 10 Servings
Calories 107 kcal

Ingredients
  

  • 1 cup Cashews * soaked overnight, rinsed and drained well
  • 2 Red peppers
  • 6-7 Garlic cloves
  • 2 tbsp Extra virgin olive oil
  • 1 tsp Dried oregano
  • 1/2 tsp Paprika You can use any variety. Add less or more according to your taste
  • Salt & pepper to taste

Instructions
 

  • Preheat your oven to 200C. Line a baking tray with parchment paper or aluminium foil.
  • Rub 1 tbsp olive oil all over the red peppers and garlic cloves. Place them on the baking tray and roast for 20-25 minutes. Yo would need to turn the bell peppers a couple times. When the skin is slightly charred, your peppers are ready.
  • Place them in a bowl and keep them covered for 5-10 minutes. The skin will be easy to peel off now.
  • Combine the drained cashews, roasted bell peppers, garlic, 1 tbsp olive oil, paprika, oregano, salt, and pepper in a blender or food processor. Blend till smooth.
    You may want to add a splash of water if you find the consistency too thick. Taste and adjust for seasoning. Enjoy!

Notes

  • You can also soak the cashews in hot water for 2-3 hours. Rinse  and drain them well before using.

Nutrition

Serving: 1 ServingCalories: 107kcalCarbohydrates: 6gProtein: 3gFat: 9gSaturated Fat: 1gPolyunsaturated Fat: 1gMonounsaturated Fat: 5gSodium: 3mgPotassium: 149mgFiber: 1gSugar: 2gVitamin A: 798IUVitamin C: 31mgCalcium: 13mgIron: 1mg


Nankhatai | Eggless Cardamom Cookies

October 15, 2018

Nankhatai Indian Shortbread Cookies Eggless Cardamom Festive Foods

Light and crumbly, these melt-in-your-mouth, cardamom and rose-flavored Indian shortbread cookies, aka Nankhatai are truly a delectable treat!

Nankhatai Indian Shortbread Cookies Eggless Cardamom Festive Foods

According to Wikipedia, these eggless cookies are derived from the Persian word "naan" meaning bread and "khatai", an Afgan word for biscuits. Their rich sweet buttery taste has made them supremely popular. Being eggless also contributes to their larger appeal. And so they make it to our festive tables in most Indian homes, especially during Diwali.

How To Make Nankhatai

Now to the recipe, nankhatai are typically made with 3 basic ingredients -  all-purpose flour, ghee and sugar.

You simply whisk the butter/ghee with sugar and mix it in with the flour and semolina. This dough is refrigerated for a little bit to make it firm. It is then shaped into little balls and flattened slightly before baking.

Nankhatai Indian Shortbread Cookies Eggless Cardamom Festive Foods

Ghee is an important ingredient here as it imparts its unique nutty flavour and aroma. Having said that, you can use butter too.  I ran out of ghee, so butter was used here. Unsalted is recommended but I really don't mind using the salted variety sometimes. We quite enjoy the sweet savoury taste in our bakes. Honestly, I think it is alright to deviate from authentic recipes to pander to your tastes and preferences.

They are lightly spiced with cardamom and sometimes saffron too. Nuts like pistachios or almonds are sprinkled on top. Dried rose petals are used in this recipe as I just love that flavour. A small portion of sooji/semolina is mixed in the flour to add texture.  This also makes the nankhatai a bit crispy.

Nankhatai Indian Shortbread Cookies Eggless Cardamom Festive Foods

If you don't want to add sooji or semolina to the dough, simply add the same quantity of all-purpose flour or besan ( chickpea flour). It makes the cookies a bit richer and imparts a characteristic nuttiness to the taste. By the way, some almond meal would be wonderful here too.

Nankhatai Indian Shortbread Cookies Eggless Cardamom Festive Foods

NOTES:

  • You can use butter or ghee to make nankhatai. Though unsalted butter is recommended, I  do use salted one sometimes.
  • Because of the high-fat content here, the dough is refrigerated for 30 minutes or so. This ensures that the cookies don't spread out much.
  • Please make sure you're using fine sugar. Just grind some regular granulated sugar in your coffee grinder to make it fine.
Nankhatai Indian Shortbread Cookies Eggless Cardamom Festive Foods

Half the joy of cooking is sharing it with others. That’s why I’m always eager to hear from you. So go right ahead & drop a comment or reach out on Instagram, Pinterest, YouTube, or Facebook. I hope you love this delicious nankhatai as much as we do!

📖 Recipe

Tried this recipe?Let us know how it was!
Nankhatai Indian Shortbread Cookies Eggless Cardamom Festive Foods

Nankhatai

Natasha Minocha
Light and crumbly, these cardamom and rose flavoured Indian shortbread cookies, aka Nankhatai are truly a delectable treat!
No ratings yet
Print Recipe Pin Recipe
Prep Time 40 minutes mins
Cook Time 15 minutes mins
Total Time 55 minutes mins
Course Cookies, Snack
Cuisine Indian
Servings 18 Cookies
Calories 125 kcal

Ingredients
  

  • 150 gms Butter, slightly softened
  • 100 gms Fine sugar
  • 1 1/4 cup All purpose flour
  • 1/3 cup Semolina/ sooji
  • 1 tsp Dried rose petals, slightly crushed
  • 1/2 tsp Cardamom powder
  • 2 tsp Pistachio, roughly chopped plus extra for sprinkling on top

Instructions
 

  • Cream butter and sugar in a large bowl till light and fluffy.
  • Stir in the all purpose flour, semolina/ sooji, cardamon powder, dried rose petals and chopped pistachio. Combine well and refrigerate the dough for 20-30 minutes for the dough to firm a bit.
  • Preheat your oven to 180C. Line a baking tray with parchment paper or silpat.
  • Shape the chilled dough into small balls and flatten them slightly. Making cross wise cuts on each dough ball using a knife.
  • Place them on the cookie sheet. Sprinkle some chopped pistachios on top and bake for 12-15 minutes or until they are light golden.
  • Carefully transfer the cookies to a cooling rack. They will be soft but will firm up as they cool. Enjoy!

Nutrition

Serving: 1CookieCalories: 125kcalCarbohydrates: 15gProtein: 1gFat: 7gSaturated Fat: 4gPolyunsaturated Fat: 0.3gMonounsaturated Fat: 2gTrans Fat: 0.3gCholesterol: 18mgSodium: 54mgPotassium: 18mgFiber: 0.4gSugar: 6gVitamin A: 208IUVitamin C: 0.01mgCalcium: 4mgIron: 1mg
Nankhatai Indian Shortbread Cookies Eggless Cardamom Festive Foods

Sweet Potato Waffles (Gluten-Free)

October 11, 2018

Sweet Potato Cornmeal Waffles easy healthy glutenfree recipe

After hanging around on my "must-make" list, savory waffles finally made an appearance in my kitchen. And boy, I’m glad I began with sweet potato waffles. Crunchy with a delicate, moist center, these cornmeal waffles are so healthy and the perfect last-minute snack.

Sweet Potato Waffles (Gluten-Free)

I'm borderline addicted to sweet potatoes. When in season, they make it to our table almost every day. They are wonderful roasted sweet potato fries, fantastic in wonderful sweet potato salad, yummy with quinoa, and don’t get me started on wonderful sweet potato salad. They make a healthy snack, just simply steamed, tossed in lemon juice, and some chaat masala.

So, I hope you won't wait as long as I did to make these delicious, hearty, wholesome, and savory sweet potato cornmeal waffles.

[feast_advanced_jump_to]

Why We Love This Recipe

Versatile meal option: They are superb as a sweet potato waffles toddler snack, for a lazy brunch or even dinner.

Unique flavor: the combo of cornmeal, herbs, spices, and the natural sweetness of sweet potatoes creates a delicious taste.

Nutritional boost: a tasty treat packed with the healthful goodness of sweet potatoes.

Sweet Potato Waffles (Gluten-Free)

How To Make Sweet Potato Waffles

Step 1: Set your waffle iron to preheat according to the manufacturer's instructions.

Step 2: Blitz sweet potatoes, olive oil, and almond milk in a blender. Process till you have a smooth sweet potato purée.

Step 3: Pour the sweet potato purée into a bowl. Stir in a beaten egg.  

Step 4: Sift and mix the cornmeal, baking powder, salt, and turmeric powder with the wet ingredients.

Step 5: Fold in chopped basil in the cornmeal waffles gluten-free batter.

Step 6: Grease the waffle cavities well and pour a ladleful of batter into the cavity.

Step 7: Let the sweet potato waffle cook for 5–6 minutes (or until golden and crisp).

Step 8: Make sweet potato cornmeal waffles with the rest of the batter.

Final step: Serve warm and savor!

Pro Tips

  • The sweet potato waffle recipe requires cooked potatoes. I used the pressure cooker for it. You can even steam them.
  • Don’t confuse cornmeal with corn flour. The latter is softer and almost powdery. Cornmeal has a grittier texture.
  • Cornmeal waffles or even sweet potato waffles with no flour are best served immediately. But if you have leftover savory waffles, they reheat rather well in a toaster.
  • Don’t have a waffle maker? Use the same batter to make sweet potato pancakes.
Sweet Potato Waffles

Gluten-free Cornmeal Waffle Ingredients

Sweet potatoes add a good amount of moisture and natural sweetness to the savory waffle.

Cornmeal makes the gluten-free sweet potato waffles crunchy and gives them a tender crumb. It also adds a tinge of sweet, nutty flavor. It’s unique to cornmeal.

Almond milk is my choice because I prefer to cook with plant-based milk. Use any milk you have at hand and love.

Easy Sweet Potato Waffles gluten-free

How To Serve

Breakfast for toddlers, an after-school snack for kids, or dinner for you—you can serve this sweet potato cornmeal waffle recipe anyway. My suggestion? Pair the savory waffles with:

  • Some veggies
  • Sausages
  • Chicken
  • An egg
  • Tofu

And don’t get me started on dips and sauces. There are so many that would work with these sweet potato waffles:

  • Good old mint chutney
  • Spicy tomato chutney
  • Tahini yogurt sauce
  • BBQ sauce
  • Sriracha
  • Pesto

I made a simple soy-honey mustard sauce for them. Simply mix a tablespoon of soy sauce, a teaspoon of honey, and half a teaspoon of mustard in a small bowl. Add chili flakes and coarsely ground pepper, and you are done. Drizzle on the sweet potato cornmeal waffles and relish!

Sweet Potatoes

More Sweet & Savory Waffle Recipes

Sourdough Waffles

Carrot Cake Waffles

Eggless Waffle Recipe

Lemon Poppyseed Waffles

Apple Cinnamon Buckwheat Waffles

Half the joy of cooking is sharing it with others. That’s why I’m always eager to hear from you. So go right ahead & drop a comment or reach out on Instagram, Pinterest, YouTube, or Facebook. I hope you love these sweet potato waffles as much as we do!

📖 Recipe

Tried this recipe?Let us know how it was!
Sweet Potato Cornmeal Waffles easy healthy glutenfree recipe

Sweet Potato Waffles (Gluten-Free)

Natasha Minocha
Sweet Potato Waffles - Crunchy with a delicate, moist center, these cornmeal waffles are so healthy and the perfect last-minute snack!
No ratings yet
Print Recipe Pin Recipe
Prep Time 15 minutes mins
Cook Time 20 minutes mins
Course Breakfast, Main Course, Side Dish, Snack
Cuisine American
Servings 10 Waffles
Calories 137 kcal

Ingredients
  

  • 2 medium Sweet Potatoes,cooked I cooked them in my pressure cooker. You could even steam them.
  • 1 1/4 cup Almond milk you can use any milk
  • 2 tbsp Extra virgin Olive oil
  • 1 Egg, beaten
  • 1 cup Cornmeal
  • 1 tsp Turmeric powder
  • 1 tsp Baking powder
  • 3/4 tsp Salt
  • Small handful fresh basil, finely chopped

Instructions
 

  • Place the sweet potatoes, olive oil and almond milk in a blender. Process till smooth.
  • Pour out into a large bowl, stir in the beaten egg, cornmeal, baking powder, salt and turmeric powder. Mix the chopped basil in the batter.
  • Preheat your waffle iron according to manufacturer's instructions.
  • Grease the waffle cavities well and pour a ladleful of batter in the cavity. Let the batter cook for 5-6 minutes, until golden and crisp.
  • Repeat with the rest of the batter. Serve warm. Enjoy!

Nutrition

Serving: 1 ServingCalories: 137kcalCarbohydrates: 21gProtein: 3gFat: 5gSaturated Fat: 1gPolyunsaturated Fat: 1gMonounsaturated Fat: 3gTrans Fat: 0.002gCholesterol: 16mgSodium: 290mgPotassium: 216mgFiber: 3gSugar: 2gVitamin A: 6436IUVitamin C: 1mgCalcium: 79mgIron: 1mg

Pumpkin Banana Bread

October 6, 2018

Sliced pumpkin banana bread on a white platter.

Moist, tender, and studded with walnuts and chocolate chips, this pumpkin banana bread is the cozy loaf you’ll want to bake all fall! It’s a simple banana pumpkin bread recipe that takes just 15 minutes to prep. So you can have a homemade bread in the oven before your coffee even finishes brewing!

A stack of 4 pumpkin banana bread slices with a hand picking up one.

I’ll admit it. I’m head-over-heels for pumpkin bakes (you’ve probably guessed from my pumpkin snickerdoodle cookies and pumpkin madeleines). The beauty of pumpkin is that it soaks up flavors around it. So, when you pair the sweetness of ripe bananas with pumpkin puree and pumpkin pie spice, you get a bread loaf so full of flavor that it vanishes faster than you can slice it!

[feast_advanced_jump_to]

Why You’ll Love The Recipe

✨ When we can have a pumpkin pie latte, then why not a fall version of the classic banana bread? This easy, wholesome banana and pumpkin bread is made for autumn!

✨ Warm spices, earthy pumpkin, sweet bananas, and gooey chocolate chips make this such a comforting bake!

✨ The bread stays moist for days, making it great for lunchboxes, after-school snacks, or a slice with your morning coffee.

✨ This pumpkin banana bread with chocolate chips is a delicious way to use up overripe bananas. And since the recipe is easily adaptable, you can make it vegan or gluten-free.

Recipe Ingredients

Labelled ingredients for making pumpkin banana bread.

Flour: I used all-purpose flour because it gives the best crumb. But I’ve also made it with whole-wheat flour for a heartier loaf. If you’d like to try a gluten-free version, swap it with buckwheat flour. It works beautifully in my soft pumpkin chocolate chip cookie recipe.

Pumpkin pie spice brings all the fall vibes. You can use store-bought or make your own with my homemade pumpkin pie spice blend.

Bananas: Pick the most overripe ones, as they lend natural sweetness and moisture.

Pumpkin puree: You can use canned, but I usually make my own at home, like I did for my pumpkin burnt Basque cheesecake.

Eggs: They provide structure and help the bread rise beautifully. To make pumpkin banana bread vegan, replace the egg with flax egg.

Sugar: I used brown sugar. But regular sugar, jaggery powder, and honey work too. I do plan to make it again with date syrup.

Oil: I love coconut oil for its subtle nutty sweetness, but any neutral vegetable oil works.

Vanilla extract enhances the flavor of the bread. I used my homemade vanilla extract.

Walnuts add texture and crunch. Pecans or hazelnuts would also be lovely.

Dark chocolate: Use chips or chunks to create those tempting melted pockets of chocolate, like I did with my pumpkin and chocolate swirl muffins.

Please see the recipe card for full information about ingredients and quantities.

How To Make Pumpkin Banana Bread?

Dry ingredients for making pumpkin banana bread in a mixing bowl.

Step 1: In a large bowl, combine the flour, baking soda, baking powder, salt, and pumpkin pie spice.

Mashed banana and pumpkin puree in a mixing bowl.

Step 2: In another bowl, mash the bananas with a fork. Add the pumpkin puree. Whisk in oil, eggs, brown sugar, and vanilla extract.

Dry and wet ingredients for making banana pumpkin bread in a bowl.

Step 3: Combine the wet and dry ingredients. Please don't overmix.

Chocolate chunks on top of cake batter in a bowl.

Step 4: Fold in the walnuts and chocolate chips.

Cake batter with chocolate chips and walnuts in a cake pan.

Step 5: Transfer the batter into a greased 9 x 4-inch loaf pan. Top with a few walnuts and chocolate chips.

baked pumpkin banana bread in a cake pan.

Step 6: Bake for 45-55 minutes or until golden brown and a skewer inserted in the center comes out clean.

Step 7: Let the bread cool in the pan for a few minutes before turning it out on a cooling rack. Serve warm or at room temperature. 

Top Tips

  • You can use canned pumpkin puree instead of a homemade one. Please make sure you're using pumpkin puree and not pumpkin pie filling!
  • Use ripe bananas for the best, sweet flavor. 
  • For a soft and tender crumb, please don't overmix the batter. You should mix it only until no flour streaks are visible. Overmixing will give you a dense quick bread.
  • If your bread is overbrowning, tent it loosely with a piece of aluminum foil.
  • Allow the bread to cool completely before slicing. This helps the loaf to firm up, and you'll get neater slices!
  • I highly recommend using a kitchen scale to measure your ingredients. This ensures better and consistent results, always.
Sliced pumpkin banana bread on a platter.

How To Serve

This pumpkin and banana bread is delicious warm, or at room temperature the next day when the flavors deepen. This quick bread is perfect for tea time or with a cup of coffee.

It's so good for breakfast too! It's so lovely, toasted and served with a pat of butter or cinnamon honey butter or even pear butter! For an extra indulgence, try it with homemade cream cheese!

2 halves of a bread slice stacked on a small plate with a red fork.

Recipe FAQs

What is pumpkin pie spice?

It’s a cozy blend of cinnamon, ginger, cloves, and nutmeg. You can use store-bought or try my homemade pumpkin pie spice.

Can I leave out the nuts?

Yes, you can! This pumpkin banana bread is so wonderful without any add-ins, too!

Can I make pumpkin banana muffins instead?

Absolutely! Pour the batter into a lined muffin tin and bake for 18-20 minutes at 180 °C or 350°F, like I did with my vegan pumpkin muffins.

How to store the pumpkin banana bread recipe?

This bread stays well in the refrigerator for 4-5 days in an air-tight container.

Looking For More Easy Fall Treats?

  • Puff pastry apple donuts stacked on a serving plate.
    Easy Puff Pastry Apple Donuts
  • Baked Apple Donuts with Cinnamon Sugar
    Baked Apple Donuts with Cinnamon Sugar
  • Sliced pumpkin cheesecake on parchment paper with 2 forks.
    Pumpkin Basque Cheesecake
  • chocolate dipped pumpkin donuts on a plate.
    Vegan Pumpkin Donuts

Half the joy of cooking is sharing it with others. That’s why I’m always eager to hear from you. So go right ahead & drop a comment or reach out on Instagram, Pinterest, YouTube, or Facebook. I hope you love this pumpkin banana bread as much as we do!

📖 Recipe

Tried this recipe?Let us know how it was!
Sliced pumpkin banana bread on a white platter.

Pumpkin Banana Bread

Natasha Minocha
Celebrating fall baking with this delicious Pumpkin Banana Bread! Chock full of walnuts and chocolate chips, this easy fall dessert is an instant family favorite.
5 from 1 vote
Print Recipe Pin Recipe
Prep Time 15 minutes mins
Cook Time 45 minutes mins
Course Bread, Cakes, Snack
Cuisine American
Servings 8 Servings
Calories 364 kcal

Ingredients


  • 1.5 cup All-purpose flour
  • 1.5 tsp Baking powder
  • 1/2 tsp Baking soda
  • 1/4 tsp Salt
  • 1.5 tsp Pumpkin pie spice
  • 2 small Bananas
  • 1/2 cup Pumpkin puree
  • 2 Eggs
  • 1/2 cup Brown sugar
  • 1/3 cup Oil
  • 1 tsp Vanilla extract
  • 1/3 cup Walnuts, roughly chopped
  • 1/2 cup Dark chocolate chunks/chips

Instructions
 

  • Preheat your oven to 180 C / 350 F. Grease an 8 x 4-inch loaf pan.
  • In a large bowl, combine the flour, baking soda, baking powder, salt, and pumpkin pie spice.
    1.5 cup All-purpose flour, 1.5 tsp Baking powder, 1/2 tsp Baking soda, 1/4 tsp Salt, 1.5 tsp Pumpkin pie spice
  • In another bowl, mash the bananas with a fork. Add the pumpkin puree.
    2 small Bananas, 1/2 cup Pumpkin puree
  • Whisk in oil, eggs, brown sugar, and vanilla extract.
    1/3 cup Oil, 2 Eggs, 1/2 cup Brown sugar, 1 tsp Vanilla extract
  • Combine the wet and dry ingredients. Please don't overmix.
  • Fold in the walnuts and chocolate chips, reserving a few for topping.
    1/3 cup Walnuts, roughly chopped, 1/2 cup Dark chocolate chunks/chips
  • Transfer the batter into the prepared tin. Top with the reserved walnuts and chocolate chips.
  • Bake at 180 C/ 350 F for 45-55 minutes or until golden brown and a skewer inserted in the center comes out clean.
    If the top is browning too fast, cover the top of the tin loosely with a piece of foil.
  • Let the bread cool in the pan for a few minutes before turning it out on a cooling rack. Serve warm or at room temperature. Enjoy!

Video

Notes

  • You can use canned pumpkin puree instead of a homemade one. Please make sure you're using pumpkin puree and not pumpkin pie filling!
  • Use ripe bananas for the best, sweet flavor. 
  • For a soft and tender crumb, please don't overmix the batter. You should mix it only until no flour streaks are visible. Overmixing will give you a dense quick bread.
  • If your bread is overbrowning, tent it loosely with a piece of aluminum foil.
  • Allow the bread to cool completely before slicing. This helps the loaf to firm up, and you'll get neater slices!
  • I highly recommend using a kitchen scale to measure your ingredients. This ensures better and consistent results, always.

Nutrition

Serving: 1 ServingCalories: 364kcalCarbohydrates: 47gProtein: 6gFat: 18gSaturated Fat: 5gPolyunsaturated Fat: 5gMonounsaturated Fat: 7gTrans Fat: 0.04gCholesterol: 41mgSodium: 254mgPotassium: 279mgFiber: 3gSugar: 21gVitamin A: 2497IUVitamin C: 3mgCalcium: 113mgIron: 2mg

Pear Blueberry Ginger Smoothie

October 2, 2018

pear blueberry ginger smoothie vegan refined sugarfree healthy breakfast

This Pear Blueberry Ginger Smoothie is an easy, invigorating, and super delicious way to make your day healthier! This smoothie is made with almond milk, fruits, ginger, and chia seeds.

pear blueberry ginger smoothie vegan refined sugarfree healthy breakfast

Smoothies are a simple and effective way to pack a bunch of nutritious, delicious ingredients into one glass! This Blueberry Ginger Smoothie is vegan, using almond milk.

I've grown to love ginger in my smoothies since I made this Beetroot Ginger Detox Smoothie. The health benefits of ginger are enormous, but I also enjoy its sharp taste against the creamy smooth sweetness of pear and bananas.

Blueberries add a hefty load of antioxidants to this nutrient-rich smoothie. It's loaded with fiber, protein, vitamins, and immunity-boosting properties.

pear blueberry ginger smoothie vegan refined sugarfree healthy breakfast

I didn't feel the need to add any sweetener as bananas and pears did that job well. But you could certainly add a couple of dates or honey according to your preference. These days, I'm quite hooked on my homemade Almond Milk and that's what was used here. All good fats!

pear blueberry ginger smoothie vegan refined sugarfree healthy breakfast

More Easy Smoothie Recipes

  • Chocolate Beet Smoothie
  • Chocolate Peanut Butter Smoothie
  • Fig & Dates Smoothie
  • Pineapple strawberry Smoothie

Half the joy of cooking is sharing it with others. That’s why I’m always eager to hear from you. So go right ahead & drop a comment or reach out on Instagram, Pinterest, YouTube, or Facebook. I hope you love this pear blueberry smoothie as much as we do!

📖 Recipe

Tried this recipe?Let us know how it was!
pear blueberry ginger smoothie vegan refined sugarfree healthy breakfast

Pear Blueberry Ginger Smoothie

Natasha Minocha
This Blueberry Ginger smoothie is the best vegan fruit smoothie! A simple almond milk smoothie with pears, blueberry, ginger and more goodness, that makes for an easy healthy breakfast.
No ratings yet
Print Recipe Pin Recipe
Prep Time 15 minutes mins
Total Time 15 minutes mins
Course Breakfast, Drinks
Cuisine World
Servings 2 Servings
Calories 135 kcal

Ingredients
  

  • 1 big Pear, peeled and cut in pieces
  • 1/2 cup Blueberries, fresh or frozen
  • 1 tsp Fresh Ginger, grated You can add more if you prefer a sharper taste
  • 1 Banana
  • 2 tsp Chia seeds
  • 2 tbsp Oats, lightly roasted and cooled I prefer to lightly roast the oats, you can use them as is too.
  • 1 cup Almond milk You can use any milk of your choice

Instructions
 

  • Place all the ingredients in a blender and process till smooth and creamy. Taste and adjust for taste. Serve immediately. Enjoy!

Nutrition

Serving: 1 ServingCalories: 135kcalCarbohydrates: 25gProtein: 3gFat: 3gSaturated Fat: 0.3gPolyunsaturated Fat: 2gMonounsaturated Fat: 1gTrans Fat: 0.01gSodium: 167mgPotassium: 283mgFiber: 5gSugar: 11gVitamin A: 60IUVitamin C: 9mgCalcium: 186mgIron: 1mg

Carrot Hummus

September 29, 2018

Hummus in a bowl with pomegranate arils, nuts and pumpkin seeds.

This carrot hummus is creamy, savory, slightly sweet, and beautifully golden. Ready in 30 minutes, it's the perfect dip for veggies, homemade pita, or spreading on your morning toast.

Carrot hummus in a bowl with olive oil, pomegranate, nuts and pumpkin seeds.


Carrots are a staple in my kitchen, and I love cooking and baking with them, especially for Easter recipes, like my eggless carrot cake and carrot cake madeleines. This time, I decided I wanted an appetizer, so I turned them into this roasted carrot hummus.

It’s creamy, vibrant, and just a little different from classic hummus. The roasted carrots add a natural sweetness and depth that makes it feel a bit special. Now it’s part of my regular dips & sauces lineup, right alongside my favorite whipped goat cheese recipe and creamy avocado dip.

[feast_advanced_jump_to]

Why You'll Love This Recipe

✨ The flavor of roasted carrot hummus is an explosion. Roasted carrots add a subtle sweetness, while garlic, tahini, and lemon keep it balanced and savory.

✨ Super easy and quick to make! It takes all of 15 minutes to make this dip once you have the roasted carrots and chickpeas ready.

✨ It’s also naturally vegan and gluten-free, so it works for people with dietary restrictions.

✨ You can customize the recipe for carrot hummus your way. That’s the beauty. You can make the dip taste exactly how you want. More garlic? Go for it. Extra lemon? Absolutely.

✨ The recipe is ultra-versatile. It's great as a party dip to serve with Turkish pide, sourdough crackers, as part of a cheese board, or even on your morning avocado toast.

Recipe Ingredients

Labelled ingredients for making roasted carrot hummus.

Chickpeas: Use canned for speed or home-cooked for extra creaminess. I always keep cooked chickpeas in my pantry (soaked overnight). They're so handy for whipping up quick curries, adding to salads, smooshing for sandwiches, and, of course, for hummus.

Carrots: Roasting vegetables is my favorite way of cooking them. It's an easy, hands-off method that brings out the best in them. Roasting caramelizes the natural sugars in vegetables, intensifying their flavors and making them slightly sweet. And those little crispy charred bits? Pure gold!

Garlic: A few cloves add the perfect savory punch.

Tahini: Use homemade or store-bought. It adds nutty richness and makes the hummus so creamy. Don't want to add tahini? Don't worry, your hummus will still taste amazing!

Lemon juice brightens the flavor.

Oil: Good-quality extra virgin olive oil makes a difference!

Cold water or aquafaba helps create a light, airy texture. Add a little at a time.

Turmeric powder is optional. I added it just for the lovely golden sunshine color. You can barely taste it.

Roasted cumin powder is also optional, but I highly recommend it for the smoky, earthy note.

Fresh herbs: Cilantro or parsley for freshness.

Please see the recipe card below for full information about the ingredients and quantities.

How to Make Roasted Carrot Hummus

Step 1: Preheat your oven to 200 C /400 F.

Roasted carrots and garlic on a parchment paper-lined baking tray.

Step 2: Peel the carrot and cut it into chunks. Place on a baking tray with the garlic. Toss with olive oil and salt. Roast for 20 minutes, until the vegetables are cooked through. Let them cool.

Roasted carrots, garlic, chickpeas, and spices in a blender jar.

Step 3: Once the vegetables are cooled, add them to the food processor along with the chickpeas, tahini, lemon juice, turmeric, roasted cumin powder, olive oil, cold water (or aquafaba), and salt.

Blended hummus mixture in a blender jar.

Step 4: Blend until smooth. Add more cold water or aquafaba if the mixture is too thick. Taste and adjust for seasonings.

Carrot hummus in a bowl.

Step 5: Add the herbs and pulse a couple of times. Transfer to a serving plate and drizzle with olive oil. Add whatever toppings you like. Serve with pita chips and enjoy!

Hummus topped with nuts, pomegranates and pumpkin seeds in a bowl with crackers.

Top Tips

  • When blending, use cold water or aquafaba. It helps emulsify the ingredients better and gives you a super smooth hummus.
  • Adding a couple of ice cubes gives an even fluffier texture.
  • Cook the chickpeas well. They should be sort of falling apart when cooked. This will give your hummus a very creamy texture.
  • If using canned chickpeas, simmer them for 10-15 minutes. This will make them softer and easier to blend.
  • Choose a good-quality tahini. It should be smooth, slightly runny, and nutty. It makes a huge difference to the taste and texture.

How To Serve

Spoon the dreamy golden-hued hummus onto a plate or bowl, swirling slightly to create depth. This creates those gorgeous ridges that hold all the toppings.

Fill those ridges with a generous pour of high-quality olive oil. Top it with pomegranate arils for a pop of color, pumpkin seeds, and roasted pine nuts for crunch. You can even add some cooked chickpeas and a sprinkle of paprika on top. Really, anything you fancy works!

  • This roasted carrot hummus recipe is perfect for a crudité platter.
  • It’s fantastic with warm pita bread, air fryer tortilla chips, naan, sweet potato crackers, Olive Garden breadsticks, or crispy crostini; all work beautifully.
  • Serve it as a part of a mezze platter along with my air-fryer falafels, vegetable cheese falafels, tzatziki, and homemade labneh.
  • Use it on toast or for making sandwiches and wraps.
Hummus scooped on a cracker on top of a bowl of hummus.

Recipe FAQs

Can I use raw carrots instead of roasted ones?

You can, but you'll miss out on that deep, caramelized sweetness that roasting brings. I highly recommend roasting!

Can I make the carrot hummus recipe without tahini?

Tahini is traditional and gives hummus its signature flavor, but if you don't have it, you can skip it. The flavor will be different but still delicious.

What is aquafaba?

Aquafaba is the liquid in canned chickpeas or the liquid left over after cooking dried beans. The name literally means “bean water.” It may not look like much, but it’s a great natural emulsifier. It helps make hummus extra smooth and creamy. You can use it instead of cold water while blending.

How do I store leftover carrot hummus?

Keep any leftover vegan carrot hummus in an airtight container and refrigerate for up to 5 days.

More Easy Dip Recipes

  • Sambal Oelek sauce in a glass jar with a spoon on a wooden plate.
    Sambal Oelek Recipe
  • Cashew Roasted Red Pepper Sauce vegan dairyfree healthy
    Easy Cashew Roasted Red Pepper Sauce
  • cashew ricotta cheese garnished with parsley in a small bowl place on 2 plates.
    Cashew Ricotta Cheese
  • Baked vegan spinach artichoke dip in a cast-iron pan.
    Vegan Spinach Artichoke Dip

Half the joy of cooking is sharing it with others. That’s why I’m always eager to hear from you. So go right ahead and drop a comment or reach out on Instagram, Pinterest, YouTube, or Facebook. I hope you love this roasted carrot hummus as much as we do!

📖 Recipe

Tried this recipe?Let us know how it was!
Hummus in a bowl with pomegranate arils, nuts and pumpkin seeds.

Carrot Hummus

Natasha Minocha
This carrot hummus is creamy, savory, slightly sweet, and beautifully golden. Ready in 30 minutes, it's the perfect dip for veggies, crackers, pita, or spreading on your morning toast.
5 from 1 vote
Print Recipe Pin Recipe
Prep Time 15 minutes mins
Cook Time 20 minutes mins
Total Time 35 minutes mins
Course Condiment, Sauce
Cuisine Middle Eastern
Servings 15 Servings
Calories 68 kcal

Ingredients


  • 1.5 cups Chickpeas, cooked
  • 1 large Carrots
  • 4 cloves Garlic
  • 2 tbsp Tahini
  • 2 tsp Lemon juice
  • 1 tsp Turmeric powder Optional
  • 1 tsp Roasted cumin powder Optional
  • 3 tbsp Extra virgin Olive oil Plus more for serving
  • 1/4 cup Cold water or aquafaba plus more if needed
  • Salt to taste
  • 1-2 tbsp Fresh Cilantro chopped You can use parsley if you like or leave the herbs out altogether

Instructions
 

  • Preheat your oven to 200 C /400 F.
  • Peel the carrot and cut it into chunks.
    Place on a baking tray with the garlic. Toss them with 1 tablespoon of olive oil and salt.
    Roast for 20 minutes, until the vegetables are cooked through. Let them cool.
  • Once the vegetables are cooled, add them to the food processor along with the chickpeas, tahini, lemon juice, turmeric, roasted cumin powder, 2 tablespoons of olive oil, cold water (or aquafaba), and salt. Blend till smooth.
    Taste and adjust for seasoning.
  • If the hummus is too thick, add some more liquid. Once your hummus has reached the consistency you prefer, add the herbs and blitz for a couple of minutes.
    This will ensure the herbs don't get completely blended into the dip, leaving bright green flecks in the hummus.
  • Spoon on to a bowl or plate, top with olive oil and serve. Enjoy!

Notes

  • When blending, use cold water or aquafaba. It helps emulsify the ingredients better and gives you a super smooth hummus.
  • Adding a couple of ice cubes gives an even fluffier texture.
  • Cook the chickpeas well. They should be sort of falling apart when cooked. This will give your hummus a very creamy texture.
  • If using canned chickpeas, simmer them for 10-15 minutes. This will make them softer and easier to blend.
  • Choose a good-quality tahini. It should be smooth, slightly runny, and nutty. It makes a huge difference to the taste and texture.

Nutrition

Serving: 1 ServingCalories: 68kcalCarbohydrates: 6gProtein: 2gFat: 4gSaturated Fat: 1gPolyunsaturated Fat: 1gMonounsaturated Fat: 3gSodium: 6mgPotassium: 83mgFiber: 2gSugar: 1gVitamin A: 810IUVitamin C: 1mgCalcium: 16mgIron: 1mg

Orange Madeleine Cookies

September 19, 2018

Orange Madeleines w/ dried blue cornflowers French cake

Orange Madeleine Cookies! These buttery little French cakes are one of my favorites to serve with tea or coffee. Softly spongy, speckled with dried blue cornflowers, infused with fresh orange zest and orange blossom water, they are truly a delight to make and eat!

Orange Madeleines w/ dried blue cornflowers in a bowl.

It may seem that their production is fiddly, but really they are one of the simplest confections you can make. The only requirement is the correct mold. The ingredients are straight off your basic pantry..but then you can pretty much add any flavoring you enjoy. Like I did for my Lemon Madeleines and Chocolate Madeleines.

Orange Madeleines | Dried Blue Cornflowers French cake

These Orange Madeleine cookies got a hefty dose of orange zest and a splash of orange blossom water along with a tablespoon full of dried blue cornflowers.

This was a lovely gift I got from a friend on my visit to Moscow in July.  They added pretty blue speckles to the madeleines and a subtle clove flavor. If you can't find these, just go ahead and use whatever edible dried flower petals ( dried rose would be great here!) you can lay your hands on. Or, leave them out altogether..your cakes will still taste sublime.

Orange Madeleines | Dried Blue Cornflowers French cake

Whilst making madeleines is a breeze, there are a couple of things to keep in mind:

  • The butter should be melted and cooled before you fold it into the batter, slowly.
  • The batter needs to rest in the refrigerator for a couple of hours. That's what ensures that the madeleines get their characteristic hump once baked.

So go ahead, fancy up your tea time, and enjoy these little treats! Aren't they just the prettiest?!

Orange Madeleines | Dried Blue Cornflowers French cake

More Easy Madeleine Recipe To Try:

  • Chocolate Cherry Madeleines
  • Pumpkin Oats Madeleines 
  •  Vegan Coffee Hazelnut Madeleines
  • Spiced Brown Butter Madeleines

Half the joy of cooking is sharing it with others. That’s why I’m always eager to hear from you. So go right ahead & drop a comment or reach out on Instagram, Pinterest, YouTube, or Facebook. I hope you love these lovely orange madeleines as much as we do!

📖 Recipe

Tried this recipe?Let us know how it was!
Orange Madeleines w/ dried blue cornflowers French cake

Orange Madeleine Cookies

Natasha Minocha
Buttery little French cakes,softly spongy, infused with orange zest & orange blossom water, these Orange Madeleines are truly a delight to make and eat!
No ratings yet
Print Recipe Pin Recipe
Prep Time 15 minutes mins
Cook Time 15 minutes mins
Resting Time 3 hours hrs
Total Time 3 hours hrs 30 minutes mins
Course Cakes, Cookies
Cuisine French
Servings 15 Madeleines
Calories 100 kcal

Ingredients
  

  • 1 cup All purpose flour
  • 3/4 tsp Baking powder
  • 1 pinch Salt Omit if using salted butter
  • 2 tsp Fresh orange zest
  • 1/3 cup Sugar
  • 2 Eggs
  • 1 tsp Orange blossom water Optional
  • 90 gms Butter, melted and cooled I used salted butter
  • 1.5 tsp Dried blue cornflower petals Optional

Instructions
 

  • Sift the flour, salt and baking powder in a bowl.
  • In a small bowl, mix the orange zest and sugar with your fingertips till the sugar is fragrant and moist.
  • Beat the eggs and sugar till pale and thick, doubled in volume. Whisk in the orange blossom water.
    Now gently fold in the flour mixture, followed by butter. Please don't over-mix. Add the dried blue cornflower petals, gently.
  • Cover the batter and refrigerate for minimum of 3 hours or for up to 2 days.
  • When you're ready to bake, preheat your oven to 200C.
    Grease and flour the madeleine molds. If you have a silicone pan, no prep is needed.
  • Spoon the batter into the molds, about three-quarters of the way. There is no need to level the batter.
    Bake for 12 -15 minutes at 200 C or until they are golden and the tops are springy to touch.
  • Turn them out on a cooling rack. Cool to room temperature and sprinkle with icing sugar. Serve immediately.

Notes

This  recipe has been adapted from one of my favourite cookbook authors Dorie Greenspan ‘s Baking From My Home To Yours.

Nutrition

Serving: 1madeleineCalories: 100kcalCarbohydrates: 11gProtein: 2gFat: 6gSaturated Fat: 3gPolyunsaturated Fat: 0.3gMonounsaturated Fat: 1gTrans Fat: 0.2gCholesterol: 35mgSodium: 71mgPotassium: 19mgFiber: 0.3gSugar: 5gVitamin A: 183IUVitamin C: 0.4mgCalcium: 18mgIron: 1mg

Almond Millet Kheer (Pudding)

September 11, 2018

Almond Millet Kheer (Pudding) healthy refined sugarfree glutenfree recipe

As the festive season in India approaches, all I'm thinking about are the goodies I want to make. So here we are starting out with this incredibly simple, creamy, and healthy Almond Millet Kheer (pudding)!

Almond Millet Kheer (Pudding) in 2 small bowls with flowers and spoons.

This recipe came about one day when I was chewing my parents' brains about getting some recipe ideas from them. Fed up, they suggested kheer! Now I'm the biggest fan of traditionally made kheer - with rice, milk, and sugar ( it does most definitely deserves a blog post of its own). But  I just had to mess with that recipe!  So in came millets, almond milk, and jaggery with a splash of rose water. And thankfully this almond millet kheer flew with the purists in my family!

Typically the milk is cooked ever so slowly till it reduces in volume and thickens, then the rice is added and cooked till you get the creamiest softest textured pudding, with the sugar going in right at the end. As much as I find the whole process joyful, I wanted to make a slightly quick version with my millets.

These got roasted in a bit of ghee, then pressure-cooked with some crushed cardamom. That smell....!!!  They were cooked further for a little while in my homemade almond milk,  till it thickened. I love the depth of flavor jaggery imparts, so that went in as a sweetener as did a drizzle of rose water.

Almond Millet Kheer (Pudding) healthy refined sugarfree glutenfree recipe

The result was this creamy custard-like, mildly sweet kheer/pudding, with nuttiness from the almond milk, warmly aromatic from the cardamoms, delicately flavored with rose water and topped with crunchy roasted cashews and pistachios. It's a lovely dessert that works very well served warm or cold.  And is healthy and nourishing enough to have for breakfast! It's also great for the days when anyone is fasting during Navratri!

Almond Millet Kheer (Pudding) healthy refined sugarfree glutenfree recipe

NOTE:

  • You can make this recipe vegan by omitting ghee and using coconut oil instead.
  • You can use dates or date syrup or regular sugar to sweeten the kheer too.
  • By all means, use regular milk if you don't wish to use almond milk.
  • The millets can be cooked in a saucepan if you don't have a pressure cooker. Use the same millet-to-water ratio as mentioned in the recipe and cook over medium heat.

Half the joy of cooking is sharing it with others. That’s why I’m always eager to hear from you. So go right ahead & drop a comment or reach out on Instagram, Pinterest, YouTube, or Facebook. I hope you love this almond millet kheer as much as we do!

📖 Recipe

Tried this recipe?Let us know how it was!
Almond Millet Kheer (Pudding) healthy refined sugarfree glutenfree recipe

Almond Millet Kheer (Pudding)

Natasha Minocha
Simple, delicious Almond Millet Kheer (Pudding) to kick off the festive season! Its a lovely dessert that's wholesome enough to serve as breakfast!
No ratings yet
Print Recipe Pin Recipe
Prep Time 5 minutes mins
Cook Time 25 minutes mins
Total Time 30 minutes mins
Course Dessert
Cuisine Indian
Servings 4 Servings
Calories 198 kcal

Ingredients
  

  • 1 tsp Ghee Or coconut oil
  • 1/2 tsp Cardamom seeds, crushed
  • 3/4 cup Millets I used a mix of Kodo, Barnyard, Little and Foxtail. You can use all of these or any one.
  • 1.5 cup Water
  • 2 -2.5 cups Almond milk
  • 3 tbsp Jaggery powder You may need to add more, depending on your preference
  • 1 tsp Rose water
  • 2-3 tbsp Roasted cashews, pistachios, dried rose petals For topping

Instructions
 

  • In your pressure cooker, heat 1 teaspoon ghee, add crushed cardamom and the millets. Roast them for 3-4 minutes till lightly fragrant.
  • Add water and close the lid, put the weight on. Let it cook on medium high for 1 whistle. Turn off the gas and let the pressure release on its own. Your millets should be well cooked by now. Fluff them up with a fork.
    If you don't have a pressure cooker, you can also cook the millets in a saucepan, like you would cook rice. Add more water if needed.
  • Now add 2 cups of almond milk and let the mixture cook on low heat till it thickens, 10-15 minutes. Add more milk if the kheer is too thick for you.
  • Stir in the jaggery and rose water. Taste and adjust for sweetness.
  • Sprinkle with cashews, pistachios and dried rose petals. Serve warm or chilled. Enjoy!

Nutrition

Serving: 1 ServingCalories: 198kcalCarbohydrates: 39gProtein: 3gFat: 3gSaturated Fat: 1gPolyunsaturated Fat: 0.4gMonounsaturated Fat: 1gCholesterol: 3mgSodium: 88mgPotassium: 3mgFiber: 0.3gSugar: 10gVitamin C: 0.1mgCalcium: 91mgIron: 2mg

Crispy Baked Chicken Nuggets

August 25, 2018

A bowl of chicken nuggets with sauce on the side.

These crispy baked chicken nuggets are the ultimate quick and crowd-pleasing snack. Golden and crunchy on the outside, soft and tender on the inside, and packed with flavor - these homemade nuggets could not be simpler to make!

A bowl of chicken nuggets with sauce on the side.

While these chicken nuggets do need a little prep time, it’s absolutely worth it. Perfect for game days, anytime munching, and even great served with lunch or dinner! They are delicious on their own and even better dunked in your favorite dip or sauce.

[feast_advanced_jump_to]

Why You’ll Love This Recipe

✨ Crispy, crunchy chicken nuggets without the stress and mess of frying!

✨ Though the prep does take a little time, the process is straightforward and easy.

✨ Baked just right, the chicken stays soft and moist every time.

✨These baked chicken nuggets are always a hit with everyone - kids and adults alike.

✨They are so versatile. Perfect for snacking, stuffing into wraps and sandwiches, or even topping salads and pasta!

Recipe Ingredients

Labelled ingredients for making baked chicken nuggets.

Chicken: Use boneless chicken breast, cut into 2-inch pieces. Even -sized pieces ensure even cooking.

Flour: Use all-purpose flour for coating the chicken pieces.

Panko breadcrumbs: Lighter and airier than the regular breadcrumbs, panko give these chicken nuggets their extra-crispy texture. They are easily available online or in the Asian section of most supermarkets.

Eggs: To help the flour and panko coating stick.

Spices:  I used a blend of garlic powder, onion powder, paprika, dried thyme, and oregano. The recipe is so adaptable that you can switch to any kind of spices you prefer. Or even stick to simple salt and pepper!

Olive oil: For brushing on top of the nuggets. 

Please see the recipe card below for full information about the ingredients and quantities.

How To Make Crispy Baked Chicken Nuggets

Recipe Video

Step-By-Step Instructions

Mixed spices in a white bowl.

Step 1: Combine all the spices in a bowl - onion powder, garlic powder, dried thyme, dried poregano, paprika, salt, and pepper.

flour, breadcrumbs and eggs in 3 bowls.

Step 2: Set up the dredging station - flour, eggs, and breadcrumbs in 3 bowls. Mix 2 teaspoon of spice blend into the flour. Mix the remaining spice blend into the panko breadcrumbs.

one chicken piece coated in flour in a bowl.
A flour coated chicken piece in a bowl of beaten eggs.
A chicken piece in a bowl of panko breadcrumbs.

Step 3: Dip each piece of chicken in the seasoned flour, then eggs, and then in the seasoned breadcrumbs.

Panko breadbrumb coated chicken pieces on a parchment-lined tray.

Step 4: Place the coated chicken pieces on a parchment-lined tray. Brush both sides with olive oil.

Baked chicken nuggets on a parchment-lined tray.

Step 5: Bake at 200 C/ 400 F for 20 minutes or until the nuggets are golden and cooked through.

A bowl of chicken nuggets with one nugget cut in half.

Step 6: Serve the crispy baked chicken strips hot with your favorite dip or sauce!

Top Tips

  • Cut the chicken evenly. Similar- sized pieces cook evenly and at the same rate, so you get moist chicken tenders without any dry bits.
  • Pat the chicken dry before dredging it in flour. This will help the coating to stick better.
  • For extra crispiness, toast the panko breadcrumbs in butter for 4-5 minutes until golden.
  • You can bake these chicken nuggets on a wire rack for even browning. If you use a tray ( like I do), remember to flip the chicken halfway through baking.
  • To check for doneness - slice a chicken nugget in half. It should be white with no traces of pink. You can also use a meat thermometer to check. The internal temperature of chicken should read 74-75 C / 165 F.
  • Allow the baked chicken nuggets to rest for 5 minutes and serve immediately! These chicken nuggets are the crispiest straight out of the oven.
  • Lightly spray or brush with oil on both sides before baking for that beautiful golden brown color!
  • If prepping the crispy baked chicken tenders in advance, store them in the fridge. Bring them to room temperature and then brush with oil before baking.

How To Serve

These baked homemade chicken nuggets with panko are wonderfully versatile and can be served in so many ways -

With your favorite dips - Serve them hot with ketchup, honey mustard, fried pickle dip, easy yum yum sauce, creamy avocado dip, or homemade Tzatziki.

Tuck them in slices of my easy everyday bread for making sandwiches.

Roll them with veggies in these homemade naans or pita breads for delicious wraps!

Slice them and add them to salads for that extra protein and crunch.

As a part of a fun party spread - serve alongside Korean sausage rolls, cheddar cheese scones, pretzel bites, and air-fryer falafels!

A hand holding a chicken nugget dipped in sauce.

How To Store

These oven-fried chicken tenders store well in the refrigerator for 2-3 days. The best way to reheat them is in an oven, an air fryer, or on the stovetop in a pan. 

More Easy Snacks

  • Korean Cream Cheese Garlic Bread
    Korean Cream Cheese Garlic Bread
  • A platter full of pretzel bites with a small bowl of dip.
    Homemade Pretzel Bites
  • Cheesy pesto swirl rolls in a round baking dish.
    Cheesy Pesto Swirl Rolls
  • Cheese straws in a bowl with ingredients around.
    Easy & Quick Cheese Straws Recipe

Half the joy of cooking is sharing it with others. That’s why I’m always eager to hear from you. So go right ahead & drop a comment or reach out on Instagram, Pinterest, YouTube, or Facebook. I hope you love these crispy baked chicken nuggets as much as we do!

📖 Recipe

Tried this recipe?Let us know how it was!
A bowl of chicken nuggets with one nugget cut in half.

Crispy Baked Chicken Nuggets

Natasha Minocha
These crispy baked chicken nuggets are golden and crunchy on the outside, tender and juicy on the inside. Made with simple pantry ingredients and baked to perfection, they are an easy family -friendly recipe, perfect for snacks, lunch, or dinner!
No ratings yet
Print Recipe Pin Recipe
Prep Time 15 minutes mins
Cook Time 20 minutes mins
Total Time 35 minutes mins
Course Appetizer, Side Dish, Snack
Cuisine World
Servings 24 Nuggets
Calories 33 kcal

Ingredients


  • 1 Ib Boneless chicken breast, cut into bite-sized pieces
  • 1/3 cup All-purpose flour
  • 1 cup Panko breadcrumbs
  • 2 Eggs, beaten
  • 2-3 tbsp Olive oil

Spice mix

  • 1 tsp Garlic powder
  • 1 tsp Onion powder
  • 1 tsp Dried thyme
  • 1 tsp Dried oregano
  • 1 tsp Paprika
  • 1 tsp Salt
  • 1/2 tsp Black pepper

Instructions
 

  • Combine all ingredients for the spice mix in a small bowl - garlic powder, onion powder, paprika, salt, pepper, dried thyme, and dried oregano.
  • Mix 2 teaspoons of the spice mix into the flour.
  • Combine the rest of the spice mix with the panko breadcrumbs.
  • Preheat the oven to 200 C/ 400 F. Line a baking tray with parchment paper.
  • Set up the assembly line with 3 bowls.
    1st bowl - All-purpose flour
    2nd bowl - Eggs
    3rd bowl - Panko breadcrumbs
  • Dip each piece of chicken in the flour, then eggs, and then the breadcrumbs. Make sure each piece of chicken gets coated properly.
    Place the coated chicken pieces on the prepared tray.
  • Brush the chicken pieces with some oil on both sides and bake for 18-20 mins at 200 C / 400 F. Flip halfway through baking.
    They should all be golden and crispy.
  • Slice a nugget to check for doneness - it should be white with no traces of pink. You can also use a meat thermometer to check. The internal temperature of chicken should read 74-75 C / 165 F.
  • Serve hot with honey mustard, ketchup, or any dip you like. Enjoy!

Video

Notes

  • Cut the chicken evenly. Similar- sized pieces cook evenly and at the same rate, so you get moist chicken tenders without any dry bits.
  • Pat the chicken dry before dredging it in flour. This will help the coating to stick better.
  • For extra crispiness, toast the panko breadcrumbs in butter for 4-5 minutes until golden.
  • You can bake these chicken nuggets on a wire rack for even browning. If you use a tray (like I do),  remember to flip the chicken halfway through baking.
  • To check for doneness - slice a chicken nugget in half. It should be white with no traces of pink. You can also use a meat thermometer to check. The internal temperature of chicken should read 74-75 C / 165 F.
  • Allow the baked chicken nuggets to rest for 5 minutes and serve immediately! These chicken nuggets are the crispiest straight out of the oven.
  • Lightly spray or brush with oil on both sides before baking for that beautiful golden brown color!
  • If prepping the crispy baked chicken tenders in advance, store them in the fridge. Bring them to room temperature and then brush with oil before baking.

Nutrition

Serving: 1 ServingCalories: 33kcalCarbohydrates: 3gProtein: 1gFat: 2gSaturated Fat: 0.3gPolyunsaturated Fat: 0.3gMonounsaturated Fat: 1gTrans Fat: 0.001gCholesterol: 14mgSodium: 169mgPotassium: 18mgFiber: 0.3gSugar: 0.2gVitamin A: 64IUVitamin C: 0.05mgCalcium: 10mgIron: 0.4mg

Chocolate Stuffed Pancakes

August 18, 2018

A stack of half chocolate stuffed pancakes on a plate with fresh fruits around.

Chocolate Stuffed Pancakes! Yes, the ultimate in breakfast decadence is here. Although I did give them a healthy-ish spin on them by using whole-wheat flour and chocolate almond butter!

halves of chocolate stuffed pancakes stacked on a plate.

These Chocolate Stuffed Pancakes are a happy indulgence. They are light, fluffy and of course super chocolatey. The pancake recipe is a keeper. The batter's got some yogurt in it for extra softness and its fabulous for making plain ones too. And,as always it's rather simple to make.

Chocolate Stuffed Pancakes breakfast wholegrain cooking

I used chocolate almond butter for the filling. But Nutella would work very well here. You didn't need me to tell you that though, right?! Now this recipe, as easy it is, does demand your attention. Once you've poured some of the pancake batters on the pan, you need to have melted/softened chocolate filling that you can spoon on quickly and spread a bit. Then another bit of the batter goes on top to cover it. Don't worry even if some of the fillings oozes out. Just wipe the pan clean before making the next pancake. And if all this sounds like too much work, think about the rich reward that will be waiting for you to devour!

Chocolate Stuffed Pancakes breakfast wholegrain cooking

While this isn't an everyday kind of breakfast, it is a fabulous treat that got me a 5 star rating at home!!  Soft, fluffy, oozing with warm luscious chocolate filling, these beauties don't even need maple syrup. I got some on for "photo-op" though! Fruits are optional but I always like to serve them with pancakes and waffles for freshness.

Chocolate Stuffed Pancakes breakfast wholegrain cooking

Half the joy of cooking is sharing it with others. That’s why I’m always eager to hear from you. So go right ahead & drop a comment or reach out on Instagram, Pinterest, YouTube, or Facebook. I hope you love these chocolate-stuffed pancakes as much as we do!

📖 Recipe

Tried this recipe?Let us know how it was!
A stack of half chocolate stuffed pancakes on a plate with fresh fruits around.

Chocolate Stuffed Pancakes

Natasha Minocha
Chocolate Stuffed Pancakes! Yes, the ultimate in breakfast decadence is here with a healthy-ish spin using wholewheat flour and chocolate almond butter!
No ratings yet
Print Recipe Pin Recipe
Prep Time 25 minutes mins
Cook Time 10 minutes mins
Course Breakfast, Dessert, Snack
Cuisine American
Servings 8 pancakes
Calories 222 kcal

Ingredients
  

  • 1.5 cup Wholewheat Flour
  • 1.5 tsp Baking powder
  • 1/2 tsp Baking soda
  • 1/4 tsp Salt
  • 3/4 cup Yogurt
  • 1/4 cup Milk
  • 1 Egg
  • 3 tbsp Coconut oil
  • 2 tsp Vanilla extract
  • 1/3-1/2 cup Chocolate Almond Butter or Nutella You may need more depending on how much filling you want.
  • 1 tbsp Oil for cooking the pancakes

Instructions
 

  • Sift in all the dry ingredients in a medium sized bowl.
  • In another bowl, whisk the yogurt, milk, egg, oil, and vanilla extract. Pour over the dry ingredients and whisk well till no lumps remain. The batter should be thick, with a soft dropping consistency. Let the batter rest for 5-10 minutes.
  • Heat a non stick pan over medium heat. Pour 1/4 cup of batter on the pan, once it starts setting, drizzle a couple tablespoons of the chocolate almond butter, spread it gently over the pancake. Cover the chocolate filling with a little more batter.
  • Let the pancake cook for 1-2 minutes more till the underside is golden. Carefully flip it over. Cook on the other side till golden brown. Repeat till all the batter is used up.
  • Serve warm with some fruits and maple syrup. Enjoy!

Notes

NOTES:
  • These pancakes need to be cooked on medium heat. You may need to lower the heat to low if the pan gets too hot.
  • I found it easier to make these one at a time.
  • In case the filling oozes out, please do wipe the pan before making the next pancake.
  • By all means use melted butter or any vegetable oil you prefer, if you don't want to use coconut oil.

Nutrition

Serving: 1 ServingCalories: 222kcalCarbohydrates: 22gProtein: 8gFat: 12gSaturated Fat: 5gPolyunsaturated Fat: 2gMonounsaturated Fat: 4gTrans Fat: 0.01gCholesterol: 22mgSodium: 240mgPotassium: 151mgFiber: 2gSugar: 2gVitamin A: 38IUVitamin C: 0.01mgCalcium: 118mgIron: 2mg


Plum Apricot Crumble

August 13, 2018

Plum Apricot Crumble vegan easy summer baking

Fruit crumbles are delightful! No matter what the season, they are always welcome in our house.  Warm, cinnamon-scented sweet-tart fruits with juices bubbling over the buttery crisp oats topping...this Plum  Apricot Crumble is irresistible!

Plum Apricot Crumble vegan easy summer baking

Fresh, seasonal fruits work the best in fruit crumbles. The fruit will always be more flavourful and sweeter. And when your basic ingredients are good quality, you don't need to fiddle much at all. We are still getting some lovely plums and apricots in the market to make this Plum  Apricot Crumble.

But if you aren't getting them anymore, there are already apples and pears flooding the fruit stalls. And they are so great in this recipe too! And oh do add some fresh berries too if they are in season. I'm already thinking of an apple strawberry crumble!

This recipe isn't overly sweet as  I like to let the fruits do their magic. They are tossed with just a little bit of sugar and sprinkled with cinnamon powder. Typically, the fruits are tossed in a bit of cornstarch too, but I tend to leave it out as I like the messy juices that overflow!

The topping here is whole-wheat flour, rolled oats, and almonds mixed with coconut oil. Again, usually, there would be butter, but I'm on a bit of a coconut oil trip for my baking. As long as it works, I'm happy. Glad to report, it came out beautiful!

You can also make it gluten-free by using gluten-free flour and oats. Millet or quinoa flakes would work really well too. So would seeds like sunflower and pumpkin in case you want to avoid nuts.

Plum Apricot Crumble in small ramekins.

This is a simple dessert to whip up. No fancy technique or ingredients are required. It's such a simple one that you don't even need a recipe. Usually, this dessert is more fruit-heavy than a pie or tart. A liberal dose of crumble won't take the glory away from the fruit. You can always adjust the ratio of fruit to crumble according to your preference.

It's great for a weeknight treat and is a fabulous crowd-pleaser too. It's an easy make-ahead recipe. Just assemble the crumble a few hours earlier and throw it in the oven an hour before you want to serve it. Warm, fresh, gorgeous homestyle dessert will be ready for your guests, to enjoy as is or with a scoop of good ol' vanilla ice cream or softly whipped cream or custard.

Plum Apricot Crumble vegan easy summer baking

Half the joy of cooking is sharing it with others. That’s why I’m always eager to hear from you. So go right ahead & drop a comment or reach out on Instagram, Pinterest, YouTube, or Facebook. I hope you love this plum apricot crumble as much as we do!

📖 Recipe

Tried this recipe?Let us know how it was!
Plum Apricot Crumble vegan easy summer baking

Plum Apricot Crumble

Natasha Minocha
Fruit crumbles are delightful! No matter what the season, they are always welcome in our house.  Warm, cinnamon scented sweet tart fruits with juices bubbling over the buttery crisp oats topping...this Plum & Apricot Crumble is irresistible!
5 from 1 vote
Print Recipe Pin Recipe
Prep Time 15 minutes mins
Cook Time 30 minutes mins
Course Dessert
Cuisine American
Servings 4 Servings
Calories 281 kcal

Ingredients
  

Filling

  • 6-7 Apricots, seeded and diced
  • 5-6 Plums, seeded and diced
  • 1 tbsp Sugar
  • 1/2 tsp Cinnamon powder

Topping

  • 1/4 cup Wholewheat flour
  • 1/4 cup Rolled oats
  • 1/4 cup Almond flakes
  • 3 tbsp Sugar
  • 3 tbsp Coconut oil
  • 1 tsp Cinnamon powder
  • 1/4 tsp Salt

Instructions
 

  • Preheat your oven to 180C. Keep 4 ramekins ready. You could use a small 6" baking dish as well.
  • Combine the diced fruits, sugar and cinnamon powder in a small bowl. Keep aside.

Topping

  • Combine all the topping ingredients except coconut oil in a bowl. Stir in the coconut oil with a fork to get a wet sandy textured mixture. If its too dry, add another tablespoon of oil or even milk.

Assembly

  • Divide the fruits evenly amongst the ramekins. Leaving about 1/2" space from the top.
    Sprinkle the topping covering the fruits, press down a bit to add more topping if you need to to.
    Place the ramekins on a baking tray and bake for 25-30 minutes until the topping is crisp and golden and the fruit juices are bubbling.
  • Let the dessert sit for 10-15 minutes for the juices to settle down before serving as is or with vanilla ice cream. Enjoy!

Notes

NOTES:
  • I had a few cherries in  my freezer, so I added them to the fruit mixture and stuck a couple right on top.
  • You will have some leftover topping . You can freeze it for use another time or simply bake it till crisp and use it to top ice cream or yogurt!

Nutrition

Serving: 1 ServingCalories: 281kcalCarbohydrates: 39gProtein: 4gFat: 14gSaturated Fat: 9gPolyunsaturated Fat: 1gMonounsaturated Fat: 3gSodium: 147mgPotassium: 339mgFiber: 4gSugar: 25gVitamin A: 1298IUVitamin C: 13mgCalcium: 39mgIron: 1mg

Sooji Badam Halwa | Semolina Almond Pudding

August 6, 2018

Sooji Badam Halwa Semolina Almond Pudding Indian dessert Festive food

Sooji Badam Halwa or Semolina Almond Pudding is one of the easiest and quickest desserts made in Indian homes. Be it any celebration or festival, this is the most commonly made treat. But in our house, we have plenty of excuses to make it- rainy days, cold weather, sore throats, anyone feeling the blues…We love it that much!!

Sooji Badam Halwa in a small bowl.

Apart from its lovely comforting taste, the ease of making sooji halwa, I think, makes it very popular. Essentially you only need three ingredients to make it - ghee, sugar and sooji/semolina. Well, make it four if you want to include water! Now this, not a dish that’s calorie-conscious at all, but then I hardly ever think of food in terms of their calories. I’m happier practising moderation and balance…keeps my sweet tooth satisfied and in check!

Now back to the recipe. The other component of this sooji badam halwa, as the name suggests, is badam/almonds. They add a lovely nuttiness to this soft, melt-in-your-mouth textured dessert.  You can always play around with the proportions, add more or less of the ground almonds or to keep it classic, leave them out altogether.

Sooji Badam Halwa | Semolina Almond Pudding

I like to dry roast the sooji till its light golden brown before adding the ghee and almond meal. It all gets roasted further till the sooji gets a deeper golden colour.  Do make sure you are roasting the semolina on low heat till fragrant. This ensures that there is no raw taste at all.

Saffron, along with green cardamom are my choice of flavourings in my halwa recipes. It always results in a beautiful, delicately aromatic dish that hits the sweet spot! Whilst I prefer to use water here, you can certainly use milk to make your halwa richer and creamier. I like to use cardamom and saffron-infused water to dissolve the sugar. It adds tremendously to the flavour.

Adding milk will result in a lighter-hued halwa though. I strongly recommend flavouring the milk with saffron and cardamom too. The taste is just sublime.

When you add the hot liquid, there will be a lot of splattering..so be careful. I like to turn the heat off when I stir in the water. And I also make sure I have a long-handled wooden spoon for whisking.

To ensure a smooth texture, stir continuously as you add the liquid. You don't want a lumpy halwa!

Sooji Badam Halwa | Semolina Almond Pudding

Half the joy of cooking is sharing it with others. That’s why I’m always eager to hear from you. So go right ahead & drop a comment or reach out on Instagram, Pinterest, YouTube, or Facebook. I hope you love this sooji badam halwa as much as we do!

📖 Recipe

Tried this recipe?Let us know how it was!
Sooji Badam Halwa Semolina Almond Pudding Indian dessert Festive food

Sooji Badam Halwa

Natasha Minocha
Comforting and delicious, this Sooji Badam Halwa is super simple to make. It needs only 5 ingredients and comes together in a few minutes!
No ratings yet
Print Recipe Pin Recipe
Prep Time 5 minutes mins
Cook Time 20 minutes mins
Total Time 25 minutes mins
Course Dessert
Cuisine Indian
Servings 6 Servings
Calories 360 kcal

Ingredients
  

  • 1 cup Sooji / Semolina I use the fine variety.
  • 1/4 cup Almond meal Simply grind almonds to a fine powder in your coffee/masala grinder
  • 1/2 cup Ghee
  • 3/4 cup Sugar
  • 3.5 cup Water
  • 1 tsp Cardamom powder
  • 1/2 tsp Saffron
  • 3-4 Tbsp Slivered almonds for topping

Instructions
 

  • Heat a kadai or a thick bottomed pan, add the sooji. Dry roast it on medium -low heat till its lightly golden brown.
  • Now add the ghee and ground almonds to the sooji. Continue roasting on low flame. You have to keep stirring so the mixture doesn't burn.
  • In the meanwhile, combine the sugar, water, saffron, and cardamom powder in a saucepan and bring all to a boil. Lower the heat and let it simmer for another 4-5 minutes. Take it off the heat.
  • By now, your sooji mixture should be golden brown. Slowly and carefully add to the sugar mixture. There will be a lot of spluttering. Keep stirring as the semolina will start to absorb the water and swell up.
  • Keep stirring till the mixture is thick and starts leaving the sides of the pan. Sprinkle with almonds and serve hot. Enjoy!

Nutrition

Serving: 1 ServingCalories: 360kcalCarbohydrates: 47gProtein: 5gFat: 18gSaturated Fat: 10gPolyunsaturated Fat: 1gMonounsaturated Fat: 4gCholesterol: 39mgSodium: 8mgPotassium: 57mgFiber: 2gSugar: 25gVitamin A: 0.04IUVitamin C: 0.1mgCalcium: 20mgIron: 1mg

Thai Peanut Noodles Recipe

July 30, 2018

Spicy Thai Peanut Noodles vegan healthy vegetarian Asian food

This delicious Thai peanut noodles recipe comes together easily, making it the type of meal that becomes a weekly staple! Loaded with crunchy veggies, these creamy, nutty noodles with peanut sauce are always a hit!

 Thai Peanut Noodles Recipe

Asian food is always a great cuisine when I'm in a rush. There's always quick stir fries, and fried rice to the rescue for us. I don't worry about the sauces and all the ingredients that a particular dish may require. Usually, I go with what I have and it works...just like it did with these Thai  Peanut Noodles.

[feast_advanced_jump_to]

Why we love this Thai noodles with peanut sauce recipe

  • So easy to make, the whole dish comes together in under 30 minutes.
  • Versatile - you can use any veggies you have at home, and add any kind of protein you like.
  • The peanut sauce is a breeze to make and tastes so good you can put it on anything!
  • A light wholesome meal that everyone loves.
  • Perfect meal prep dish - prep the veggies and make the peanut sauce ahead of time for a quick meal any time of the week!
 Thai Peanut Noodles Recipe

How to make peanut butter Thai noodles

Step 1: Start with Peanut sauce for Thai noodles.

Blend all the sauce ingredients until smooth - peanut butter, ginger, garlic, sriracha sauce, soy sauce, rice wine vinegar, lemon juice, honey and water.

Peanut sauce for  Thai Peanut Noodles Recipe

Step 2: Cook the noodles according to the instructions on the package. Drain and keep aside.

Step 3: In a wok, heat sesame oil, add the vegetables, and cook them briefly for 4-5 minutes on high heat, stirring all the time.

Step 4: Turn the heat off and toss in the noodles. Pour the peanut sauce in and give it all another good toss.

Step 5: Sprinkle with peanuts, red pepper flakes, fresh cilantro, or basil, and serve immediately. 

 Thai Peanut Noodles Recipe

Peanut noodles recipe variations

  • You can use any kind of noodles you like and have on hand. Fettuccine, lo mein, ramen, udon, soba, even spaghetti will work.
  • Use any kind of veggies you like, as much or as little as you prefer.
  • Add protein to these peanut noodles - tofu, shrimp, or chicken.
  • Stir in your favorite chili sauce to amp up the heat!
 Thai Peanut Noodles Recipe

Light yet immensely satisfying, these Thai Peanut Noodles are creamy, crunchy from all the vegetables and peanuts, slightly spicy, and overall so well-balanced in taste and textures.

These Thai noodles with peanuts are great served warm or even cold. I would add the sauce right before serving though, to prevent the noodles from getting clumpy.

 Thai Peanut Noodles Recipe

Half the joy of cooking is sharing it with others. That’s why I’m always eager to hear from you. So go right ahead & drop a comment or reach out on Instagram, Pinterest, YouTube, or Facebook. I hope you love this Thai peanut noodles recipe as much as we do!

📖 Recipe

Tried this recipe?Let us know how it was!
Spicy Thai Peanut Noodles vegan healthy vegetarian Asian food

Thai Peanut Noodles Recipe

Natasha Minocha
A wonderful easy weeknight meal, these Thai Peanut Noodles are a huge hit! Creamy, crunchy, and loaded with vegetables, they are too delicious to miss!
No ratings yet
Print Recipe Pin Recipe
Prep Time 10 minutes mins
Cook Time 15 minutes mins
Course Main Course
Cuisine Asian
Servings 4 persons
Calories 418 kcal

Ingredients


  • 8 oz Noodles Udon, lo mein, fettuccine, spaghetti, or any other
  • 1 Red bell pepper, julienned
  • 1 Yellow bell pepper, julienned
  • 1 Green bell pepper, julienned
  • 10-12 Button mushrooms , sliced
  • 5-6 Baby corn, sliced lengthways
  • 1.5 Tbsp Sesame oil

Peanut Sauce

  • 3 tbsp, heaped Peanut butter
  • 4-5 Garlic cloves
  • 1/2" Fresh ginger, roughly chopped
  • 2 Tbsp Sriracha Sauce You can add more if you like.
  • 3 Tbsp Soy Sauce
  • 1 Tbsp Honey
  • 5 Tbsp Water
  • 1 Tbsp Fresh lemon juice
  • 1 Tbsp Rice wine vinegar
  • Salt to taste

Toppings

  • Peanuts, red pepper flakes, cilantro, basil

Instructions
 

Peanut Sauce

  • Blend all the peanut sauce ingredients together until smooth. Taste and adjust for seasoning.
  • If the sauce is too thick, add more water, 1 tablespoon at a time until you get the desired consistency.

Noodles

  • Cook the noodles according to the instructions on the package. Drain and keep aside.
  • In a wok, heat sesame oil, add the vegetables, and cook them briefly for 4-5 minutes on high heat, stirring all the time.
    They should still retain their vibrant color and crunch.
  • Turn the heat off and toss in the noodles. Pour the peanut sauce in and give it all another good toss.
    Sprinkle with peanuts, red pepper flakes, fresh cilantro, or basil, and serve immediately. Enjoy!

Nutrition

Serving: 1 ServingCalories: 418kcalCarbohydrates: 65gProtein: 15gFat: 13gSaturated Fat: 2gPolyunsaturated Fat: 4gMonounsaturated Fat: 5gSodium: 985mgPotassium: 657mgFiber: 5gSugar: 12gVitamin A: 1198IUVitamin C: 127mgCalcium: 39mgIron: 2mg

Keema Aloo Curry | Spicy Mutton Mince

July 16, 2018

Keema Aloo Curry | Spicy Mutton Mince with potatoes

This delectable Keema Aloo Curry recipe is one of those meals that is perfect for a slow Sunday. Learn how to make the best keema curry, that can be served with rice, pav, naan or any of your favorite sides.

Keema Aloo Curry |Spicy Mutton Mince with potatoes

This simple and easy Keema Aloo Curry recipe is one of those meals that will become an instant family favorite.

Though patience is not a virtue I possess, I do prefer to slow-cook this keema curry in a kadhai. The process doesn't really require me to stand at the stovetop all the time. But just an occasional stir, once in a while. So I can get on with doing other chores or simply continue reading a book while it's getting done. But just the process of browning the meat, cooking the masalas...all of it is so comforting. You feel like you want to take that time to make something special.

It is a labour of love and the flavor that comes through is unparalleled.  But in times of rush, a pressure cooker comes in very handy. Once the mince has been browned well and all masala added, you can let the cooker do its job. I can assure you this comes out very very delicious as well.

Keema Aloo Curry | Spicy Mutton Mince with potatoes

It always helps to make extra curry and the leftovers taste even better and truly, no one complains about having this the next day! Ever!

If you're not fan of red meat, you can easily make this curry using chicken mince as well. I have even made a vegetarian version using soy granules. Trust me, it comes out superb!

What can you expect from the Keema Curry Recipe

So what did we get? A tender mince mutton curry with perfectly creamy potatoes making it thick and luscious,  oodles of flavours from all the lovely spices,  ready to be mopped up with hot buttered pavs or soft fresh rotis or steamed rice. Eat this with flaky hot paranthas, if you're looking for a bit of indulgence...And the little man of the house ecstatically ate six pavs piled high with this keema aloo curry! 🙂

Keema Aloo Curry | Spicy Mutton Mince with potatoes

Half the joy of cooking is sharing it with others, which is why I’m always eager to hear from you. So go right ahead and drop a comment or reach out on Instagram, Pinterest, YouTube, or Facebook. I hope you love the keema curry recipe as much as we do!

More Easy Dinner Recipes

  • Kung Pao Cauliflower
  • Sticky Sesame Cauliflower
  • Crispy Tofu in Sweet Sour Sauce

📖 Recipe

Tried this recipe?Let us know how it was!
Keema Aloo Curry | Spicy Mutton Mince with potatoes

Keema Aloo Curry | Spicy Mutton Mince with Potatoes

Natasha Minocha
A tender mince curry with perfectly creamy potatoes making it thick and luscious, oodles of flavours from all the lovely spices,ready to be mopped up with hot buttered pavs or soft fresh rotis. This Keema Aloo Curry is indeed a special one!
5 from 3 votes
Print Recipe Pin Recipe
Prep Time 25 minutes mins
Cook Time 1 hour hr
Total Time 1 hour hr 25 minutes mins
Course Main Course
Cuisine Indian
Servings 8 Servings
Calories 429 kcal

Ingredients
  

  • 1 kg Keema /Minced Mutton
  • 3 Tbsp Oil
  • 4 medium Onions, finely diced
  • 6 Tomatoes, roughly chopped
  • 8 Garlic cloves
  • 1" Fresh ginger root
  • 2-3 Green chilis adjust to taste (add more or less depending on spice preference)
  • 1.5 tsp Cumin seeds
  • 2 tsp Meat masala Homemade or store-bought. I used store- bought.
  • 2 tsp Garam Masala
  • 1.5 tsp Coriander powder
  • Salt to taste
  • 4 Black cardamoms
  • 1" Cinnamon stick
  • 2 Dried bay leaves
  • 4 Dried red chilis, whole adjust to taste
  • 2 pcs Star anise
  • 3 Potatoes, peeled and quartered

Instructions
 

  • Heat oil in a kadai or a large pan. Add the cumin seeds, bay leaves, dried red chilis, black cardamom, cinnamon stick, and star anise.
    Once the cumin seeds splutter, add the keema/mince and chopped onions to the pan.
  • Keep stirring occasionally to brown the meat very well.
    In the meanwhile, puree the tomatoes, ginger, garlic, and green chilis to a smooth paste. When the meat is all well browned and all the water is dried up, add the tomato paste, meat masala, garam masala, coriander powder, and salt.
  • Stir the mixture well. Add 1/2 cup water, cover the pan, and let it cook for 30-40 minutes.
    At this stage, you can add potatoes to the mince right away and cook it in the pressure cooker.
  • Add the potatoes now and some more water if required. Let it all cook in a covered pan for another 30 minutes or until the potatoes are soft and cooked through.
  • Taste and adjust for seasoning and spices. Garnish with fresh coriander. Serve hot with pav or rotis. Enjoy!

Notes

NOTE:
You can saute the potatoes before adding them to the curry if you like.
 
Adjust the chili content to taste. 

Nutrition

Serving: 1 ServingCalories: 429kcalCarbohydrates: 14gProtein: 24gFat: 31gSaturated Fat: 10gPolyunsaturated Fat: 2gMonounsaturated Fat: 14gTrans Fat: 2gCholesterol: 89mgSodium: 132mgPotassium: 753mgFiber: 4gSugar: 6gVitamin A: 992IUVitamin C: 52mgCalcium: 69mgIron: 4mg

Tofu Potstickers (Gyoza)

July 13, 2018

Tofu Potstickers vegan healthy vegetarian easy recipe

These tofu potstickers will make you swoon. Flavored simply with garlic and ginger, but so beautifully. Packed with veggies and wrapped in a perfectly crunchy exterior, these vegetarian potstickers are a game-changer for any weeknight dinner.

Tofu Potstickers

Dumplings have always been my weakness, but I never even thought about making them at home. Then I discovered Gyoza wrappers, and let me tell you, it changed the game.

If you love crispy, golden potstickers but want a lighter, plant-based option, this tofu version will hit the spot. My tofu gyoza were perfectly crispy on the outside and juicy inside.

Tofu Potstickers vegan healthy vegetarian
[feast_advanced_jump_to]

What is a pot sticker?

A potsticker is a type of dumpling popular in Chinese and Japanese (called gyoza) cuisine. They’re typically filled with meat, vegetables, or tofu. They're pan-fried on one side, giving them a crispy, golden bottom, while the other side is steamed, making them tender and soft. The combination of textures and flavors makes potstickers so loved around the world.

What is the difference between potstickers and dumplings?

All potstickers are dumplings, but not all dumplings are potstickers.

Dumplings are a broad term for any dish made from dough wrapped around a filling. They can be boiled, steamed, pan-fried, or deep-fried, depending on your recipe.

Potstickers are a specific type of dumpling that are pan-fried until crispy and then steamed to cook the filling, resulting in a dumpling that has a crunchy bottom and a soft top. The name "potsticker" comes from the way they "stick" to the pot during the frying process before being released with the addition of water for steaming.

Tofu Potstickers

Why We Love This Recipe

Quick and easy, especially when you use pre-made wrappers

Crispy and satisfying: perfect for a quick weeknight dinner or a small party starter

Healthy and plant-based: a protein-packed, meat-free alternative that’s both nutritious and delicious

Versatile and customizable: adjust the filling with your favorite veggies and seasonings to suit your taste

Vegetarian Potstickers Ingredients

Tofu: Use firm or extra-firm tofu, which holds its shape better when crumbled and soaks up the flavors of the seasonings just wonderfully.

Filling: Finely dice red, yellow, and green bell peppers and button mushrooms. These colorful bell peppers add a vibrant crunch and natural sweetness, balancing the savory tofu. The mushrooms add that lovely umami taste, giving the vegan potstickers filling a satisfying depth.

Spices and seasoning: Finely mince garlic and ginger. Red chili flakes give the fried dumplings a subtle heat. Salt and pepper balance all the flavors.

Sauce: Light soy sauce adds a savory, umami-rich note to the filling of the vegan potstickers. When serving, use regular soy sauce as a tangy dipping sauce. Or you could also try this delicious Yum Yum sauce for dipping!

Wrapper: Store-bought wonton or gyoza wrappers are perfect for holding the flavorful filling. They crisp up beautifully when fried. Plus, the pre-made dough wrappers take care of a big chunk of the tofu gyoza recipe.

Oil: Use sesame oil in the filling. A little goes a long way. For frying, use a neutral vegetable oil.

Tofu Potstickers

How To Make Tofu And Mushroom Potstickers?

Step 1: In a pan, heat sesame oil and then cook ginger, garlic, and red chili flakes for 30 seconds.

Step 2: Stir in your diced vegetables and crumbled tofu.

Step 3: Mix in the soy sauce with the vegan tofu potsticker filling.

Step 4: Season with salt and pepper and cook for 3–4 minutes. Taste and adjust.

Step 5: Let the tofu mixture cool, and then assemble the mushroom dumplings.

Step 6: Place the wrappers on your work surface. Spoon a teaspoon of the tofu mushroom filling in the center.

Tofu Potstickers

Step 7: With your finger, rub the edges of the wrappers with water. Fold the dough over to create a half-moon shape. Pinch the edges to seal, making pleats as you do so.

Step 8: When all the potstickers are assembled, heat vegetable oil in a large skillet over medium heat.

Tofu Potstickers

Step 9: Add potstickers in a single layer. Keep the pleated side up. Fry until the bottom is golden. It takes about 2 minutes.

Step 10: Add water to the skillet and quickly cover it. Let the gyoza steam for another 2–3 minutes.

Final step: Serve warm with soy sauce and enjoy!

Pro Tips

  • If you are folding the tofu potstickers for the first time, be patient. It’s easy, but it takes practice. Steamy Kitchen’s blog post gives fabulous step-by-step tips; scroll down to how to fold potsticker dumplings. And just in case you’re in the mood to make the wrappers at home, the recipe tells you that too!
  • Leftover Gyoza wrappers? Give them an Italian twist and turn them into cheese ravioli.
Tofu Potstickers vegan healthy vegetarian easy recipe

Vegan Potsticker Variations

Filling: minced chicken, pork, cabbage, carrots, shrimp—any combination would work in this fried dumpling recipe.

Sauce: oyster sauce, sriracha, black bean, and hoisin; use whatever sauce you like to cook the tofu potsticker filling.

Tofu Potstickers vegan healthy vegetarian easy recipe

Recipe FAQs

How to serve vegetarian potstickers with tofu?

Serve them hot with a bit of soy sauce or make a lovely bowl meal out of them with stir-fried veggies, like I did:

- Heat sesame oil in a pan
- Add minced ginger and garlic
- Cook for a minute, and add any veggies you want.
- Cook for a few more minutes
- Stir in the ready-to-eat potstickers along with some soy sauce (and sambal oelek for some extra punch)
- Finish with some toasted sesame seeds, cashews, and scallions.

Can you make tofu gyoza ahead of time?

Yes, you can. Assemble the potstickers and freeze. When you want to eat, don’t thaw them. They go straight from the freezer to your pan!

Tofu Potstickers

More Tofu Recipes

Spicy Tofu Stir-Fry

Crispy Tofu With Sweet and Sour Sauce

Half the joy of cooking is sharing it with others. That’s why I’m always eager to hear from you. So go right ahead & drop a comment or reach out on Instagram, Pinterest, YouTube, or Facebook. I hope you love these tofu potstickers as much as we do!

📖 Recipe

Tried this recipe?Let us know how it was!
Tofu Potstickers in a bowl with dipping sauce in the center and red chopsticks.

Tofu Potstickers (Gyoza)

Natasha Minocha
Tofu Potstickers are packed with veggies, and flavored with garlic and ginger. Moist on the inside, they are so crisp and crunchy on the outside. A total game-changer for any weeknight dinner!
No ratings yet
Print Recipe Pin Recipe
Prep Time 1 hour hr
Cook Time 20 minutes mins
Course Appetizer, Main Course, Snack
Cuisine Chinese, Japanese
Servings 25 potstickers
Calories 46 kcal

Ingredients


  • 8.5 oz Tofu, crumbled
  • 1/4 Red bell pepper, diced finely
  • 1/4 Yellow bell pepper, finely diced
  • 1/4 Green bell pepper, finely diced
  • 6 Button mushrooms, finely diced
  • 2 cloves Garlic, finely minced
  • 1/4" Ginger, finely minced
  • 1/2 tsp Red Chilli Flakes
  • 2 tsp Light soy sauce
  • Salt & Pepper to taste
  • 2 tsp Sesame oil
  • 25 Wonton/gyoza wrappers
  • 2 tbsp Vegetable oil for frying
  • 2 tbsp Soy sauce for serving

Instructions
 

  • Heat the sesame oil in a pan. Add ginger, garlic and red chilli flakes. Cook for 30 seconds.
  • Stir in the vegetables and crumbled tofu. Mix in the soy sauce, salt and pepper. Cook for 3-4 minutes. Taste and adjust for seasoning.
  • Let this mixture cool a bit.
  • To assemble the dumplings, place wrappers on a work surface. Spoon 1 teaspoon of the tofu mixture into the center of each wrapper.
    Using your finger, rub the edges of the wrappers with water. Fold the dough over the filling to create a half-moon shape, pinching the edges to seal, making pleats as you do so.
  • Heat vegetable oil in a large skillet over medium heat.
    Add potstickers in a single layer, pleat side up, and cook until the bottom is golden about 2 minutes.
    Add 2 tablespoons of water and quickly cover the pan. Let cook for another 2-3 minutes.
  • Serve warm with soy sauce. Enjoy!

Nutrition

Serving: 1 potstickerCalories: 46kcalCarbohydrates: 5gProtein: 2gFat: 2gSaturated Fat: 0.3gPolyunsaturated Fat: 1gMonounsaturated Fat: 1gTrans Fat: 0.01gCholesterol: 1mgSodium: 152mgPotassium: 35mgFiber: 0.4gSugar: 0.2gVitamin A: 57IUVitamin C: 5mgCalcium: 17mgIron: 0.5mg
Tofu Potstickers | easy recipe

Greek Salad With Avocado

July 11, 2018

Greek Salad healthy vegetarian easy recipe glutenfree

Fresh, colorful, and bursting with vibrant flavors, this Greek salad with avocado is a summer staple for us! It’s made with simple ingredients and fresh homemade Greek salad dressing, and each forkful is bursting with salty, juicy, crunchy, and refreshing goodness!

Greek salad with avocado in a bowl with the dressing and flatbread on the side.

This avocado Greek salad comes together in minutes, with crisp cucumbers, juicy tomatoes, briny olives, marinated onions, and creamy avocado—all tossed in a zesty homemade dressing.

Greek salad (Horiatiki) has a lot of guises based on the ingredients you use in the recipe. So, no, my recipe is not one of the authentic Greek salads, but it is so addictively delicious. And is the perfect quick salad for busy weekdays, easy lunches, or effortless entertaining!

[feast_advanced_jump_to]

Why You'll Love This Recipe

This Greek salad with avocado comes together in minutes. Just a little chopping and a quick toss in the dressing, and you're set!

Fresh, uncomplicated, colorful, and bursting with textures and flavors—exactly what you want in a salad!

Wholesome and satisfying, it's absolutely great as a light meal!

Perfect summer salad for a quiet dinner, barbecue, or potluck (it’s delicious and inviting even at room temp).

Greek salad in a bowl with 2 forks on the side.

Recipe Ingredients

Tomatoes(cut into chunks)Cucumbers(slice thickly)Onion(slice thinly)
Olives(add as many as you like)Feta Cheese(cubed)Avocado(cubed)

Salad dressing

Lemon JuiceRed Wine VinegarExtra Virgin Olive Oil
Dried OreganoHoneySalt & Pepper 

Garnish

Fresh Mint Dried Oregano

How To Make Greek Salad With Avocado

Step 1: Soak the onion in vinegar.

Step 2: Chop all the veggies in your cucumber and tomato Greek salad.

Step 3: In a large but shallow bowl, place the tomatoes, onions (without the vinegar in which they were soaked), and cucumbers.

Step 4: Save 1-2 tablespoons of the dressing and pour the rest on top of the salad. Toss well.

Step 5: Coat the chopped avocado with the saved dressing.

Step 6: Top with avocado, feta cheese, and olives.

Step 7: Garnish with fresh mint leaves and dried oregano.

Final step: Serve and savor!

How To Make Greek Salad Dressing

I use a very basic dressing and make it at home because it lets me control the amount of salt, oil, and sugar that goes in (so much better than the bottled, sodium- and preservative-laden vinaigrette that have been sitting on the shelf for God knows how long)!

  • In a small bowl, mix a splash of lemon juice, vinegar, good-quality oil, a pinch of dried oregano, and a bit of honey.
  • Whisk in a little bit of honey to balance out the flavors.
  • Season with salt and pepper.
  • Taste and adjust.

Pro Tips

  • Traditional Greek salad uses raw onions, but marinating them in red wine vinegar for an hour or more adds so much drama to the salad. Plus, it gets rid of the raw pungency onions have.

I like to keep a small bowl of these mildly pickled, pink-hued onions in my fridge, and whenever the mood strikes, I add them to a recipe. Don’t have the time to soak? Use the onion as-is.

  • For the Greek salad dressing, honey is optional. I prefer a touch of sweetness to balance out the flavors.
  • You can serve the salad chilled or at room temperature.
  • Add the avocado to the other ingredients right at the end so it doesn't get mushy.
  • I like to toss the avocado with a little bit of the dressing before adding it to the salad bowl.
  • This salad will stay well in the refrigerator for up to 2 days.
  • Double the quantity of the salad dressing and store it in the refrigerator for up to 2 weeks.
Easy Greek Salad in a bowl with ingredients in the background.

How To Serve Avocado Greek Salad

This vibrant Greek salad is a total crowd-pleaser and a must for effortless entertaining.

It shines beautifully on a mezze-style table with dishes like homemade pita bread, easy air-fryer falafels, and a generous bowl of classic hummus. Add a side of roasted carrots, marinated tomatoes, or Korean pickled radish for extra color and texture. I also love to serve this with my copycat Olive Garden bread sticks!

This easy avocado Greek salad is fresh, flavorful, and comes together so easily—perfect for a relaxed lunch with friends or a sunny garden get-together.

More Must-Try Summer Salads

  • Creamy Cucumber Salad with Greek Yogurt
    Creamy Cucumber Salad with Greek Yogurt
  • The Easiest Smashed Chickpea Salad
    Easiest Smashed Chickpea Salad
  • Italian Tortellini Pasta Salad
    Italian Tortellini Pasta Salad
  • Peach Mozzarella Salad | Easy Summer Salad
    Peach Mozzarella Salad

Half the joy of cooking is sharing it with others. That’s why I’m always eager to hear from you. So go right ahead & drop a comment or reach out on Instagram, Pinterest, YouTube, or Facebook. I hope you love this easy Greek salad with avocado as much as we do!

📖 Recipe

Tried this recipe?Let us know how it was!
Greek salad with avocado in a bowl with 2 forks on the side.

Greek Salad With Avocado

Natasha Minocha
Simple, fresh, vibrant, bursting with flavours and textures! That's what this wonderful Greek salad with avocado is all about. Healthy and delicious, its substantial enough to serve as a light summer meal!
No ratings yet
Print Recipe Pin Recipe
Prep Time 15 minutes mins
Total Time 15 minutes mins
Course Salad, Side Dish
Cuisine Greek
Servings 4 Servings
Calories 228 kcal

Ingredients
  

  • 3 Tomatoes, cut into chunks
  • 3 medium Cucumbers, sliced thickly
  • 1 small Red onion, thinly sliced Marinate this in 1 tbsp red wine vinegar for at least an hour, if possible
  • 12-15 Olives Add more if you like.
  • 1/3 cup Feta Cheese, cut into cubes Add more if you like.
  • 1 Avocado, cut into cubes

Salad dressing

  • 1 Tbsp Lemon juice
  • 1 Tbsp Red wine vinegar
  • 2 Tbsp Extra virgin Olive oil
  • 1 tsp Dried oregano
  • 1/2 tsp Honey
  • Salt & Pepper to taste

Garnish

  • Fresh mint leaves
  • Dried oregano

Instructions
 

  • Place the tomatoes, onions (without the vinegar in which they were soaked), and cucumbers in a large shallow bowl.
  • Save 1-2 tablespoons of the dressing and pour the rest over the vegetables. Toss well.
  • Gently toss the chopped avocado with the reserved dressing.
  • Add it to the salad, top with olives and feta cheese.
    Garnish with fresh mint leaves and dried oregano. Serve chilled or at room temperature. Enjoy!

Salad dressing

  • Whisk all the dressing ingredients in a small bowl. Taste and adjust for seasoning.

Notes

    • Traditional Greek salad uses raw onions, but marinating them in red wine vinegar for an hour or more adds so much drama to the salad. Plus, it gets rid of the raw pungency onions have.
    • For the Greek salad dressing, honey is optional. I prefer a touch of sweetness to balance out the flavors.
    • You can serve the salad chilled or at room temperature.
    • Add the avocado to the other ingredients right at the end so it doesn't get mushy.
    • I like to toss the avocado with a little bit of the dressing before adding it to the salad bowl.
    • This salad will stay well in the refrigerator for up to 2 days.
    • Double the quantity of the salad dressing and store it in the refrigerator for up to 2 weeks.
  •  
  •  
  •  
  •  

Nutrition

Serving: 1 ServingCalories: 228kcalCarbohydrates: 12gProtein: 4gFat: 19gSaturated Fat: 4gPolyunsaturated Fat: 2gMonounsaturated Fat: 12gCholesterol: 11mgSodium: 340mgPotassium: 514mgFiber: 6gSugar: 4gVitamin A: 292IUVitamin C: 13mgCalcium: 111mgIron: 1mg
  • « Go to Previous Page
  • Page 1
  • Interim pages omitted …
  • Page 12
  • Page 13
  • Page 14
  • Page 15
  • Page 16
  • Go to Next Page »

Primary Sidebar

New-Cover-4-1024x934

I’m Natasha! I’m a self-taught baker and cook, sharing easy, fuss-free recipes that anyone can make with confidence. From breads and cookies to decadent desserts to simple meals, I hope you’ll find your next favorite recipe here.

More about me →

Add us as a Trusted Site

Sign Up For Email Updates

Get A Free E-Book With 8 Easy Bread Recipes For Beginner Bakers!

Popular Recipes

  • mushroom quiche on a platter with ingredients in the background.
    Mushroom Quiche
  • chocolate fudge squares stacked on top of each other on small plate.
    Chocolate Fudge With Condensed Milk
  • Easiest Homemade Cream Cheese | Homemade Cream Cheese Recipe
    Easiest Homemade Cream Cheese
  • Cinnamon Bread Pudding
    Cinnamon Bread Pudding
  • Korean Corn Cheese in a cast iron skillet.
    Korean Corn Cheese Recipe
  • Best Condensed Milk Bread Rolls (Soft & Fluffy)
    Best Condensed Milk Bread Rolls (Soft & Fluffy)

Summer Recipes

  • Mango Tres Leches Cake
    Mango Tres Leches Cake
  • Strawberry cream cheese rolls stacked on a cake stand with strawberries on the side.
    Strawberry Cream Cheese Rolls
  • cherry bread pudding in 3 ramekins with spoons on the side on a wooden board.
    Cherry Bread Pudding
  • Frozen Yogurt Bark on a white platter.
    Frozen Yogurt Bark - Easy Summer Recipe
  • Sliced lemon blueberry bread on a white platter.
    Blueberry And Lemon Bread
  • Mango Mousse
    The Best Mango Mousse Recipe! (3 Ingredients)

See More Summer Recipes →

Footer

↑ back to top

Sign Up For Email Updates

Get A Free E-Book With 8 Easy Bread Recipes For Beginner Bakers!

Tasha’s Artisan Foods

About

Work With Me

Connect With Me

Browse Recipes

Desserts
Snacks
Breads
Cakes
Baking Guides

Published with WordPress

PRIVACY POLICY

COPYRIGHT © 2026 TASHA'S ARTISAN FOODS

Rate This Recipe

Your vote:


A rating is required
A name is required
An email is required