• Skip to main content
  • Skip to primary sidebar

menu icon
go to homepage
  • Summer Recipes
  • Recipe Index
  • About Natasha
  • Free E-Book
subscribe
search icon
Homepage link
  • Summer Recipes
  • Recipe Index
  • About Natasha
  • Free E-Book
×
Home > Recipes

Pistachio Matcha Popsicles

June 23, 2020

3 pistachio matcha popsicles in a small tray.

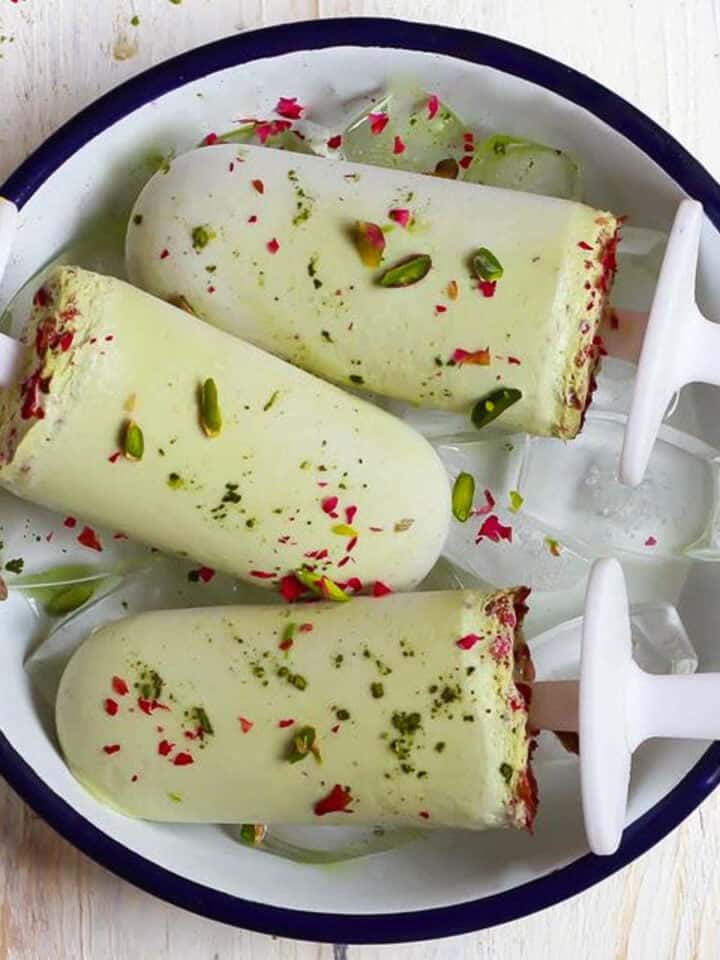
There is nothing like a refreshing frozen treat on a hot summer day! And these cool and creamy pistachio matcha popsicles hit the spot every time!

3 pistachio matcha popsicles in a small tray.

Made with just 5 ingredients, these matcha popsicles are incredibly easy to make. Just blend, pour, and freeze! Whether you’re a matcha fan or are curious to try something new, these popsicles are for you. And they taste as fabulous as they look! 

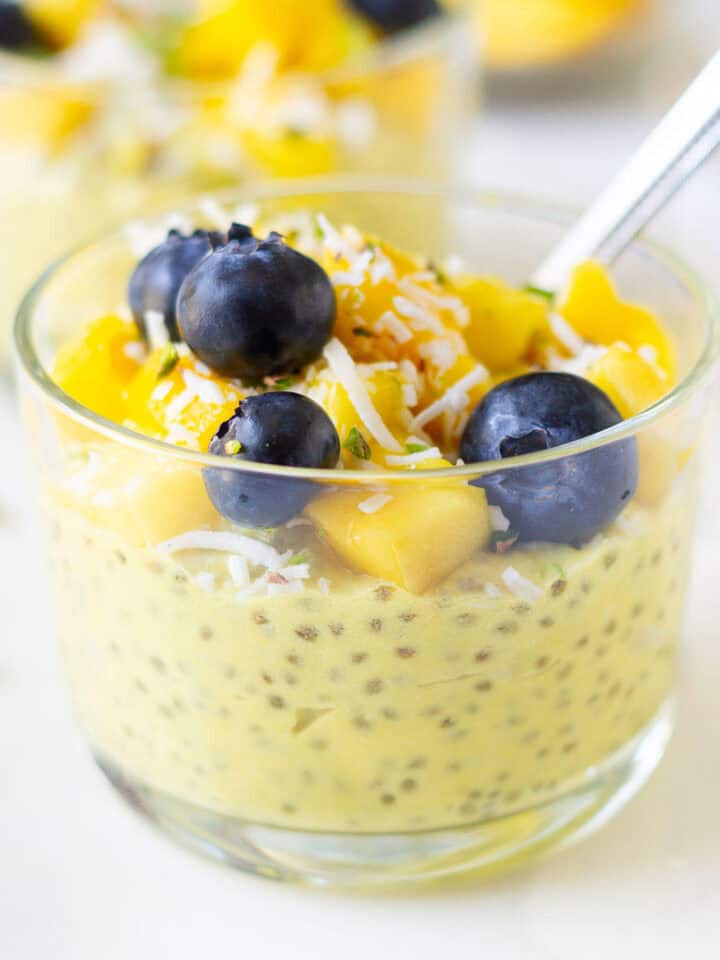
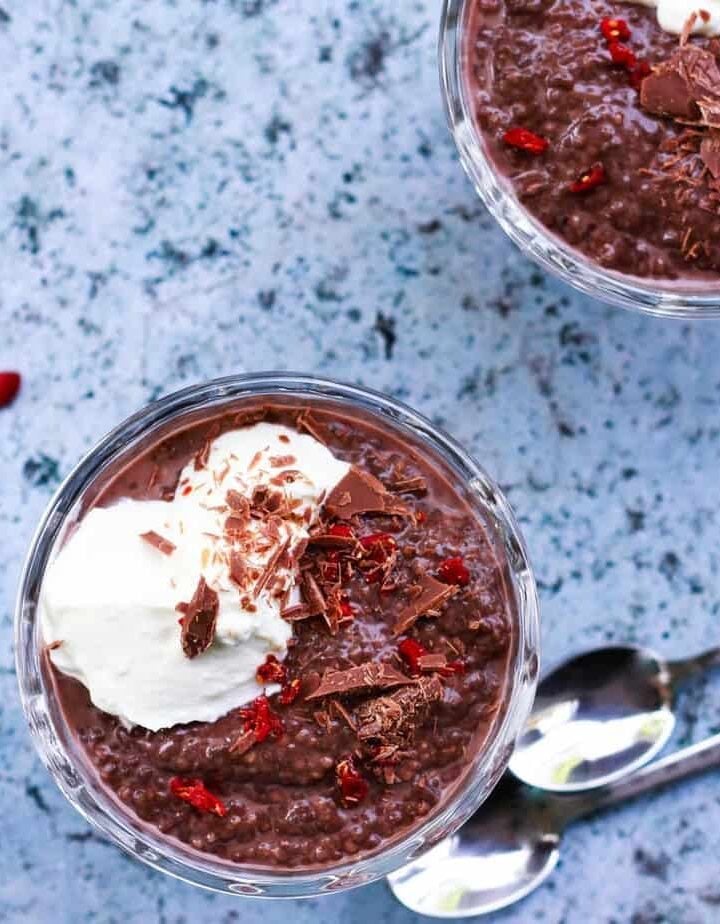
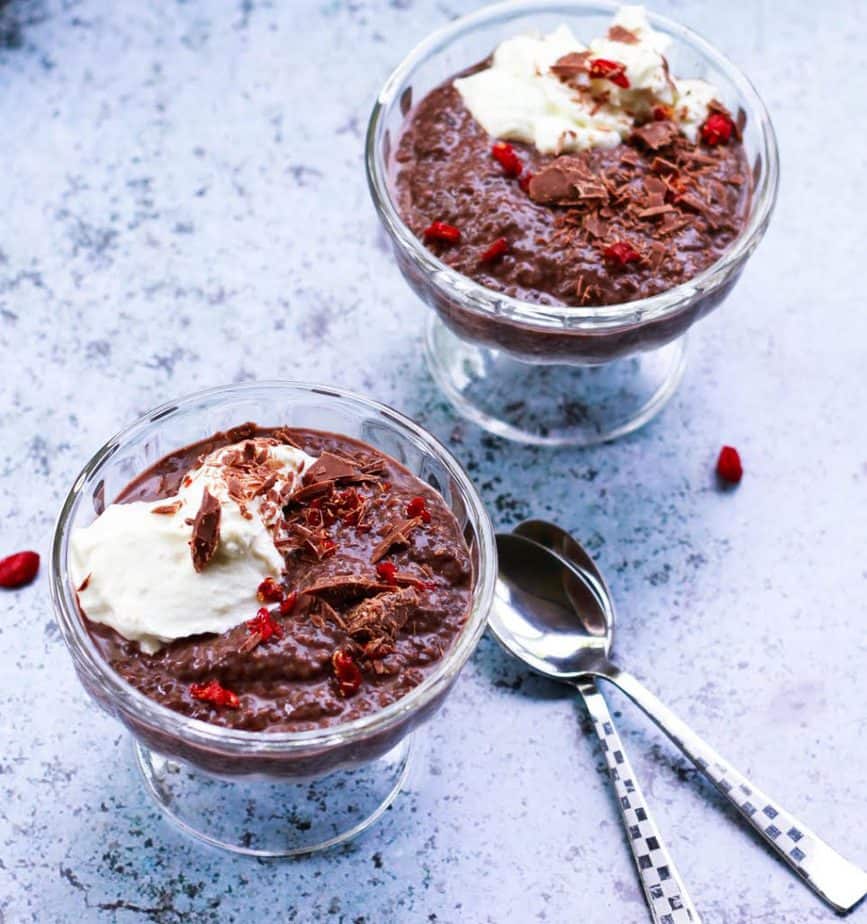
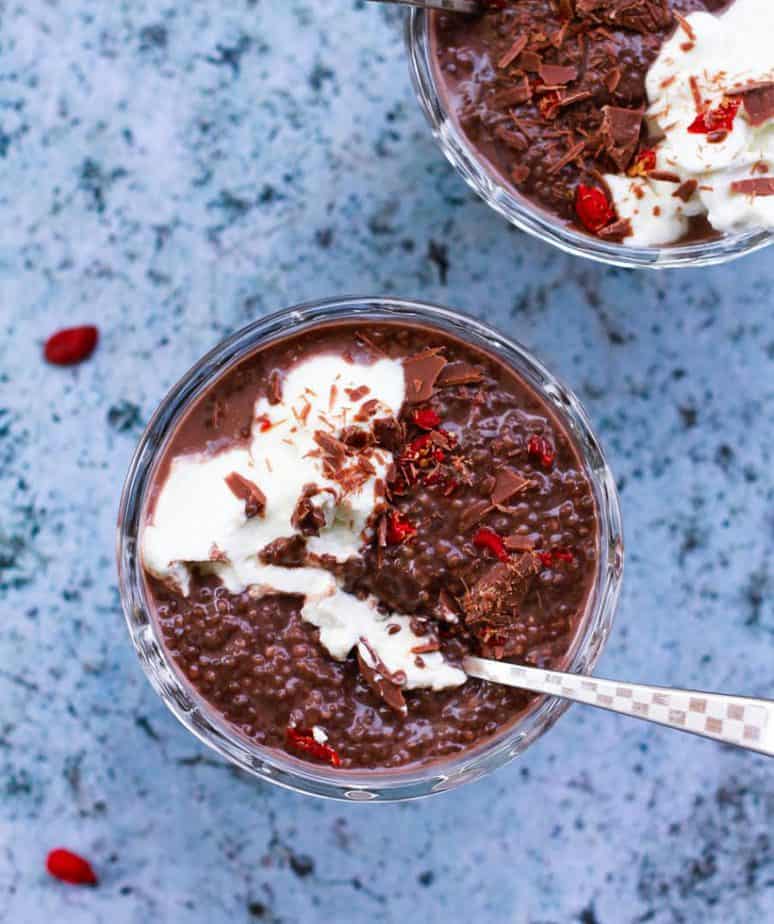
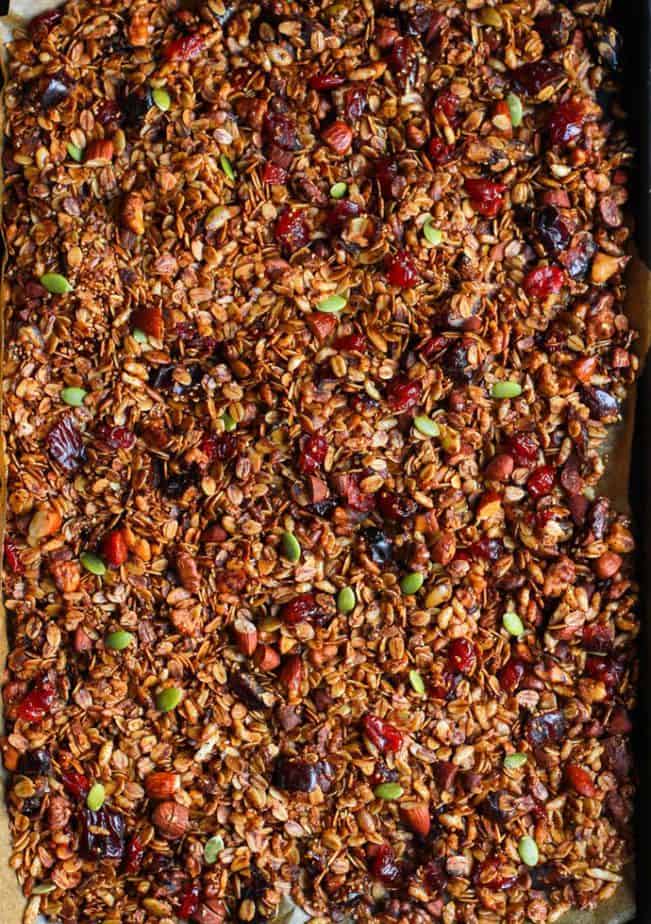
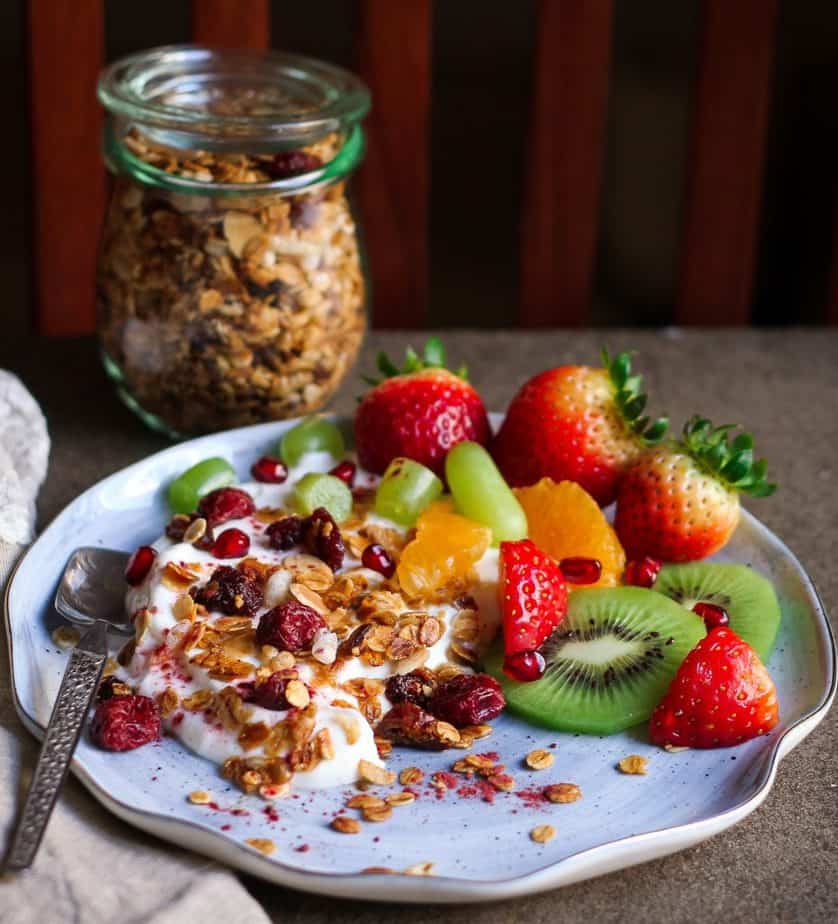
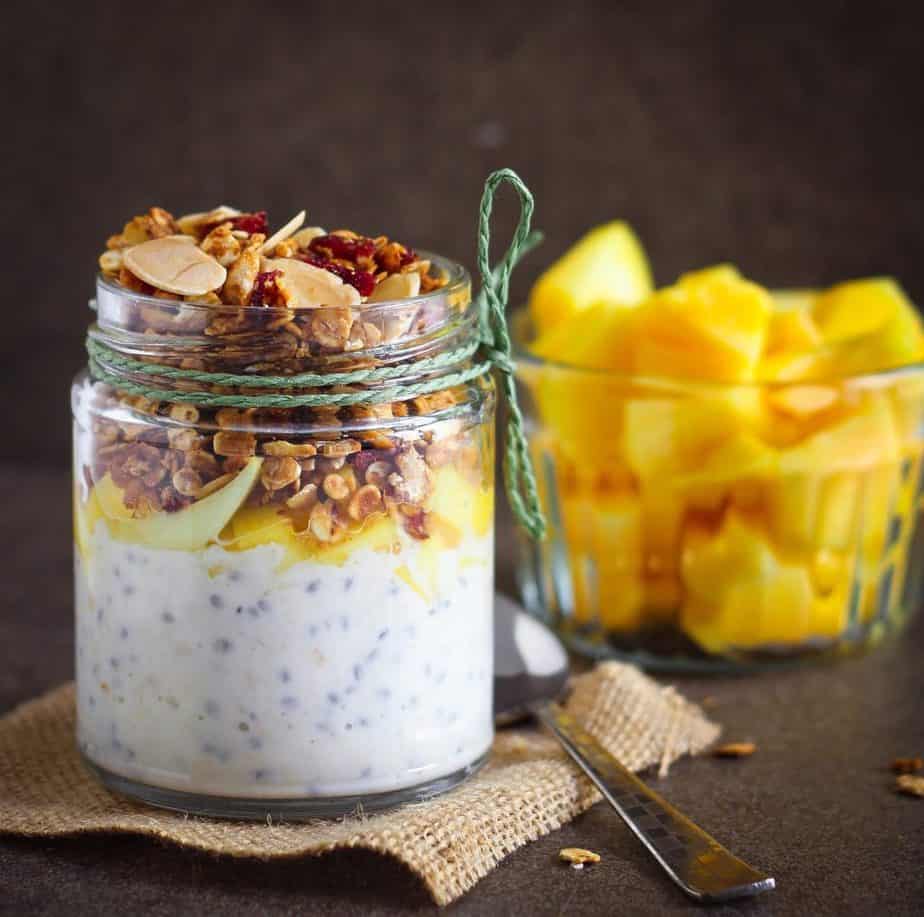
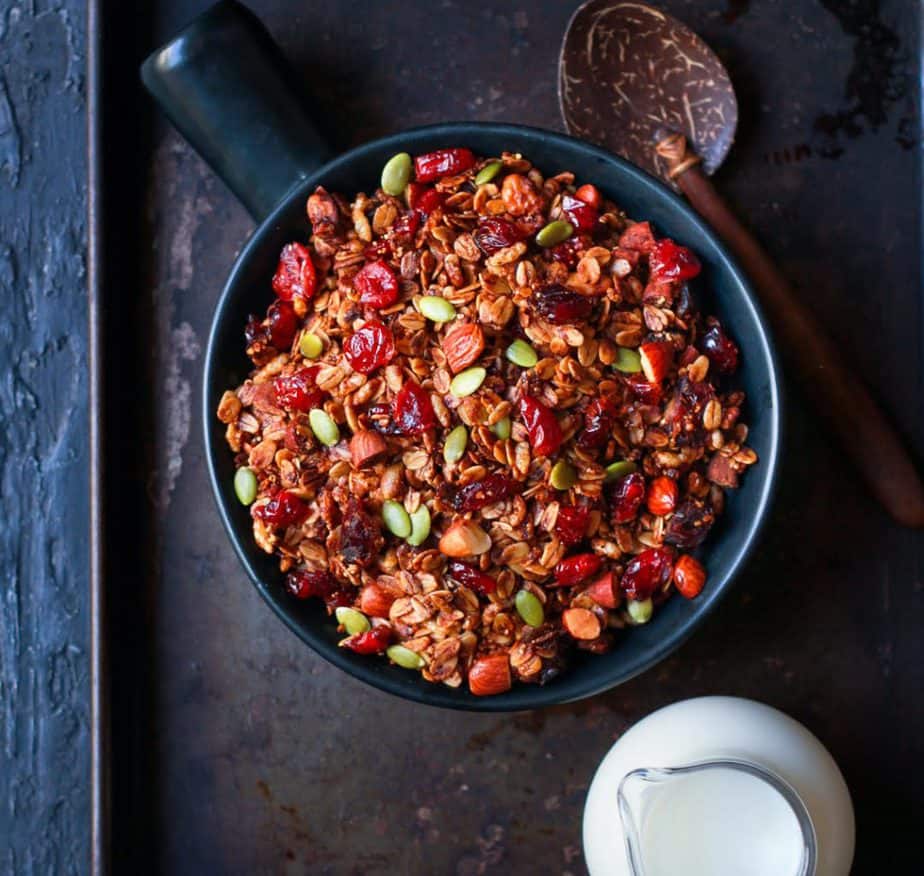
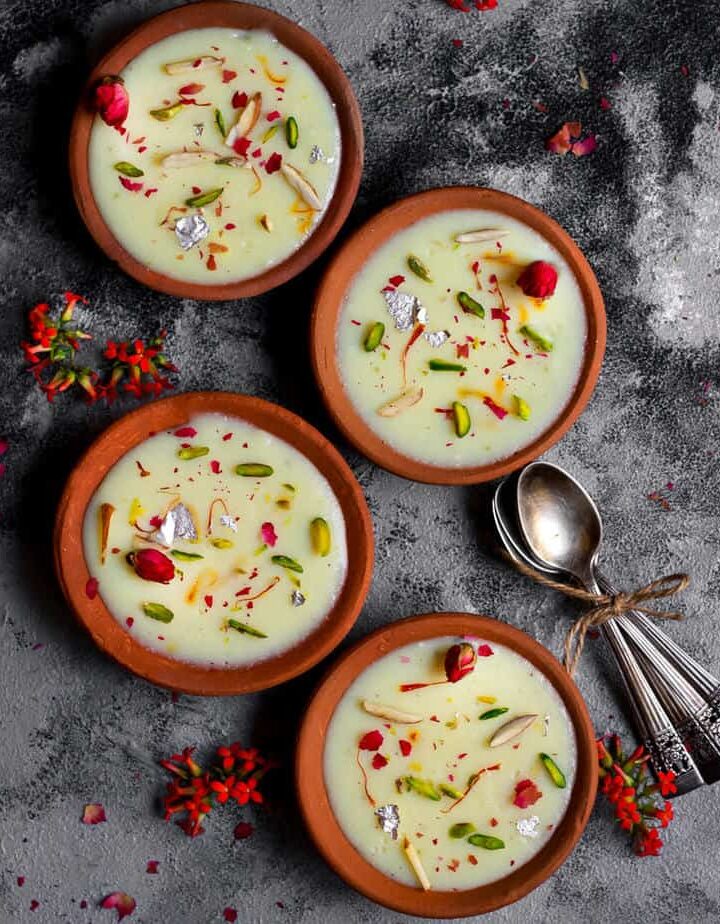
If you love matcha, you will really enjoy this matcha chia pudding, easy baked matcha donuts, and matcha granola!

[feast_advanced_jump_to]

Why You’ll Love The Recipe

✨A unique flavor combo! Creamy, nutty pistachios combined with earthy matcha make these popsicles so luxurious!

✨The recipe couldn’t be simpler! You only need to blend all the ingredients, pour them into the mold, freeze, and enjoy!

✨They are stunning to look at! Pale green hue with a pop of red from the dried rose petals, makes these look festive and beautiful with literally no effort!

✨Perfectly cool and refreshing for hot summer days! Enjoy them as an afternoon snack or a light after-dinner dessert!
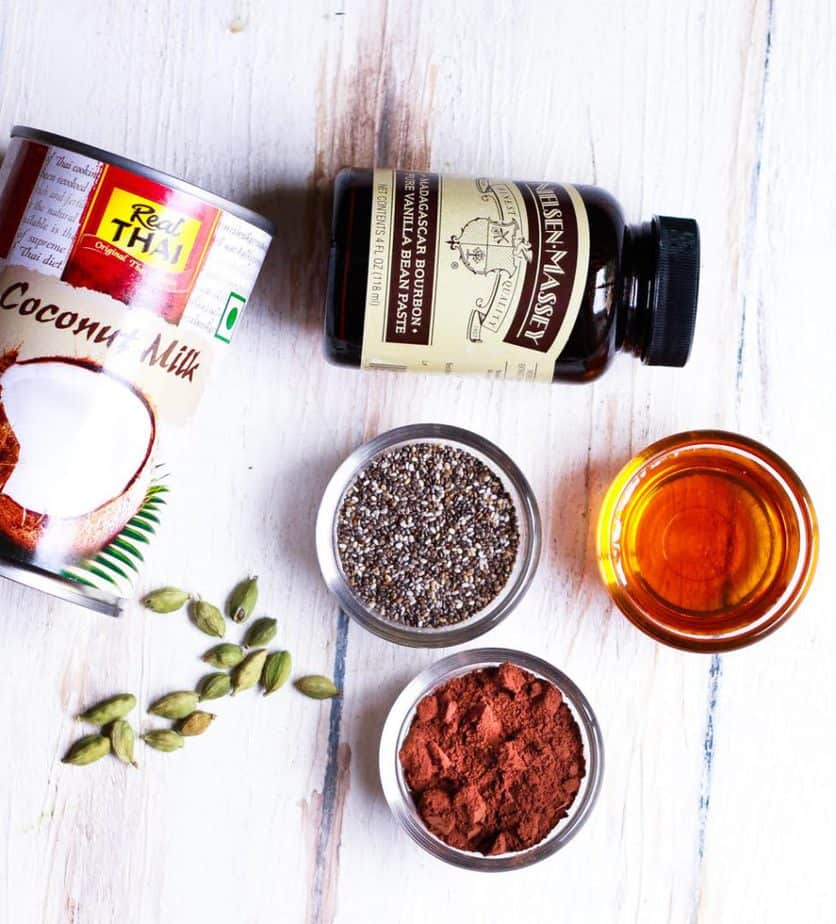
Recipe Ingredients

Ingredients for making matcha popsicles.

Coconut milk: Full-fat coconut milk is the best here. It makes the popsicles rich and creamy. You can also use coconut cream for ultra-velvety matcha popsicles.

Pistachios: Use raw shelled pistachios for this recipe. You can blanch them and take their skins off if you wish. I skipped this step. Please don’t use roasted pistachios here.

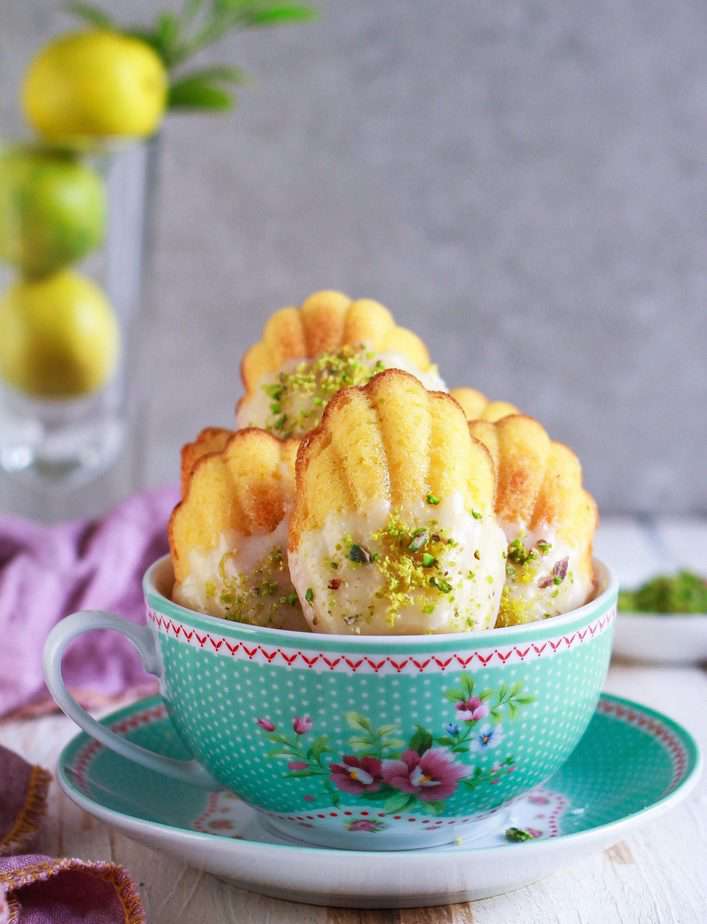
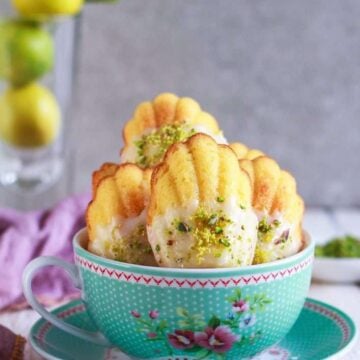
Matcha: Please use the best quality matcha you can get. Typically, ceremonial grade matcha is used for drinking, like in this mango matcha latte and strawberry matcha latte. Culinary grade matcha is used in food recipes, like in this matcha madeleine recipe.  I have used ceremonial grade in this recipe. 

Rosewater: I love the light floral flavor rosewater imparts. It pairs beautifully with pistachios. You can leave it out if you wish.

Maple syrup: I’ve used maple syrup for sweetening these popsicles. Feel free to swap with honey or agave syrup.

Please see the recipe card below for full information about the ingredients and quantities.

3 matcha popsicles in a white tray with ice.

How to Make Pistachio Matcha Popsicles

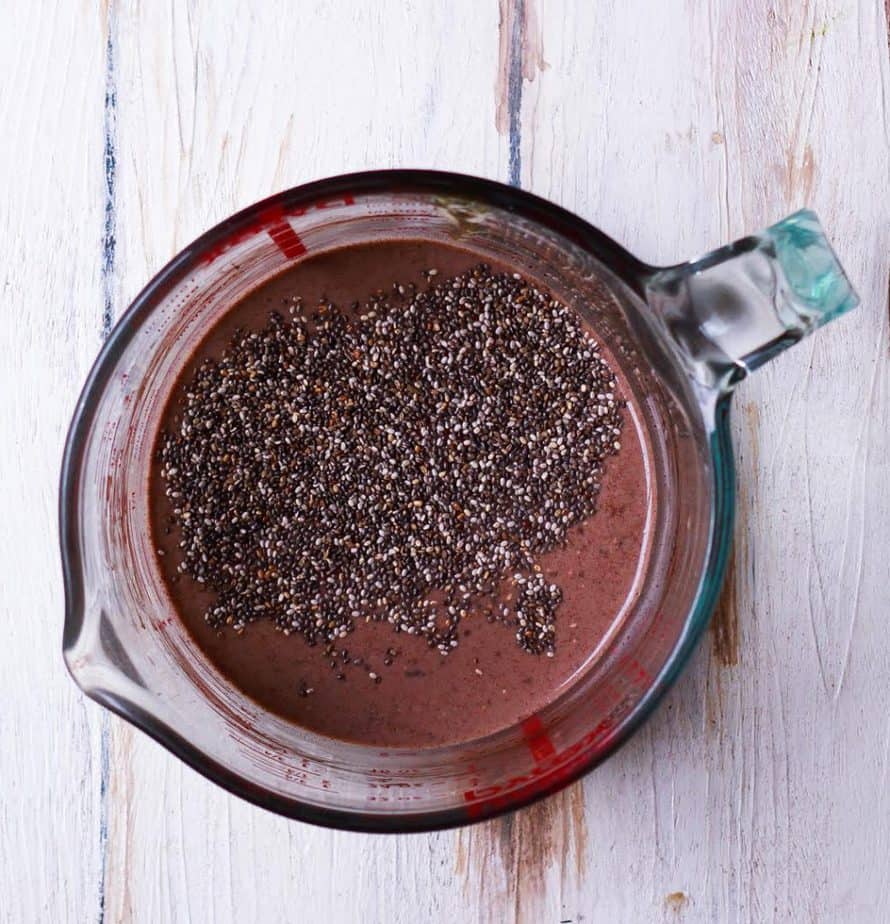
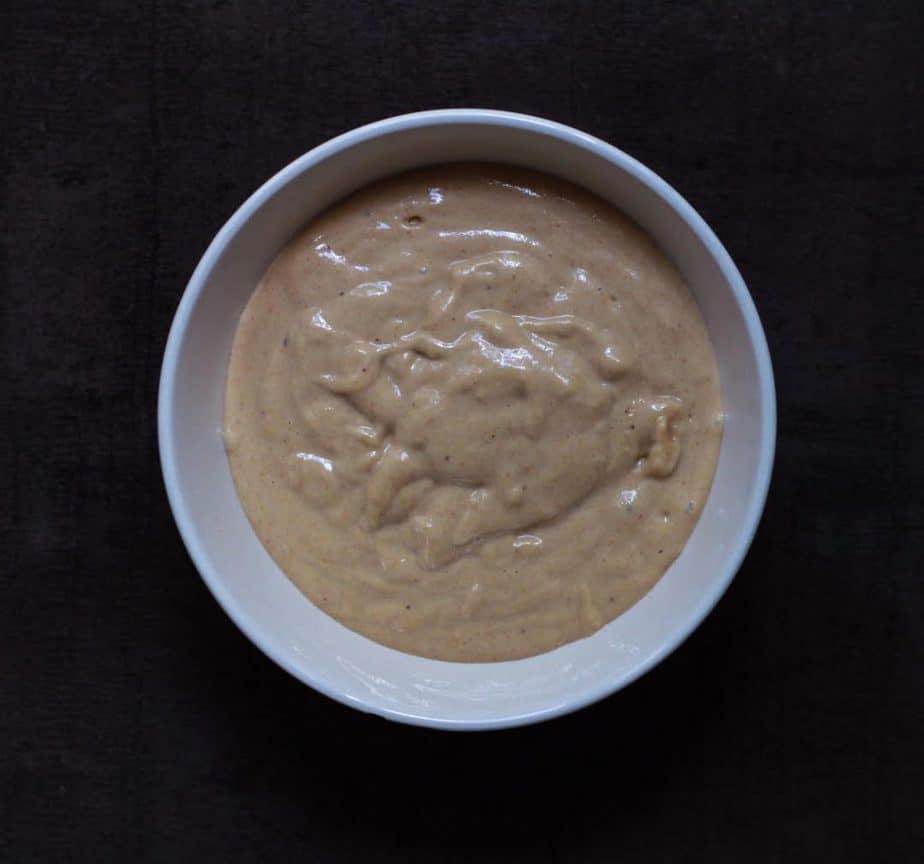
Step 1: Combine the coconut milk, pistachios, matcha powder, rosewater, and maple syrup in a blender.

Step 2: Blend until smooth. Taste and adjust for sweetness. Add more matcha powder if you like.

Step 3: Stir in some dried rose petals, if using. Pour the mixture into the popsicle molds.

Step 4: Freeze for 10-12 hours. Unmold and enjoy!

Top Tips

  • You can store the popsicles in their molds for 1-2 days..
  • For longer storage, unmold the popsicles and place them in a freezer-friendly air-tight container. Be sure to layer a sheet of wax paper between each layer of popsicles.
  • You can also wrap each popsicle in plastic wrap, parchment paper, or beeswax wrap and place them in a ziplock bag. Make sure the bag is tightly sealed. 
  • The best way to unmold a popsicle is to run it under warm water for a few seconds. This will help release it easily from the mold.
  • You can use regular dairy cream or half and half in place of coconut milk. Regular milk will make the popsicles icy, not creamy.
Pistachio matcha popsicle on a blue plate.

Serving and Storage

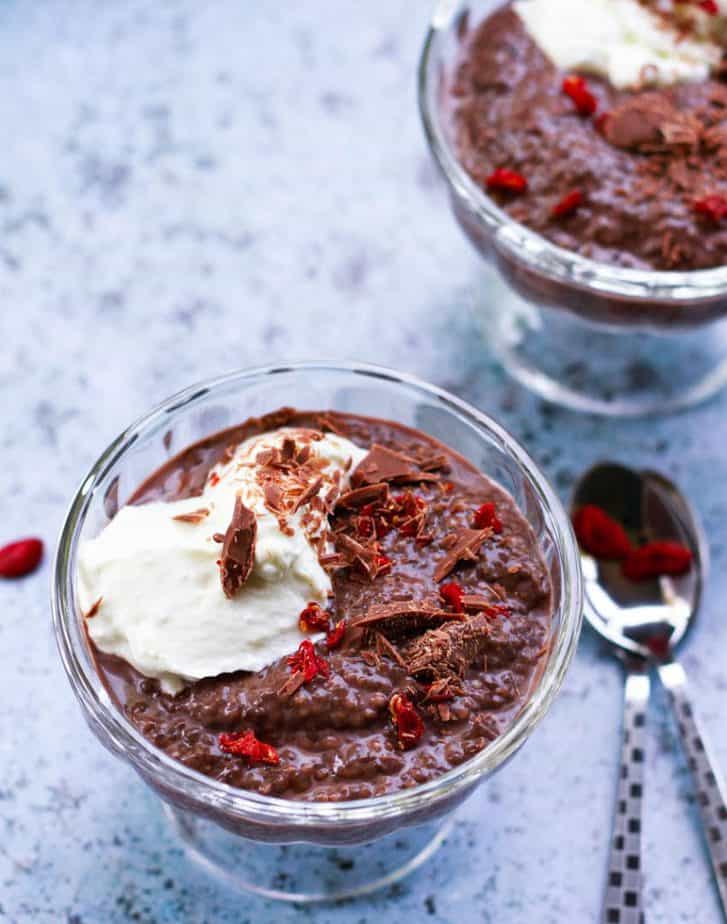
These pistachio matcha popsicles are just perfect as they are! Just enjoy them straight from the freezer. But if you’re feeling extra, drizzle with melted dark or white chocolate!

Store them in the freezer, in the molds, for 1-2 days. For longer storage, store them in an airtight container or wrapped individually in parchment paper to keep them fresh and frost-free for up to two weeks.

More Popsicle Recipes You'll Love

  • Almond Peach Popsicles on a serving tray.
    Almond Peach Popsicles
  • 4 mango coconut popsicles on a white tray with ice.
    Coconut Mango Popsicles
  • 3 cherry popsicles in a bowl with ice and fresh cherries.
    Cherry Popsicles
  • 3 mango popsicles on a iced filled tray.
    Mango Thandai Popsicles

Half the joy of cooking is sharing it with others. That’s why I’m always eager to hear from you. So go right ahead & drop a comment or reach out on Instagram, Pinterest, YouTube, or Facebook. I hope you love these pistachio matcha popsicles as much as we do!

📖 Recipe

Tried this recipe?Let us know how it was!
3 pistachio matcha popsicles in a small tray.

Pistachio Matcha Popsicles

Natasha Minocha
There is nothing like a refreshing frozen treat on a hot summer day! And these cool and creamy 5-ingredient pistachio matcha popsicles hit the spot every time!
No ratings yet
Print Recipe Pin Recipe
Prep Time 15 minutes mins
Total Time 12 hours hrs
Course Dessert, Ice cream
Cuisine American
Servings 6 popsicles
Calories 214 kcal

Ingredients
  

  • 1.5 cups/ (400 ml) Coconut milk, full fat
  • 1/3 cup Pistachios
  • 1 tsp Matcha powder You can add more per your preference
  • 1/2 tsp Rose water
  • 1/4 cup Maple syrup/Honey
  • Dried rose petals (optional)

Instructions
 

  • Blend the coconut milk, pistachio, matcha powder, rosewater, and maple syrup in a blender.
    Taste and adjust for sweetness. You can also add more matcha powder at this point if you like.
  • Stir in some dried rose petals (if using) and pour this mixture into the popsicle molds.
  • Freeze the popsicles for 10-12 hours.
  • Unmold and enjoy!

Notes

  • You can store the popsicles in their molds for 1-2 days..
  • For longer storage, unmold the popsicles and place them in a freezer-friendly air-tight container. Be sure to layer a sheet of wax paper between each layer of popsicles.
  • You can also wrap each popsicle in plastic wrap, parchment paper, or beeswax wrap and place them in a ziplock bag. Make sure the bag is tightly sealed. 
  • The best way to unmold a popsicle is to run it under warm water for a few seconds. This will help release it easily from the mold.
  • You can use regular dairy cream or half and half in place of coconut milk. Regular milk will make the popsicles icy, not creamy.

Nutrition

Serving: 1 ServingCalories: 214kcalCarbohydrates: 14gProtein: 3gFat: 17gSaturated Fat: 13gPolyunsaturated Fat: 1gMonounsaturated Fat: 2gSodium: 10mgPotassium: 257mgFiber: 2gSugar: 11gVitamin A: 62IUVitamin C: 2mgCalcium: 32mgIron: 1mg

Baked Mango Cheesecake

June 20, 2020

Baked Ricotta Mango Cheesecake | Easy summer cheesecake

This baked mango cheesecake is rich, creamy and infused with juicy fresh mangoes and velvety ricotta. Decadent yet light, this ricotta cheesecake is surprisingly easy to make!

Baked Ricotta Mango Cheesecake | Easy summer cheesecake

This cheesecake is a delicious fusion of velvety smooth cheesecake and the tropical sweetness of ripe mangoes on a buttery, crumbly cookie base. The recipe is fuss-free and uses simple ingredients and no special technique!

If you love mangoes, you must try my easy mango cake, 3-ingredient mango mousse, and mango pancakes!

[feast_advanced_jump_to]

Why You'll Love This Recipe

✨This flavorful mango ricotta cheesecake is bursting with the fresh, natural sweetness of mangoes.

✨Thanks to the ricotta, this cheesecake is lighter than the traditional cheesecakes but is still super creamy!

✨The recipe is simple and easy to follow. No water bath, no technique, it's perfect for new bakers as well as the experts!

✨Stunning to look at, absolutely delightful to eat, this is a stress-free dessert you can make when you're entertaining or just treating yourself!

Reader Love❤️

5 stars

This came out amazing, made it for my mom's birthday! Thank you for sharing!

5 stars

Thanks Natasha. The cake turned out delicious. My family absolutely loved it.

Baked Ricotta Mango Cheesecake | Easy summer cheesecake

Recipe Ingredients

Cookies: Graham crackers are the best. If you don’t have them, use Marie biscuits or digestive cookies.

Mango: Fresh mango puree works the best here though you can also use canned mango pure.

Saffron: I added saffron while making mango shrikhand, and the combination just blew my mind. So, I just had to include it in this baked ricotta mango cheesecake recipe for the hue and flavor.

Sugar: Granulated sugar or cane sugar will work well here. Feel free to increase or decrease the amount depending on how sweet your mangoes are.

Ricotta cheese: I have used ricotta cheese in this recipe. If you don’t have ricotta cheese, use cream cheese instead, like I did for my chocolate hazelnut cheesecake and Bailey's cheesecake.

Please see the recipe card for full information about the ingredients and quantities.

How To Make Baked Mango Cheesecake

Step 1: Make the cheesecake base by mixing crushed Marie biscuits and melted butter till you reach a wet sand consistency.

Step 2: Evenly pat the biscuit mixture on the bottom of an 8-inch loose bottom pan and slide it in the oven, just for 5–10 minutes. While the crust bakes, quickly work on the fresh mango cheesecake filling.

Step 3: Add a few strands of saffron to the cream.

Step 4: Once the cream is infused with color and flavor, mix in ricotta cheese, flour, sugar, fresh mango puree, and eggs.

Step 5: Pour the thick, creamy, and lump-free batter on the baked biscuit base.

Process of making Baked Ricotta Mango Cheesecake | Easy summer cheesecake

Step 6: Carefully place in the oven and bake at 160°C for about 45–55 minutes.

Step 7: Let the cheesecake cool at room temperature to help settle it more evenly. Then refrigerate overnight.

Baked Ricotta Mango Cheesecake | Easy summer cheesecake

Final step: Slice and enjoy!

Top Tips

  • Use room-temperature ingredients to get the best cheesecake texture and to make the filling easily.
  • Don’t overbeat the mango cheesecake filling.
  • Wrap the spring-bottom pan with foil just in case the pan leaks!
  • Bake the cheesecake at a low temperature for a long time. It's the key to a moist cake.
  • Don’t keep opening the oven door every few minutes to check for cracks. Even if the cake doesn’t turn out aesthetically perfect, you can always cover it up with fruit compote, a dusting of icing sugar, or a handful of chopped fresh fruits!
  • When the cake looks set but has a little jiggle and wobble in the center, switch the oven off and crank the door open, leaving the cake inside for 20-30 minutes. The remaining heat will gently and slowly bake the mango cheesecake at a steady pace, without cracking it.
  • Chill the cheesecake for at least 6 hours. I prefer to chill mine overnight. This helps the ricotta cheesecake set well and ensures the best creamy texture and flavor.
Baked Ricotta Mango Cheesecake | Easy summer cheesecake

Recipe FAQs

Which mango should I use for this Ricotta mango cheesecake?

Use the ripest mangoes you have at home to make the puree. Any non-fibrous mango will be perfect here. I had Safeda at hand, which gave the cheesecake a gorgeous orange color, and the saffron just enhanced the hue.
Can’t get your hands on a non-fibrous mango? Simply strain the puree before you use it to make the filling!

Can I make this mango cheesecake without eggs?

Yes, absolutely. Just increase the amount of ricotta cheese or cream cheese by about 60 grams, like I did for my saffron cardamom cheesecake.

How to store mango cheesecake?

You can store this cheesecake in an air-tight container in the refrigerator for upto 5 days. You can also freeze it for up to 1 month. Thaw in the refrigerator before serving.

Baked Ricotta Mango Cheesecake | Easy summer cheesecake

More Mango Recipes

  • Mango bread on a white marble board with ingredients on the side.
    Mango Bread Recipe
  • Mango Float Recipe
    Mango Float Recipe
  • Mango Mousse
    The Best Mango Mousse Recipe! (3 Ingredients)
  • Mango Tres Leches Cake
    Mango Tres Leches Cake

Half the joy of cooking is sharing it with others. That’s why I’m always eager to hear from you. So go right ahead and drop a comment or reach out on Instagram, Pinterest, YouTube, or Facebook. I hope you love this mango cheesecake as much as we do!

📖 Recipe

Tried this recipe?Let us know how it was!
Baked Ricotta Mango Cheesecake | Easy summer cheesecake

Baked Mango Cheesecake

Natasha Minocha
Baked Mango cheesecake is a delicious fusion of velvety smooth cheesecake and the tropical sweetness of ripe mangoes on a buttery, crumbly cookie base!
4.25 from 4 votes
Print Recipe Pin Recipe
Prep Time 20 minutes mins
Cook Time 1 hour hr 30 minutes mins
Chilling time 9 hours hrs
Course Dessert
Cuisine American, Indian
Servings 8 Servings
Calories 525 kcal

Equipment

  • 8" Loose bottom pan

Ingredients


Cheesecake base

  • 1.5 cup Crushed Marie biscuits You can use Graham crackers or Digestive biscuits as well.
  • 1/3 cup Melted butter

Cheesecake filling

  • 1/3 cup Cream
  • 1 tsp Saffron strands
  • 16 oz Ricotta cheese
  • 3/4 cup Sugar
  • 1/4 cup All purpose flour
  • 2 Eggs
  • 1.5 tsp Vanilla extract
  • 1 1/4 cup Fresh mango puree You can use canned mango puree as well.

Instructions
 

Cheesecake Base

  • Preheat your oven to 180C. Cover the bottom and sides of your 8" springform pan with aluminium foil.
  • Combine the melted butter and crushed cookies in a small bowl. This mixture should have the consistency of wet sand.
  • Press it down evenly at the bottom of the pan. Bake for 10 minutes. Lower the oven temperature to 160C while you're preparing for the filling.

Cheesecae filling

  • Stir in saffron into the cream. Let this sit for 5 -10 minutes.
  • Beat the ricotta cheese, saffron-infused cream, flour, pureed mango, and sugar in a large bowl with an electric mixer. When this mixture is smooth, add one egg at a time, mixing well until incorporated. Whisk in the vanilla extract.
  • Pour into the prepared crust. Carefully place in the oven and bake at 160C for about 45-55 minutes. The top of the cake should look cooked and the center should be a bit wobbly.
  • Turn off the heat and slightly crack the door open and allow to cool for 30 minutes.
  • Let the cake cool on countertop for another hour and then refrigerate for at least 8 hours for it to set completely. Remove carefully from the pan, place on your serving plate.
  • Garnish with pistachio slivers and some saffron strands. Serve chilled. Enjoy!

Notes

  • Use room-temperature ingredients to get the best cheesecake texture and to make the filling easily.
  • Don’t overbeat the mango cheesecake filling.
  • Wrap the spring-bottom pan with foil just in case the pan leaks!
  • Bake the cheesecake at a low temperature for a long time. It's the key to a moist cake.
  • Don’t keep opening the oven door every few minutes to check for cracks. Even if the cake doesn’t turn out aesthetically perfect, you can always cover it up with fruit compote, a dusting of icing sugar, or a handful of chopped fresh fruits!
  • When the cake looks set but has a little jiggle and wobble in the center, switch the oven off and crank the door open, leaving the cake inside for 20-30 minutes. The remaining heat will gently and slowly bake the mango cheesecake at a steady pace, without cracking it.
  • Chill the cheesecake for at least 6 hours. I prefer to chill mine overnight. This helps the ricotta cheesecake set well and ensures the best creamy texture and flavor.

Nutrition

Serving: 1 ServingCalories: 525kcalCarbohydrates: 65gProtein: 12gFat: 25gSaturated Fat: 13gPolyunsaturated Fat: 3gMonounsaturated Fat: 7gTrans Fat: 0.3gCholesterol: 102mgSodium: 361mgPotassium: 237mgFiber: 2gSugar: 36gVitamin A: 1138IUVitamin C: 15mgCalcium: 172mgIron: 2mg

Coconut Mango Popsicles

June 17, 2020

4 mango coconut popsicles on a white tray with ice.

These creamy coconut mango popsicles are the ultimate summer treat! Cool, refreshing, and bursting with fresh fruity tropical flavors, these dreamy popsicles need just 4 ingredients and are prepped in 15 minutes!

4 mango coconut popsicles on a white tray with ice.

When it gets hot, the popsicle cravings hit hard. Instead of reaching for sugar-loaded store-bought pops, I like to whip up these mango coconut popsicles. They’re dairy-free and perfect as a midday snack, dessert, or even breakfast on the go!

They’ve got the perfect balance of sweet, juicy mango and rich, creamy coconut milk. I love layering them just for fun, but you can totally skip that part and blend everything. Either way, these vegan frozen treats are a healthy summer must-make. If you love mangoes like me, try mango float, matcha mango latte, or mango mousse next.

[feast_advanced_jump_to]

Why You’ll Love The Recipe

✨These vegan mango and coconut popsicles are incredibly easy to make - all you need are 4 ingredients and 15 minutes of prep. No cooking, no fancy equipment, no fuss. Just blend, pour, and freeze. 

✨They’re perfect if you're avoiding dairy or trying to eat a little lighter. They’re a treat you can feel good about!

✨Mango coconut popsicles taste amazing, look so pretty, and are way better than store-bought options. Keep your freezer stocked with these, along with frozen yogurt bark, pistachio matcha popsicles, and cherry yogurt popsicles for an easy anytime treat!

✨Whether it’s a hot afternoon, a cranky post-nap moment, or a need-something-sweet-after-dinner kind of night, these coconut milk mango pops are always a hit!

Recipe Ingredients

Ingredients for making coconut mango popsicles.

Mangoes: I used Safeda mangoes here because they’re naturally super sweet and juicy, which meant I didn’t need much sweetener. Use the ripest, sweetest mangoes you can find. You can use canned mango puree as well.

Milk: Go for full-fat coconut milk for that rich, creamy texture we all love in popsicles. It gives them a smooth, velvety finish and keeps them from getting icy. You can also use coconut cream for a richer flavor. Love coconut and mangoes together? Try velvety mango coconut panna cotta or mango chia pudding with coconut milk. 

Sweetener: If your mangoes aren’t super ripe, they may need some help. I used maple syrup. You can swap it with honey or regular sugar. Whatever you have on hand. Feel free to sub in the sugar-free alternative of your choice.

Vanilla extract: I love the cozy, dessert-y flavor a little splash of vanilla brings. 

Please see the recipe card below for full information on ingredients and quantities.

Substitutions

Fruit: This popsicle recipe works with any fruit. Add cherries, strawberries, apricots, or peaches like I did in this recipe for almond peach pops.

Milk: Don’t want to make coconut milk mango popsicles? Use thick, Greek yogurt instead of coconut milk or regular full cream.

Mango coconut popsicles on a tray with a cut mango on the side.

How To Make Coconut Mango Popsicles

Step 1: Blend coconut milk, vanilla extract, and ample syrup. Keep it aside. 

Step 2: Use a little of this coconut mixture to puree chopped mangoes.

Step 3: Pour mango puree into your molds, a quarter of the way through. Freeze for about 30 minutes.

Step 4: Add a quarter of the coconut milk mixture on top of the frozen mango. Freeze for 30 minutes.

Step 5: Keep repeating steps 3 and 4 until both mixtures are used up for gorgeous white and yellow layers.

Step 6: Freeze the mango popsicles overnight. 

Final step: Unmold and enjoy!

A mango popsicle held in a hand.

Pro Tips

  • Use ripe mangoes. The sweeter the mangoes, the better the flavor. It also means you’ll need less added sweetener.
  • Make popsicles overnight. Trust me, it’s the easiest way to avoid checking the freezer every hour (we’ve all done it). Just prep them in the evening, and they’ll be ready to enjoy the next day
  • Want to save time? Skip the layering and go for pretty mango-coconut swirls, or just blend everything into one smooth mix. Either way, mango coconut milk popsicles taste just as amazing!

Storing Coconut Mango Popsicles

These coconut mango popsicles are summer on a stick. They are easy make-ahead desserts, perfect for everyday cravings and entertaining.

You can store the popsicles in their molds for up to 2 days in the freezer. For longer storage, transfer the mango popsicles in a freezer bag or an air-tight container for up to 2 weeks.

More Mango Recipes!

  • The Perfect Mango Matcha Latte
    The Perfect Mango Matcha Latte
  • Easy Mango Cake - Eggless Recipe
    Easy Mango Cake - Eggless Recipe
  • Mango bread on a white marble board with ingredients on the side.
    Mango Bread Recipe
  • mango-filled donuts on a cake stand.
    Mango-Filled Donuts

Half the joy of cooking is sharing it with others. That’s why I’m always eager to hear from you. So go right ahead & drop a comment or reach out on Instagram, Pinterest, YouTube, or Facebook. I hope you love these coconut mango popsicles as much as we do!

📖 Recipe

Tried this recipe?Let us know how it was!
4 mango coconut popsicles on a white tray with ice.

Coconut Mango Popsicles

Natasha Minocha
These creamy coconut mango popsicles are the ultimate summer treat! Bursting with fresh fruity tropical flavors, these dreamy popsicles need just 4 ingredients and are prepped in 15 minutes!
5 from 1 vote
Print Recipe Pin Recipe
Prep Time 15 minutes mins
Freezing time 12 hours hrs
Total Time 12 hours hrs 15 minutes mins
Course Dessert, Ice cream
Cuisine American
Servings 6 popsicles
Calories 177 kcal

Ingredients
  

  • 13.5 oz / 400 ml Coconut milk, full fat
  • 1 tsp Vanilla extract
  • 2/3 tbsp Maple syrup/ honey You may need to add more
  • 1 large Mango, peeld and diced

Instructions
 

  • Blend the coconut milk, vanilla extract, and maple syrup. Taste and adjust for sweetness.
  • Use a quarter of this mixture to puree the diced mangoes.
  • Pour this mango mixture a quarter of the way through in your molds. Put this in the freezer for about 30 minutes.
    Add a quarter of the coconut mixture on top of the frozen mango mixture. Freeze for 30 minutes.
    Alternate this way till both the mixtures are used up.
  • Freeze the layered popsicles for 8-10 hours.
  • Unmold and enjoy!

Notes

  • Use ripe mangoes. The sweeter the mangoes, the better the flavor. It also means you’ll need less added sweetener.
  • Make popsicles overnight. Trust me, it’s the easiest way to avoid checking the freezer every hour (we’ve all done it). Just prep them in the evening, and they’ll be ready to enjoy the next day
  • Want to save time? Skip the layering and go for pretty mango-coconut swirls, or just blend everything into one smooth mix. Either way, mango coconut milk popsicles taste just as amazing!

Nutrition

Serving: 1 ServingCalories: 177kcalCarbohydrates: 11gProtein: 2gFat: 15gSaturated Fat: 13gPolyunsaturated Fat: 0.2gMonounsaturated Fat: 1gSodium: 10mgPotassium: 231mgFiber: 2gSugar: 9gVitamin A: 373IUVitamin C: 14mgCalcium: 16mgIron: 1mg

Homemade Labneh Recipe

June 15, 2020

Labneh on a small plate topped with olives,sumac, pomegranate, mint and olive oil.

Homemade labneh is delicious, tangy, and rich. It’s a thick, creamy dip you’ll love with quick homemade pita bread, salads, veggies, and sandwiches. And it takes all of 10 minutes to prep and 4 steps to make.

Labneh on a plate topped with olives, pomegranate, sumac, mint and olive oil.

This easy soft yogurt cheese is a breeze to make and tastes divine! It's so versatile! You can use it as a dip or spread for your everyday meals and snacks. Dress it up for a beautiful mezze platter when you're entertaining. This creamy labneh recipe is a keeper!

[feast_advanced_jump_to]

What Is Labneh?

Labneh is just extra, extra-strained, tangy yogurt! It is a luscious Middle Eastern traditional specialty that transforms yogurt into a delicious, no-fuss dip that almost feels like fresh cheese. It has a mild flavor but a thick, creamy texture. The taste is very similar to slightly sour yogurt. Trust me, it’s addictive.

Why You’ll Love This Recipe

✨ It takes just 10 minutes to prep! 

✨ Creamy, cool, and so flavorful. Its a dip everyone loves!

✨ So versatile! Tweak the flavors according to your taste.

✨ It pairs so well with literally everything! From grilled veggies, chicken, wraps, sandwiches, and of course, all kinds of crackers and chips!

Recipe Ingredients

Yogurt: Always use whole milk yogurt to make labneh, and you’ll get phenomenal results. Greek yogurt is also an excellent choice for this recipe.

Salt: We only need a small quantity of salt in this recipe. It helps draw out the whey and makes the labneh very flavorful.

See the recipe card for full information on ingredients and quantities.

Labneh on a small plate topped with olives,sumac, pomegranate, mint and olive oil.

How to Make Labneh At Home?

Labneh is ridiculously easy to make. There are no strict guidelines you need to follow, but a few tricks help get that creamy, dense consistency.

Step 1: Combine the yogurt and salt in a bowl.

Yogurt and salt mixture on a kitchen towel.

Step 2: Take a fine-mesh strainer and spread cheesecloth on it. Place the sieve over a large bowl.

Step 3: Spoon the yogurt mixture on the cheesecloth-lined sieve, cover with a kitchen towel, and place in the refrigerator for 24-48 hours. Over the day, the whey will drip and collect in the bowl below, making the yogurt firmer.

Yogurt on a kitchen towel placed over a sieve over a measuring cup with whey.

Step 4: Scoop the thick yogurt out and transfer it to a bowl. Give a little whisk.

Final step: Season, serve, and savor!

Pro Tips

  • A muslin works just as well as cheesecloth. A kitchen napkin or a large coffee filter are great substitute, too.
  • How thick your labneh is depends on how long you drain the yogurt. Sometimes I let it strain for more than a day, and it becomes so thick that I can roll it into balls. I’d suggest picking the texture you’ll love. 

Labneh on a small plate.

How To Use

Labneh can be served with practically anything. You can use it as a creamy spread over homemade pita, sweet potato crackers, or air fryer tortilla chips.

Simple dip: You can serve it plain as the dip of a mezze platter, too. It tastes just as delectable and tangy. I sprinkled my homemade labneh with sumac and then dressed it up with mint, olives, and, ever my favorite, pomegranate arils for a pop of color. A drizzle of olive oil and it's ready for dipping! I love it as a dip for my soft pretzel bites.

Use it in wraps: Spread some creamy labneh on a wrap, top it with air fryer falafels or crispy baked chicken nuggets, add some crunchy pickles and you've got yourself a fabulous, quick meal!

Stunning crudité centerpiece: Roll the thick cheesy labneh into balls and coat it with crushed nuts or spices, and serve during a dinner party. No one will ever know that it’s laughably easy to make.

Homemade labneh on a plate, topped with olives, pomegranate, mint, sumac and olive oil.

Recipe FAQs

How to use the whey?

Whey is the liquid that collects in the bowl. Don’t throw it away. It is full of proteins. You can drink it (it's delicious), you can bake bread with it, you can make it a base for soups, and you can even add it to your roti or paratha dough!

How long does labneh last?

Homemade labneh stays good for 10 or so days, refrigerated. Want it to last longer? Roll it into balls and put it in a sterilized jar filled with olive oil. This will stay for 1 month in the refrigerator.

More Fun & Easy Dips

  • Easy Creamy Avocado Dip
    Easy Creamy Avocado Dip
  • Tzatziki in a bowl with a piece of pita bread scooping it up.
    Tzatziki
  • Creamy dip in a bowl garnished with parsley and pomegranate arils.
    Whipped Goat Cheese Dip
  • Classic Hummus | How to make classic hummus
    Classic Hummus Made Easy!

Half the joy of cooking is sharing it with others. That’s why I’m always eager to hear from you. So go right ahead & drop a comment or reach out on Instagram, Pinterest, YouTube, or Facebook. I hope you love this easy homemade labneh recipe as much as we do!

📖 Recipe

Tried this recipe?Let us know how it was!
Labneh on a small plate topped with olives,sumac, pomegranate, mint and olive oil.

Homemade Labneh Recipe

Natasha Minocha
This homemade Labneh recipe gives a luscious Middle Eastern traditional specialty that transforms yogurt into delicious, creamy cheese.
No ratings yet
Print Recipe Pin Recipe
Prep Time 10 minutes mins
Draining time 1 day d
Total Time 1 day d 10 minutes mins
Course Appetizer, Condiment
Cuisine Mediterranean
Servings 10 Servings
Calories 30 kcal

Equipment

  • Sieve, Bowl, Kitchen napkin

Ingredients


  • 2 cups Whole milk yogurt
  • 1/2 tsp Salt

Toppings

  • Olive oil, Sumac, Mint, Pomegranate arils, Olives

Instructions
 

  • Keep a sieve, lined with a kitchen towel or muslin cloth, ready. Place this atop a bowl, to catch the whey.
  • Mix the salt with yogurt.
  • Pour into the prepared sieve. Cover with the napkin. Place in the fridge for 24-48 hours.
  • Take the strained yogurt out. It should be very very thick.
  • Whisk it a bit, spread out on a plate or a shallow bowl. Top with sumac, olives, mint, pomegranate arils and drizzle over some olive oil.
  • Serve with pita, bread, crackers, veggies sticks etc. Enjoy!

Nutrition

Serving: 1 ServingCalories: 30kcalCarbohydrates: 2gProtein: 2gFat: 2gSaturated Fat: 1gPolyunsaturated Fat: 0.05gMonounsaturated Fat: 0.4gCholesterol: 6mgSodium: 139mgPotassium: 77mgSugar: 2gVitamin A: 49IUVitamin C: 0.2mgCalcium: 60mgIron: 0.03mg

Easy Gluten-Free Chocolate Brownies

June 13, 2020

Easy Gluten-Free Chocolate Brownies


Deliciously gooey, dense, and fudgy with a lush chocolate flavor, the easy-to-make gluten-free chocolate brownies are just the way I like them - copiously decadent!

Easy Gluten-Free Chocolate Brownies

We’re religious about our desserts. Some days, our dinners are merely preludes to delicious, dark chocolate treats. So, what’s one gotta do to keep at least a semblance of wholesomeness during meals? 

Serve homemade brownies. And that’s precisely what I do. This way, I can keep a check on both sugar and portion size (hence my brownie mug cakes)!

For the past few days, the rumblings about better-than-box brownies have resumed, and I've started experimenting with a gluten-free version of our favorite dessert! I’ve made (and devoured) more of the totally addictive gluten-free brownies than I would like to count. These fudgy, chewy, deeply chocolatey brownies are that irresistible!

Love brownies like we do? Then you must try my homemade cosmic brownies, chocolate raspberry brownies, and sourdough peanut butter brownies!

[feast_advanced_jump_to]
Easy Gluten-Free Chocolate Brownies

Why You'll Love This Recipe

You can’t even tell the homemade brownie is gluten-free

It checks all the boxes: crackly top, chewy edges, and gooey middle

Once you make a batch, you’ll keep making them. Trust me on this.

Ours disappeared in slightly less than 24 hours, and the crew was already asking for more!

How To Make Gluten-Free Chocolate Brownies

Step 1: Melt butter and 70% dark chocolate chips in a double boiler (more on this later).

Step 2: Take the glossy and smooth melted chocolate off the heat and add in coconut sugar.

Step 3: Cool the brownie mixture, and then whisk in eggs and some vanilla extract.

Process of making Easy Gluten-Free Chocolate Brownies

Step 4: Mix in ragi or finger millet flour, and the chocolate gluten-free brownie batter is ready.

Optional step: I folded in a handful of chocolate chips to give the chocolate brownies some additional decadence.

Step 5: Bake and then cool.

Final step: Slice and the from-scratch brownies are ready to be served!

Easy Gluten-Free Chocolate Brownies

Pro Tips

  • Use a kitchen scale to measure ingredients, particularly the flour. It gives the best results because too much flour will give you a cakey or dry gluten-free brownie.
  • Before you whisk in the eggs, watch out that the mixture has cooled a tad bit. If it’s still hot, the eggs will scramble!
  • The secret to baking fudgy, chewy brownies is that the batter shouldn’t be overmixed. Eggs have to be whisked just for a minute, and the ragi is folded in with a light hand. 
  • Just as important is that you don’t overbake. I kinda did. When you do a skewer test, a few very, very moist crumbs should be attached to it. Bake too long, and you’ll get a dry-ish texture. 
Easy Gluten-Free Chocolate Brownies

How To Make A DIY Double Boiler

I used a double boiler and not a microwave to make this brownie recipe from scratch because it gives me better control. Chocolate is temperature-sensitive, and gentle heating works best!

To make a double boiler at home, take a pot, fill it with an inch of water, and bring it to a simmer. Now snugly fit a metal or glass bowl on top of it with butter and chocolate inside it. That’s it!

Are These Gluten-Free Chocolate Brownies Fudgy?

There are two kinds of people: those who love a cake-like, spongy brownie and those who love fudgy, dense brownies. I am the latter; in case you couldn’t tell from the photos of these homemade brownies. This is why these easy gluten-free chocolate brownies are the fudgiest of baked goods ever, made all the gooier with the addition of chocolate chips.

Easy Gluten-Free Chocolate Brownies

Gluten-Free Brownies Ingredients & Swaps

Flour: If you don’t have ragi, any of your favorite gluten-free flour will work in a pinch. Buckwheat flour, I know for sure, is a great ingredient. Or, you can keep it simple and use regular whole wheat or all-purpose flour.

What is ragi?

Ragi, or finger millet, is an extremely nutritious grain. It looks somewhat like mustard seeds and is chock-full of fiber besides being packed with amino acids, calcium, vitamin D, and carbs (the good kind).

Sugar: I prefer the caramelly flavor coconut sugar imparts to brownies, but if you prefer regular white sugar, go ahead and use it.

Chocolate: Feel free to swap the 70% baking chocolate with 40% or 50% chocolate to give these gluten-free dark chocolate brownies a lighter note. 

Easy Gluten-Free Chocolate Brownies

Add-ons: You can make gluten-free brownies with cocoa powder. Simply replace a tablespoon of flour with cocoa powder to give the brownies a deep, intense flavor. 

When I’m in the mood for chocolate topped with more chocolate, I add coffee powder. It enhances and adds complexity to the chocolaty flavor, making the brownies full-bodied.

Easy Gluten-Free Chocolate Brownies

How To Serve

You don’t have to be fancy while serving these easy gluten-free chocolate brownies. But I was gunning for moist, fudgy, gooey, dense brownies that are just decadent. That’s why, right before I slipped the pan into the oven:

  • I chopped up a Cadbury Silk bar and sprinkled it on top.
  • Oh, and a pinch of sea salt to wake the whole thing up. A little sea salt goes a long way toward tying the flavors beautifully.
  • You can dig into the brownies once they’ve cooled enough to cut into squares with a dollop of ice cream.

Personally, I have a weakness for chilled chocolate brownies. A few hours in the fridge, and these gluten-free brownies magically become even fudgier, more sumptuous, and just the right amount of heavy, perfect with a cup of coffee! So, if you have the patience for it, chill them.

Easy Gluten-Free Chocolate Brownies

More Brownie Recipes

Sourdough Peanut Butter Brownies

Fudgy Miso Brownies

Cheesecake Swirl Brownie

Half the joy of cooking is sharing it with others. That’s why I’m always eager to hear from you. So go right ahead and drop a comment or reach out on Instagram, Pinterest, YouTube, or Facebook. I hope you love these gluten-free chocolate brownies as much as we do!

📖 Recipe

Tried this recipe?Let us know how it was!
Easy Gluten-Free Chocolate Brownies

Easy Gluten-free Chocolate Brownies

Natasha Minocha
Deliciously gooey, dense, and fudgy with a lush chocolate flavor, the easy to make gluten-free chocolate brownies are just the way I like them - copiously decadent!
No ratings yet
Print Recipe Pin Recipe
Prep Time 20 minutes mins
Cook Time 25 minutes mins
Course Dessert
Cuisine American
Servings 16 pieces
Calories 199 kcal

Equipment

  • 8" square pan

Ingredients


  • 1/2 cup Butter I used regular salted butter
  • 1 cup Dark chocolate chips 70%
  • 1 cup Coconut sugar You can use regular white sugar or brown sugar
  • 3 Eggs
  • 2 tsp Vanilla extract
  • 3/4 cup Ragi/ fingermillet flour You can use any gluten-free flour or regular all-purpose flour
  • 1/3 cup Dark chocolate chips 70% Optional

Topping

  • Sea salt, Chocolate chips

Instructions
 

  • Preheat your oven to 180C. Line an 8" square pan with parchment paper or foil.
  • Comine butter and chocolate chips in a large bowl. Place this bowl over a pan of just simmering water.
  • Mix the chocolate and butter until melted.
  • Take it off the heat. Stir until the mixture is smooth and glosy.
  • Stir in the sugar.
  • Let this mixture cool for 5 minutes, then add the eggs and vanilla extract. Whisk wwell for 1 minute.
  • Fold in the flour and the additional chocolate chips ( if using).
  • Pour the mixture into the prepared pan and bake at 180C for 20 -25 minutes.
  • Don't over bake this. A skewer inserted in the center should come out with very moist crumbs attached.
  • Scatter some chocolate chips/chunks and sea salt on the brownie, as soon as it comes out of the oven.
  • Let cool for at least 1 hour before cutting into squares. Enjoy!

Nutrition

Serving: 1 ServingCalories: 199kcalCarbohydrates: 22gProtein: 3gFat: 12gSaturated Fat: 8gPolyunsaturated Fat: 0.5gMonounsaturated Fat: 2gTrans Fat: 0.2gCholesterol: 46mgSodium: 95mgPotassium: 143mgFiber: 1gSugar: 12gVitamin A: 226IUVitamin C: 0.1mgCalcium: 55mgIron: 1mg

Vegan Baked Cinnamon Donuts

June 10, 2020

Vegan Baked Cinnamon Donuts | Easy donut recipe

Soft, fluffy, and super moist, these vegan baked cinnamon donuts are a delight to make and eat! Made with a few basic pantry ingredients, these cinnamon donuts are a cinch to make. They are so scrumptious, you won't even know they are vegan!

Vegan Baked Cinnamon Donuts | Easy donut recipe

My donut pans have been sitting in the cupboard for months now. And for the past few weeks, I can feel them staring me down with ‘bake-with-us’ vibes.

Why the hiatus you ask?

Because with donuts, I can never stop with one. And really, who wants to deal with the guilt that comes after a binge?  I certainly don’t!

That’s why I found a way around the guilt–baked donuts. These fluffy, soft, and oven-fresh versions are a great deal healthier than their fried counterparts.

So, I finally gave in and got to making vegan baked cinnamon donuts!

How To Make Vegan Baked Cinnamon Donuts?

Traditional donuts, as delicious as they may be, involve yeast. You have to wait for the dough to rise, shape, rise, and fry. It takes oodles of time and heaps of effort before you can indulge.

Baked donuts, on the other hand, are the perfect instant gratification tidbit. With no more than 15 minutes of prep and 12 minutes of baking, you have donuts ready to be devoured. And the only special tool you’ll need for this is a donut pan!

The batter comes together in a jiffy by whisking the dry ingredients (flour, baking soda, powder, salt, sugar, and cinnamon powder) into the wet ones (milk, vinegar, vanilla extract, and oil).

Make sure the batter is smooth and lump-free. The consistency will be thick, much like a cake batter.

Process of making Vegan Baked Cinnamon Donuts | Easy donut recipe

Baking the vegan cinnamon donuts

Once the batter is done, spoon it in the greased cavities of a donut pan till it is three-quarters full. This allows the donuts to rise well.

After a couple of trials, I figured out that it’s far easier and neater to use a Ziplock baggie to dispense the batter in the donut cavities. So, instead of spooning, I fill a baggie with the batter, snip off a corner, and pipe the batter in.

Slide the donut pan into the oven and keep an eye out as you don’t want to overbake. Mine was done in just under 12 minutes. To check if they are nice and soft, skewer them with a toothpick or knife right in the center.

Vegan Baked Cinnamon Donuts | Easy donut recipe

Quick notes:

I used coconut sugar to bake the donuts because I love the slightly caramelized taste it imparts. Hence the warm, dark-ish tone to the donuts. If you use regular sugar, they’ll be the usual light brown in shade.

For the milk, I prefer homemade almond milk. You can pour in any plant-based, soy, or even regular milk.  When you add vinegar to the milk, let it sit for 2 to 3 minutes till it curdles. Then add in coconut oil, which is what makes the donuts wonderfully light and springy.

While I’ve used regular all-purpose flour here, you can make the vegan baked cinnamon donuts gluten-free. Just switch it with buckwheat flour. I’ve made donuts with buckwheat before, so rest assured that the result will be delicious.

If you don't have a donut pan, you can use a muffin tray to bake up these lovely little treats.

Vegan Baked Cinnamon Donuts | Easy donut recipe

Serving the Vegan Baked Cinnamon Donuts

While you wait for the donuts to bake your kitchen is filled with that wonderful cozy bakery smell that never, ever fails to invite, make the glaze.

I mixed almond milk, icing sugar, and a pinch of cinnamon powder and then drizzled it over the donuts after they had cooled down. To top it off and give the donuts an extra touch, I sprinkled some more cinnamon over the glaze!

Vegan Baked Cinnamon Donuts | Easy donut recipe

Or you can go the extra mile, and drown them in chocolate glaze.

If you don’t want a glaze, make a crunchy topping by coarsely grinding sugar and mixing it with cinnamon. Dump the donuts on this powder and you have those dreamy, powdery donuts you see on Instagram all the time.

Vegan Baked Cinnamon Donuts | Easy donut recipe

Cinnamon is one of my favorite ingredients to bake with and in the donuts, it works gorgeously. Super fluffy, really soft, and blissfully satisfying, making vegan baked cinnamon donuts is faster than ordering a takeaway from Dunkin Donuts or Krispy Kreme.

Even better, they’re tons healthier and are not cloyingly sweet. Isn't it just nicer to enjoy the pleasure of a donut without worrying about the crazy amount of sugar in it?

Vegan Baked Cinnamon Donuts | Easy donut recipe

Half the joy of cooking is sharing it with others. That’s why I’m always eager to hear from you. So go right ahead & drop a comment or reach out on Instagram, Pinterest, YouTube, or Facebook. I hope you love these vegan baked donuts as much as we do!

📖 Recipe

Tried this recipe?Let us know how it was!
Vegan Baked Cinnamon Donuts | Easy donut recipe

Vegan Baked Cinnamon Donuts

Natasha Minocha
Soft and fluffy, these Vegan Baked Cinnamon Donuts are a cinch to make and oh- so satisyfying!
No ratings yet
Print Recipe Pin Recipe
Prep Time 15 minutes mins
Cook Time 12 minutes mins
Total Time 35 minutes mins
Course Dessert, Snack
Cuisine American
Servings 8 Donuts
Calories 169 kcal

Ingredients
  

  • 1.5 cups All purpose flour
  • 1.5 tsp Baking powder
  • 1/4 tsp Baking soda
  • 1/2 tsp Salt
  • 1 tsp Cinnamon powder
  • 1/2 cup Coconut Sugar You can use regular white sugar too
  • 1/2 cup + 2 Tbsp Almond milk You can use any milk
  • 1/2 tbsp Apple cider vinegar You can use white vinegar too
  • 2 Tbsp Coconut oil You can use vegetable oil or melted butter
  • 1 tsp Vanilla extract

Cinnamon Glaze

  • 1/4 cup Icing sugar
  • 1-2 tsp Almond milk You can use any milk
  • 1/2 tsp Cinnamon powder

Instructions
 

  • Pre heat the oven to 180 C. Grease cavities of a donut pan well.
  • Combine the almond milk and vinegar in a small bowl. Set aside for 5 minutes.
  • Combine all the dry ingredients in a large bowl.
  • Whisk all the liquid ingredients - almond milk mixture, coconut oil and vanilla extract in another bowl.
  • Pour over the dry ingredients and mix until combined. You may want to add another tbsp or so of milk to get a thick pouring consistency.
  • Spoon or pipe the batter into the prepared pan, filling 3/4 of the way.
  • Bake for 10-12 minutes or until a skewer inserted in the center comes out clean. Mine were done in just about 12 minutes.
  • Let the donuts rest for 5 minutes in the pan before turning them out on a cooling rack.
  • For the topping, combine the icing sugar, almond milk and cinnamon powder till thick and smooth. Drizzle over the cooled doughnuts. Enjoy!

Nutrition

Serving: 1 ServingCalories: 169kcalCarbohydrates: 31gProtein: 3gFat: 4gSaturated Fat: 3gPolyunsaturated Fat: 0.3gMonounsaturated Fat: 0.4gSodium: 304mgPotassium: 29mgFiber: 1gSugar: 10gVitamin A: 2IUVitamin C: 0.01mgCalcium: 75mgIron: 1mg

Best Ever Eggless Chocolate Chip Cookies Recipe

June 6, 2020

BEST EVER Eggless Chocolate Chip Cookies Recipe

Been searching for an eggless chocolate chip cookie recipe for ages? These one-bowl cookies without eggs hit the spot with tender, fudgy goodness that will have you craving more after the first bite. 

BEST EVER Eggless Chocolate Chip Cookies Recipe

Every dessert aficionado has their idea of the perfect chocolate chip cookie. These eggless chocolate cookies are ours! Crispy edges, a chewy center, and gooey chocolate—that's the dessert in a nutshell.

The no-egg chocolate chip cookie recipe I’m sharing here is one I have perfected over dozens of trials, countless cups of coffee, and midnight baking sessions. It’s the simplicity of it that you’ll love.

WHY TRY A CHOCOLATE CHIP COOKIE RECIPE WITHOUT EGGS?

They are the ultimate comfort dessert and truly a family staple.

Without fail, these eggless cookies turn out excellent each time!

Sharp flavors and easy to make—even my youngest confidently whips up a batch.

Make countless variations, and each one is a total winner! 

Make ahead: You can leave the no-egg cookie dough to chill overnight.

Eggless Chocolate Chip Cookies | Easy chocolate chip cookies recipe

HOW TO MAKE EGGLESS CHOCOLATE CHIP COOKIES AT HOME?

Step 1: Start with making your flax egg (which I’ll get to in a moment).

Step 2: Blend both white and brown sugar with softened (not melted) butter.

Step 3: When well mixed, add in your flax egg and vanilla. I also like to add a touch of coffee to the mixture at this point. Chocolate and coffee are really a match made in heaven. Just 1 tablespoon of brewed coffee brings out such gorgeous richness. 

Step 4: In the same bowl, sift in the flour, baking soda, salt, and cinnamon. 

Step 5: Fold the dry ingredients into the wet gently.

Step 6: While the eggless chocolate chip cookie dough is still streaked white with flour, add in the chocolate chips.

Step 7: Stick the dough in the fridge for an hour or longer.

Dough for Eggless Chocolate Chip Cookies

Step 8: About half an hour before baking, preheat your oven to 200 °C.

Step 9: Use an ice cream scoop (roughly the size of 1.5 tablespoons per serving) and transfer the chocolate chip cookie dough without eggs to your baking tray. Keep a distance of a few inches between each scoop. 

Scooped out dough for Eggless Chocolate Chip Cookies

Step 10: Bake for 10–12 minutes, till your cookies are nicely browned with a crispy exterior. 

Final step: Serve and savor!

NOTES ON HOMEMADE CHOCOLATE CHIP COOKIES WITHOUT EGGS 

You get the best eggless chocolate chip cookies when you don’t mess with the basics. I’ve learned the hard way.

  • Adding chocolate chips to the eggless cookies at step 6 (when the dry and wet ingredients are still not completely combined) makes it easier to distribute the chocolate evenly. 
  • Chilling eggless chocolate chip cookies is very important. It allows the fats to cool, so the cookie holds a nice shape and doesn’t flatten. Not only is it important for texture, but while the dough chills, the flavor gets more concentrated. Trust me, it's worth the wait.
Eggless Chocolate Chip Cookies

WHAT IS A FLAX EGG?

I learned about baking with flax eggs from Jessica Hylton in this blog post. It's an excellent egg substitute that is so easy to make. 1 flax egg replaces 1 egg. To make:

  • Mix 1 tablespoon of ground flaxseed with 3 tablespoons of water.
  • Set that to chill in the fridge for at least 15 minutes. When chilled, the texture of the flax egg is gelatinous.
  • Move on to the next step while you wait!

WHAT YOU’LL NEED FOR THIS NO-EGG CHOCOLATE CHIP COOKIE RECIPE

All you need are a handful of pantry ingredients and good-quality couverture chocolate.

  • A mixing bowl
  • A spatula (or a hand mixer if you find that easier)
  • Ice cream scoop (or two tablespoons)
  • Baking tray
  • Parchment paper or Silpat
Eggless Chocolate Chip Cookies | Easy chocolate chip cookies recipe

EGGLESS CHOCOLATE CHIP COOKIE INGREDIENTS & SWAPS

Eggless: I initially created these eggless cookies for my sister, as she's allergic to eggs. The result turned out to be so delightful that we never went back. If you don’t want to use flax eggs, try chia seeds.

Chocolate chip cookies with eggs: When there are no flax seeds handy, I often make this eggless chocolate chip recipe with eggs. The process remains the same, and the flavor and texture changes are nearly imperceptible.

Chocolate: When adding chocolate, opt for the best quality you can get your hands on. This really makes or breaks these cookies without eggs. I used 70% couverture chocolate chips. If you can’t find good-quality chips, chop up a baking chocolate bar.

Sugar: You can make eggless chocolate chip cookies without brown sugar. Use just white sugar, or swap it with a cane or raw sugar.

Add-ons: Cocoa makes these chocolate cookies richer. Add pumpkin to make them denser and gooier. The addition of cinnamon and coffee gives them an extra kick. They are excellent without them, but I feel that the addition of these simple ingredients really takes them to the next level.

Vegan chocolate chip cookie recipe: It doesn’t take much to make the eggless chocolate chip cookie recipe vegan. Replace butter with coconut oil. Make sure the oil is not melted just softened. I promise this tasted just as divine! Of course, the chocolate should also be vegan. A great vegan chocolate I use is by Mason & Co., which you can easily find online.

Eggless Chocolate Chip Cookies

LET’S SERVE THESE CHEWY EGGLESS CHOCOLATE CHIP COOKIES

The next time you have a hankering for something sweet, eat these eggless chocolate chip cookies warm. There is nothing as gorgeous as melting chocolate. It’s pure bliss. You can even dunk them in milk or have them with your cup of coffee—the options to enjoy them are endless! 

MORE EGGLESS DESSERTS

Eggless Brownie Cookies

Tahini Chocolate Chip Cookies

Chocolate Protein Muffins

Eggless Chocolate Chip Cookies

Half the joy of cooking is sharing it with others. That’s why I’m always eager to hear from you. So go right ahead and drop a comment or reach out on Instagram, Pinterest, YouTube, or Facebook. I hope you love these eggless chocolate chip cookies as much as we do!

📖 Recipe

Tried this recipe?Let us know how it was!
BEST EVER Eggless Chocolate Chip Cookies Recipe

BEST EVER Eggless Chocolate Chip Cookies Recipe

Natasha Minocha
Tender, fudgy goodness that will have you craving more after the first bite. These Eggless Chocolate Chip Cookies are the ultimate comfort dessert.
5 from 2 votes
Print Recipe Pin Recipe
Prep Time 1 hour hr 30 minutes mins
Cook Time 12 minutes mins
Course Cookies, Snack
Cuisine American
Servings 16 cookies
Calories 172 kcal

Ingredients


  • 1 tbsp Ground flaxseed
  • 3 tbsp Water
  • 1/2 cup Butter, softened I used regular salted butter
  • 1/2 cup Brown sugar
  • 1/2 cup White sugar
  • 1 tsp Vanilla extract
  • 1 tbsp Brewed coffee
  • 1 1/4 cup All purpose flour
  • 1/2 tsp Salt If using unsalted butter
  • 1/2 tsp Baking soda
  • 1 tsp Cinnamon powder
  • 1/2 cup Dark chocolate chips 70%

Instructions
 

  • Mix 1 tablespoon of ground flaxseed with 3 tablespoons of water. Set that to chill in the fridge for at least 15 minutes.
  • Blend together both white & brown sugar with softened (not melted) butter. When well mixed, add in your flax egg and vanilla extract.
  • Stir in the brewed coffee to this mixture.
  • To this bowl, sift in the flour, baking soda, cinnamon powder, and salt, if using.
  • Fold the dry ingredients in gently.
  • Add the chocolate chips. Mix well to ensure they are evenly distributed.
  • Cover the bowl with cling wrap and chill in the refrigerator for at least 1 hour.
  • Preheat your oven to 200 C. Line a baking tray with parchment paper or silpat.
  • Scoop out the dough, using an icecream scooper or 2 spoons, on the prepared tray.
  • Make sure there is space between the dough balls as they will spread a bit while baking.
  • Bake for 10-12 minutes till the cookies are lightly browned.
  • Let cool for a few minutes on the tray before transferring on a cooling rack.
  • Serve warm or at room temperature. Enjoy!

Nutrition

Serving: 1 CookieCalories: 172kcalCarbohydrates: 24gProtein: 2gFat: 8gSaturated Fat: 5gPolyunsaturated Fat: 0.4gMonounsaturated Fat: 2gTrans Fat: 0.2gCholesterol: 16mgSodium: 452mgPotassium: 63mgFiber: 1gSugar: 9gVitamin A: 181IUVitamin C: 0.04mgCalcium: 29mgIron: 1mg
Eggless Chocolate Chip Cookies | Easy chocolate chip cookies recipe

Mango Shrikhand

June 4, 2020

Mango shrikhand in a silver bowl on a silver tray.

Mango shrikhand is the light, creamy, chilled treat your summer absolutely needs. The Indian mango dessert is a no-cook recipe, takes 15 mins to prep, and is a total crowd-pleaser!

Mango shrikhand in a silver bowl on a silver tray.

I utterly love this mango dessert. The fresh, juicy mangoes and the velvety, thick yogurt make it a go-to dessert for summer. Whether it is plain or flavored with cardamom, chilled shrikhand is the perfect way to escape the heat. Although mango panna cotta and mango sago come a close second!

[feast_advanced_jump_to]

Why You'll Love This Recipe

What I love most about this recipe for mango shrikhand that you don’t need any fancy ingredients or tools. Just a little patience to strain the yogurt and a big spoon for licking the bowl clean!

And there’s no cooking required. Yep, it’s a zero-stove dessert and a perfect way to treat yourself on a Tuesday afternoon or a dessert for a dinner party.

It tastes better after a few hours in the fridge. So, it’s great for parties or prepping in advance.

The flavor is just amazing! It has tang from the yogurt, brightening the sweet taste of mangoes and a surprising pop of color from the saffron. It feels less like a mouthful of yogurt and more like a bite of chilled cream.

Looking for more chilled mango treats? You’ll love these easy recipes for 3-ingredient mango mousse and mango float!

Mango Shrikhand Ingredients

Ingredients for making mango shrikhand.

Yogurt: Homemade wins every time. But if you’re short on time (or patience), you can make mango shrikhand with Greek yogurt. Whichever type of yogurt you use, make it full-fat!

Mango: I used pairi mangoes. They are extraordinarily juicy and just the right amount of sweet-tart. If you can get your hands on Alfonso or Kesar, those are great options too. Safeda works in a pinch.

I like my shrikhand with little bits of mango in every spoonful. So, I kept the purée slightly chunky. But a silky, smooth purée also works. Go with your texture preference! And if you’re left with extra mangoes, bake this gorgeous eggless mango cake. It’s simple and full of flavor.

Sugar: I used superfine raw sugar. But mostly powdered sugar is used to make this dessert as it’s easier to blend. You can use regular, granulated sugar, too. Just powder it in a coffee grinder.

Cardamom: Freshly ground powder gives the mango dessert a warm, floral aroma. A little goes a long way.

Saffron is a must for its delicate golden color and subtle flavor.

Please see the recipe card for full information on ingredients and quantities.

How To Make Mango Shrikhand?

Step 1: Hang homemade yogurt overnight or at least 4–5 hours in the refrigerator.

Step 2: Purée your mangoes.

Step 3: Mix mango purée, cardamom powder, saffron-soaked milk, and raw sugar with yogurt.

Step 4: Whisk well till the mixture is thick, smooth, and lump-free.

Step 5: Taste and adjust for sweetness, and then transfer to a serving bowl.

Step 6: Chill for another 1–2 hours.

Step 7: Garnish with pistachios, almonds, and rose petals.

Final Step: Serve cold and enjoy!

Pro Tips

  • Mangoes vary in sweetness, and yogurt can be anything from mellow to sharply tangy. So, I recommend giving the shrikhand a taste test and then adjusting the sugar as required.
  • You can use canned mango puree if fresh mangoes aren't available.
  • Skip the blender. Blending hung yogurt turns your shrikhand into a watery mess.
  • Whisk by hand. Yes, it takes a few extra minutes (3–4 tops), but it keeps the texture luxuriously thick and creamy.
mango shrikhand in a silver bowl garnished with rose petals, pistachios and almonds.

How To Serve

Always serve shrikhand chilled. It needs a few hours in the fridge to thicken up. Right before serving, add the finishing touches: slivers of pistachio and almond, a sprinkle of dried rose petals, and a few saffron strands. You can totally top it off with a few juicy cubes of mango for that fresh bite.

Traditionally, mango shrikhand is served along with hot pooris. We do that once in a while. But feel free to serve it for dessert after any meal! I even sneak a spoonful or two after breakfast!

Once you’ve had your fill of shrikhand (if that’s even possible), here are some other recipes to explore. Try these ultra-soft mango pancakes for breakfast. They’re fluffy, fruity, and perfect with a drizzle of honey or maple syrup. This mango bread is moist, lightly spiced, and makes the whole house smell divine.

Recipe FAQs

What is shrikhand?

Shrikhand or srikhand is a creamy and thoroughly refreshing sweet dish. It’s very popular in India and likely originated in Gujarat and Maharashtra around 400 B.C.!
It is made with hung yogurt and has an unbelievably thick, rich, and luxurious texture. Not only is it filling and delicious, but it is also very easy to make at home. Mango shrikhand, also known as amarkhand, is one of the common variations of the dessert.

Can I use canned mango purée to make shrikhand?

Yes, any good-quality canned mango purée works like a charm in this mango shrikhand recipe.

How to make hung yogurt at home?

Line a sieve with a clean muslin or cheesecloth and place it over a deep bowl to catch the whey. Spoon in the full-fat yogurt. Gather the cloth edges and twist them into a bundle. You can either let it rest in the sieve or hang the bundle from a kitchen tap (with the bowl underneath to collect the liquid). Let it drain overnight (or for at least 6–8 hours) in the fridge or a cool corner of your kitchen.

More Mango Desserts

  • Mango Tres Leches Cake
    Mango Tres Leches Cake
  • mango chia pudding topped with coconut, mangoes, and blueberries in a glass.
    Mango Chia Pudding With Coconut Milk
  • Easy Mango Cake - Eggless Recipe
    Easy Mango Cake - Eggless Recipe
  • 4 mango coconut popsicles on a white tray with ice.
    Coconut Mango Popsicles

Half the joy of cooking is sharing it with others. That’s why I’m always eager to hear from you. So go right ahead & drop a comment or reach out on Instagram, Pinterest, YouTube, or Facebook. I hope you love this mango shrikhand as much as we do!

📖 Recipe

Tried this recipe?Let us know how it was!
Mango shrikhand in a silver bowl on a silver tray.

Mango Shrikhand

Natasha Minocha
Perfectly creamy, luscious, and chilled, Mango Shrikhand is a quintessential summer dessert. Super easy to make, this 5-ingredient no-cook dessert is a crowd pleaser!
No ratings yet
Print Recipe Pin Recipe
Prep Time 8 hours hrs
Cook Time 15 minutes mins
Total Time 8 hours hrs 15 minutes mins
Course Dessert
Cuisine Indian
Servings 4 Servings
Calories 157 kcal

Ingredients
  

  • 2 cups Full fat yogurt
  • 3/4 cup Mango puree
  • 1/4 cup Raw sugar or powdered sugar
  • 1 tsp Cardamom powder
  • 1/2 tsp Saffron strands, soaked in 1 tbsp warm milk

Garnish

  • Slivered almonds, pistachios, dried rose petals

Instructions
 

  • Place the yogurt in a cheesecloth lined sieve. Place the sieve on a bowl, to catch the whey from the yogurt as it drains.
  • Leave this to drain overnight or at least 4-5 hours in the refrigerator.
  • Mix the drained yogurt with the mango puree, cardamom powder, saffron and raw sugar.
  • Whisk well till the mixture is thick, smooth and lumpfree.
  • Taste and adjust for sweetness.
  • Transfer to a serving bowl. Garnish with pistachios, almonds and rose petals.
  • Chill for another 1-2 hours. Serve cold. Enjoy!

Notes

  • Mangoes vary in sweetness, and yogurt can be anything from mellow to sharply tangy. So, I recommend giving the shrikhand a taste test and then adjusting the sugar as required.
  • You can use canned mango puree if fresh mangoes aren't available.
  • Skip the blender. Blending hung yogurt turns your shrikhand into a watery mess.
  • Whisk by hand. Yes, it takes a few extra minutes (3–4 tops), but it keeps the texture luxuriously thick and creamy.

Nutrition

Serving: 1 ServingCalories: 157kcalCarbohydrates: 26gProtein: 5gFat: 4gSaturated Fat: 3gPolyunsaturated Fat: 0.2gMonounsaturated Fat: 1gCholesterol: 16mgSodium: 58mgPotassium: 283mgFiber: 1gSugar: 25gVitamin A: 648IUVitamin C: 18mgCalcium: 159mgIron: 0.3mg

Easy Sourdough Waffles

June 3, 2020

3 waffles on a plate, with cherries and peaches on the side.

This recipe for easy sourdough waffles is exceptional - golden, crispy on the outside, fluffy on the inside, with just the right touch of tang. The great part is that you don’t have to keep the batter overnight, the no-wait sourdough discard waffles are made in minutes!

3 waffles on a plate, with cherries and peaches on the side.

If you’ve got sourdough discard sitting in your fridge, these waffles are must try! Adding sourdough discard to the batter makes them delicious, fluffy and utterly sublime.

[feast_advanced_jump_to]

Why You'll Love This Recipe

  • Golden, light, airy - these sourdough discard waffles have the best texture!
  • A delicious way to use that sourdough discard! It adds a lovely tang and depth of flavor that makes these waffles extra special!
  • A zero-waste recipe! By the way, you can use the sourdough discard to make many more delicious things like sourdough banana bread, sourdough crackers, and sourdough peanut butter brownies. 
  • While this is a no-wait sourdough waffle recipe, you can make the batter the night before for even more flavor and ease! Just heat the waffle iron in the morning, and you're good to go!
  • These vegan waffles work with everything! Load them with your favorite toppings: cinnamon honey butter, strawberry jam, fresh fruits, or even a dollop of vanilla ice cream!
5 stars

I've made these twice and both times they ended up absolutely perfect! The second time I doubled the recipe and used half GF all purpose flour and half spelt flour and the consistency was amazing. This is definitely going to be my go-to recipe for discard! Thank you!

A stack of waffles on a plate with a cherry on top.

Vegan Sourdough Waffles Ingredients

Flour: All-purpose flour is the best way to make crispy, fluffy waffles.

Sugar: I used granulated sugar to give the sourdough starter waffles a little sweetness.

Baking powder and baking soda act as leavening agents.

Sourdough starter helps the batter rise and adds that signature tangy flavor we love.

Milk: The liquid ingredient for this recipe. Since I made vegan sourdough waffles, I used almond milk. But any milk will do – dairy or non-dairy.

Oil adds a little fat for crispy edges and tender insides. Don’t like coconut oil? Use melted butter. 

Cinnamon powder and homemade vanilla extract add a ton of flavors. 

Please see the recipe card for full information on ingredients and quantities

Variations

Flour: You can use whole wheat flour for a heartier waffle. Or make them gluten-free by using buckwheat flour, like I did with apple cinnamon waffles.

Add-ins: The sourdough waffle batter can handle it all. Throw in poppy seeds like in my lemon poppy seed waffles. Or mix cocoa powder for a chocolate flavor as I did in my brownie waffles! Try chocolate chips, chopped nuts, or orange zest as in these cute gluten-free orange waffle cookies!

Savory versions: Reduce the amount of sugar and add cheese, spices, and herbs for a lovely savory version. My cheese waffles are always a hit for brunch or a light evening supper!

How to Make Easy Sourdough Waffles?

Step 1: Whisk the flour with salt, baking powder, baking soda, cinnamon powder, and sugar.

Step 2: Mix sourdough starter discard, vanilla extract, coconut oil, and milk. 

Step 3: Add the wet ingredients to the dry ingredients. Whisk till you have a smooth and lump-free batter with a thick, viscous consistency. Let the batter rest for 10-15 minutes.

Step 4: Follow the instructions given by your waffle maker, and then ladle the batter into the hot, well-greased cavities. 

Step 5: Cook till golden brown and crisp.

Final step: Serve and savor!

Pro Tips

Make sure your waffle iron is HOT and well-greased! That’s how you make crispy sourdough waffles. Let the iron reheat between waffles. 

Do not overmix the waffle batter. A few lumps here and there are just fine.

Do let the batter rest for 10-15 minutes. This allows the gluten to relax, resulting in tender, fluffy waffles.

3 bite-sized pieces and half a waffle with maple syrup on a plate.

Serving Sourdough Waffles

We enjoyed the sourdough waffles hot off the iron with fresh cherries and some peaches. A drizzle of maple syrup, a sprinkle of cinnamon sugar, and some roasted hazelnuts rounded off to make them a full breakfast. 

You can serve them with a spoonful of apple butter, persimmon jam, or cherry jam. Enjoy with a chilled glass of mango matcha latte or a creamy cup of oatmeal latte.

Or turn them into a dessert with a scoop of vanilla ice cream, topped with Nutella or chocolate sauce!

Recipe FAQs

Can I use sourdough discard straight from the fridge?

Yes! You don’t need to bring cold sourdough starter discard to room temperature. You can mix it in directly.

Can I keep the sourdough waffle batter overnight?

Yes, for a stronger, tangier flavor (and ease) you can certainly make the batter the night before.

How to keep sourdough discard waffles crisp?

Don’t stack cooked waffles on a plate. The steam will make them soggy and soft. Place them individually on a wire rack in a single layer.

Can I freeze the sourdough waffles?

Yes, allow the waffles to cool completely and transfer them to a freezer bag. They'll stay well for up to 1 month. Reheat in a toaster.

More Sourdough Recipes

  • Sourdough discard bread on a cloth napkin.
    Easy Sourdough Discard Bread
  • A galette with plums and apricots on a black tray.
    Plum Apricot Sourdough Galette
  • Sourdough Oatmeal Walnut Cookies | Easy vegan recipe
    Sourdough Oatmeal Walnut Cookies
  • A stack of sourdough banana pancakes on a plate with a fork and knife.
    Sourdough Banana Cinnamon Pancakes

Half the joy of cooking is sharing it with others. That’s why I’m always eager to hear from you. So go right ahead & drop a comment or reach out on Instagram, Pinterest, YouTube, or Facebook. I hope you love these easy sourdough waffles as much as we do!

📖 Recipe

Tried this recipe?Let us know how it was!
3 waffles on a plate, with cherries and peaches on the side.

Easy Sourdough Waffles

Natasha Minocha
The easy sourdough waffles are everything waffles are known for – crispy crust, tender interior, and airy texture!
5 from 6 votes
Print Recipe Pin Recipe
Prep Time 30 minutes mins
Cook Time 20 minutes mins
Total Time 35 minutes mins
Course Breakfast, Snack
Cuisine American
Servings 8 Waffles
Calories 108 kcal

Equipment

  • Waffle Maker

Ingredients
  

  • 1 cup All-purpose flour
  • 1 tsp Baking powder
  • 1/4 tsp Baking soda
  • 1 tsp Cinnamon powder
  • 1/4 tsp Salt
  • 1 tbsp Sugar
  • 1/3 cup Sourdough starter
  • 3/4 cup Almond milk You can use any milk of your choice
  • 2 tbsp Coconut oil You can use any oil you prefer
  • 1 tsp Vanilla extract

Toppings ( optional)

  • Cinnamon sugar
  • Hazelnuts

Instructions
 

  • Combine all the dry ingredients - flour, baking powder, baking soda, salt, sugar, and cinnamon powder, in a bowl.
  • Mix the sourdough starter, milk, vanilla and coconut oil together. Pour into the dry ingredients. Whisk until smooth and thick. The batter should have a soft dropping consistency, like a cake batter.
  • Let the batter rest for 10 -15 minutes.
  • Preheat your waffle iron according to manufacturer's instructions.
  • Grease the waffle cavities well and pour a ladleful of batter in the cavity. Let the batter cook for 4-5 minutes, until golden and crisp.
  • Repeat with the rest of the batter.
  • Serve warm with maple syrup or honey. Sprinkle some cinnamon sugar and chopped hazelnuts on top and enjoy!

Notes

  • Make sure your waffle iron is HOT and well-greased! That’s how you make crispy sourdough waffles. Let the iron reheat between waffles. 
  • Do not overmix the waffle batter. A few lumps here and there are just fine.
  • Do let the batter rest for 10-15 minutes. This allows the gluten to relax, resulting in tender, fluffy waffles.

Nutrition

Serving: 1 ServingCalories: 108kcalCarbohydrates: 16gProtein: 2gFat: 4gSaturated Fat: 3gPolyunsaturated Fat: 0.3gMonounsaturated Fat: 0.4gSodium: 191mgPotassium: 19mgFiber: 1gSugar: 2gVitamin A: 1IUVitamin C: 0.01mgCalcium: 63mgIron: 1mg

Fresh Cherry Cake

May 28, 2020

Fresh cherry cake with cherries on top on a platter.

This fresh cherry cake is everything! Fast, easy, moist, and bursting with fresh cherries. You’ll be baking this cherry cake recipe over and over again. Serve it as is or with a scoop of ice cream, and it’ll be the best homemade summer cake you’ll have!

Cherry cake on a white plate with cherries around.

Every summer, when fresh cherries hit the market, I go a little overboard with them. Every summer! Baking a cherry pie, a cherry bread pudding, and this cherry cake from scratch is a must. It’s a soft and juicy cake. So light that I love it with evening tea or morning coffee. It’s flavored with almonds and vanilla, which tastes delicious with cherries (like my cherry almond scones)!

[feast_advanced_jump_to]

Why You'll Love This Recipe

✨ This cherry cake is packed with fresh seasonal cherries that add a pop of juicy, sweet-tart flavor in every bite!

✨ With a soft, light, fluffy crumb, this rustic cherry cake is as comforting as it's beautiful!

✨ Super simple to make, it comes together so quickly. No special ingredients, no complicated steps, just a straightforward, feel-good bake!

✨ It's perfect for any time of the day, great with tea or coffee, snacking, and dessert. Top it with ice cream, whipped cream, or even a dollop of homemade cream cheese and make it extra special!

✨ This cake is a sure-shot crowd-pleaser! Bring it for potlucks, picnics, or serve it for brunch, everyone will love this cherry cake!

Reader Love ❤️

5 stars

This recipe is an all rounder! I loved it ♡ I doubled the ingredients to fit a 18cm cake pan.
Super easy to follow
I topped it up with some sugar sprinkled at the top, to give it extra crunchiness. I also serve it with whipped cream
Thanks heaps for sharing

5 stars

This was phenomenal! We made it in a 6in pan and it was the perfect size for our small family

Recipe Ingredients

Ingredients for making fresh cherry cake.

Cherries are the star of the show, and fresh cherries are preferable. 

Flour: I use all-purpose flour and almond flour for a delicate nutty flavor.

Sugar: Regular granulated sugar works well. But you can use cane or raw sugar too.

Egg helps bind the cake and gives it structure.

Yogurt: Plain, full-fat Greek yogurt is the best. It makes the fresh cherry crumb incredibly moist. Don’t have it? Use homemade yogurt. Just drain it really, really well. 

Oil: I use coconut oil. You can use any neutral oil or even melted butter.

Flavorings: Just a little almond extract takes this cherry cake to a whole new level. Vanilla extract gives a bakery-style touch. Store-bought is fine, or you can try my homemade vanilla extract.

Please see the recipe card for full information about ingredients and quantities.

Substitutions

Frozen cherries: You can make this cherry cake recipe with frozen cherries. Thaw and drain them first. 

Almond meal: Instead of almond flour, you can use almond meal like I did in my plum and apricot cake.

Fruit: Swap cherries with cape gooseberries or stone fruits like plums or apricots. Or you can make peach cherry cake!

Love chocolate? Add a handful of dark chocolate chips, as I did with my chocolate cherry mug cake and chocolate and cherry cake!

How To Make Fresh Cherry Cake

Dry ingredients for making cake in a mixing bowl.

Step 1: In a large bowl, whisk together the all-purpose flour, almond flour, sugar, baking powder, baking soda, and salt.

Egg, yogurt, oil, vanilla extract, almond extract in a measuring cup.

Step 2: In another bowl, whisk together the egg, yogurt, oil, vanilla extract, and almond extract.

Cherries coated in flour on cake batter in a bowl.

Step 3: Pour the wet ingredients over the dry ingredients. Mix well, but gently. This is a thick batter. Toss the pitted and halved cherries in a bit of flour. Fold the flour-coated cherries into the cake batter.

Cake batter with fresh cherries and almond flakes in a cake pan.

Step 4: Spoon the batter into the prepared pan. Top with cherry halves and almond flakes. Bake for 40 -45 minutes or until a skewer inserted in the center comes out clean.

Baked cherry cake in a round cake pan.

Step 5: Let the cake cool in the pan for 15-20 minutes before turning it out on a cooling rack.

Step 6: Sprinkle some powdered sugar on top, and serve!

Cake with fresh cherries and almonds on a plate.

Pro Tips

  1. Toss the cherries in a couple of teaspoons of flour before you fold them into the batter. This prevents them from sinking to the base. You can use this technique with any fresh fruit or chocolate chips.
  2. I used a 6-inch pan and got a tall cake. If you use a bigger size pan - 7" or 8", the cake will be flatter.
  3. Grease the cake pan well and line the bottom with parchment paper. This will help the cake come out neatly and will keep the crust intact!
  4. Please don't overmix the batter. Mix just enough that the ingredients are combined well. This ensures a soft and tender crumb.
  5. Allow the cake to cool completely before slicing. This cake is so soft, it can crumble easily if sliced when warm!
  6. You can use almond meal instead of almond flour. To make almond meal at home, grind almonds in your food processor until you get coarse crumbs. You can also blanch, peel, and dry the almonds well before grinding them.
A slice of cherry cake on a small plate with a fork.

How To Serve the Fresh Cherry Cake

This cherry cake with fresh cherries is perfect on its own. You don’t need to pretty it up. It’s the ideal fresh cherry coffee cake for brunches, lazy weekends, or afternoon tea. 

You can, of course, dust it with powdered sugar or serve it slightly warm with whipped cream or vanilla, or coffee ice cream. 

Recipe FAQs

Can I use frozen cherries instead of fresh ones?

Yes, just make sure to thaw and drain them well before adding them to the batter to avoid excess moisture.

How do I stop the cherries from sinking into the cake batter?

Toss your halved cherries in a little flour before folding them into the batter. This helps suspend them evenly throughout the cake.

How long does cherry cake stay fresh?

Stored in an airtight container in the refrigerator, your moist cherry cake will stay fresh for 3-4 days.

Cherry cake with a slice taken out to show the cross-section.

More Summer Fruit Desserts

  • Eggless Coconut Peach Cake in a square baking pan.
    Eggless Coconut Peach Cake
  • Mango Float Recipe
    Mango Float Recipe
  • Sliced lemon blueberry bread on a white platter.
    Blueberry And Lemon Bread
  • Peach Cobbler Cake Recipe
    Peach Cobbler Cake Recipe

Half the joy of cooking is sharing it with others. That’s why I’m always eager to hear from you. So go right ahead & drop a comment or reach out on Instagram, Pinterest, YouTube, or Facebook. I hope you love this fresh cherry cake as much as we do!

📖 Recipe

Tried this recipe?Let us know how it was!
Fresh cherry cake with cherries on top on a platter.

Fresh Cherry Cake

Natasha Minocha
The fresh cherry cake, bursting with the sweetest, juiciest ruby-red cherries and lightly dusted with powdered sugar, is a true, true crowd-pleaser. And it's so easy to bake!
5 from 7 votes
Print Recipe Pin Recipe
Prep Time 20 minutes mins
Cook Time 40 minutes mins
Course Dessert
Cuisine American
Servings 6 persons
Calories 287 kcal

Ingredients


  • 1 cup All-purpose flour
  • ¼ cup Almond flour You can also use almond meal.
  • ½ cup Sugar You can use raw or cane sugar too.
  • 1 tsp Baking powder
  • ¼ tsp Baking soda
  • ¼ tsp Salt
  • 1 Egg
  • ½ cup Greek yogurt, plain
  • ¼ cup Coconut oil You can use any oil you prefer
  • 1 tsp Vanilla extract
  • ½ tsp Almond extract
  • 1 cup Cherries, pitted and halved Tossed in 2 tsp of flour
  • Cherry halves, almond flakes - for topping Optional

Instructions
 

  • Preheat your oven to 180C or 350 F. Grease a 6" pan well. Line the bottom of the pan with parchment paper and lightly grease that too.
  • In a large bowl, whisk the all-purpose flour, almond flour, sugar, baking powder, baking soda, and salt.
    1 cup All-purpose flour, ¼ cup Almond flour, ½ cup Sugar, 1 tsp Baking powder, ¼ tsp Baking soda, ¼ tsp Salt
  • In another bowl, whisk together the egg, yogurt, oil, vanilla extract, and almond extract.
    1 Egg, ½ cup Greek yogurt, plain, ¼ cup Coconut oil, 1 tsp Vanilla extract, ½ tsp Almond extract
  • Pour the wet ingredients over the dry ingredients. Mix well, but gently. This is a thick batter.
  • Fold in the flour-coated cherries.
    1 cup Cherries, pitted and halved, 2 tsp flour
  • Spoon the batter into the prepared pan. Top with a few cherry halves and almond flakes - this is optional.
    Bake at 180 c or 350 f for 40 -45 minutes or until a skewer inserted in the center comes out clean.
  • Let the cake cool in the pan for 15-20 minutes before turning it out on a cooling rack.
  • Allow the cake to cool completely. Sprinkle some powdered sugar on top, and serve. Enjoy!

Video

Notes

  1. Toss the cherries in a couple of teaspoons of flour before you fold them into the batter. This prevents them from sinking to the base. You can use this technique with any fresh fruit or chocolate chips.
  2. I used a 6-inch pan and got a tall cake. If you use a bigger size pan - 7" or 8", the cake will be flatter.
  3. Grease the cake pan well and line the bottom with parchment paper. This will help the cake come out neatly and will keep the crust intact!
  4. Please don't overmix the batter. Mix just enough that the ingredients are combined well. This ensures a soft and tender crumb.
  5. Allow the cake to cool completely before slicing. This cake is so soft, it can crumble easily if sliced when warm!
  6. You can use almond meal instead of almond flour. To make almond meal at home, grind almonds in your food processor until you get coarse crumbs. You can also blanch, peel, and dry the almonds well before grinding them.

Nutrition

Serving: 1 ServingCalories: 287kcalCarbohydrates: 39gProtein: 6gFat: 12gSaturated Fat: 8gPolyunsaturated Fat: 0.4gMonounsaturated Fat: 1gTrans Fat: 0.01gCholesterol: 28mgSodium: 231mgPotassium: 115mgFiber: 2gSugar: 21gVitamin A: 56IUVitamin C: 2mgCalcium: 80mgIron: 2mg

Khachapuri – Georgian Cheese Bread

May 25, 2020

sliced Khachapuri - Georgian Cheese Bread.

A crispy canoe of fluffy, homemade bread flooded with three phenomenal types of gooey cheese. Need I sell you more on Khachapuri – Georgian Cheese bread?

sliced Khachapuri - Georgian Cheese Bread.

If you think pizza can claim ownership to the most fabulous combination on earth – crusty dough and melted cheese – think again. In a land wedged against the Black Sea, the love affair of bread & diary has been ongoing for generations. 

They call it Khachapuri.

Despite staying in Moscow for one and a half years, I never got around to trying the famous Eurasian dish. It was while I visited Moscow a year or so back, that I got my first taste of Khachapuri, or as others call it, Georgian cheese bread.

I had it again during my jaunt to Minsk and fell head over heels in love. 

Khachapuri- Georgian Cheese Bread

What is Georgian Cheese Bread?

A traditional food of the Republic of Georgia, Khachapuri is a flatbread shaped like a boat and filled to the bursting with cheese. Each region of the country has its favorite iteration of the savory bread. Khachapuri Adjaruli (the one I’ve made) simply eclipses them all.

Typically, the bread uses a mixture of sulguni and imeruli cheese, but the gooey texture of mozzarella and the tart tanginess of feta gets you real close to the conventional version.

Ingredients for making Khachapuri- Georgian Cheese Bread

How to Make Georgian Cheese Bread?

Making Georgian cheese bread takes a tad bit of finesse, but the outcome is more than worth it.

Who doesn’t love to dip soft, chewy bread in molten cheese? Right?

First, make the dough.

The dough for Khachapuri- Georgian Cheese Bread

Knead flour and salt with a mixture of tepid water, sugar, and yeast. When it starts to come together drizzle in some olive oil to make a soft, supple, and elastic dough. Put in a well-oiled container and cover with a damp cloth.

FYI, you can use any of your favorite pizza dough recipes. This one is my go-to, no-fail pizza dough recipe!

While you wait for the dough to rise (which it will in less than an hour or so if you’re living through the same sweltering heatwave I am), get to creating the cheese filling.

Second, make the cheese filling.

Filling for Khachapuri- Georgian Cheese Bread

I used cashew ricotta cheese; regular, Amul mozzarella, and some feta I happened to have around. You can use any cheese you have at home. For the ricotta, if you know how to make a homemade one, now is the time to make some.

I added some fresh thyme and purslane from my garden to the cheese. The purslane was sautéed in olive oil for a tad 2-3 minutes, till it wilted just a soupcon. 

What’s purslane?

Purslane/ Kulfa ka saag

For those who are new to purslane, it’s also called kulfa ka saag. The green leafy succulent grows wildly during summer, and most people mistake it for a weed. 

It is not. 

The entire plant is edible – leaves, flowers, and all – and filled to the brim with nutrients. It has Vitamins E, C, and A. It is rich in dietary fiber. And it has loads of omega-3 fatty acids. 

If you don’t have purslane growing in your garden, look for it at your local vegetable vendors.

Variations of the filling:

You can leave the purslane out and add fresh herbs. Spinach works in a pinch. Grilled shredded chicken is a great addition or even cooked minced meat. 

Go the traditional way and you don’t need anything other than cheese.

Give soft crumbled paneer a try, too. The only condition is that it has to be freshly made and soft.

Third, bake the Khachapuri – Georgian cheese bread

Once the dough has risen, punch it a few times and cut it into four pieces. Cover them with a damp cloth again for a few minutes. Roll out each piece and form a canoe shape.

Divide the dough in 4 equal parts for Khachapuri- Georgian Cheese Bread
Rolled out dough for Khachapuri- Georgian Cheese Bread
Shape the dough for Khachapuri- Georgian Cheese Bread

Add in the cheese mixture and slide it in the oven till the sides are beautifully brown and crispy.

Dig in while the Georgian cheese bread is hot but not before the final flourish: hunks of butter.

Ready for baking Khachapuri- Georgian Cheese Bread

Eggless and vegan variations of Georgian cheese bread:

I made an eggless Georgian cheese bread because neither the daughter nor the mothership delight in it.

But the original recipe for Georgian cheese bread has egg. Five minutes before the bread is done, you take it out, crack an egg, and put it back in the oven. You bake it just enough that the white solidifies and the yolk is deliciously runny. 

For a completely vegan Georgian cheese bread, use plant-based cheese and butter. You can replace the butter with a drizzle of olive oil, too.

Khachapuri- Georgian Cheese Bread

Finally, Serve the Georgian Cheese Bread

Khachapuri is best savored straight out of the oven.

You tear off a piece, use it as a spoon to stir the melting pats of butter in the bubbling cheese, and then find bliss!

Khachapuri- Georgian Cheese Bread

I made four bread boats and served them with a side of a light salad as a meal. The crust was exquisitely crispy and not one bit soggy – the bane of bread and cheese combos. I think it was because I didn’t overstuff the bread with cheese as our love for cheese comes in moderation. 

The deliciously light Georgian cheese bread is excellent as a snack too. It doesn’t leave you with that chunky, heavy feel of overtly cheesy bread.

I’d love to hear from you! Please tag me on Instagram @tashasartisanfoods, using the hashtag #tashasartisanfoods. You can also FOLLOW ME on INSTAGRAM, PINTEREST for more fabulous recipes! Do subscribe to Tasha’s Artisan Foods so you’ll never miss a recipe!

📖 Recipe

Tried this recipe?Let us know how it was!

Khachapuri - Georgian Cheese Bread

Natasha Minocha
Khachapuri - A crispy canoe of fluffy, homemade bread flooded with three phenomenal types of gooey cheese. This Georgian cheese bread is absolutely irresistible!
No ratings yet
Print Recipe Pin Recipe
Prep Time 2 hours hrs
Cook Time 20 minutes mins
Total Time 2 hours hrs 20 minutes mins
Course Bread, Side Dish, Snack
Cuisine Georgian
Servings 4 persons
Calories 539 kcal

Ingredients
  

Dough

  • 2.5 cups All purpose flour
  • 1 tsp Salt
  • 1 tsp Dry active yeast
  • ¾ cup Water, lukewarm
  • ½ cup Milk, lukewarm
  • 1 tsp Sugar
  • 1 tbsp Olive oil plus extra for brushing the dough

Filling

  • ⅓ cup Cashew ricotta You can use regular Ricotta or cream cheese
  • ¾ cup Shredded Mozzarella
  • ⅓ cup Feta Cheese
  • 1 cup Purslane, chopped
  • 1 tsp Olive oil
  • 1-2 tsp Fresh or dried Thyme
  • 2-3 tbsp Butter, cut into cubes
  • Coarsely ground black pepper, to taste

Instructions
 

Dough

  • Combine the lukewarm water, milk, sugar, and yeast in a small bowl and set aside for 5 -10 minutes., for the yeast to get bubbly.
  • In a large bowl, combine flour and salt. Make a well in the center and pour in the yeast mixture.
  • Knead them together till the dough almost starts coming together. Now add in the olive oil. Knead well till the dough is smooth and elastic. This will take about 8-10 minutes. " See notes "
  • Place the ready dough ina greased bowl. Cover with a damp kitchen towel and place in a draft-free area for about an hour till the dough doubles. Mine doubled in 30 minutes, it's so hot here!

Filling

  • In the meanwhile, saute the chopped purslane for a couple of minutes in olive oil. Let it cool.
  • Combine the cooled purslane, cashew ricotta, mozzarella, and feta cheese in a bowl. Mix in some fresh or dried thyme and coarsely ground black pepper. I didn't add any salt as the cheeses were salty enough. But do add some if you prefer.

Assembly

  • Preheat the oven to 225C. Line a baking tray with baking paper or Silpat.
  • Punch down the proofed dough and knead it gently for 2-3 minutes. Cut the dough into 4 equal parts and cover for 10-15 minutes with a damp kitchen towel.
  • Working with one piece of dough at a time, roll it out into a 6" - 7" circle or oval. Roll up the sides towards the center and twist the sides, to make a boat shape.
  • Fill the center of the boats with the cheese mixture.
  • Carefully place the baking paper or Silpat on the baking tray. Brush the edges with olive oil and bake for 15-20 minutes or until the crust turns golden brown.
  • Place 2-3 cubes of butter on the hot breads, serve immediately and enjoy!

Notes

You can get the 5-minute Cashew Ricotta recipe here.
Please check my Everyday Bread post for tips on kneading the bread dough.

Nutrition

Serving: 1 ServingCalories: 539kcalCarbohydrates: 65gProtein: 19gFat: 22gSaturated Fat: 11gPolyunsaturated Fat: 1gMonounsaturated Fat: 8gTrans Fat: 0.2gCholesterol: 58mgSodium: 944mgPotassium: 229mgFiber: 3gSugar: 3gVitamin A: 1231IUVitamin C: 2mgCalcium: 275mgIron: 4mg
Khachapuri- Georgian Cheese Bread

Easy Pop Tarts

May 21, 2020

pop tarts on a metal trivet with some cherries around.

Stuffed with jam, and topped with lemon glaze and sprinkles, these enchanting, comforting, and cute easy pop tarts are irresistibly good. You’ll never wish for the store-bought versions again!

pop tarts on a metal trivet with some cherries around.

They are lovely for breakfast or an evening snack. They are adorably cute to look at and a tremendous hit! Once you make homemade pop tarts, you’ll never want the boxed ones!

[feast_advanced_jump_to]

What Are Pop -Tarts

Pop tarts (jam tarts or jam-filled hand pies) are rectangular, flaky pastries filled with sweet jam. Popular as a quick and sweet breakfast treat, they are a great hit with the kids ( and adults alike!).

cross section of a pop tart to show the filling.

Why You’ll Love This Recipe?

Kids ( and adults too!) will love these perfectly tender and flaky pop tarts.

I loved it because, unlike what the world tells you, making pastry at home is not hard. And homemade pastry makes these pop tarts so so much better!

Plus, you have full control over how much sugar you add to homemade tarts.

And finally, you can switch the pop-tart flavors every time! 

Ingredients

Flour: I used all-purpose flour for this recipe. It gives a lovely tender pastry. You can use wholewheat flour as well. to make the pop-tart pastry at home. Or you can try the quicker version of this recipe and use store-bought puff pastry instead, like I did for my strawberry turnovers!

The butter needs to be chilled and cut into cubes. I used regular salted butter. If you use unsalted butter, please add a quarter teaspoon to the flour.

Powdered sugar sweetens the pastry dough.

Water has to be chilled.

Jam: I used strawberry jam for these copycat homemade strawberry pop-tarts. You can use storebought or homemade. 


Pop Tarts Flavors Variations

This is such a versatile recipe! The options for tart fillings are endless. So, go ahead and let your imagination run free with these homemade pop tarts. Use persimmon jam, cherry jam, mulberry jam, or even fig jam.

Not a jam fan? Add Nutella to the little tarts. Fill it with peanut butter and chocolate chips. Or try this cinnamon-spiced apple butter!

You can even try savory pop-tarts and fill them with cheese, sautéed mushrooms, BBQ chicken, or tofu!

How to Make Pop Tarts?

Step 1: Combine the flour and sugar in a large bowl. Rub the chilled butter in the mixture, using your fingertips. When it resembles coarse breadcrumbs, add iced cold water, 1 Tbsp at a time, just enough to bind the dough.

Step 2: Divide the dough into 2. Flatten each half into a disk. Wrap in cling wrap and refrigerate until ready to use. This should rest for at least an hour.

Step 3: Working with one half of the dough at a time, roll it out into a rough rectangle on a lightly floured surface.

dough cut into 9 rectangles.

Step 4: Cut the dough into 8 rectangles. Repeat with the other half of the dough.

spoonful of strawberry jam in the center of five pastry rectangles.

Step 5: Spoon 1.5 teaspoons of jam in the center of half of the rectangles. Leave about 1/2" of the edges. Use a pastry brush or your fingers to wet the edges with water.

six pastry rectangles with crimped edges and holes on the top.

Step 6: Place another rectangle on top. Seal the edges with your fingertips and then use a fork to make an attractive pattern around each rectangle. This helps to seal the edges better.

seven baked pop tarts on parchment paper with jam oozing out.

Step 7: Prick each filled rectangle 4-6 times with a toothpick. Place the tray in the refrigerator for 20-30 minutes. Bake the chilled/frozen tarts for 20-25 minutes until lightly golden brown on top.

pop tarts with lemon glaze and sprinkles.

Step 8: Once the pop tarts are ready, let them cool completely. Drizzle over some glaze and immediately top with sprinkles. Serve and enjoy!

Pro Tips

  • The flour, the water, and the butter need to be chilled. If needed, add ice cubes to the water to keep it cold.
  • Don’t overwork the dough. Instead of kneading, bring it together till it feels sticky and moist.
  • I really recommend making the pastry dough the night before. It’ll make the rest of the easy pop tarts recipe a breeze. Cover it with cling wrap and refrigerate it. I left it overnight, of course, but even an hour will do wonders!
  • I used a scale to keep the pastry dough pieces somewhat even in size. You can eyeball it, too.
  • Don’t skip refrigerating the assembled strawberry pop-tarts. It’s the secret to flaky, buttery pastry. When they are chilled, bake till golden brown!
  • Always line the baking tray with parchment or Silpat for easy clean up as the filling does ooze out. 
pop tarts on a metal trivet with cherries in the background.

How To Serve

I used the littlest amount of sugar in the dough of these easy pop-tarts. The strawberry jam gave them all the sweetness they needed. We’re not big on overly sweet treats at my home.

But I did add a lemon glaze to the easy homemade strawberry pop tarts for some oomph. The lemony tang was just the kick the tarts needed. Remember to cool the tarts completely before you glaze.

For the final touch, I added some colorful sprinkles. Sprinkles make everything better!

For a bigger breakfast spread, serve the copycat strawberry pop-tarts alongside strawberry chia pudding, date & fig smoothie, or a gorgeous mango matcha latte!

Recipe FAQs

Can you reheat homemade pop tarts in the toaster?

I won’t recommend it as the filling and glaze will melt and spoil your toaster. Reheat for a few minutes in a preheated oven instead.

Why did my pop tarts tear?

Pastry dough is tender. If it’s tearing while you roll it out, pop it back in the fridge. Cold dough is easier to work with. If the pop tarts tore while baking, it could be because you added too much strawberry jam. A little is enough. Too much, and it’ll ooze out. Or you didn’t use a fork to close the pop tart edges tightly.

Can I use a store-bought pie crust?

You absolutely can. Or even try using puff pastry like I did with my cherry puff pastry tarts.

How long do strawberry pop-tarts keep?

The homemade pop tarts will keep for 2-3 days in an air-tight container at room temperature.

More Easy Breakfast Recipes

  • strawberry turnovers on a white plate on a cloth napkin.
    Strawberry Turnovers
  • cherry puff pastry tarts on a white platter.
    Cherry Puff Pastry Tarts
  • Gluten-free Apple Hand Pies | easy apple pie recipe
    Gluten-free Apple Hand Pies
  • Breakfast Granola Tarts easy no bake healthy recipe vegetarian vegan friendly
    Granola Breakfast Tarts

Half the joy of cooking is sharing it with others. That’s why I’m always eager to hear from you. So go right ahead & drop a comment or reach out on Instagram, Pinterest, YouTube, or Facebook. I hope you love these easy pop-tarts as much as we do!

📖 Recipe

Tried this recipe?Let us know how it was!

Easy Pop Tarts

Natasha Minocha
Stuffed with jam, topped with lemon glaze and sprinkles, these enchanting, comforting and cute easy pop tarts are irresistibly good!
No ratings yet
Print Recipe Pin Recipe
Prep Time 2 hours hrs
Cook Time 25 minutes mins
Total Time 2 hours hrs 25 minutes mins
Course Breakfast, Snack
Cuisine American
Servings 8 Pop Tarts
Calories 234 kcal

Ingredients


  • 2 cup All purpose flour
  • 1/2 cup Butter, chilled, cut into cubes I used salted butter
  • 1 tsp Powdered sugar
  • 5-6 tbsp Chilled Water
  • 2-3 tbsp Strawberry jam

Lemon glaze

  • 1 tbsp Lemon juice
  • 3-4 tbsp A handful of ice
  • Sprinkles, Optional

Instructions
 

  • Combine the flour and sugar in a large bowl. Rub the chilled butter in the mixture, using your fingertips. When it resembles coarse breadcrumbs, add iced cold water, 1 Tbsp at a time, just enough to bind the dough.
    It can be a bit scraggy at this point but don’t worry, it will come together. Using the palm of your hand, push the dough away from you 4-5 times until its smooth.
  • Divide the dough into 2. Flatten each half into a disk. Wrap in cling wrap and refrigerate until ready to use. This should rest for at least an hour.
  • When you’re ready to bake, keep a Silpat or parchment paper-lined baking tray handy and preheat the oven to 180C.
  • Working with one half at a time, unwrap the dough and flour your work surface well.
    Roll out the dough into a rough rectangle and cut into 8 rectangles, approximately 2.5" *3.5".
    Repeat with the second half of the dough.
  • Once you've got all the rectangles cut out. Spoon 1.5 teaspoons of jam in the center of half of the rectangles.
    Spread it out a bit, leaving about 1/2" of the edges. Use a pastry brush or your fingers to wet the edges with water.
  • Place another rectangle on top. Seal the edges with your fingertips and then use a fork to make an attractive pattern around each rectangle. This helps to seal the edges better.
  • Prick each filled rectangle 4-6 times with a toothpick or a fork. Place the tray in the refrigerator for 20-30 minutes.
  • Bake the chilled tarts for 20-25 minutes until lightly golden brown on top.
  • Once the pop tarts are ready, let them cool completely. Drizzle over some glaze and immediately top with sprinkles, if using. Let the glaze set, about 5 minutes. serve and enjoy!

Lemon Glaze

  • Combine lemon juice and icing sugar in a small bowl. Whisk until smooth and thick.

Notes

  • The flour, the water, and the butter need to be chilled. If needed, add ice cubes to the water to keep it cold.
  • Don’t overwork the dough. Instead of kneading, bring it together till it feels sticky and moist.
  • I recommend making the pastry dough the night before. It’ll make the rest of the easy pop tarts recipe a breeze. Cover it with cling wrap and refrigerate it. I left it overnight, of course, but even an hour will do wonders!
  • I used a scale to keep the pastry dough pieces somewhat even in size. You can eyeball it, too.
  • Don’t skip refrigerating the assembled strawberry pop-tarts. It’s the secret to flaky, buttery pastry. When they are chilled, bake till golden brown!
  • Always line the baking tray with parchment or Silpat for easy clean up as the filling does ooze out. 

Nutrition

Serving: 1 ServingCalories: 234kcalCarbohydrates: 28gProtein: 3gFat: 12gSaturated Fat: 7gPolyunsaturated Fat: 1gMonounsaturated Fat: 3gTrans Fat: 0.5gCholesterol: 31mgSodium: 95mgPotassium: 43mgFiber: 1gSugar: 3gVitamin A: 360IUVitamin C: 1mgCalcium: 10mgIron: 1mg

Classic Hummus Made Easy!

May 16, 2020

Classic Hummus | How to make classic hummus

If you've never made hummus at home, this is your sign to start! This classic hummus is silky smooth, delightfully creamy, and ridiculously easy to make! It comes together in minutes using simple pantry ingredients - chickpeas, tahini, lemon juice, garlic, and olive oil.

Hummus in a bowl topped with pomegranates.

Making homemade hummus is deeply satisfying! It tastes fresher, is easily customizable, and is quick to make. My version is garlicky, lemony, and smoky from roasted cumin powder!

You can scoop it up with a warm pita, spread it on sandwiches, or add it to your veggie platter. Hummus is a staple that makes everything so delicious and is a crowd-pleaser!

[feast_advanced_jump_to]

Why You'll Love This Recipe

Incredibly simple to make! With just a few pantry ingredients and a blender or food processor, you can easily whip up hummus in no time!

This recipe gives you the most velvety smooth and luscious hummus! Way better than the store-bought ones.

It's great for meal prepping!

It's so versatile! You can play with the flavors and toppings, make it spicy, add herbs, even some veggies if you like.

It's wholesome, nourishing, and so delicious.

Reader Love❤️

5 stars

Love this hummus recipe. Very delicious and easy to do. Perfect to surprise my family. Thanks. - Vicky

That looks delicious! I feel it is always better to use dried chickpeas instead of canned ones. They are more flavorful and affordable. Plus, you can add spices and aromatics in the water while boiling them. - Lucy

Recipe Ingredients

Ingredients for making hummus.

Chickpeas: Some hummus recipes add baking soda when soaking chickpeas/garbanzo beans, and then peel the skin off after they are cooked. The soda lessens cooking time, and removing the skins makes homemade hummus less lumpy.

Me? I skip this step entirely! I simply soak dried chickpeas overnight and cook them for a slightly longer time until they are literally falling apart, skin and flesh. 

You can also use canned chickpeas. Drain and rinse them before using.

Tahini: This brings a warm, nutty flavor to the hummus. It also gives hummus its signature silky, rich texture. Use quality tahini paste - store bought or homemade, both work well.

Garlic has to be chopped or smashed. Putting whole cloves in the blender means more work for the blender and an uneven texture.

Lemon: I love a lemony zing to my classic chickpea hummus. The delicate, bright savor is what I look forward to. If you don’t prefer a tangy touch, go light on the lemon juice.

Cumin powder: Roast a few cumin seeds. After they’ve cooled down, pound them, and then add the powder to the blender. It will give the hummus a beautiful, smoky hint.

Please see the recipe card below for full information about the ingredients and quantities.

Variations

 My hummus recipe is very adaptable. You can:

  • Add paprika, red chili flakes, or jalapeños.
  • Make it with cooked beetroot or carrots like I did for my roasted carrot hummus!
  • Add parsley when blitzing all the ingredients, and the hummus will have the most gorgeous green flecks scattered in it.

How To Make Classic Hummus At Home

Step 1: Cook chickpeas.

Step 2: Blitz chickpeas, garlic, lemon juice, cumin powder, salt, tahini, and olive oil, with cold water, in a blender until smooth.

Step 3: Taste and adjust salt. Add more water, if needed, and pulse till you have a silky, delicious, classic chickpea hummus.

Step 4: Transfer to a bowl, drizzle olive oil, and garnish.

Final step: Serve and enjoy!

Hummus in a bowl with crackers and olives.

Top Tips 

  • When blending, use cold water. It helps emulsify the ingredients better and gives you a hummus as smooth as a store-bought one. Adding a couple of ice cubes gives a fluffier texture.
  • Cook the chickpeas well. They should be sort of falling apart when cooked. This will make your hummus super creamy and smooth.
  • If using canned chickpeas, simmer them for 10-15 minutes. This will make them softer and easier to blend.
  • Choose a good-quality tahini. It should be smooth, slightly runny, and nutty. It makes a huge difference to the taste and texture.
  • Take your time blending. When you think the hummus is done, don’t stop. Let the blender work its magic some more, and you’ll end up with that super-light, luscious, and velvety hummus dip.
  • Taste and adjust the seasonings. Hummus should be flavorful, bright, and zesty!
  • Finish with a drizzle of good-quality extra virgin olive oil!
Hummus in a bowl with crackers.

How To Serve Hummus

The simplest hummus dressing is a drizzle of olive oil. But I think pomegranate arils make everything pretty with their red hue. That’s why I use them liberally for this simple hummus recipe. Those went on top of the classic hummus, along with mint snipped from my garden. You can replace mint with parsley to garnish hummus.

For the final touch, I added a generous dusting of sumac, the versatile Middle Eastern spice with a tangy lemony flavor.

Classic Hummus | How to make classic hummus

What To Eat With Hummus

For the habitually hungry stomachs in my home, I quickly served the classic homemade hummus with sourdough crackers. You can:

  • Serve it with homemade pita, air-fried falafels, or vegetable cheese falafels
  • It's so good with air fryer tortilla chips and sweet potato fries!
  • Make a hummus platter with crudités or serve it on a cheese board.
  • It’s excellent on toasts. Try it with toasted English muffins, homemade bagels, or pretzel buns.
  • Try a hummus wrap, smeared with grilled chicken, tofu, or paneer.
  • Drizzle some on roasted/ grilled veggies like my oven-roasted carrots, roasted cauliflower, roasted Brussels sprouts, and crispy smashed potatoes!
  • You can even stir a spoonful of the hummus into hot pasta for a truly creamy, delectable sauce.
Hummus scooped up on a cracker.

Recipe FAQS

How to make hummus from dried chickpeas?

I like to soak dried chickpeas overnight and then pressure-cook them the next day until they are melt-in-your-mouth and mushy soft.
If you are using canned chickpeas for this simple hummus recipe, rinse them and then cook them on the stovetop for 10-15 minutes till they are tender.

Does hummus need to be refrigerated?

Yes, hummus is perishable and needs to be refrigerated to maintain freshness and extend its shelf life. It will stay well in an air-tight container for 4-5 days in the fridge.
Keep it fresh by drizzling a thin layer of olive oil on top.
Give it a good stir before serving.

Is classic hummus vegan?

Yes, classic hummus is vegan as it is made from plant-based ingredients. However, store-bought hummus may contain additional ingredients, so it's always a good idea to check the label.

Can I make hummus without tahini?

Every hummus must begin with great tahini! It is the most prominent flavor in the dip. If you don’t have tahini, just add a tablespoon or two of sesame seeds when blending the chickpeas to make classic hummus.

What is tahini?

It is a paste made from sesame seeds, and it has a marvelous nutty taste and an incredibly buttery texture. You can make it at home or buy it online for this classic hummus recipe with tahini.

Check Out These Easy Dip Recipes

  • Labneh on a small plate topped with olives,sumac, pomegranate, mint and olive oil.
    Homemade Labneh Recipe
  • Feta dip with cherry tomatoes, pinenuts, olive oil and mint on top.
    Whipped Feta Cheese Dip
  • Hummus in a bowl with pomegranate arils, nuts and pumpkin seeds.
    Carrot Hummus
  • Gochujang Mayo Recipe
    Gochujang Mayo Recipe

Half the joy of cooking is sharing it with others. That’s why I’m always eager to hear from you. So go right ahead and drop a comment or reach out on Instagram, Pinterest, YouTube, or Facebook. I hope you love this classic hummus as much as we do!

📖 Recipe

Tried this recipe?Let us know how it was!

Classic Hummus Made Easy!

Natasha Minocha
This classic hummus is silky smooth, delightfully creamy, and ridiculously easy to make! It comes together in minutes using simple pantry ingredients!
5 from 3 votes
Print Recipe Pin Recipe
Prep Time 20 minutes mins
Cook Time 30 minutes mins
Total Time 50 minutes mins
Course Condiment
Cuisine Middle Eastern
Servings 20 Servings
Calories 48 kcal

Ingredients
  

  • 1.5 cups Chickpeas, cooked
  • 4 cloves Garlic
  • 3 tbsp Tahini
  • 1 tbsp Lemon juice
  • 1 tsp Roasted cumin powder
  • 2-3 tbsp Olive oil Plus some extra for pouring on top
  • Cold Water, as needed
  • Salt to taste

Instructions
 

  • Add the chickpeas, garlic, tahini, lemon juice, salt, cumin powder, olive oil, cold water, and salt.
    Blitz till smooth. Taste and adjust for seasoning.
  • If the hummus is too thick, add some more liquid. Once your hummus has reached the consistency you prefer, blitz for a couple minutes extra to make it creamier and fluffier.
  • Spoon on to a bowl or plate, top with olive oil and serve. Enjoy!

Notes

  • When blending, use cold water. It helps emulsify the ingredients better and gives you a hummus as smooth as a store-bought one. Adding a couple of ice cubes gives a fluffier texture.
  • Cook the chickpeas well. They should be sort of falling apart when cooked. This will make your hummus super creamy and smooth.
  • If using canned chickpeas, simmer them for 10-15 minutes. This will make them softer and easier to blend.
  • Choose a good-quality tahini. It should be smooth, slightly runny, and nutty. It makes a huge difference to the taste and texture.
  • Take your time blending. When you think the hummus is done, don’t stop. Let the blender work its magic some more, and you’ll end up with that super-light, luscious, and velvety hummus dip.
  • Taste and adjust the seasonings. Hummus should be flavorful, bright, and zesty!
  • Finish with a drizzle of good-quality extra virgin olive oil!

Nutrition

Serving: 1 ServingCalories: 48kcalCarbohydrates: 4gProtein: 2gFat: 3gSaturated Fat: 0.4gPolyunsaturated Fat: 1gMonounsaturated Fat: 2gSodium: 2mgPotassium: 52mgFiber: 1gSugar: 1gVitamin A: 6IUVitamin C: 1mgCalcium: 11mgIron: 1mg

Sourdough Crackers

May 15, 2020

Sourdough Crackers | Easy Vegan Sourdough Cracker Recipe

Sourdough crackers are the quintessential snack – thin, crispy, and addictive. Eat them as-is, dip them in healthy hummus, or smear them with soft ricotta cheese.

sourdough crackers in a small bowl.

I don’t have empty stomachs at my home. They are endlessly hungry, bottomless pits. By the time the table is cleared of lunch stuff, at least one person is ready with the question “what’s for snacks?” Which means I have an oeuvre of snackable treats. 

This time it is ultra-thin and crispy sourdough crackers made out of starter discard.

Sourdough Crackers  in a bowl with ingredients around.

What’s sourdough starter discard?

When you have a sourdough starter at home, a sheer amount of it goes to waste. Every time you feed the starter; you have to do away with a certain quantity.

The discard is perfectly usable and chucking it in the bin is a travesty. And I do try to follow a zero-waste policy in my kitchen. That’s why I’ve cooked up a storm with sourdough starter discard, from paranthas to waffles to banana cinnamon pancakes to sourdough banana bread!

So, when I saw the starter jar get too full and the call for snacks rising in pitch yet again, I thought now is a great time to try sourdough crackers. 

How to Make Sourdough Crackers?

Store-bought crackers are convenient, sure, but to my palate, they are lifeless and utterly bland. I switched to homemade crackers because they have an unbeatable fresh taste, and give me complete control over the amount of salt, sugar, and fats in it. Plus, making them is as easy as opening a box.  

You mix the sourdough starter discard with a combination of whole wheat and all-purpose flour, salt, olive oil, and a touch of paprika and knead it into a pliable dough. 

Dough for Sourdough Crackers | Easy Vegan Sourdough Cracker Recipe

Cover the dough with a cloth and let it sit for some time because a well-rested dough rolls out like a dream. After it's relaxed a bit, take it out, divide it into two, and then working with one piece at a time, using a rolling pin to make thin sheets.

The power-to-be on the internet say that the rolled-out dough has to be 1/16th of an inch. I have no idea if my dough reached this exalted thinness (couldn’t be bothered to measure), but I did make them as slim and even as possible. If you have a pasta machine at home, use it. The dough will turn out to be paper-thin and absolutely level.

 Rolled out dough for Sourdough Crackers | Easy Vegan Sourdough Cracker Recipe

Baking the sourdough crackers

On both pieces of the rolled out dough, brush olive oil, and then any topping of your choice. I dusted a fantastic Middle Eastern seasoning mix, za’atar, on one half and Italian seasoning on the other half.

Finish off by sprinkling a bit of sea salt on top (in my haste, I forgot to add it on one half of the dough, and you can certainly tell the difference).

Take a sharp knife, or a pizza cutter, or a pastry cutter (whatever is in your drawer) and cut the thin sheets in squares (or any shape you prefer). Transfer the squares on Silpat or a baking paper-lined tray and bake! Or you can simply roll out the dough on a sheet of baking paper and cut into desired shapes and transfer the sheet onto your baking tray…

Sourdough Crackers | Easy Vegan Sourdough Cracker Recipe

Quick Notes

For the paprika, degi mirch powder works in a pinch because it gives the crackers a lovely hue and just a tad bit of flavour.

When you knead the dough, if it’s too soft and sticky, add in more flour. If the dough is dry-ish, increase the amount of sourdough starter discard.

For all those who have little ones at home and want them involved in the baking, forgo a knife. Use a cookie cutter to cut the rolled-out dough into cute and fun shapes.

When baking, keep an eye out. Stop when they are lightly golden brown because sourdough crackers become crisper as they cool.

Sourdough Crackers | Easy Vegan Sourdough Cracker Recipe

Variations of sourdough crackers

Making your own crackers really couldn’t be simpler. The ingredients are straight from your pantry shelf, and you need no special equipment. Within an hour, you have homemade crackers ready to your liking.

The best part? You can take the recipe in any direction your taste buds desire. For the toppings, you can replace the seasoning with cumin, sesame seeds, or even dried herbs. For a touch of Indianness, try ajwain crackers, or a mix of kasoori methi and chaat masala. 

If you’re in the mood for a burst of colors and some fun, add a smidgen of turmeric or beetroot powder or pureed spinach to the dough. Fresh herbs like parsley, thyme, and rosemary are also a lovely complement to the sourdough flavor. Knead a small handful of them in the dough.

While the sourdough starter discard does give the crackers a tangy, almost cheese-like flavor, you can take it up a notch and mix grated cheese in the dough. Throw in some garlic powder to get the match made in heaven.

Sourdough Crackers | Easy Vegan Sourdough Cracker Recipe

Serving the Sourdough Crackers

Sourdough is supposedly excellent for your gut, but that wasn’t just the impetus for making the crackers. It was to keep the permanent snackers at my home happy and satiated.

Sourdough crackers are an ideal snack on their own to have by the fistful. But I served them on an insanely delicious and nutritious platter with a side of hummus (keep your eyes peeled for a classic hummus blog) and some olives. 

Classic Hummus & Sourdough Crackers

Half the joy of cooking is sharing it with others. That’s why I’m always eager to hear from you. So go right ahead & drop a comment or reach out on Instagram, Pinterest, YouTube, or Facebook. I hope you love these sourdough crackers as much as we do!

📖 Recipe

Tried this recipe?Let us know how it was!

Sourdough Crackers

Natasha Minocha
Sourdough crackers are the quintessential snack - thin, crispy, and addictive. So good to nibble on as is or with your favorite dip!
5 from 3 votes
Print Recipe Pin Recipe
Prep Time 20 minutes mins
Cook Time 25 minutes mins
Total Time 45 minutes mins
Course Appetizer, Snack
Cuisine American
Servings 60 crackers
Calories 23 kcal

Ingredients
  

  • 3/4 cup All purpose flour
  • 1/2 cup Wholewheat flour
  • 3/4 tsp salt
  • 1 tsp Paprika
  • 3 tbsp olive oil
  • 1 1/4 cup Sourdough starter discard

Topping

  • 1-2 tbsp olive oil
  • 2 tbsp Zataar
  • 2 tbsp Italian seasoning
  • Sea salt

Instructions
 

  • Combine both the flours, salt, paprika, olive oil, and sourdough starter discard in a large bowl.
  • Use a fork or your hands to bring all the ingredients together. Knead the dough for 2-3 minutes till you get a soft, pliable dough.
    The dough should not be sticky. If it is, add more flour. If it's too dry, add more discard or water.
  • Cover the dough with a damp kitchen towel and let it rest for 10-15 minutes.
  • Preheat your oven to 180C. Line a baking tray with silpat or parchment paper.
  • Divide the dough in half.
  • Using a rolling pin, roll out each dough into a large rectangle or circle. Don't worry if it's not perfectly shaped.
  • Roll out dough as thinly and evenly as possible, about 1/16th of an inch.
  • Brush liberally with olive oil and sprinkle zataar on one rolled out sheet. And Italian seasoning on the other. You can use one or the other. Or whatever else you prefer to use. Sprinkle some sea salt.
  • Using a sharp knife, pizza cutter or a pastry cutter, cut into small squares. Or whatever shape you prefer.
  • Transfer the cut-out dough on to the prepared baking tray and bake for 20-25 minutes or until light golden brown. These will harden more as they cool.
  • Cool completely and serve with hummus or any dip of your choice. Enjoy!

Nutrition

Serving: 1 ServingCalories: 23kcalCarbohydrates: 3gProtein: 0.4gFat: 1gSaturated Fat: 0.1gPolyunsaturated Fat: 0.1gMonounsaturated Fat: 1gSodium: 29mgPotassium: 6mgFiber: 0.2gSugar: 0.02gVitamin A: 19IUVitamin C: 0.004mgCalcium: 3mgIron: 0.2mg

Swedish Chocolate Cake

May 13, 2020

Swedish chocolate cake topped with powdered sugar and hazelnuts on a tray.

If you’re craving a chocolate cake that’s rich, gooey, and incredibly easy to make, this Swedish chocolate cake is calling your name. With a fudgy center, crisp edges, this kladdkaka is a chocolate lover’s dream come true!

Swedish chocolate cake topped with powdered sugar and hazelnuts on a tray.
[feast_advanced_jump_to]

What is Swedish Kladkaka?

Kladdkaka is a populare Swedish dessert. The English interpretation of it is "sticky or gooey cake". It is baked without baking powder and makes for a deliciously dense and fudge-like treat, almost like a cross between a gooey chocolate brownie and a chocolate lava cake.

This recipe has been adapted from the amazing Linda Limelino’s blog. It’s a firm favorite in our house for years now!

Love chocolate? Then you must try these delicious chocolate raspberry brownie bites, decadent chocolate chickpea cake, and my favorite - chocolate babka!

Why You'll Love This Recipe

✨This cake is special! It’s so decadent, gooey, and soft, you will keep coming back for more!

✨The Swedish sticky chocolate cake is naturally gluten-free as it is flourless, which means that really all you will taste is dark chocolate, with a beautiful coffee aftertaste that just takes it to another level.

✨The Swedish chocolate cake is ridiculously simple to make. This flourless chocolate cake needs just 6 basic ingredients and no fancy technique.

✨Beautifully rustic yet elegant, this rich chocolate Swedish cake is easy to make ahead of time and is perfect for entertaining.

Reader Love❤️

5 stars

this was amazing, thanks for such a easy recipe! I'm new to baking and found it very simple to make!

5 stars

been making this swedish chocolate cake for almost all of the birthdays in my house, everyone loves it! thank you so much for this recipe

Recipe Ingredients

Chocolate: Use the best-quality chocolate you can get. Really, this is the cake you need that really good stuff for! I recommend 70% dark chocolate, though you could also make it with 55% dark chocolate. 

Butter: I used salted butter. If using unsalted butter, add a ¼ tsp of salt to the batter.

Eggs: They provide structure and stability to the cake. They also help in leavening as this recipe does not have any baking powder or baking soda.

Coffee: Strong brewed coffee enhances the deep chocolate flavor here.

Sugar: Regular granulated sugar works well.

Please see the recipe card for full information about ingredients and quantities.

How to Make Swedish Chocolate Cake

Step 1: Grease a 9″ spring-bottom pan and line the bottom with parchment paper. Preheat the oven to 180 °C/350°F.

Step 2: Melt the chocolate and butter in a large bowl placed over a pan of simmering water. Once it's all melted, add the coffee and keep it aside. Let it cool for 5-10 minutes.

Step 3: In another bowl, beat the eggs, sugar, and vanilla until light and doubled in volume.

Process of making Swedish Chocolate Cake | Easy Flourless Chocolate Cake Recipe

Step 4: Gently stir the chocolate mixture into the egg mixture. Pour into the prepared pan.

Step 5: Bake for about 40-50 minutes. It will get puffed up and then fall once it cools. Run a knife around the edges and let the cake cool completely.

Swedish Chocolate Cake in a cake pan.

Step 6: I let the cake cool in the pan and then refrigerate it for at least 2-3 hours before releasing it from the pan.

Step 7: Carefully remove the cake from the pan. Slice, serve, and enjoy!

Powdered sugar being sprinkled from a sieve on a chocolate cake.

Top Tips

  • Keep all the ingredients at room temperature. It makes everything mix together well and gives the cake the right texture.
  • Mix the egg-sugar mixture with the melted chocolate, gently so that the whipped-up mixture doesn’t deflate.
  • Getting the cake out of the pan is a teensy bit tricky. I recommend doing this once it is completely cooled, which can take a few hours. I prefer baking it a day before so that it sets well.
  • Cover the outside base of the tin with foil. Because you’re using a loose-bottom pan, drips and leaks are possible. It happens to me ALL the time! The foil catches them all and prevents a messy oven.
  • Line the tin with parchment paper for easy removal of the cake.
  • Since the kladdkaka doesn’t include any leavening agent like baking powder,  the cake will rise, then fall. So please don’t panic when it sinks!
  • You will not be able to test this cake with a toothpick as it is meant to be gooey in the center. When the edges of the Swedish cake seem a little set and the top gets puffy, but still has a bit of jiggle, it's time to take out the cake! It's better to have the cake slightly under-baked than overdone.
  • Use a kitchen scale to measure the ingredients for better and consistent results every time!
Chocolate cake topped with powdered sugar and hazelnuts.

Serving the Swedish Chocolate Cake

Getting the sticky Swedish chocolate cake out of the pan can be a tad tricky. Run a knife around the edges once the cake is out of the oven. Remove the cake from the pan once it is completely cooled, which can take a few hours. I prefer baking it a day before so that it sets well.

The 9-inch cake should comfortably serve 8 to 10 people, as this is a rich cake!

You can enjoy the Swedish chocolate cake while it’s still warm and indulge in its silky, sticky goodness. Serve it with a scoop of ice cream or a dollop of whipped cream. We really enjoy this cake when it’s been refrigerated for a few hours, preferably overnight. Chilling it makes the texture wickedly dense and fudgy.

A slice of Swedish kladdkaka with whipped cream on the side on a plate.

Swedish Chocolate Cake | Easy Flourless Chocolate Cake Recipe

More Delicious Chocolate Cakes

  • Chocolate Chickpea Cake | Eggless Chocolate Cake with Chickpea Flour | Glutenfree Chocolate Cake
    Chocolate Chickpea Cake
  • Chocolate Sheet Cake | Eggless Chocolate Sheet Cake | Eggless Chocolate Cake
    Chocolate Sheet Cake
  • chocolate zucchini cake with cream cheese frosting and edible flowers on a cake stand.
    Chocolate Zucchini Cake
  • chocolate cake with chocolate frosting and pomegranate arils on top on a platter.
    Stovetop Chocolate Cake

Half the joy of cooking is sharing it with others. That’s why I’m always eager to hear from you. So go right ahead & drop a comment or reach out on Instagram, Pinterest, YouTube, or Facebook. I hope you love this Swedish chocolate cake as much as we do!

📖 Recipe

Tried this recipe?Let us know how it was!
Swedish chocolate cake topped with powdered sugar and hazelnuts on a tray.

Swedish Chocolate Cake

Natasha Minocha
If you’re craving a chocolate cake that’s rich, gooey, and incredibly easy to make, this Swedish chocolate cake is calling your name. With a fudgy center, crisp edges, this kladdkaka is a chocolate lover’s dream come true!
4.84 from 6 votes
Print Recipe Pin Recipe
Prep Time 25 minutes mins
Cook Time 45 minutes mins
Cooling Time 3 hours hrs
Total Time 4 hours hrs 10 minutes mins
Course Cakes, Dessert
Cuisine Swedish
Servings 10 servings
Calories 424 kcal

Ingredients


  • 1 cup Butter I used salted butter
  • 8.8 oz 70% dark chocolate
  • 1/3 cup Brewed strong coffee 1/3 cup hot water + 1 tbsp coffee powder
  • 4 Eggs
  • 3/4 cup Sugar
  • 1 tsp Vanilla extract

Instructions
 

  • Grease a 9″ spring bottom pan and line the bottom with parchment paper. Pre heat the oven to 180 C.
  • Melt the chocolate and butter in a large bowl placed over a pan of simmering water. Once its all melted, add the coffee and keep it aside. Let the mixture cool for 5-10 minutes.
  • In another bowl, beat the eggs, sugar, and vanilla until light and doubled in volume.
  • Gently stir the chocolate mixture into the egg mixture. Pour into the prepared pan. Bake for about 40-50 minutes. It will get puffed up and then fall once it cools.
    Run a knife along the edges of the pan to loosen the cake.
  • Let the cake cool in the pan and then refrigerate it for at least 2-3 hours before releasing it from the pan.
  • Note : You will not be able to test this cake with a tooth pick as it is meant to be gooey in the center.

Notes

    • Keep all the ingredients at room temperature. It makes everything mix together well and gives the cake the right texture.
    • Mix the egg-sugar mixture with the melted chocolate, gently so that the whipped-up mixture doesn’t deflate.
    • Getting the cake out of the pan is a teensy bit tricky. I recommend doing this once it is completely cooled, which can take a few hours. I prefer baking it a day before so that it sets well.
    • Cover the outside base of the tin with foil. Because you’re using a loose-bottom pan, drips and leaks are possible. It happens to me ALL the time! The foil catches them all and prevents a messy oven.
    • Line the tin with parchment paper for easy removal of the cake.
    • Since the cake doesn’t include any leavening agent like baking powder,  the cake will rise, then fall. So please don’t panic when it sinks!
    • You will not be able to test this cake with a toothpick as it is meant to be gooey in the center. When the edges of the cake seem a little set and the top gets puffy, but still has a bit of jiggle, it's time to take out the cake! It's better to have the cake slightly under-baked than overdone.
    • Use a kitchen scale to measure the ingredients for better and consistent results.

Nutrition

Serving: 1 ServingCalories: 424kcalCarbohydrates: 30gProtein: 4gFat: 33gSaturated Fat: 20gPolyunsaturated Fat: 1gMonounsaturated Fat: 9gTrans Fat: 1gCholesterol: 120mgSodium: 191mgPotassium: 215mgFiber: 3gSugar: 24gVitamin A: 730IUCalcium: 35mgIron: 3mg

Pancake Cereal

May 10, 2020

Call them mini pancakes, call them baby pancakes, or call them pancake cereal. All I know is that they are cute as a button and the softest, fluffiest, and most delightful breakfast to grace our tables. Ever!

Pancake Cereal | Easy fun vegan pancake recipe| How to make pancake cereal

Saturday began with some social time. On the phone, of course. Apparently, after bread and dalgona coffee, another food trend is going viral on TikTok because of the lockdown. 

This time it’s pancake cereal. 

Made in practically nil time, I must say, the trend is falling at the perfect moment because one look at them and the kids decided these petite puffy pancakes just had to be made not just for Mother’s Day but also for both their birthdays falling right after. Yes, we have two back to back birthdays coming up!

Pancake Cereal | Easy fun vegan pancake recipe| How to make pancake cereal

How to Make Pancake Cereal?

With such an evocative name, you’d think the recipe would be pages long.

It isn’t. You can use any regular pancake batter to make them. I adapted fluffy cinnamon pancakes, my basic go-to recipe for pancakes.

I made short work of sifting all-purpose flour, baking soda and powder, salt, sugar and a pinch of cinnamon in a bowl. Separately, I whisked milk with vinegar to make buttermilk, then added oil and vanilla to it.

In went the dry ingredients into the wet to make the batter, which sat for a handful of minutes. Pretty much like every other pancake recipe, right? It’s the next part – cooking the mini pancakes – that makes a world of difference!

Batter for Pancake Cereal | Easy fun vegan pancake recipe| How to make pancake cereal
Batter in a piping bag for Pancake Cereal | Easy fun vegan pancake recipe| How to make pancake cereal

Cooking the pancake cereal

You transfer the batter into a piping bag or a squeeze bottle or even a zip lock bag, whatever you have at home works. The trick is to have a teensy hole at the corner to pour bite-sized batter. 

Heat a griddle pan– I used a dosa tawa since I had that at hand – and then pour small buttons of batter on to it. You can keep them as miniature as a real button or make them a little bigger; it’s absolutely up to you. 

When the top starts to bubble flip the mini pancakes to cook the other side. It takes less than 2 minutes for both sides to be golden brown, and the pancake cereals are ready to be served.

Pancake Cereal | Easy fun vegan pancake recipe| How to make pancake cereal

Quick notes:

Make sure the batter is lump-free or depositing the batter in tiny coin sizes will be a herculean task.

Test the batter with just one small button on the griddle, before you really get into it. If the batter spreads or drips out of the piping bag, then it is too runny. If you have to squeeze too hard to pour it, then it is too thick.

Adjust the batter to get that perfect thickness and consistency, and you’ll pipe out smooth buttons in a matter of seconds.

Don’t press the pancake cereals down with your spatula. They will end up flat instead of tiny, fluffy clouds.

When you pipe the batter, keep it smaller than the size you want. The batter does spread a bit while it cooks. 

Pancake Cereal | Easy fun vegan pancake recipe| How to make pancake cereal

Variations of pancake cereal

I used a vegan pancake recipe here, but the world is your pancake cereal canvas! You can make them gluten-free, you can add a layer of stuffed chocolate, or you can play around with flavours like tangy lemon and crunchy poppyseeds.

Honestly, you can use any pancake recipe. From peanut butter to cocoa powder, from banana to chocolate chips, pretty much everything goes. The only condition is to avoid big chunks in the batter; else they’ll block the piping bag. 

If you love some chocolate chips, instead of mixing them in the batter sprinkle them on top while serving the pancake cereal!

Pancake Cereal | Easy fun vegan pancake recipe| How to make pancake cereal

Serving Pancake Cereal

You can spruce the pancake cereal up in endless ways. Have them the traditional way with a dollop of butter. Enjoy them with liberal amounts of honey or maple syrup. Slather them with peanut butter, Nutella or chocolate. Or by all means, add in some nuts!

My son drowned them in milk and polished them off with a spoon à la cereal. The daughter couldn’t be bothered with the “cereal” part of the moniker and drenched the tiny pancakes in maple syrup. I relished them warm, straight out of the pan with freshly chopped mangos and frozen strawberries. 

Pancake Cereal | Easy fun vegan pancake recipe| How to make pancake cereal

Think of pancake cereal as an itsy-bitsy blank canvas and get creative while serving. No matter how you dress these fun-sized pancakes up, you just can’t go wrong. They are that delightful.  

Pancake Cereal | Easy fun vegan pancake recipe| How to make pancake cereal

Half the joy of cooking is sharing it with others. That’s why I’m always eager to hear from you. So go right ahead & drop a comment or reach out on Instagram, Pinterest, YouTube, or Facebook. I hope you love these cute little pancakes as much as we do!

📖 Recipe

Tried this recipe?Let us know how it was!
Pancake Cereal | Easy fun vegan pancake recipe| How to make pancake cereal

Pancake Cereal

Natasha Minocha
Call them mini pancakes, call them baby pancakes, or call them pancake cereal. These little pancakes are cute as a button and the softest, fluffiest, and most delightful breakfast to grace our tables!
No ratings yet
Print Recipe Pin Recipe
Prep Time 20 minutes mins
Cook Time 15 minutes mins
Total Time 35 minutes mins
Course Breakfast, Snack
Cuisine American
Servings 30 Mini Pancakes
Calories 44 kcal

Ingredients
  

  • 1.5 cups All purpose flour
  • 1.5 tsp Baking powder
  • 1/2 tsp Baking soda
  • 1/4 tsp Salt
  • 1 tsp Cinnamon powder
  • 1 tbsp Raw sugar You can use regular sugar too.
  • 3/4 cup Coconut milk You can use any milk of your choice.
  • 1 tbsp Apple cider vinegar / white vinegar
  • 2 tbsp Coconut oil You can use any oil.
  • 1 tsp Vanilla extract

Instructions
 

  • Combine coconut milk and vinegar in a small bowl. Keep aside for 5-10 minutes. This is your buttermilk.
  • In a large bowl, sift together the flour, baking powder, baking soda, and salt. Stir in the cinnamon powder and raw sugar.
  • To the buttermilk, add coconut oil and vanilla extract.
  • Whisk the buttermilk mixture to the dry ingredients. Mix well to form a smooth, lump-free, thick batter.
    Make sure the batter is neither too thin or too thick. If it's too thin, add more flour. If it's too thick, add more liquid. Rest this batter for about 10 minutes.
  • Grease a griddle with oil and heat it.
  • Pour the pancake batter in a squeeze bottle or a piping bag or a Ziploc. Snip off the end of the bag, if using.
  • Squeeze out mini pancakes onto the griddle.
  • Let the pancakes cook for 1-2 minutes more till the underside is golden. Carefully flip it over. Cook on the other side till golden brown. Repeat till all the batter is used up.
  • Serve with maple syrup, or honey or chocolate sauce. Enjoy!

Nutrition

Serving: 1Mini PancakeCalories: 44kcalCarbohydrates: 6gProtein: 1gFat: 2gSaturated Fat: 2gPolyunsaturated Fat: 0.1gMonounsaturated Fat: 0.1gSodium: 60mgPotassium: 20mgFiber: 0.2gSugar: 0.4gVitamin A: 0.3IUVitamin C: 0.1mgCalcium: 15mgIron: 1mg

Banana Scones

May 7, 2020

Banana scones with walnuts and chocolate chips in a bowl with a napkin.

This banana scone recipe gives you soft, buttery scones loaded with flavor that bake up in half the time of banana bread! With a hint of cinnamon, chocolate chips, and walnuts, they're about to become your new favorite way to use up those spotty bananas!

Banana scones with walnuts and chocolate chips in a bowl with a napkin.

Who doesn’t have overripe bananas sitting around? Mine? They practically multiply overnight. While I love a good banana bread, like this walnut and fig banana bread, sometimes I also want all the flavors, but in a bakery-style scone! They bake really fast, meaning you can go from spotty banana to warm scone in hand in about 30 minutes.

If you love baking with bananas, you might also enjoy my miso banana bread, crunchy banana granola, banana bread with sourdough discard, or these gluten-free banana pancakes!

[feast_advanced_jump_to]

Why You’ll Love This Recipe

✨ My banana scones recipe is perfect for beginner bakers. It’s impossible to mess up. And it’s a fabulous way to use brown bananas without committing to a full loaf of bread.

✨ Full of natural sweetness, the banana nut scones have a mellow, cozy flavor and an explosion of texture thanks to walnuts and chocolate chips.

✨ The scones are great for any time of day: breakfast, brunch, or as an afternoon snack with coffee or tea.

✨ The recipe is endlessly customizable. Want banana chocolate scones? Throw in some chocolate chips. Prefer banana blueberry scones? Fold in fresh berries or even strawberries, as I did with my strawberry banana bread.

Reader Love ❤️


5 stars

Tried this recipe a couple of times and it's delish....was over in no time!!!
Thank you Natasha!!! - Shaaista

Banana Scone Ingredients

Labelled ingredients for making banana scones.

Ripe bananas: The spottier, the better. They add natural sweetness and moisture. You can even use frozen bananas. Thaw and drain them before use.

Flour: All-purpose flour keeps the texture tender. You can use whole wheat flour, but the texture will be a bit dense. I've also made these banana walnut scones using a combination of all-purpose and quinoa flour, and they turned out great!

Butter: Cold butter is key for flaky layers. You can use chilled coconut oil if you prefer. If you’re using salted butter, then skip the salt.

Cinnamon: Adds warmth and depth.

Sugar: I used regular white sugar. Feel free to swap with light brown sugar, raw sugar, or coconut sugar.

Cream: Adds richness and helps bind the dough. Keep it cold. Use a little to brush the tops for that golden finish.

Vanilla extract: I love adding vanilla extract for flavor. Use store-bought or homemade vanilla extract.

Walnuts: For crunch and nutty flavor.

Chocolate chips: Optional, but highly recommended in these banana chocolate scones. Use a good-quality baking chocolate.

See the recipe card for full information on ingredients and quantities.

Variations

Swap out the vanilla for almond extract for a slightly different flavor profile. Don’t love walnuts? Pecans add amazing texture and taste. You can also use almonds or hazelnuts.

  • Make them vegan: For vegan banana scones, swap the butter for chilled coconut oil and use a plant-based milk instead of cream.
  • Instead of just sprinkling sugar on top, you can drizzle these banana bread scones with maple glaze (like in my maple pecan cookies) or use the vanilla glaze I made for cinnamon roll focaccia.

How To Make Banana Scones

Watch The Video

Step-By-Step Instructions

Step 1: Preheat the oven to 200 C/ 400 F. Line a baking tray with parchment paper.

Mashed banana, cream, and vanilla extract in a bowl.

Step 2: In a small bowl, mix mashed banana, vanilla extract, and cream well.

Sifted dry ingredients in a mixing bowl.

Step 3: In a large bowl, sift the dry ingredients - all-purpose flour, sugar, cinnamon powder, baking powder, and salt.

Cubed butter on top of dry ingredients in a mixing bowl.

Step 4: Rub in the chilled, cubed butter using your fingertips or a pastry cutter until the mixture forms large, coarse crumbs.

Dry and wet ingredients in a bowl.

Step 5: Pour the banana mixture over the dry ingredients and mix with a fork until the dry ingredients are just moistened.

Dough in a glass bowl.

Step 6: Bring the dough together using your hands. There is no need to knead the dough.

chocolate chips and walnuts on top of dough on a pink silicone mat.

Step 7: Transfer the dough to a lightly floured surface. Flatten the dough with your hands and then sprinkle chocolate chips and chopped walnuts across the surface. Press them down slightly.

Dough mixed with chocolate chips and walnuts on a silicone mat.

Step 8: Using a knife, divide the dough into two. Then place one layer over the other with the side studded with walnuts and chocolate facing upwards. Press the layers so they flatten a bit and stick to each other. Cut them in half once more and place one over the other. Press and then cut again.

Rolled out dough cut into 8 triangles on a pink baking mat.

Step 9: Roll into a 9" circle and cut into 8 triangles.

Scones brushed with cream and topped with sugar on a parchment paper lined tray.

Step 10: Place the scones on the prepared tray. Brush lightly with cream. Sprinkle some sugar on top.

Baked banana scones on parchment paper.

Step 11: Bake for 18-20 minutes or until lightly golden and cooked through. Allow to cool for a few minutes, then serve warm!

Scones with chocolate chips and walnuts in a bowl.

Pro Tips

  • Keep everything cold. Make sure your butter and cream are straight from the fridge. Cold butter creates those irresistible flaky layers in your scones.
  • Work quickly. When you're mixing the butter into the dry ingredients, make quick work of it. The less you handle the dough, the better.
  • Don't overmix or knead the dough. Mix just until the ingredients are combined. Overmixing can lead to dense, tough scones.
  • Don’t knead the add-ins. Stick to the folding method for the add-ins. This helps distribute them evenly and also creates airy, light-textured scones.
  • Chill if needed. If your kitchen is warm (or you've handled the dough too much), chill the shaped scones for 10–15 minutes before baking. This keeps the butter cold and helps them rise beautifully.

How To Serve

Banana scones are excellent fresh out of the oven. But they're even better with a little something on the side!

Serve them as a dessert with fresh berries for an added burst of flavor or chocolate ice cream.

Slather on some cinnamon honey butter and your favorite jam (cherry jam or homemade fig jam) for an easy and quick breakfast.

These homemade scones taste amazing alongside Vietnamese iced coffee, a strawberry matcha latte, or a cozy cup of tea, making them a great choice for a relaxing evening.

A bowl of scones with one half a scone to show the cross section.

Recipe FAQs

How are banana scones different from biscuits?

Scones are slightly sweeter and often flavored with fruit or spices. Biscuits are usually savory and have more butter. Scones also have a higher ratio of liquid to flour, and their texture is somewhere between cake and bread.

Are these scones very sweet?

They are actually quite mild! Most of the sweetness comes from the ripe bananas and the chocolate chips. If you like things sweeter, you can increase the quantity of sugar to 1/2 cup.

Can I make this banana bread scones recipe ahead of time?

Absolutely! You can shape the scones and freeze them unbaked. When you're ready to bake, you can thaw them briefly and add a few extra minutes to the baking time.

How do I store banana bread scones?

They’re best served fresh but can be stored in an airtight container at room temperature for 2–3 days.

More Easy Scones

  • Chocolate chip scones on a wooden tray.
    Chocolate Chip Buttermilk Scones
  • scones on a cake stand with a candle, tea and plant in the background.
    Mango Coconut Scones
  • Apple Cranberry Scones | Easy Eggless Scones Recipe
    Apple Cranberry Scones
  • Cinnamon chocolate chip scones on a metal tray.
    Cinnamon Chocolate Chip Scones

Half the joy of cooking is sharing it with others. That’s why I’m always eager to hear from you. So go right ahead & drop a comment or reach out on Instagram, Pinterest, YouTube, or Facebook. I hope you love these banana scones as much as we do!

📖 Recipe

Tried this recipe?Let us know how it was!
Banana scones with walnuts and chocolate chips in a bowl with a napkin.

Banana Scones

Natasha Minocha
This banana scone recipe gives you soft, buttery scones loaded with flavor that bake up in half the time of banana bread! With a hint of cinnamon, chocolate chips, and walnuts, they're about to become your new favorite way to use up those spotty bananas!
5 from 1 vote
Print Recipe Pin Recipe
Prep Time 15 minutes mins
Cook Time 18 minutes mins
Total Time 33 minutes mins
Course Cakes, Cookies, Snack
Cuisine American
Servings 8 Scones
Calories 375 kcal

Ingredients


  • 1 Large Banana, mashed
  • 1/3 cup Cream
  • 1 tsp Vanilla extract
  • 2 cup All-purpose flour
  • 2 tsp Baking powder
  • 1/4 tsp Salt Use salt if your butter is unsalted or if you're using coconut oil. Omit if using salted butter
  • 1 tsp Cinnamon
  • 1/3 cup Sugar
  • 1/2 cup Butter, chilled, cut into small cubes
  • 1/4 cup Walnuts, chopped
  • 1/3 cup Chocolate chips/ chunks
  • 1 tbsp Cream or milk For brushing on top
  • 2 tsp Sugar For sprinkling on top

Instructions
 

  • Preheat your oven to 200 C/ 400 F. Line a baking tray with baking paper.
  • In a small bowl, mix the mashed banana, vanilla extract, and cream well.
    1 Large Banana, mashed, 1/3 cup Cream, 1 tsp Vanilla extract
  • In a large bowl, sift the dry ingredients - all-purpose flour, sugar, cinnamon powder, baking powder, and salt.
    2 cup All-purpose flour, 1/3 cup Sugar, 2 tsp Baking powder, 1 tsp Cinnamon, 1/4 tsp Salt
  • Rub in the chilled cubed butter, using your fingertips or a pastry cutter, until the mixture forms large coarse crumbs.
    1/2 cup Butter, chilled, cut into small cubes
  • Pour the banana mixture over the dry ingredients and mix with a fork or your hands until a rough dough forms.
  • Turn the dough out onto a lightly -floured surface and gently pat into an even circle, about 6" in diameter.
  • Sprinkle the chopped walnuts and chocolate chips on the dough. Press them down slightly.
    Cut the dough in half and place one on top of the other. Press the dough slightly, and again cut it in half.
    Place the halves on top of each other, press them slightly, and repeat this process twice more.
    This helps the walnuts and chocolate chips get dispersed evenly through the dough without overworking it. It also helps create flaky layers.
    1/4 cup Walnuts, chopped, 1/3 cup Chocolate chips/ chunks
  • Use a rolling pin to roll the dough into a 9" circle and cut into 8 triangles.
    Place on the prepared tray.
    Brush lightly with cream. Sprinkle some sugar on top.
    1 tbsp Cream or milk, 2 tsp Sugar
  • Bake at 200 C/ 400 F for 18-20 minutes or until lightly golden and cooked through.
    Remove from the oven and allow to cool for a few minutes.
  • Serve warm. Enjoy!

Video

Notes

  • Keep everything cold. Make sure your butter and cream are straight from the fridge. Cold butter creates those irresistible flaky layers in your scones.
  • Work quickly. When you're mixing the butter into the dry ingredients, make quick work of it. The less you handle the dough, the better.
  • Don't overmix or knead the dough. Mix just until the ingredients are combined. Overmixing can lead to dense, tough scones.
  • Don’t knead the add-ins. Stick to the folding method for the add-ins. This helps distribute them evenly and also creates airy, light-textured scones.
  • Chill if needed. If your kitchen is warm (or you've handled the dough too much), chill the shaped scones for 10–15 minutes before baking. This keeps the butter cold and helps them rise beautifully.

Nutrition

Serving: 1SconeCalories: 375kcalCarbohydrates: 43gProtein: 5gFat: 21gSaturated Fat: 12gPolyunsaturated Fat: 3gMonounsaturated Fat: 5gTrans Fat: 0.5gCholesterol: 43mgSodium: 276mgPotassium: 170mgFiber: 2gSugar: 15gVitamin A: 524IUVitamin C: 2mgCalcium: 86mgIron: 2mg

No-Yeast Stovetop Pizza

May 4, 2020

To make my life easier and to teach both the kids a simple recipe, I got this no-yeast stovetop pizza. The dough gets ready in a jiffy, each one gets an individual pan-sized pizza in 20 minutes. And the cleanup is a breeze! Win-win for all!

No-Yeast Stovetop Pizza| Easy pizza recipe

How To Make No-Yeast Stovetop Pizza

The process is really easy, you guys. Just mix together all-purpose flour, semolina (sooji), salt, sugar, and baking powder in a bowl. Mix in olive oil and water and knead for a few minutes till soft and malleable. Now at this stage, you can leave it rest, covered with a damp cloth for 10-15 minutes.

Dough for No-Yeast Stovetop Pizza| Easy pizza recipe

When you're ready to make the pizza, grease your frying pan. I used my 6" cast-iron pan. Divide the dough in half, roll it out into a ball.

Use a rolling pin or your hands to make a 6" circle and place it in the pan.

No-Yeast Stovetop Pizza| Easy pizza recipe

Now this pan goes on to your stovetop. Let the crust cook for 5 minutes on high.

Flip the pizza base and on the crispy side, spread some tomato sauce or pesto, add on your toppings and then the cheese.

No-Yeast Stovetop Pizza| Easy pizza recipe

Cover with a lid and cook for another 8-10 minutes, till the bottom of the base is golden and crusty and the cheese on top has all melted.

Your pizza is ready to eat!

If you want a slightly more blistered look, like we always do, put your pizza under the broiler for 3-4 minutes. And dig in! But remember your fresh basil will also get charred, so be smart: put the basil on later.

This pizza bakes beautifully in the oven too. It takes a high temperature of 200C and about 15 -18 minutes for these to bake up.

No-Yeast Stovetop Pizza| Easy pizza recipe

No-Yeast Pizza Dough

Since this dough does not use yeast, it does come together very fast.

Make sure the dough is soft but not sticky. It should be supple and moist at all. Otherwise you'll get a really hard, dry pizza crust.

So if the dough feels sticky, add more flour. If it feels dry, add more water.

You can use the dough immediately, as soon as it's ready. But I prefer to let it rest for 10-15 minutes.

I love semolina in my dough. It gives a wonderful crunch and texture. Feel free to swap it out with cornmeal or all-purpose flour.

Feel free to throw in any herbs, fresh or dried, to give extra oomph to the dough.

You can also use my easy and quick pizza dough here!

No-Yeast Stovetop Pizza| Easy pizza recipe

How does the No-Yeast Stovetop Pizza Taste

I would say its quite like a bread pizza, just more crisp and definitely with better flavour.

Its great eaten warm, though its good at room temperature too. So if you want to serve it , cut into small pieces with some drinks, you have my nod!

No-Yeast Stovetop Pizza| Easy pizza recipe

Variations, Sauces and Toppings

As with any pizza, the variations with sauce, toppings, and cheese are endless.

Classic Tomato Sauce for the Pizza

I almost always have my simple tomato sauce in the refrigerator. So I mostly use that for my pizzas.

Basil Pesto for the Pizza

These days basil in my garden is growing abundantly, so a quick blend of basil, garlic, salt, pistachios, and olive oil was also easy. This pesto is a good sauce to have handy in the refrigerator.

I love feta and goat cheese on my pizza, but none of these seem to be available these days here. So I used regular cheddar and mozzarella cheese I got from my neighborhood store.

No-Yeast Stovetop Pizza| Easy pizza recipe

You can use any plant-based cheese to make this pizza completely vegan.

Any combination of veggies or meats will be wonderful here. For the sake of simplicity, I like to keep the toppings on these pizzas light. The flavour, though, is anything but!

So anytime that craving hits, you know a good, flavourful pizza is just 20 minutes away. I hope this no-yeast stovetop pizza becomes a favorite with all of you just as it has with us.

I’d love to hear from you! Please tag me on I’d love to hear from you! Please tag me on Instagram @tashasartisanfoods, using the hashtag #tashasartisanfoods. You can also FOLLOW ME on INSTAGRAM, PINTEREST for more fabulous recipes!

📖 Recipe

Tried this recipe?Let us know how it was!
No-Yeast Stovetop Pizza| Easy pizza recipe

No-Yeast Stovetop Pizza

Natasha Minocha
Delicious, crispy, crunchy, this No-Yeast stovetop Pizza is a breeze to make and is guaranteed to satisfy all the pizza cravings!
No ratings yet
Print Recipe Pin Recipe
Prep Time 15 minutes mins
Cook Time 15 minutes mins
Total Time 30 minutes mins
Course Bread, Main Course, Side Dish, Snack
Cuisine American
Servings 2 Pizzas
Calories 640 kcal

Ingredients
  

  • 1 1/4 cup All purpose flour
  • 1/2 cup Semolina
  • 1.5 tsp Baking powder
  • 3/4 tsp Salt
  • 1/2 tsp Sugar
  • 2 tbsp Olive oil
  • 1/2 -3/4 cup Water

Toppings

  • 2-3 tbsp Tomato sauce You can also use store-bought
  • 2 Tbsp Pesto You can also use store-bought
  • 1 small Tomato , sliced
  • 5-6 Fresh Basil Leaves
  • Mozzarella cheese, cut into small pieces I used some grated cheddar too.

Instructions
 

  • Combine all-purpose flour, semolina, salt, sugar and baking powder in a bowl.
  • Pour in the olive oil and 1/2 cup of water.
  • Using your hands, mix well till the dough is soft but not sticky. Add more flour if it seems too sticky. Add more water if it seems too dry.
  • Lightly knead the dough for 2-3 minutes. Cover with a damp cloth and let it rest for 10-15 minutes.
  • Grease a frying pan well. I used my 6" cast iron pan.
  • Divide the dough in half. Working with one half at a time, roll it out into a 6' circle.
  • Place in your pan and cook on high heat for 4-5 minutes, till the bottom is lightly golden and cooked.
  • Flip the pizza base so the cooked part is on top now. Spoon the tomato sauce or the pesto sauce, top with tomatoes, or whatever other toppings you want.
  • Cover with cheese.
  • Cover the pan with a lid and let the pizza cook for 8-10 minutes or until the base is crisp and golden brown and the cheese has all melted. You can also bake this at 200C for 15-18 minutes in your oven.
  • The pizza is ready to eat at this point. If you want a blistered look, place the pizza under the broiler for 3-4 minutes. Please make sure your pan is oven-proof if you're using the broiler. If not, simply transfer the pizza out on a baking tray and then put it under the broiler.
  • Serve warm. Enjoy!

Notes

  • You can use any tomato sauce you like for the pizza. Or make my simple tomato sauce in just 20 minutes.
  • You can use this pistachio pesto recipe for the pizza.

Nutrition

Serving: 1PizzaCalories: 640kcalCarbohydrates: 97gProtein: 15gFat: 21gSaturated Fat: 3gPolyunsaturated Fat: 2gMonounsaturated Fat: 10gCholesterol: 1mgSodium: 1412mgPotassium: 320mgFiber: 5gSugar: 3gVitamin A: 801IUVitamin C: 7mgCalcium: 232mgIron: 6mg

Vegan Chocolate Peanut Butter Cookies - Family Favorite!

May 2, 2020

These vegan chocolate peanut butter cookies are pools of chocolatey, peanut buttery goodness with layers of flavor and texture packaged in lusciously soft delights. You can bake these dairy-free chocolate peanut butter cookies in just half an hour!

Vegan Chocolate Peanut Butter Cookies in a plate.

It’s been a while since I baked cookies. I think it was around Christmas, and I made ginger-cranberry oatmeal cookies. In a home where even one day without soft-baked cookies, vegan or otherwise, seems like eleven thousand years, that’s a really long time.

So, much to the appreciation of the people at home, on Friday morning, I gathered the ingredients for peanut butter chocolate vegan cookies. The combination of peanut butter and cocoa cookies had been in my head for some time because all of us are big, big fans of peanut butter, and who here doesn’t love chocolate?

vegan chocolate peanut butter cookies with peanut butter glaze on a plate.
[feast_advanced_jump_to]

Reasons To Make These Vegan Chocolate And Peanut Butter Cookies

Cookies come out creamy and fudgy, with PB’s sweet/salty flavor shining through.

The recipe is easy, remarkably quick, and makes about 18 decent-sized cookies.

Peanut butter and chocolate is an irresistible combo!

Recipe Ingredients & Swaps

Sweetener: Instead of coconut sugar, you can use brown sugar, raw sugar, or even jaggery powder.

Oil: Instead of coconut oil, you can use softened butter, as long as you don’t need to bake vegan chocolate peanut butter cookies.

Milk: Feel free to swap some homemade almond milk (what I used) with coconut or regular milk.

How To Make Vegan Chocolate Peanut Butter Cookies?

Step 1: In a bowl, toss all the dry ingredients of these vegan cocoa cookies—all-purpose flour, baking soda, and baking powder—and set them aside.

Step 2: In another bowl, add coconut sugar, peanut butter, coconut oil, almond milk, and vanilla extract. Beat the ingredients to get a creamy, fluffy mixture.

Step 3: Mix the dry ingredients with the wet ingredients to make vegan chocolate and peanut butter cookie dough.

Step 4: Roll the dough into small balls.

Step 5: Use the tines of a fork to flatten the dough balls slightly, imparting that lovely signature crisscross pattern of chocolate peanut butter cookies.

Process of making Vegan Chocolate Peanut Butter Cookies.

Step 6: Bake the vegan cookies for 8–10 minutes.

Step 7: Let cool for a few minutes on the tray before transferring to a cooling rack.

Optional step: Make the glaze while the peanut butter chocolate cookies cool. Drizzle the glaze using a spoon or piping bag.

Final step: Serve and savor!

Make peanut butter glaze

  • Mix peanut butter with warm water and icing sugar.
  • Drizzle the smooth, thick paste on the cookies using a spoon.
  • I used a piping bag since there was one at hand.

Pro Tips

  • The coconut oil has to be melted and then cooled before you pour it in.
  • The dough of these peanut butter and chocolate cookies is crumbly. Add some more milk, if it looks dry-ish.
  • The cookies are actually creamy peanut butter fudge masquerading as scrumptious chocolate cookies. The trick to getting that crackly exterior with a decadently tender center is not to overbake them.
baked peanut butter chocolate cookies in a bowl.

Recipe FAQs

Why were my peanut butter cookies dry?

If you bake the peanut butter cookies for too long, they will get dry. About 8 to 10 minutes should do it. I recommend keeping an eye on the eight-minute mark.

How can I make these cookies gluten-free?

You can use your favorite gluten-free flour. I love to use buckwheat flour, like I did for my gluten-free chocolate chip cookies and gluten-free waffle cookies!

 Chocolate Peanut Butter Cookies with drizzle of peanut butter glaze.

How To Serve

Once the cookies are out of the oven and cooled (which takes 5 minutes), you can top them up with some peanut butter glaze. This is an entirely optional step. The taste is phenomenal with or without the glaze.

The soft cookies have a brownie-like thickness. Not at all cakey, but uber-fudgy. Think soft, rich interiors you’ll love to sink your teeth into with a tall glass of cold milk or a cup of coffee!

chocolate peanut butter cookie cut in half to show fudgy texture.

More Vegan Desserts

  • Easy Chocolate Caramel Peanut Clusters
  • Vegan Sticky Toffee Pudding Glutenfree Dairyfree Refined Sugarfree Dessert
    Vegan Sticky Toffee Pudding
  • Coffee ice cream in a pan with one scoop in an ice cream scoop.
    Vegan Coffee Ice Cream
  • 3 Almond Butter Cups stacked on top of each other.
    Almond Butter Cups

Half the joy of cooking is sharing it with others. That’s why I’m always eager to hear from you. So go right ahead and drop a comment or reach out on Instagram, Pinterest, YouTube, or Facebook. I hope you love these chocolate peanut butter no-bake cookies as much as we do!

📖 Recipe

Tried this recipe?Let us know how it was!
Vegan Chocolate Peanut Butter Cookies | Easy baking

Vegan Chocolate Peanut Butter Cookies

Natasha Minocha
These vegan chocolate peanut butter cookies are pools of chocolatey, peanut buttery goodness with layers of flavor and texture packaged in lusciously soft delights. You can bake these dairy-free chocolate peanut butter cookies in just 30 minutes!
No ratings yet
Print Recipe Pin Recipe
Prep Time 15 minutes mins
Cook Time 10 minutes mins
Course Cookies, Snack
Cuisine American
Servings 18 cookies
Calories 152 kcal

Ingredients
  

  • 1.5 cup All purpose flour
  • 1/2 cup Cocoa powder
  • 1/2 tsp Baking soda
  • 1/4 tsp Salt
  • 3/4 cup Coconut sugar You can use brown sugar instead.
  • 1/2 cup Peanut butter, smooth You can use crunchy peanut butter
  • 1/3 cup Coconut oil, melted and cooled You can use softened butter instead
  • 1/3 cup Almond milk You can use any milk
  • 1.5 tsp Vanilla

Peanut Butter Glaze ( optional)

  • 1 tbsp Peanut butter
  • 2 tbsp Hot water
  • 1-2 tbsp Icing sugar

Instructions
 

  • Preheat your oven to 180C. Line a baking tray with Silpat or baking paper.
  • Combine the flour, cocoa powder, baking soda, and salt in a large bowl.
  • In another bowl, combine the sugar, oil, milk, peanut butter, and vanilla extract.
  • Cream all of these together till a well mixed and fluffy.
  • Mix the dry ingredients into the creamed mixture. The mixture will look a bit crumbly but not dry. You should be able to form balls with this dough. Add some more milk, if it looks dry-ish.
  • Form even sized balls with this dough and place them on the prepared tray. Make a criss-cross pattern with tines of a fork.
  • Bake for 8-10 minutes. I baked mine for 10 minutes. These are soft baked cookies.
  • Let cool for a few minutes on the tray before transferring on a cooling rack.
  • If you want to glaze the cookies. Let them cool completely, then drizzle over the peanut butter glaze using a spoon or piping bag.

Peanut Butter Glaze

  • Combine all the ingredients for the glaze in a small bowl. Whisk till very thick and smooth.

Nutrition

Serving: 1 CookieCalories: 152kcalCarbohydrates: 18gProtein: 3gFat: 9gSaturated Fat: 4gPolyunsaturated Fat: 1gMonounsaturated Fat: 2gSodium: 118mgPotassium: 95mgFiber: 2gSugar: 6gVitamin A: 0.2IUCalcium: 14mgIron: 1mg

Chocolate Chia Pudding

April 29, 2020

Chocolate Chia Pudding | Easy Healthy Vegan Recipe

When you want dessert for breakfast, the Chocolate Chia Pudding is it! Creamy dreamy chocolatey goodness that's really hard to resist.

Chocolate Chia Pudding | Easy Healthy Vegan Recipe

I am continuing with the chia pudding bandwagon...It's one of the easiest, most versatile breakfasts to make. And not to forget, super healthy too!

What’s Chia?

Chia is an edible seed that comes from the desert plant Salvia hispanica, grown in Mexico dating back to Mayan and Aztec cultures. It means strength, and folklore has it that these cultures used the tiny black and white seeds as an energy booster. – WebMD

Chocolate Chia Pudding | Easy Healthy Vegan Recipe

What are the benefits of chia seeds?

I think it was four years back when the very versatile chia seeds burst into mainstream popularity. Everyone hailed them as superfoods because they are loaded with antioxidants, fibres, proteins, calcium, magnesium, and omega – 3 fatty acids.

And the seeds have proven true to the moniker. Unlike flax seeds, chia seeds don’t have to be ground to get all their nutritional benefits.

They are extremely versatile. You can sprinkle them on your salads, smoothies, shakes, and yogurt.  Mix them in your baked goodies or jams. (I’ve made a wonderful mulberry jam out of them).

 Or even use them as thickeners because they swell up quite a bit in liquid.

Ingredients for Chocolate Chia Pudding | Easy Healthy Vegan Recipe

How to Make Chocolate Chia Pudding?

The chocolate chia pudding is an excellent ‘make-ahead breakfast’ recipe because it takes only one, ridiculously simple step.

Whisk in coconut milk, maple syrup/honey, cardamom, and cocoa powder to form a creamy mixture.  Add in the chia seeds, stir it and you’re done.

Pour the mixture into a small jar, cover and refrigerator overnight to chill.

Chocolate Chia Pudding | Easy Healthy Vegan Recipe

Quick notes

Next morning, you can stir more milk, if the consistency feels too thick or simply garnish and serve.

To bring a sweeter note to the pudding, add in more honey or maple syrup.

For the cardamom, crush only the seeds of two pods. If you don’t like or have cardamom, a couple pinches of cinnamon powder will work like a charm. A dash of nutmeg will further enhance the flavours here.

 For the milk, homemade almond milk or even regular dairy milk are absolutely fine here.

I have tried this with Greek yogurt as well, and boy, is it rich and creamy with that!

You can also blend this mixture for a ultra creamy texture, like I did with my cashew chocolate chia pudding.

Chocolate Chia Pudding | Easy Healthy Vegan Recipe

Serving the chocolate chia pudding

Right when you are ready to dig into your breakfast, stir the chocolate chia pudding well, top it for with some cocoa nibs and fresh chopped fruit. For the final touch, add in toasted coconut.

Have some granola handy? Use a spoonful for topping, maybe some toasted nuts too. A  handful of mixed seeds would be great here too.

For an extra dose of indulgence, add a dollop of coconut cream and shaved chocolate and you have a wonderful breakfast for dessert ready! Or is it dessert for breakfast?!

Chocolate Chia Pudding | Easy Healthy Vegan Recipe

More Chia Puddings

Coconut Mango Chia Pudding

Rose Strawberry Chia Pudding

Cashew Chocolate Chia Pudding

Half the joy of cooking is sharing it with others. That’s why I’m always eager to hear from you. So go right ahead & drop a comment or reach out on Instagram, Pinterest, YouTube, or Facebook. I hope you love this chocolate chia pudding as much as we do!

📖 Recipe

Tried this recipe?Let us know how it was!
Chocolate Chia Pudding | Easy Healthy Vegan Recipe

Chocolate Chia Pudding

Natasha Minocha
When you want dessert for breakfast, the Chocolate Chia Pudding is it! Creamy dreamy chocolatey goodness that's really hard to resist.
5 from 1 vote
Print Recipe Pin Recipe
Prep Time 5 minutes mins
Resting Time 8 hours hrs
Total Time 8 hours hrs 5 minutes mins
Course Breakfast, Dessert
Cuisine American
Servings 2 Servings
Calories 320 kcal

Ingredients
  

  • 1 cup Coconut milk I use light coconut milk here
  • 2-3 tbsp Chia seeds
  • 2 tsp Cocoa powder
  • 1-2 tbsp Maple syrup / Honey
  • 1/2 tsp Vanilla extract / Vanilla bean paste
  • 2 Green cardamom pods, seeds crushed

Topping (Optional)

  • Coconut cream/ Shaved chocolate/ Goji Berries You can use any topping of your choice - fruits, nuts, granola, seeds

Instructions
 

  • In a small bowl or jar, whisk all the ingredients. Taste and adjust for sweetness/ cocoa.
  • Cover and chill overnight in the refrigerator.
  • Stir it well the next morning. Add a bit more milk, if the consistency is too thick for you. Taste and adjust for sweetness.
  • Top with coconut cream, shaved chocolate, and goji berries. Or use any topping of your choice.

Nutrition

Serving: 1 ServingCalories: 320kcalCarbohydrates: 17gProtein: 5gFat: 28gSaturated Fat: 22gPolyunsaturated Fat: 3gMonounsaturated Fat: 1gTrans Fat: 0.01gSodium: 18mgPotassium: 361mgFiber: 5gSugar: 6gVitamin A: 6IUVitamin C: 2mgCalcium: 116mgIron: 5mg

Eggless Chocolate Chip Cake

April 27, 2020

Sliced chocolate chip cake on a platter.

This eggless chocolate chip cake is soft, moist, and packed with melty chocolate chips in every bite! Easy to make. No eggs. No frosting. Just a delicious cake you’ll want to make again and again.

Sliced chocolate chip cake on a platter with ingredients in the background.


I have a serious soft spot for simple cakes - the kind you slice while they’re still a little warm, eat straight from your hands, no plates and forks needed!

The batter comes together in minutes, the oven does the rest, and before you know it, your kitchen smells like vanilla and chocolate. Simple, easy, and always a hit with everyone!

[feast_advanced_jump_to]

Why You'll Love This Recipe

✨ This chocolate chip cake recipe is perfect when I want something sweet, comforting, and quick without pulling out every bowl in the kitchen.

✨The ingredients are simple, available anywhere, and substitutes work in a pinch! The batter comes together in no time - you’ll love how easy it is.

✨ Since this is a chocolate cake without eggs, it's perfect for baking for someone who’s allergic or a vegetarian. It is still light, incredibly moist, and ready in under an hour!

✨ Like my everyday snack cakes, like almond honey cake or vegan coconut tea cake, this one shines on its own. No frosting needed.

✨ The eggless vanilla chocolate chip cake is very kid-friendly. It makes a great school snack or after-school treat.

Reader Love ❤️

5 stars

My go to loaf cake recipe! So easy and always turns out yummy. Thanks so much for sharing! - Kavya Singh

Recipe Ingredients

Labelled ingredients for making eggless chocolate chip cake.

Flour: All-purpose flour keeps the cake super light and tender. But a combination of flours, like I did with my orange semolina almond cake, works great too!

Chocolate: I used 55% dark chocolate chips. A good-quality baking chocolate bar works too. Chop it up into pieces. The mix of shards and chunks is pure bliss. Some melt into the crumb, some stay gooey on top. You can go darker or use milk chocolate instead. My only advice? Use the best quality baking chocolate. It makes all the difference.

Oil: This is the secret to a moist eggless chocolate chip cake. I use sunflower oil, but you can use any neutral vegetable oil or even melted coconut oil.

Sugar: I used regular granulated white sugar. Brown sugar will work too if you want a more caramelized flavor in your cake.

Milk: You can use regular milk or plant-based milk, whatever you prefer.

Vinegar: Apple cider vinegar or regular vinegar, use whatever you have in the pantry.

Vanilla extract brings so much warmth to the easy chocolate cake. I love to use homemade vanilla extract.

Please see the recipe card below for full information about the ingredients and quantities.

Variations

This eggless chocolate chip cake recipe is wonderfully flexible, so you can tweak it based on what you have or what you’re craving.

  • Add a couple of tablespoons of cocoa powder to the batter as I did with my chocolate cherry cake, to make it extra chocolatey!
  • Vegan chocolate chip cake: Use plant-based milk and dairy-free chocolate as I did with my vegan chocolate chip mug cake
  • Add nuts: Fold in chopped walnuts, almonds, hazelnuts, or pecans for extra crunch and texture.
  • Citrus twist: Fresh orange zest lifts the cake, and it pairs beautifully with chocolate.
  • Coffee lover’s cake: Stir in a teaspoon of instant coffee powder to deepen the chocolate flavor. You can also top it with a coffee glaze as I did for my espresso bundt cake.
  • Warm spice cake: Replace cinnamon with homemade chai masala for cozy spice notes, much like my chai masala tiramisu, or use gingerbread spices as I did with my gingerbread mug cake.

How To Make Eggless Chocolate Chip Cake

Quick Recipe Video

Step-By-Step Process

Step 1: Preheat your oven and grease a loaf pan well.

In a small bowl, combine the milk and vinegar. Set aside for a few minutes. This is your buttermilk!

Wet ingredients for a cake in a measuring cup.

Step 2: Whisk together the milk and vinegar mixture, oil, and vanilla extract.

Dry ingredients for a cake in a mixing bowl.

Step 3: In a large bowl, sift together the all-purpose flour, sugar, baking powder, baking soda, cinnamon powder, and salt.

Chocolate chips coated with flour on top of cake batter in a mixing bowl.

Step 4: Pour the wet ingredients over the dry ingredients. Mix well. Toss the chocolate chips in 1 teaspoon of flour and fold them into the cake batter.

Cake batter with chocolate chips in a loaf pan.

Step 5: Transfer the batter into the prepared loaf pan. Top with more chocolate chips and granulated sugar.

Baked cake with chocolate chips in a loaf pan.

Step 6: Bake for 30-35 minutes or until a skewer inserted in the center comes out clean. Let the cake cool in the pan for 10-15 minutes before turning it out on a cooling rack. Allow the cake to cool completely before slicing.

Sliced cake on a platter.

Top Tips

  • Use room temperature ingredients. This helps the batter mix smoothly and gives an even-textured crumb.
  • Don't overmix the batter. Mix just until the wet and dry ingredients are combined.
  • Toss the chocolate chips in a little flour. This prevents them from sinking to the bottom of the cake.
  • Allow the cake to cool before slicing. This helps the cake to set and also gives cleaner slices.
  • I like to use an 8 x 4- inch loaf pan. But if I'm using a round cake pan, I prefer a 6-inch pan as it gives a thicker cake. An 8-inch is fine too, but the cake will be slightly flatter.
  • Store the cake in an airtight container for up to 3 days at room temperature or in the refrigerator for 5-6 days. If it's very hot where you live, please keep it refrigerated.
Two halves of a cake slices stacked on a small plate with a fork.

How To Serve

I personally love this eggless chocolate chip cake just the way it is. It’s already lovely and gooey from the melted chocolate, and crunchy on top from the sugar sprinkled over the batter before baking. That golden, crackly crust makes the cake look pretty enough on its own.

It pairs wonderfully with a cup of coffee, tea, hot chocolate, strawberry milk, or even a blueberry matcha latte.

But, if you’re in the mood to dress it up, you absolutely can! A light cream cheese frosting that I made for my eggless whole-wheat carrot cake, or a chocolate ganache like in my chocolate sheet cake, works beautifully.

Or a simple glaze if you prefer something subtle, as I did with my apple fritter cake. For a more indulgent twist, drizzle melted Biscoff on top as I did with my Biscoff cheesecake.

More Easy Eggless Cakes

  • Eggless carrot cake with cream cheese frosting on a white platter.
    Eggless Carrot Cake
  • Almond honey cake with rose petals and almonds on top on a platter.
    Almond Honey Cake
  • Cardamom Almond Tea Cake
    Cardamom Almond Tea Cake

Half the joy of cooking is sharing it with others. That’s why I’m always eager to hear from you. So go right ahead & drop a comment or reach out on Instagram, Pinterest, YouTube, or Facebook. I hope you love this eggless chocolate chip cake as much as we do!

📖 Recipe

Tried this recipe?Let us know how it was!
Sliced chocolate chip cake on a platter.

Eggless Chocolate Chip Cake

Natasha Minocha
This eggless chocolate chip cake is soft, tender, and moist. It's an easy egg-free cake, perfect for snacking, tea-time, or dessert!
5 from 1 vote
Print Recipe Pin Recipe
Prep Time 15 minutes mins
Cook Time 35 minutes mins
Total Time 50 minutes mins
Course Cakes, Dessert, Snack
Cuisine American
Servings 8 Servings
Calories 349 kcal

Ingredients


  • 1.5 cup All purpose flour
  • 1 tsp Baking Powder
  • 1/2 tsp Baking soda
  • 1/4 tsp Salt
  • 1 tsp Cinnamon powder
  • 1/2 cup Sugar
  • 1 cup Milk
  • 1 tbsp Apple cider vinegar You can use white vinegar
  • 1/2 cup Oil You can use any vegetable oil you prefer
  • 1 tsp Vanilla Extract
  • 1/2 cup Chocolate chips Plus extra for topping the batter
  • 1 tsp All-purpose flour
  • 2 tsp Sugar For sprinkling on the batter

Instructions
 

  • Preheat your oven to 180 C / 350 F. Grease an 8 x 4-inch loaf pan.
  • In a small bowl, combine the milk and vinegar. Set aside for a few minutes.
    1 cup Milk, 1 tbsp Apple cider vinegar
  • In a large bowl, sift together the all-purpose flour, sugar, baking powder, baking soda, cinnamon powder, and salt.
    1.5 cup All purpose flour, 1/2 cup Sugar, 1 tsp Baking Powder, 1/2 tsp Baking soda, 1/4 tsp Salt, 1 tsp Cinnamon powder
  • In another bowl, whisk together the milk and vinegar mixture, oil, and vanilla extract.
    1/2 cup Oil, 1 tsp Vanilla Extract
  • Pour over the dry ingredients. Mix gently.
  • Toss the chocolate chips with 1 teaspoon of flour and fold them into the batter.
    1/2 cup Chocolate chips, 1 tsp All-purpose flour
  • Pour into the prepared pan.
    Top with more chocolate chips and sugar.
    2 tsp Sugar
  • Bake at 180 C / 350 F for 30-35 minutes or until a skewer inserted in the center comes out clean.
    If the top is getting browned too fast, cover loosely with a piece of aluminum foil.
  • Let the cake cool in the pan for 10 minutes before turning it out on a cooling rack.
    Cool the cake, slice, and enjoy!

Video

Notes

  • Use room temperature ingredients. This helps the batter mix smoothly and gives an even-textured crumb.
  • Don't overmix the batter. Mix just until the wet and dry ingredients are combined.
  • Toss the chocolate chips in a little flour. This prevents them from sinking to the bottom of the cake.
  • Allow the cake to cool before slicing. This helps the cake to set and also gives cleaner slices.
  • I like to use an 8 x 4- inch loaf pan. But if I'm using a round cake pan, I prefer a 6-inch pan as it gives a thicker cake. An 8-inch is fine too, but the cake will be slightly flatter.
  • Store the cake in an airtight container for up to 3 days at room temperature or in the refrigerator for 5-6 days. If it's very hot where you live, please keep it refrigerated.

Nutrition

Serving: 1 ServingCalories: 349kcalCarbohydrates: 40gProtein: 4gFat: 19gSaturated Fat: 4gPolyunsaturated Fat: 4gMonounsaturated Fat: 10gTrans Fat: 0.1gCholesterol: 3mgSodium: 210mgPotassium: 136mgFiber: 2gSugar: 19gVitamin A: 37IUVitamin C: 0.1mgCalcium: 79mgIron: 2mg

Loaded Potato Nachos

April 25, 2020

Loaded Potato Nachos in a cast iron skillet.

These loaded potato nachos are a heaping pile of crispy, seasoned potatoes, laden with crunchy toppings, and smothered with the most drool-worthy cheese sauce. I call them an unbelievably comforting treat!

Loaded Potato Nachos in a cast iron skillet.

You can never go wrong with cheese and potatoes. The match made in heaven is universally pleasing – in any form. Given the almost inconceivable circumstances all of us are living in, I wanted to take this combo and turn it into authentic comfort food. 

So, I went all out and made loaded potato nachos. The recipe may seem like overkill, but there is a method to the madness. Somewhere under the intricate strata of crunchy veggies and ooey-gooey pleasure of cheese, you’ll find epicurean goodness.

Loaded Potato Nachos | Easy fun kid friendly recipe

How to Make Loaded Potato Nachos?

Right off the bat, let me say, that you just can’t mess up loaded potato nachos. The recipe is adaptable. You're just 4 simple steps away from this deliciousness!

1. Baking the potatoes

I thinly sliced potatoes, drizzled olive oil, tossed in salt, black pepper, cumin powder, red chilli and then baked till they were golden and crisp. 

Sliced potatoes for Loaded Potato Nachos | Easy fun kid friendly recipe
Sliced potatoes tossed in olive oil and seasoning for Loaded Potato Nachos | Easy fun kid friendly recipe

Quick notes:

I wanted a healthier substitute to store-bought nachos and since there are tons of potatoes at home, I used them. If you are, understandably, not in the mood for extra effort, good old nacho packets work equally well. 

If you do utilise potatoes, cut the slices as thin as possible, and they will bake that much faster. Also, keep the slices uniform so that they bake evenly. 

Roasted potatoes for Loaded Potato Nachos | Easy fun kid friendly recipe

2. Prepping the toppings

While the potato slices were baking, I finely chopped onions, tomatoes, olives, and green bell pepper and then mixed them with red kidney beans and corn. 

Quick notes:

Deseed the tomatoes, else the topping will be watery and the nachos limp and soggy. For the corn, frozen ones work like a charm. 

I had cooked red kidney beans leftover from the Mexican rice I made the other day. You can choose to leave out the beans or switch them for black beans or even chickpeas. 

Toppings for Loaded Potato Nachos | Easy fun kid friendly recipe

3. Making the cheese sauce

With the cheese, there are two options - either use freshly grated cheese or make a cheese sauce. I was gunning for melty cheese that pools around all the nooks and crannies of the loaded potato nachos – so the cheese sauce it was. 

I heated olive oil and butter in a pan. When the mixture is hot and bubbling, sprinkle in some flour while constantly stirring to form the roux (read: a thick paste).  

Cooking the flour is important because it takes away the raw taste. Still whisking continuously, I decanted milk. After reducing the heat, in went grated cheese, salt, pepper, chilli flakes and red chilli powder to get that gorgeous golden-orange hue of nacho sauce.

Cheese sauce for Loaded Potato Nachos | Easy fun kid friendly recipe

Quick notes:

The easy, creamy and versatile cheese sauce is also an excellent base for pasta, burgers, rice, fries or as a dipping sauce… getting the picture? Make it a go-to item in your repertoire. It refrigerates well, so you simply have to take it out and stir it in!

If you like a thin consistency to the cheese sauce, add more milk. If you love a thick, melty sauce, be liberal with the grated cheese.

4. Assembling the Loaded Potato Nachos

The homestretch and my favourite part of the loaded potato nachos is assembly. In a cast-iron pan (or any oven-friendly dish), I layered the baked potatoes, topped them with veggies and then drizzled the freshly made cheese sauce.

Layering the ingredients for Loaded Potato Nachos | Easy fun kid friendly recipe

The layers were repeated one more time to make a heaping concoction and then baked till the cheese began to bubble and brown in bits.

LAyers done for Loaded Potato Nachos | Easy fun kid friendly recipe

Quick notes:

We aren’t a cheesy family, i.e., we like it in moderation, kids included. So, I kept the cheese sauce layers on the lighter side (the leftover sauce was stored in a jar).

That said, the topmost cheese sauce layer has to be liberal because you really want it to be laden with drapes of oozing cheese.

Loaded Potato Nachos | Easy fun kid friendly recipe

Serving the Loaded Potato Nachos

The final touch was to scatter some cilantro and olives. The crispy loaded potato nachos hot out of the oven were ready to be dug in – which we did with great gusto!

Loaded Potato Nachos | Easy fun kid friendly recipe

Variations:

If you have access to avocados, the loaded potato nachos pair excellently with a big dollop of guacamole. A giant spoonful of sour cream is another great addition, as is this delicious Yum Yum sauce!

You can also top them off with jalapeños, shredded chicken, crumbled tofu, cooked minced meat, or salsa. To make it vegan, stick to shredded vegan cheese. If your heart’s set on cheese sauce, skip the butter and replace regular milk with plant-based.

Loaded Potato Nachos | Easy fun kid friendly recipe

You can serve the loaded potato nachos family style or in individual portions, both work. You can even double the portions and easily make a meal out of them – they’re that hearty.

Don't feel like roasting the potatoes, just use store-bought nachos and proceed with the recipe!

What to Serve with the Loaded Nachos

  • Mango Margarita
  • Vietnamese Iced Coffee
  • Mango Matcha Latte
  • Peach Iced Tea

Half the joy of cooking is sharing it with others. That’s why I’m always eager to hear from you. So go right ahead & drop a comment or reach out on Instagram, Pinterest, YouTube, or Facebook. I hope you love these loaded potato nachos as much as we do!

📖 Recipe

Tried this recipe?Let us know how it was!
Loaded Potato Nachos in a cast iron skillet.

Loaded Potato Nachos

Natasha Minocha
These loaded potato nachos are a heaping pile of crispy, seasoned potatoes, laden with crunchy toppings, and smothered with the most drool-worthy cheese sauce. I call them an unbelievably comforting treat!
No ratings yet
Print Recipe Pin Recipe
Prep Time 25 minutes mins
Cook Time 45 minutes mins
Total Time 1 hour hr 10 minutes mins
Course Appetizer, Side Dish, Snack
Cuisine American
Servings 4 servings
Calories 502 kcal

Ingredients
  

Roasted Potatoes

  • 4 large Potatoes, scrubbed clean and sliced thinly
  • 2 tbsp Olive oil
  • 1 tsp Cumin powder
  • 1/2 tsp Red chilli powder You can add more
  • Salt & Pepper to taste

Cheese Sauce

  • 1 tbsp Olive oil
  • 1 tbsp Butter
  • 2 tbsp All purpose flour
  • 1/2 cup Milk
  • 1/3-1/2 cup Shredded cheese
  • 1/2 tsp Red chili flakes
  • 1 tsp Paprika
  • Salt & Pepper to taste I keep the salt light here as cheese also adds saltiness

Toppings

  • 1/2 Onion, diced
  • 1-2 Tomatoes, deseeded and diced
  • 1/3 cup Cooked red kidney beans
  • 1/3 cup Corn
  • 1/2 Green bell pepper, diced
  • 8-10 Olives, chopped
  • Fresh cilantro/ coriander for sprinkling on top

Instructions
 

Roast Potatoes

  • Preheat your oven to 220 C.
  • Toss the sliced potatoes in olive oil, cumin powder, chilli powder, salt and pepper.
  • Spread in a single layer on a baking tray and roast the potatoes for about 20-25 minutes, until cooked through and crispy golden. You will have to turn them over once while they are baking.

Cheese Sauce

  • Heat olive oil and butter in a heavy bottom pan over medium heat. Add flour and seasonings. Cook, stirring, for 1 to 2 minutes or until bubbling. Lower the heat and slowly add the milk, whisking constantly till the sauce comes to a boil and thickens. Mix in the cheese. Taste and adjust for seasonings.

Assembly

  • Preheat your oven to 220 C. Keep an ovenproof baking dish ready.
  • Start with the layering - potatoes, veggies, olives, cheese sauce. Keep layering till all ingredients are used up. Finish off the top layer with cheese sauce.
  • Bake for 15-20 minutes till the cheese sauce is bubbling.
  • Sprinkle with fresh cilantro/coriander. Serve warm. Enjoy!

Nutrition

Serving: 1 ServingCalories: 502kcalCarbohydrates: 78gProtein: 13gFat: 17gSaturated Fat: 5gPolyunsaturated Fat: 2gMonounsaturated Fat: 9gTrans Fat: 0.1gCholesterol: 17mgSodium: 165mgPotassium: 1825mgFiber: 11gSugar: 7gVitamin A: 985IUVitamin C: 91mgCalcium: 149mgIron: 4mg

3 Ingredient Mango Margarita

April 23, 2020

2 glasses of mango margarita with ice, lemon, and mint.

This delicious, refreshing 3-ingredient mango margarita is the ultimate and easiest summer cocktail! Delicious and refreshing, it comes together in just 5 minutes. And, let’s be honest, there’s never a time when a margarita doesn’t sound like a good idea!

2 glasses of mango margarita with ice, lemon, and mint.

I just love cocktails with fresh fruits, be it a pomegranate mimosa, a cherry gin and tonic, or a pomegranate mojito. Cold and perfectly sweet, they’re like a tropical vacation! A good margarita is a happy mix of all three. 

That’s why I love this 3-ingredient mango margarita recipe. It mixes fresh, juicy mango flavor with some exquisite tequila and a hint of paprika-salt on the glass rim.

[feast_advanced_jump_to]

Why You’ll Love This Recipe

✨The fruity, citrusy, and boozy drink needs only 3 ingredients! No fancy syrups, no hard-to-find liqueurs. Just simple stuff you probably already have at home.

✨The refreshing, subtly spiced, and seriously delicious cocktail is ready in 5 minutes, perfect for a lazy day.  

✨It’s easily customizable. You can make a mango margarita on the rocks or frozen, or even add fruits.

Mango Margarita Ingredients

Mango: I used mango juice to make this margarita. If you can get your hands on fresh mango juice, excellent; otherwise, use the regular packaged juice. Mango puree works too (fresh or canned).

Tequila: Pick the best quality tequila you can get. A well-made and aged tequila is smooth with agave flavors. Its taste is earthy, very mildly peppery with suggestions of citrus and tiny fruity notes. A good margarita is one that brings all these flavours into the drink.

Garnish: Chili salt on the rim elevates everything! Trust me on it. However, the paprika is optional if you don’t want a spicy mango margarita.

See the recipe card for full information about the ingredients and quantities.

Variations

Triple sec or Cointreau: Either or both are added in a classic margarita. So, please mix them in if you want.

Frozen mangoes: Use frozen mangoes in place of mango juice. Blend all the ingredients in a blender to make a frozen mango margarita!

Fruits: Don't want to use mangoes? Try pineapple, watermelon (do try watermelon iced tea next), peaches, or strawberries. Of course, it won’t be a mango margarita then, but it’ll still be a fantastic cocktail. 

Lemon: If you like a bit of tang to your cocktail, add freshly squeezed lemon juice. It balances the sweetness of the mango and brings that classic margarita zing. 

2 glasses of mango cocktails on a silver tray.

How To Make Mango Margarita?

Step 1: Make a mixture of sea salt and paprika on a plate.

A white plate with paprika and salt mixture.

Step 2: Dip the rim of a glass in lemon juice. And then dip into the salt-chili mixture.

Step 3: In a shaker or glass (work with what you have at home), combine mango juice and tequila.

Step 4: Pour in the prepped glass. Top with ice.

Step 5: Garnish with a mint leaf and a wedge of lemon.

Final step: Serve and enjoy!

Pro Tips

  • The trick to a good mango margarita recipe is to use a good-quality tequila.  
  • Like sweeter drinks? Increase the amount of mango juice. Or add some simple syrup.
  • You can use packaged or fresh mango juice. Mango puree will also work well.
  • Have frozen mangoes? Make it a frozen mango margarita recipe by blending all the ingredients in your blender. It makes a delicious, thirst-quenching, and slushy margarita!
2 glasses of mango margarita with paprika salt on the rims on a tray.

How To Serve

Any good cocktail is best served chilled. I love to serve the mango margarita on the rocks with a mint leaf and a lemon wedge. The clash of bright green, fresh yellow, and summery orange looks just so beautiful. The hint of red from the paprika rounds off the effect!

The 3-ingredient cocktail is perfect for lazy brunches – serve it with Mexican rice or loaded potato nachos! Or with tacos and smashed potatoes on a weekend barbecue. I love to pair it with chips dipped in creamy avocado dip or roasted red pepper sauce. 

Recipe FAQs

What's in a mango margarita cocktail?

Typically, a mango margarita has tequila, mango, lime juice, and ice. Triple sec or Cointreau is also added. This recipe doesn’t include them because I love this simple version so much!

How to rim a glass for margaritas?

Spread some salt on a plate. Rub a lime wedge around the rim of your glass. Dip in margarita salt until coated. I used a combination of paprika and sea salt for this recipe.

What is the 321 rule for margaritas?

The 3-2-1 rule is a classic margarita ratio that keeps the flavors balanced. For every 3 parts of tequila, add 2 parts Triple Sec or Cointreau and 1 part lime juice.

More Refreshing Summer Drinks

  • Peach Iced Tea
    Easy Homemade Peach Iced Tea
  • Mulberry Sharbat
    Mulberry Sharbat
  • Easy Korean Strawberry Milk
    Easy Korean Strawberry Milk
  • The Perfect Mango Matcha Latte
    The Perfect Mango Matcha Latte

Half the joy of cooking is sharing it with others. That’s why I’m always eager to hear from you. So go right ahead & drop a comment or reach out on Instagram, Pinterest, YouTube, or Facebook. I hope you love this 3-ingredient mango margarita as much as we do!

📖 Recipe

Tried this recipe?Let us know how it was!
2 glasses of mango margarita with ice, lemon, and mint.

3 Ingredient Mango Margarita

Natasha Minocha
This delicious, refreshing 3-ingredient mango margarita is the ultimate and easiest summer cocktail! Delicious and refreshing, it comes together in just 5 minutes!
No ratings yet
Print Recipe Pin Recipe
Prep Time 5 minutes mins
Total Time 5 minutes mins
Course Drinks
Cuisine Mexican
Servings 1 Serving
Calories 108 kcal

Ingredients
  

  • 45 ml Tequila
  • 1/2 cup Mango juice
  • 3-4 Ice cubes
  • 1 tsp Sea salt
  • 1/2 tsp Paprika Optional
  • Lemon wedges and Mint to garnish Optional

Instructions
 

  • Make a mixture of sea salt and paprika. Place in a plate.
  • Run a wedge of lime on the rim of your glass. And then dip into the salt-chili mixture, rotating the glass until the rim is well-coated..
  • Combine the tequila, mango juice in a cocktail shaker or a glass.
  • Pour into the prepared glass and top with ice.
  • Garnish with a mint leaf and a wedge of lemon. Cheers!

Notes

  • The trick to a good mango margarita recipe is to use a good-quality tequila.  
  • Like sweeter drinks? Increase the amount of mango juice. Or add some simple syrup.
  • You can use packaged or fresh mango juice. Mango puree will also work well.
  • Have frozen mangoes? Make it a frozen mango margarita recipe by blending all the ingredients in your blender. It makes a delicious, thirst-quenching, and slushy margarita!

Nutrition

Serving: 1 ServingCalories: 108kcalCarbohydrates: 1gProtein: 0.1gFat: 0.1gSaturated Fat: 0.02gPolyunsaturated Fat: 0.1gMonounsaturated Fat: 0.02gSodium: 2328mgPotassium: 23mgFiber: 0.3gSugar: 0.1gVitamin A: 493IUVitamin C: 0.01mgCalcium: 5mgIron: 0.2mg

Easy Mexican Rice

April 22, 2020

Easy Mexican Rice in a serving dish.

Bold and flavourful, my easy Mexican rice is loaded with a complex tomato flavor infused with gorgeous spices. Each grain has just the right amount of bite, heat and an underlying hint of tang!

Easy Mexican Rice in a 
 serving dish.

Lazing around after binging on some damn good food – that’s the mood I was aiming for last night.

But, how do you have a fiesta when you’re stuck at home?

You pour a beer or lemonade or margarita (pick your poison) and serve it with colorful and seriously flavourful Mexican rice.

Easy Mexican Rice | Healthy Vegan Gluten-free Recipe

Like most rice dishes, Mexican Rice uses the most basic of ingredients and is unbelievably easy to make. The prep and the cooking barely take any time.

So, shall we?

How to Make Mexican Rice?

In a pan heat oil and sauté diced onions and garlic for about a minute.

Sauté onion and garlic for Easy Mexican Rice | Healthy Vegan Gluten-free Recipe

To the sautèed onions, add the rice and let that cook for a minute. Keep stirring it gently so it doesn't stick to the bottom of the pan.

Add rice Easy Mexican Rice | Healthy Vegan Gluten-free Recipe

Now you add in the salt, smoked paprika, cumin powder, and chili powder. I used our good old Degi Mirch powder..it gives a wonderful color and flavor.

Add the spices Easy Mexican Rice | Healthy Vegan Gluten-free Recipe

Give this a good mix and stir in some tomato puree and vegetable stock. You can use store bought puree, but i just made some at home with 3 tomatoes .

Add veg stock and tomato puree Easy Mexican Rice | Healthy Vegan Gluten-free Recipe

Also, use chicken stock, if you want or plain water will do too.

Now is the time for the veggies. I used green bell peppers and corn. That's what I had on hand. And oh, also a cup full of red kidney beans went in to make the dish livelier and heartier.

Add the veggies and red kiney bean Easy Mexican Rice | Healthy Vegan Gluten-free Recipe

Now everything gets a good mix and lid on for cooking! Let it cook until the rice is soft and tender. That’s it! Mexican rice is an easy, one-pot recipe that’s done in a jiffy.

All those who struggle with rice dishes or don’t think that you can do much with the grain will be delightfully surprised. Mexican rice cooks up beautifully and tastes exquisitely amazing!

Cooked Easy Mexican Rice | Healthy Vegan Gluten-free Recipe

Quick notes

For the rice, any long-grain white rice will work like a charm in the recipe. I had basmati at home, so in they went. For the stock, both vegetable and chicken stock are great – pick your preference. Since there was some homemade veg stock in my fridge, I used that.

You can use water to make Mexican rice, but nothing beats stock. It’s the rich flavor of the chicken or vegetable that the rice absorbs as it cooks, which takes the dish from good to great.

I especially added kidney beans to the recipe because they give you that extra protein and fiber. Plus, rajma is one ingredient every home has. You can use any kind of beans you like - black beans or black-eyed peas...or just leave it out altogether.

If you have some chicken or sausages handy, go ahead, and add that to the rice too.

Serving Mexican Rice

I prefer to cook Mexican rice when my kiddos start grumbling about regular and often unvarying typical Indian meals. The colorful recipe makes for a nice and pleasant change.

So, at my table, you will always find the tomato-flavored rice with a wonderful hint of spices as is. All I add is a dash of lemon and some freshly chopped cilantro to bring out the simple yet delicious taste of it.

And, honestly, the kidney beans give Mexican rice a heft that takes it from a humble side dish to a hearty and satisfying main dish. That said, you can always use the rice as a delectable filling for tacos, quesadillas, or burritos!

You can serve it with some guacamole or salsa too.

No matter how you serve Mexican rice, the recipe is a keeper. The best part is you can tweak and adapt it to your taste, or use it as-is. It’s pretty close to perfect.

Easy Mexican Rice | Healthy Vegan Gluten-free Recipe

Half the joy of cooking is sharing it with others. That’s why I’m always eager to hear from you. So go right ahead & drop a comment or reach out on Instagram, Pinterest, YouTube, or Facebook. I hope you love this easy Mexican rice recipe as much as we do!

📖 Recipe

Tried this recipe?Let us know how it was!
Easy Mexican Rice in a serving dish.

Easy Mexican Rice

Natasha Minocha
Bold and flavourful, my easy Mexican rice is loaded with a complex tomato flavor infused with gorgeous spices. Each grain has just the right amount of bite, heat and an underlying hint of tang!
5 from 2 votes
Print Recipe Pin Recipe
Prep Time 15 minutes mins
Cook Time 25 minutes mins
Total Time 40 minutes mins
Course Main Course, Side Dish
Cuisine Mexican
Servings 6 servings
Calories 286 kcal

Ingredients
  

  • 1.5 cups Rice, washed, soaked for 15 minutes and drained
  • 2 tbsp Olive oil
  • 1.5 small Onions, diced
  • 4-5 cloves Garlic, minced
  • 1 tsp Cumin powder
  • 1 tsp Red Chili powder I used Degi Mirch powder
  • 1 tsp Smoked paprika
  • 1 cup Tomato puree I made my own using 3 large tomatoes
  • 2 cups Vegetable stock You can use chicken stock or plain water
  • Salt to taste
  • 3/4 cup Corn
  • 1 small Green bell pepper, diced
  • 3/4 cup Cooked red kidney beans
  • Fresh cilantro/ coriander and lemon wedges for serving

Instructions
 

  • Heat oil in a large pan. Add the diced onions and garlic. Sauté for 2-3 minutes.
  • Add the drained rice and stir it gently with the onions and garlic for a minute.
  • Stir in the salt, chili powder, cumin powder and smoked paprika.
  • Now add the stock and tomato puree.
  • Mix in the vegetables and kidney beans.
  • Bring to a boil, then cover and lower the heat. cook for about 25 minutes or until the rice is cooked through.
  • Garnish with fresh cilantro/coriander leaves and lemon wedges. Serve warm. Enjoy!

Nutrition

Serving: 1 ServingCalories: 286kcalCarbohydrates: 53gProtein: 6gFat: 6gSaturated Fat: 1gPolyunsaturated Fat: 1gMonounsaturated Fat: 4gSodium: 398mgPotassium: 425mgFiber: 4gSugar: 5gVitamin A: 760IUVitamin C: 18mgCalcium: 42mgIron: 2mg

Almond Date Granola

April 16, 2020

Almond Date Granola | Easy Breakfast Recipe

Deliciously crunchy, naturally sweetened, and a powerful punch of nutrients are not the reasons why I am sharing the Almond Date Granola recipe. It is the freedom to put in what you like and have that makes it perfect for these days!

Almond Date Granola | Easy Vegan Breakfast Recipe

We gave up on packaged breakfast cereals many moons ago for the simple reason that what is advertised as “healthy multigrain cereal” is sugar-laden, high in sodium, and full of preservatives.

Next time you are shopping for packaged foods sold in the garb of “health food,” take a minute. Read the labels. When you can’t pronounce or recognize more than half the words in the ingredient list, that would be a good time to put that box back where it belongs. And that’s not your cart!

All it took on my part was a little bit of research to realize what all goes in these cereals, which made eating them no longer an option. That left me with a conundrum. I had to figure out how to make some kick-ass, absolutely delicious breakfast cereal at home.

I did what any sane person does and took to Google. In 0.0005 secs flat I had some 986548 recipes for granola. There were many trials and errors, some burnt, some dry, some soggy, and some completely flavorless. But once I started making almond date granola, there was no looking back.

Over the years, I made many versions of it - matcha granola, and banana granola. I even moved on to granola tarts !

But the almond date granola is what we all love. And I’m finally sharing the recipe with you.

Almond Date Granola | Easy Vegan Breakfast Recipe

How to Make Almond Date Granola at Home?

For the sake of clarity, let me put it out there that my entire family is unabashedly in love with homemade granola. Our devotion to it is quite intense. We eat it ALL THE TIME! For breakfast, for an afternoon or evening snack, for dessert…I swear somebody’s hand is always in the granola jar.

But this almond date granola holds its special place for two reasons – it is easy to make and I can replace any of the ingredients depending upon what I have in hand.

Ingredients for Almond Date Granola | Easy Vegan Breakfast Recipe

Begin by mixing all the dry ingredients - rolled oats, puffed rice, popped amaranth, pumpkin, and sunflower seeds. Chop in a handful of chopped almonds and walnuts. Finish it off by sprinkling cinnamon for that lovely sweet earthy flavor.

making of Almond Date Granola | Easy Vegan Breakfast Recipe

Whisk these with coconut oil, honey, and vanilla extract mixture – you’ll end up with a wet sand sort of texture. Put it on a baking tray and then let the oven do all the work!

Process of making Almond Date Granola | Easy Vegan Breakfast Recipe

Ready for the oven Almond Date Granola | Easy Vegan Breakfast Recipe

Serving almond date granola

The granola is healthy, crunchy, and just the right amount of sweet. The best part is you get to control the amount of sugar, salt, and fats that go in it.

As you slide the granola out of the oven, the fabulous aroma of cinnamon will hit you. Immediately stir in the chopped dates and cranberries into the hot granola mix and let cool.

Almond Date Granola | Easy Vegan Breakfast Recipe

Once cooled, enjoy with cold milk or cool creamy yogurt with some fresh fruits.

Yogurt with fruits and Almond Date Granola | Easy Vegan Breakfast Recipe

Add on top of chia pudding to make a wonderful breakfast or snack jar.

Mango Chia Pudding with Almond Date Granola | Easy Vegan Breakfast Recipe

The lightly sweetened, toasted oats, roasted, crispy nuts, chewy soft bits of dates and cranberries along with the tad bit of nuttiness of coconut oil, and the nutrient quotient of the seeds hits all the right spots.

What Can I Use Instead?

Chances are that you may not have all the ingredients I used. However, each of them will be readily available at any supermarket or online. But still, if you’re scrambling to find a particular one, worry not.

The wonderful thing about granola is freedom of choice. Here’s what you can substitute them for.

No cranberries? Then, by all means, use raisins, chopped apricots, or any other dry fruit of your choice. No coconut oil? You can certainly swap it for butter or any neutral flavored, vegetable oil.

No rolled oats? Simply use the regular, instant oats, but remember to cut down on baking time because these cook lightning fast! All out of almonds? Throw in any nuts you have lying in the pantry.

Don’t have any dates? Then raisins will do in a pinch! Can’t find any pumpkin or sunflower seeds. Make use of those ever-present melon seeds or sesame seeds.

No cinnamon powder; use the lovely floral-scented cardamom powder.

Almond Date Granola | Easy Vegan Breakfast Recipe

The almond date granola is not a fancy recipe. But I keep coming back to it because it gives me the satisfaction of knowing where my food is coming from and what everyone in my home is putting in their body.

It’s a step towards mindful cooking and eating, without compromising on taste. These days I usually make a big batch of it. Between the four of us, we can have one serving each day and it still lasts a long time.

I advise doubling (or halving) the recipe to fit your family size and then storing it in an air-tight container. The staying power of almond date granola is truly unmatched!

Almond Date Granola | Easy Vegan Breakfast Recipe

Half the joy of cooking is sharing it with others. That’s why I’m always eager to hear from you. So go right ahead & drop a comment or reach out on Instagram, Pinterest, YouTube, or Facebook. I hope you love this almond-date granola as much as we do!

📖 Recipe

Tried this recipe?Let us know how it was!
Almond Date Granola | Easy Breakfast Recipe

Almond Date Granola

Natasha Minocha
This almond date granola is deliciously crunchy, naturally sweetened, and packed with healthy ingredients. So easy to make, this homemade granola rivals any store-bought one!
No ratings yet
Print Recipe Pin Recipe
Prep Time 10 minutes mins
Cook Time 40 minutes mins
Total Time 50 minutes mins
Course Breakfast, Snack
Cuisine American
Servings 12 Servings
Calories 214 kcal

Ingredients
  

  • 2 cups Rolled oats
  • 1/2 cup Puffed Rice
  • 1/4 cup Popped Amranth
  • 1/4 cup Almonds, chopped
  • 1/4 cup Walnuts, chopped
  • 2-3 tbsp Pumpkin seeds
  • 2 -3 tbsp Sunflower seeds
  • 1 tsp cinnamon powder
  • 1/2 cup Honey/ maple syrup
  • 1/3 cup Coconut oil You can use butter or any neutral flavoured oil
  • 2 tsp Vanilla extract
  • 2-3 tbsp Cranberries
  • 8-10 Dates, pitted and chopped

Instructions
 

  • Preheat the oven to 170 C. Line a baking sheet with baking paper.
  • Mix all the dry ingredients - rolled oats, nuts, seeds, cinnamon powder, in a large bowl.
  • Lightly heat honey and coconut oil in a small saucepan. Take it off the heat and add the vanilla extract.
  • Pour this over your dry ingredients, mix well. The mixture should have the consistency of wet sand. Spread this mixture evenly onto the prepared baking sheet.
  • Bake, stirring every 10-15 mins, for about 40-45 mins. The granola should be fragrant, look all golden and toasty. Once you’ve taken the tray out of the oven, stir in the dates and cranberries. Let it cool completely.
  • Store in an airtight container. Serve with milk or yogurt. Enjoy!

Nutrition

Serving: 1 ServingCalories: 214kcalCarbohydrates: 27gProtein: 4gFat: 11gSaturated Fat: 6gPolyunsaturated Fat: 3gMonounsaturated Fat: 2gTrans Fat: 0.002gSodium: 2mgPotassium: 144mgFiber: 3gSugar: 15gVitamin A: 4IUVitamin C: 1mgCalcium: 24mgIron: 1mg

Easy Everyday Bread

April 15, 2020

Sliced bread with butter and jam on a wooden board.

Making bread at home doesn’t have to be complicated. This soft and golden, easy everyday bread is proof! Quick to make, beginner-friendly, and super versatile, this recipe is a keeper! 

Sliced bread with butter and jam on a wooden board.

A good loaf of everyday bread doesn’t require fancy equipment, exotic ingredients, or a lot of thought. All it asks for is a bit of your time to lead you into the wonderful world of yeasty things - golden on the outside and soft in the middle!

This everyday bread is an old favorite of ours. I’ve been making it for years, the recipe uses basic pantry items, and is ready in 3-4 hours (in the bread world, that's fast!).

[feast_advanced_jump_to]

Why You’ll Love This Recipe

✨ This bread is perfect for anyone to try out. For beginners, it's a simple one with basic ingredients and an easy technique for bread making. 

✨ This recipe is wonderful for seasoned bakers, too. It is a blank canvas for experimenting with flavors!

✨ This simple homemade bread recipe is easily customizable. Add herbs, spices, cheese, seeds, nuts - make it your own every time!

✨ It delivers that bakery-style texture every single time! Soft on the inside with a golden crust, so satisfying!

✨ No complicated steps, no equipment, you can easily knead the dough by hand or simply let your stand mixer do the job. 

✨ Versatile for every meal- use it to make sandwiches, dip it in soup, or just enjoy with butter and jam!

✨ You can use the leftover bread to make crostini,  classic French toast, or veggie breakfast casserole!

Reader Love ❤️

I made this both with AP and AP + WW flour, both times was really good! This is my new favorite bread recipe, thank youuu - Matt

I make this weekly, following your recipe to the T! Best bread, ever. Thank you so much for sharing! - Sandra

I made this with 100% AP flour, turned out so good! Thanks for the recipe, really simple to follow - Ayesha

Recipe Ingredients

Labelled ingredients for making easy homemade bread.

Flour: I use a combination of all-purpose and whole wheat flour in this recipe. But you can use 100% of either of the flours with great results!

Yeast: You can use active dry yeast or instant yeast to make this easy bread. Always test it to make sure it's fresh, though. Dissolve 1/2 a teaspoon in 1/2 cup of warm water. If it becomes frothy and bubbly, in 5 -10 minutes, the yeast is good to go!

Water: The ideal temperature at which yeast blooms is 105°F (40.5 °C). So, use warm water—not hot, not cold. Hot water will kill your yeast. Cold water will not activate it.

Salt: To add flavor to this artisanal bread!

Olive oil: I have used a small quantity of olive oil here for better flavor and to make a softer bread.  

Please see the recipe card below for full information about ingredients and quantities.

Variations

This recipe is fabulously versatile!

You can add shredded cheese and chopped garlic to the dough. Or maybe some red chili flakes. Add some fresh herbs or even dried ones. Chop some olives and sundried tomatoes and mix them in.

How about some seeds and finely chopped nuts? This bread holds up very well and produces great results every single time.

Note: Please add the nuts, cheese, olives, sundried tomatoes, or jalapenos after the first dough rise. But you can add the spices and herbs at the time of kneading the dough the first time.

How To Make Easy Everyday Bread

Bubbly yeast water mixture in a cup.

Step 1: In a small bowl, dissolve the yeast and sugar in the water. Let it stand for 10 minutes until foamy.

Yeast mixture in a mixing bowl with flour.

Step 2: In a large bowl, mix the flours and salt. Make a well in the center and add olive oil and the bubbly yeast mixture.

Bread dough on a pink silicone sheet.

Step 3: Mix well with a fork or a dough whisk till a rough dough forms. Flour your work surface well, turn out the dough onto it.

Kneaded bread dough in a mixing bowl.

Step 4: Knead for 10-12 minutes until you get a smooth, soft, slightly sticky dough. Form the dough into a ball and transfer to a lightly oiled bowl.

Proofed bread dough in a mixing bowl.

Step 5: Cover and leave the dough to rise in a warm, draft-free spot for  1 -2 hours or until it doubles.

Rolled out dough on a silicone sheet.

Step 6: Once it's doubled, punch the dough down and knead it again for about a minute on a lightly floured surface. Pat the dough to make a 12" square.

Bread dough in a baguette shape on a parchment-lined tray.

Step 7: Roll the dough into a tight log to make a baguette shape. Crimp the edges to seal. You can also use a rolling pin to roll out the dough. Place it on a baking paper-lined tray. 

Scored baguette shaped bread dough on a tray.

Step 8: Cover the loaf loosely with a kitchen towel and let it rise in a draft-free spot for 30-40 minutes until it doubles in size. Make 4-5 slashes with a sharp knife on the loaf.

Baked loaf of bread on parchment paper.

Step 9: Bake the loaf for 30-40 minutes or until it is golden brown and sounds hollow when tapped on the bottom. Cool the bread for at least 1 hour before slicing.

Top Tips

  • Don’t use hot water. You want it slightly warm at about 105°F or 40.5 °C.
  • Make sure the yeast you are using is active. How to check if it's active? Dissolve ½ tsp of yeast in half a cup of warm water with half a teaspoon of sugar. Stir and let it sit in a draft-free place for 10 minutes. If it's bubbly and foamy, it’s good to use!
  • Do knead the dough for 10-12 minutes. The more you knead, the more gluten strands develop. A well-kneaded dough will give you a well-risen, softer, and fluffier bread.
  •  Avoid adding too much extra flour while kneading. Add just enough that will give a dough that is soft, supple, and slightly sticky to the touch.
  • If you are kneading by hand and getting tired, you can cover the dough with a damp towel about halfway through and take a 5-6 minute break. Continue kneading till the dough is ready. 
  • You can also knead this dough in a stand mixer for 8-10 minutes.
  • The bread dough is done when you poke it, and it springs back gradually. If the indentation stays, you need to keep kneading.
  • This dough is supple and pliable enough to shape into any shape you like. For this bread, we like the baguette shape; however, you can shape it into a boule or even bake it in a 9-inch round baking tin. 
  • Brush the top with butter or olive oil to keep the crust soft. Let the bread cool on a cooling rack for at least an hour before slicing.
  • Please use a kitchen scale to measure the ingredients. It’s a more accurate way to bake bread and will help you get better and consistent results every time.
Half a loaf of bread and sliced bread with butter and jam on a board.

How To Serve The Easy Everyday Bread

This is a lovely loaf that pairs well with soups and salads, and it’s perfect for mopping up curries and dals. Try it with my keema aloo curry, creamy roasted pumpkin soup, and smashed chickpea salad.

It makes for wonderful sandwiches and toasts - great for any time of the day.

It's also a fantastic bread to serve with olive oil and balsamic vinegar for dipping.

Serve it alongside fried pickle dip, creamy avocado dip, or some marinated tomatoes. So yum!

And of course, eating thick, warm slices with soft butter and jam is what we love doing. I don't know anyone who can resist this! Try this soft homemade bread with my homemade fig jam, strawberry chia jam, or apple butter.

A slice of bread with butter and jam on a small plate.

Recipe FAQs

What kind of yeast do I need to use for making bread from scratch?

You can use active dry yeast or instant yeast for making bread. They can be used interchangeably. The important part here is to check if the yeast is active.
Sometimes we have forgotten packs of yeast lying at the back of our kitchen cabinets. Do check for expiry dates, and even if they are not expired, check if the yeast is active. How?
Add some yeast to just barely warm water with half a teaspoon of sugar. Stir and let it sit in a draft-free place for 10 minutes. If it bubbles up nicely, go ahead and use it.

Can I make this every day bread in any other shape?

Yes! This bread dough is very pliable, and while we love this everyday bread in a baguette form, you can easily shape it into a boule. You can also bake it in a 9-inch round cake pan. You can also shape it into buns or rolls if you like!

How can I knead bread dough by hand?

Here’s how you can knead dough by hand:
- Begin by pushing the dough away from you, using the heels of your hands. - - Then fold over half the dough towards you, press down, and again push outwards.
- Turn it sideways and continue with the kneading. Keep turning and kneading till the dough feels soft, elastic, and slightly tacky.
You are lengthening and strengthening the gluten strands in this process. This creates a structure for the gases to get trapped and the dough to rise.

How to store the easy everyday bread?

This bread stays well in an air-tight container for up to 3 days on the countertop. You can also refrigerate it for up to 5 days. 
This bread also freezes beautifully. Slice it and freeze it in an air-tight container or a bag for up to 1 month. Just pop the frozen bread slices in your toaster!

More Easy Bread Recipes

  • A loaf of sandwich bread on a wooden board.
    My Favorite Easy Sandwich Bread
  • Easy Olive Bread
    Easy Olive Bread
  • mini no-knead focaccia
    Mini No-Knead Focaccia
  • Sourdough discard bread on a cloth napkin.
    Easy Sourdough Discard Bread

Half the joy of cooking is sharing it with others. That’s why I’m always eager to hear from you. So go right ahead and drop a comment or reach out on Instagram, Pinterest, YouTube, or Facebook. I hope you love this Easy Everyday Bread as much as we do!

📖 Recipe

Tried this recipe?Let us know how it was!
Sliced bread with butter and jam on a wooden board.

Easy Everyday Bread

Natasha Minocha
Making bread at home doesn’t have to be complicated. This soft and golden, easy everyday bread is proof! Quick to make, beginner-friendly, and super versatile, this recipe is a keeper! 
5 from 6 votes
Print Recipe Pin Recipe
Prep Time 3 hours hrs
Cook Time 30 minutes mins
Total Time 3 hours hrs 30 minutes mins
Course Bread
Cuisine World
Servings 14 Slices
Calories 77 kcal

Ingredients


  • 1.5 tsp Active dry yeast
  • 1 tsp Sugar
  • 1 cup Warm water at 45C or 105F You may need more
  • 1 cup Wholewheat flour
  • 1 1/4 cup All-purpose flour
  • 1 tsp Salt
  • 1 tbsp Olive oil You can use melted butter or any neutral tasting oil
  • Extra flour for dusting the surface

Instructions
 

  • In a small bowl, dissolve the yeast and sugar in the water. Let it stand for 10 minutes until foamy.
    1.5 tsp Active dry yeast, 1 cup (240 ml) Warm water at 45C or 105F
  • In a large bowl, mix both the flours and salt.
    1 cup (130 g) Wholewheat flour, 1 1/4 cup (156 g) All-purpose flour, 1 tsp Salt
  • Make a well in the center and add olive oil and the bubbly yeast mixture.
    1 tbsp Olive oil
  • Mix well with a fork or your hand till a rough, shaggy dough forms.
  • Flour your work surface well, turn out the dough onto it. Use the heels of your hands to push the dough away from you, then fold it over halfway, press it down, and push it away again.
    Turn the dough sideways and repeat this process. Keep turning and kneading until the dough is soft, supple, and just a tad sticky. This will take about 10-12 minutes.
    You can also knead the dough in a stand mixer for 8-10 minutes.
  • Form the dough into a ball and transfer to a lightly oiled bowl. Cover and leave the dough to rise in a warm, draft-free spot for 1 -2 hours or until it doubles.
  • Once it's doubled, punch the dough down and knead it again for about 1 minute.
    Roll out the dough into a rough 12" square. Roll it up tightly to make a baguette shape. Pinch the edges to seal.
    You can also shape it into a ball. You can also place the dough in a round baking pan.
  • Place the shaped dough on a baking paper-lined tray.
  • Cover the loaf loosely with a kitchen towel and let it rise in a draft-free spot for 30-40 minutes until it doubles in size.
  • Preheat your oven to 250C/ 482 F. Make 4-5 slashes with a sharp knife on the loaf.
    Put the tray in the oven and lower the heat to 220C/ 430 F. Bake the loaf for 30-40 minutes or until it is golden brown and sounds hollow when tapped on the bottom.
  • Brush the top with butter or olive oil to keep the crust soft. Let the bread cool on a cooling rack for at least an hour before slicing.

Video

Notes

  • Don’t use hot water. You want it slightly warm at about 105°F or 40.5 °C.
  • Make sure the yeast you are using is active. How to check if it's active? Dissolve ½ tsp of yeast in half a cup of warm water with half a teaspoon of sugar. Stir and let it sit in a draft-free place for 10 minutes. If it's bubbly and foamy, it’s good to use!
  • Do knead the dough for 10-12 minutes. The more you knead, the more gluten strands develop. A well-kneaded dough will give you a well-risen, softer, and fluffier bread.
  •  Avoid adding too much extra flour while kneading. Add just enough that will give a dough that is soft, supple, and slightly sticky to the touch.
  • If you are kneading by hand and getting tired, you can cover the dough with a damp towel about halfway through and take a 5-6 minute break. Continue kneading till the dough is ready. 
  • You can also knead this dough in a stand mixer for 8-10 minutes.
  • The bread dough is done when you poke it, and it springs back gradually. If the indentation stays, you need to keep kneading.
  • This dough is supple and pliable enough to shape into any shape you like. For this bread, we like the baguette shape; however, you can shape it into a boule or even bake it in a 9-inch round baking tin. 
  • Please use a kitchen scale to measure the ingredients. It’s a more accurate way to bake bread and will help you get better and consistent results every time.

Nutrition

Serving: 1 SliceCalories: 77kcalCarbohydrates: 14gProtein: 2gFat: 1gSaturated Fat: 0.2gPolyunsaturated Fat: 0.2gMonounsaturated Fat: 1gSodium: 84mgPotassium: 25mgFiber: 1gSugar: 0.2gVitamin A: 1IUVitamin C: 0.001mgCalcium: 4mgIron: 1mg

Lemon Rice

April 13, 2020

Lemon Rice | How To Make Lemon Rice | Easy Vegan Gluten-Free Recipe

Lemon rice is the quick recipe you’ve been looking for! It takes a boring leftover and turns it into a light, tangy, crunchy, and delicious dinner with zilch effort.

Traditionally, lemon rice is South Indian cuisine, but it has inched its way to most tables in the country. Why? Because it is a pleasure to cook (read: no effort) and because a squeeze or two of lemon makes everything better!

It is for these very reasons that lemon rice is the perfect recipe to try right now. A quick and easy preparation, it’ll makes you mouth water with fresh, tangy and distinct flavours. 

How to Make Lemon Rice?

If you have leftover rice, then lemon rice is a one-step recipe. Seriously, it’s that elementary. If you don’t have pre-cooked rice, then your first step is to cook them and cool them. Once that’s done, temper the rice with spices, and you have a light and hearty meal ready in minutes.

Tempering

We start with heating oil in a big-ish pan.

In this hot oil, peanuts get roasted till golden and crunchy. Take them out (we add them back later on) and then throw in the mustard seeds along with chana and urad dal till they get that beautiful golden hue. In quick succession, throw in the pan curry leaves, green chilies, and dried red chilies.

When the seeds start popping and spluttering, turn off the heat and add in the leftover (or freshly cooked and cooled) rice. Mix well because it is when each rice grain is flawlessly coated with the tempering that you achieve that lovely spiciness of lemon rice.

Adding the tangy relish

Now comes the best part of lemon rice: squeezing in the lemons.

Use the juice of two whole lemons. Be generous because you really want that tang and zest to shine through. If you love the bite and sharpness of lemon, go ahead and increase the amount of juice a tad bit. The spices of the tempering will complement the sourness of lemon excellently. 

The final step is to garnish with the roasted peanuts and get that wonderful balance of crunch and kick!

Quick notes

Soak the chana dal and urad dal for ten minutes and drain them before adding to the tempering. To save time, let them soak while you boil the rice. 

If you can’t get your hands on fresh curry leaves, dried ones will do in a pinch. For the rice, I prefer a Sona Masoori grain, but Basmati works just as well too. 

Serving the rice

Lemon rice is a straightforward recipe that’s why it is fabulous for a quick lunch or dinner. Just like the making, the serving of lemon rice requires zilch effort.

Serve it as is. The burst of flavours from the spices and lemon and the crispy elements of peanuts make it a delicious meal.

If you want a more substantial serving, plain, thick yogurt or raita makes for an excellent accompaniment. A slice of pickle, some dal and a few papads with lemon rice will give you a filling meal.

Variations of Lemon Rice

Lemon rice has simple and clean flavours, but if you want to take it up a notch add cumin for a smoky touch or coriander for a refreshing taste. 

Instead of peanuts, toss in roasted cashews or almonds in the rice to keep that crunch. If you love the nutty note coconut brings, garnish the lemon rice with shreds of it.

The very fact that lemon rice is not only quick to cook but also customizable to the palate makes it one of my preferred meals these days. I hope the easy-peasy recipe finds its way to your table soon!

More Easy Flavored Rice Recipes:

  • Raw Mango Rice
  • Coconut Rice
  • Mexican Rice

Half the joy of cooking is sharing it with others. That’s why I’m always eager to hear from you. So go right ahead and drop a comment or reach out on Instagram, Pinterest, YouTube, or Facebook. I hope you love this easy homemade lemon rice recipe as much as we do!

📖 Recipe

Tried this recipe?Let us know how it was!
Lemon Rice | How To Make Lemon Rice | Easy Vegan Gluten-Free Recipe

Lemon Rice

Natasha Minocha
Lemon rice is the quick recipe you’ve been looking for! It takes a boring leftover and turns it into a light, tangy, crunchy and delicious dinner with zilch effort.
No ratings yet
Print Recipe Pin Recipe
Prep Time 25 minutes mins
Cook Time 10 minutes mins
Total Time 35 minutes mins
Course Main Course, Side Dish
Cuisine Indian, South Indian
Servings 4 Servings
Calories 282 kcal

Ingredients
  

  • 2 tbsp Sesame or groundnut oil Use any vegetable oil if you don't have these
  • 3 tbsp Peanuts
  • 1.5 tsp Mustard seeds
  • 1 tsp Chana dal
  • 1 tsp Urad dal
  • 12-15 Curry leaves
  • 1 Green chili pepper, finely chopped
  • 2 Dried red chili peppers
  • 1 tsp Turmeric powder
  • Salt to taste
  • 3 cups Cooked rice I used Sona Masuri. You can use Basmati too.
  • Juice of 2 lemons

Instructions
 

  • Soak the chana dal and urad dal in water for 10-15 minutes.
  • Heat oil in a large pan. Add peanuts and roast till golden brown. Take them out and keep aside.
  • To the same oil, add the soaked, drained dals along with mustard seeds.
  • When the dals are golden brown, add the curry leaves, red chillies and green chillies. Cook for a few seconds and add the turmeric powder and salt.
  • Turn the heat off and mix in the rice and roasted peanuts. Mix well. Add the lemon juice.
  • Taste and adjust for seasoning and lemon juice according to your preference.
  • Serve warm immediately with raita, plain yogurt, chutney or any curry of your choice. Enjoy!

Nutrition

Serving: 1 ServingCalories: 282kcalCarbohydrates: 38gProtein: 6gFat: 12gSaturated Fat: 2gPolyunsaturated Fat: 4gMonounsaturated Fat: 5gSodium: 41mgPotassium: 123mgFiber: 3gSugar: 1gVitamin A: 180IUVitamin C: 62mgCalcium: 40mgIron: 1mg

Stovetop Chocolate Cake

April 11, 2020

chocolate cake with chocolate frosting and pomegranate arils on top on a platter.

Soft, moist, and rich, this stovetop chocolate cake is proof that you don’t need an oven to bake a great cake. This easy stovetop cake recipe comes together with pantry staples and cooks right in a pan!

A chocolate cake with frosting and pomegranate arils on a platter.

I’ve been asked this question more times than I can count: how to bake a cake without an oven? For the longest time, I was skeptical. Like, really skeptical. I'm a traditionalist at heart. Cakes belong in ovens, right?

Then one day, curiosity (and a serious chocolate craving) got the better of me. I pulled out a heavy-bottom pan and tried a stovetop cake recipe. Since then, I’ve made this cake plenty of times, and it's perfect, fluffy, and decadent each time. My kids love it. My mom calls it her go-to tea cake (which makes it a keeper).

If you enjoy baking on the stovetop, try my easy stovetop naan, cast-iron pan pizza, English muffins, and cheese-stuffed flatbread for more no-oven recipes.

[feast_advanced_jump_to]

Why You’ll Love This Recipe

✨ It’s surprisingly easy to make with ingredients you likely already have in your kitchen right now, and the process is just as quick.

✨ The no-bake chocolate cake is intensely moist. The secret is the yogurt, which keeps every bite velvety and soft.

✨ The stovetop cake is a definite for hot summer days when you can't bear to turn on the oven!

✨ An easy recipe for anyone who wants to bake but doesn't have an oven or a microwave!

✨ This soft and delicious chocolate cake is perfect for teatime, easy snacking, or as a decadent dessert. Serve it plain, frost it, or serve thick, warm slices with ice cream.

Stovetop Cake Ingredients

Labelled ingredients for making stovetop chocolate cake.

Flour: All-purpose flour to give structure and a tender crumb.

Cocoa powder: Use good-quality cocoa for a rich chocolate flavor.

Sugar: I used brown sugar for a deeper flavor, but white sugar or jaggery works too.

Yogurt: Plain Greek yogurt is great here. Otherwise, your regular homemade yogurt (drained of excess water) works like a charm.

Oil: You can use any neutral-tasting oil. I used coconut oil to keep the stovetop chocolate cake moist and rich. Vegetable oil works great, too.

Vanilla extract: Use store-bought or homemade vanilla extract to give the cake a warm, cozy flavor.

Hot water blooms the cocoa powder, making the chocolate flavor more intense.

Chocolate: I used 70% dark chocolate. Feel free to use any good-quality baking chocolate that's available to you.

Milk: I used coconut milk to make a quick ganache. You can use any milk. Heavy cream makes it extra rich!

Please see the recipe card below for full information about the ingredients and quantities.

Variations

Gluten-free: Swap all-purpose flour with buckwheat flour or your favorite gluten-free blend. You can also try my buckwheat chocolate layer cake for a tested version.

Vegan: Swap with plant-based yogurt and dairy-free chocolate to make a vegan no-oven chocolate cake.

More chocolate: Add chopped chocolate into the batter of the stovetop cake for a more indulgent cake.

Flavor twists: Add a pinch of cinnamon, cardamom, or even instant coffee powder to enhance the flavor.

Add-ins: Nuts like walnuts or almonds work beautifully here.

Sliced chocolate cake with chocolate frosting and pomegranates on top on a plate.

How To Make Stovetop Chocolate Cake

Step 1: To bake without an oven, first prepare your stovetop setup. Use a heavy-bottomed pan with a lid. Place a trivet, ring mold, or inverted plate inside to create a base.

Step 2: Preheat the covered pan on medium heat for 5–7 minutes.

Step 3: In a bowl, sift together flour, baking powder, baking soda, and salt. Mix in sugar.

Step 4: In a separate bowl, mix cocoa powder with hot water until smooth.

Step 5: Add yogurt, oil, and vanilla extract to the cocoa mixture.

Step 6: Combine wet and dry ingredients. Mix gently until smooth.

Step 7: Pour the batter into a greased 6-inch cake tin.

Process of making Easy Stovetop Chocolate Cake.

Step 8: Place the cake tin inside the pan. Cover and cook on low heat for 30–40 minutes.

Step 9: Insert a toothpick or wooden skewer in the center to check for doneness. If it comes out clean, your stovetop cake is ready. 

Chocolate cake with ganache and pomegranate arils and sprinkles on a plate.

Pro Tips

  • When baking without an oven, use a heavy, thick-bottomed pan that’s big enough to fit the cake tin comfortably. Ensure your pot lid is tight to trap the heat.
  • Any heat-proof, bake-safe dish (tart case, trivet, or inverted metal plate) that can balance your tin can serve as the makeshift pedestal for the cake tin.
  • Resist the urge to peek too often! Opening the lid releases steam and heat, which affects baking time.
  • Cook on low heat. High heat can burn the bottom.
  • Check the cake after 30 minutes. Cooking time may vary by stove.

How To Serve

This chocolate stovetop cake is amazing on its own, but a quick ganache takes it to the next level.

You can also top the cake with a soft mascarpone cheese frosting, as I did for my coffee banana cake, or a cream cheese frosting, as I did for this chocolate zucchini cake.

Serve it warm with a scoop of vanilla ice cream or this delicious vegan coffee ice cream.

Fresh pomegranate arils, raspberries, blueberries, or strawberries on top add a bright, fruity contrast to the rich chocolate.

A slice of chocolate cake with ganache on a small plate.

Recipe FAQs

Can I use a different pan size?

Yes. Avoid using a smaller pan, as the batter may overflow. If you don't have a 6-inch tin, you can use a slightly larger one. The cake will be thinner, but it will still taste great. Just keep an eye on the clock, as it might bake faster!

What kind of pot should I use for baking on the stovetop?

A heavy-bottomed pot (think Dutch oven), hard-anodized cookware, or a 3-ply stainless steel pan will work best. They distribute heat more evenly.

Do I need to add water?

You can add water, but dry baking has really worked for me. And no, none of my pans have been spoiled. It feels a little counterintuitive, I know. But the heavy-bottomed pan works like a mini oven, trapping heat inside and cooking the cake evenly.

Is this the same as a skillet cake?

While similar, a skillet cake recipe (like my cheesecake swirl brownie or peach cherry cake) is still baked in an oven. This recipe uses a stovetop to cook the cake instead of baking it in an oven.

More Easy Chocolate Cakes

  • Sliced chocolate chip cake on a platter.
    Eggless Chocolate Chip Cake
  • Swedish chocolate cake topped with powdered sugar and hazelnuts on a tray.
    Swedish Chocolate Cake
  • Chocolate Chickpea Cake | Eggless Chocolate Cake with Chickpea Flour | Glutenfree Chocolate Cake
    Chocolate Chickpea Cake
  • Chocolate Sheet Cake | Eggless Chocolate Sheet Cake | Eggless Chocolate Cake
    Chocolate Sheet Cake

Half the joy of cooking is sharing it with others. That’s why I’m always eager to hear from you. So go right ahead & drop a comment or reach out on Instagram, Pinterest, YouTube, or Facebook. I hope you love this easy stovetop chocolate cake as much as we do!

📖 Recipe

Tried this recipe?Let us know how it was!
chocolate cake with chocolate frosting and pomegranate arils on top on a platter.

Easy Stovetop Chocolate Cake

Natasha Minocha
With a soft, tender, moist crumb and luscious frosting, this stovetop chocolate cake is an instant hit! Made with simple pantry ingredients and without an oven, this cake is a delicious comfort bake.
5 from 1 vote
Print Recipe Pin Recipe
Prep Time 20 minutes mins
Cook Time 30 minutes mins
Total Time 50 minutes mins
Course Cakes, Dessert
Cuisine World
Servings 6 Servings
Calories 376 kcal

Ingredients
  

  • 1/4 cup Cocoa Powder
  • 1/2 cup Boiling hot water
  • 1 1/4 cups All purpose flour
  • 1.5 tsp Baking powder
  • 1/2 tsp Baking soda
  • 1/4 tsp Salt
  • 3/4 cup Brown sugar
  • 1 tsp Vanilla extract
  • 1/2 cup Plain yogurt
  • 1/3 cup Coconut oil You can use any neutral tasting oil

Chocolate Frosting ( Optional)

  • 1/4 cup Dark chocolate chips or any chocolate bar cut into small chunks
  • 2-3 tbsp Coconut milk You can use any milk or cream

Instructions
 

  • Lay an upside-down tart case/plate or a trivet at the bottom of a wide and deep saucepan. The saucepan must have a tight-fitting lid. You can even use a pressure cooker without the weight.
  • Very important - The saucepan should be wider than the cake pan, and deep enough for the cake to rise with the lid on.
  • Put the lid on the pan and preheat it on high heat for 5-7 minutes.
  • Now to the cake - In a small bowl, blend together the cocoa powder and hot boiling water.
  • In a medium-sized bowl, sift in the flour, baking powder, baking soda, and salt.
  • Stir in the brown sugar.
  • Now whisk in the cocoa water mixture, yogurt, oil and vanilla extract. You'll get a thick cake batter.
  • Grease a 6" cake tin and pour the batter in.
  • Place this tin carefully on the upturned tart case/ trivet in the hot pan. Cover with the lid, turn the heat to low. Cook for 30-40 minutes, until the cake is springy on top and a skewer inserted in the center comes out clean.
  • Wait for 10-15 minutes before turning the cake out on a cooling rack.
  • If you are frosting the cake, then let the cake cool completely before spreading the chocolate ganache on. Cut into slices and serve. Enjoy!

Chocolate Frosting

  • Combine the chocolate chips/chunks and the milk or cream in a small bowl. Place this on a pan of simmering water and stir until the chocolate melts and you get a shiny glossy ganache. Cool this for a bit before using on the cake. You can melt the chocolate and milk together in the microwave too, in increments of 30 seconds.

Notes

  • You can also bake this cake in a conventional oven at 180 C / 350 F for 20-25 minutes.
  • Use a heavy, thick-bottomed pan that’s big enough to fit the cake tin comfortably. Ensure your pot lid is tight to trap the heat.
    Any heat-proof, bake-safe dish (tart case, trivet, or inverted metal plate) that can balance your tin can serve as the makeshift pedestal for the cake tin.
  • Check the cake after 30 minutes. Cooking time may vary by stove.
  • Cook on low heat. High heat can burn the bottom.
  • Resist the urge to peek too often! Opening the lid releases steam and heat, which affects baking time.
 

Nutrition

Serving: 1 ServingCalories: 376kcalCarbohydrates: 55gProtein: 6gFat: 16gSaturated Fat: 14gPolyunsaturated Fat: 0.4gMonounsaturated Fat: 1gTrans Fat: 0.002gCholesterol: 1mgSodium: 319mgPotassium: 205mgFiber: 2gSugar: 30gVitamin A: 2IUVitamin C: 0.1mgCalcium: 134mgIron: 2mg

Nutella Banana Muffins

April 9, 2020

Muffins with Nutella stacked on a plate on a red striped napkin.

Nutella banana muffins are soft and moist with ribbons of creamy Nutella in every bite. Rich, chocolatey, and packed with sweet banana flavor, they’re ready with just 20 minutes of prep!

A plate stacked with nutella swirl muffins with a jar of nutella around.

My family is super fussy about bananas -  The second a banana gets a single brown spot, nobody wants to even touch it!

I wait for those bananas to ripen. That’s when the magic happens. They become the star ingredient in the best baked treats. I’ve used overripe bananas in everything from banana cinnamon pancakes to walnut and fig banana bread. But these banana Nutella muffins might be my favorite use yet. Honestly? They disappear the moment they come out of the oven.

And if you love banana desserts, you should also try my banana scones, banana baked oatmeal, or coffee banana cake.

[feast_advanced_jump_to]

Why You’ll Love This Recipe

✨ I’ve tried every muffin recipe under the sun, but these Nutella-filled banana muffins are irresistible. The bananas add moisture and natural sweetness, while the Nutella creates gooey chocolate swirls.

✨ Super easy and quick to make, these eggless banana muffins need basic pantry ingredients. You probably already have most of the ingredients in your kitchen.

✨ There is Nutella inside. There is Nutella on top. You really don’t need to add anything else to these perfect decadent treats.

✨ Perfect for a mid-morning snack, tea time, as an after-dinner treat, or anytime that chocolate craving hits!

✨ This muffin recipe works well with a variety of mix-ins. Add nuts, raisins, or chocolate chips, and play around with the flavors… this is a very versatile recipe.

Recipe Ingredients

Labelled ingredients for making nutella banana muffins.

Flour: I used all-purpose flour for a soft, tender crumb. I have also made these using a combination of all-purpose and whole wheat flour, and it works very well.

Bananas: The darker and spottier, the sweeter the Nutella swirled banana muffins.

Nutella is the star ingredient. It creates those beautiful chocolate swirls.

Cinnamon powder is a must, because if there is a match made in heaven, then it surely is banana and cinnamon!

Sugar: I used brown sugar, but regular granulated sugar, coconut sugar, or cane sugar will also work.

Milk: I like the slight sweetness of coconut milk in this recipe, but feel free to use any milk of your choice. 

Vinegar: Apple cider or regular white, either works to make the buttermilk, which is essential to the Nutella banana muffins recipe. It makes them tender and beautifully moist.

Coconut oil adds moisture and keeps them light. You can use any neutral vegetable oil.

Vanilla extract gives a warm, cozy flavor. Use store-bought or homemade vanilla extract.

Please see the recipe card below for full information about the ingredients and quantities.

Variations

Use different nut butters. You can add almond butter, as I did for my almond butter cup, or peanut butter (as I did with my peanut butter oat cups) as Nutella substitutes. You can even swirl in Biscoff spread instead, as I did for my Biscoff banana bread.

Add more mix-ins. Throw in some chopped walnuts, raisins, or dates. Mix in some chocolate chips as I did for my chocolate chip muffins. This is a great basic batter for moist banana bread-style muffins.

How To Make Nutella Banana Muffins

Recipe Video

Step-By-Step Instructions

A mixture of milk and vinegar in a glass cup on a striped napkin.

Step 1: Make the buttermilk- Mix vinegar and milk and set it aside for 5 minutes.

Flour, cinnamon powder, and brown sugar in a glass mixing bowl.

Step 2:  In a large bowl, sift together flour, baking powder, baking soda, salt, and cinnamon powder. Whisk in the brown sugar.

Wet ingredients in a measuring cup on a red striped napkin.

Step 3: Mash the banana well and add the buttermilk, oil, and vanilla extract. Mix well.

Batter in a glass mixing bowl.

Step 4: Mix the wet and dry ingredients. Don't overmix.

Batter in a muffin tray with Nutella on top.

Step 5: Spoon 2-3 tablespoons of batter into each muffin cup. Add a teaspoon of Nutella on top.

Muffin batter with Nutella swirls in a muffin tray.

Step 6: Put another 2 tablespoons of batter on top and then another 1 teaspoon of Nutella on top of the batter. With a wooden skewer or toothpick, swirl the Nutella into the batter.

Baked Nutella banana muffins in a muffin tray.

Step 7: Bake at 220 C / 425 F for 5 minutes, lower the temperature to 190 C / 375 F and continue baking for 12-15 minutes or until a skewer inserted in the center comes out clean with just a few moist crumbs attached.

A plate and wire rack with muffins with a jar of Nutella in the background.

Top Tips

  • Use room temperature ingredients for a smooth, even-textured batter. This helps give airier, fluffier muffins.
  • Warm the Nutella slightly if it’s too thick. This makes it easier to swirl.
  • Don’t over-whisk the Nutella swirl banana muffins batter. Mix just enough so all the dry ingredients are moist.
  • Bake the muffins at a high temperature for a few minutes initially. This creates air bubbles that expand the batter to help get tall muffins!
  • If you don't want to bake at different temperatures, just bake at 180 C/ 350 F for 18-20 minutes.
Half a muffin on top of a stack of muffins to show the cross section.

Recipe FAQs

How ripe should my bananas be?

The riper, the better! Look for bananas that are heavily spotted or even completely brown. They're sweeter and have a more intense banana flavor.

Can I make vegan Nutella banana muffins?

Yes! This is one question I get asked a lot. The banana Nutella muffins recipe is already eggless. All you need to do is get your hands on some vegan Nutella or vegan chocolate hazelnut spread.

Can I make Nutella banana bread instead of muffins?

Absolutely! You can use this recipe to make Nutella banana bread. Follow it as written, but instead of baking in a muffin tin, use a 9" x 5" loaf pan.

How do I store the eggless Nutella banana muffins?

Store the Nutella-stuffed banana muffins in an airtight container in the refrigerator for up to 3 days. Warm them in the microwave for about 15–20 seconds before eating.

More Easy Muffins

  • Chocolate Chip Muffins on a round wire rack.
    Chocolate Chip Muffins Recipe
  • Blueberry Muffins on a blue striped napkin on a wire rack.
    Vegan Lemon Blueberry Muffins
  • 7 Peanut butter apple muffins with cinnamon glaze on a round wire rack.
    Peanut Butter Apple Muffins
  • Cherry Cheesecake Muffins | Eggless Cherry Cream Cheese Muffins
    Cherry Cheesecake Muffins

Half the joy of cooking is sharing it with others. That’s why I’m always eager to hear from you. So go right ahead & drop a comment or reach out on Instagram, Pinterest, YouTube, or Facebook. I hope you love these Nutella banana muffins as much as we do!

📖 Recipe

Tried this recipe?Let us know how it was!
A plate stacked with nutella swirl muffins with a jar of nutella around.

Nutella Banana Muffins

Natasha Minocha
Nutella banana muffins are soft and moist with ribbons of creamy Nutella in every bite. Rich, chocolatey, and packed with sweet banana flavor, they’re super easy to make!
No ratings yet
Print Recipe Pin Recipe
Prep Time 20 minutes mins
Cook Time 20 minutes mins
Total Time 40 minutes mins
Course Dessert, Snack
Cuisine World
Servings 12 Muffins
Calories 257 kcal

Ingredients


  • 2 cups All-purpose flour
  • 2 tsp Baking powder
  • 1/2 tsp Baking soda
  • 1/4 tsp Salt
  • 1 tsp Cinnamon powder
  • 1/3 cup Brown sugar You can use any sugar
  • 1 cup Coconut milk You can use any milk
  • 1 tbsp Apple cider vinegar Regular white vinegar will also work
  • 1/3 cup Coconut oil You can use any neutral oil
  • 2 tsp Vanilla extract
  • 1 large Banana, overripe
  • 1/3 cup Nutella You can also use chocolate peanut butter / almond butter.

Instructions
 

  • Preheat the oven to 220 C / 425 F. Line your muffin tray cavities with paper liners.
  • Combine coconut milk and apple cider vinegar in a bowl. Set aside for 5 minutes.
    1 cup Coconut milk, 1 tbsp Apple cider vinegar
  • Sift together all-purpose flour, cinnamon powder, baking powder, baking soda, and salt in a large bowl.
    2 cups All-purpose flour, 2 tsp Baking powder, 1/2 tsp Baking soda, 1/4 tsp Salt, 1 tsp Cinnamon powder
  • Stir in the sugar.
    1/3 cup Brown sugar
  • In a small bowl, mash the banana with a fork. Add the milk & vinegar mixture, oil, and vanilla extract.
    1 large Banana, overripe, 1 cup Coconut milk, 1 tbsp Apple cider vinegar, 1/3 cup Coconut oil, 2 tsp Vanilla extract
  • Pour the liquid mixture into the dry ingredients. Gently stir with a spatula, just until moistened.
  • Put 2 tablespoons of batter in each cup, and put 1 teaspoon of Nutella on top.
  • Put another 2-3 tablespoons of batter on top and then another 1 teaspoon of Nutella on top of the batter.
  • With a wooden skewer or toothpick, swirl the Nutella into the batter.
  • Bake at 220 C / 425 F for 5 minutes, then lower the temperature to 190 C/ 375 F and bake for 12-15 minutes or until a skewer inserted comes out clean with just a few moist crumbs attached.
  • Serve warm and enjoy!
  • These muffins can be stored in an airtight container in the refrigerator for 3 days. Reheat in the microwave before eating.

Video

Notes

  • Use room temperature ingredients for a smooth, even-textured batter. This helps give airier, fluffier muffins.
  • Warm the Nutella slightly if it’s too thick. This makes it easier to swirl.
  • Don’t over-whisk the Nutella swirl banana muffins batter. Mix just enough so all the dry ingredients are moist.
  • Bake the muffins at a high temperature for a few minutes initially. This creates air bubbles that expand the batter to help get tall muffins!
  • If you don't want to bake at different temperatures, just bake at 180 C/ 350 F for 18-20 minutes.

Nutrition

Serving: 1 ServingCalories: 257kcalCarbohydrates: 32gProtein: 3gFat: 14gSaturated Fat: 12gPolyunsaturated Fat: 0.3gMonounsaturated Fat: 1gSodium: 174mgPotassium: 162mgFiber: 2gSugar: 13gVitamin A: 8IUVitamin C: 2mgCalcium: 62mgIron: 2mg

Sourdough Banana Cinnamon Pancakes

April 6, 2020

A stack of sourdough banana pancakes on a plate with a fork and knife.

These sourdough banana cinnamon pancakes are soft, fluffy, and full of cozy cinnamon flavor. Perfect for breakfast, brunch, or a snack, this blender pancake recipe makes excellent use of your sourdough discard!

Sourdough pancakes drizzled with honey and stacked on a plate.

These vegan banana pancakes are a delicious way to use sourdough discard and those overripe bananas sitting on your counter. Plus, they come together quickly, making them perfect for even a busy morning.

Serve them with a drizzle of maple syrup, a dollop of yogurt, a pat of cinnamon honey butter, or just a sprinkle of cinnamon—and you’ve got yourself the most heartwarming start to the day!

[feast_advanced_jump_to]

Why You'll Love This Recipe

This is a great way to use sourdough discard and spotty bananas. A fabulous no-waste recipe!

Sourdough discard adds a wonderful, gentle tang that pairs beautifully with the sweetness of bananas.

With ripe bananas, a hint of cinnamon, and that sourdough magic, these pancakes turn out soft, fluffy, and irresistibly good!

The batter comes together in no time in a blender! So easy, and you can make it ahead of time, too. Make it the night before, and cook the pancakes the next morning.

These vegan cinnamon pancakes are always a hit at our table - whether it’s for breakfast, weekend brunch, or a snack!

5 starsJust made these and they were so great I had to come to leave a comment. They are filling, super fluffy for sourdough pancakes, great flavor.....really all-around a dream! I would say your photo doesn't do it justice for how thick and fluffy these really are! Great job, highly recommend!

What’s Sourdough Discard?

Sourdough discard is that part of your sourdough starter that you have to get rid of. Why? Because you have to keep feeding the sourdough starter, and that involves removing a certain amount of the starter. And since it's perfectly usable, why waste it, right?

The good thing is you can cook up a storm with a sourdough starter discard. If you have some in your refrigerator, then do consider making this easy sourdough discard bread, light and crispy waffles, or moist sourdough banana bread!

Recipe Ingredients

  • Sourdough discard - for light, tender, and flavorful pancakes. An active sourdough starter will also work well here.
  • Banana - Use a ripe, spotty banana for the best flavor.
  • Milk - I used homemade almond milk. Feel free to use any kind of milk you prefer.
  • Wholewheat flour. You can easily use all-purpose or buckwheat flour as I did in this gluten-free banana pancake recipe.
  • Sugar- I used coconut sugar for a deeper flavor. You can easily switch to white or brown sugar.
  • Oil- Any neutral-tasting vegetable oil is good here. Melted butter also works well.
  • Cinnamon and vanilla extract for an extra flavor boost!

Please see the recipe card for full information on ingredients and quantities.

How To Make Sourdough Banana Pancakes

This is an easy blender banana pancake recipe - the kind I love the most!

Step 1: Place all the ingredients - banana, sourdough discard, flour, almond milk, oil, baking powder, salt, coconut sugar, cinnamon, and vanilla extract in a blender and blend until you get a smooth batter.

Step 2: This will be a thick batter. You can thin it a bit with some extra milk if you want thinner pancakes.

Step 3: Let this batter rest for 30 -40 minutes.

Sourdough banana pancake batter in a bowl.

Step 4: Grease a griddle with oil and heat it. Pour a small ladle full of batter on the griddle. Let the pancake cook for 2-3 minutes till the underside is golden. Carefully flip it over. Cook on the other side till golden brown. Repeat till all the batter is used up.

4 small pancakes on a griddle.
Flipped banana pancakes on a griddle.

Step 5: Serve warm with honey or maple syrup!

A stack of sourdough banana pancakes on a plate with a fork and knife.

Pro Tips

  • Select the ripest banana for making these sourdough pancakes for the most flavor and natural sweetness.
  • If you don't have sourdough discard or an active starter, you can use yogurt instead. The yogurt imparts the banana pancakes with the same delightful tang and zest as the discard. Greek yogurt is the best, but you can use any yogurt. Just drain it well to keep it thick.
  • To make fluffy pancakes, do not press them with your spatula when they are cooking.
  • Let the pancake batter rest for at least 30 minutes. This helps the flour to hydrate and the gluten to relax, resulting in tender, soft pancakes!
  • You can also make the batter the night before! Just make sure you don't add the baking powder to the overnight mixture. Whisk it in the morning.
  • You can make a big batch and freeze the extras. Just pop them in the microwave or warm them in a pan for a quick, cozy breakfast anytime.

How To Serve Sourdough Banana Pancakes

These sourdough banana cinnamon pancakes are a dream served warm with a drizzle of maple syrup, honey, or a dollop of creamy, tangy cream cheese or Nutella for an extra indulgence! 

Top them with fresh fruits or spoon over some of my strawberry chia jam, easy cherry jam, or spiced apple butter.

However you top them, these pancakes are pure comfort on a plate!

Banana pancakes on a plate with a fork and knife on the side.

More Pancake Recipes

  • A stack of mango pancakes with a drizzle of maple syrup.
    Mango Pancakes
  • Gluten-free Banana Pancakes
    Gluten-free Banana Pancakes
  • A stack of pancakes on a plate with a maple syrup getting poured on top.
    The Fluffiest Cinnamon Pancakes Recipe
  • Apple Pancake Recipe
    Apple Pancake Recipe

Half the joy of cooking is sharing it with others. That’s why I’m always eager to hear from you. So go right ahead & drop a comment or reach out on Instagram, Pinterest, YouTube, or Facebook. I hope you love these sourdough banana cinnamon pancakes as much as we do!

📖 Recipe

Tried this recipe?Let us know how it was!
A stack of sourdough banana pancakes on a plate with a fork and knife.

Sourdough Banana Cinnamon Pancakes

Natasha Minocha
These sourdough banana cinnamon pancakes are soft, fluffy, and full of cozy cinnamon flavor. Perfect for breakfast, brunch, or a snack, this blender pancake recipe makes excellent use of your sourdough discard!
5 from 2 votes
Print Recipe Pin Recipe
Prep Time 45 minutes mins
Cook Time 15 minutes mins
Total Time 1 hour hr
Course Breakfast, Snack
Cuisine American
Servings 10 Small Pancakes
Calories 79 kcal

Ingredients


  • 1 Banana, peeled and sliced Over ripe bananas work the best here
  • 1/4 cup Sourdough discard You can use plain yogurt if you don't have the sourdough discard
  • 1/3 cup Almond milk You can use any milk
  • 1 tbsp Oil
  • 1 cup Wholewheat flour you can use any flour
  • 1 tsp Baking powder
  • 1/4 tsp Salt
  • 1 tbsp Coconut sugar You can use any sugar
  • 1 tsp Cinnamon
  • 1 tsp Vanilla extract

Instructions
 

  • Place all the ingredients in a blender and blend until you get a smooth batter. This will be a thick batter. You can thin it a bit with some extra milk if you want thinner pancakes.
  • Let this batter rest for 30 -40 minutes.
  • Grease a griddle with oil and heat it. Pour a small ladle full of batter on the griddle. Let the pancake cook for 2-3 minutes till the underside is golden. Carefully flip it over. Cook on the other side till golden brown.
    Repeat till all the batter is used up.
  • Serve warm with maple syrup or honey. Enjoy!

Notes

  • Select the ripest banana for making these sourdough pancakes for the most flavor and natural sweetness.
  • If you don't have sourdough discard or an active starter, you can use yogurt instead. The yogurt imparts the banana pancakes with the same delightful tang and zest as the discard. Greek yogurt is the best, but you can use any yogurt. Just drain it well to keep it thick.
  • To make fluffy pancakes, do not press them with your spatula when they are cooking.
  • Let the pancake batter rest for at least 30 minutes. This helps the flour to hydrate and the gluten to relax, resulting in tender, soft pancakes!
  • You can also make the batter the night before! Just make sure you don't add the baking powder to the overnight mixture. Whisk it in the morning.
  • You can make a big batch and freeze the extras. Just pop them in the microwave or warm them in a pan for a quick, cozy breakfast anytime.

Nutrition

Serving: 1PancakeCalories: 79kcalCarbohydrates: 14gProtein: 2gFat: 2gSaturated Fat: 0.1gPolyunsaturated Fat: 1gMonounsaturated Fat: 1gTrans Fat: 0.01gCholesterol: 0.3mgSodium: 116mgPotassium: 65mgFiber: 1gSugar: 3gVitamin A: 8IUVitamin C: 1mgCalcium: 44mgIron: 1mg

Easy No Yeast Naan

April 3, 2020

A stack of naan breads topped with onion seeds and cilantro.

This easy no-yeast naan is soft, chewy, and made right on the stovetop with simple pantry ingredients. If you ever wanted homemade naan without the wait, this quick naan recipe without yeast delivers all the flavor and texture with minimal effort!

A stack of naan breads topped with onion seeds and cilantro.

Warm, pillowy, and brushed with butter, this quick Indian-style naan without yeast pairs beautifully with curries, dals, and everyone’s favorite butter chicken! There’s no yeast, no oven, and no complicated steps - just an easy homemade naan recipe you'll make on repeat.

And if you love easy flatbreads, I’d really recommend trying Sheermal, Turkish pide, or Kachapuri recipe. 

[feast_advanced_jump_to]

Why You’ll Love This Recipe

✨ This homemade naan comes together quickly with no yeast and no long proofing time.

✨ Soft, chewy, and nicely blistered, it has the looks and texture of a classic restaurant-style naan!

✨ This recipe uses simple ingredients you most likely already have in your kitchen.

✨ Easy, uncomplicated steps make this quick naan recipe perfect for even beginners. 

⭐️ Made this recipe? Please consider leaving a review. Your comments and star ratings help other readers find and trust my recipes.

Ingredients For No-Yeast Naan

Labelled ingredients for making no yeast naan.
labelled toppings for naan.

Flour: All-purpose flour gives the softest texture. However, I have made it using a combo of all-purpose and whole-wheat flour plenty of times. We enjoy this version as well.

Leavening agents: Since we are not using yeast, baking powder and baking soda are the leavening agents in this recipe. Make sure your baking powder is fresh and not expired.

Yogurt: Plain yogurt adds tang and moisture to the naan and keeps it soft and tender. For vegan naan recipes without yeast, use plant-based yogurt. 

Topping: I love to top the naans with kalonji (onion seeds or nigella seeds) and fresh cilantro. 

Butter: For the yummiest butter naan, we brush the hot naans with melted butter! You can also use ghee.

Please see the recipe card for full information about the ingredients and quantities.

Variations

One of the best things about homemade naan is how easy it is to customize.

  • Top with finely chopped garlic to make garlic naan!
  • Stuff it with cheese, as I did with my cheese-stuffed flatbread 
  • Sprinkle mint leaves or chili flakes on the rolled naan dough for a kick.

How To Make No Yeast Naan

Video Recipe

Step-By-Step Instructions

Flour, water, and yogurt in a bowl.

Step 1: Combine all-purpose flour, sugar, salt, baking powder, and baking soda in a bowl. Mix in the yogurt and water.

Kneaded dough in a bowl on top of a kitchen towel.

Step 2: Knead the dough for 7-8 minutes, until you get a smooth, soft, slightly sticky dough. Rub a few drops of oil over the ready dough, cover with a damp kitchen towel, and let the dough rest for 20-30 minutes.

6 dough balls in a bowl.

Step 3: Divide the dough into 6 equal-sized balls.

A dough ball placed on a surface sprinkled with cilantro and nigella seeds.

Step 4: Working with one dough ball at a time, sprinkle nigella seeds and fresh coriander on the work surface. Place a dough ball on top.

Rolled out dough topped with nigella seeds and cilantro.

Step 5: Roll it out into an oval shape. Sprinkling your topping on the prep area helps it stick better. 

Rolled out naan topped with nigella seeds and cilantro cooking on a pan.

Step 6: Heat a griddle pan, and place the rolled-out naan on it, seed side up. Let it cook for 1-2 minutes until you see bubbles on the surface.

Cooked naan in a pan.

Step 7: Flip the no-yeast naan bread and let it cook on the other side for 2-3 minutes till puffy.

A cooked naan on stove top.

Step 8: After the naan has cooked on both sides, you can cook it on open flame on a gas stove (using tongs, of course) to get beautiful charred and crispy edges. 

A naan topped with cilantro and onion seeds on parchment paper.

Step 9: Once cooked, take it off the heat and brush liberally with melted butter. Serve hot!

Top Tips

  • Knead the dough well for 7-8 minutes. A soft, elastic dough will give soft and chewy naans.
  • Let the dough rest. This helps the gluten relax, making the naan softer and easier to roll.
  • If the dough seems too dry, add more liquid, one spoon at a time.
  • Use a hot skillet. A properly heated pan helps naans puff up and get golden brown spots.
  • For the charred look, finish the cooked naan on the open flame of your stovetop for 20-30 seconds. Remember to use tongs!
  • Brush with butter while the naan is still hot. This gives a lovely sheen and flavor.
A hand picking a naan from a stack of naans.

How To Serve And Store

The best way to have this no-yeast naan is hot, just off the griddle. Pair it with:

  • Dips and sauces like the ever-popular classic hummus or creamy tzatziki
  • A hot bowl of keema aloo curry, Moroccan vegetable stew, dals, or butter chicken.
  • This soft naan also works wonderfully as an easy flatbread for wraps, sandwiches, and pizzas. Make delicious wraps with crispy baked chicken nuggets, easy cheese falafels, and air-fryer falafels.

Store the leftover naans in an air-tight container for 3-4 days in the refrigerator. You can also freeze them for up to 1 month. Reheat in a skillet or a preheated oven for 3-4 minutes. 

A stack of naans on parchment paper.

Recipe FAQs

What is naan?

Naan is a very popular, very delicious leavened Indian flatbread. It is traditionally baked in a clay oven called tandoor and has an astonishingly soft and pillowy texture. 

Can I make naan without yeast and yogurt?

In the absence of yeast, yogurt (along with baking powder and soda) is what makes the no- yeast naan soft. If you don’t want to use yogurt, you can also use store-bought or homemade buttermilk. 

Why did my no-yeast naan not puff up?

Was your griddle or tawa hot enough? It’s the high heat that makes naan without yeast nicely blistered and bubbly. 

Can I make naan dough ahead of time?

Yes, you can prepare the dough a few hours ahead of time. Keep it covered with a damp cloth in the refrigerator. Naan dough dries out quickly. Let it come to room temperature before rolling out and cooking. 

Can I make naan without yeast in the oven?

Yes, this no-yeast naan recipe can be made in the oven. Follow the instructions to prep the dough. Preheat your oven to 200 C / 400 F. Lightly grease a baking tray. Place the rolled-out naan, seed-side up, on the tray. Leave space between each piece and bake for 5-6 minutes or until brown and puffy.

More Flatbread Recipes

  • Butternut Squash Flatbread Pizza
    Butternut Squash Flatbread Pizza
  • Pita Breads stacked on a kitchen towel with dips and salads in the background.
    Homemade Pita Bread Recipe
  • Best Turkish Pide Bread Recipe!
    Best Turkish Pide Bread Recipe
  • A flatbread half-folded in a hand to show its softness.
    Cheese Stuffed Flatbread

Did you try this recipe? I'd love to hear how it turned out. Please drop a comment below or reach out on Instagram, Pinterest, YouTube, or Facebook. I hope you love this easy no-yeast naan recipe as much as we do!

📖 Recipe

Tried this recipe?Let us know how it was!
A stack of naan breads topped with onion seeds and cilantro.

Easy No Yeast Naan

Natasha Minocha
This easy no-yeast naan is soft, chewy, and made with simple pantry ingredients. With no proofing time and easy steps, this homemade naan recipe is perfect for weeknight meals, curries, wraps, and dips.
No ratings yet
Print Recipe Pin Recipe
Prep Time 10 minutes mins
Cook Time 10 minutes mins
Resting Time 30 minutes mins
Total Time 50 minutes mins
Course Bread
Cuisine Indian
Servings 6 Naans
Calories 158 kcal

Ingredients


  • 1.5 cup All-purpose flour
  • 1/2 tsp Salt
  • 1 tsp Baking powder
  • 1/4 tsp Baking soda
  • 1 tsp Sugar
  • 1/4 cup Plain yogurt
  • 1/4 -1/3 cup Water, for kneading the dough
  • 1/4 tsp Oil, for spreading on the kneaded dough
  • 2 tsp Kalonji/ Onion seeds/ Nigella seeds
  • 2-3 tsp Cilantro, chopped
  • 2-3 tbsp Melted butter to brush on top of naan You can also use ghee

Instructions
 

  • In a large bowl, combine flour, sugar, salt, baking powder, and baking soda.
    1.5 cup All-purpose flour, 1 tsp Sugar,1/2 tsp Salt,1 tsp Baking powder, 1/4 tsp Baking soda
  • Mix in the yogurt and water. Start with 1/4 cup of water.
    Knead the dough for 7-8 minutes, until you get a smooth, soft, slightly sticky dough.
    If the dough is too sticky, add more flour. If it's too dry, add some water or extra yogurt.
    1/4 cup Plain yogurt, 1/4 -1/3 cup Water, for kneading the dough
  • Rub a few drops of oil over the ready dough, cover with a damp kitchen towel, and let the dough rest for 20-30 minutes.
    1/4 tsp Oil, for spreading on the kneaded dough
  • Divide the dough into 6 equal-sized balls.
    Lightly flour the work surface. Sprinkle a few nigella seeds and a little bit of chopped cilantro on the work surface.
    Place a dough ball on the toppings and roll it into an oval shape - see the video and pictures above.
    2 tsp Kalonji/ Onion seeds/ Nigella seeds, 2-3 tsp Cilantro, chopped
  • Heat a tawa or a griddle pan, place the rolled out naan on it, the seed side should face up.
    Repeat with the remaining dough balls.
  • Let it cook for a minute till you see bubbles on the surface. Now flip the naan and let it cook on the other side for 2-3 minutes. It will get a bit puffy.
    You can also cook the naan on direct gas flame for an additional 30-60 seconds to get that blistery, tandoor-like look. Be sure to use tongs to hold the naan.
  • Once cooked, take it off the heat and brush liberally with melted butter.
    Serve hot. Enjoy!
    2-3 tbsp Melted butter to brush on top of naan

Video

Notes

  • Knead the dough well for 7-8 minutes. A soft, elastic dough will give soft and chewy naans.
  • Let the dough rest. This helps the gluten relax, making the naan softer and easier to roll.
  • If the dough seems too dry, add more liquid, one spoon at a time.
  • Use a hot skillet. A properly heated pan helps naans puff up and get golden brown spots.
  • For the charred look, finish the cooked naan on the open flame of your stovetop for 20-30 seconds. Remember to use tongs!
  • Brush with butter while the naan is still hot. This gives a lovely sheen and flavor.

Nutrition

Serving: 1NaanCalories: 158kcalCarbohydrates: 25gProtein: 4gFat: 4gSaturated Fat: 2gPolyunsaturated Fat: 0.3gMonounsaturated Fat: 1gTrans Fat: 0.2gCholesterol: 10mgSodium: 346mgPotassium: 47mgFiber: 1gSugar: 1gVitamin A: 118IUCalcium: 56mgIron: 2mg

Vegan Cinnamon Rolls

March 23, 2020

Vegan Cinnamon Rolls | Easy Baking Recipe | Eggless | Dairyfree

Craving some extra comfort? These warm, buttery, utterly divine Vegan Cinnamon Rolls will do just the trick! You can make these in a pinch and with plenty to share!

Vegan Cinnamon Rolls | Easy Baking Recipe | Eggless | Dairyfree

These Vegan Cinnamon Rolls are my greatest ode to my favorite spice - cinnamon!

I can’t think of anything more comforting than the smell of cinnamon. It's in my tea every day, add it to desserts, and have been guilty of buying more than a dozen cinnamon-scented candles. I never tire of its warmth and how it brings a beautiful earthy-sweet spiciness to any recipe!

I have been making these gooey cinnamon rolls since I stumbled into the world of baking - I don’t think a month goes by without at least one batch being whipped up and some stored away for emergency cravings! 

Vegan Cinnamon Rolls | Easy Baking Recipe | Eggless | Dairyfree

I have modified the original recipe from The Pioneer Woman to make these vegan. I promise this does not make these any less perfect! The beauty of this cinnamon roll recipe is whether you make it vegan or not, you have a guaranteed hit!

If you love cinnamon rolls, you must try my coffee cinnamon rolls and Biscoff cinnamon rolls. Soft and fluffy, cinnamon roll muffins are an irresistible variation of these classic cinnamon rolls. If you're craving a fruity sweet roll, then my apple pie rolls and strawberry rolls are just perfect!

[feast_advanced_jump_to]
Vegan Cinnamon Rolls | Easy Baking Recipe | Eggless | Dairyfree

Why Make These Vegan Cinnamon Rolls?

  • Soft, fluffy, gooey, and full of cinnamon flavor!
  • So easy to make with this no-knead method
  • Excellent make-ahead early morning or brunch treat 
  • Always a hit with kids and adults alike

How To Make Vegan Cinnamon Rolls

Step 1: Warm milk, oil, and sugar over medium heat. Take the mixture off the heat as soon as the sugar dissolves.

Step 2: Let the mixture cool to lukewarm and then mix in the yeast. Let it sit for 5 -10 minutes until frothy and bubbly.

Step 3: Whisk in the 2 cups of flour. Cover and place in a draft-free place for 1 hour or until the dough is doubled in size.

Step 4: Mix in the extra 1/4 cup flour, baking powder, baking soda, and salt.

Step 5: The dough is now ready for use immediately. You can refrigerate it for 30 minutes or up to 3 days. For easier handling, I like to refrigerate the dough overnight.

Cinnamon Rolls dough steps

Step 6: Preheat your oven to 200 C. Grease your baking pan.

Step 7: Sprinkle flour on your work surface and roll out the dough into a large rectangle.

Step 8: Slather coconut oil liberally over the rolled-out dough. Then sprinkle on some brown sugar followed by cinnamon. Don’t skimp on the cinnamon!

Step 9: Starting with the long side of the rectangle, start rolling the dough tightly. Pinch the seam together and make sure the seam is facing down.

Step 10: Cut into 12 slices, and place the cut side down in your greased baking dish.

Vegan Cinnamon Rolls

Step 11: Let the rolls rise for another 15-20 minutes, until puffy.

Step 12: Bake for 20-22 minutes until they are golden brown on top.

Step 13: Let the rolls cool in the pan for 5 minutes, then pour the glaze over the rolls. 

Step 14: Serve these warm or at room temperature!

Vegan Cinnamon Rolls | Easy Baking Recipe | Eggless | Dairyfree

How To Make The Glaze For The Cinnamon Rolls

You want to be ready to glaze when the cinnamon rolls are ready. For my glaze, I used almond milk and some icing sugar. Combine the two to get a nice thick, smooth glaze.

When the rolls are out, generously pour this all over and let them cool. Or not. Your choice.

Vegan Cinnamon Rolls | Easy Baking Recipe | Eggless | Dairyfree

More Delicious Cinnamon Recipes

  • Apple Pie Cinnamon Rolls
    Apple Pie Cinnamon Rolls
  • Cinnamon roll cake drizzled with glaze and topped with pecans on a plate.
    Cinnamon Roll Cake Recipe
  • Cinnamon Cheesecake with figs on top on a cake stand.
    Cinnamon Cheesecake Recipe
  • Apple Cinnamon Waffles With Buckwheat
    Apple Cinnamon Buckwheat Waffles

Half the joy of cooking is sharing it with others. That’s why I’m always eager to hear from you. So go right ahead & drop a comment or reach out on Instagram, Pinterest, YouTube, or Facebook. I hope you love these vegan cinnamon rolls as much as we do!

📖 Recipe

Tried this recipe?Let us know how it was!
Vegan Cinnamon Rolls | Easy Baking Recipe | Eggless | Dairyfree

Vegan Cinnamon Rolls

Natasha Minocha
Craving some extra comfort? These warm, buttery, utterly divine Vegan Cinnamon Rolls will do just the trick! You can make these in a pinch and with plenty to share!
3.50 from 2 votes
Print Recipe Pin Recipe
Prep Time 2 hours hrs
Cook Time 25 minutes mins
Resting Time 8 hours hrs
Total Time 2 hours hrs 25 minutes mins
Course Dessert
Cuisine American
Servings 12 Rolls
Calories 222 kcal

Ingredients


  • 1 cup Almond Milk You can use any milk of your choice
  • 1/4 cup Coconut Oil You can use any vegetable oil
  • 1/4 cup Raw sugar You can use regular sugar
  • 1.5 tsp Dried active yeast
  • 2 cups Wholewheat flour You can use all purpose flour
  • 1/4 tsp Baking powder
  • 1/4 tsp Baking soda
  • 1/4 tsp Salt
  • 1/4 cup Wholewheat flour

Filling

  • 1/4 cup Coconut oil, melted You can use butter here
  • 1/3 cup Brown sugar
  • 2-3 tsp Cinnamon powder

Glaze

  • 1/3 cup Icing sugar
  • 2-3 tbsp Almond milk You can use any milk

Instructions
 

Dough

  • Heat milk, oil, and sugar in a small saucepan. Don't let it come to a boil. Take off the heat and cool.
  • When this mixture is just warm, sprinkle over the yeast. Set aside for 5-10 minutes until the mixture is bubbly.
  • Whisk in the 2 cups of flour. Cover and place in a draft-free place for 1 hour or until the dough is doubled in size.
  • Now add in the extra 1/4 cup flour, baking powder, baking soda, and salt.
  • Mix well. The dough is now ready for use immediately. You can refrigerate it for 30 minutes or up to 2 days.
  • Preheat your oven to 200 C. Keep a greased baking dish handy.
  • Sprinkle flour on your work surface and roll out the dough into a large rough rectangle. I like to keep the thickness around 1/8".
  • Brush liberally with coconut oil or butter. Sprinkle over the brown sugar evenly and the cinnamon powder.
  • Starting with a long side of the rectangle, start rolling the dough tightly. Pinch the seam together and make sure the seam is facing down.
  • Cut into 1 -1.5" slices, place cut side down on your baking pan. Make sure there is some room between the rolls as they will expand.
  • Let the rolls rise for another 15-20 minutes. Bake for 20-25 minutes at 200 C until they are golden brown on top.
  • Pour the glaze over the warm rolls. Let the glaze set, 5 -10 minutes and serve warm. Enjoy!

Glaze

  • Whisk the almond milk and icing sugar till thick and smooth,

Storing the cinnamon rolls

  • You can store the cinnamon rolls in the refrigerator for up to 3 days. Reheat in the microwave.

Notes

This recipe has been adapted from The Pioneer Woman.

Nutrition

Serving: 1 RollCalories: 222kcalCarbohydrates: 32gProtein: 3gFat: 10gSaturated Fat: 8gPolyunsaturated Fat: 0.4gMonounsaturated Fat: 1gSodium: 113mgPotassium: 40mgFiber: 1gSugar: 14gVitamin A: 1IUVitamin C: 0.01mgCalcium: 46mgIron: 1mg

Oats Banana Mug Cake

March 16, 2020

Vegan Oats Banana Mug Cake | Easy Kid Friendly Recipe

If you are looking for an easy, quick sweet fix, this Vegan Oats Banana Mug Cake needs to be next on your list! Made in 15 minutes and finished even sooner, I promise you’ll keep coming back to this delicious, gooey, fudgy treat. 

With everyone at home under the unfortunate circumstances we are facing, there is a lot more snacking going on. Between online classes for the little one and online meetings for the working lot, everyone has different snack requests to keep them going.

Vegan Oats Banana Mug Cake  | Easy Kid Friendly Recipe

The Oats Banana Mug Cake Story

My kids were making mug cakes the other day, which inspired me to try a healthier version of my own. Using amaranth flour instead of all-purpose and introducing bananas + oats to accompany the chocolate, I was certain we’d have an instant hit! But alas, my recipe refused to cooperate. It did not rise, nor did it fully set and the texture was not quite what I wanted it to be. 2 days and 8 testing sessions (much to the joy of my enthusiastic tasters)  later, this Vegan Oats Banana Mug Cake was born! 

With a single bowl and a handful of ingredients, the recipe will deliver excellent results from both the microwave and the oven. Trust me, I tried enough times to know that both versions will be equally delicious! What stands out about this mug cake is that it has an indulgent pudding-esque consistency. 

Vegan Oats Banana Mug Cake  | Easy Kid Friendly Recipe

Texture Talk

With the addition of the banana and oats, the consistency of this mug cake became more thick and gooey. Instead of the cakiness that is normally expected,  it had the texture of a gooey warm pudding. This was more than fine by us! I used coarsely ground rolled oats here. They added just enough to bring in a touch of hearty chewiness that is so good paired with a generous serving of chocolate! 

Vegan Oats Banana Mug Cake  | Easy Kid Friendly Recipe

Where, When, Why

While the Vegan Oats Banana Mug Cake started out as a snack, we learned that it was good for so much more! It's quite a healthy recipe; with banana, coconut milk, walnuts, and oats, which makes it hearty and filling enough for breakfast - the chocolate is optional if you're not into it for the morning. Just add more nuts and seeds if you like!

Now on the other end, you can double the recipe, add some more chocolate, and have the perfect dessert dish! 

You can make this mug cake gluten-free if you use certified gluten-free oats.

That's the fun of recipes this simple and dynamic - have them however and whenever you please!

Ingredients for Vegan Oats Banana Mug Cake  | Easy Kid Friendly Recipe

The One Bowl Mug Cake Recipe

Finally, let's get to the nitty gritty. Or more accurately, the easy peasy (sorry, I had to). 

You start with mashing an overripe, spotty banana in a bowl. They are the best kinds for baking...they have the perfect caramel-y sweetness.

To this, you add the wet ingredients - coconut milk, vanilla essence, and coconut oil. Throw in a tablespoon of coconut sugar and then the rest - amaranth flour, ground oats, baking powder, baking soda, and a touch of salt. Of course, if there is a banana, a dash of cinnamon is mandatory!

Lastly, a bit of walnut and dairy-free 70% chocolate chips. If you’re a chocolate nut - add some more chocolate on top. This mug (I used ramekins for my final round) goes into the microwave for 1.5 minutes or you can bake it in the oven for 12-15 minutes. Heads up  - the cakes will rise beautifully but fall shortly after, so don’t be alarmed!

Note - the recipe shared here is for 2 mugs. You can half it for a single serving or double it for a complete dish!

Vegan Oats Banana Mug Cake  | Easy Kid Friendly Recipe

In the end, you will get a healthy yet decadent, pudding-like cake, that's ooey-gooey, rich, and comforting...much needed in these times of anxiety and panic. My kitchen is where I turn to when I am stressed. It calms me like nothing else, along with my daily dose of yoga.

I hope you all stay healthy and safe. Love and prayers for all of you.

I have some more fun mug cakes for you on the blog, like this divine brownie mug cake. If you can get your hands on some cherries, then this chocolate cherry mug cake is a dream. Got some pumpkin puree in your fridge? Then give this pumpkin mug cake a go, it is a wonderful one to make.

Half the joy of cooking is sharing it with others. That’s why I’m always eager to hear from you. So go right ahead & drop a comment or reach out on Instagram, Pinterest, YouTube, or Facebook. I hope you love this oat banana mug cake as much as we do!

📖 Recipe

Tried this recipe?Let us know how it was!
Vegan Oats Banana Mug Cake | Easy Kid Friendly Recipe

Oats Banana Mug Cake

Natasha Minocha
If you are looking for an easy, quick sweet fix, this Vegan Oats Banana Mug Cake needs to be next on your list! Made in 15 minutes and finished even sooner, I promise you’ll keep coming back to this delicious, gooey, fudgy treat.
No ratings yet
Print Recipe Pin Recipe
Prep Time 5 minutes mins
Cook Time 12 minutes mins
Total Time 17 minutes mins
Course Breakfast, Dessert, Snack
Cuisine American
Servings 2 Servings
Calories 380 kcal

Ingredients
  

  • 1 Banana
  • 2 tbsp Coconut oil
  • 4 tbsp Coconut milk
  • 1 tsp Vanilla extract
  • 1 tbsp Coconut sugar
  • 2.5 tbsp Oats flour I ground up some rolled oats in my coffee grinder.
  • 4 tbsp Amaranth flour
  • 1/4 tsp Baking powder
  • 1/8 tsp Baking soda
  • 1/8 tsp Salt
  • 1/2 tsp Cinnamon powder
  • 5-6 Walnuts, chopped
  • 1-2 tbsp Dairy free Chocolate or 70% Dark Chocolate

Instructions
 

  • In a bowl, mash the banana with a fork.
  • Add the oil, milk and vanilla extract to the mashed banana.
  • Stir in oats flour, amaranth flour, baking powder, baking soda, salt, and cinnamon powder.
  • Fold in the chopped walnuts and chocolate chips. This is a thick batter.
  • Equally, divide the batter into 2 ramekins or cups. Top with more chocolate if you want. Microwave one by one for 1.5 minutes and use a big cup as these cakes will rise a lot and tend to spill out.
  • If you want to bake these, preheat your oven to 180C. Place on a baking tray and bake for 12-15 minutes.
  • These cakes will puff up and sink as they cool. Serve warm. Enjoy!

Nutrition

Serving: 1 ServingCalories: 380kcalCarbohydrates: 37gProtein: 5gFat: 26gSaturated Fat: 18gPolyunsaturated Fat: 3gMonounsaturated Fat: 2gSodium: 288mgPotassium: 339mgFiber: 4gSugar: 12gVitamin A: 40IUVitamin C: 6mgCalcium: 73mgIron: 3mg

Lemon Madeleines Recipe

March 11, 2020

Lemon Madeleines in a teacup.

Typically, we don’t coo over the look of a dessert, but lemon madeleines have you salivating from the first glance. And don’t even get me started on the taste- it is meant to be savored.

Lemon Madeleines in a teacup.

After the heavy-duty baking and cooking for Holi, both my stomach and my soul wanted a respite. Something light and airy that pairs with a cup of tea in the evening like a song.

Lemon madeleines came to mind as I was flipping through Dorie Greenspan’s, a baker I follow religiously, Baking: From My Home to Yours. I have used the book as a source of inspiration for a long, long time and this lemon madeleine recipe is another adaption from it. 

How to Make Lemon Madeleines?

Madeleines are classic French cookies with a recognizable shell-like appearance. A deliciously impressive dessert, you’ll love it if you crave cakes as much as cookies.  

These buttery, spongy tea cakes are ludicrously easy to make because all the ingredients are right there in your pantry. All you require is a madeleine mold, and you’re good to go.

In a pan, mix all-purpose flour, salt, and baking powder and set aside. In another bowl, with your fingertips blend powdered raw sugar and lemon zest. Mix till you get that citrusy whiff and the sugar is moist.  Now add in the eggs and beat well. When the mixture is wonderfully thick, pale, and almost double the original volume, stop whisking and sprinkle some lemon juice in it. Fold the dry ingredients in followed by melted butter to form the batter.

Lemons

Important Notes:

When you fold the flour and butter into the egg mixture, do it very, very gently. You actually fold them together, not madly whisk them! The butter has to be cooled slightly after melting before you pour it in to give the madeleines a rich, complex flavor.

For that signature hump of madeleines, you need to chill the batter. After all the ingredients are folded (gently!) slide it in the refrigerator for a minimum of 2 hours. If you wish, you can even chill the madeleine pan to get that characteristic shape better.

Lemon Madeleines Easy Baking

Baking the lemon madeleines

When the batter is chilled enough, scoop it right into the middle of each mold. You don’t have to spread it around. As the madeleines bake, they do so automatically. 

As I said at the beginning, baking madeleines is easy if you have the correct mold. There are two types of them - metal and silicon. I use a silicon one but if you have the metal one at home, take an extra step. Brush each mold with melted butter. Liberally. 

It hardly takes fifteen minutes for the madeleines to cook, but as the clock reaches the 10-minute limit, I recommend keeping a constant eye on them because they can burn quickly after a certain point.

When the madeleines get that lovely golden hue and are springy to touch, that’s the time to take them out of the oven.  Garnish with slivers of pistachio and lemon glaze and the madeleines are ready to be served!

Lemon Madeleines Easy Baking

Variations of the madeleine recipe

These elegant and summery cakes were a pure delight to make and not just because of their exquisite prettiness. The buttery cake cum cookies also have absolutely the best taste, especially when they’re still warm from the oven.

Plus, like every other cake on earth, madeleines are highly adaptable. If you like a zing to your treats, try the orange madeleines. For those chocoholics, the chocolate madeleine recipe is a match made in heaven. And if you’re looking to up the game, the lavender madeleines are a great choice!

Half the joy of cooking is sharing it with others. That’s why I’m always eager to hear from you. So go right ahead & drop a comment or reach out on Instagram, Pinterest, YouTube, or Facebook. I hope you love these lemon madeleines as much as we do!

📖 Recipe

Tried this recipe?Let us know how it was!
Lemon Madeleines in a teacup.

Lemon Madeleines Recipe

Natasha Minocha
These elegant and summery Lemon Madeleines are a pure delight to make. They are exquisitely pretty and have a wonderful buttery lemony taste!
1 from 1 vote
Print Recipe Pin Recipe
Prep Time 1 hour hr
Cook Time 12 minutes mins
Total Time 1 hour hr 12 minutes mins
Course Cakes, Cookies, Snack
Cuisine French
Servings 15 madeleines
Calories 105 kcal

Ingredients
  

  • 1 cup All purpose flour
  • 1/2 tsp Baking powder
  • 1/8 tsp Salt Leave this out if using salted butter
  • 2 tsp Lemon zest
  • 1/3 cup Sugar
  • 2 Eggs, at room temperature
  • 2 tsp Lemon juice
  • 90 gms Butter, melted and cooled I used salted butter

Lemon Glaze

  • 2-3 tbsp Icing sugar
  • 1-2 tsp Lemon juice
  • Lemon zest and chopped pistachio for garnishing

Instructions
 

  • Sift the flour, salt and baking powder in a bowl.
  • In a small bowl, mix the lemon zest and sugar with your fingertips till the sugar is fragrant and moist.
  • Beat the eggs and sugar till pale and thick, doubled in volume. Whisk in the lemon juice. Now gently fold in the flour mixture, followed by the butter. Please don't over mix.
  • Cover the batter and refrigerate for a minimum of 2 hours or for up to 2 days.
  • When you're ready to bake, preheat your oven to 200 C. Grease and flour the madeleine molds. If you have a silicone pan, no prep is needed.
  • Spoon the batter into the molds, about three-quarters of the way. There is no need to level the batter. Bake for 12 -15 minutes or until they are golden and tops are springy to touch.
  • Turn them out on a cooling rack. Cool completely. Dip each madeleine halfway into the lemon glaze. Immediately top with chopped pistachios and lemon zest. Let these set for a few minutes and serve. Enjoy!

Notes

This recipe has been adapted from Dorie Greenspan's Baking From My Home To Yours.

Nutrition

Serving: 1 ServingCalories: 105kcalCarbohydrates: 12gProtein: 2gFat: 6gSaturated Fat: 3gPolyunsaturated Fat: 0.3gMonounsaturated Fat: 1gTrans Fat: 0.2gCholesterol: 35mgSodium: 81mgPotassium: 22mgFiber: 0.2gSugar: 6gVitamin A: 182IUVitamin C: 1mgCalcium: 15mgIron: 1mg

Vegan Phirni Recipe

March 9, 2020

Phirni | Vegan Phirni Recipe | Indian Dessert

What is any festival without an abundance of sweets and comfort food? This vegan phirni recipe is the perfect dessert to share with family and friends on this special occasion. 

Phirni | Vegan Phirni Recipe | Indian Dessert

I’ll admit, I have a love-hate relationship with Holi; I am not a fan of the playing with colors that leave me with pink residue in my hair for weeks, but I adore all the gujiyas and mithais that come along with it! After all, Holi ( like all other festivals) is all about celebrating happiness and love - what better way to do that than sharing comfort food with your loved ones? 

My absolute favorite among them all? My mom’s phirni. I could eat it by the gallon! So it's her recipe that I've shared here, with a little twist of my own.

Phirni | Vegan Phirni Recipe | Indian Dessert

What is Phirni? 

Phirni is a rice + milk based pudding, which is sweetened with sugar. The flavor enhancers that are typically used traditional Indian spices - saffron (very generously) and cardamon. The texture of this dessert is delightfully creamy and silky. 

Since milk is one of the base ingredients, you can imagine how my lactose-intolerant stomach can't handle the original recipe. With a simple switch from full fat to almond milk, its the perfect pudding for me and no one else can tell the difference! 

Phirni is different from Kheer as it is made with ground rice whereas Kheer uses whole rice. The consistency here is more like a custard.

Also phirni is best served chilled whereas kheer can be served warm or cold.

Phirni | Vegan Phirni Recipe | Indian Dessert

How to make Phirni

This is a pretty straight forward recipe. You begin by soaking rice in water for an hour. The rice is then drained and ground to a coarse paste. You coffee or masala grinder is the best appliance to use for this.

A little bit of milk or water maybe added to grind the rice.

The rice paste is then added to a pot of boiling hot milk and then its stir stir stir, for about 20-25 minutes. This mixture, needs to cook on low heat. It thickens fairly quickly but also gets lumpy rather fast. Hence the frequent stirring.

Once its thick and the rice is cooked through, the aromatics go in along with the sugar. Freshly ground cardamom and saffron soaked in warm milk get stirred in. Just a whiff of these beautiful spices makes desserts so special.

I am quite partial to raw sugar these days. So that's the sweetener used here. Regular granulated sugar will be just fine though.

Phirni | Vegan Phirni Recipe | Indian Dessert

Making Vegan Phirni

Traditionally this dessert is made with full-fat milk. But my lactose intolerance does not make it easy to indulge in my love for phirni. I decided to make a plant-based version which suited me better. 

Using almond milk instead of full fat as my mom used to, makes this phirni lighter for me but just as creamy and delicious. Even if you are not lactose intolerant like me, it's a great plant-based recipe for anyone seeking a slightly healthier twist on a beloved Indian dessert. 

Phirni | Vegan Phirni Recipe | Indian Dessert

Serving the dessert

This rich, creamy, subtly nutty phirni is usually served in shallow earthen bowls. But of course they sit pretty in lovely glass or terracotta dessert dishes too. If serving family style, then by all means use a large serving bowl.

A touch of silver leaf or varq, slivers almonds and pistachios and a sprinkle of rose petals ( fresh or dried) make phirni absolutely irresistible.

Phirni | Vegan Phirni Recipe | Indian Dessert

Half the joy of cooking is sharing it with others. That’s why I’m always eager to hear from you. So go right ahead & drop a comment or reach out on Instagram, Pinterest, YouTube, or Facebook. I hope you love this vegan phirni recipe as much as we do!

📖 Recipe

Tried this recipe?Let us know how it was!
Phirni | Vegan Phirni Recipe | Indian Dessert

Vegan Phirni Recipe

Natasha Minocha
Rich and creamy this vegan phirni looks so impressive and is a breeze to make!
No ratings yet
Print Recipe Pin Recipe
Prep Time 10 minutes mins
Cook Time 20 minutes mins
Total Time 30 minutes mins
Course Dessert
Cuisine Indian
Servings 6 servings
Calories 126 kcal

Ingredients
  

  • 1 ltr Almond milk You can use any milk of your choice
  • 1/2 cup Rice
  • 1 tsp Saffron, soaked in 1 tbsp of warm milk
  • 1 tsp Cardamom powder
  • 1/2 cup Raw sugar
  • Almond, Pistachio, Silver Leaf and Rose petals for garnishing

Instructions
 

  • Wash and soak the rice for 1 hour.
  • Drain the water and grind the rice with 2-3 tablespoons of almond milk to make a coarse paste.
  • Bring the almond milk to a boil and add the rice paste.
  • Cook on low heat, stirring very frequently, for 20- 25 minutes until the mixture has thickened and rice cooked. Please keep in mind the phirni thickens further as it cools.
  • Once thickened, take it off the heat and stir in the soaked saffron strands, sugar, and cardamom. Taste and adjust for sweetness.
  • Pour into your serving bowls. I like to serve phirni in small earthen bowls. Garnish with almonds and pistachios. Refrigerate for a few hours.
  • Serve chilled, topped with rose petals and silver leaf /varq ( if using ). Enjoy!

Nutrition

Serving: 1 ServingCalories: 126kcalCarbohydrates: 30gProtein: 1gFat: 0.1gSaturated Fat: 0.03gPolyunsaturated Fat: 0.03gMonounsaturated Fat: 0.04gSodium: 2mgPotassium: 27mgFiber: 0.3gSugar: 17gVitamin A: 0.1IUVitamin C: 0.1mgCalcium: 8mgIron: 0.2mg

Baked Mawa Gujiya

March 7, 2020

Gujiya | Baked Mawa Gujiya

One of the best parts of Holi? The crispy, flaky, stuffed mawa gujiya. Obviously.

I know for most people playing with colors is the pièce de résistance of Holi. The food is just a side dish that adds to the overall course. 

For me, the sweets and savouries are the mainstays of the festival with gujiya leading the way.

Gujiya | Baked Mawa Gujiya

Why?

Because somewhere under the intricate strata of dough and filling there is a deep satisfaction that only a gujiya can fulfill. It’s safe to say I really look forward to March each year!

How to Make Baked Gujiya at Home for Holi?

I have a household that eagerly waits to stuff their faces with heaps and heaps of Holi-special eats. The scrumptious array of sweets, snacks and drinks are consumed round the clock for the entire duration of festivities. 

The health-nut inside me finds this somewhat alarming - so, I decided to bake the gujiyas this year instead of deep frying and use jaggery instead of sugar.

Wholewheat flour with ghee | Gujiya | Baked Mawa Gujiya

The first step is the dough. I knead whole wheat flour, melted ghee and water till I have a smooth, soft dough. I cover it with a moist cloth and set it aside for a few minutes.

Dough | Gujiya | Baked Mawa Gujiya

In the meanwhile, to make the filling, I soften the khoya by heating it in a pan. I use store-bought khoya, but if you want to use homemade one, that works like a charm too. The trick is to keep the flame low and continuously stir it because khoya tends to burn rather quickly.

Heat up the Khoya | Gujiya | Baked Mawa Gujiya

After the khoya is semi-solid and cooled down, I add in finely chopped cashews, pistachios, and almonds along with a few strands of saffron. In go some freshly grounded cardamom powder and some jaggery powder.

Gujiyas are a two-part symphony. The crust has to be smooth, shine and flaky while the stuffing must have a texture, which is why people love to add grated coconut. (I in my rush to get the gujiyas ready like yesterday forgot to add it.)

Filling for the gujiya | Gujiya | Baked Mawa Gujiya

Quick notes:

The traditional gujiya recipe for Holi uses regular powdered sugar. If you want to go all out, by all means, skip the jaggery and choose sugar. 

When you mix the dry stuffing ingredients with khoya, really get in there. Eschew a spoon or spatula and use your hands!

Shaping the gujiyas:

Rolling perfectly round discs is like muscle memory for my mom. I am a klutz when it comes to shaping gujiya. No matter how much I try, they’re circumferentially challenged. So, I used cheat codes! I divide the dough into small even balls, roll them into thin discs and then use a cookie cutter to get perfect circles. 

Rolled out disc with filling | Gujiya | Baked Mawa Gujiya

Next, I slightly wet the edges with water (acts as a glue), place the filling on one side and then fold the other section on top to make a half-moon. Minutely pleat the edges, and it’s done.

As you can see from the images, my pleating skills need some serious intervention. I tried dozens of methods to no avail. But in the end, it is the taste that matters with gujiya, and I can attest it was sublime.

If pleating confounds you too, then I recommend buying gujiya molds!

Ready for baking | Gujiya | Baked Mawa Gujiya

Baking the gujiyas:

At this stage, you can air fry or deep fry the gujiya. If you prefer baking, then gently brush melted ghee and then slide them in the oven.

Once the gujiyas are golden brown, I dip them in jaggery syrup that I made for malpuas.

Dipping the gujiyas in the jaggery syrup | Gujiya | Baked Mawa Gujiya

In my humble opinion, honed over decades of gujiya-eating and then gujiya-making the jaggery dip makes them muuuch more delicious!

If you have fried the gujiyas, you can skip this step. But if you’re baking them, I highly recommend dipping them nicely in the syrup. 

It makes a world of difference. The syrup imparts the buttery, flaky crust a tempting sheen and just the right amount of sweetness. Trust me, the gujiyas will not be overly sweet as the dough does not have any sugar and the filling is also mildly sweet. So the balance here is perfect.

Gujiya | Baked Mawa Gujiya

Relishing Homemade Gujiya for Holi

The thing I like best about homemade baked gujiyas is that they are sweet, but not sugar-saturated like the ones you get in the market. They’re light but incredibly satisfying, especially with a cup of chai ????

If you want to indulge for the festivities, I advise adding more khoya to the gujiya filling. If you wish to jazz it up, then go ahead experiment with chocolate or lemon zest in the stuffing. 

Making gujiya is a process. Even when you buy the khoya and use gujiya molds. But it is a labor of love and every single buttery, crumbly bite proves it.

Half the joy of cooking is sharing it with others. That’s why I’m always eager to hear from you. So go right ahead & drop a comment or reach out on Instagram, Pinterest, YouTube, or Facebook. I hope you love these delicious gujiya as much as we do!

📖 Recipe

Tried this recipe?Let us know how it was!
Gujiya | Baked Mawa Gujiya

Baked Mawa Gujiya

Natasha Minocha
Baked Mawa Gujiya- One of the best parts of Holi is the crispy, flaky, stuffed mawa gujiya. It is a labor of love and every single buttery, crumbly bite proves it!
5 from 2 votes
Print Recipe Pin Recipe
Prep Time 1 hour hr
Cook Time 20 minutes mins
Total Time 1 hour hr 20 minutes mins
Course Dessert
Cuisine Indian
Servings 15 Gujiyas
Calories 188 kcal

Ingredients
  

Dough

  • 1.5 cups Wholewheat flour
  • 3 tbsp Ghee, melted
  • 1/4 -1/3 cup Water

Filling

  • 1 cup Crumbled khoya
  • 1/3 cup Mixed nuts, finely chopped ( almonds, pistachios, cashews)
  • 2 tbsp Jaggery Powder
  • 1 tsp Cardamom powder
  • 1/2 tsp Saffron strands

Jaggery Syrup

  • 1 cup Water
  • 1/2 cup Jaggery Powder

Instructions
 

Dough

  • Combine the flour and ghee in a large bowl. Add enough water to knead it into a soft smooth dough. Cover with a kitchen towel and let it rest for 10 -15 minutes.

Filling

  • Heat the crumbled khoya in a pan until it melts and the oil separates.
  • Take it off the heat. Let it cool for a few minutes and mix in the jaggery powder, nuts, cardamom, and saffron.

Assembly

  • Preheat your oven to 200 C. Line a baking tray with parchment paper.
  • Divide the dough into small equal-sized balls. Roll them out into thin discs. You can use a cookie cutter to make perfect circles as I did.
  • Lightly brush the edges of the disc with water. Place a teaspoon of the filling in the center and fold over the other section on top to make a half-moon. Press the edges to seal the gujiya. You can make pleats with the edge or make patterns with a fork. Or just leave it plain.
  • Place the gujiya on the prepared tray and brush with ghee. Bake for 12-14 minutes or until the gujiya are lightly golden.
  • Once the gujiyas cool a bit, dip them in jaggery syrup for a minute. Place them on a wire rack and let them dry.
  • Serve warm or at room temperature. Enjoy!

Jaggery syrup

  • Heat the jaggery powder and water in a small saucepan for 7-8 minutes, until the syrup just barely starts to thicken.

Nutrition

Serving: 1 ServingCalories: 188kcalCarbohydrates: 23gProtein: 5gFat: 9gSaturated Fat: 5gPolyunsaturated Fat: 1gMonounsaturated Fat: 3gTrans Fat: 0.02gCholesterol: 11mgSodium: 46mgPotassium: 34mgFiber: 1gSugar: 9gVitamin A: 73IUVitamin C: 0.2mgCalcium: 118mgIron: 1mg

Mawa Cake

March 6, 2020

Mawa cake with almonds and pistachios on a cake platter.

Decadent, delicious, and arguably the butteriest cake, mawa cake is perfect for festive baking. A classic teacake, it’s soft, moist, and delicately spiced with cardamom and saffron.

Mawa cake with almonds and pistachios on a cake platter.

Rich but not overly sweet, this eggless Mawa cake has a beautiful crumb and a gentle caramel flavor thanks to khoya (Mawa). Every bite is buttery, lightly nutty, and wonderfully aromatic.

The khoya adds a deep richness while keeping the cake soft and moist. Add a hint of saffron, a touch of cardamom, and a sprinkle of nuts on top, and you have a cake that feels both comforting and celebratory.

[feast_advanced_jump_to]

What Is Mawa Cake?

If you’ve been to a Parsi café, especially in Mumbai or Pune, you know their love for food and delightful baked items. But the one that deserves special mention is Mawa cake, a sumptuous plateful of calorie-laden indulgence.

The iconic tea-time snack that the community introduced to us is not merely an Irani specialty; it is also a time capsule of an era gone by. Enter any Parsi café and Mawa cake will be on the menu. 

The cake itself is simple: flour, butter, sugar, khoya, and cardamom.

But the flavor? Deep, rich, and unforgettable.

My recipe stays close to the classic but adds my own small twist: a little saffron and coconut. I got the idea from my incredibly tasty coconut burfi recipe!

Cake with a slice taken out on a cake stand.

Why You’ll Love This Recipe

✨ Nice, simple, and wholly doable, the eggless Mawa cake is fantastic for Holi, Diwali, or any celebration.

✨ It’s made with pantry staples and comes together quickly, making it a great bake for casual tea-time. It uses yogurt for moisture and binding instead of egg. If you love eggless baking, you'll also enjoy my eggless chocolate chip cake.

✨The cake is rich but balanced. The khoya gives it a deep milky flavor, while the cardamom and saffron add their own unique aroma and taste.

✨ It’s also a nostalgic bake. The flavors instantly remind many of childhood bakery treats and festive sweets. And best of all, it pairs beautifully with a cup of tea or coffee.

Reader Love ❤️

5 stars

Hello Tasha! I made this for our Book Club yesterday and it turned out absolutely perfect!!! Everyone in the book club loved your Mawa Cake and many want me to share your recipe with them, which I will of course! I skipped the almonds and saffron but I did add some gulkand to the batter, which added a very nice flavor addition. Thank you for sharing your wonderful recipe!!! By the way, our Book Club book was, "A Bad Day At The Vulture Club" by Vaseem Khan. - Bob

Mawa Cake Ingredients

Flour: I used a mix of whole wheat and all-purpose flour. Feel free to make it with either of the flours.

Khoya (Mawa) is the heart of the cake. You can buy it at the store or make it at home. It adds an intense, milky nuttiness.

Butter: I used regular salted butter. Make sure it's at room temperature for easy creaming.

Yogurt acts as the egg substitute in this eggless cake while adding moisture.

Sugar: Regular granulated sugar works well here.

Spices: The traditional Mawa cake recipe doesn’t have any other spice except cardamom powder, and it is more than enough to give the buttery cake a wonderful flavor. I added some saffron as well, since I love it in my bakes, like in my cardamom pistachio madeleines and saffron cardamom cheesecake.

Desiccated coconut: This is also optional, but I do love the nutty, sweet flavor in this mawa cake.

Nuts: Pistachio and almond slivers for that gorgeous, crunchy top.

Please see the recipe card below for full information about the ingredients and quantities.

How To Make Mawa Cake

Step 1: In a mixing bowl, beat softened butter and sugar until light and fluffy.

Step 2: Add the yogurt and mix well.

Step 3: In another bowl, sift together both flours, baking powder, and baking soda.

Step 4: Stir in desiccated coconut, cardamom powder, and saffron.

Step 5: Fold the dry ingredients into the butter mixture.

Process of making Mawa Cake.

Step 6: Add the crumbled khoya and mix gently until combined.

Step 7: Pour the batter into a greased cake pan.

Step 8: Sprinkle almond and pistachio slivers on top.

Step 9: Bake until golden and a skewer inserted comes out clean. Let cool in the pan for a few minutes before turning out on a cooling rack.

Step 10: Serve at room temperature.

Cake with nuts and rose petals on a cake stand with ingredients in the background.

Pro Tips

  • Make sure the yogurt is at room temperature; otherwise, your cake batter will curdle.
  • The butter should be softened.
  • Crumble the khoya finely so it mixes evenly into the batter.
  • Do not overmix the batter. It can make the cake dense.
A slice of cake on a small plate.

Recipe FAQs

What's khoya (or khoa)?

Khoya is evaporated milk solids. It has this incredible, concentrated, almost caramelized dairy flavor that's unlike anything else. When you bake with it, be it a Mawa gujjiya or chocolate burfi, it keeps the dessert incredibly moist and adds a rich, nutty depth.
Khoya is readily available at Indian grocery stores. If you have time at hand, I recommend making it at home from scratch using a traditional recipe.

How to serve mawa cake?

This rich cake needs no icing or frosting. It's best served with a cup of tea spiced with homemade chai masala.

How long does Mawa cake stay fresh?

The cake stays fresh for 2–3 days at room temperature in an airtight container. I prefer to keep it refrigerated in the summer months.

More Festive Cake Recipes

  • Cardamom Almond Tea Cake
    Cardamom Almond Tea Cake
  • Easy Baklava Cake Recipe
    Easy Baklava Cake
  • Easy Persian Love Cake
    Easy Persian Love Cake
  • Pistachio cake topped with chopped pistachios and rose petals on a cake stand.
    Pistachio Cake Recipe

Half the joy of cooking is sharing it with others. That’s why I’m always eager to hear from you. So go right ahead & drop a comment or reach out on Instagram, Pinterest, YouTube, or Facebook. I hope you love this scrumptious mawa cake as much as we do!

📖 Recipe

Tried this recipe?Let us know how it was!
Mawa cake with almonds and pistachios on a cake platter.

Mawa Cake

Natasha Minocha
Decadent, delicious, and arguably the butteriest cake, mawa cake is perfect for festive baking. A classic teacake, it’s soft, moist, and delicately spiced with cardamom and saffron.
5 from 2 votes
Print Recipe Pin Recipe
Prep Time 20 minutes mins
Cook Time 50 minutes mins
Total Time 1 hour hr 10 minutes mins
Course Cakes, Dessert
Cuisine Indian
Servings 10 Servings
Calories 274 kcal

Ingredients


  • 1/2 cup Butter, softened I used regular salted butter
  • 1/2 cup Sugar
  • 1 cup Yogurt, at room temperature
  • 1 cup Wholewheat Flour
  • 1/2 cup All Purpose Flour
  • 1.5 tsp Baking Powder
  • 1/2 tsp Baking Soda
  • 1.5 tsp Cardamom powder
  • 2 tbsp Desiccated coconut Optional
  • 1 tsp Saffron strands Optional
  • 1/2 cup Crumbled Khoya /mawa
  • Pistachio and Almond Slivers for Topping the cake

Instructions
 

  • Preheat your oven to 180 C/ 350 F. Grease an 8" cake tin.
  • In a large bowl, beat together the butter and sugar until light and fluffy.
    1/2 cup Butter, softened, 1/2 cup Sugar
  • Whisk in the yogurt.
    1 cup Yogurt, at room temperature
  • Sift the flours, baking powder, and baking soda in another bowl.
    1 cup Wholewheat Flour, 1/2 cup All Purpose Flour, 1.5 tsp Baking Powder, 1/2 tsp Baking Soda
  • Stir in desiccated coconut, cardamom powder, and saffron.
    1.5 tsp Cardamom powder, 2 tbsp Desiccated coconut, 1 tsp Saffron strands
  • Fold in the dry ingredients into the butter-sugar mixture. Gently stir in the crumbled khoya.
    1/2 cup Crumbled Khoya /mawa
  • This is a thick batter. Scrape into the prepared pan and top with pistachio and almond slivers.
    Pistachio and Almond Slivers for Topping the cake
  • Bake at 180 C/ 350 F for 45-55 minutes, or until a skewer inserted in the center comes out clean.
    Let cool in the pan for a few minutes before turning out on a cooling rack.
  • Serve at room temperature. Enjoy!
  • You can store the leftover cake in the refrigerator in an airtight container.

Notes

  • Make sure the yogurt is at room temperature; otherwise, your cake batter will curdle.
  • The butter should be softened.
  • Crumble the khoya finely so it mixes evenly into the batter.
  • Do not overmix the batter. It can make the cake dense.

Nutrition

Serving: 1 ServingCalories: 274kcalCarbohydrates: 30gProtein: 5gFat: 15gSaturated Fat: 10gPolyunsaturated Fat: 1gMonounsaturated Fat: 3gTrans Fat: 0.4gCholesterol: 30mgSodium: 243mgPotassium: 68mgFiber: 1gSugar: 12gVitamin A: 367IUVitamin C: 0.3mgCalcium: 155mgIron: 1mg

Easy Malpua Recipe

March 5, 2020

Easy Malpua Recipe Indian Dessert Festive Food

Easy Malpua Recipe - An easier, lighter, and slightly healthier version of the original malpua, but no less crispy, gooey, and indulgent dessert for Holi!

Easy Malpua Recipe Indian Dessert Festive Food

Festivals invariably have a food ritual attached to them. The cuisine is as important to the celebration as the customs. Well, unless you have a home like mine, where the centre of attention is always food.

So, it really shouldn’t come as a surprise that I am already cooking up a storm for Holi. The first on the menu are crisp-edged, soft-centred and insanely delicious malpuas.

For those not in the know, think of a malpua as a fried pancake that is dunked in a sweet syrup. Traditionally, it is sugar syrup. I use jaggery but that’s for later, first is how to make the malpuas.

Easy Malpua Recipe Indian Dessert Festive Food

How to Make Malpua Quickly?

The old-fashioned and established malpua recipe takes time because it requires the batter to rest for a few hours. But when you have a house full of perpetually hungry people, you learn to tweak recipes for quicker results. The easy malpua recipe I use does just that.

To make instant malpuas, I substituted khoya with milk powder and mixed it with whole wheat flour and thick yogurt. I know maida (all-purpose flour) is the customary malpua ingredient, but wheat flour is just so much healthier. 

For the unique malpua taste, I sprinkled some freshly ground fennel powder and cardamom powder.  Finally, I added water to make a soft, lump-free batter. After this step, you have two options. You can either leave the batter for four to five hours for it to thicken. Or if you’re short on time, just mix fruit salt or baking soda in the batter and use it instantly.

Process of Easy Malpua Recipe Indian Dessert Festive Food

Shallow frying the malpuas

Traditionally malpuas are deep-fried in ghee. But since I am petrified of deep-frying, I shallow fry them. In ghee. Always in ghee. The flavor it imparts is just incomparable.

Ladle the smooth batter into the ghee and fry till they are a deep, golden brown. The trick is to use medium heat. If the ghee is too hot, the malpua will be crispy on the outside but raw from inside. Low heat makes sure you get that lovely soft, gooey texture in the middle and the crunchy bits on the edges.

Easy Malpua Recipe Indian Dessert Festive Food

Making the jaggery syrup for malpua

Making malpua takes no effort, especially if you use the instant version of the recipe. All you do is mix the batter and then fry. The toughest part is making the jaggery syrup, and honestly, that is laughably simple too. 

In a pan, you heat water and jaggery for a few minutes and, et voila, you have a wonderful sticky syrup. Dip the fried malpua in the jaggery syrup and you are ready to indulge in some serious deliciousness.

Easy Malpua Recipe Indian Dessert Festive Food

Quick notes

You can adjust the consistency of the batter as per your preference. If you love thin and crispy malpuas, add in some more water to the batter to thin it. If you love fluffy and fat malpua (like me), keep the batter a little thick.

When you ladle the batter on the homemade ghee, don’t spread it out , the batter spreads nicely on its own.

The conventional malpua recipe makes use of sugar to give it a sweet touch, but making a sugar syrup with that perfect one-string consistency makes me a bit nervous. Plus, I prefer to keep away from refined sugar whenever possible. So, I stuck to wholesome jaggery.

The jaggery syrup does tend to harden as it cools. Simply keep it over a pan of hot water and it will not lose the runniness.

How to Serve Malpua?

Once the malpua have soaked in the jaggery syrup nicely, garnish them with a few slivers of almonds and pistachio. For those who love the taste of kesar, a few strings of it bring a whole new explosion of flavour to the dessert.

You can even go the customary way and serve the malpuas with rabri, but they are lovely as is. In my home, we just pour some more jaggery syrup right before we sit down to enjoy them!

Easy Malpua Recipe Indian Dessert Festive Food

Half the joy of cooking is sharing it with others. That’s why I’m always eager to hear from you. So go right ahead & drop a comment or reach out on Instagram, Pinterest, YouTube, or Facebook. I hope you love this easy malpua recipe as much as we do!

📖 Recipe

Tried this recipe?Let us know how it was!
Easy Malpua Recipe Indian Dessert Festive Food

Easy Malpua Recipe

Natasha Minocha
An easier, lighter and slightly healthier version of the original malpua, but no less crispy, gooey and indulgent dessert for Holi!
No ratings yet
Print Recipe Pin Recipe
Prep Time 20 minutes mins
Cook Time 25 minutes mins
Total Time 45 minutes mins
Course Dessert
Cuisine Indian
Servings 6 Servings
Calories 242 kcal

Ingredients
  

  • 1 cup Wholewheat flour
  • 3 tbsp Milk powder
  • 1 tsp Fennel / Saunf powder
  • 1 tsp Cardamom / Elaichi powder
  • 1/8 tsp Baking soda / fruit salt
  • 1/3 cup Yogurt
  • 1/2 cup Water You may need more
  • 3-4 tbsp Ghee, for frying

Jaggery Syrup

  • 1/2 cup Jaggery Powder
  • 1 cup Water

Instructions
 

Malpua Batter

  • In a medium-sized bowl, combine the wholewheat flour, milk powder, baking soda, fennel, and cardamom powder.
  • Whisk in the yogurt and water to make a thick lump-free batter. Keep aside for 10 minutes.
  • Heat 3 tbsp ghee in a frying pan. Add a small ladle full of batter to the ghee and cook on moderate heat till its light golden brown on both sides.
  • Remove from heat and dip it in the hot jaggery syrup for a couple of minutes. Serve warm with slivers of pistachio and almonds. For a touch of extra decadence, serve with rabri. Enjoy!

Jaggery Syrup

  • Heat the jaggery powder and water in a small saucepan for 7-8 minutes, until the syrup just barely starts to thicken. Keep the syrup warm by placing the saucepan atop a pan of hot water.

Nutrition

Serving: 1 ServingCalories: 242kcalCarbohydrates: 36gProtein: 4gFat: 9gSaturated Fat: 5gPolyunsaturated Fat: 0.4gMonounsaturated Fat: 3gCholesterol: 23mgSodium: 45mgPotassium: 98mgFiber: 1gSugar: 19gVitamin A: 36IUVitamin C: 0.5mgCalcium: 63mgIron: 1mg

Easy Cape Gooseberry Almond Cake

February 28, 2020

Easy Cape Gooseberry Almond Cake Eggless Wholegrain Baking

Locally sourced, seasonal produce is our best friend in the kitchen. Case in point today, gorgeous golden berries that went into this Easy Cape Gooseberry Almond Cake.

Easy Cape Gooseberry Almond Cake Eggless Wholegrain Baking

The markets are flooded with Cape Gooseberries or Physalis or Rasbhari as its commonly called here in India. Literally translated, it means “full of juice”! Native to Peru and Chile, Cape Gooseberries or Physalis, also now grow in India, Australia, China, and Malaysia.

These shiny irresistible berries pack quite a flavorful punch. A little sweet a little sour, they are a delight to look at and eat. Because of its very tartness, this fruit works beautifully in sweet bakes, jams, and compotes.

Cape Gooseberries/ Physalis / Rasbhari

The goodness of Cape Gooseberries

These little berries are a fabulous snack as they provide a hefty dose of fructose, which is a soluble fiber. And that my friends is wonderful for diabetics, as it helps control blood sugar levels. A good amount of pectin here helps in better calcium absorption which means it is great for our bones. It also aids in digestive health. All this while being a great immunity booster…Rasbhari is brimming with vitamins A & C and antioxidants. So load up people, while it's still in season!

Easy Cape Gooseberry Almond Cake Eggless Wholegrain Baking

How to make this Easy Cape Gooseberry Almond Cake

Since I decided it leave eggs out of this one too, the prep was really quick and simple.

Wholewheat flour, baking powder, baking soda, and salt are first sifted in a bowl. To that, I added the almond meal and raw sugar. Almond meal ensures that the cake gets a subtle nutty flavor and stays moist. This, apart from adding a boost of nutrition. To make almond meal, simply grind almonds in your coffee grinder or food processor. It's fresh and cheap.

In another bowl, plain Greek yogurt, olive oil and vanilla extract are whisked. Once the liquids are mixed in with the dry ingredients, you fold in the quartered cape gooseberries and fresh thyme leaves.

Process of making Easy Cape Gooseberry Almond Cake Eggless Wholegrain Baking

Yes, you heard that right! Fresh herbs in a cake? I enjoy throwing in a bit of that herbalicious ( is this a word?) savor as I did in my Orange Upside Down Cake. Trust me, it makes the flavor pop, in a delicate way. And it's an exceptional match with the fruity olive oil here.

Baking the Cake

The batter for this cake is quite thick ( almost like brownie batter). But do resist the temptation to add more liquid here. The Cape Gooseberries release their juices as the cake bakes so there is enough hydration!

Scrap the cake batter into your greased pan, and top it with a few more gooseberries and some sliced almonds. This cake does take a bit of a while to bake up..in my oven it took about 50 minutes till it was done.

Waiting for 10-15 minutes before turning it out is important as you want the juices from the fruit to settle in.

Easy Cape Gooseberry Almond Cake Eggless Wholegrain Baking

This cake is best served warm or at room temperature. However, I don’t have any problem with eating it cold from the refrigerator. Yes, as the weather warms up, I highly recommend storing the leftovers in the fridge. Thanks to the yogurt, berries, and almond meal, this cake does not dry out. It stays well for 2-3 days in an airtight container.

This cape gooseberry almond cake has a soft, tender, nutty crumb liberally interspersed with juicy jammy tart fruity bites with a whiff of savory garden-fresh thyme. Truly a lovely teatime treat for us!

Easy Cape Gooseberry Almond Cake Eggless Wholegrain Baking

NOTE :

This cake can be easily made gluten-free as I did for my plum & apricot cobbler cake. If you want to make it vegan, simply use plant-based yogurt instead of Greek yogurt.

Half the joy of cooking is sharing it with others. That’s why I’m always eager to hear from you. So go right ahead & drop a comment or reach out on Instagram, Pinterest, YouTube, or Facebook. I hope you love this cape gooseberry almond cake as much as we do!

📖 Recipe

Tried this recipe?Let us know how it was!
Easy Cape Gooseberry Almond Cake Eggless Wholegrain Baking

Easy Cape Gooseberry Almond Cake

Natasha Minocha
Easy Cape Gooseberry Almond Cake - a delicious, egg-free cake full of juicy gooseberries and almonds. A wonderful tea-time treat that comes together super quickly.
No ratings yet
Print Recipe Pin Recipe
Prep Time 25 minutes mins
Cook Time 50 minutes mins
Total Time 1 hour hr 15 minutes mins
Course Cakes, Dessert
Cuisine World
Servings 8 servings
Calories 242 kcal

Ingredients
  

  • 1 cup Wholewheat flour
  • 1.5 tsp Baking powder
  • 1/4 tsp Baking soda
  • 1/8 tsp Salt
  • 1/2 cup Almond meal
  • 1/2 cup Raw sugar
  • 2/3 cup Greek yogurt, plain
  • 1/3 cup Olive oil
  • 1 tsp Vanilla extract
  • 20-25 Cape Gooseberries, quartered
  • 1 tsp Fresh Thyme leaves

Topping

  • Cape Gooseberries quartered and Sliced Almonds

Instructions
 

  • Preheat your oven to 180C. Grease a 6" cake tin very well.
  • Sift the wholewheat flour, baking soda, baking powder and salt in a large bowl. Mix in the almond meal and raw sugar.
  • In a separate small bowl, whisk together the olive oil, Greek yogurt, and vanilla extract.
  • Pour the wet ingredients into the dry ingredients.
  • Fold in the gooseberries and thyme. This is a thick batter.
  • Scrape the batter into the prepared pan. Sprinkle some additional gooseberries and sliced almonds on top.
  • Bake for 50-55 minutes or until a skewer inserted in the center comes out clean. If your cake is browning too fast from the top, cover loosely with a piece of foil.
  • Once the cake is baked, wait for 10-15 before turning it out. Turn it out on a cooling rack. Let cool completely.
  • Serve warm or at room temperature. Enjoy!
  • This cake will stay well for 2-3 days in the refrigerator in an airtight container.

Nutrition

Serving: 1 ServingCalories: 242kcalCarbohydrates: 27gProtein: 5gFat: 13gSaturated Fat: 2gPolyunsaturated Fat: 1gMonounsaturated Fat: 7gTrans Fat: 0.001gCholesterol: 1mgSodium: 157mgPotassium: 47mgFiber: 1gSugar: 13gVitamin A: 13IUVitamin C: 0.4mgCalcium: 83mgIron: 1mg

Sticky Sesame Cauliflower

February 25, 2020

Sticky Sesame Cauliflower easy vegetarian glutenfree vegan friendly meal

Crispy, crunchy, spicy, and sweet, the Sticky Sesame Cauliflower is as Asian as it can get. And it leaves you smiling in deep satisfaction.

Sticky Sesame Cauliflower easy vegetarian glutenfree vegan friendly meal

Is it just my household or “can we order food, tonight?” a common refrain in yours too? Every other day one of my kids will try to guilt trip me into getting food delivered with their puppy dog eyes.

Considering I try the utmost to keep meals as healthy as possible, takeout is like a burr in my saddle. It is what spurred me to try recipes that are “better than takeout.” The first foray was with a delicious Raw Mango Rice and the second with a fantastic Spicy Tofu Stir Fry.

For my third attempt, I wanted an explosion of flavors that hit the craving for really good food bang on. Hence, the sticky sesame cauliflower recipe. So, shall we begin?

How to Make Sticky Sesame Cauliflower?

The sticky sesame cauliflower has been on my must-make list for a long while. With the vegetable in season, it was the perfect time to try it. My son insists it was the right time because he was tired of eating the same old ‘aloo-gobhi.’ Whatever the reason, the slightly hot, a little sweet and a whole lot delicious sticky sesame cauliflower was a total hit. 

Start by cutting florets from the cauliflower. Don’t chop it too small and keep the sizes fairly similar (to bake evenly). Next, make a smooth, thick batter by mixing corn starch and rice flour (for amazing crunchy textures), garlic powder, a teaspoon of any vegetable oil with water.

It’s the batter that bakes the cauliflower to a crisp. So, keep it rich. Toss the florets in it. Ensure they are coated well and then slide them in the oven till they are just done.

Baked Cauliflower Florets

Making the sauce for sticky sesame cauliflower

While the cauliflower is turning into a gorgeous light golden, you have the time to make the unbelievably divine sauce. In a pan, heat soy sauce, chilli sauce, rice wine vinegar, sesame oil, and minced garlic and ginger. 

I used sriracha because I love to turn the volume up on the heat. You can use any chilli sauce of your preference based on how hot you want the recipe. For the sesame oil, I prefer cold-pressed because it has the best flavor!

Once the sauce has cooked for about five odd minutes, whisk in a mixture of cornstarch and water to give it a slurry-like consistency. Now comes the sticky and yummy part of the recipe - add in some honey to the thickened sauce. 

Combine the cauliflowers (which should be baked by now) with the sauce, and you’re done!

Quick notes

The sticky sesame cauliflower recipe is vegan-friendly. You simply substitute honey for maple syrup. If you chose to do so, add the syrup while heating all the sauce ingredients. I add the honey after taking the sauce off the stove because high temperatures leech away the condiment’s properties.

The recipe is uber-quick, but you can reduce the prep time further by making the sauce beforehand. Just reheat it with a touch of water (it tends to thicken with time) and then chuck in the cooked cauliflower.  You’ll often find a jar of the sauce in my pantry because it is just so versatile and, to be honest, addictive. You can add it to mushrooms, chicken, and even tofu for some truly finger-lickin’ results.

Serving sticky sesame cauliflower

Each bite of the sticky sesame cauliflower hits all the senses. Not once do you realize, you’re eating cauliflower with such gusto! 

The trick to keeping cauliflower sticky and crispy on the outside and soft on the inside is to serve it immediately after mixing the baked florets with the sesame sauce. 

I love to plate it on a bed of Jasmine rice and then garnish with some green onions, red chili, and sesame seeds. You can switch the rice with noodles, and the recipe is still utterly delicious. 

More healthy, quick recipes

  • Thai Peanut Noodles
  • Sticky Chili Sweet Potatoes
  • baked sweet potatoes
  • Spicy Tofu Stir Fry
  • Spicy Keema Curry

I hope you give the sticky sesame cauliflower a whirl. It is healthy, and it tastes exactly like takeout from your favorite Asian restaurant. Plus, with minimal chopping and stove time, it's the best fuss-free cooking.

Trust me; words will fall short of how amazing it tastes. 

I’d love to hear from you! Please tag me on Instagram @tashasartisanfoods, using the hashtag #tashasartisanfoods. You can also FOLLOW ME on INSTAGRAM, PINTEREST for more fabulous recipes! Do subscribe to Tasha’s Artisan Foods so you’ll never miss a recipe!

📖 Recipe

Tried this recipe?Let us know how it was!
Sticky Sesame Cauliflower easy vegetarian glutenfree vegan friendly meal

Sticky Sesame Cauliflower

Natasha Minocha
Crispy, crunchy, spicy and sweet, the Sticky Sesame Cauliflower is as Asian as it can get. And it leaves you smiling in deep satisfaction.
4.43 from 19 votes
Print Recipe Pin Recipe
Prep Time 20 minutes mins
Cook Time 30 minutes mins
Total Time 50 minutes mins
Course Main Course
Cuisine Asian
Servings 4 servings
Calories 205 kcal

Ingredients
  

Cauliflower

  • 1 medium Cauliflower, cut into florets
  • 1/3 cup Rice flour
  • 1 tbsp Cornstarch
  • 1 tsp oil
  • 1/2 tsp Garlic powder, optional
  • 1/3 - 1/4 cup Water

Sauce

  • 1.5 tbsp Sesame oil
  • 1/4 cup Light soy sauce
  • 1 tbsp Rice wine vinegar
  • 1-2 tbsp Sriracha Sauce adjust to taste (you add more if you prefer more heat)
  • 1" Fresh ginger, finely minced
  • 4-5 cloves Fresh garlic, finely minced
  • 2-3 tbsp Honey/ maple syrup
  • 1 Tbsp Cornstarch
  • 1/4 cup Water

Garnish

  • Sesame seeds, Spring onions, Sliced Chillis

Instructions
 

Cauliflower

  • Preheat your oven to 200C / 392F. Line a baking tray with foil or parchment paper.
  • In a small bowl, whisk together the rice flour, cornstarch, oil, garlic powder and water to make a smooth thick mixture.
  • Coat the cauliflower florets in this mixture and place in a single layer on the prepared baking tray.
  • Bake for 20-25 minutes at 200 C / 392 F until just done. Don't let the cauliflower overcook. You want to retain the crunchy texture.

Sauce

  • While the cauliflower is in the oven, combine sesame oil, soy sauce, rice wine vinegar, sriracha sauce, ginger, and garlic in a small saucepan and cook for 5-6 minutes. If using maple syrup, you can add that at this point too.
  • Whisk cornstarch and water in a small bowl and add it to the simmering sauce.
  • Cook till the sauce thickens another 2-3 minutes. Take it off the heat and add the honey to the sauce. Taste and adjust for seasoning.

Assembly

  • Once the cauliflower is ready, toss it in with the sauce. Garnish with sesame seeds, spring onions, and chillis. Serve immediately. Enjoy!

Nutrition

Serving: 1 ServingCalories: 205kcalCarbohydrates: 33gProtein: 5gFat: 7gSaturated Fat: 1gPolyunsaturated Fat: 3gMonounsaturated Fat: 3gTrans Fat: 0.01gSodium: 954mgPotassium: 505mgFiber: 4gSugar: 12gVitamin A: 6IUVitamin C: 73mgCalcium: 44mgIron: 1mg
Sticky Sesame Cauliflower easy vegetarian glutenfree vegan friendly meal
  • « Go to Previous Page
  • Page 1
  • Interim pages omitted …
  • Page 10
  • Page 11
  • Page 12
  • Page 13
  • Page 14
  • Interim pages omitted …
  • Page 16
  • Go to Next Page »

Primary Sidebar

New-Cover-4-1024x934

I’m Natasha! I’m a self-taught baker and cook, sharing easy, fuss-free recipes that anyone can make with confidence. From breads and cookies to decadent desserts to simple meals, I hope you’ll find your next favorite recipe here.

More about me →

Add us as a Trusted Site

Sign Up For Email Updates

Get A Free E-Book With 8 Easy Bread Recipes For Beginner Bakers!

Popular Recipes

  • mushroom quiche on a platter with ingredients in the background.
    Mushroom Quiche
  • chocolate fudge squares stacked on top of each other on small plate.
    Chocolate Fudge With Condensed Milk
  • Easiest Homemade Cream Cheese | Homemade Cream Cheese Recipe
    Easiest Homemade Cream Cheese
  • Cinnamon Bread Pudding
    Cinnamon Bread Pudding
  • Korean Corn Cheese in a cast iron skillet.
    Korean Corn Cheese Recipe
  • Best Condensed Milk Bread Rolls (Soft & Fluffy)
    Best Condensed Milk Bread Rolls (Soft & Fluffy)

Summer Recipes

  • Mango Tres Leches Cake
    Mango Tres Leches Cake
  • Strawberry cream cheese rolls stacked on a cake stand with strawberries on the side.
    Strawberry Cream Cheese Rolls
  • cherry bread pudding in 3 ramekins with spoons on the side on a wooden board.
    Cherry Bread Pudding
  • Frozen Yogurt Bark on a white platter.
    Frozen Yogurt Bark - Easy Summer Recipe
  • Sliced lemon blueberry bread on a white platter.
    Blueberry And Lemon Bread
  • Mango Mousse
    The Best Mango Mousse Recipe! (3 Ingredients)

See More Summer Recipes →

Footer

↑ back to top

Sign Up For Email Updates

Get A Free E-Book With 8 Easy Bread Recipes For Beginner Bakers!

Tasha’s Artisan Foods

About

Work With Me

Connect With Me

Browse Recipes

Desserts
Snacks
Breads
Cakes
Baking Guides

Published with WordPress

PRIVACY POLICY

COPYRIGHT © 2026 TASHA'S ARTISAN FOODS

Rate This Recipe

Your vote:


A rating is required
A name is required
An email is required