• Skip to main content
  • Skip to primary sidebar

menu icon
go to homepage
  • Mother's Day Recipes
  • Recipe Index
  • About Natasha
  • Free E-Book
subscribe
search icon
Homepage link
  • Mother's Day Recipes
  • Recipe Index
  • About Natasha
  • Free E-Book
ร—
Home > Recipes

Mango Bread Recipe

May 7, 2024

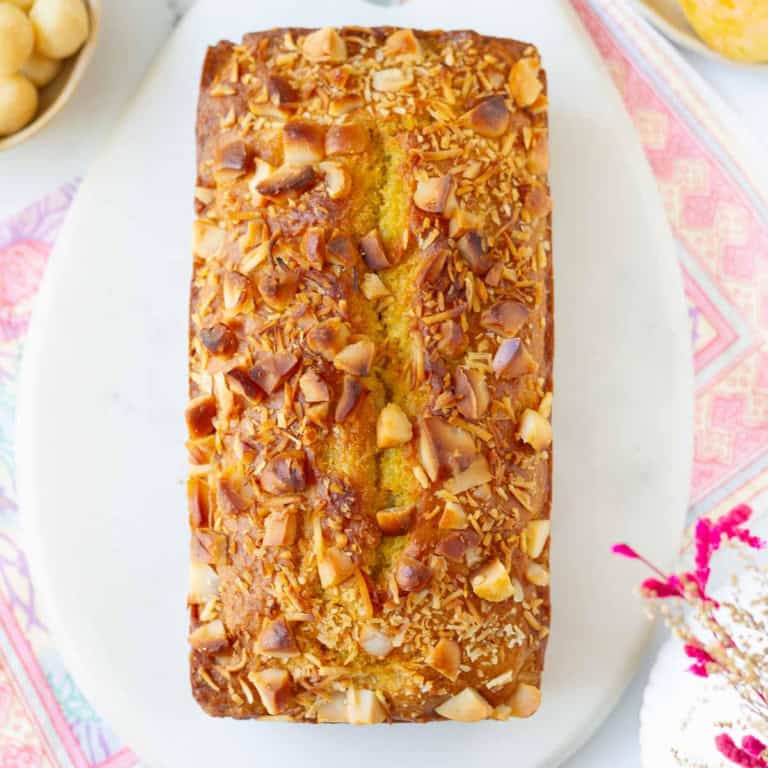
Mango bread on a white marble board with ingredients on the side.

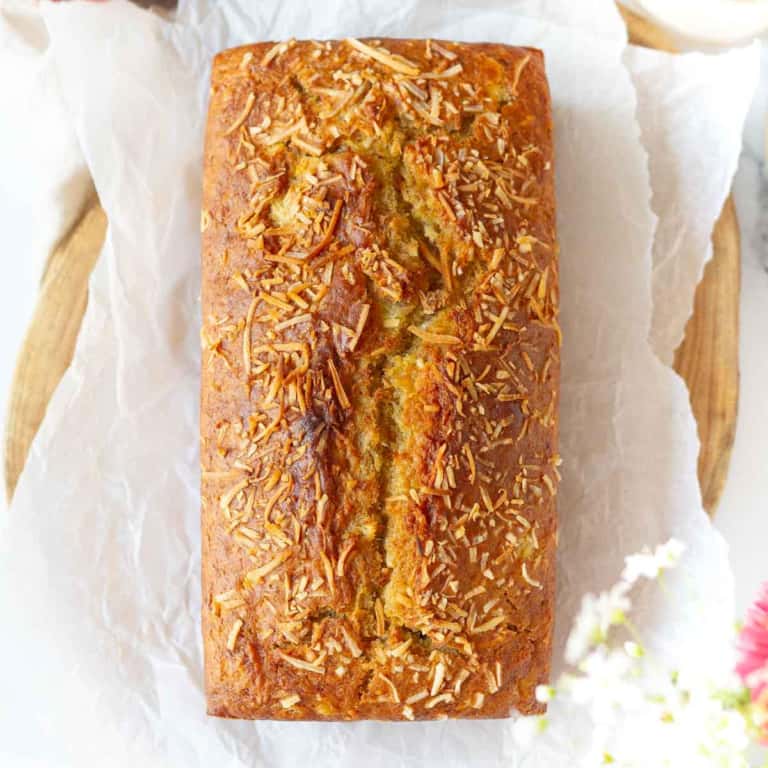
Mango bread is soft, delicious, and full of tropical flavors, making it a great way to make the most of the mango season. And the recipe couldn't be simpler. Just whisk, mix, and bake!

Mango bread on a white board with ingredients on the side.

Like every summer, I dive into the world of mangos like thereโ€™s no tomorrow. From vegan mango curd to the ricotta mango cheesecake to the well-loved creamy mango shrikhand, I make it all. So, when I say this mango coconut bread is one of the best ways to use the yummy, juicy fruit in a recipe, Iโ€™m not kidding.

The delicious tropical treat is made with ripe mangoes and is very similar to this coconut banana bread in texture. Not to mention, it's golden brown, coconutty from the shredded coconut, and buttery, crunchy from macadamia nuts, the quick bread is perfect as a snack or dessert.

Love fruity quick breads? Then you must try my soft & zesty blueberry lemon bread, sweet strawberry banana bread, and moist and buttery peach bread!

[feast_advanced_jump_to]

Why You'll Love This Recipe

This mango bread recipe is so easy and simple to follow. No special equipment, no beaters, or technique!

The taste of this Filipino mango bread is unparalleled! Mango lends its natural sweetness and fruity aroma, while coconut adds a hint of tropical essence and a subtle chewiness. The macadamia nuts, with their creamy texture and nutty taste, provide a satisfying crunch and a touch of richness that complements the other ingredients perfectly.

It's perfect for a cozy teatime or even dessert. I love it toasted and smeared with butter for breakfast, too!

Recipe Ingredients

Ingredients for making mango bread.

Mango: This is mango bread with mango purรฉe. Use ripe mangos that are not stringy. I went with Kesar. If you do use a fibrous mango, be sure to strain your purรฉe. You can also use canned mango puree if that's what you have.

Coconut: Desiccated coconut is easily available, and it adds a lovely flavor. Of course, you can use shredded coconut too in this mango loaf bread. I would suggest you chop it finely.

Flour: You can use all-purpose flour or whole wheat flour for the recipe. By all means, mix half of each.

Macadamia nuts: Nutty and creamy, these nuts go so well with the tropical vibe of this easy mango bread.

Oil: I used sunflower. Feel free to substitute with canola or coconut.

Yogurt: adds moisture, making the mango bread moist and soft. Plain Greek yogurt is the best choice. You can use homemade yogurt as long as it is thick and well-drained.

Vanilla extract brings depth to the quick bread. Use homemade vanilla extract or store-bought.

Sugar: Cane, raw, or castor; pick whatโ€™s at hand for the mango bread recipe.

See the recipe card for full details about ingredients and quantities.

Variations

For the extra crunch, I topped this mango loaf cake with macadamia nuts and shredded unsweetened coconut.

  • You can top it with almond flakes or any chopped nuts of your choice.
  • Or add cinnamon to the fresh mango bread batter.

How To Make Mango Bread

Step 1: Preheat your oven to 180ยฐC 350ยฐF. Grease a loaf tin well.

Step 2: In a large bowl, whisk together the flour, desiccated coconut, baking powder, baking soda, and salt.

Step 3: Next, mix mango puree, Greek yogurt, oil, sugar, and vanilla extract in a separate smaller bowl.

Step 4: Pour the wet ingredients over the dry ingredients and mix well until no white streaks of flour are visible. The batter of this mango loaf bread recipe will be thick.

Step 5: Fold in the chopped macadamia nuts.

Steps for making Mango Bread.

Step 6: Transfer the batter for fresh mango bread to your prepared cake tin. Top with more macadamia nuts and shredded unsweetened coconut, if you wish.

Mango Bread batter with macadamia nuts and shredded coconut on top in a loaf tin.

Step 7: We bake the Hawaiian mango bread recipe for 40-45 minutes or until a skewer inserted in the center comes out clean.

Step 8: Then, let the mango coconut bread cool in the tin for 10-15 minutes before turning it onto a cooling rack to cool completely.

Final step: Slice and enjoy!

Baked mango bread in a loaf tin.

Pro Tips

  • Do not over-mix the batter for this simple mango bread recipe.
  • The batter for this quick bread is thick. But if it looks too thick or dryish, please add 1-2 tbsp of lukewarm milk.
  • To prevent the bread from over-browning, loosely tent with aluminum foil after 30-35 minutes.
  • Let the bread cool completely before slicing so the crumb sets and the flavors develop well.
Sliced mango bread on a white marble board.

How To Store

As with all quick breads, this mango bread is also best enjoyed the same day.

In case you have leftovers, cover the mango bread or place it in an airtight container and keep it refrigerated. Reheat in a toaster or for 10 to 15 seconds in the microwave.

You can also freeze fresh mango bread as a whole loaf or sliced. Wrap it in aluminum foil, and itโ€™ll stay good for up to a month. Thaw at room temperature. 

How To Serve The Hawaiian Mango Bread

This delightfully moist mango quick bread is a perfect accompaniment to your favorite cuppa. It's wonderful with Korean strawberry milk or a refreshing peach iced tea!

Add a dollop of creamy cream cheese on top of the mango bread for a lovely contrast of flavors. Try it toasted with a pat of honey cinnamon butter for breakfast - so good!

A slice of mango bread cut into half on a small plate.

More Mango Recipes

  • Mango Float Recipe
    Mango Float Recipe
  • Easy Mango Cake - Eggless Recipe
    Easy Mango Cake - Eggless Recipe
  • Mango Tres Leches Cake
    Mango Tres Leches Cake
  • Baked Ricotta Mango Cheesecake | Easy summer cheesecake
    Baked Mango Cheesecake

Half the joy of cooking is sharing it with others. Thatโ€™s why Iโ€™m always eager to hear from you. So go right ahead and drop a comment or reach out on Instagram, Pinterest, YouTube, or Facebook. I hope you love this mango bread recipe as much as we do!

๐Ÿ“– Recipe

Mango bread on a white marble board with ingredients on the side.

Mango Bread Recipe

Natasha Minocha
Mango bread is soft, delicious, and full of tropical flavors, making it a great way to make the most of the mango season. And the recipe couldn't be simpler. Just whisk, mix, and bake!
No ratings yet
Print Recipe Pin Recipe
Prep Time 20 minutes mins
Cook Time 45 minutes mins
Total Time 1 hour hr
Course Breakfast, Dessert, Snack
Cuisine American
Servings 8 Servings
Calories 409 kcal

Ingredients


  • 1.5 cups All-purpose flour
  • 1/2 cup Desiccated coconut
  • 1 1/4 tsp Baking powder
  • 1/2 tsp Baking soda
  • 1/4 tsp Salt
  • 1/2 cup Vegetable oil
  • 1/2 cup Mango puree
  • 2/3 cup Plain Greek yogurt
  • 1/2 cup Sugar I used castor sugar
  • 1.5 tsp Vanilla extract
  • 3-4 tbsp Macadamia nuts Roughly chopped

Topping ( Optional)

  • Macadamia nuts, chopped, Shredded unsweetened coconut

Instructions
 

  • Preheat your oven to 180 C. Grease a loaf pan well. I used an 8"x4" pan.
  • In a large bowl, whisk together the flour, desiccated coconut, baking powder, baking soda, and salt.
  • Whisk the yogurt, mango puree, sugar, oil, and vanilla extract, in a small bowl.
  • Pour the wet ingredients over the dry ingredients andย mix well until no white streaks of flour are visible. The batter will be thick.
    If the batter feels too dry, add 1-2 tbsp of warm milk.
  • Fold in the chopped macadamia nuts.
  • Transfer the batter to your prepared cake tin.
  • Sprinkle some more chopped macadamia nuts and shredded coconut on top.
  • Bake at 180 C for 40-45 minutes, or until a skewer inserted in the center comes out clean.
    To prevent the top from over-browning, loosely tent with a piece of aluminum foil after 30 -35 minutes.
  • Let the cake cool in the tin for 10-15 minutes, before turning it out on a cooling rack to cool completely.
  • Slice and serve. Enjoy!

Video

Notes

  • Do not over-mix the batter for this simple mango bread recipe.
  • The batter for this quick bread is thick. But if it looks too thick or dryish, please add 1-2 tbsp of lukewarm milk.
  • To prevent the bread from over-browning, loosely tent with aluminum foil after 30-35 minutes.
  • Let the bread cool completely before slicing so the crumb sets and the flavors develop well.

Nutrition

Serving: 1ServingCalories: 409kcalCarbohydrates: 39gProtein: 6gFat: 26gSaturated Fat: 10gPolyunsaturated Fat: 8gMonounsaturated Fat: 5gTrans Fat: 0.1gCholesterol: 1mgSodium: 244mgPotassium: 92mgFiber: 1gSugar: 17gVitamin A: 176IUVitamin C: 6mgCalcium: 64mgIron: 1mg
Tried this recipe?Let us know how it was!

Easy Lemon Tiramisu Recipe

May 2, 2024

Easy Lemon Tiramisu Recipe

Lemon tiramisu is a delightful variation of theย classic Italian coffee dessert. It combines the creamy richness of mascarpone cheese with the tangy sweetness of lemon curd. Moreover, the fresh, bright, and citrusy dessert hasย no eggs and no alcohol.

Easy Lemon Tiramisu Recipe

This is the best lemon tiramisu recipe. If you love tiramisu but prefer a caffeine-free version, this is the one for you! Undeniably creamy, it mixes the goodness of traditional tiramisuย with a burst of tangy lemon flavor.

For me, itโ€™s the taste of summer - tangy, zesty, and refreshing, perfect for summer gatherings or a sweet treat at home. Above all, anyone can whip up this delightful dessert with simple ingredients and super-easy steps.

If you like tiramisu with different flavors, you must try these easy versions - Biscoff tiramisu, masala chai tiramisu, and strawberry tiramisu!

Easy Lemon Tiramisu Recipe
[feast_advanced_jump_to]
Easy Lemon Tiramisu Recipe

Why You'll Love This Recipe

A winner: Tiramisu in any flavor is always the perfect choice for dessert.

Simple: Easy and straightforward, with no egg whites to be whipped. Plus, the tiramisu is sans alcohol!

Make ahead: You can make the lemon curd and the no-bake dessert a day or two before and let it chill in the fridge.

Refreshing twist: Lemon curd and syrup give it a zesty lemon flavor that is perfect with the creamy layers of mascarpone.

Recipe Ingredients & Swaps

Ingredients for making Lemon Tiramisu

Lemon curd: The star of the show! You can use homemade lemon curd or a store-bought version.

Ladyfinger biscuits:ย I used store-bought because they save time and are easily available. You can make the biscuits at home or use pound cake, sponge cake, or evenย homemade ruskย for this lemon mascarpone tiramisu recipe.

Mascarpone gives a delicate creaminess to the tiramisu. You can use cream cheese if youโ€™re out of mascarpone. Itโ€™ll give the dessert a more cheesecake-like texture though.

Whipping cream: I prefer cream with 30 to 35% fat whipped to a soft to medium peak.

Sugar: Icing or powdered sugar will work in this recipe.

How To Make Lemon Tiramisu

Step 1: Heat half a cup of sugar with water and lemon peel. After it comes to a boil, take the syrup off the heat and set it aside to cool.

Step 2: Whisk mascarpone cheese with icing sugar.

Step 3: Next, fold in whipped cream and lemon curd. Donโ€™t overmix. Youโ€™re looking for a light, smooth tiramisu filling.

Steps for making Lemon Tiramisu

Step 4: Start assembling the tiramisu with eggless lemon curd by dipping each ladyfinger in the syrup we made in Step 1.

Step 5: Arrange the soaked cookies in a single layer in your serving dish. Use whatever catches your fancyโ€”a round plate, a rectangle dish, or a square pie dish.

Step 6: Spread half of the mascarpone-lemon curd mixture on top.

 Lemon Tiramisu Recipe

Step 7: Make another layer of soaked ladyfingers and top with the rest of the mascarpone filling.

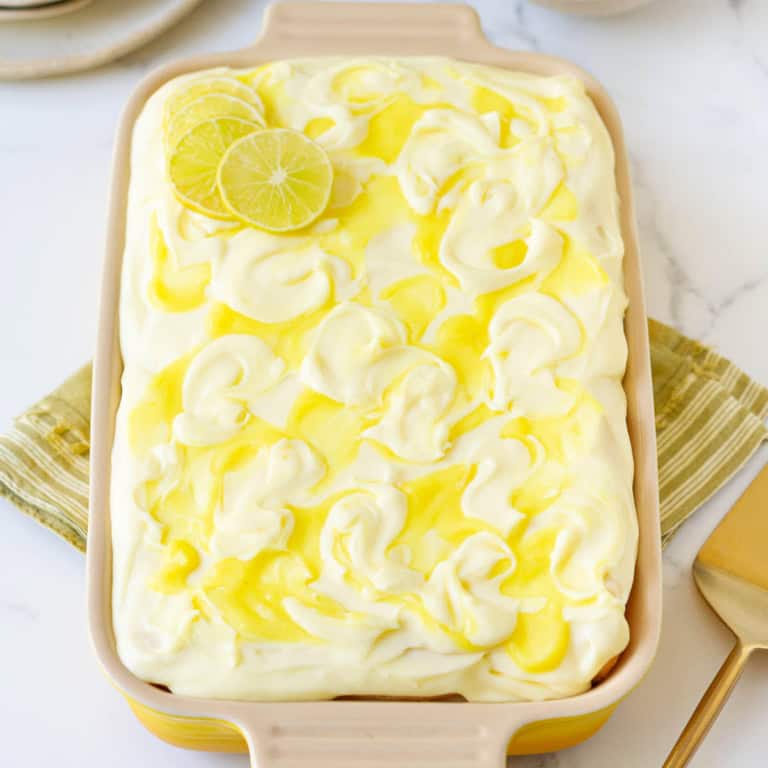
Step 8: Swirl lemon curd on top.

Easy Lemon Tiramisu Recipe

Step 9: Refrigerate for at least 8 hours or overnight to allow the flavors to meld.

Final step: Serve and savor!

Easy Lemon Tiramisu Recipe

Pro Tips

  • Donโ€™t use metal utensils. You donโ€™t want the acid in the lemon to react, giving your eggless tiramisu a metallic taste.
  • The mascarpone should be at room temperature.
  • Fold the mascarpone, whipped cream, and lemon curd with a light hand so it remains light and airy.
  • Give the cookies a good dunk in the syrup, for about 1-2 seconds. We don't want mushy cookies, just soft ones.
  • Let it chill.ย Give the tiramisu a good 8 hours in the fridge, so the ladyfinger biscuits have the time to soak up the flavors.
  • Leftover lemon syrup?ย Use it in iced teas, mocktails, andย cocktails.
a slice of lemon tiramisu on a small plate with a fork

Lemon Tiramisu Recipe FAQs

How to make lemon tiramisu eggfree?

Weโ€™re using whipping cream instead of egg whites in the mascarpone mixture and eggless lemon curd instead of egg yolk. So, the simple recipe is pretty much without eggs.
To make it completely eggless, use egg-free Savoiardi or ladyfingers. You can even make lemon tiramisu withย eggless pound cake,ย or cake rusk.

How to make gluten-free lemon tiramisu?

Use a gluten-free substitute for ladyfingers. A gluten-free sponge or pound cake will also work well here.

Can you make it ahead?

Yes, you can prepare lemon curd tiramisu in advance and refrigerate for up to 3 days.

Can you freeze it?

Yes, you can. Just remember to double-wrap it before you stick it in the freezer. Frozen lemon tiramisu tastes delicious, almost like ice cream.

What other curd flavors can I use in place of lemon?

You can try orange, passionfruit, strawberry, or mango curdย for a different summery twist on the classic coffee dessert.

 Lemon Tiramisu Recipe

More Lemon Recipes

  • Lemon Pound Cake
    Lemon Pound Cake
  • Blueberry Muffins on a blue striped napkin on a wire rack.
    Vegan Lemon Blueberry Muffins
  • Lemon Cheesecake | Easy Lemon Cheesecake Recipe
    Lemon Cheesecake
  • lemon crinkle cookies on a platter with Christmas decorations around.
    Soft Lemon Crinkle Cookies Recipe

Half the joy of cooking is sharing it with others. Thatโ€™s why Iโ€™m always eager to hear from you. So go right ahead and drop a comment or reach out onย Instagram,ย Pinterest,ย YouTube, orย Facebook. I hope you love this lemon tiramisu as much as we do!

๐Ÿ“– Recipe

Easy Lemon Tiramisu Recipe

Easy lemon Tiramisu Recipe

Natasha Minocha
This delicious lemon tiramisu combines the creamy richness of mascarpone cheese with the tangy sweetness of lemon curd. With fresh, bright, and citrusy notes, this dessert hasย no eggs and no alcohol.
No ratings yet
Print Recipe Pin Recipe
Prep Time 30 minutes mins
Cook Time 5 minutes mins
Resting Time 8 hours hrs
Total Time 8 hours hrs 35 minutes mins
Course Dessert
Cuisine Italian
Servings 8 servings
Calories 614 kcal

Ingredients


  • 20-24 Ladyfinger cookies See Notes

Lemon Syrup

  • 1 cup Water
  • 1/2 cup Granulated sugar
  • 2-3 tbsp Lemon juice
  • 2-3 pcs Lemon peels

Filling

  • 3/4 cup Cream 30-35% fat
  • 1 lb Mascarpone cheese
  • 3/4 cup Icing sugar
  • 3/4 cup Lemon curd Homemade or store-bought

Toppings Optional

  • 2 tbsp Lemon curd
  • Lemon slices

Instructions
 

  • Keep a non-metallic serving dish ready. Use any serving dish you prefer - round, square, or rectangle. I used a 6"x 9" casserole dish.

Lemon Syrup

  • Combine water, sugar, and lemon peel in a small saucepan.
  • Bring to a simmer on medium heat. Let it cook for 5 minutes.
  • Let the syrup cool, whisk in the lemon juice, remove the lemon peel, and transfer to a bowl. Keep aside.

Filling

  • Whip the cream in a chilled bowl for 4-5 minutes until soft to medium peaks form.
  • In a large bowl, whisk together the mascarpone cheese and icing sugar.
  • Fold in the whipped cream and lemon curd. Don't overmix.

Assembly

  • Start assembling the lemon tiramisu with eggless lemon curd by dipping the ladyfingers, one at a time, in the lemon syrup.
  • Arrange the soaked cookies in a single layer in your serving dish.
  • Evenly spread half of the mascarpone-lemon curd mixture on top.
  • Make another layer of soaked ladyfingers on top of the filling.
  • Spread out the rest of the filling on top of the second layer.
  • Drop small spoonfuls of lemon curd on top of the mascarpone filling and make swirls. This step is OPTIONAL.
  • Refrigerate for at least 8 hours or overnight to allow the flavors to meld.
  • Decorate with lemon slices and serve. Enjoy!

Video

Notes

  • Donโ€™t use metal utensils. You donโ€™t want the acid in the lemon to react, giving your eggless tiramisu a metallic taste.
  • The mascarpone should be at room temperature.
  • Fold the mascarpone, whipped cream, and lemon curd with a light hand so it remains light and airy.
  • Give the cookies a good dunk in the syrup, for about 1-2 seconds. We don't want mushy cookies, just soft ones.
  • Let it chill.ย Give the tiramisu a good 8 hours in the fridge, so the ladyfinger biscuits have the time to soak up the flavors.
  • Leftover lemon syrup?ย Use it in iced teas, mocktails, andย cocktails.

Nutrition

Serving: 1 ServingCalories: 614kcalCarbohydrates: 58gProtein: 8gFat: 39gSaturated Fat: 24gPolyunsaturated Fat: 1gMonounsaturated Fat: 3gTrans Fat: 0.1gCholesterol: 143mgSodium: 158mgPotassium: 57mgFiber: 0.3gSugar: 40gVitamin A: 1280IUVitamin C: 2mgCalcium: 109mgIron: 1mg
Tried this recipe?Let us know how it was!

Easy Eggless Lemon Curd Recipe

April 27, 2024

Easy Eggless Lemon Curd Recipe

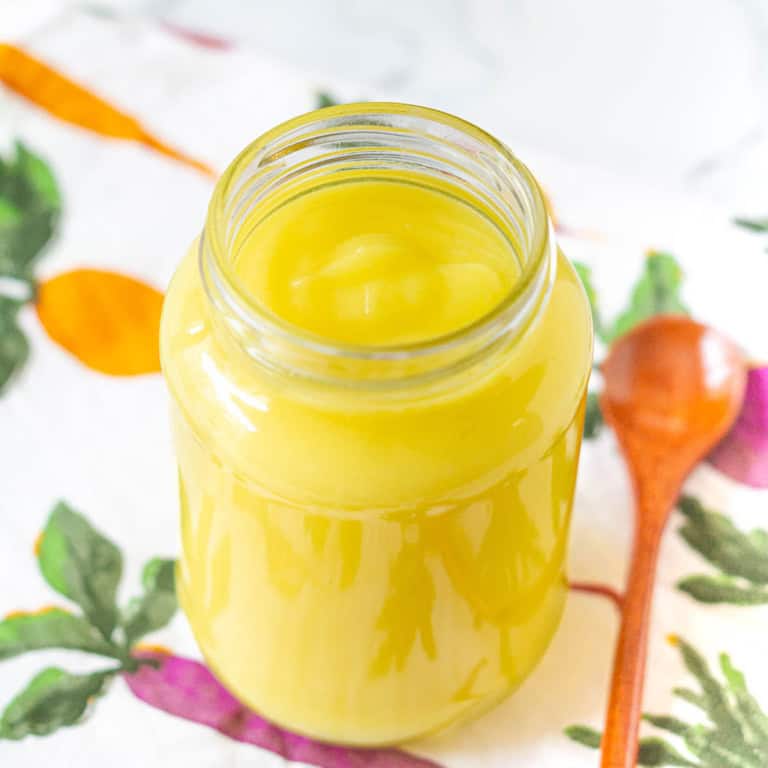
Lemon curd is a one-pot, six-ingredient, 10-minute recipe. Sweet and tart, silky and creamy, you can spoon eggless lemon curd straight up from jar to mouth, but itโ€™s even better on toast, cakes, pastries, and more.

Easy Eggless Lemon Curd Recipe

Lemond curd is easy. It barely takes any time or technique to make. Andย donโ€™tย get me started on its uses. They are endless. Use it on toast, cookies, pop tarts, as a lemon tart filling, cakes,ย scones, orย pavlova.

FYI, it's not the dairy curd youโ€™re thinking about. Itโ€™s a pudding-sauce-spread-like treat that is rich, buttery, and intensely lemony!

 Eggless Lemon Curd
[feast_advanced_jump_to]

What is lemon curd?

Lemon curd is a thick, creamy spread or filling made from lemon juice, sugar, butter, andย egg yolks. The dessert topping originated in England, whereย itโ€™sย more commonly called lemon cheese.

So, can it made without eggs? Yes, yes, it can. My lemon curd recipe is without eggs. It has a smooth texture and an intense, tangy, citrusy flavor thanks to lemon zest!

 Lemon Curd Eggless

Why you'll love it?

You wonโ€™t believe how easy it is to make!

Itโ€™s 100 times better than store-bought lemon curd.

Endless ways to use from bread to cookies.

Ingredients

Lemon juice: Use fresh. Not bottled for the absolute best flavor.

Milk: You can use any kind of milk; I'm partial to whole milk, but plant-based options work great too if you want to make the lemon curd vegan!

Sugar: I opted for regular granulated sugar, although caster sugar would be an equally excellent choice.

Cornstarch acts as a stabilizer and thickener. It helps give the curd a smooth, creamy texture and prevents it from being too runny or thin.

Butter gives the curd richness and silkiness. If youโ€™re using unsalted butter, unlike me, add a quarter teaspoon of salt to the recipe.

Turmeric is only for color. It adds no flavor to the lemon curd. If you donโ€™t have it in your pantry and still want that pop of yellow? Use food color. Or omit it. Both turmeric and food color are completely, completely optional.

Ingredients for eggless lemon curd

How to make eggless lemon curd?

Step 1: Zest a lemon. Remove the seeds, and then juice it.

Step 2: In a small saucepan, mix sugar, cornstarch, lemon zest, and a pinch of turmeric (more on this later).

sugar, cornstarch, turmeric and lemon zest in a saucepan

Step 3: Add milk and lemon juice, and on low heat, cook the mixture, stirring constantly.

milk and lemon juice in the saucepan with the dry ingredients

Step 4: When the eggless lemon curd thickens, starts to bubble, and gains a custard-like consistency, take it off the heat.

Step 5: Whisk in butter until melted.

Step 6: Strain through a metal sieve, into a heat-proof bowl, to get a velvety, silky-smooth curd.

Steps for making eggless lemon curd

Step 7: Cool the curd in the refrigerator and then transfer to a sterilized jar.

Final step: Store in the fridge. Serve and savor!

Pro tips

  • Invest in a microplane. Itโ€™s a great way to zest lemons. Through a grater works too.
  • Stir the lemon curd without eggs constantly. You donโ€™t want it to get burned.
  • Take the curd off the heat before you add the butter.
  • When do you know itโ€™s time to take the curd off the heat? When it begins to coat the back of your spoon and has a pudding-like texture.
  • If you relish the lemon zest in every bite, there's no need to strain the curd.
  • Cover the surface of the lemon curd with cling wrap before you refrigerate so the curd doesnโ€™t form a skin.
 Eggless Lemon Curd Recipe
Easy Eggless Lemon Curd Recipe

How to use lemon curd?

Lemon curd is commonly used as a topping or filling for desserts such as tarts, pies, and pastries. Likewise, in yogurts, on ice creams, and in between layers of cake, it brings a lot of tang to any recipe. My suggestion? Try it as lemon curd tiramisu or:

  • Crepe filling
  • Cupcake topping
  • Pound cake garnish
  • Cheesecake topping
  • Filling for donuts
  • Thumbprint cookies filling
Eggless Lemon Curd Recipe

More quick recipes

  • Pear butter in a glass container with a wooden spoon on the side.
    Pear Butter Recipe
  • cashew ricotta cheese garnished with parsley in a small bowl place on 2 plates.
    Cashew Ricotta Cheese
  • Stovetop Apple Butter Recipe
    Stovetop Apple Butter
  • cherry jam recipe
    Cherry Jam Recipe

Half the joy of cooking is sharing it with others. Thatโ€™s why Iโ€™m always eager to hear from you. So go right ahead and drop a comment or reach out on Instagram, Pinterest, YouTube, or Facebook. I hope you love this lemon curd as much as we do!

๐Ÿ“– Recipe

Easy Eggless Lemon Curd Recipe

Easy Eggless Lemon Curd Recipe

Natasha Minocha
Lemon curd is a one-pot, six-ingredient, 10-minute recipe. Sweet and tart, silky and creamy, you can spoon eggless lemon straight up from jar to mouth, butย itโ€™sย even better on toast, cakes, pastries, and more!
No ratings yet
Print Recipe Pin Recipe
Prep Time 10 minutes mins
Cook Time 10 minutes mins
Total Time 20 minutes mins
Course Condiment
Cuisine American, British
Servings 24 Servings
Calories 35 kcal

Ingredients


  • 1 cup Milk I used whole milk
  • 1/2 cup Granulated sugar
  • 1/2 cup Lemon juice, from 5 lemons
  • 2 tbsp Cornstarch
  • 1 tbsp Lemon zest
  • 1/8 tsp Turmeric, for color Optional
  • 2 tbsp Butter I used salted butter

Instructions
 

  • In a small saucepan, combine sugar, cornstarch, turmeric, and lemon zest.
  • Add milk and lemon juice. Mix well.
  • Cook on low heat, whisking continuously until the mixture is thick and bubbly and coats the back of a spoon.
  • Take it off the heat and whisk in the butter.
  • Strain through a sieve into a heat-proof bowl, to get a silky smooth lemon curd.
  • Cover with plastic wrap on the surface of the curd to prevent skin from forming.
  • Refrigerate until cold, then remove the plastic wrap. The curd will thicken as it cools.
  • Transfer to an air-tight container or jar. Keep refrigerated for up to 2 weeks. Enjoy!

Nutrition

Serving: 14gCalories: 35kcalCarbohydrates: 6gProtein: 0.4gFat: 1gSaturated Fat: 1gPolyunsaturated Fat: 0.05gMonounsaturated Fat: 0.3gTrans Fat: 0.04gCholesterol: 4mgSodium: 12mgPotassium: 22mgFiber: 0.04gSugar: 5gVitamin A: 46IUVitamin C: 2mgCalcium: 14mgIron: 0.02mg
Tried this recipe?Let us know how it was!

The Best Lemon Poppy Seed Bread

April 22, 2024

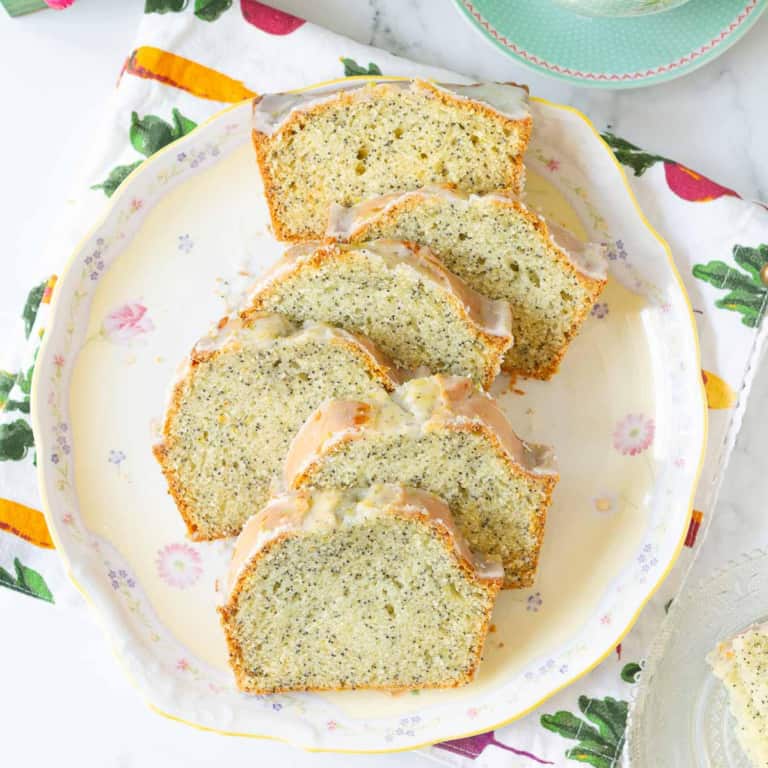
Sliced poppyseed bread on a platter.

Making lemon poppy seed quick bread from scratch is easy, and it's delicious as-is or with some lemony glaze. What's more, it looks pretty, is speckled with little poppy seeds, has an incomparably moist crumb, and is fascinatingly crunchy!

Sliced poppyseed bread on a platter.

Lemon poppy seed bread is perfectly balanced. Not too sweet nor overwhelmingly lemony. Itโ€™s a soft, moist bread, almost like a lemon pound cake but not as heavy, so perfect with a cup of tea.

Love lemony bakes? Then do try my soft and zesty blueberry and lemon bread, creamy lemon cheesecake, easy lemon tiramisu, and vegan lemon tart!

[feast_advanced_jump_to]

Why You'll Love This Recipe

This is a simple and straightforward recipe, ideal for beginner bakers.

The crumb is moist, tender, and light with a light crunch from the poppyseeds!

Bursting with zesty lemon flavor, this poppyseed bread is perfect with your morning cuppa or an afternoon treat.

This lemon poppyseed bread is a crowd pleaser, wonderful for brunches, picnics, and potlucks.

This bread freezes beautifully, making it ideal for meal prep!

Recipe Ingredients

Ingredients for making poppyseed bread.

Flour: Opt for all-purpose flour for the most tender crumb in your lemon poppy seed bread. You can also experiment with whole wheat flour or a blend of both for added depth of flavor and texture.

Poppy seeds: These little black-blue seeds give this lemon bread a wonderful, delicate nutty crunch and give a lovely appearance to the crumb.

Sugar: I went with caster sugar, but cane sugar, raw sugar, or any type you like will work just as well.

Milk: Any kind will do. I personally prefer full-fat milk for that extra creaminess.

Oil: Donโ€™t have sunflower oil? Use olive oil, coconut oil, or even melted butter to give your quick bread that delicious buttery touch.

Eggs make the easy lemon poppy seed bread richer and give it structure.

Lemon: Use whatever variety is locally available to you.

Please see the recipe card for full information about the ingredients and quantities.

 Lemon poppyseed bread with lemon glaze on a platter.

How To Make Lemon Poppy Seed Bread

Step 1: Set your oven to preheat and grease your loaf tin. I used an 8-by-4-inch one.

Step 2: Sift flour, baking soda, baking powder, and salt in a bowl. Mix.

Step 3: Whisk in poppy seeds and set the dry ingredients aside.

poppy seeds with the dry  ingredients for lemon poppy seed bread.

Step 4: Zest a lemon and rub sugar into it to make lemon-infused sugar (more on this in the notes).

lemon zest infused sugar in a bowl.

Step 5: In another larger bowl, beat eggs and sugar till light, creamy, and pale. About 3 to 4 minutes.

Step 6: Pour the oil and lemon juice and mix well.

Step 7: Add half the dry ingredients to the wet. Combine.

Step 8: Pour milk into the lemon poppyseed bread batter. Mix.

Steps for making lemon poppyseed bread.

Step 9: Add the rest of the dry ingredients and combine just until no dry streaks are visible.

Step 10: Pour the lemon and poppy seed bread batter into the prepared tin and bake until a skewer inserted in the center comes out clean.

 Lemon Poppy Seed Bread batter in a baking pan.

Step 11: Let the quick bread cool in the pan before turning it out on a wire rack.

Optional step: Drizzle lemon glaze on the lemon poppy seed bread.

Final step: Serve and enjoy!

baked lemon poppy seed bread in a loaf pan.

Pro Tips

  • Donโ€™t just fold the lemon zest and sugar into the ingredients. Use your fingers to rub the zest into the sugar. Why? Because it gives the lemon poppy seed loaf cake an extra punch of lemony flavor and distributes it more evenly.
  • The eggs need to be at room temperature.
  • And the milk needs to be lukewarm, not hot or cold.
  • Finally, donโ€™t overmix the batter. Mix just enough so no white streaks are visible to get a soft, moist, and tender crumb.
The Best Lemon Poppy Seed Bread with lemon glaze.

How To Make Lemon Glaze

Homemade lemon poppy seed bread is delicious with or without glaze. I wanted to dress it up simply. So I decided to mix icing sugar and lemon juice until I had a thick, smooth, and pourable consistency.

Drizzle the lemon poppy seed glaze on top. Let it set for a few minutes. And then slice the poppyseed bread.

sliced Lemon Poppy Seed Bread on a platter.

Can I Freeze The Lemon Quick Bread?

Yes, you can! You can freeze this bread (without the glaze).

Let the lemon and poppy seed bread cool completely. Then wrap it in cling wrap or aluminum foil. This will keep well for 1 month. Thaw on the countertop for a few hours or overnight in the fridge.

Any leftovers can be stored in an air-tight container in the refrigerator for 4-5 days, if your kitchen is as hot as mine. If youโ€™re enjoying cooler weather still, the countertop will work for 3 to 4 days.

 Lemon Poppy Seed Bread slice cut in half on a small plate.

More Quick Bread Recipes

  • Sliced peach bread on a white platter.
    Peach Bread Recipe
  • Apple Butter Bread recipe
    Apple Butter Bread
  • Almond Poppy Seed Bread
    Almond Poppy Seed Bread
  • Sliced avocado bread on a platter.
    Avocado Bread Recipe

Half the joy of cooking is sharing it with others. Thatโ€™s why Iโ€™m always eager to hear from you. So go right ahead and drop a comment or reach out on Instagram, Pinterest, YouTube, or Facebook. I hope you love this lemon poppy seed bread as much as we do!

๐Ÿ“– Recipe

Sliced poppyseed bread on a platter.

The Best Lemon Poppy Seed Bread

Natasha Minocha
Making lemon poppy seed quick bread from scratch is easy. Delicious as-is or with some lemony glaze. It looks really pretty, has an incomparably moist crumb, and is fascinatingly crunchy!
No ratings yet
Print Recipe Pin Recipe
Prep Time 20 minutes mins
Cook Time 40 minutes mins
Course Dessert
Cuisine American
Servings 8 servings
Calories 321 kcal

Ingredients


  • 1.5 cups All-purpose flour
  • 1 tsp Baking powder
  • 1/2 tsp Baking soda
  • 1/4 tsp Salt
  • 2 tbsp Poppy seeds
  • Zest and juice of 1 lemon
  • 1/2 cup + 2 tbsp Sugar
  • 2 Eggs
  • 1/2 cup Oil
  • 1/4 tsp Lemon oil
  • 1/2 cup Milk

Lemon Glaze

  • 1/3 cup Powdered sugar
  • 1-2 tbsp Lemon juice

Instructions
 

  • Set your oven to preheat at 180 C or 350 F and grease your loaf tin. I used an 8 by 4 inch one.
  • Sift flour, baking soda, baking powder, and salt in a bowl.
  • Whisk in poppy seeds and set the dry ingredients aside.
  • Zest a lemon and rub sugar into it to make lemon-infused sugar.
  • In another larger bowl, beat eggs and the lemon sugar till light, creamy, and pale. About 3 to 4 minutes.
  • Pour the oil and lemon juice and mix well.
  • Add half the dry ingredients to the wet. Combine.
  • Pour milk into this lemon poppyseed bread batter and mix well.
  • Add the rest of the dry ingredients and combine just until no dry streaks are visible.
  • Pour the lemon and poppy seed bread batter into the prepared tin and bake at 180 C ( 350 F), for 35-40 minutes or until a skewer inserted in the center comes out clean.
  • Let the bread cool in the pan for 10 minutes before turning it out on a wire rack.
  • Drizzle the lemon glaze on top of the cooled cake. Let it set for 5 minutes.
  • Slice and serve. Enjoy!

Lemon Glaze

  • Combine the icing sugar and lemon juice till smooth and lumpfree. The glaze should have a thick, pourable consistency.

Video

Nutrition

Calories: 321kcalCarbohydrates: 44gProtein: 5gFat: 17gSaturated Fat: 2gPolyunsaturated Fat: 5gMonounsaturated Fat: 10gTrans Fat: 0.1gCholesterol: 43mgSodium: 217mgPotassium: 82mgFiber: 1gSugar: 19gVitamin A: 85IUVitamin C: 1mgCalcium: 91mgIron: 2mg
Tried this recipe?Let us know how it was!

Creamy Cucumber Salad with Greek Yogurt

April 18, 2024

Creamy Cucumber Salad with Greek Yogurt

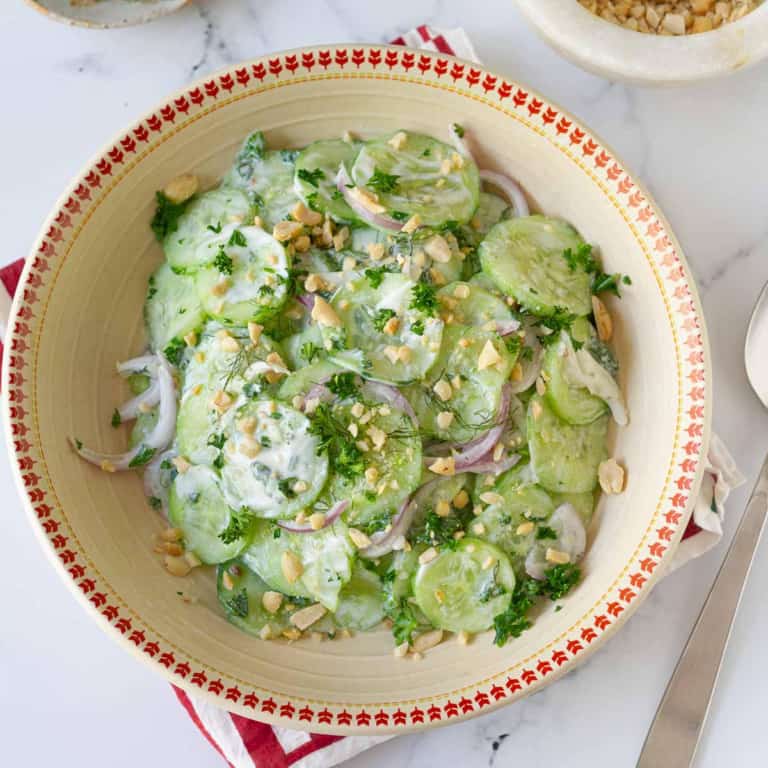
This quick and super easy creamy cucumber salad is the perfect refreshing summer recipe for your next barbecue or get-together. I made it with Greek yogurt (not mayo or sour cream), so itโ€™s healthier, crunchy, crispy, and plenty creamy!

Creamy Cucumber Salad with Greek Yogurt

Chop, dress, chill, and serve. Thatโ€™s all you need to do to make this easy, creamy cucumber salad. Refreshing and full of contrasts, itโ€™s crunchy from the cucumbers and onions and creamy from Greek yogurt.

Exactly how you want a summer salad. And if your fridge is anything like mine, you'll already have all the ingredients for a refreshing salad inside it. 

[feast_advanced_jump_to]

Why you'll love creamy cucumber salad?

Itโ€™s the perfect summer salad recipe, and itโ€™s healthy to boot.

This is a fantastic BBQ side dish that pairs perfectly with grilled foods, and youโ€™re going to love it as a creamy cucumber salad sandwich.

Versatile: Itโ€™s the best creamy cucumber salad dressing. And it goes well with any recipe.

Scalable: You can easily double (or halve) the recipe depending on the crowd you have to serve.

Ingredients

Cucumbers: Opt for cucumbers with a thin peel, such as English or Persian cucumbers, as they tend to be crunchier. If you're going for organic ones and their skin isn't waxy, you can use them whole without peeling for added convenience.

Yogurt: Plain Greek yogurt makes the delicious salad a little tangy and gives it that extra shot of protein. You can make a creamy cucumber salad with sour cream orย with mayoย too.

Dillย is the classic addition to cucumbers, and I find fresh is the best, making the summer salad brighter. But dried dill would work too. You can make the cucumber salad without dill. Use oregano, cilantro, parsley, or even mint.

Onions: Red onions are easily available here and they have so much flavor, so thatโ€™s what I used. Green onions are a good swap.

Garlic gives the salad a bit of sharpness.

Spices: I would recommend using salt, pepper, and sugar according to your preference.

Add-ins: You can make a creamy cucumber salad with tomatoes or even boiled or wonderful sweet potato salad for a heartier meal. A creamy cucumber and carrot salad is another option.

Ingredients for Creamy Cucumber Salad with Greek Yogurt

How to make creamy cucumber salad recipe?

Step 1: Wash cucumbers thoroughly. Peel and slice them with a mandolin slicer or a sharp knife. Thinly.

Step 2: Slice half a red onion. Keep both vegetables aside.

sliced cucumber and onions on a wooden chopping board. Parsley and dill in small bowls

Step 3: Combine thick Greek yogurt, salt, pepper, garlic, and sugar to make the creamy cucumber salad dressing. Whisk Well.

creamy greek yogurt dressing

Step 4: Add the cucumber and onions to the creamy salad Greek yogurt dressing.

cucumber, onion, parsley and dill in a large glass bowl

Step 5: Top with chopped dill and parsley.

Step 6: Mix and you're done!

Creamy Cucumber Salad with Greek Yogurt in a serving bowl

Final step: Serve and savor!

Creamy Cucumber Salad with Greek Yogurt

Pro tips

  • I added a little extra flair to the cucumber-dill salad with yogurt by sprinkling on some crushed peanuts and chopped parsley. Totally up to you if you want to add them, but they give a nice crunch and freshness!
  • I like a light coating of the dressing. If you're going for more of that creamy dressing, simply double the quantity and add that to the vegetables.
  • The creamy cucumber onion salad remains perfectly crunchy for 2 to 3 hours. After that, the cucumbers lose water and become soggy. If youโ€™re going to be serving it later, then I recommend salting the cucumber.
Creamy Cucumber Salad with Greek Yogurt

How to keep salad crunchy?

You donโ€™t want too much water in the salad. It makes the dressing watery and sacrifices the crunch. There are two ways to keep the creamy cucumber salad with dill crunchy:

  1. Keep everything prepped in the fridge in a separate bowl. Combine the chilled dressing and sliced vegetables right before you want to serve.
  2. Salt the cucumbers. Let them sit while you prep the dressing. Squeeze out the excess moisture with a kitchen or paper towel, and then mix it with the dressing.
Creamy Cucumber Salad with Greek Yogurt

More summer salads

Smashed Asian Cucumber Salad

Pasta Salad with Basil Balsamic Vinaigrette

Watermelon Blueberry Salad

Caprese Salad Skewers

Watermelon Feta Salad

Apple Walnut Salad

Greek Salad

Half the joy of cooking is sharing it with others. Thatโ€™s why Iโ€™m always eager to hear from you. So go right ahead and drop a comment or reach out on Instagram, Pinterest, YouTube, or Facebook. I hope you love this creamy cucumber salad as much as we do!

๐Ÿ“– Recipe

Creamy Cucumber Salad with Greek Yogurt

Creamy Cucumber Salad With Greek Yogurt

Natasha Minocha
This quick and super easy creamy cucumber salad is the perfect refreshing summer salad for your next barbecue or get-together. I made it with Greek yogurt, so itโ€™s healthier, crunchy, crispy, and plenty creamy!
No ratings yet
Print Recipe Pin Recipe
Prep Time 10 minutes mins
Total Time 10 minutes mins
Course Salad
Cuisine American
Servings 4 Servings
Calories 46 kcal

Ingredients


  • 3 Cucumbers
  • 1/2 Red onion
  • 1 tbsp Dill
  • 2-3 tbsp Parsley

Dressing

  • 4 tbsp Greek yogurt
  • 1 tsp Minced garlic
  • 1 tbsp Red wine vinegar
  • 1/2 tsp Sugar
  • Salt & Pepper to taste

Instructions
 

  • Peel and thinly slice the cucumbers.
  • Thinly slice the onion and finely chop the dill and parsley.
  • Place the cucumbers, onions, dill, and parsley in a large bowl.
  • Spoon over the dressing and mix well.
  • Transfer to a serving bowl, and top with chopped parsley and crushed peanuts.
  • Serve immediately. Enjoy!

Dressing

  • Combine the yogurt, minced garlic, red wine vinegar, sugar, salt, and pepper in a small bowl. Whisk well. Taste and adjust for seasoning.

Nutrition

Calories: 46kcalCarbohydrates: 8gProtein: 3gFat: 0.4gSaturated Fat: 0.1gPolyunsaturated Fat: 0.02gMonounsaturated Fat: 0.02gCholesterol: 1mgSodium: 12mgPotassium: 364mgFiber: 2gSugar: 5gVitamin A: 339IUVitamin C: 11mgCalcium: 56mgIron: 1mg
Tried this recipe?Let us know how it was!

How To Make Garlic Confit

April 13, 2024

How To Make Garlic Confit

Garlic confit is a simple recipe that lets the oven do all the work, turning garlic into a fabulously flavorful pantry essential. Overall, it's super versatile, perfect for adding a tasty twist to pasta, potatoes, and more.

How To Make Garlic Confit
[feast_advanced_jump_to]

What's garlic confit?

Garlic cloves cooked for a long time is garlic confit. The cloves are cooked at a low temperature in high fat until they become soft, tender, and flavorful. You simmer the peeled cloves gently in any fat of your choice until they are very soft and spreadable.

The garlic mellows and develops a rich, sweet flavor and a creamy, caramelized texture. The resulting garlic confit can be used as a spread on bread and added to sauces, soups, or mashed potatoes. It's a great way to enjoy garlic in a more subtle and nuanced way compared to raw or sautรฉed garlic.

 Garlic Confit

Why you'll love it?

Versatile: A small recipe that can be used on breads, sauces, soups, stews, and more, making it the best thing in your culinary arsenal.

Hands-Off Cooking: Yes, it takes a long time to make, but with the oven doing most of the work, your effort is minimal.

Effortless Flavor: The garlic caramelizes gently, developing a rich and mellow taste that's a perfect, delicious, fragrant addition to dishes.

Ingredients

ingredients for making garlic confit

Garlic: I always say that when a recipe has few ingredients, use the best quality possible. So, reach for the freshest garlic for this oven-roasted garlic confit.

I know peeling them can be a pain, but the hot water trick really works for me. Submerge the cloves in hot water and let them sit for a few minutes. The skin will slip off easily.

Oil: You can make garlic confit with canola oil, grapeseed oil, or olive oil. As I said before, the only thing you need to take care of is that it's of good quality.

Herbs: I made garlic confit with rosemary for that added flavor. Itโ€™s not essential, but it works wonderfully with garlic. Thyme, peppercorns, whole chilies, or even thinly sliced lemons would be fantastic.

How to make garlic confit in an oven?

Step 1: Place the peeled garlic cloves and your herbs in a small baking dish.

garlic cloves, rosemary and canola oil in a small baking dish

Step 2: Pour oil till the cloves are submerged.

Step 3: Roast the confit in the oven for an hour or two till golden and soft.

 Garlic Confit

Pro tips

  • How long you need to bake confit depends on your oven temperature and quantity. I love to make it in small batches, so it took about an hour.
  • This is a garlic confit in the oven recipe. But yes, you can make garlic confit on the stovetop. Itโ€™ll be more hands-on, and youโ€™ll need to check on the garlic every once in a while and stir it to make sure it doesnโ€™t burn. Keep the heat low and let it slowly roast.
  • I didn't add salt to my confit. You can if you wish.
  • You can store the confit with the herbs or discard them.
garlic confit in a jar

How to use garlic confit?

There are many delicious uses for garlic confit. Wherever you use garlic in a recipe, you can switch it with this instead. You can add it to mini no-knead focaccia or my easy homemade cornbread.

mini focaccia with  garlic confit
  • Spread: Mash and spread the softened garlic confit onย toasted easy everyday breadย  or no-knead seeded oatmeal bread for a quick snack or appetizer.
  • In Pasta Dishes: Add to pasta sauces, such as a simple tomato sauce, for a rich and savory flavor.
  • Sandwich base: Buttery garlic confit makes for an excellent base for any sandwich.
  • Potatoes: Mix with smashed potatoes for a creamy twist, or add them to baked sweet potatoes
  • Salad Dressing: Mix confit and olive oil and turn it into a delicious dressing for salads or as a marinade for grilled vegetables.
  • Vegetables: Add it to oven-roasted carrots, roasted Brussels sprouts, or roasted cauliflower for a flavor boost!
  • Dips and toppings: Blend it in any dip you love and serve with crackers, veggies, or sandwiches:
    • Whipped Goat Cheese
    • Pistachio Pesto
    • Homemade Mayonnaise
    • Classic Hummus
garlic confit on toast

FAQs

How to store garlic confit?

Let it cool completely. Then transfer it into a sterilized jar and keep it refrigerated for up to 2 weeks. This brings us to botulism.
Itโ€™s a concern when making garlic confit or any other type of preserved food. The bacteria that cause it thrive in low-oxygen environments like those found in oil. If you donโ€™t store it without proper precautions, you risk botulism contamination. To prevent it:
1. Use fresh garlic and thoroughly clean it before cooking.
2. Make sure the garlic is fully submerged in the oil during cooking and storage.
3. Cook the garlic for a long enough time to kill any bacteria present.
4. Most importantly, please remember to store it in the refrigerator. Never at room temperature.
Use it within 2 weeks. Most recipes say that garlic confit's shelf life is 2 months, but I like to err on the safer side.

Can you freeze it?

Yes, garlic confit can be frozen. Allow it to cool completely to room temperature. Then transfer the garlic cloves along with the oil into a freezer-safe container or in a covered ice cube tray. Seal the container and freeze it.

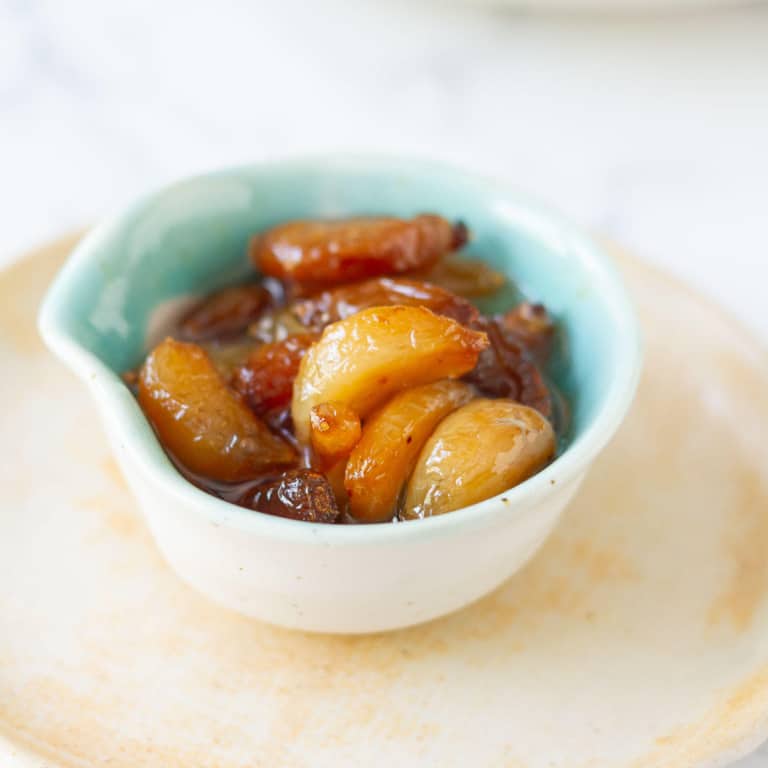
Garlic Confit in a small bowl

More pantry essentials

  • DIY Infused OIls | Easy Homemade Flavored Oils
    DIY Infused Oils
  • Homemade Vanilla Extract | How to make vanilla extract
    Homemade Vanilla Extract
  • Easiest Homemade Cream Cheese | Homemade Cream Cheese Recipe
    Easiest Homemade Cream Cheese
  • Chili oil in a glass jar on a wooden board with ingredients in the background.
    Easy Chili Oil

Half the joy of cooking is sharing it with others. Thatโ€™s why Iโ€™m always eager to hear from you. So go right ahead and drop a comment or reach out on Instagram, Pinterest, YouTube, or Facebook. I hope you love this garlic confit as much as we do!

๐Ÿ“– Recipe

How To Make Garlic Confit

How To Make Garlic Confit

Natasha Minocha
Garlic confit is a simple recipe that lets the oven do all the work, turning garlic into a fabulously flavorful pantry essential. It's super versatile, perfect for adding a tasty twist to pasta, potatoes, and more.
No ratings yet
Print Recipe Pin Recipe
Prep Time 5 minutes mins
Cook Time 1 hour hr
Course Condiment
Cuisine French
Servings 8 Servings
Calories 194 kcal

Ingredients


  • 1 head Garlic
  • 3/4 cup Canola oil
  • 3-4 sprigs Rosemary

Instructions
 

  • Preheat your oven to 120 C or 250 F.
  • Peel the garlic cloves.
  • Place the rosemary and garlic cloves in a small baking dish. Pour over the oil.
  • Bake for 1 hour until the garlic is soft and lightly brown.
  • Let the confit cool before transferring it to a sterilized jar. Store in the refrigerator. Use within 2 weeks.

Video

Nutrition

Calories: 194kcalCarbohydrates: 1gProtein: 0.2gFat: 21gSaturated Fat: 2gPolyunsaturated Fat: 6gMonounsaturated Fat: 13gTrans Fat: 0.1gSodium: 1mgPotassium: 14mgFiber: 0.1gSugar: 0.04gVitamin A: 1IUVitamin C: 1mgCalcium: 7mgIron: 0.1mg
Tried this recipe?Let us know how it was!

Mini No-Knead Focaccia

April 9, 2024

mini no-knead focaccia

Mini focaccia is the quick, easy, small-batch recipe you didnโ€™t know you needed. Utterly delicious, this no-knead mini focaccia is thick, fluffy, chewy, flavorful, and very versatile. Simply the perfect meal or snack for 1 or 2 people.

mini no-knead focaccia
[feast_advanced_jump_to]

What's Small Batch Focaccia?

One of the most popular blogs I have is my no-knead focaccia. Iโ€™ve had so many readers reach out to me about the recipe. But the thing with it is that it serves a crowd. 

So, I created a dialed-down version: this easy mini focaccia. It serves 1 to 2 people and can be doubled for 2 to 4 people. If youโ€™re baking for 8 or more, use the original focaccia recipe linked above.

Why You'll Love Mini Focaccia?

Thereโ€™s no kneading, so the recipe is ideal for baking beginners. Just like my easy one-bowl homemade cornbread and no-knead Dutch oven bread!

Small batch focaccia is just perfect for a quiet dinner at home for two people.

It hardly needs any work, and proofing doesn't take time because the dough is so small. So, itโ€™s an easy and quick recipe.

mini focaccia cut into quarters

Recipe Ingredients

mini no-knead focaccia ingredients

Yeast: Instant yeast, or dried active yeastโ€”all work for the mini focaccia recipe.

Flour: We donโ€™t get bread flour easily here; thatโ€™s why I used all-purpose flour. Feel free to swap it for whole wheat or use a mix of both.

Olive oil: Use the best-quality oil you can find and use it with a free hand. Donโ€™t be sparing. It makes all the difference in the world to the small focaccia recipe.

Toppings: Like all focaccia, this bread is a blank canvas. Garnish it to your palate. Make mini focaccia with sun-dried tomatoes, or add:

  • Fresh thyme
  • Olives
  • Thinly sliced potatoes
  • Brush generously with Italian seasoning and olive oil
mini no-knead focaccia cut in 2 halves

How To Make

Step 1: Stir yeast and sugar in lukewarm water and let it sit till nice and frothy.

Step 2: Sift a cup of flour and some salt in a small bowl. Combine.

Step 3: Add the activated yeast to the flour and mix with a spatula just until there are no dry, white streaks visible and everything comes together.

Step 4: Spread olive oil on the surface of the small focaccia bread dough and rub it all over.

steps for making mini focaccia

Step 5: Cover with plastic wrap (or kitchen towel) and then you can either refrigerate overnight or wait for it to double in size, in a warm place. (It takes about 1.5 hours, after which you can use the dough.)

Step 6: When the dough has risen (or the next day), oil your hands. Fold the dough over itself. Turn the bowl a quarter of the way and fold the dough over itself again. Do 3 more quarter turns of the bowl, folding the dough each time.

Step 7: Line the bottom of a cast-iron skillet or a baking pan with parchment paper. Pour 1- 2 teaspoons of olive oil into the prepared pan's center and then transfer the dough to it.

Step 8: Spread the dough and let it proof a second time for 1 to 2 hours on the countertop in a draft-free place.

1st and 2nd proof for mini focaccia dough

Step 9: When the mini focaccia is puffy and doubled in size, Pour the remaining 2 teaspoons of olive oil on the dough and spread it all over. Dimple the dough using your fingers.

Step 10: Top with rosemary, cherry tomatoes, and sea salt flakes.

mini focaccia dough topped with cherry tomatoes, rosemary and sea salt

Step 11: Bake for 25 minutes, or until the top is golden brown and the bottom is crispy.

Final step: Serve warm and savor!

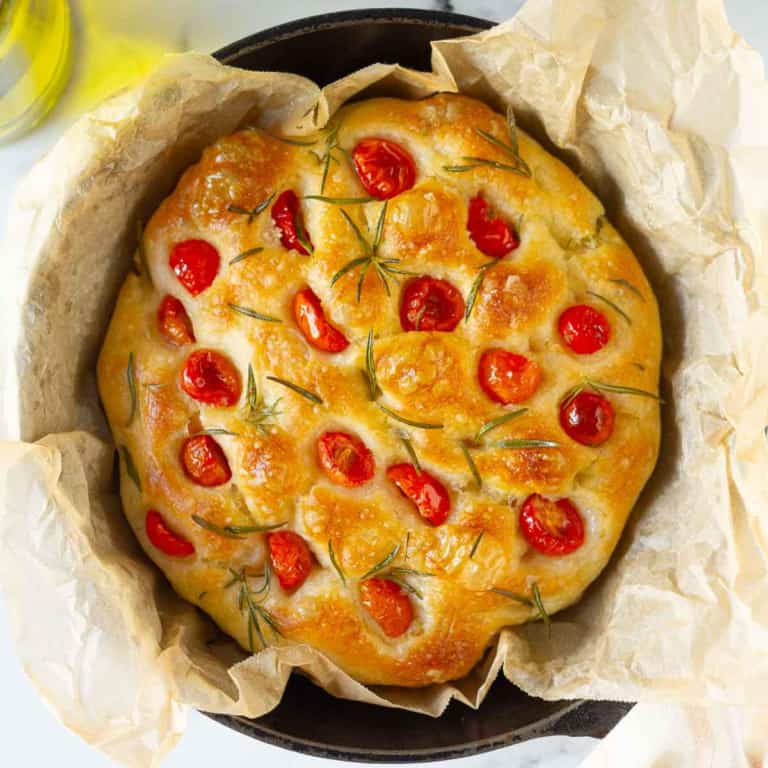
baked mini focaccia

Pro Tips

  • Always activate the yeast so you know it still works and donโ€™t have to waste the entire batch.
  • The water has to be lukewarm, not hot or cold, for the yeast to work.
  • The mini no-knead focaccia bread recipe is very adaptable. You can proof the dough for anywhere from 1.5 hours to overnight. If you want to make it ahead, refrigerate the dough. If youโ€™re baking focaccia the same day, keep it in a warm place until it doubles in size.
  • How long it takes for mini focaccia to rise depends on how hot it is in your corner of the world. The hotter, the faster the rise.
  • I would recommend proofing the dough for as long as you can. It makes a magical difference to the flavor. If possible, give it a good 12 to 14 hours in the fridge.
  • Preheat your oven to maximum. For me, thatโ€™s 250 ยฐC or 482 ยฐF. Just after you slide the small batch focaccia into the oven, dial down the thermostat to 200 ยฐC or 392 ยฐF.
  • You can bake the mini focaccia in a loaf pan or a jumbo-sized muffin tin. Just remember to oil the base.
mini no-knead focaccia

How To Serve

A mini garlic confit focaccia or a simple mini tomato confit focaccia are brilliant ideas if youโ€™re craving something fancier. I love to make a mini focaccia sandwich and serve it with:

  • Whipped Goat Cheese
  • Gochujang Mayo
  • Pistachio Pesto
  • Tzatziki
mini no-knead focaccia

More Easy Bread Recipes

  • No-Knead Focaccia with rosemary on parchment paper.
    Super Easy No-Knead Focaccia
  • Best Turkish Pide Bread Recipe!
    Best Turkish Pide Bread Recipe
  • Sliced bread with butter and jam on a wooden board.
    Easy Everyday Bread

Half the joy of cooking is sharing it with others. Thatโ€™s why Iโ€™m always eager to hear from you. So go right ahead and drop a comment or reach out on Instagram, Pinterest, YouTube, or Facebook. I hope you love this mini focaccia as much as we do!

๐Ÿ“– Recipe

mini no-knead focaccia

Mini No-Knead Focaccia

Natasha Minocha
Mini focaccia is the quick, easy, small-batch recipe you didnโ€™t know you needed. Utterly delicious, this no-knead mini focaccia is thick, fluffy, chewy, flavorful, and very versatile. Simply the perfect meal or snack for 1 or 2 people!
No ratings yet
Print Recipe Pin Recipe
Prep Time 10 minutes mins
Cook Time 20 minutes mins
Resting Time 1 day d
Course Side Dish
Cuisine Italian
Servings 2 people
Calories 256 kcal

Equipment

  • 6" Cast- Iron Skillet

Ingredients


  • 1/2 cup Water
  • 1/2 +1/8 tsp Yeast I used dried active yeast
  • 1/2 tsp Sugar
  • 1 cup All-purpose flour
  • 1/2 tsp Salt
  • 4 tsp Olive oil

Toppings

  • Cherry tomatoes, Fresh rosemary, Sea Salt

Instructions
 

  • Stir yeast and sugar in lukewarm water and let it sit till nice and frothy.
  • Combine the flour and salt in a bowl.
  • Pour over the yeast mixture and mix well with a spatula until a sticky dough is formed.
  • Pour a teaspoon of olive oil on the surface of the dough and rub it all over.
  • Cover with plastic wrap and refrigerate for 18-24 hours.ย Or place it in a warm spot for 1.5 -2 hours or until the dough doubles in size.
  • When you're ready to bake, line the bottom of your cast-iron skillet or baking pan with parchment paper.
    Pour 2 teaspoons of olive oil in the center of the prepared pan.
  • Oil your hands and gently bring the proofed dough in from the sides of the bowl.
  • Fold the dough over itself. Turn the bowl a quarter of the way and fold the dough over itself again. Do 2 more quarter turns of the bowl, folding the dough each time.
  • Transfer the dough to the prepared pan. Cover and place in a warm place for 1-2 hours or until the dough doubles in size and fills the pan.
  • Preheat the oven to 250 C or 482 F.
  • Pour over the remaining 2 teaspoons of olive oil on the dough and spread it all over. Dimple the dough using your fingers.
  • Top with rosemary, cherry tomatoes, and sea salt flakes.
  • Place the pan in the oven and reduce the temperature to 200 C or 392F.
  • Bake for 20-25 minutes or until the top is golden brown and the bottom is crispy.
  • Let the bread rest in the pan for 5 minutes before turning it out on a cooling rack. Slice it warm or let it cool completely. Enjoy!

Video

Nutrition

Calories: 256kcalCarbohydrates: 50gProtein: 8gFat: 2gSaturated Fat: 0.3gPolyunsaturated Fat: 0.4gMonounsaturated Fat: 1gCholesterol: 2mgSodium: 245mgPotassium: 99mgFiber: 2gSugar: 1gVitamin A: 40IUVitamin C: 0.05mgCalcium: 19mgIron: 3mg
Tried this recipe?Let us know how it was!

Whipped Goat Cheese Dip

April 3, 2024

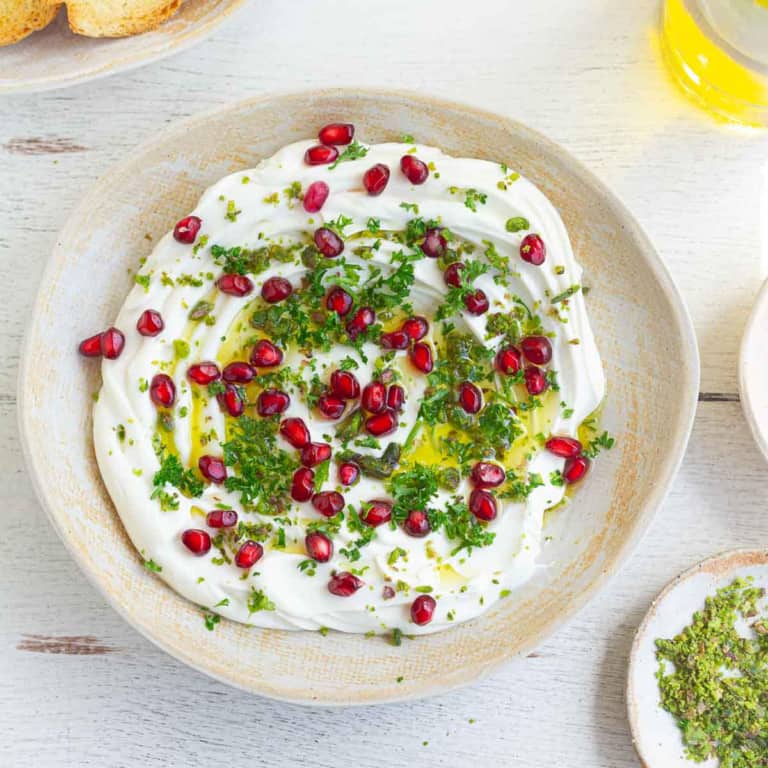
Creamy dip in a bowl garnished with parsley and pomegranate arils.

If you're looking for an easy, crowd-pleasing appetizer, this whipped goat cheese dip is it! Creamy, tangy, and incredibly smooth, it comes together in minutes and feels instantly special - like something you'd serve when you want to impress, but without the effort!

whipped goat cheese dip garnished with parsley and pomegranates in a bowl.

All it takes is a quick blend of tangy goat cheese, cream cheese, roasted garlic, and olive oil to give you an irresistible, decadent restaurant-style dip! Add your favorite toppings and serve with crackers, crostini, veggies, or pretzels. Perfect for game nights, Holidays, parties, or everyday snacking. This simple whipped goat cheese recipe is a keeper!

[feast_advanced_jump_to]

Why You'll Love This Recipe

โœจ An impressive, flavor-packed dip that everyone loves. So good for potlucks, parties, holidays, or any occasion.

โœจ Super simple to make - just a quick blend and it's ready in minutes. And you can also make it a couple of days in advance - for stress-free entertaining!

โœจ It's so easy to customize. This goat cheese dip pairs very well with savory and sweet toppings- fresh herbs, nuts, fig jam, hot honey, sundried tomatoes, olives...the possibilities are endless.

โœจ This whipped goat cheese olive oil dip is lip-smacking good! Serve it as a dip, as a topping for your bruschetta, as a sandwich spread, or drizzle it on roasted veggies or grilled meat.

Recipe Ingredients

Labelled ingredients for making whipped goat cheese dip.

Cheese: I used chรจvre, plain goat cheese, and plain cream cheese. I also like to use my homemade cream cheese sometimes. Please make sure both are at room temperature.

Garlic: I love to use roasted garlic for this goat cheese dip recipe. It is an additional step, but it's really worth the effort. Roasting garlic makes it mellow, creamy, and almost sweet. This adds depth of flavor and deliciousness that can't be missed! You can use garlic confit if you wish.

Oil: I used extra virgin olive oil for that fruity flavor and to give the garlic-whipped goat cheese a nice sheen.

Lemon: For a bright, citrusy flavor that cuts through the richness of cheese.

Please see the recipe below for full information about the ingredients and quantities.

How To Make Whipped Goat Cheese Dip

Step 1: Add goat cheese, cream cheese, roasted garlic, oil, salt, and lemon juice to your food processor.

Cream cheese, goat cheese, roasted garlic, olive oil, and lemon juice in a bowl.

Step 2: Blend till you have a nice, thick, creamy whipped goat cheese spread.

Step 3: Adjust salt and lemon juice to taste.

whipped creamy cheese in a bowl with toppings on the side.

Step 4: Transfer to a serving bowl. Drizzle olive oil, add the toppings - parsley, pomegranate arils, and pistachios. Serve and enjoy!

Creamy dip topped with parsley, pomegranates with crostini and other ingredients around.

Pro Tips

  • Make sure the goat cheese and cream cheese are at room temperature. This will help whip the mixture into a lighter, creamier texture more easily.
  • Blend the ingredients very well to get that smooth, creamy consistency.
  • If the dip tastes too sharp, add more olive oil or even a small drizzle of honey or maple syrup to round out the flavors.
  • You can make the dip up to 2 days in advance and keep it refrigerated in an airtight container. Transfer to a bowl and garnish right before serving.
  • Serve at room temperature for that perfectly spreadable, scoopable consistency.
A hand scooping out dip from a bowl with a crostini.

More Topping Ideas

The whipped goat cheese dip is very versatile and pairs so well with a variety of toppings.

  • Fresh herbs
  • Caramelized onions
  • Crispy bacon
  • Roasted cherry tomatoes or marinated cherry tomatoes
  • Any kind of pesto, like my pistachio pesto
  • Sun-dried tomatoes
  • Olives
  • Roasted nuts

A pairing Iโ€™ll say is not to be missed is whipped goat cheese withย fig jam. You can even add heat to the dip with hot honey!

How To Serve

This simple goat cheese dip is easy to serve and fits right into any spread, from casual snacking to elegant entertaining.

Serve it with toasted bread or crostini for a classic pairing. It goes beautifully with my easy everyday bread or sourdough discard bread. Crackers like my pumpkin cranberry crackers and sweet potato crackers work just as well.

Serve with fresh vegetables or cruditรฉs. Fresh and crunchy, they are delicious with the creamy dip.

It also makes a lovely addition to a cheeseboard. Add fruits, nuts, and breads for a relaxed, crowd-pleasing appetizer.

Serve with roasted veggies like my oven-roasted carrots, roasted cauliflower, crispy smashed potatoes, or baked sweet potato fries.

Dip with pomegranate arils, parsley and olive oil in a ceramic bowl.

Recipe FAQs

How to make it without a food processor?

If you don't have a food processor or blender, you can use a handheldย electric beater.ย If you're ready for an arm workout, you can even whip goat cheese dip with aย balloon whisk!

How to roast garlic?

Take a whole head of garlic and cut 1/4 -inch off the top. Drizzle olive oil on it. Place it on parchment paper or aluminum foil, and wrap tightly. Bake at 200 C or 400 F for 30-40 minutes, until soft and golden brown.

More Easy Creamy Dips

  • Fried pickle dip in a serving bowl with veggies and chips around.
    Fried Pickle Dip
  • cashew ricotta cheese garnished with parsley in a small bowl place on 2 plates.
    Cashew Ricotta Cheese
  • Easy Creamy Avocado Dip
    Easy Creamy Avocado Dip
  • Gochujang Mayo Recipe
    Gochujang Mayo Recipe

Half the joy of cooking is sharing it with others. Thatโ€™s why Iโ€™m always eager to hear from you. So go right ahead and drop a comment or reach out onย Instagram,ย Pinterest,ย YouTube, orย Facebook. I hope you love this whipped goat cheese as much as we do!

๐Ÿ“– Recipe

Creamy dip in a bowl garnished with parsley and pomegranate arils.

Whipped Goat Cheese Recipe

Natasha Minocha
If you're looking for an easy, crowd-pleasing appetizer, this whipped goat cheese dip is it! Creamy, tangy, and incredibly smooth, it comes together quickly and feels instantly special - like something you'd serve when you want to impress, but without the effort!
No ratings yet
Print Recipe Pin Recipe
Prep Time 15 minutes mins
Cook Time 40 minutes mins
Course Appetizer
Cuisine American
Servings 8 Servings
Calories 113 kcal

Ingredients


  • 8.8 ounces Goat cheese
  • 2 tbsp Cream cheese
  • 1-2 tbsp Olive oil
  • 1/4 tsp Sea salt
  • 1 tbsp Lemon juice

Roasted Garlic

  • 1 head Garlic
  • 1-2 tsp Olive oil

Toppings

  • Olive oil
  • Parsley, finely chopped
  • Pistachios, finely chopped
  • Pomegranate arils

Instructions
 

  • Combine the goat cheese, cream cheese, olive oil, salt, lemon juice, and roasted garlic in a blender or food processor.
  • Blitz until the mixture is creamy and fluffy.
  • Transfer to a serving bowl and drizzle some olive oil.
    Top with chopped parsley, pistachios, and pomegranate arils.
  • Serve with crackers or crostini. Enjoy!
  • Store covered in the refrigerator for up to 2 days.

Roasted Garlic

  • Preheat your oven to 200 C or 400 F.
  • Cut the top 1/2" of the garlic. Drizzle 1 -2 tsp olive oil on the garlic.
  • Place on a piece of parchment paper or aluminum foil. Make a parcel and bake at 200 C or 400 F for 30-40 minutes until the garlic is soft and light brown.
  • Let this cool enough for you handle. Squeeze out the roasted garlic cloves out of their skin, using your hands or a fork.

Video

Notes

  • Make sure the goat cheese and cream cheese are at room temperature. This will help whip the mixture into a lighter, creamier texture more easily.
  • Blend the ingredients very well to get that smooth, creamy consistency.
  • If the dip tastes too sharp, add more olive oil or even a small drizzle of honey or maple syrup to round out the flavors.
  • You can make the dip up to 2 days in advance and keep it refrigerated in an airtight container. Transfer to a bowl and garnish right before serving.
  • Serve at room temperature for that perfectly spreadable, scoopable consistency.

Nutrition

Serving: 15gCalories: 113kcalCarbohydrates: 2gProtein: 7gFat: 9gSaturated Fat: 5gPolyunsaturated Fat: 0.4gMonounsaturated Fat: 3gCholesterol: 15mgSodium: 220mgPotassium: 37mgFiber: 0.1gSugar: 1gVitamin A: 325IUVitamin C: 2mgCalcium: 66mgIron: 1mg
Tried this recipe?Let us know how it was!

Family Favorite Oatmeal Raisin Cookies Recipe

March 28, 2024

Family Favorite Oatmeal Raisin Cookies Recipe

This oatmeal raisin cookie recipeย makes for crispy outside and moist, chewy inside treats. These are the perfect cookies you want to keep snacking on. They have hints of cinnamon, and the raisins keep every bite interesting!

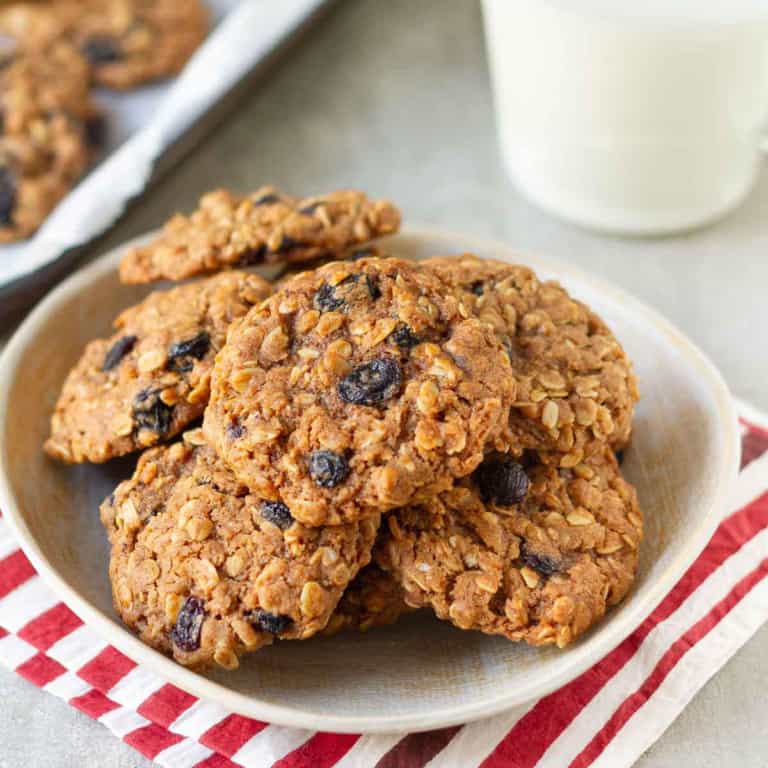
Oatmeal Raisin Cookies in a small plate on a  red striped napkin.

Warm, cozy, and just the right sweetness, this is one of the classic grandma's cookie recipes. When youโ€™re craving a simple treat, use this old-fashioned cookie recipe to make crispy-edged, chewy cookies with hidden notes of deep caramel. And so easy to make, they are totally beginner-friendly!

[feast_advanced_jump_to]

Why You'll Love This Recipe

You need these cookies. Trust me. Theyโ€™re a delicious treat and nourishing fuel all at the same time.

Yes, they pair well with coffee, but theyโ€™re fantastic with a tall glass of milk.

They bring the best chewy and crispy cookie worlds, so youโ€™ll WANT to double or triple the recipe.

Make a big batch, scoop, shape, freeze, and then bake whenever you crave a cookie.

Recipe Ingredients

Ingredients for making oatmeal raisin cookies.

Oats: This is an old-fashioned oat cookie recipe. Rolled oats are how you get that chewy texture. Quick oats are too thin, so I wonโ€™t recommend them.ย 

Flour: My cookies are baked with all-purpose flour, but the recipe is very adaptable, so whole wheat flour is fantastic too.

Sugar: Brown sugar has more moisture than regular sugar, and it imparts a delicious caramel flavor.

Butter: My oatmeal raisin cookies recipe uses salted butter. Add ยผ teaspoon of salt to the dry ingredients if your butter is unsalted.

Milk: I used regular full-fat milk for a little richness.

Cinnamonย gives the oats and raisin cookies a spicy kick. Vanilla extract rounds out the flavor.

Baking soda acts as a leavening agent, helps the oatmeal raisin cookies recipe expand easily, and makes the texture softer.

Raisins: Black raisins are popular here, so thatโ€™s what went into the dough, but they can be easily replaced with green raisins or golden raisins.

Please see the recipe card for full information about ingredients and quantities.

One oatmeal cookie broken into half to show the texture on a plate.

How To Make Oatmeal Raisin Cookies

Step 1: Set your oven to preheat at 180 C / 350 F. Line a baking tray with parchment paper.

Step 2: Whisk the flour, baking soda, and cinnamon powder in a small bowl.

Dry ingredients for oatmeal cookies in a glass bowl.

Step 3: In a large bowl, beat the softened butter and brown sugar until creamy. Takes 2 to 3 minutes with an electric beater.

wet ingredients for oatmeal cookies in a mixing bowl.

Step 4: Add milk and vanilla extract and beat for another 10โ€“15 seconds.

Step 5: Combine the dry ingredients with the wet.

Dry and wet ingredients for oatmeal cookies in a bowl.

Step 6: Fold your oats and black raisins with a spatula to make a thick oatmeal-raisin cookie batter.

 Oats and raisins  in the cookie batter.
Dough for oatmeal raisin cookies.

Step 7: Use a cookie scoop (1.5 tablespoons) to portion the oatmeal cookies.

scooped out the cookie dough with a cookie scooper.

Step 8: Shape each into a ball. Flatten slightly. Place on a parchment paper or Silpat lined tray.

scooped out dough on a baking tray with parchment paper.

Step 9: Bake at 180 ยฐC for 13 to 15 minutes (mine took 14 minutes).

Step 10: Let the oatmeal-raisin cookies rest on the tray for about 10 minutes. Then cool completely on a wire rack.

Final step: Transfer to an old-fashioned cookie jar and munch on will!

baked oatmeal raisin cookies on parchment paper.

Pro Tips

  • The butter has to be softened, not melted, for this oat and raisin cookie recipe. Thatโ€™s how you get the right texture.
  • Use a handheld electric beater or balloon whisk to cream the butter.
  • The secret to the best oatmeal raisin cookies recipe is soaking the raisins in hot water for 10 to 15 minutes before folding them into the dough. Soaking will plump them up and pack more flavor. This is important if your raisins are too dry because theyโ€™ll become harder after baking.
  • If your raisins are soft and sticky, add them without soaking them.
  • Donโ€™t forget to flatten the dough slightly before placing it on the tray. Thatโ€™s how you get the best oat and raisin cookies that are chewy and flat.
  • Leave space between the cookie dough as the oatmeal raisin cookies expand a bit as they bake.
 Oatmeal Raisin Cookies

Oatmeal Cookie Recipe FAQs

Why is my oatmeal raisin cookie dough dry?

Add milk or water to the dough if itโ€™s too dry. If itโ€™s too sticky, mix in a tablespoon of oats or refrigerate it.

Are these eggless oatmeal cookies?

Yes, they are. You can make this oatmeal raisin cookie recipe with eggs. Simply leave out the milk and beat an egg into the creamed butter-sugar mixture. You may need to increase the quantity of dry ingredients, as the batter would have a higher liquid content.

How to store the cookies?

To keep the oatmeal raisin cookies chewy and fresh, store them in an airtight container, and theyโ€™ll stay well for 4 to 5 days.

Can you freeze raisin and oat cookies?

Absolutely. Roll the dough into balls, place them on your tray, and freeze. Once theyโ€™ve firmed up, you can transfer the frozen oatmeal cookies into a baggie so they donโ€™t take up too much space. Bake as and when the mood strikes.

Can I make soft oatmeal cookies without raisins?

Not a fan of raisins? Leave them out! No matter how you bake the oatmeal cookie recipe with raisins or without or with any other add-in, they are delicious. A few variations I would 100% suggest are:
Dark chocolate chips, like in my sourdough oatmeal cookies
Cranberries, as I did in my cranberry oatmeal cookies
Peanut butter or butterscotch chips
Dried cherries
Chopped dates
Nuts, likeย in theseย pecan cookies
You can either swap raisins for these add-ins or combine them. This oat raisin cookies recipe is very versatile.

 Oatmeal Raisin Cookies stacked on a plate.

More Classic Cookies

  • Cookies with sprinkles on a doily-lined platter.
    Butter Cookies
  • Thumbprint cookies on a platter surrounded by holiday decor.
    Best Thumbprint Cookies Recipe
  • BEST EVER Eggless Chocolate Chip Cookies Recipe
    Best Ever Eggless Chocolate Chip Cookies Recipe
  • Peanut butter blossom cookies on a trivet.
    Peanut Butter Blossom Cookies

Half the joy of cooking is sharing it with others. Thatโ€™s why Iโ€™m always eager to hear from you. So go right ahead and drop a comment or reach out onย Instagram,ย Pinterest,ย YouTube, orย Facebook. I hope you love this oatmeal raisin cookie recipe as much as we do!

๐Ÿ“– Recipe

Family Favorite Oatmeal Raisin Cookies Recipe

Family Favorite Oatmeal Raisin Cookies Recipe

Natasha Minocha
Warm, cozy, and just the right sweetness, this is one of the classic grandma's cookie recipes. Soft and chewy, these old-fashioned cookies are packed with hearty oats, warm cinnamon, and sweet raisins. Simple, wholesome, and so satisfying!
5 from 1 vote
Print Recipe Pin Recipe
Prep Time 15 minutes mins
Cook Time 14 minutes mins
Course Snack
Cuisine American
Servings 20 Cookies
Calories 107 kcal

Ingredients


  • 3/4 cup All-purpose flour
  • 1/2 tsp Baking soda
  • 1 tsp Cinnamon powder
  • 1/2 cup Butter, softened
  • 3/4 cup Brown sugar
  • 1 tsp Vanilla extract
  • 1 tbsp Milk
  • 1.5 cups Rolled oats
  • 1/2 cup Raisins * I used black raisins

Instructions
 

  • Preheat your oven to 180 C or 350 F. Line your baking tray with parchment paper or Silpat.
  • In a small bowl, whisk together the flour, baking soda, and cinnamon powder.
  • In a large bowl, combine the softened butter and brown sugar. Beat well using an electric beater until creamy. This takes about 2-3 minutes.
  • Add the milk and vanilla extract and beat again for 10-15 seconds.
  • Whisk in the flour mixture.
  • Fold in the rolled oats and raisins. This will be a thick dough.
  • Use a cookie scoop (1.5 tablespoon size) to portion the oatmeal cookies.
  • Shape each into a ball. Flatten slightly. Place on the prepeared baking tray.
  • Bake at 180 ยฐC for 13 to 15 minutes (mine took 14 minutes).
  • Let the cookies rest on the tray for about 10 minutes before carefully transferring them to a cooling rack.
  • Serve and enjoy!

Video

Notes

  • Theย butterย has to beย softened, not melted, for this oat and raisin biscuit recipe. Thatโ€™s how you get the right texture.
  • Use a handheld electric beater or balloon whisk to cream the butter.
  • The secret to the best oatmeal raisin cookies recipe isย soaking the raisins in hot water for 10 to 15 minutes before folding them into the dough. Soaking will plump them up and pack more flavor. This is important if your raisins are too dry because theyโ€™ll become harder after baking.
  • If your raisins are soft and sticky, add them without soaking them.
  • Donโ€™t forget toย flatten the doughย slightly before placing it on the tray. Thatโ€™s how you get the best oat and raisin cookies that are chewy and flat.
  • Leave space between the cookie dough as the oatmeal raisin cookies expand a bit as they bake.

Nutrition

Calories: 107kcalCarbohydrates: 24gProtein: 2gFat: 1gSaturated Fat: 0.2gPolyunsaturated Fat: 0.2gMonounsaturated Fat: 0.2gTrans Fat: 0.01gCholesterol: 0.1mgSodium: 75mgPotassium: 74mgFiber: 1gSugar: 11gVitamin A: 2IUVitamin C: 0.2mgCalcium: 27mgIron: 1mg
Tried this recipe?Let us know how it was!

Easy Pizza Pull-Apart Bread

March 26, 2024

Easy Pizza Pull-Apart Bread in a baking dish.

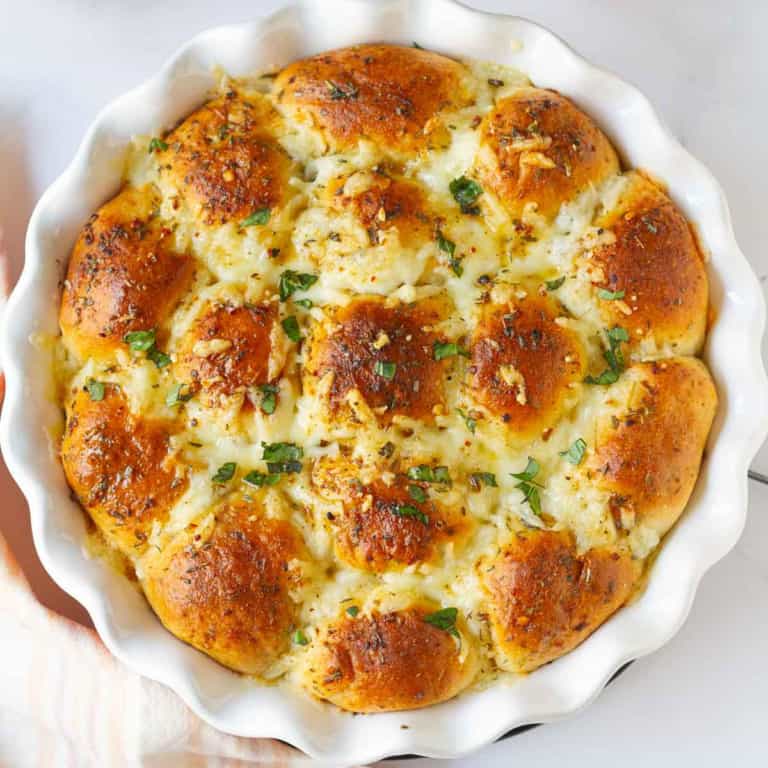
You wonโ€™t even know when the pizza pull-apart bread disappears! You pull one and the rest follow suit, faster than you can say "yum,โ€ leaving no trace of cheesy goodness. Once you have the pizza pull-apart recipe dough ready, assembly and baking are quick. The only trouble? Itโ€™s hard to resist the cheesy, garlicky, herby aroma!

Easy Pizza Pull-Apart Bread in a round dish.

This pizza pull-apart rolls recipe is a riff on myย pull-apart cheese garlic bread. Call them rolls, call them pull-apart buns, or call them pull-apart pizza bread. Once you taste this superย yummy, deliciousness,ย you wonโ€™t even care!

[feast_advanced_jump_to]
A hand pulling a piece of the pizza pull-apart bread.

Why You'll Love This Recipe

Perfect appetizer: easy to serve, easy to eat, and guaranteed to disappear in minutes.

Ideal for any occasion: Whether it's game day, a casual gathering with friends, or just a cozy Friday night dinner, this recipe fits the bill.

Comfort food at its finest: Imagine sinking your teeth into a buttery, tender bread stuffed with pizza flavors.

Recipe Ingredients

Ingredients for making pizza pull-apart bread

Flour: I used all-purpose flour, but you can certainly use whole wheat flour too.

Yeast: I used active dry yeast. Instant yeast will work too.

Oil: This recipe uses olive oil for a lovely fruity flavor. You can use any vegetable oil if you wish.

Sugar:ย This helps activate the yeast and balances the flavors.

Milk: I used regular cow's milk. But you can use plant-based milk like almond milk, as I did for my classic cinnamon rolls.

Mozzarella Cheese:ย Use packaged block mozzarella cheese. Fresh mozzarella will be too wet for this recipe.

Add-ons:ย You can stuff the roll withย sautรฉed mushroomsย or makeย pepperoniย pull-apart bread by adding pepperoni. You can also add pizza sauce to the filling!

Please see the recipe card for full information about the ingredients and quantities.

How To Make Pizza Pull-Apart Rolls

Step 1: Heat milk until lukewarm. Stir in sugar and oil, followed by yeast. Set aside for 5โ€“10 minutes, until frothy and bubbly.

Step 2: Whisk in 2 1/3 cups of flour and Italian seasoning. Cover and place in a draft-free place until the dough doubles in size (about 1 to 2 hours).

Steps for making dough for rolls.

Step 3: Add the rest of the flour along with baking powder, baking soda, and a teaspoon of sea salt.

Step 4: Mix well and let it rest in the fridge overnight.

Step 5: Gently deflate the dough the next morning and knead for barely 10 to 15 seconds.

Dough for pull-apart pizza bread.

Step 6: Divide the pull-apart pizza buns dough into 15 equal pieces. You can eyeball it or weigh them. My pieces were 40 to 42 grams each.

Step 7: Take one piece. Flatten it a bit. Place a 1-inch mozzarella cheese cube in the center. Press the dough ends together. Pinch the seam to seal. Roll into a proper ball and then place on a 9-inch pie dish, seam side down.

steps for making pull-apart pizza bread.

Step 8: Repeat for all the other 14 pieces to make pizza roll buns.

Step 9: Cover the rolls and let them rest until puffy.

Dough balls in a pan for pizza pull-apart bread.

Step 10: Meanwhile, set your oven to preheat and make garlic herb butter. Melt butter. Add garlic powder and a tablespoon of Italian seasoning. Mix well.

garlic herb butter in a bowl with a spoon.

Step 11: Brush the puffed-up pizza pull-apart rolls with half of the garlic herb butter.

dough balls brushed with garlic herb butter.

Step 12: Pop them in the oven and bake for 20 minutes at 190ยฐC.

Step 13: Slide the pie dish out. Add grated mozzarella on top and pop it back in the oven for 10 more minutes until the rolls are golden.

Grated cheese on top of the baked bread.

Step 14: Gently slather the saved garlic herb butter on hot rolls. Garnish with fresh basil.

Final step: Serve and savor!

Baked pizza pull-apart bread in a pan.

Pro Tips

  • I use this no-knead dough for practically everything, fromย cinnamon rollsย toย coffee bunsย toย pesto bread. Itโ€™s just fantastic. And yes, it isย soft dough,ย soย please don't add too much flour.ย The softer the dough, the fluffier your rolls. Trust me, youโ€™ll be able to handle itย veryย easily after refrigerating it. Itโ€™s a pliable one.
  • Since this is a recipe for pizza pull-apart bread, Iย didnโ€™t leave a lot of gapsย between the rolls, making it a tight fit.
  • My pull-apart pizza bread took 20 minutes forย 2nd riseย because itโ€™s already warm here. It may take youย 30 to 45 minutes,ย depending on how cold your kitchen is.
  • Donโ€™t grate the cheeseย on top of the pizza pull-apart breadย at the start. Add it after the bread is almost baked. I picked up this tip fromย Sallyโ€™s Baking Addiction,ย and let me tell you, itโ€™s going to be a standard practice for me now.
Easy Pizza Pull-Apart Bread

How To Serve Pizza Pull-Apart Bread

There is no shame in eating pizza pull-apart bread as-is. Dig in and enjoy. But dipping the warm rolls in marinara sauce is just a must. Chunky or completely purรฉed. Spicy or mildly flavored. Homemade or store-bought. It doesnโ€™t matter. These pizza rolls go beautifully with tomato sauce!

Dipping the pizza pull-apart bread in tomato sauce.

Recipe FAQS

Can pizza dough be used for making rolls?

As I said, Iโ€™ve used this bread dough countless times. I simply made it extra savory for this pizza pull-apart bread. You canย use any of your favorite doughย recipes, or go for store-bought biscuit dough, or pizza dough. Adjust the baking time accordingly.

How to make the pull-apart bread more cheesy?

Instead of using a one-inch cheese cube, increase the amount you stuff in the pull-apart pizza buns. Then top it with as much mozzarella as you want.

Can you bake it in a bundt pan?

Yes, you can use a bundt pan for this garlic butter pizza pull-apart bread. You can turn it into a pizza pull-apartย monkey bread. You can even make it in a 10-inch pie dish or cast-iron skillet. That said, I used a 9โ€ pan, and it worked just fine.

How to make vegan pizza pull-apart bread?

Switch to plant-based milk and cheese. For the garlic herb butter, swap the butter with olive oil.

What to do with leftover pizza rolls?

Warp any pull-apart pizza rolls that are left over tightly and refrigerate them. Theyโ€™ll stay well for 3 to 4 days. Reheat in the microwave, oven or an air-fryer.

cheesy pizza pull-apart bread split into half to show the cheese pull.

More Easy Fun Bread Recipes

  • mini no-knead focaccia
    Mini No-Knead Focaccia
  • Easy Pull-Apart Cheese Garlic Bread | Cheesy Garlic Pull- Apart Bread
    Pull-Apart Garlic Bread
  • Baked garlic cheese bread in a baking dish.
    Homemade Garlic Cheese Bread
  • Korean Cream Cheese Garlic Bread
    Korean Cream Cheese Garlic Bread

Half the joy of cooking is sharing it with others. Thatโ€™s why Iโ€™m always eager to hear from you. So go right ahead and drop a comment or reach out onย Instagram,ย Pinterest,ย YouTube, orย Facebook. I hope you love this pizza pull-apart bread as much as we do!

๐Ÿ“– Recipe

Easy Pizza Pull-Apart Bread in a baking dish.

Easy Pizza Pull-Apart Bread

Natasha Minocha
Easy Pizza Pull-Apart Bread- easy to make and always a crowd-pleaser, this cheesy pull-apart bread recipe is a must-have in your repertoire!
No ratings yet
Print Recipe Pin Recipe
Prep Time 2 minutes mins
Cook Time 30 minutes mins
Resting Time 8 hours hrs
Course Side Dish, Snack
Cuisine American
Servings 15 Servings
Calories 192 kcal

Ingredients


  • 1 cup Milk
  • 1/4 cup Olive oil
  • 2 tbsp Sugar
  • 1.5 tsp Yeast I used dried active yeast. Instant yeast will also work here.
  • 2 1/3 cups All-purpose flour
  • 1.5 tsp Italian seasoning
  • 1/4 tsp Baking powder
  • 1/4 tsp Baking soda
  • 1 tsp Salt
  • 1/4 cup All-purpose flour
  • 3.5 oz Mozzarella cheese Cut into 1 -1.5" cubes
  • 2.6 oz Mozzarella cheese Shredded

Garlic Herb Butter

  • 1/4 cup Butter
  • 1 tsp Garlic powder
  • 1 tsp Italian seasoning

Instructions
 

  • Heat the milk until lukewarm. Stir in sugar, oil, and yeast.
  • Set aside for 5-10 minutes until the mixture is bubbly.
  • Whisk in the 2 and 1/3 cups of flour and 1.5 tsp of Italian seasoning. Cover and place in a draft-free place for 1 hour or until the dough is doubled in size.
  • Mix in the extra 1/4 cup flour, baking powder, baking soda, and salt. Mix well and let it rest in the fridge overnight.
  • Gently deflate the dough the next day and knead for barely 10 to 15 seconds.
  • Divide the pull-apart pizza buns dough into 15 equal pieces. You can eyeball it or weigh them.
    My pieces were 40 to 42 grams each.
  • Take one piece. Flatten it a bit. Place a 1-inch mozzarella cheese cube in the center. Press the dough ends together. Pinch the seam to seal. Roll into a proper ball and then place on a 9-inch pie dish, seam side down.
  • Repeat for all the remaining dough pieces.
  • Cover the rolls with a kitchen towel or cling wrap and let them rest until puffy.
  • Meanwhile, set your oven to preheat and make garlic herb butter.
    Melt butter. Add garlic powder and 1 tsp of Italian seasoning. Mix well.
  • Brush the puffed-up pizza pull-apart rolls with half the garlic herb butter.
  • Pop them in the oven and bake for 20 minutes at 190ยฐC or 375F.
  • Slide the pie dish out. Add grated mozzarella on top and pop it back in the oven for 10 more minutes until the rolls are golden and the cheese is all melty.
  • Gently slather the saved garlic herb butter on hot rolls. Garnish with fresh basil.
  • Serve with marinara sauce and enjoy!

Video

Notes

  • I use this no-knead dough for practically everything, fromย cinnamon rollsย toย coffee bunsย toย pesto bread. Itโ€™s just fantastic. And yes, it isย soft dough,ย soย please don't add too much flour.ย The softer the dough, the fluffier your rolls. Trust me, youโ€™ll be able to handle itย veryย easily after refrigerating it. Itโ€™s a pliable one.
  • Since this is a recipe for pizza pull-apart bread, Iย didnโ€™t leave a lot of gapsย between the rolls, making it a tight fit.
  • My pull-apart pizza bread took 20 minutes forย 2nd riseย because itโ€™s already warm here. It may take youย 30 to 45 minutes,ย depending on how cold your kitchen is.
  • Donโ€™t grate the cheeseย on top of the pizza pull-apart breadย at the start. Add it after the bread is almost baked. I picked up this tip fromย Sallyโ€™s Baking Addiction,ย and let me tell you, itโ€™s going to be a standard practice for me now.

Nutrition

Calories: 192kcalCarbohydrates: 20gProtein: 6gFat: 10gSaturated Fat: 4gPolyunsaturated Fat: 1gMonounsaturated Fat: 4gTrans Fat: 0.1gCholesterol: 18mgSodium: 293mgPotassium: 72mgFiber: 1gSugar: 3gVitamin A: 198IUVitamin C: 0.01mgCalcium: 114mgIron: 1mg
Tried this recipe?Let us know how it was!

Avocado Bread Recipe

March 21, 2024

Sliced avocado bread on a platter.

Avocado bread is a beautiful bread with a lovely avocado flavor. It's super moist, and the quick bread recipe's walnuts are the perfect foil to the buttery-ness, lending the anytime snack a lovely texture.ย 

Avocado Bread Recipe

Avocado bread is all the rage on TikTok. I didnโ€™t know the quick bread had gone viral, well, because we donโ€™tย haveย the app here in India. I came across it on Pinterest, and because it was so similar to banana bread (and Iโ€™ve made one too many of those), I decided to whip up a loaf.

For those new to the green-delicious world of avo bread, itโ€™s not the toast you often see. The one schmeared with it. This a quick bread that has lovely green fruit mixed into the batter. And it really is the best bread ever. It is what avocado loaf bread dreams are made of.ย 

[feast_advanced_jump_to]
Avocado Bread Recipe

Why you'll love avocado bread?

Itโ€™s an ingenious idea for quick bread if you hate banana bread but love avocados.

Youโ€™ll be pleasantly surprised at how tasty, vibrantly green, AND easy the bread is.

Moist, loaded with flavor, but not too sweet or oily. 

It's fantastic toasted!

Avocado Bread ingredients

Ingredients & swaps

Flour: Itโ€™s a dense bread, but it has a very tender and moist crumb thanks to all-purpose flour. You can substitute it with whole wheat.

Eggs help bind the quick bread. To make eggless avocado bread, replace it with an equivalent amount of flax egg or yogurt, as I did with my coconut banana bread.

Avocados: Pick the super-ripe ones. 1 large or 2 medium-sized will be sufficient.

Sugar: Cane or raw sugar works like a charm if you donโ€™t have caster sugar. Most recipes use ยพ cup of sugar. I used much less. You can easily up the sugar if you like a sweeter bread.

Fat: I used a neutral-tasting vegetable oil because I didnโ€™t want to overpower the subtle flavors of avocado. And thatโ€™s what I would suggest you go for.

Walnuts: Almonds, hazelnuts, cranberries, chocolate chips โ€“ almost anything is *chefโ€™s kiss* in this simple avocado bread recipe. Or just bake it plain with no add-ons.

Matcha is entirely, entirely optional. I added it to give the loaf that stunning, verdant color. It was only after I baked the avocado walnut bread that I realized it didnโ€™t need any. The fruit is enough to give the loaf a green color.

You donโ€™t taste the matcha at all, so if youโ€™re a fan and love it in your chocolate, cookies, or bakes, increase the amount to make avocado matcha bread. Also, stick to good-quality matcha.

How to make avocado bread?

Step 1: Sift and whisk together flour, baking powder, baking soda, and matcha powder (completely optional).

dry ingredients for avocado quick bread

Step 2: In another bowl, mash well a nicely ripened avocado.

Step 3: Add eggs, sugar, oil, and vanilla extract to the mashed avocado. Give it a good whisk until everything is mixed properly.

wet ingredients for avocado bread

Step 4: Add the dry ingredients to the wet.

Folding walnuts into the batter

Step 5: Fold chopped walnuts into the avocado matcha bread batter and then pour into a well-greased 8 by 4-inch tin.

Step 6: Top with more walnuts.

batter in the cake tin, topped with more walnuts

Step 7: Bake for 50 - 60 minutes, or until a skewer inserted in the center comes out clean.

Step 8: Let the avocado walnut bread cool in the tin and then on a wire rack.

Baked avocado bread

Final step: Serve warm or at room temperature and savor!

sliced Avocado Bread

My tips

  • I cannot say this enough. Use ripe avocados for this easy avocado bread recipe. Unripe avocados will give the avocado loaf a bitter taste, which we donโ€™t want. Plus, riper fruit makes it easier to make a smoother, creamier batter.
  • Love a domed loaf? Then donโ€™t overmix the batter. With the avocado quick bread recipe, itโ€™s best to mix until the flour is just folded in.
Avocado Bread

FAQs

Is this the viral avocado bread TikTok recipe?

No, this is a vintage avocado bread. The OG. The one that was made with oil. The TikTok avocado bread recipe doesnโ€™t use any added fat. It relies on the natural ones avocados already have.

How to store the leftover bread?

Wrapย it tightly in cling wrap or foil andย refrigerate. It keeps well for 4 to 5 days. Nuke it in the microwave for 10 to 15 seconds, or warm it in a preheated oven.

avocado bread sliced

How to serve avocado bread?

Avocado walnut bread is incredible when toasted. Out of the world incredible. Itโ€™ll be a big hit with everyone, so I definitely recommend toasting it on a griddle or toaster.

Slather it with butter, and you have breakfast from heaven! Or have it as-is; avo gives the quick bread all the good fats, so a slice is delicious even without anything. 

Because the loaf has minimal added sugar, itโ€™s not a very sweet bread, so it pairs deliciously with tea or coffee.

avocado bread bite on a fork

More quick bread recipes

Orange Cranberry Bread

Strawberry Banana Bread

Hawaiian Banana Bread

Pumpkin Bread

Half the joy of cooking is sharing it with others. Thatโ€™s why Iโ€™m always eager to hear from you. So go right ahead and drop a comment or reach out on Instagram, Pinterest, YouTube, or Facebook. I hope you love this avocado bread as much as we do!

๐Ÿ“– Recipe

Sliced avocado bread on a platter.

Avocado Bread Recipe

Natasha Minocha
Avocado bread is a beautiful bread with a lovely avocado flavor. It's super moist, and the quick bread recipe's walnuts are the perfect foil to the buttery-ness, lending the anytime snack a lovely texture.ย 
No ratings yet
Print Recipe Pin Recipe
Prep Time 15 minutes mins
Cook Time 1 hour hr
Course Dessert
Cuisine American
Servings 8 Servings
Calories 228 kcal

Ingredients


  • 1.5 cups All-purpose flour
  • 1 1/4 tsp Baking powder
  • 1/2 tsp Baking soda
  • 1/4 tsp Salt
  • 1 tsp Matcha powder
  • 1 Avocado
  • 1/3 cup Vegetable oil
  • 1/2 cup + 2 tbsp Castor sugar
  • 2 Eggs
  • 1.5 tsp Vanilla extract
  • 1/2 cup Walnuts, roughly chopped

Instructions
 

  • Preheat your oven to 180 C or 350 F. Grease an 8"x4" loaf pan.
  • In a medium bowl, whisk together the flour, baking powder, baking soda, salt, and matcha powder.
  • In a large bowl, add the avocado and mash it well.
  • Whisk in the oil, sugar, eggs, and vanilla extract.
  • Combine the dry and wet ingredients. Mix well until no dry streaks are visible.
  • Fold in the walnuts.
  • Transfer the batter to your prepared pan and top with some more chopped walnuts if you wish.
  • Bake at 180C or 350 F for 50-60 minutes or until a skewer inserted in the center comes out clean.
  • Let the cake cool in the pan for a few minutes before turning it out on a cooling rack to cool completely.
  • Slice and serve. Enjoy!

Nutrition

Calories: 228kcalCarbohydrates: 21gProtein: 5gFat: 14gSaturated Fat: 2gPolyunsaturated Fat: 6gMonounsaturated Fat: 5gTrans Fat: 0.1gCholesterol: 41mgSodium: 225mgPotassium: 164mgFiber: 2gSugar: 0.4gVitamin A: 122IUVitamin C: 3mgCalcium: 50mgIron: 2mg
Tried this recipe?Let us know how it was!

Easy Chocolate Peanut Butter No-Bake Cookies

March 17, 2024

Easy Chocolate Peanut Butter No-Bake Cookies

These chocolate peanut butter no-bake cookies are deliciously chocolately, fudgy, nutty, and chewy! They are also ridiculously easyย to make and always a hit with the crowd!

 Chocolate Peanut Butter No-Bake Cookies in a bowl.

Baking may be my first love, but there are days when even I just can't turn on the oven. That's when I turn to my easy, no-bake recipes, like this one. No oven, no fuss, just some basic ingredients and a few minutes of your time! That's all you need to make these irresistible no-bake chocolate peanut butter cookies!

Love no-bake treats? Then you must try these peanut butter rice Krispie squares, the easiest peanut butter stuffed dates, and peanut chocolate protein balls!

[feast_advanced_jump_to]

Why You'll Love This Recipe

โœจThese no-bake cookies are lovely for the days when you're craving something yummy but are too tired or it's too hot to bake!

โœจThis recipe is super quick and easy, from mixing bowl to the fridge in minutes! This is really a fast dessert!

โœจChocolate and peanut butter is a classic combo that just can't be beaten!

โœจA fun treat to make with the kids!

โœจA crowd pleaser, these chocolate peanut butter no-bake cookies are loved by kids and adults alike!

Recipe Ingredients

Ingredients for making no-bake peanut butter chocolate cookies.

Oats: I used rolled oats for these no-bake chocolate pb cookies. They give a hearty, chewy texture that we love. You can also make these cookies with quick oats. The recipe works with either. Switch to certifies gluten-free oats for a gluten-free version.

Sweetener: Date syrup was a personal preference. Feel free to substitute it with honey, maple syrup, or agave syrup.

Peanut Butter: I used creamy peanut butter as that's what I had on hand. But if crunchy peanut butter is what you love, use that for these peanut butter cookies. You can even replace it with any nut or seed butter.

Cocoa powder: For that deep chocolate flavor.

Chocolate: You can use chocolate chips or a roughly chopped chocolate bar. I prefer to use 55% or 70% dark chocolate. If you enjoy a sweeter and milder chocolate, use that. Keep the chocolate dairy-free for a vegan treat.

Coconut oil: This binds the cookie dough and also adds richness. You can use melted butter if you wish.

Please see the recipe card for full information about ingredients and quantities.

How To Make Chocolate Peanut Butter No-Bake Cookies

Step 1: Keep all your ingredients and a small, paper-lined baking sheet ready.

Cocoa powder, peanut butter, date syrup, coconut oil in a saucepan.

Step 2: Place a saucepan over medium heat and gently warm date syrup, cocoa powder, coconut oil, and peanut butter.

Step 3: Keep stirring until everything has melted completely and you have a smooth peanut butter cocoa cookie mixture. Take it off the heat.

Chocolate mixture  in a saucepan.

Step 4: To this, add the toasted ( and cooled) oats, roughly chopped chocolate, sea salt, and vanilla extract.

Rolled oats, chopped chocolate, vanilla extract and salt in the saucepan.

Step 5: Combine everything to make peanut butter chocolate oat cookie dough. Allow this to rest for 5 minutes.

Dough for no-bake peanut butter chocolate cookies in a bowl.

Step 6: Shape the cookie dough into even-sized balls.

cookie dough shaped into balls on parchment paper.

Step 7: Press down a bit to flatten the no-bake cookies, place them on the prepared baking sheet and refrigerate for 15-20 minutes, or until firm.

Step 8: Drizzle some melted chocolate on each cookie, and sprinkle roasted peanuts on top.

Final step: Serve and enjoy!

 Chocolate Peanut Butter No-Bake Cookies on parchment paper.

Pro Tips

  • It's important to have all your ingredients measured out and kept ready as this recipe comes together really fast.
  • You need to chill the cookies for at least 15 minutes for them to harden.
  • Don't let the chocolate mixture cool before adding all other ingredients in. We need the mixture to be still warm for easier mixing and scooping.
  • Let the cookie dough rest for 5 minutes before scooping and rolling into balls. This allows the oats to soak some moisture and become a bit softer.
  • Don't overcook the chocolate mixture.
  • I like to toast my rolled oats for these peanut butter oatmeal cookies because I prefer the toasty flavor. You can omit this step altogether if you want.
  • I prefer to use rolled oats for a more chewy texture but quick cooking oats work well too.
Chocolate Peanut Butter No-Bake Cookies with chocolate drizzle and peanuts.

Recipe FAQs

Why didn't my no-bake cookies harden?

When youโ€™re making these no-bake cookies, the trick is refrigeration. Give themย enough time to chillย and firm up.

Why did my peanut butter no-bake cookies fall apart?

Stick to theย wet-to-dry ingredient quantities given, and your no-bake chocolate peanut butter cookies will not fall apart. But, in case the mixture seems too dry, you can add a tablespoon of milk, if too wet, simply add more oats.

How do you store no-bake cookies?

Transfer the peanut butter chocolate cookies into an airtight container and store them in the refrigerator or the freezer. Allow the frozen cookies to thaw in the refrigerator before eating.

Chocolate No-Bake Cookies in a bowl with one cookie cut in half to show the texture.

More No-Bake Recipes

  • peanut chocolate protein balls topped with peanuts and seasalt in a small bowl.
    Peanut Chocolate Protein Balls
  • chocolate orange tart garnished with berries, orange zest, candied oranges on a white napkin.
    Chocolate Orange Tart
  • Peanut Butter Oats Bites | Peanut Butter Chocolate Oats Cups
    Peanut Butter Oat Cups
  • Chocolate peanut butter oatmeal bars cut into 16 squares on parchment paper.
    Chocolate Peanut Butter Oatmeal Bars

Half the joy of cooking is sharing it with others. Thatโ€™s why Iโ€™m always eager to hear from you. So go right ahead and drop a comment or reach out onย Instagram,ย Pinterest,ย YouTube, orย Facebook. I hope you love these chocolate peanut butter no-bake cookies as much as we do!

๐Ÿ“– Recipe

Easy Chocolate Peanut Butter No-Bake Cookies

Easy Chocolate Peanut Butter No-Bake Cookies

Natasha Minocha
These easy no-bake peanut butter chocolate cookies are irresistible! Chocolatey, fudgy, dense and so chewy, they come together in a cinch!
No ratings yet
Print Recipe Pin Recipe
Prep Time 20 minutes mins
Resting Time 20 minutes mins
Total Time 40 minutes mins
Course Cookies, Dessert, Snack
Cuisine American
Servings 14 Cookies
Calories 127 kcal

Ingredients


  • 3 tbsp Peanut butter
  • 4 tbsp Coconut oil
  • 1/4 cup Date syrup
  • 2 tbsp Cocoa powder
  • 1.5 cups Rolled oats, lightly roasted and cooled
  • 1/3 cup Dark chocolate, roughly chopped
  • 1/4 tsp Sea salt
  • 1 tsp Vanilla extract

Topping ( Optional)

  • Melted chocolate for drizzling on top
  • 2 tbsp Roasted peanuts, roughly chopped

Instructions
 

  • Keep a small tray lined with baking paper ready.
  • In a medium sized saucepan, gently heat the date syrup, cocoa powder, coconut oil, and peanut butter, until melted and smooth. Take it off the heat.
    3 tbsp Peanut butter, 4 tbsp Coconut oil, 1/4 cup Date syrup, 2 tbsp Cocoa powder
  • To this mixture, add the oats, chocolate, sea salt, and vanilla extract. Mix well.
    1.5 cups Rolled oats, lightly roasted and cooled, 1/3 cup Dark dairy-free chocolate, roughly chopped, 1/4 tsp Sea salt, 1 tsp Vanilla extract
  • Form into even sized balls and press down a bit to flatten them.
  • Place on the prepared tray and refrigerate for 15-20 minutes until firm.
  • Drizzle some melted chocolate on top of each cookie and top with chopped peanuts. Serve and enjoy!
    Melted chocolate for drizzling on top, 2 tbsp Roasted peanuts, roughly chopped
  • Store in an air-tight container in the refrigerator or freezer.

Video

Notes

  • It's important to have all your ingredients measured out and kept ready as this recipe comes together really fast.
  • You need to chill the cookies for at least 15 minutes for them to harden.
  • Don't let the chocolate mixture cool before adding all other ingredients in. We need the mixture to be still warm for easier mixing and scooping.
  • Let the cookie dough rest for 5 minutes before scooping and rolling into balls. This allows the oats to soak some moisture and become a bit softer.
  • Don't overcook the chocolate mixture.
  • I like to toast my rolled oats for these peanut butter oatmeal cookies because I prefer the toasty flavor. You can omit this step altogether if you want.
  • I prefer to use rolled oats for a more chewy texture but quick cooking oats work well too.

Nutrition

Serving: 1 CookieCalories: 127kcalCarbohydrates: 12gProtein: 3gFat: 9gSaturated Fat: 5gPolyunsaturated Fat: 1gMonounsaturated Fat: 2gSodium: 63mgPotassium: 89mgFiber: 2gSugar: 4gVitamin A: 0.3IUVitamin C: 0.01mgCalcium: 15mgIron: 1mg
Tried this recipe?Let us know how it was!

Hawaiian Banana Bread With Pineapple And Coconut

March 13, 2024

Hawaiian Banana Bread with Pineapple and Coconut

Hawaiian banana bread with pineapple and coconut was gone in a snap in my home. Super moist with lots of flavor and texture, this quick bread recipe lets you escape to the tropics without leaving your kitchen or putting in too much effort!

Hawaiian Banana Bread with Pineapple and Coconut

The perfect blend of ripe bananas, nutty shredded coconuts, and sweet-tart pineapples come together to create a moist and tender loaf that captures the essence of the tropics in this Hawaiian-style banana bread. With a tender texture and crisp corners and edges, the easy Hawaiian bread brings the flavors of paradise to your table.

[feast_advanced_jump_to]

What's Hawaiian Banana Bread?

Hawaiian banana bread is a variation of traditional banana bread that includes ingredients that give it a unique tropical twist. While the exact recipe can vary, some common additions include shredded coconut, pineapple, and sometimes even macadamia nuts. The result is a moist and flavorful banana bread with a hint of the islands.

Why We Love Hawaiian Banana Bread

A flavorful and memorable treat with a tropical flavor fusion

A soft and luscious banana bread, itโ€™s lovely and humbleโ€”a hug in loaf form

Want to experiment with different tropical add-ons? Adjust the level of sweetness. Or even make it gluten-free or vegan; Hawaiian banana bread recipe can be easily adapted to suit you!

Recipe Ingredients & Swaps

Ingredients for Hawaiian Banana Bread

Flour: All-purpose flour gives the tenderest crumbs. But whole wheat flour will work in a cinch, as it did for my walnut fig banana bread. If you want gluten-free Hawaiian banana bread, try buckwheat flour.

Sweetener: Caster sugar was my choice for this recipe for Hawaiian banana bread. Regular granulated sugar, cane sugar, or raw sugar will work too. Brown sugar would complement the bananas superbly and give the bread a darker color and a more caramelized, nutty flavor.

Eggs: Give the tropical banana bread structure, binding all the ingredients together and lending richness. To make Hawaiian banana bread vegan, swap eggs with flax eggs. Mix 1 tablespoon of flax seed powder with 3 tablespoons of water to make 1 flax egg.

Pineapple: Crushed pineapples are easily available in tins, but if you canโ€™t get your hands on them, buy sliced pineapple. Rinse them, drain them, and then pulse the slices in your food processor till you have a coarsely ground texture. Leftover pineapples? Use them to make pineapple sheera or coconut pineapple cake.

Bananas: Chunky or smoothly mashed, are both perfectly fine for this banana bread recipe with pineapple and coconuts. Pick the texture you prefer.

Coconut: Banana bread has enough sweetness from the fruits and added sugar, so the best bet is dried and unsweetened shredded coconut. You can substitute them with desiccated coconut. Any leftover coconut? Bake coconut banana bread!

Sliced Hawaiian Banana Bread

How To Make

Step 1: Set the oven to preheat. Grease your baking pan and set it aside.

Step 2: In a medium bowl, sift flour, baking powder, baking soda, and a pinch of salt. Mix well.

Steps for making Hawaiian Banana Bread

Step 3: In another large bowl, beat the eggs with caster sugar. Add mashed bananas, crushed pineapple, oil, and vanilla extract to it.

Step 4: To make the Hawaiian banana bread batter, add the wet ingredients to the dry, and then fold in shredded coconut.

Step 5: Pour the pineapple, coconut, and banana bread batter into your prepared pan.

Hawaiian style banana bread batter in a loaf tin

Step 6: Scatter some shredded coconut on top.

Step 7: Bake at 180 ยฐC for 40 to 45 minutes until the top is golden, and a skewer inserted in the center comes out clean.

Step 8: Cool in the pan for 15 minutes, then transfer to a wire rack to cool completely.

Final step: Slice, serve, and savor the Aloha banana bread recipe!

Hawaiian Banana Bread with Pineapple and Coconut

Pro Tips

  • The best recipe is when all the ingredients are at room temperature, especially the eggs.
  • The trick to super moist Hawaiian banana bread is to use very ripe bananas! Spotty bananas are the sweetest.
  • Amp up the flavor: Feel free to sneak in some cinnamon powder and nuts into the Hawaiian banana bread with coconut and pineapple.
  • Add-ons: The bread is delicious as-is, but macadamia nuts would be a smashing addition. Walnuts and pecans would be wonderful here too.

How To Serve

Banana bread with coconut and pineapple is great at room temperature AND cold, straight from the fridge. But you can reheat it in the microwave.

Like all quick breads, itโ€™s fantastic toasted and slathered with easy apple butter or homemade cinnamon honey butter!

FAQs

Can I turn Hawaiian banana bread into muffins?

Absolutely! You can use the same batter to make Hawaiian-inspired banana bread muffins. Just reduce the baking time to 15 to 20 minutes.

How to store banana bread with pineapple?

I refrigerated the bread because it has fruit in it, and itโ€™s not cold here anymore. If your corner of the world is still cold, you can store it on a countertop for 1-2 days.

Can you freeze this bread?

Yes, you can freeze Hawaiian-style banana bread. Cool completely to room temperature. (If you freeze it while still warm, it might develop ice crystals, affecting the texture.) Wrap it tightly in plastic wrap or aluminum foil. Place it in a container and freeze.

Sliced Hawaiian Banana Bread

More Quick Banana Breads

  • Cream Cheese Swirl Banana Bread | Easy Banana Bread with Cream Cheese
    Cream Cheese Swirl Banana Bread
  • Miso banana bread on a wooden board with a knife.
    Miso Banana Bread
  • Biscoff Banana Bread - Easiest Recipe!
    Biscoff Banana Bread
  • Perfect Strawberry Banana Bread Recipe
    Perfect Strawberry Banana Bread Recipe

Half the joy of cooking is sharing it with others. Thatโ€™s why Iโ€™m always eager to hear from you. So go right ahead and drop a comment or reach out on Instagram, Pinterest, YouTube, or Facebook. I hope you love this Hawaiian banana bread as much as we do!

๐Ÿ“– Recipe

Hawaiian Banana Bread with Pineapple and Coconut

Hawaiian Banana Bread With Pineapple And Coconut

Natasha Minocha
The perfect blend of ripe bananas, nutty shredded coconuts, and sweet-tart pineapples come together to create a moist and tender loaf that captures the essence of the tropics in this Hawaiian-style banana bread. With a tender texture and crisp corners and edges, the easy Hawaiian bread brings the flavors of paradise to your table.
5 from 4 votes
Print Recipe Pin Recipe
Prep Time 15 minutes mins
Cook Time 45 minutes mins
Course Dessert
Cuisine American
Servings 8 Servings
Calories 299 kcal

Ingredients


  • 1.5 cup All-purpose flour
  • 1 1/4 tsp Baking powder
  • 1/2 tsp Baking soda
  • 1/4 tsp Sea salt
  • 2 Eggs
  • 1/2 cup Sugar I used Castor sugar
  • 1/3 cup Vegetable oil
  • 2 Bananas Mashed
  • 1 cup Crushed pineapple Not drained
  • 1.5 tsp Vanilla extract
  • 1/4 cup Shredded unsweetened coconut

Instructions
 

  • Preheat your oven to 180 C or 350 F. Grease an 8"x4" loaf pan.
  • In a medium bowl, combine the flour, baking powder, baking soda, and salt.
  • In another large bowl, whisk together the eggs and caster sugar.
  • Combine the oil, mashed bananas, crushed pineapple, and vanilla extract. Mix well.
  • Combine the dry and wet ingredients. Mix well until no dry streaks are visible.
  • Fold in the shredded coconut.
  • Pour the batter into your prepared pan, top with some more shredded coconut, and bake at 180 C ( 350 F) for 40-45 minutes, until the top is golden brown and a skewer inserted in the center comes out clean.
  • Let the cake cool in the pan for 10-15 minutes before turning it out on a cooling rack. Let the cake cool completely.
  • Slice and serve with tea or coffee. Enjoy!

Video

Nutrition

Calories: 299kcalCarbohydrates: 43gProtein: 5gFat: 13gSaturated Fat: 4gPolyunsaturated Fat: 6gMonounsaturated Fat: 3gTrans Fat: 0.1gCholesterol: 41mgSodium: 225mgPotassium: 201mgFiber: 2gSugar: 21gVitamin A: 94IUVitamin C: 5mgCalcium: 54mgIron: 2mg
Tried this recipe?Let us know how it was!

Carrot Cake Baked Oats Recipe

March 8, 2024

Carrot Cake Baked Oats Recipe

Carrot Cake Baked Oats Recipe - Carrots, walnuts, and oats are baked in cinnamon and ginger to make healthy and easy carrot baked oats. The result? Well, itโ€™s pretty much like carrot cakeโ€”just made ahead and meal-prepped!

Carrot Cake Baked Oats Recipe

Carrot cake-baked oats are made with fresh and minimally processed ingredients. Healthy and super quick, itโ€™ll become your simple go-to recipe forย fueling your morning breakfastย to kick-start the day. But you canย dig into baked oatmeal at all sorts of odd times, making it a fabulous snack, too!

[feast_advanced_jump_to]

Why You'll Love This Recipe

Made with hearty oats, fresh carrots, and warming spices, this baked oatmeal is healthy and packed with goodness!

Its made for easy meal prep! Just mix, bake, and enjoy! No fancy steps, no messโ€”just a fuss-free breakfast you can prep in advance for the whole week.

All the warm, spiced goodness of carrot cake, but in a wholesome, nourishing breakfast that tastes like dessertโ€”without the guilt!

This recipe is so versatile! Stir in crunchy nuts, plump raisins or dried currants, or even a swirl of nut butter. Serve it with yogurt, a drizzle of maple syrup, or a dollop of cream cheese for that true carrot cake experience!

Recipe Ingredients & Swaps

Ingredients for Carrot Cake Baked Oats Recipe

Oats: I like to useย rolledย oats for baked oatmeal recipes because they add chewiness and texture. Instant oats will work too, but the texture will be differentโ€”think cakier. You can also make a carrot cake withย oat flourย (oats ground in a processor)โ€”a take on carrot cake baked with oats.

Egg: Adds structure and binds it all together. If you want to make eggless carrot cake baked oats, flax eggs will work in a cinch. Psyllium husk also works beautifully. Iโ€™ve tried it for myย banana-baked oatmeal recipeย (mix 2 tablespoons of the husk with 5 tablespoons of water. Wait till thick and gelatinous.).

Sweetener: Maple syrup is my choice because of its mild taste. You can substitute it with honey, agave syrup, date syrup, or regular sugar if you donโ€™t have any of them.

Add-ons: Raisins and walnuts are the typical choices for healthy carrot cake oats, so thatโ€™s what I used for this healthy and easy-baked oatmeal. Feel free to customize with your favorite nuts or exclude them altogether.

Spices: I stayed true to the timeless duo that defines the beloved carrot cake: cinnamon and ginger.

Vanilla extract: to give the baked oatmeal more flavor.ย You can use homemade vanilla extractย or store-bought.

Milk: I used almond milk here. But feel free to use your choice of milk. Creamy cashew milk, oat milk or regular dairy milk, all will work here.

Carrots: Use fresh, not frozen, and grate them with a box grater.

Salt: To balance flavors.

See the recipe card below for full information on ingredients and quantities.

How To Make Carrot Cake Baked Oats?

Step 1: In a small bowl, whisk the egg, almond milk, vanilla extract, and maple syrup.

combine wet ingredients in a bowl

Step 2: In a large bowl, combine rolled oats, grated carrots, cinnamon powder, ginger powder, and a pinch of salt.

combine dry ingredients in a large bowl

Step 3: Pour the wet ingredients into the dry and mix well.

Batter for carrot cake baked oatmeal

Step 4: Fold in raisins and chopped nuts.

fold in walnuts and raisins into the carrot cake oats batter

Step 5: Transfer the carrot cake baked oats cake batter to a lightly greased 8-inch square baking dish.

transfer the mixture in an 8" pan

Step 6: Bake for 30โ€“35 minutes until the oats are cooked and a skewer inserted in the center comes out clean.

Step 7: Give the carrot cake-baked oatmeal a 10-minute rest.

Carrot Cake Baked Oatmeal

Final step: Cut into squares, serve, and enjoy!

Carrot Cake Baked Oats Recipe

Pro Tips

  • Donโ€™t have a square pan? Make this easy carrot cake baked oatmeal recipe in an 8โ€ round pan or any baking dish you have; just make sure to adjust the baking time accordingly.
  • You can even make them in a cast-iron skillet.

How To Serve

Warm and barely pulled from the oven, carrot cake-flavored baked oats are *chefโ€™s kiss* all by its lonesome self. I love it with a drizzle of maple syrup and a side of Greek yogurt with cinnamon powder and walnuts.

You can also serve it with:

  • A dollop of lightly whipped cream will work like a charm.
  • Sweetened cream cheese and turn it into an indulgent treat.ย Carrot cake and cream cheese frostingย go hand-in-hand; whip it up by mixing cream cheese, cream, and icing sugar.
Carrot Cake Baked Oats Recipe

How To Store Healthy Carrot Cake Baked Oats?

Leftover baked oatsย refrigerateย rather well, lastingย 4 to 5 days.ย Youย can even freezeย them, in case you love meal prep. Cut into squares, wrap each individually, and freeze. Reheat in the microwave in spurts of 30 seconds whenever you feel like it, and enjoy it warm!

Recipe FAQs

Should baked oats be runny?

No, the consistency of baked oats is more like a soft cake with a hearty texture.

Can you cook baked oatmeal with water?

Iโ€™ve not tried them with water, but I guess that you wonโ€™t get the richness, nutrition, and flavor that milk (of any kind) imparts to carrot cake-baked oats.

Are baked oats good for you?

Baked oats are a wonderfully nourishing way to start the day. Packed with fiber-rich oats, carrots, nuts, and spices, this hearty breakfast will keep you full and energized for hours!

Carrot Cake Baked Oats Recipe

More Recipes With Oats

  • Tiramisu Overnight Oats Recipe
    Tiramisu Overnight Oats Recipe For Easy Mornings
  • Snickers Overnight Oats | Healthy Overnight Oats Recipe
    Snickers Overnight Oats
  • Vegan Oats Banana Mug Cake | Easy Kid Friendly Recipe
    Oats Banana Mug Cake
  • Banana Baked Oatmeal | Easy vegan baked oatmeal recipe
    Banana Baked Oatmeal

Half the joy of cooking is sharing it with others. Thatโ€™s why Iโ€™m always eager to hear from you. So go right ahead and drop a comment or reach out onย Instagram,ย Pinterest,ย YouTube, orย Facebook. I hope you love this carrot cake baked oats as much as we do!

๐Ÿ“– Recipe

Carrot Cake Baked Oats Recipe

Carrot Cake Baked Oats Recipe

Natasha Minocha
Carrots, walnuts, and oats are baked in cinnamon and ginger to make healthy and easy carrot cake-baked oats. The result? Well, itโ€™s pretty much like carrot cakeโ€”just made ahead and meal-prepped!
No ratings yet
Print Recipe Pin Recipe
Prep Time 10 minutes mins
Cook Time 30 minutes mins
Course Breakfast
Cuisine American
Servings 9 Servings
Calories 165 kcal

Ingredients


  • 2 cups Rolled oats
  • 1 cup Grated carrots
  • 1.5 tsp Cinnamon powder
  • 3/4 tsp Ginger powder
  • 1/4 tsp Salt
  • 2 Eggs
  • 1.5 cups Almond milk
  • 1/3 cup Maple syrup
  • 1.5 tsp Vanilla extract
  • 1/4 cup Chopped walnuts optional
  • 1/4 cup Raisins optional

Instructions
 

  • Preheat your oven to 180 C or 350 F. Grease an 8" square baking pan.
  • In a large bowl, combine the oats, carrots, cinnamon powder, ginger powder, and salt.
  • In another bowl, whisk together eggs, almond milk, maple syrup, and vanilla extract.
  • Pour the wet ingredients into the dry ingredients, and mix well.
  • Whisk in the walnuts and raisins.
  • Pour the mixture into the prepared pan and bake for 30-35 minutes at 180 C or 350 F, until the top is light golden brown and the oatmeal is set.
  • Let the oatmeal cool for 10 minutes before cutting into 9 squares.
  • Serve warm with a dollop of plain Greek yogurt and maple syrup. Enjoy!

Video

Notes

  • Donโ€™t have a square pan? Make this easy carrot cake baked oatmeal recipe in an 8โ€ round pan or any baking dish you have; just make sure to adjust the baking time accordingly.
  • You can even make them in a cast-iron skillet.
  • Store the leftover baked oats in the refrigerator, in an air-tight container, for 4-5 days.

Nutrition

Serving: 1 ServingCalories: 165kcalCarbohydrates: 26gProtein: 5gFat: 5gSaturated Fat: 1gPolyunsaturated Fat: 2gMonounsaturated Fat: 1gTrans Fat: 0.003gCholesterol: 36mgSodium: 147mgPotassium: 206mgFiber: 3gSugar: 8gVitamin A: 2465IUVitamin C: 1mgCalcium: 92mgIron: 1mg
Tried this recipe?Let us know how it was!

Tiramisu Overnight Oats Recipe For Easy Mornings

March 4, 2024

Tiramisu Overnight Oats Recipe

Tiramisu overnight oatsโ€”healthy and easyโ€”are a great way to start the day and take all of 5 minutes of prep. They are super nutritious and delicious to boot and perfect for breakfast or a snack.

Tiramisu Overnight Oats Recipe

Easy tiramisu overnight oats are a take on the classic and universally loved Italian dessert. They mimic the flavor of tiramisu, are healthy, and give you that kick of caffeine.

I mean they area creamy from the almond milk, earthy from the coffee, chocolatey from the cocoa powder. For sure, this is not a simple bowl (or jar) of oats. Itโ€™s morning magic that nourishes the body and soul. Overall, itโ€™s simply the best tiramisu overnight oats recipe!

[feast_advanced_jump_to]
Tiramisu Overnight Oats Recipe For Easy Mornings

Why you'll love tiramisu overnight oats?

Make-ahead recipe: Throw together the night before.

Zero cooking: Itโ€™s a breakfast recipe that will save your Monday morning.

Portable: easy to carry in jars to school, college, work, and even road trips!

Great for meal prep: Make a few jars and refrigerate them in an airtight container. It keeps well for 2 to 3 days. Just add milk before you serve.

Post-workout snack: Need a jolt of inspiration for workout snacks? Overnight oats are just what the nutritionist ordered!

Ingredients for Tiramisu Overnight Oats Recipe

Ingredients & swaps

Oats: Oats are packed with dietary fiber that dissolves and forms a thick solution in the gut, which makes you feel fuller and helps lower bad and total cholesterol levels.

Yogurt: The richness and creaminess (and shot of protein) come from plain Greek yogurt, unsweetened and not flavored. Donโ€™t want tiramisu overnight oats with Greek yogurt? Replace it with hung homemade yogurt. Get rid of the excess water as much as you can.

Tiramisu Overnight Oats

Milk: Make it of your choice. Any unsweetened plant-based milk, regular, homemade, or packaged.

Coffee: I made tiramisu overnight oats with instant coffee. You can use a shot of espresso or even leftover coffee. Increase or decrease the amount of coffee you put in. I like it mild, so I kept it on the low side.

Sweetener: Maple syrup is not essential to the recipe. Feel free to swap it with date syrup, honey, agave syrup, or even chopped dates or prunes.

Chia seeds: They help bulk up the treat as they swell, making the pudding nice and thick. Plus, they are a great plant-based source of omega-3 fatty acids and are also full of protein and fiber.

Vanilla extract: It gives the flavor of the oats more depth and gives the feeling of having a "treat,โ€ not just a simple breakfast. You know? Homemade vanilla extract or store-bought will do.

Cocoa powder: Use any brand you love.

How to make tiramisu overnight oats?

Step 1: In a bowl, combine rolled oats, coffee powder, chia seeds, and a pinch of salt.

All ingredients in a bowl for making overnight oats

Step 2: Add vanilla extract, maple syrup, almond milk, and yogurt. Mix everything.

All ingredients mixed well in a bowl

Step 3: Cover and refrigerate.

Final step: When ready to serve, stir, top with maple yogurt, and relish.

Creamy overnight tiramisu-flavored oats

Recipe notes

  • Do overnight oats need to be cooked first? No, the trick is getting the liquid-to-oat ratio right and mixing them well.
  • Do a taste test before serving. If the tiramisu overnight oats and chia pudding is not sweet enough, add more of the sweetener of your choice.
  • If needed or the overnight oats are too thick for your liking the next morning, splash some milk or yogurt. Mix, and then serve.
Tiramisu Overnight Oats topped with maple-flavored yogurt and cocoa powder

How to serve tiramisu-inspired overnight oats

Divide the oats into bowls. Top with maple-flavored yogurt, my take on the mascarpone used in tiramisรน. Simply mix yogurt and maple syrup until thick and creamy.

Dust with cocoa powder, very much like you do with a tiramisu. It makes for the prettiest and most tempting breakfast bowl. Youโ€™ll WANT that deliciousness in your life. But if you love oats in a jar, then do those!

2 TOPPING IDEAS

Since these are tiramisu-flavor-inspired oats, thereโ€™s not much you can experiment with:

  • Add chopped (or even toasted) hazelnuts or almonds for some texture.
  • A drizzle of dark melted chocolate if youโ€™re feeling indulgent.
Tiramisu Overnight Oats Recipe For Easy Mornings

FAQs

How long do overnight oats take to make?

Takes no more than 5 minutes, start to finish. The rest of the work is done by the fridge.

Do overnight oats have to be kept overnight?

No, overnight oats (tiramisu or any other kind) donโ€™t have to be chilled overnight. You can refrigerate them for 4 hoursย toย overnight.

Can any oats be used for tiramisu overnight oats with chia?

Rolled oats are your best bet, as they hold their shape well, giving the snack a soft chewiness and texture. Instant oats turn into a mushy, goopy mess, and steel-cut oats donโ€™t soak up the milk and yogurt.

Tiramisu Overnight Oats Recipe

More oat recipes

Snickers Overnight Oats

Blueberry Overnight Oats

Carrot Baked Oatmeal

Half the joy of cooking is sharing it with others. Thatโ€™s why Iโ€™m always eager to hear from you. So go right ahead and drop a comment or reach out on Instagram, Pinterest, YouTube, or Facebook. I hope you love this tiramisu overnight oats as much as we do!

๐Ÿ“– Recipe

Tiramisu Overnight Oats Recipe

Tiramisu Overnight Oats Recipe

Natasha Minocha
Tiramisu overnight oatsโ€”healthy and easyโ€”are a great way to start the day. Have it for breakfast or a snack; overnight oats are super nutritious and delicious, and take all of 5 minutes of prep!
No ratings yet
Print Recipe Pin Recipe
Prep Time 5 minutes mins
Resting Time 8 hours hrs
Total Time 8 hours hrs 5 minutes mins
Course Breakfast
Cuisine American
Servings 2 servings
Calories 296 kcal

Ingredients


  • 1/2 cup Rolled Oats
  • 3 tbsp Chia seeds
  • 1 tsp Instant coffee powder
  • 1/8 tsp Salt
  • 1 cup Almond milk
  • 2-3 tbsp Maple syrup
  • 2 tbsp Greek yogurt, plain
  • 1 tsp Vanilla extract

Topping

  • 3 tbsp Greek yogurt, plain
  • 1 tbsp Maple syrup
  • 1 tsp Cocoa powder

Instructions
 

  • In a bowl, combine oats, chia seeds, coffee powder, and salt.
  • Add in almond milk, yogurt, maple syrup, and vanilla extract.
  • Mix well, cover, and refrigerate overnight.
  • When you're ready to serve, stir the oats, and taste for sweetness.
    Divide them into 2 serving bowls.
  • Top with maple yogurt, dust with cocoa powder, and serve immediately.
    Enjoy!

Topping

  • Combine the yogurt and maple syrup in a small bowl.

Nutrition

Calories: 296kcalCarbohydrates: 45gProtein: 10gFat: 9gSaturated Fat: 1gPolyunsaturated Fat: 5gMonounsaturated Fat: 2gTrans Fat: 0.03gCholesterol: 2mgSodium: 331mgPotassium: 296mgFiber: 9gSugar: 20gVitamin A: 11IUVitamin C: 0.3mgCalcium: 352mgIron: 2mg
Tried this recipe?Let us know how it was!

Easy Baked Brie with Fig Jam

February 23, 2024

Easy Baked Brie with Fig Jam

Easy-baked brie with fig jam is a no-fuss, low-effort appetizer that gives you a gorgeous and grand result. On top of it, this 3-ingredient baked brie and fig jam recipe is a complete crowd-pleaser. Above all, it has the holy grail of taste & texture in every biteโ€” savory creaminess with a touch of sweetness.

Easy Baked Brie with Fig Jam
[feast_advanced_jump_to]

What is brie?

Brie is a soft and creamy cow's milk cheese, named after the French region from which it originated. Itโ€™s pale, has an edible rind, and a soft, smooth interior. Called the King of Cheeses, Brie has a mild, buttery flavor with a slight earthy undertone.

It is a popular choice for savory and sweet dishes like cheese platters and sandwiches, and it is also commonly used in recipes like baked brie with fruit preserves.

Easy Baked Brie with Fig Jam

Why you'll love baked brie with fig jam?

Itโ€™ll become your go-to appetizer for parties

Or a simple cheese board for a quiet night at home with loved ones

It looks absolutely fancy, but itโ€™s not complicated at all!

Easy Baked Brie with Fig Jam

How to make baked brie with fig jam recipe?

I know a lot of the recipes I post are easy. But this one is super simple by all standards. Itโ€™s a top it, pop it, and enjoy it kinda easy baked brie appetizer. Thereโ€™s nothing you have to do except gather the ingredients!

  1. Take the wheel of brie and place it on a cast-iron skillet or oven-proof dish lined with parchment paper (optional, but I prefer it).Brie on parchment lined cast iron skillet

  2. Spread 2 to 3 tablespoons of fig jam thickly using the back of a spoon.wheel of brie topped with fig jam

  3. Top with chopped pistachios and walnut halves.chopped pistachios and walnuts on top of the brie cheese

  4. Bake for 12 to 15 minutes until the brie is soft and gooey around the edges.Baked Brie with fig jam and nuts

  5. Cool for 5 minutes.

  6. Dig right in and scoop the baked brie with fig jam with bread,ย chips,ย or crackers.

My recipe notes

  • You can leave the brie in the wooden container it comes in or place it in a dish like I did. It helps the cheese hold its shape. Itโ€™s not necessary to cut the rind off.
  • Let the fig jam spill over the sides of the brie wheel for that deliciously gooey melting mess effect.
  • Avoid over-baking brie recipes with jam; the goal is creamy, not soupy.
  • And keep in mind that brie can firm up fast. Test for perfect meltiness by gently pressing the top of the rind.
melted baked Brie on top of crostini

Swaps & subs

Cheese: An expensive brie is not necessary for this fig jam and cheese appetizer. Use whatever is available in your local supermarket. I use an entire wheel because it looks prettier and has more room for baked brie toppings. Canโ€™t find Brie? Use camembert; the cheese is very similar to brie with an earthier touch.

 Baked Brie with Fig Jam on a wooden board with almonds, olives, macadamia nuts, strawberries, fresh figs, crostini

Serving ideas for baked brie with fig jam

After the brie and fig jam had cooled to a gooey level (about 5 minutes), I transferred it to a platter to make a quick cheese board. 

  • Sprigs of rosemary went on top to garnish the brie fig jam, and on the sides, I added strawberries, almonds, grapes, figs, and olives
  • You can even serve it with slices of no-knead cranberry walnut bread, jalapeno cheddar bread, crostini, or as part of a cruditรฉ platter withย easy oven-roasted carrots.ย 
  • or charcuterie with cold cuts and dips like labneh, tzatziki, avocado cucumber, or gochujang mayo. 
  • Pour yourself a glass of wine and enjoy this easy appetizer.
Baked Brie with Fig Jam

Brie cheese toppings

You can try baked brie with fig jam and walnuts. You can make baked brie with fig jam and pistachios. Or do a mix of both, like me.

Honestly, all nuts are fantasticโ€”hazelnuts, pecans, and even macadamias. They get lightly toasted in the oven, and the texture is just next level.

  • Allergic to nuts or donโ€™t like them? Omit them. Instead, try fresh figs, pears, or dried cranberries.
  • After baking, drizzle some honey. I sometimes like to pour a teaspoon of olive oil. This is completely optional, but it tastes great.
 Baked Brie with Fig Jam

FAQs

How to store baked brie with fig jam without pastry?

Bring the Brie to room temperature, and then transfer it into an airtight container. Store in theย refrigerator for up to 2 days.ย Reheat in a preheated oven for 5 minutes at 190ยฐC

What jam goes best with baked brie?

Any jam you have will doโ€”strawberry, apricot,ย mulberry, peach, orย persimmon.ย Homemade fig jamย or store-bought, either work. Likewise, itโ€™ll taste delicious even withย orange marmaladeย or honey.

Easy Baked Brie with Fig Jam

More appetizer recipes

Cheese Straws

Pinwheel Cookies

Air fryer Tortilla Chips

Baked Sweet Potato Fries

Cranberry Brie Puff Pastry Bites

Half the joy of cooking is sharing it with others. Thatโ€™s why Iโ€™m always eager to hear from you. So go right ahead and drop a comment or reach out on Instagram, Pinterest, YouTube, or Facebook. I hope you love baked brie with fig jam as much as we do!

๐Ÿ“– Recipe

Easy Baked Brie with Fig Jam

Easy Baked Brie with Fig Jam

Natasha Minocha
Easy-baked brie with fig jam is a no-fuss, low-effort appetizer that gives you a gorgeous and grand result. A complete crowd-pleaser, this 3-ingredient baked brie and fig jam recipe has the holy grail of taste & texture in every biteโ€” savory creaminess with a touch of sweetness.
No ratings yet
Print Recipe Pin Recipe
Prep Time 5 minutes mins
Cook Time 15 minutes mins
Course Appetizer
Cuisine American, French
Servings 6 servings
Calories 107 kcal

Ingredients


  • 4.4 oz Brie cheese
  • 2-3 tbsp Fig jam
  • 1 tbsp Chopped pistachios
  • 1 tbsp Chopped walnuts

Instructions
 

  • Preheat your oven to 180 C / 350 F. Line your baking dish with parchment paper. This step is optional.
  • Place the Brie cheese in your baking dish.
  • Top it with fig jam. Spread it all over the surface of the cheese using the back of a spoon.
  • Top it with the chopped pistachios and walnuts.
  • Bake for 12-15 minutes until the brie cheese is soft around the edges.
  • Remove the cheese from the oven and let it rest for 5 minutes before serving.
  • Serve with crostini, crackers, nuts, grapes, etc. Enjoy!

Nutrition

Calories: 107kcalCarbohydrates: 4gProtein: 5gFat: 8gSaturated Fat: 4gPolyunsaturated Fat: 1gMonounsaturated Fat: 2gCholesterol: 21mgSodium: 132mgPotassium: 67mgFiber: 0.4gSugar: 3gVitamin A: 130IUVitamin C: 1mgCalcium: 43mgIron: 0.3mg
Tried this recipe?Let us know how it was!

The Best Strawberry Rolls Recipe

February 17, 2024

Strawberry rolls in a round baking dish with cream cheese glaze.

Luscious, soft, fluffy, and bursting with strawberry flavorโ€”this is the best strawberry rolls recipe! One of the easiest strawberry desserts, you can make the no-knead dough ahead of time which is perfect for busy days!

strawberry sweet rolls in a baking dish with frosting and fresh strawberries on top.

I am a big fan of making (and eating!) cinnamon rolls. Iโ€™ve made so many variations but never used strawberries, and it made for the best sweet roll recipe. Call them what you wantโ€”strawberry cinnamon rolls or strawberry bunsโ€”and youโ€™ll still fall in love!

[feast_advanced_jump_to]

Why You'll Love This Recipe

Easy to make, no-knead dough that keeps well for up to 2 days! Perfect for prepping in advance for busy days!

Gooey, soft, and luscious, these strawberry rolls with cream cheese frosting are irresistible!

These rolls are wonderful for potlucks, any time snacking, brunches, and dessert!

Strawberry roll on a small plate with a fork.

Recipe Ingredients

Yeast: Use dry active or instant yeast; just ensure itโ€™s fresh. Always test it beforehand by mixing half a teaspoon in half a cup of warm water. If it becomes frothy and bubbly, in 5 -10 minutes, the yeast is good to go!

Flour: All-purpose, whole wheat, or half-and-half of both โ€“ pick whatever floats your boat.

Jam: Use any strawberry jam you love- homemade strawberry jam or storebought. Whatever you find easy.

Sugar: Cane or raw sugar will do if you donโ€™t want to use regular granulated sugar.

Zest: I highly recommend including orange zest in any dessert using strawberries. The zing you get in every bite is worth a tiny extra bit of effort.

Cream cheese: For making a thick, tangy frosting for the rolls. You can use homemade cream cheese or storebought.

See the recipe card for full information on ingredients and quantities.

How To Make Strawberry Rolls

Step 1: Heat milk, oil, and sugar in a small saucepan. Take it off the heat before it comes to a boil.

Step 2: Cool the mixture to lukewarm, and then sprinkle over the yeast. Set aside for 5โ€“10 minutes until the mixture is bubbly.

Step 3: Whisk in 2 cups of flour into the activated yeast. Cover the bowl and place it in a draft-free place for 1 hour, or until the dough is doubled in size.

Step 4: Add 1/4 cup of flour, baking powder, baking soda, and salt. Mix well. The dough is now ready for use. But you can choose to refrigerate it for 30 minutes or up to 2 days.

Steps for making dough for  Cinnamon Rolls.

Step 5: Set your oven to preheat to 200ยฐ C. Grease your baking dish and keep it handy.

Step 6: Sprinkle flour on your work surface and roll out the strawberry sweet rolls dough into a large rectangle, roughly 12" by 17".

Step 7: Spread strawberry jam evenly on the dough. Sprinkle orange zest on top.

strawberry jam spread over the rolled out dough.

Step 8: Starting from the longer side of the dough, tightly roll it into a log.

rolled up dough log.

Step 9: Cut into 12 equal-sized pieces. Transfer to your greased baking dish. I used a 9โ€ one, that could fit only 9 of the rolls. The rest went into a smaller pan.

Step 10: Cover and let the sweet rolls rise for another 15โ€“20 minutes.

proofed strawberry rolls in a round baking dish.

Step 11: Bake for 20-22 minutes or until they are golden brown on top.

Step 12: Allow the rolls to cool for 15 minutes, then pour the glaze on top and serve warm!

baked strawberry rolls in a round baking dish.

Pro Tips

  • Be patient and give the strawberry roll dough time to proof and rise.
  • After step 4, the dough is ready to be shaped into strawberry cinnamon rolls, but I recommend chilling it for about 30 minutes or even up to 2 days. Why? Well, because:
    • It allows you to make the dough ahead.
    • Itโ€™ll continue to rise and the slow, long fermentation lends the rolls a lovely flavor.
    • And most importantly, itโ€™ll make the dough joyously easy to roll and shape!
  • Rolling is slightly messy as the strawberry filling in the cinnamon rolls tends to ooze and the dough is JUST so soft. But clean-up is easy, so donโ€™t let that stop you.
  • Grease your baking dish well, so the dough doesnโ€™t stick to it.
  • Leave space in between the strawberry buns when placing them on the baking dish, so thereโ€™s room to expand.
strawberry rolls with cream cheese glaze and garnished with chopped strawberries.

How To Serve The Strawberry Rolls

These strawberry sweet rolls are lovely enough to serve as-is. Just sprinkle a bit of powdered sugar and you're good to go!

But boy, the cream cheese frosting makes them even more swoon-worthy! And it comes together rather quickly too. Just whisk together milk, powdered sugar, 2 tablespoons of cream cheese, and some orange zest till itโ€™s smooth and has a soft, dropping consistency. Drizzle over warm strawberry rolls and let it set for 5 -10 minutes. Top with more fresh strawberries if you want.

One strawberry roll on a pie server to show the texture.

Recipe FAQs

Why did my breakfast sweet rolls not rise?

There could be a couple of reasons the strawberry sweet rolls didn't rise. Either your yeast was too old. Or, the milk was too hot or cold.
The temperature of your milk mixture isย crucial.ย It should be just warm, about 40.5 C or 105 F.
Thatโ€™s why I always make the yeast mixture separately. If the milk bubbles after I sprinkle the yeast, I know itโ€™s good to go. If it doesnโ€™t, I start over.

How to store the strawberry rolls?

These cinnamon rolls with strawberries areย bestย when theyโ€™re stillย warm from the oven. In case you have leftovers, store them in theย refrigerator for up to 3 days, in an air-tight container. Reheat in theย microwaveย for 20 seconds till gooey and warm.

More Strawberry Desserts

  • Fresh Strawberry Poke Cake
    Fresh Strawberry Poke Cake
  • Perfect Strawberry Banana Bread Recipe
    Perfect Strawberry Banana Bread Recipe
  • Strawberry Swirl Cheesecake | Baked strawberry cheesecake recipe
    Strawberry Swirl Cheesecake
  • Strawberry Banana Muffins
    Strawberry Banana Muffins

Half the joy of cooking is sharing it with others. Thatโ€™s why Iโ€™m always eager to hear from you. So go right ahead and drop a comment or reach out on Instagram, Pinterest, YouTube, or Facebook. I hope you love these strawberry rolls as much as we do!

๐Ÿ“– Recipe

Strawberry rolls in a round baking dish with cream cheese glaze.

The Best Strawberry Rolls Recipe

Natasha Minocha
Luscious, so soft, fluffy, and bursting with strawberry flavorโ€”these strawberry rolls are terrific. One of the easy strawberry desserts, you can make the dough aheadโ€”perfect for dessert or a weekend morning!
No ratings yet
Print Recipe Pin Recipe
Prep Time 2 hours hrs
Cook Time 20 minutes mins
Resting Time 8 hours hrs
Course Breakfast, Dessert
Cuisine American
Servings 12 Rolls
Calories 225 kcal

Ingredients


  • 1 cup Milk, lukewarm
  • 1/4 cup Sugar
  • 1/4 cup Vegetable oil
  • 1.5 tsp Dried active yeast
  • 2 1/3 cup All-purpose flour
  • 1/4 tsp Baking powder
  • 1/4 tsp Baking soda
  • 1/4 tsp Salt
  • 1/4 cup All-purpose flour

Filling

  • 1/2 cup Strawberry jam I used a mix of store-bought and homemade jam
  • Zest of 1 orange

Glaze

  • 2 tbsp Cream cheese
  • 2-3 tbsp Milk
  • 1/4 cup Icing sugar

Instructions
 

  • In a small bowl combine milk, sugar, oil, and yeast.
  • Set aside for 5-10 minutes until the mixture is bubbly.
  • Whisk in the 2 and 1/3 cups of flour. Cover and place in a draft-free place for 1 hour or until the dough is doubled in size.
  • Mix in the extra 1/4 cup flour, baking powder, baking soda, and salt.
  • The dough is now ready for use immediately. You can refrigerate it for 30 minutes or up to 3 days.
    For easier handling, I like to refrigerate the dough overnight.
  • Preheat your oven to 200 C. Butter your baking pan. I used a 9" pie dish and a small baking tray.
  • Sprinkle flour on your work surface and roll out the dough into a large rectangle, approximately 12"x 17".
  • Spread the strawberry jam over the dough.
  • Top with freshly grated orange zest.
  • Starting with the long side of the rectangle, start rolling the dough tightly. Pinch the seam together and make sure the seam is facing down.
  • Cut into 12 slices, place cut side down in your greased baking dish. Cover and place in a draft-free place.
  • Let the rolls rise for another 15-20 minutes, until puffy.
  • Bake for 20-22 minutes until they are golden brown on top.
  • Let the rolls cool in the pan for 5 minutes, then pour the cream cheese glaze over the rolls. Sprinkle some chopped strawberries and orange zest.
  • Serve warm or at room temperature. Enjoy!

Glaze

  • Whisk together the cream cheese, milk, and icing sugar in a small bowl, until thick and smooth.

Video

Notes

  • Be patientย and give the strawberry roll dough time to proof and rise.
  • After step 4, the dough is ready to be used, but I recommend chilling it for about 30 minutes or even up to 2 days.ย 
    • It allows you to make the dough ahead.
    • Itโ€™ll continue to rise and the slow, long fermentation lends the rolls a lovely flavor.
    • And most importantly, itโ€™ll make the dough joyously easy to roll and shape!
  • Rolling is slightly messyย as the strawberry filling in the cinnamon rolls tends to ooze and the dough is JUST so soft. But clean-up is easy, so donโ€™t let that stop you.
  • Grease your baking dishย well, so the dough doesnโ€™t stick to it.
  • Leave space inย between the strawberry buns when placing them on the baking dish, so thereโ€™s room to expand.

Nutrition

Serving: 1RollCalories: 225kcalCarbohydrates: 39gProtein: 4gFat: 6gSaturated Fat: 1gPolyunsaturated Fat: 3gMonounsaturated Fat: 1gTrans Fat: 0.03gCholesterol: 3mgSodium: 115mgPotassium: 87mgFiber: 1gSugar: 15gVitamin A: 40IUVitamin C: 1mgCalcium: 51mgIron: 1mg
Tried this recipe?Let us know how it was!

Fresh Strawberry Poke Cake

February 14, 2024

Fresh Strawberry Poke Cake

Soft, moist, fluffy, and downright divine, with creamy mascarpone frosting that complements the juicy crumb to perfection, this is the best fresh strawberry poke cake!

a slice of strawberry poke cake on a small plate with a fork.

This is an easy strawberry poke cake. You bake a sheet cake. Poke holes. Pour in bright and fresh strawberry syrup, and you have the grooviest cake ready for Valentineโ€™s Day!

[feast_advanced_jump_to]
4 squares of poke cake on 4 small dessert plates with forks and fresh strawberries.

Why You'll Love This Recipe

Make ahead: I find this the best strawberry poke cake recipe because I can make it the night before!

So delicious: Strawberry poke with fresh strawberries is so delicious that it tricks you into eating far more than you should.

Valentineโ€™s treat: Topped with cream frosting, red swirls, and golden sprinkles, itโ€™s a beauty!

What's A Poke Cake?

A poke cake is a type of dessert that is made by baking a cake and then poking holes in it. Hence, the name. These holes are then filled with a flavorful liquid, such as fruit purรฉe, sweetened condensed milk, or flavored gelatin.

The idea is that the filling seeps into the holes, adding moisture and flavor to the cake. After the filling is added, the cake is typically chilled to allow the flavors to meld and the cake to set.

All in all,ย versatile, fun, and easy-to-makeย dessert.

Recipe Ingredients

ingredients for making Fresh Strawberry Poke Cake.

Flour: You can use whole wheat flour in this strawberry poke cake recipe, but all-purpose is best because weโ€™re looking for the very fine and tender crumb that only it can give.

Sugar: Raw, cane, or granulated; pick whatโ€™s in your pantry.

Oil: Use any vegetable oil. Or coconut oil.

Vanilla extract: Donโ€™t skimp on it, whether homemade vanilla extract or store-bought. You want the essence to shine through.

Yogurt: We are using yogurt here instead of eggs. Plain Greek yogurt works the best in this recipe. However, if you want to use eggs, please omit the yogurt and add 3 eggs plus 2 tablespoons of milk.

Strawberry Syrup:ย Traditionally,ย this cake is made withย jello.ย As much as I love jellies, I would happily swap them for fresh fruit every time. So, my twist on the recipe was to make a strawberry poke cake without Jello.

Nothing beatsย the sweet aroma and flavor ofย fresh strawberry syrup!

I know the syrupย soundsย like extra work, but it takesย no more than 10 minutes.ย Make a jar full and then swirl it in your yogurt or add it to your ice cream,ย crรชpes,ย and, of course,ย strawberry milk!

Frosting: Poke cakes are a take on trifles, topped heavily withย whipped cream or Cool Whip.ย But after making my strawberry mug cake, my heart was set onย mascarponeย frosting.ย The soft, creamy texture goes beautifully well here. You can use cream cheese instead if you wish, like I did for my strawberry rolls.

How To Make Strawberry Poke Cake

Step 1: Sift flour, baking powder, baking soda and salt together.

Step 2: In another bowl, whisk together Greek yogurt, oil, vanilla extract, and sugar.

Step 3: Add the dry ingredients to the wet and combine till you have a smooth and soft-dropping consistency batter.

steps for making Fresh Strawberry Poke Cake.

Step 4: Grease an 8-inch baking tin. Line with parchment paper.

cake batter in a square baking tin.

Step 5: Transfer the batter to the pan and bake for 30 to 35 minutes, or until a skewer inserted in the center comes out clean.

Step 6: Cool the cake in the tin for 5 to 10 minutes. Turn out on a wire rack and cool for 15โ€“20 minutes more.

Baked cake for making strawberry poke cake in a square metal cake pan.

Step 7: While the cake bakes and then cools, make fresh strawberry syrup using the same recipe as in the heavenlyย Korean strawberry milk.

 strawberry syrup in a glass jar.

Step 8: Toss your chopped strawberries with sugar and let them macerate for a few minutes.

Step 9: Transfer to a saucepan, and on low-medium heat, cook till the berries soften and juices start running.

Step 10: Let the mixture cool, and then purรฉe it until smooth.

Step 10: Poke holes in the still slightly warm cake in intervals of an inch, going only 2/3rd of the way (and not all the way down).

cake with holes poked all over on a cake platter.

Step 11: Spoon the cool strawberry syrup onto the cake.

cake holes filled with strawberry syrup.

Step 12: Let the cake rest for a minimum of 3 hours or overnight.

Step 13: Slather on the mascarpone cheese frosting.

Final step: Serve and devour!

Fresh Strawberry Poke Cake with mascarpone frosting and golden dragees.

Pro Tips

  • Useย room-temperature ingredients when making strawberry poke cake from scratch.
  • Donโ€™t overmix,ย or youโ€™ll end up with a dense poke strawberry cake.
  • Use the back of a woodenย spoonย with a round handle to makeย holesย or aย chopstick, like I did.
  • A small spoon works wonderfully for filling the holes. I just found itย easier and fasterย to rely on aย piping bagย fitted with a straight icing nozzle.
  • Make the cakeย a day ahead, soย the crumbs have time to soak in the strawberry syrup flavors.
A square of strawberry cake on a small plate with a golden fork.

How To Serve

Since this poke cake with strawberries was a Valentineโ€™s Day treat, I went for FANCY and topped the cake with mascarpone cheeseย frosting. Swirled some red strawberryย syrupย and finished it off with a little bit of goldenย sprinklesย action!

Very Valentine-y, if you will!

Serve with a side of strawberry syrup or some more chopped, juicy berries.

To make the frosting:

  • Whisk room-temperature mascarpone with icing sugar.
  • Add a tablespoon or so of whipped cream if it feels too thick.

To make swirls:

  • Put drops of strawberry syrup using a teaspoon or piping bag.
  • With a toothpick, make whirls.

More Fresh Strawberry Recipes

  • Strawberry rolls in a round baking dish with cream cheese glaze.
    The Best Strawberry Rolls Recipe
  • strawberry jam cake on a black tray with one slice kept down to show the texture.
    Strawberry Jam Cake
  • Perfect Strawberry Banana Bread Recipe
    Perfect Strawberry Banana Bread Recipe
  • Easy Strawberry Madeleines Recipe
    Easy Strawberry Madeleines Recipe

Half the joy of cooking is sharing it with others. Thatโ€™s why Iโ€™m always eager to hear from you. So go right ahead and drop a comment or reach out onย Instagram,ย Pinterest,ย YouTube, orย Facebook. I hope you love this fresh strawberry poke cake as much as we do!

๐Ÿ“– Recipe

Fresh Strawberry Poke Cake

Fresh Strawberry Poke Cake

Natasha Minocha
Soft, moist, fluffy, and downright divine, with creamy mascarpone frosting that complements the juicy crumb to perfection, itโ€™s the best strawberry poke cake!
No ratings yet
Print Recipe Pin Recipe
Prep Time 20 minutes mins
Cook Time 30 minutes mins
3 hours hrs
Course Dessert
Cuisine American
Servings 9 servings
Calories 353 kcal

Ingredients


  • 1.5 cups All-purpose flour
  • 1.5 tsp Baking powder
  • 1/2 tsp Baking soda
  • 1/4 tsp Salt
  • 1 cup Plain Greek yogurt
  • 1/2 cup Oil
  • 1/2 cup Caster sugar
  • 1.5 tsp Vanilla extract

Strawberry Syrup

  • 8 oz Strawberries, diced
  • 3-4 tbsp Sugar
  • 2 tbsp Water

Mascarpone Cheese Frosting

  • 1/2 cup Mascarpone cheese
  • 1/4 cup Icing sugar
  • 2 tbsp Cream I used 25% fat cream. You can use 35% fat cream as well

Instructions
 

  • Preheat your oven to 180C. Grease an 8" square pan and line the bottom with parchment paper.
  • Sift the flour, baking powder, baking soda, and salt in a large bowl.
  • In another large bowl, whisk together the yogurt, oil, sugar, and vanilla extract.
  • Add the dry ingredients and mix well.
  • Pour the batter into the prepared pan and bake for 25-30 minutes or until a skewer inserted in the center comes out clean.
  • Let the cake cool in the pan for 10 minutes, before turning it out on a cooling rack. Let the cake cool for about 15-120 minutes.
  • Place the cake on a serving platter and using the handle of a wooden spoon or a chopstick, poke holes about 3/4" apart all over the cake's surface.
    Make sure you poke only 2/3 rd of the way.
  • Fill the holes with strawberry syrup using a spoon or a piping bag fitted with a long nozzle.
  • Chill the cake for at least 3 hours.
  • Top the chilled cake with mascarpone cheese frosting. Use the leftover strawberry syrup to make swirls on top, if you wish.
    Sprinkle some golden ball sprinkles, cut into squares, and serve. Enjoy!

Strawberry Syrup

  • Combine the chopped strawberries, sugar, and water in a saucepan.
  • Cook on low-medium heat, till the berries soften and the juices start running. About 5-7 minutes. Cool completely and puree until smooth.

Mascarpone Cheese Frosting

  • Whisk together the mascarpone cheese, icing sugar, and cream in a small bowl until smooth.

Video

Notes

  • Useย room-temperature ingredientsย when making strawberry poke cake from scratch.
  • Donโ€™t overmix,ย or youโ€™ll end up with a dense poke strawberry cake.
  • Use the back of a wooden spoon or chopsticksย  to make holes in the cake.
  • A small spoon works wonderfully for filling the holes. I just found itย easier and fasterย to rely on aย piping bagย fitted with a straight icing nozzle.
  • Make the cakeย a day ahead, soย the crumbs have time to soak in the strawberry syrup flavors.

Nutrition

Serving: 1 ServingCalories: 353kcalCarbohydrates: 38gProtein: 6gFat: 20gSaturated Fat: 5gPolyunsaturated Fat: 4gMonounsaturated Fat: 8gTrans Fat: 0.1gCholesterol: 18mgSodium: 213mgPotassium: 98mgFiber: 1gSugar: 21gVitamin A: 231IUVitamin C: 15mgCalcium: 92mgIron: 1mg
Tried this recipe?Let us know how it was!

Easy Strawberry Mug Cake

February 10, 2024

Easy Strawberry Mug Cake

This 2-minute easy strawberry mug cake is literally an instant treat. An easy Valentineโ€™s dessert, youโ€™ll only need 8 ingredients, 5 minutes, and a microwave! Whisk, zap, and serve a warm, soft single-serving cake bursting with luscious strawberries.

strawberry mug cake in a red ramekin on a small plate with a red spoon.

Itโ€™s for those days when motivation is in short supply but the craving for something sweet persists that a quick and easy dessert with strawberries is my salvation!

I get to celebrate and revel in the seasonal fruit full of sunshine and summer flavor AND enjoy a tasty, gooey cake!

And boy, is it tasty!

[feast_advanced_jump_to]

Why You'll Love This Recipe

Effortless Indulgence: quick and easy strawberry dessert when you donโ€™t want to put in the work

Instant Gratification: when you want strawberry cake right this second, this is the go-to recipe.

Irresistible Flavor: moist, light, and so good, this strawberry cake balances flavors and textures like a maestro!

A spoonful of the mug cake to show the soft texture.

Recipe Ingredients

Ingredients for making strawberry mug cake.

Flour: I used all-purpose flour in this recipe. However, whole wheat flour is a great substitute. For a gluten-free option, try buckwheat flour.

Sugar: Raw, cane, or granulated; pick whatโ€™s in your pantry for this chocolate strawberry mug cake.

Strawberries: Fresh or frozen, either does the trick.

Milk: Whole milk or 2%, any will work. You can also use any plant-based milk of your choice, like almond milk, or oat milk.

Oil: Any neutral-tasting vegetable oil is good for this recipe. I used canola oil.

Vanilla Extract: For rounding up the flavors! Use store-bought or homemade vanilla extract.

Optional: The best part of simple strawberry desserts is the melty, gooey chocolate chips swirled with fresh fruit. So, while the treat is great without chocolate, Iโ€™d say donโ€™t skip it. I used dark chocolate chips. Use whatever you fancy.

How To Make Strawberry Mug Cake

Step 1: Whisk together flour, baking powder, sugar, oil, milk, and vanilla extract in a small bowl till you have a smooth mug cake batter.

All cake ingredients in a small bowl on a red striped napkin.

Step 2: Fold in chopped strawberries and chocolate chips.

chopped strawberries and chocolate chips in the cake batter.

Step 3: Pour into a microwave-friendly mug, cup, or ramekin.

Step 4: Top with more strawberries and chocolate chips.

Cake batter in a ramekin on a small plate.

Step 5: Microwave for 1.5 to 2 minutes until the top is set, and the skewer inserted in the center comes out clean or a few moist crumbs are attached.

Final step: Devour the strawberry microwave cake!

 Mug cake baked and ready to eat in a ramekin on a small plate with a spoon.

Pro Tips

  • The more you mix strawberry cake in a cup, the denser it becomes. So, stir all the ingredients until just mixed.
  • Mug cake recipes need to be immediately microwaved.
  • Since each microwave is different, you may have to fine-tune the time. After the initial 1.5 minutes, microwave the strawberry mug cake in 30-second increments until itโ€™s cooked to your liking.
  • Use a biggish mug with straight sides for the best results.

How To Serve Strawberry Mug Cake

Like all fresh and quick strawberry desserts, warm, fluffy, and light mug cakes taste best when freshly made. That said, the strawberry cakes stay well for a day in the refrigerator. Reheat the cake in the microwave till it is warmed through.

  • Eat the strawberry shortcake mug cake as-is
  • Dust it with icing sugar
  • Top with whipped cream
  • Pair with a scoop of vanilla or chocolate ice cream

I wanted a decadent finish to my strawberry mug cake, so I gave it a light, creamy crown of mascarpone cheese frosting and chocolate shavings. 

 Strawberry Mug Cake topped with mascarpone cheese frosting and chocolate shavings.

Recipe FAQs

Can I make cake-in-mug recipes in the oven?

Yes,ย you can bake this strawberry microwave cake. Grease a ramekin. Pour the batter and then bake for 10 to 15 minutes at 180ยฐC.

How to make vegan strawberry mug cake?

The mug cake is already eggless, so you can easilyย make it veganย by using plant-based milk likeย oat, orย almond. Remember to use dairy-free chocolate and whipped cream too!

More Valentine's Day Recipes

  • Strawberry Lemon Bundt Cake
    Strawberry Lemon Bundt Cake
  • strawberry dump cake in a round baking dish topped with almonds and fresh strawberries.
    Strawberry Dump Cake
  • strawberry jam cake on a black tray with one slice kept down to show the texture.
    Strawberry Jam Cake
  • Strawberry Swirl Cheesecake | Baked strawberry cheesecake recipe
    Strawberry Swirl Cheesecake

Half the joy of cooking is sharing it with others. Thatโ€™s why Iโ€™m always eager to hear from you. So go right ahead and drop a comment or reach out on Instagram, Pinterest, YouTube, or Facebook. I hope you love this strawberry mug cake as much as we do!

๐Ÿ“– Recipe

Easy Strawberry Mug Cake

Easy Strawberry Mug Cake

Natasha Minocha
Easy Strawberry Mug Cake - An easy Valentineโ€™s dessert, done in 5 minutes! This is a warm, soft single-serving cake bursting with luscious strawberries.
5 from 2 votes
Print Recipe Pin Recipe
Prep Time 5 minutes mins
Cook Time 2 minutes mins
Course Cakes, Dessert
Cuisine American
Servings 1 Serving
Calories 764 kcal

Ingredients


  • 4 tbsp All-purpose flour
  • 1/2 tsp Baking powder
  • 1/8 tsp Salt
  • 1.5 tbsp Sugar
  • 2 tbsp Oil I used vegetable oil. You can use any neutral -tasting oil you prefer.
  • 3 tbsp Milk
  • 1/2 tsp Vanilla extract
  • 3-4 tbsp Strawberries, chopped
  • 2 tbsp Dark chocolate chips (Optional)

Topping (Optional)

  • 1.5 tbsp Mascarpone cheese
  • 1 tbsp Icing sugar

Instructions
 

  • Combine the flour, baking powder, salt, and sugar in a small bowl.
  • Whisk in the oil, milk, and vanilla extract.
  • Fold in the chopped strawberries and chocolate chips, if using.
  • Pour the batter into a ramekin.
  • Cook for 1 minute 30 seconds. You may have to cook for another 15- 30 secs, depending on your microwave.
  • Let the cake cool down for a few minutes and then serve it warm, with the mascarpone cheese topping or whipped cream or ice cream. Enjoy!

Topping

  • Whisk together the mascarpone cheese and icing sugar in a small bowl, until smooth and lump-free.

Video

Notes

  • The more you mix strawberry cake in a cup, the denser it becomes. So, stir all the ingredients until just mixed.
  • Mug cake recipes need to be immediately microwaved.
  • Since each microwave is different, you may have to fine-tune the time. After the initial 1.5 minutes, microwave the strawberry mug cake in 30-second increments until itโ€™s cooked to your liking.
  • Use a biggish mug with straight sides for the best results.

Nutrition

Serving: 1 ServingCalories: 764kcalCarbohydrates: 73gProtein: 9gFat: 49gSaturated Fat: 18gPolyunsaturated Fat: 8gMonounsaturated Fat: 18gTrans Fat: 0.1gCholesterol: 26mgSodium: 570mgPotassium: 357mgFiber: 3gSugar: 41gVitamin A: 370IUVitamin C: 26mgCalcium: 306mgIron: 2mg
Tried this recipe?Let us know how it was!

Homemade Fig Jam Recipe

February 6, 2024

Homemade Fig Jam Recipe

This is the best fig jam recipe Iโ€™ve tried recently โ€“ made with fresh figs and lemon juice. The process is super simple, you need just 4 ingredients, and you have a homemade figgy jam with minimal time and effort. 

Homemade Fig Jam in a glass jar with a knife on a white wooden trivet.

My jams, be it a cherry jam with no pectin or vegan refined sugar-free strawberry jam, need no deseeding, peeling, or fancy technique. This fig jam comes together rather quickly. And because I use less sugar than usual recipes, the jam actually tastes and smells like the fruit.

[feast_advanced_jump_to]
Homemade Fig Jam Recipe

Why You'll Love Fig Jam

Youโ€™ll love the fruity flavor this fresh jam gives to toasts, cakes, and soft, buttery, wafer-thin crรชpes. 

Itโ€™s not your usual jam. Homemade fig jam is something special that is leagues ahead of any store-bought brand!

Recipe Ingredients

Ingredients for making fig jam.
Fresh figsSugar
Lemon juiceWater

See the recipe card for full information on ingredients and quantities.

How to make

fresh green figs in a glass bowl of water for cleaning.

Step 1: Wash the figs. Drain and dry them.

whole and chopped green figs on a wooden chopping board with a knife.

Step 2: Cut the ends off and cut into small pieces.

combine the ingredients in a saucepan

Step 3: Toss the cut figs with water, sugar, and lemon juice in a thick-bottomed pan.

Step 4: Cook on low to medium heat, stirring occasionally.

Step 5: Keep simmering until the fruit is soft and jammy and the juices are bubbling. About 15โ€“20 minutes.

various stages of cooking fig jam in a saucepan on a stovetop.

Final step: Cool and transfer to sterilized jars while the fig jam is still warm.

Pro Tips

  • Stir the homemade jam frequently while it simmers, so the fruit doesnโ€™t burn.
  • Fig jam congeals as it cools. So, watch out for thickness. Donโ€™t let it thicken too much while it cooks.
  • This is a fig jam recipe with no pectin because the fruit contains natural pectin, which is sufficient to make jam.
  • The traditional fig jam recipe for canning calls for a 1:1 ratio of sugar and fruit, as the sugar does the job of a preservative.ย I use less sugarย in my jams, about 1/3rd, to allow the fruit flavor to shine through. You can play around with the quantity based on how sweet your figs are.

How To Use Homemade Jams?

The best way to enjoy homemade fig jam is to spread it on toast along with your morning cuppa. But donโ€™t let what I love limit you. Experience the fresh jam flavor in any way you want:

  • Fill it in crรชpes
  • Top it on muffins or fill it inside soft, pillowy donuts with jam
  • Itโ€™s fantastic in charcuterie or easy, fresh fruit cheese boards
  • Add it to cakes. Use my strawberry jam with chia seeds cake recipe
  • Baked brie with fig jam recipe is another excellent choice
  • Spread on top of a toasted slice of this easy fig bread!
Fig jam on toast

Recipe FAQs

How to check if the fig confiture is done?

If you have aย candy thermometer, use it to check for doneness. When the temperature reaches 105ยฐC or 220ยฐF, the fig fruit jam is done. I donโ€™t have one, so I use theย plate method:
Freeze a plate.
When you feel the jam has reached the right consistency, spoon a tiny amount onto the cold plate.
Let it set for 30 seconds.
Then run your finger (or the back of a spoon) through it. If it stays apart and does not flood back together, then the jam is ready.
If not, cook the fig and jam some more.
Donโ€™t worry too much about getting the consistency right. Itโ€™s an easy fig jam recipe. Trust your eyesย to know when it is done.
a spoonful of jam on a small white cold plate for testing.

What's the difference between jam and jelly?

Jamย is made from crushed or chopped fruit, so it has texture. Jelly is made from fruit juice, so itโ€™s smoother. Jam also has fruit pieces in it, which makes the consistency thicker.ย Also, typically jams donโ€™t need added pectin because most fruits have it naturally. Jelly,ย on the other hand, is clear and gelatinous and often needs added pectin.ย When it comes to use, jams like this homemade fig jam are very versatile. You can use it as a spread or dessert topping. Fig jelly recipes are more suited to pastry glazes or a condiment for savory dishes.

How long will the fig jam last?

The more sugar any jam has, the longer its shelf life. If you use the same quantity of sugar as I did, the jam will keep well forย a month in the refrigerator.

More Fruit Jam Recipes

  • cherry jam recipe
    Cherry Jam Recipe
  • 2 jars of strawberry chia jam with flowers and strawberries around.
    Strawberry Chia Jam
  • persimmon chia jam in a glass jar with a wooden spoon on a small plate.
    Persimmon Jam
  • Mulberry jam in a glass jar with a red knife on the side.
    Mulberry Jam Recipe

Half the joy of cooking is sharing it with others. Thatโ€™s why Iโ€™m always eager to hear from you. So go right ahead & drop a comment or reach out on Instagram, Pinterest, YouTube, or Facebook. I hope you love this fig jam as much as we do!

๐Ÿ“– Recipe

Homemade Fig Jam Recipe

Homemade Fig Jam Recipe

Natasha Minocha
Homemade Fig Jam - With 4 ingredients and a super simple process, you get a homemade figgy jam with minimal time and effort that is leagues ahead of any store-bought brand!
No ratings yet
Print Recipe Pin Recipe
Prep Time 10 minutes mins
Cook Time 25 minutes mins
Course Breakfast, Condiment
Cuisine American, World
Servings 30 Servings
Calories 38 kcal

Ingredients


  • 16.7 oz Fresh figs
  • 1 cup Sugar
  • 2 tbsp Lemon juice
  • 1/2 cup Water

Instructions
 

  • Wash the figs well. Drain and cut the stems.
  • Dice the figs into small pieces.
  • Add the diced figs, sugar, lemon juice, and water to a non-reactive saucepan.
  • Cook on medium-low heat for 20-25 minutes, stirring frequently until the fruit is soft and jammy.
    You can test if the jam is done by using a sugar thermometer. The jam is ready when the temperature is 220 F or 105 C.
    You can also test by putting a spoonful of jam on a a very cold plate. Run a wooden spoon through it, if the jam wrinkles and stays separated, its done.
  • Take the pan off the heat and mash the figs using a wooden spoon or a potato masher.
  • Transfer to a clean, sterilized jar, close the jar, and let the jam cool at room temperature. Store in the refrigerator. Enjoy!

Video

Nutrition

Serving: 1tbspCalories: 38kcalCarbohydrates: 10gProtein: 0.1gFat: 0.1gSaturated Fat: 0.01gPolyunsaturated Fat: 0.02gMonounsaturated Fat: 0.01gSodium: 0.4mgPotassium: 38mgFiber: 0.5gSugar: 9gVitamin A: 22IUVitamin C: 1mgCalcium: 6mgIron: 0.1mg
Tried this recipe?Let us know how it was!

Easy Strawberry Madeleines Recipe

February 2, 2024

Easy Strawberry Madeleines Recipe

Fragrant, palest of the pinks, buttery, crisp on the edges, and soft on the inside, strawberry madeleines are one of the most delicious fresh strawberry recipes Iโ€™ve made! Iโ€™ve tried all sorts of madeleine flavors, but these are the best madeleine cookies and theyโ€™re easy and quick.

strawberry madeleines on a white serving plate with fresh strawberries and edible flowers.

I was sitting there thinking about what to bake for the month of love and chocolate when I started hankering for a hot cup of Darjeeling and a little something on the side.

Not a full snack, but a tiny nibble, and it struck me out of nowhere - Madeleines! The buttery scalloped cakes are the perfect pair for a cup of tea and February.

a plateful of madeleines with one madeleine cut into half to show the texture.
[feast_advanced_jump_to]

Why You'll Love This Recipe

Easy Valentineโ€™s dessert: even for beginner bakers!

Almost too pretty to eat: with their beautiful scalloped and shell-like shape, these are one of the prettiest teatime treats!

Insanely spongy: cake, cookies, or something in between, these light, airy strawberry desserts are utterly satisfying.

Recipe Ingredients

Ingredients for making strawberry madeleines.

Flour: This recipe uses all-purpose or "plain" flour. We need to sift it to remove any lumps in the flour.

Strawberries: I decided to use the strawberry syrup Iโ€™d made for Korean strawberry milk. If you donโ€™t want to make it, simply purรฉe 1/3 cup fresh or frozen strawberries with 2-3 tbsp of sugar.

Butter: For making the madeleines richly flavorful, delicious, and soft. You can also use coconut oil instead.

Sugar: I used caster sugar here. But feel free to experiment with any in this strawberry madeleine recipe: cane sugar, regular granulated sugar, or raw sugar.

Glaze: White chocolate, dark chocolate, chocolate tinted pink, or no chocolateโ€”it's absolutely your choice. I used beetroot powder for a pale pink hue. You can certainly add a couple of drops of red food color to the melted white chocolate for a more pronounced color.

Add-ons: Let your cravings be your guide! Want more strawberries? Finely chop them and mix them in the batter.

See the recipe card for full information on ingredients and quantities.

How To Make Strawberry Madeleines?

Step 1: Beat the eggs and sugar until it is almost double in volume. The mixture should be pale and thick. Itโ€™s the only step of the fresh strawberry dessert that takes time, and with an electric beater, itโ€™s just 3 to 4 minutes.

Eggs and sugar in a glass mixing bowl on a red striped napkin.

Step 2: Sift the flour, salt, and baking powder into the bowl.

whisking in strawberry syrup, flour, salt and baking powder into the beaten eggs and sugar.

Step 3: Add in the strawberry syrup and whisk everything together with a gentle hand.

Strawberry syrup, flour, salt and baking powder mixed with eggs in a mixing bowl.

Step 4: Fold in the melted, cooled butter into the strawberry madeleine batter.

melted butter on top of the madeleine batter in a mixing bowl.

Step 5: Refrigerate the batter (scroll down to the recipe notes for the two options you have here).

Step 6: When you're ready to bake, preheat your oven.

Step 7: Add the madeleine butter cookie batter into the molds and bake without leveling the top.

Piped batter in a red silicone madeleine mold.

Step 8: Bake for 10 minutes, or until they are golden, and the tops are springy to the touch.

Baked strawberry madeleines in a red silicone mold.

Step 9: Turn the strawberry madeleines out on a cooling rack.

strawberry madeleines on a cooling rack.

Final step: Serve as is or glaze with melted chocolate and serve!

Pro Tips

  • Sift your flour once or even twice, so there are no lumps and the batter of the madeleine cookies stays airy.
  • Donโ€™t overmix the batter when youโ€™re adding the flour.
  • Silicone molds need no prep. For all metal madeleine pans, grease the cavities well.
  • Don't overfill the molds, just 2/3rd of the way, or the batter will overflow.
  • To give the madeleines an extra pop of pink, add a drop or two of red food color.
A plateful of madeleines with strawberries and a candle in the background.

How To Get That Classic French Madeleine Hump?

Your butter has to be at the right temperatureโ€”melted and cooled, not hot. And your batter for strawberry madeleines has to be chilled. The temperature difference between the cold batter and the hot oven makes for the perfect hump.

The longer you chill it, the bigger the hump is, which is a sign of a good madeleine. You can refrigerate it for 30 minutes to up to 2 days.

  • Option 1: Load the batter into a piping bag and pipe it into the madeleine molds. Stick the tray in the refrigerator for a few hours. And then transfer the tray straight from the fridge to the hot oven.
  • Option 2: Leave the batter in the bowl. Cover and refrigerate for a few days. Use two tablespoons to fill the cavities no more than 2/3rds of the way.

How To Serve

I decided to dip the madeleine cookies in chocolate as a Valentineโ€™s Day treat. Half of the butter cookie cake got white chocolate (mixed with beetroot powder) coating and the other dark chocolate as I did with my chocolate madeleines. Hereโ€™s what you do (or watch the video):

  • Take a clean madeleine mold and add 1 -1.5 tsp melted chocolate to each cavity. Don't add too much, or the chocolate will overflow once you place the baked strawberry madeleines.
  • Tap the tray on your countertop to get rid of any air bubbles.
  • Then gently place the madeleines in the cavities.
  • Press lightly.
  • Refrigerate again till the chocolate sets.
glazing the madelienes with pink hued white chocolate in a red silicone mold.

Recipe FAQs

Is there a madeleine pan alternative?

Unfortunately, no. Madeleines are known for their scalloped and shell-like shape, and only the right pan will give you that. So, you simply must have one, but theyโ€™re easily available online.
You can make these in a mini muffin pan though. The shape will be different, but the taste will be still amazing!

What to serve with madeleines?

They are a perfect match for a steaming cup of tea or coffee! That said, they are great with a cup of hot cocoa, peach iced tea, or matcha mango latte too!

How to store madeleines?

Strawberry madeleines keep well for 2โ€“3 days as long as you store them in an airtight container at room temperature.

More Madeleine Recipes

  • carrot cake madeleines on a cake stand with a candle and teapot in the background.
    Carrot Cake Madeleines
  • Lemon Madeleines in a teacup.
    Lemon Madeleines Recipe
  • Chocolate cherry madeleines on a plate with ingredients in the background.
    Chocolate Cherry Madeleines
  • Pumpkin Oats Madeleines in a metal tray.
    Pumpkin Madeleines

Half the joy of cooking is sharing it with others. Thatโ€™s why Iโ€™m always eager to hear from you. So go right ahead and drop a comment or reach out on Instagram, Pinterest, YouTube, or Facebook. I hope you love these strawberry madeleines as much as we do!

๐Ÿ“– Recipe

Easy Strawberry Madeleines Recipe

Easy Strawberry Madeleines Recipe

Natasha Minocha
Fragrant, palest of the pinks, buttery, crisp on the edges, and soft on the inside, strawberry madeleines are one of the most delicious fresh strawberry recipes Iโ€™ve made.
No ratings yet
Print Recipe Pin Recipe
Prep Time 15 minutes mins
Cook Time 10 minutes mins
30 minutes mins
Course Cookies, Dessert
Cuisine French
Servings 18 Madeleines
Calories 134 kcal

Ingredients


  • 2 Eggs
  • 1/3 cup Caster sugar
  • 1 cup All-purpose flour
  • 3/4 tsp Baking powder
  • 1/4 tsp Salt
  • 1/3 cup Strawberry syrup See notes
  • 6 tbsp Butter, melted and cooled

Chocolate glaze

  • 1/3 cup White chocolate, melted
  • 1 tsp Beetroot powder You can also use red food color
  • 1/3 cup Dark chocolate, melted

Instructions
 

  • In a large bowl, beat the eggs and sugar till pale and thick, doubled in volume.
  • Whisk in the strawberry syrup/ puree, flour, baking powder, and salt.
  • Fold in the melted butter.
  • Pipe the batter into the cavities of the madeleine mold. Fill only 2/3 rd of the way.
  • Chill the batter in the refrigerator for at least 30 minutes up to 2 days.
  • When you're ready to bake, preheat the oven to 200 C or 392 F.
  • Carefully place the madeleine tray in the oven and bake for 9-10 minutes or until they are golden and the tops are springy to the touch.
  • Turn them out on a cooling rack. Cool completely.

Chocolate glaze

  • Pink chocolate glaze - combine the melted white chocolate and beetroot powder ( or red food color) in a small bowl.
    Dark chocolate - melt the chocolate.
    I used pink chocolate for half the madeleines and dark chocolate for the other half.
  • Drop a spoonful of melted chocolate into each of the madeleine molds.ย 
  • Place the cooled madeleines into the molds, design side down. Press lightly so all the madeleines get a nice chocolate coating.
  • Place the tray in the freezer for 5-10 minutes, until the chocolate hardens.
  • Carefully take them out of the molds and serve. Enjoy!

Video

Notes

  • Sift your flourย once or even twice, so there are no lumps and the batter of the madeleine cookies stays airy.
  • Donโ€™t overmixย the batter when youโ€™re adding the flour.
  • Silicone moldsย need no prep. For allย metal madeleine pans,ย greaseย the cavities well.
  • Don't overfill the molds, just 2/3rd of the way, or the batter will overflow.
  • To give the madeleines an extra pop of pink, add a drop or two of red food color.

Nutrition

Serving: 1 madeleineCalories: 134kcalCarbohydrates: 17gProtein: 2gFat: 7gSaturated Fat: 4gPolyunsaturated Fat: 0.3gMonounsaturated Fat: 2gTrans Fat: 0.2gCholesterol: 29mgSodium: 91mgPotassium: 26mgFiber: 1gSugar: 8gVitamin A: 145IUVitamin C: 1mgCalcium: 20mgIron: 0.5mg
Tried this recipe?Let us know how it was!

Perfect Soft Coffee Cinnamon Rolls!

January 27, 2024

Perfect Soft Coffee Cinnamon Rolls !

Super soft and fluffy, these are dream coffee cinnamon rolls -ultimate in comfort and decadence. And it's one of the easiest recipes for cinnamon buns that Iโ€™ve tried!

Perfect Soft Coffee Cinnamon Rolls !

Whatโ€™s the right way to eat fluffy cinnamon rolls? Alongside sips of coffee. But with these coffee rolls, you can eat your coffee within the roll! 

That's why I call the easy cinnamon roll recipe a fun twist on the classic. It is the kind of dessert that spreads warmth like a cozy blanket on a winter night.

 Soft Coffee Cinnamon Rolls
[feast_advanced_jump_to]
 Coffee Cinnamon Rolls

Why you'll love cinnamon coffee rolls?

  • Coffee lover's dream: a dessert that marries the rich taste of coffee with the sweet allure of cinnamon rolls.
  • Breakfast bliss: a perfect blend of a warming, spicy center, and a hearty wake-up call.
  • Perfect pairing: With a glass of milk for late-night cravings.
Cinnamon Coffee Rolls

Ingredients & swaps

Flour: substitute whole wheat flour for all-purpose flour, or use half-and-half of both for these coffee and cinnamon rolls.

Sugar: Brown sugar does wonders for cinnamon coffee rolls. Havenโ€™t got it? Muscovado sugar or cane sugar would be my first swap choice. But any other you have at home will work too.

Coffee: Regular instant coffee works best in this cinnamon rolls recipe without eggs because it combines easily and nicely as opposed to ground coffee. Use your favorite brand.

Cream cheese frosting for cinnamon rolls was my choice and is the most popular. But you can also try:

  • cinnamon glaze
  • chocolate glaze
  • regular glaze
  • Or simply dust them with icing sugar.
t Coffee Cinnamon Rolls with coffee cream cheese frosting and pecans on top

How to make coffee cinnamon rolls?

  1. Activate yeast

    Heat milk until lukewarm. Stir in sugar, oil, and yeast. Set aside for 5โ€“10 minutes, until bubbly.

  2. Mix and rest

    Whisk in the 2 & 1/3 cups of flour. Cover and place in a draft-free place until the dough doubles in size (about 1 to 2 hours).

  3. Whisk and rest again

    Add the rest of the flour along with baking powder, baking soda, and salt. Mix well and let it rest in the fridge overnight.

  4. Divide

    Gently deflate the dough the next morning and divide it into two equal parts.Dough divided in half

  5. Roll

    Roll each half into a thin rectangle. Spread the coffee roll filling (melted butter + coffee powder + brown sugar + cinnamon powder) on the two rolled rectangles.Rolled out dough with cinnamon coffee mixture on top

  6. Fold

    Like paper, fold each filled dough rectangle into thirds. Pick the right short side of the dough and fold it 2/3 of the way. Then take the left short side of the dough and bring it over the folded part. So, you have 3 layers, similar to folding a business letter. (Watch the video to see how I do it).

  7. Divide again

    Cut both the folded coffee cinnamon roll dough into 6 strips (about 1.5 inches wide).dough folded in thirds and cut into strips

  8. Shape the coffee cinnamon buns

    Working on one strip at a time, leaving part of the top end as-is, cut the rest into three equal sections (vertically).Strip of dough cut into 3 strips

  9. Plait

    Just like you would with hair, interweave the three sections to make a braid, using the intact top end as the starting point.Braided dough strip

  10. Make the bun

    Roll the braided cinnamon coffee dough into a ball. Repeat for all the strips until you have 12 espresso buns.Rolled up dough braid

  11. Rest again

    Place the coffee rolls in a well-greased muffin pan and let them rest for 30 to 45 minutes until puffy.Shaped dough braids in a muffin pan

  12. Bake and cool

    Bake to golden-top perfection (about 18 to 20 minutes). Cool in the pan for a couple of minutes and then transfer to a wire rack.

  13. Serve

    And savor!

Baked Soft Coffee Cinnamon Rolls

Cream cheese frosting

The coffee and cinnamon rolls are stunning, sumptuous, and addictive as-is. Butโ€ฆ I love to go all out while making cinnamon rolls from scratch. So, I glazed them.

How do you make it? 

Combine room-temperature cream cheese with icing sugar and half a teaspoon of coffee powder. Whisk till you have a thick, pouring consistency. Drop spoonfuls on the rolls, garnish with nuts of your choice, and enjoy!

Coffee cream cheese frosting in a small glass bowl

Recipe notes

  • Donโ€™t mix yeast with hot milk. It has to be lukewarm.
  • You can use the coffee roll dough immediately after step 3. I like to make homemade cinnamon roll dough ahead of time, as it can be refrigerated for 30 minutes or up to 3 days.
  • Since the filling of these flavored cinnamon rolls has butter and sugar, it will bubble up and caramelize on your pan. Donโ€™t worry. Itโ€™s easy to clean, and my pans prove it. I cleaned them for the pictures, and some hot, soapy water did the trick. So donโ€™t let the little mess stop you from trying this recipe.
  • Braiding the coffee cinnamon rolls is not essential. They just look prettier and cuter this way. You can skip the steps and shape them like basic and classic cinnamon rolls or like cinnamon roll muffins. FYI, it looks tough, but itโ€™s not. So, my advice? Give it a go!
cross section of a coffee cinnamon roll on a small plate

FAQs

How to make cinnamon coffee rolls vegan?

Switch to plant-based milk and butter (or coconut oil).

Can I make the dough ahead of time?

Yes! I like to makeย homemade cinnamon roll doughย aheadย of time, as it can be refrigerated for up to 3 days.

Cross section of a coffee cinnamon roll

More flavored rolls

  • Apple Pie Cinnamon Rolls
    Apple Pie Cinnamon Rolls
  • Baklava Cinnamon Rolls
    Baklava Cinnamon Rolls
  • Easy Pumpkin Cinnamon Rolls Recipe
    Easy Pumpkin Cinnamon Rolls Recipe
  • Biscoff Cinnamon Rolls
    Biscoff Cinnamon Rolls - So Soft & Fluffy!

Half the joy of cooking is sharing it with others. Thatโ€™s why Iโ€™m always eager to hear from you. So go right ahead and drop a comment or reach out on Instagram, Pinterest, YouTube, or Facebook. I hope you love the coffee cinnamon rolls as much as we do!

๐Ÿ“– Recipe

Perfect Soft Coffee Cinnamon Rolls !

Perfect Soft Coffee Cinnamon Rolls!

Natasha Minocha
These easy cinnamon rolls are a fun twist on the classic, and itโ€™ll give you the kind of dessert that spreads warmth like a cozy blanket on a winter night.
No ratings yet
Print Recipe Pin Recipe
Prep Time 2 hours hrs
Cook Time 20 minutes mins
8 hours hrs
Course Dessert
Cuisine American, World
Servings 12 Rolls
Calories 283 kcal

Ingredients


  • 1 cup Milk
  • 1.5 tsp Dried active yeast
  • 1/4 cup Sugar
  • 1/4 cup Oil
  • 2 1/3 cup All-purpose flour
  • 1/4 tsp Baking powder
  • 1/4 tsp Baking soda
  • 1/4 tsp Salt
  • 1/4 cup All-purpose flour

Filling

  • 1/3 cup Butter, melted
  • 1/2 cup Brown sugar
  • 1.5 tbsp Instant coffee powder
  • 2 tsp Cinnamon powder

Coffee Cream Cheese Frosting ( Optional)

  • 1/2 cup Cream cheese softened
  • 1/2 cup Icing sugar
  • 1/2 - 1 tsp Instant coffee powder
  • Pecans for topping Optional

Instructions
 

  • Heat the milk until lukewarm. Stir in sugar, oil, and yeast.
  • Set aside for 5-10 minutes until the mixture is bubbly.
  • Whisk in the 2 and 1/3 cups of flour. Cover and place in a draft-free place for 1 hour or until the dough is doubled in size.
  • Mix in the extra 1/4 cup flour, baking powder, baking soda, and salt.
  • The dough is now ready for use immediately. You can refrigerate it for 30 minutes or up to 3 days.
    For easier handling, I always like to refrigerate the dough overnight.
  • Butter the cavities of your muffin pan well. Or if using a baking dish, grease that well.
  • Knead the dough for 1 minute and divide into 2 halves. This is for easier handling.
  • Sprinkle flour on your work surface and roll out one half of the dough into a rectangle.
  • Spread half of the cinnamon coffee filling evenly on the rolled-out dough.
  • Pick one of the short sides and bring it over 2/3 of the dough. Then pick the other short side and bring it over the folded dough.
  • Cut the folded dough into 6 strips, approximately 3/4" in width.
  • Working with 1 piece of dough at a time, cut the strip into 3 pieces, leaving about 1/4" of the end intact.
  • Braid the strips of dough together to form a braid. Now roll up the braid into a ball.
    Repeat this with the remaining strips and the 2nd half of the dough.
  • Place the braided rolls in the muffin pan, cover with a kitchen towel or cling wrap, and let proof for about 30-45 minutes or until puffy.
  • While the rolls are proofing, preheat your oven to 190 C.
  • Remove the plastic wrap or kitchen towel and bake the proofed buns at 190 C for 18-20 minutes.
    The filling will bubble over and spread over your muffin pan, but it cleans up easily!
  • Let the rolls cool in the muffin pan for 2-3 minutes before moving them onto a cooling rack.
  • Once they have cooled, spread a spoonful of coffee cream cheese frosting on each roll. Top with pecans and serve. Enjoy!

Filling

  • Combine the melted butter, brown sugar, cinnamon powder, and coffee powder in a small bowl.

Coffee Cream Cheese Frosting

  • Combine the softened cream cheese, icing sugar, and coffee powder in a small bowl and whisk well until smooth.
    Taste and adjust for sweetness and coffee flavor.

Nutrition

Serving: 1 RollCalories: 283kcalCarbohydrates: 42gProtein: 5gFat: 11gSaturated Fat: 4gPolyunsaturated Fat: 2gMonounsaturated Fat: 5gTrans Fat: 0.2gCholesterol: 16mgSodium: 201mgPotassium: 127mgFiber: 1gSugar: 20gVitamin A: 187IUVitamin C: 0.1mgCalcium: 80mgIron: 1mg
Tried this recipe?Let us know how it was!

Best Mallorca Sweet Bread Recipe

January 22, 2024

Mallorca bread rolls on a platter.

Sweet Mallorca bread deserves a standing ovation. Unbelievably buttery and fluffy, the almost no-knead sweet bread recipe only looks difficult but, trust me, it comes together in no time!

BEST Mallorca Sweet Bread Recipe

Iโ€™ve said it before, and Iโ€™ll say it again: the aroma of baking bread makes all manner of problems vaporize for me. And when that bread has a few drops of vanilla extract in it, like this easy Mallorca bread recipe, the mouthwatering fragrance that wafts through the kitchen is just heaven waiting to be bottled.

[feast_advanced_jump_to]
BEST Mallorca Sweet Bread Recipe

What's pan de Mallorca?

Pan de Mallorca, or Mallorca bread bun, is a legendary bread from Puerto Rico. Originally named ensaรฏmadas, these delightful sweet bread rolls are said to have originated from the picturesque island of Majorca, which is off the coast of Spain. It's known for the exquisite flavor, the nearly ethereal, soft texture and distinctive spiral shape.

mallorca bread roll on a small plate

Why you'll love Mallorca sweet bread?

  • Light and Flaky: Youโ€™ll love the soft, flaky, buttery swirls.
  • Morning Bliss: The sweet bread for breakfast makes a delightful start.
  • Anytime Indulgence: The versatile sweet buns are also a delectable treat at any hour.
 Mallorca Sweet Bread

Ingredients & swaps

Flour: Bread flour gives an airier texture to the Mallorca sweet bread. If you can get your hands on it, try it. Otherwise, all-purpose flour works just as well. That's what I used for this recipe.

Butter: I love to incorporate salted butter in my loaves of bread because you get that hint of savory flavor in the crumb. That said, you can use unsalted butter too.

Add-ons: The Mallorca bread is flavorful enough, but in case you want to make the vanilla flavor stand out more, I recommend mixing the vanilla extract with butter and then brushing the cut strips with it.

 Mallorca Sweet Bread Recipe

How to make Mallorca bread?

  1. Activate

    Add lukewarm milk and whisk in the yeast in a large bowl.

  2. Whisk

    Stir in sugar, salt, an egg, softened butter, and vanilla extract.

  3. Mix

    Add flour and bring everything together with a spatula or wooden spoon until there are no dry streaks visible, and you have a shaggy dough.Steps for making Mallorca Bread dough

  4. Proof

    Cover the bowl with plastic wrap or a kitchen towel and place it in a draft-free corner for 1- 2 hours, or until the Mallorcan bread dough doubles in size.proofed dough for mallorca bread

  5. Knead

    Turn the dough out onto a lightly floured work surface. Knead briefly (about 3โ€“4 minutes) until the soft and sticky dough turns smooth.Ready bread dough

  6. Rest

    Cover again and let it rest for about 10 minutes.

  7. Roll

    Turn it out onto a floured surface and roll it into a roughly 11 -12 inch by 17-18 inch rectangle.cut the rolled out dough into long strips

  8. Slice

    Cut the rolled sweet bread dough into equal-sized vertical strips.Butter brushed on the rolled out dough

  9. Shape

    Brush the dough with softened butter and then roll each strip into a tight spiral to form the signature coil of Mallorca buns.Roll each strip into a tight spiral

  10. Transfer

    Place the buns on a parchment paper-lined tray, spacing them apart.Proof the shaped bread rolls

  11. Proof

    Cover and let the Mallorca bread rolls rest for 30 to 45 minutes until puffy.Proofed bread rolls

  12. Bake

    Bake in a preheated oven for 18โ€“20 minutes until risen and lightly golden. Brush the baked pan de Mallorca with butter. Let it cool slightly.Baked Mallorca bread

  13. Serve and savor

    Dust generously with icing sugar and enjoy right away!

Mallorca bread dusted with icing sugar

Recipe Notes

  • The dough in this Puerto Rican sweet bread recipe is soft, smooth, and a little sticky. Thatโ€™s how you get a flaky, airy sweet crumb.
  • Since itโ€™s an enriched bread dough, it takes longer to proof than other breads.
  • Brushing the Mallorca bread strips with butter helps them stick and hold the iconic snail shape.
cross section of the bread with other rolls

FAQs

What is Mallorca bread made of?

Mallorca buns are made from an enriched dough, meaning they contain butter, milk, sugar, eggs, and flavorings such as vanilla extract.

How to make Mallorca bread recipe vegan?

Instead of egg, use plant-based cream and switch to plant-based milk and butter.

How to serve this bread from Puerto Rico?

The sweet bread is a feast for the senses, whether you have itย warm or at room temperature.ย I prefer it lightly sugared, but if youโ€™re itching for a decadent treat, have the pan de Mallorca with a snowfall ofย icing sugarย on top.
My advice? Pair the sweet roll with your cup of tea or coffee for breakfast or an evening snack. You can even slice it open and slather it with jam or cheese, or have it with mains, soups, and stews.

mallorca bread roll cut in half on a small plate

More recipes like Mallorca bread

  • Best Condensed Milk Bread Rolls (Soft & Fluffy)
    Best Condensed Milk Bread Rolls (Soft & Fluffy)
  • Parker House Rolls on a plate with a butter knife and butter.
    Parker House Rolls
  • buns with tutti frutti in a napkin lined basket.
    Vegan Sweet Buns
  • A red platter stacked with pineapple buns.
    Pineapple Bun Recipe

Half the joy of cooking is sharing it with others. Thatโ€™s why Iโ€™m always eager to hear from you. So go right ahead and drop a comment or reach out on Instagram, Pinterest, YouTube, or Facebook. I hope you love this Mallorca bread as much as we do!

๐Ÿ“– Recipe

Mallorca bread rolls on a platter.

BEST Mallorca Sweet Bread Recipe

Natasha Minocha
Unbelievably buttery, fluffy, and pleasantly sweet, Mallorca bread deserves a standing ovation. Itโ€™s almost a no-knead sweet bread recipe that looks devilishly difficult butย comes together in no time!
5 from 1 vote
Print Recipe Pin Recipe
Prep Time 3 hours hrs 20 minutes mins
Cook Time 20 minutes mins
Course Side Dish
Cuisine Spanish
Servings 12 Buns
Calories 184 kcal

Ingredients


  • 2/3 cup Milk, lukewarm
  • 1 tsp Dried active yeast
  • 1/4 cup Castor sugar
  • 1/2 tsp Salt
  • 1 Egg, room temperature
  • 1/4 cup Butter, softened
  • 1 tsp Vanilla extract
  • 2.5 cups All-purpose flour

Filling

  • 1-2 tbsp Butter, softened

Topping

  • 1 tbsp Butter, melted
  • 2-3 tbsp Icing sugar

Instructions
 

  • In a large bowl, whisk together milk and yeast.
  • Add in the sugar, salt, egg, softened butter, and vanilla extract. Mix well.
  • Mix in the flour until a shaggy, sticky dough forms.
  • Cover and let the dough rise until doubled, about 1-2 hours.
  • Transfer the dough to a lightly floured surface and knead the dough for 3-4 minutes until smooth and slightly tacky to touch.
  • Cover and let the dough rest for 10 - 15 minutes.
  • Roll the dough out into a rectangle, approximately 12" x 16".
  • Cut into 12 equal-sized vertical strips.
  • Spread the softened butter all over the dough's surface.
  • Starting with one strip, roll into a tight spiral, and tuck the edge in, underneath the roll. Repeat with the balance strips.
  • Place the rolls on a parchment-lined baking tray. Cover and let rise until puffy, about 30-45 minutes.
  • In the meanwhile preheat the oven to 180 C.
  • Bake the risen rolls at 180 C for 18-20 minutes, until lightly golden on top.
  • Brush the hot, baked rolls with melted butter.
  • Cool for a few minutes and dust with icing sugar. Serve and enjoy!

Nutrition

Serving: 1 BunCalories: 184kcalCarbohydrates: 27gProtein: 4gFat: 7gSaturated Fat: 4gPolyunsaturated Fat: 0.4gMonounsaturated Fat: 2gTrans Fat: 0.2gCholesterol: 31mgSodium: 154mgPotassium: 59mgFiber: 1gSugar: 6gVitamin A: 221IUVitamin C: 0.001mgCalcium: 25mgIron: 1mg
Tried this recipe?Let us know how it was!

Easy Chocolate Puff Pastry Braid

January 19, 2024

Easy Chocolate Puff Pastry Braid

When you need a dessert that looks fancy but takes almost no effort, this chocolate puff pastry braid is the answer! Buttery, flaky pastry with a rich chocolate filling - this is the kind of treat that disappears the minute you set it on the table!

puff pastry braid with chocolate on parchment paper.

The best part? You only need 5 simple ingredients and you have a gorgeous dessert ready in less than an hour! No stress, no complicated steps - a few cuts, a quick braid, and into the oven it goes. And you get a golden, chocolate-filled pastry that everyone will love. Simple, fun, and guaranteed to be the star of the table!

[feast_advanced_jump_to]

Why You'll Love This Recipe

โœจ This recipe comes together in less than an hour!

โœจ Looks bakery-worthy but is still beginner-friendly

โœจ This decadent dessert needs just 5 simple ingredients - except for puff pastry, you'll probably have the rest in your pantry right now!

โœจ It looks like a showstopper and is a total crowd-pleaser. Loved by kids and adults alike!

Recipe Ingredients

Puff pastry: You can use either homemade or store-bought puff pastry. I use store-bought, it's a big time-saver and so convenient.

Nutella: For that rich, luscious chocolate filling! Feel free to use a homemade version if you wish.

Egg: For egg wash that gives the pastry a beautiful sheen. You can use cream instead.

Toppings: Almond flakes make the chocolate pastry puffs look so pretty, and they add an extra nuttiness and crunch.

Please see the recipe card below for full information about the ingredients and quantities.

Variations

I love how versatile this puff pastry dessert idea is. You can make a couple of easy additions to the filling:

  • Sliced bananas
  • Fresh or frozen raspberries or strawberries
  • Chopped hazelnuts or almonds

How To Make Chocolate Puff Pastry Braid

Step 1: Preheat your oven. Line a baking tray with parchment paper or Silpat. Thaw your puff pastry according to package instructions. Lightly flour your work surface and roll the puff pastry into a large rectangle.

Ends of the rolled out pastry cut into diagonal strips.

Step 2: Create two creases that act as markers to divide the dough into three parts. On each of the side sections of the rolled-out puff pastry, cut equal-sized diagonal strips.

Nutella in the center of the pastry.

Step 3: On the center section, spread Nutella, leaving about ยฝ inch of space on top and bottom.

Braiding the pastry strips over the nutella center on a silicone mat.

Step 4: Fold over the top and bottom empty ends of the middle section. Now begin braiding the puff pastry with Nutella by taking one strip from the left section and crossing it over to the right. Then, take a strip from the right section and fold it over to the other side so it overlaps the first strip at an angle.

Pastry braid on parchment paper.

Step 5: Continue crisscrossing the cut strips over each other till you have a complete braid. Chill the puff pastry with chocolate in the freezer for 10 minutes.

Pastry braid brushed with egg and topped with almond flakes and sugar.

Step 6: Brush with the beaten egg. Sprinkle granulated sugar and almond flakes on top.

Baked puff pastry with chocolate with almonds on top on parchment paper.

Step 7: Bake for 35 to 40 minutes, until golden and toasty. Let the pastry rest for 10 minutes before slicing and serving. Enjoy!

Pro Tips

  • I got about 10 stripes on each side of the chocolate puff pastry. You can make as many or as few cuts as you want, as long as both sides have the same number.
  • Once braided, chill the pastry for 10-15 minutes in the freezer. This will give your pastry flakier, crispier layers.
  • You can assemble this pastry 3-4 hours ahead of time, keep it refrigerated, and bake when needed.
  • If you useย homemade nut butterย or homemade Nutella in this chocolate puff pastry recipe, make sure they areย not runny.ย Refrigerate them until they are firmย enough to handle, or else youโ€™ll have a super messy pastry at hand.
a slice of chocolate puff pastry on parchment paper.

How To Serve Chocolate Puff Pastry

This Nutella puff pastry is wonderful served warm as-is or with a dusting of powdered sugar. I love it with a cup of tea or coffee!
However, if you want to make it super indulgent, serve it with a scoop of vanilla ice cream, my creamy chocolate almond ice cream, or even this delicious vegan coffee ice cream!

Chocolate puff pastry with almonds on top on parchment paper.

How To Store

Puff pastry desserts are best eaten the day they are baked. If you have any leftovers, keep them refrigerated for up to 3 days.

Please reheat in an oven, air fryer, or toaster oven. The microwave will make the pastry soggy!

More Valentine's Day Desserts

  • Perfect Strawberry Banana Bread Recipe
    Perfect Strawberry Banana Bread Recipe
  • Chocolate Raspberry Brownie Bites
    Chocolate Raspberry Brownie Bites
  • Strawberry Tiramisu | Eggless Alcohol-free Strawberry Tiramisu Recipe
    Strawberry Tiramisu
  • Chilli Chocolate Pudding vegan glutenfree refined sugarfree easy dessert
    Chilli Chocolate Pudding

Half the joy of cooking is sharing it with others. Thatโ€™s why Iโ€™m always eager to hear from you. So go right ahead and drop a comment or reach out onย Instagram,ย Pinterest,ย YouTube, orย Facebook. I hope you love this chocolate puff pastry as much as we do!

๐Ÿ“– Recipe

Easy Chocolate Puff Pastry Braid

Easy Chocolate Puff Pastry Braid

Natasha Minocha
When you need a dessert that looks fancy but takes almost no effort, try this chocolate puff pastry braid! Buttery, flaky pastry with a rich chocolate filling - this is the kind of treat that disappears the minute you set it on the table!
No ratings yet
Print Recipe Pin Recipe
Prep Time 20 minutes mins
Cook Time 40 minutes mins
Course Dessert
Cuisine American, World
Servings 8 servings
Calories 597 kcal

Ingredients


  • 17 oz Puff pastry
  • 12 oz Nutella chocolate spread
  • 1 Egg, beaten, for egg wash
  • 2 tbsp Almond flakes, for topping
  • 1-2 tbsp Granulated sugar, for topping
  • 2 tbsp Icing sugar, for dusting

Instructions
 

  • Preheat your oven to 200 C / 400 F. Line a baking tray with parchment paper or Silpat.
  • Thaw your puff pastry according to package instructions.
  • Lightly flour your work surface and roll the puff pastry into a large rectangle (approx 14 by 17 inches).
  • Divide the rectangle into three equal parts. You can either eyeball it or fold the dough to create two creases that act as markers.
  • On each of the side sections of the rolled-out puff pastry, cut equal-sized diagonal strips.
  • On the center section, spread Nutella, leaving about ยฝ inch of space on top and bottom.
  • Fold over the top and bottom empty ends of the middle section.
  • Now begin braiding the puff pastry with Nutella by taking one strip from the left section and crossing it over to the right. Now take a strip from the right section and fold it over to the other side so it overlaps the first strip at an angle.
  • Continue crisscrossing the cut strips over each other till you have a complete braid.
  • Chill the puff pastry with chocolate in the freezer for 10 minutes.
  • Brush with the beaten egg. Sprinkle granulated sugar and almond flakes on top.
  • Bake at 200 C / 400 F for 35 to 40 minutes, until golden and toasty.
  • Let the pastry rest for 10 minutes before slicing and serving. Enjoy!

Video

Notes

  • I got about 10 stripes on each side of the chocolate puff pastry. You can make as many or as few cuts as you want, as long as both sides have the same number.
  • Once braided, chill the pastry for 10-15 minutes in the freezer. This will give your pastry flakier, crispier layers.
  • You can assemble this pastry 3-4 hours ahead of time, keep it refrigerated, and bake when needed.
  • If you useย homemade nut butterย or homemade Nutella in this chocolate puff pastry recipe, make sure they areย not runny.ย Refrigerate them until they are firmย enough to handle, or else youโ€™ll have a super messy pastry at hand.

Nutrition

Serving: 1 SliceCalories: 597kcalCarbohydrates: 58gProtein: 8gFat: 37gSaturated Fat: 18gPolyunsaturated Fat: 3gMonounsaturated Fat: 14gTrans Fat: 0.003gCholesterol: 20mgSodium: 175mgPotassium: 236mgFiber: 4gSugar: 27gVitamin A: 32IUCalcium: 62mgIron: 4mg
Tried this recipe?Let us know how it was!

Cranberry Walnut Bread Recipe

January 16, 2024

Cranberry Walnut Bread Recipe

Soft, golden, and chewy, the cranberry walnut bread is guaranteed to fly off the shelf! Itโ€™s a bakery-style bread studded with tart cranberries and nutty walnuts, but itโ€™s ludicrously easy to make, perfect for beginners even!

Cranberry Walnut Bread Recipe

This quick bread is a take on my easy homemade bread recipe. The method I use is very much the same (with some tasty additions). Just in case you need a more detailed step-by-step process, click that link (or watch the video to the bottom of this blog post).

[feast_advanced_jump_to]
Cranberry Walnut Bread Recipe

Why you'll love cranberry and walnut bread

  • You can have it for breakfast, a snack, or a meal.
  • It's so simple that you wonโ€™t even need to follow the bread recipe after the first time.
  • The flavor and texture of this every day, easy bread will make you drop to your knees.

Ingredients & swaps

Flour: I used all-purpose (1.5 cups) and whole wheat (half cup). A ratio of 1:1 of both flours would be just as delicious. Or you can use just one of the flours for dried cranberry recipe bread. Youโ€™ll have to adjust the amount of water since whole wheat absorbs more. If you can get your hands on bread flour, then that works too.

Yeast: Dry active, or instant; pick whatever is in your pantry. The quantity remains the same. The only tip for a cranberry walnut bread recipe with yeast is to bloom it beforehand. Itโ€™s my way of making sure that the yeast is still working, and that itโ€™ll give the bread the rise I want.

Fat: Olive oil is my choice, as it lends the cranberry and walnut bread a lovely texture and fruity flavor. Any regular vegetable oil would be a fine substitute.

Sugar: Helps the yeast bloom and brings a balance to walnut bread flavor.

Sea salt seasons the bread crumb beautifully and makes it more flavorful. You can easily replace it with regular salt.

Add-ins: Cranberry and walnuts are a magical pairing. I used dried cranberries, and I haven't made the bread any other way yet, so Iโ€™m not entirely sure if fresh or frozen cranberries will work.

See the recipe card for full information on ingredients and quantities.

Cranberry Walnut Bread

How to make cranberry walnut bread?

  1. Activate the yeast

    Bloom yeast and sugar with the water until foamy (10โ€“15 minutes).

  2. Mix the ingredients

    In a large bowl, mix the flours and sea salt. Make a well in the center and add olive oil and the bubbly yeast mixture.

  3. Combine

    With your hands (or a spatula), bring everything together into a rough, scraggy dough with no dry patches.

  4. Adds-in

    Fold in chopped walnuts and dried cranberries.

  5. Knead

    On a lightly floured surface, turn out the walnut and cranberry bread dough. Begin kneading by pushing the dough away from you, using the heels of your hands.
    Then fold over half the dough towards you, press down, and again push outwards. Turn it sideways and continue with the kneading. Keep turning and kneading till the dough feels soft, elastic, and just a tad sticky.ย steps for making the bread dough

  6. Proof the bread

    Transfer to a greased bowl. Cover and let it proof in a draft-free spot for 1 -2 hours, or until it doubles.

  7. Shape the bread

    Take the risen bread dough and turn it over on a floured surface. Deflate, shape into a ball, and place on a parchment-paper-lined tray.

  8. Proof again

    Cover with a kitchen towel and let it proof for a second time in a draft-free spot for 5 minutes or till itโ€™s puffy.1st and 2nd proofs for the cranberry walnut bread

  9. Score

    Preheat your oven to 250ยฐC. When youโ€™re ready to bake the walnut-cranberry bread, slash the top with a sharp knife.

  10. Bake

    Spray some water on the bread to moisten it. Lower the oven heat and bake immediately until the crust is golden brown and the bottom sounds hollow when tapped.

  11. Serve

    Cool. Slice. Savor!

Bkaed Cranberry Walnut Bread

Pro tips

  • The water has to be lukewarm in this recipe for cranberry walnut bread. Too cold, and it doesnโ€™t let the yeast do its magic. Too hot, and it kills the years. The water should feel comfortable on your hands.
  • Use as little extra flour as you can when kneading. Too much, and itโ€™ll harden the dough and yield dry bread with a thick crust. If the dough is too sticky to handle, rub a little flour on your hands or wet them.
  • Take a break from kneading. About halfway through, cover the dough with a damp towel and give it a 5- to 6-minute rest. Your hands get a break, and the dough is much easier to knead.
  • A spray bottle is handy. Moistening the dough crown before baking gives the crust a nice, even golden hue.
  • Itโ€™s wise to wait. Consider cooling the baked bread as part of the process. Donโ€™t slice it while itโ€™s still hot.
sliced Cranberry Walnut Bread

Make it ahead bread

Some days I want quick recipes, and other days I want make-ahead ones. This walnut cranberry bread dough isย both!ย After youโ€™re done kneading, there are two ways to proof the bread:

  1. You can put it in a bowl, cover it, and leave it in a warm corner till it doubles in size.
  2. But if youโ€™re not in a rush to bake, after the dough has spent 30 minutes in the corner, refrigerate it overnight. The next morning, leave it on the countertop to come to room temperature, then follow the rest of the recipe from step 7.

That 12 to 14 hours in the fridge gives the yeasty flavors time to develop, so the bread gets an extra boost of taste thatโ€™s a thousand times better.

Not that the walnut bread isnโ€™t good on the same day. It is. Butย overnight proofingย yields true bakery-style bread!ย 

Psst: You can use this trick for any bread!

Cranberry Walnut Bread

FAQs

How to check if bread dough is done?

Generally,ย the window pane testย is a good way to tell if your bread dough is ready to be baked. But for this kind of artisan cranberry walnut bread, the poke test works better because itโ€™s crammed with nuts and berries.ย Poke the risen dough with your finger. It should bounce back quickly.ย 

How to score bread?

I donโ€™t score (slashing the top with a blade) every day breads elegantly. However, it is necessary to allow the steam to escape and the bread to expand while baking.
Here are 2 tips if youโ€™re scoring bread for the first time:
1. Use the sharpest knife (or a super-sharp blade orย lame).
2. Your movement has to be quick, confident, and smooth.

Soft or crusty homemade bread?

This walnut bread is a crusty nut bread. If thatโ€™s where your heart lies, great. But if youโ€™re like me and love aย soft crust, brush the bread with butterย the second you take it out of the oven.

Cranberry Walnut Bread

How to serve artisan cranberry walnut bread?

This walnut bread with cranberries is super delicious as-is. By the time you finish the first bite, youโ€™ll be a new person. That said, youโ€™ll also love it:

  • Slathered with bread
  • Alongside dips and stews
    • Creamy feta dip
    • Homemade cream cheese
    • Moroccan vegetable stew
    • Roasted carrot lentil soup
  • With some cheese
  • Toasted with a drizzle of honey and nuts on top
  • For a sandwich, the combo of sweet and savory is wonderful
Cranberry Walnut Bread

More no-knead bread recipes

  • No-Knead Focaccia with rosemary on parchment paper.
    Super Easy No-Knead Focaccia
  • Best Turkish Pide Bread Recipe!
    Best Turkish Pide Bread Recipe
  • The Best Monkey Bread Recipe
    The Best Monkey Bread Recipe
  • Braided pesto bread on parchment paper with ingredients around.
    Braided Pesto Bread

Half the joy of cooking is sharing it with others. Thatโ€™s why Iโ€™m always eager to hear from you. So go right ahead and drop a comment or reach out onย Instagram,ย Pinterest,ย YouTube, orย Facebook. I hope you love this cranberry walnut bread as much as we do!

๐Ÿ“– Recipe

Cranberry Walnut Bread Recipe

Cranberry Walnut Bread Recipe

Natasha Minocha
Soft, golden, and chewy, the cranberry walnut bread is guaranteed to fly off the shelf! Itโ€™s a bakery-style bread studded with tart cranberries and nutty walnuts, but itโ€™s ludicrously easy to make, perfect for beginners even!
No ratings yet
Print Recipe Pin Recipe
Prep Time 3 minutes mins
Cook Time 40 minutes mins
Course Side Dish
Cuisine World
Servings 10 Servings
Calories 178 kcal

Ingredients


  • 1 cup Warm water
  • 1.5 tsp Dried active yeast
  • 1 tsp Sugar
  • 1 1/2 cup All-purpose flour
  • 1/2 cup Wholewheat flour
  • 1/2 tsp Salt
  • 2 tbsp Olive oil
  • 1/2 cup Chopped walnuts
  • 1/2 cup Dried cranberries

Instructions
 

  • In a small bowl, dissolve yeast and sugar in the water. Let stand for 10 minutes until foamy.
  • In a large bowl, mix both the flours and salt.
  • Make a well in the center and add olive oil and the bubbly yeast mixture.
  • Mix well with a fork or your hand till a rough shaggy dough forms.
  • Flour your work surface well, and turn the dough onto it.
  • Add the chopped walnuts and cranberries to the dough and knead for 12 -14 minutes, until the dough is soft, supple, and just a tad sticky.ย 
    You can also knead the dough in your stand mixer.
  • Transfer the dough to a lightly greased bowl. Cover and keep in a warm, draft-free place for 1 hour or until the dough is doubled in size.
  • Once it is doubled, gently degas it.
  • Shape the dough into a ball. Place on a baking tray and cover it loosely with a kitchen napkin or cling wrap.
  • Let the dough rise in a draft-free spot for 30-40 minutes until it doubles in size.
  • Meanwhile, preheat your oven to 250C.
  • When the dough has proofed, make 4-5 slashes with a very sharp knife or a blade on the loaf.
    Put the tray in the oven and lower the heat to 200 C. Bake the loaf for 30-40 minutes or until they are golden brown and sound hollow when tapped on the bottom.
  • Transfer to a wire rack and let cool for at least an hour before slicing the bread.
    Enjoy!

Nutrition

Serving: 1 SliceCalories: 178kcalCarbohydrates: 26gProtein: 4gFat: 7gSaturated Fat: 1gPolyunsaturated Fat: 3gMonounsaturated Fat: 3gSodium: 119mgPotassium: 61mgFiber: 2gSugar: 5gVitamin A: 2IUVitamin C: 0.1mgCalcium: 11mgIron: 1mg
Tried this recipe?Let us know how it was!

Perfect Strawberry Banana Bread Recipe

January 11, 2024

Perfect Strawberry Banana Bread Recipe

The strawberry banana bread recipe is a perfect fusion of moist bananas and sweet strawberries. It's easy and quick! Each slice is moist, tender, and dotted with juicy bits of red berries - delicious, and possibly the best and fastest use for spotty bananas and fresh strawberries.

Strawberry banana bread, dusted with powdered sugar, on a green serving platter.

This easy strawberry banana bread is a twist on the classic bread that I never knew I needed! It is the kind of bake that makes any day brighter, whether you enjoy the banana and strawberry bread for breakfast, afternoon snack, or after-dinner dessert.

[feast_advanced_jump_to]

Why You'll Love This Recipe

  • Youโ€™ll love just how adaptable this easy quick bread recipe is.
  • It's invented for those overripe bananas you have lying around but donโ€™t know what to do with.
  • Itโ€™s so seriously delicious, that you'll want to eat the whole loaf by yourself!
  • Midday pick-me-up or after-work indulgence, a slice of it will never fail to make you smile.
Strawberry banana bread on a green serving platter with ingredients in the background.

Recipe Ingredients

Flour: I used wholewheat flour for this recipe. But you can use all-purpose or "plain" flour too.

Sugar: This time I used jaggery powder to sweeten the easy strawberry bread recipe, and it lent that extra depth of earthy, caramelly flavor that made the banana bread sing! Caster sugar, brown sugar, or regular granulated sugar will work just as well.

Keep in mind that the color of your bread will change. Jaggery and brown sugar both make for a darker loaf. Caster and regular sugar give it a lighter hue.

Butter: If youโ€™re not using salted butter like me, add ยผ teaspoon of salt to the batter along with the other dry ingredients. Use melted coconut oil or any vegetable oil as a substitute.

Mix-ins: Itโ€™s so easy to make this recipe for strawberry bread your own. Chocolate chips or chopped chunks of couverture chocolate are optional, but itโ€™s ace with them, especially if you like a sweeter-tasting bread. Yum! Walnuts will go beautifully here, like in my walnut & fig banana bread.

See the recipe card for full information on ingredients and quantities.

How To Make Banana Strawberry Bread

Step 1: With a handheld (or electric) whisk, beat softened butter and sugar till creamy. About 2 minutes.

Softened butter and sugar in a glass mixing bowl.

Step 2: Incorporate eggs and vanilla extract. At this point, the mixture may look curdled but donโ€™t panic.

Eggs and vanilla extract in the mixture of butter and sugar in a glass bowl.

Step 3: Add your mashed, overripe bananas to it.

Mashed bananas in the butter egg mixture.

Step 4: Then sift in the flour, baking soda, and baking powder right into the bowl.

A sieve with flour, baking powder and baking soda on top of a bowl with egg mixture.

Step 5: Mix just until no dry streaks are visible.

Step 6: Fold in chopped strawberries.

Optional step: Whisk in chocolate chips in the batter of this strawberry quick bread.

Chopped strawberries and chocolate chips in the batter.

Step 7: Transfer to a greased 8 by 4 or 9 by 5 loaf pan.

Step 8: Top with extra strawberries and chocolate chips, and bake for 55 to 65 minutes.

cake batter topped with chopped strawberries and chocolate chips in a loaf tin.

Step 9: Let the loaf rest in the pan for 5โ€“10 minutes. Then turn it over on a wire rack to cool completely.

Final step: Sprinkle with icing sugar and serve.

Baked Strawberry Banana Bread in a loaf tin.

Pro Tips

  • Sifting the dry ingredients breaks big lumps, makes mixing the banana bread with strawberries easier, and gives a consistent batter.
  • Toss your diced strawberries in a little bit of flour before you fold them into the batter so they donโ€™t sink to the bottom of the strawberry loaf cake.
  • Donโ€™t overmix the batter in this strawberry banana bread recipe, or youโ€™ll have a dense loaf.
  • My strawberry banana bread was baked in about an hour. When a skewer inserted in the center comes out clean, thatโ€™s when yours is done.
  • If you notice the top of the bread browning too much, loosely cover it with aluminum foil.
A slice of cake on a small plate with a golden fork on the side.

How To Serve

Serve the strawberry bread warm or at room temperatureโ€”whatever tempts your palate.

  • Itโ€™s the perfect teacake to kick back with a cup of coffee or tea.
  • Or, you can serve it with a scoop of ice cream, for a little indulgence.
  • I love it toasted and slathered with butter for my breakfast! Try it with some apple butter or honey cinnamon butter!

Recipe FAQs

Should I use fresh or frozen strawberries?

My market is flooded with fresh strawberries, so of course I had to make the most of them. But you can certainly bake the strawberry banana bread using frozen strawberries. You donโ€™t need to thaw them. Just toss in the batter and follow the step as-is.

How to ripen bananas quickly?

The best-tasting banana strawberry bread is one with the ripest bananas. The ones that are just one step ahead of being binned. If you don't have ripe bananas handy, just put the unpeeled ones on a baking tray and bake for 10-15 minutes at 300 F (150 C), or until they are browned. Peel and use the cooled bananas in the recipe.

How to make eggless strawberry banana bread?

I have done plenty ofย banana bread withย yogurtย andย flax eggsย to know they work beautifully. Thick, hung yogurt is almost magical. It keeps the loaf moist. It brings a subtle tanginess and creaminess. And it makes the crumb light.

Since my recipe for strawberry bread used 2 eggs (each was about 45 grams), youโ€™ll need 90 to 100 grams of yogurt.

More Easy Banana Breads

  • Miso banana bread on a wooden board with a knife.
    Miso Banana Bread
  • Biscoff Banana Bread - Easiest Recipe!
    Biscoff Banana Bread
  • Sliced pumpkin banana bread on a white platter.
    Pumpkin Banana Bread
  • Cream Cheese Swirl Banana Bread | Easy Banana Bread with Cream Cheese
    Cream Cheese Swirl Banana Bread

Half the joy of cooking is sharing it with others. Thatโ€™s why Iโ€™m always eager to hear from you. So go right ahead and drop a comment or reach out on Instagram, Pinterest, YouTube, or Facebook. I hope you love this strawberry banana bread recipe as much as we do!

๐Ÿ“– Recipe

Perfect Strawberry Banana Bread Recipe

Perfect Strawberry Banana Bread Recipe

Natasha Minocha
This easy, quick bread recipe is a perfect fusion of moist bananas and sweet strawberries. Each slice of this bread is moist, tender, and dotted with juicy bits of red berries.
No ratings yet
Print Recipe Pin Recipe
Prep Time 20 minutes mins
Cook Time 1 hour hr
Course Breakfast, Cakes, Dessert, Snack
Cuisine American
Servings 8 Servings
Calories 364 kcal

Ingredients


  • 1/2 cup Butter, softened I used salted butter.
  • 1/2 cup Jaggery powder or sugar You can use granulated sugar, caster sugar, or cane sugar instead of jaggery powder.
  • 2 Eggs
  • 1.5 tsp Vanilla extract
  • 3 Bananas, mashed
  • 1.5 cups Wholewheat flour
  • 1.5 tsp Baking powder
  • 1/2 tsp Baking soda
  • 1 cup Strawberries, diced - tossed in 1 tsp all-purpose flour
  • 1/2 cup Mini chocolate chips

Cake Topping ( Optional)

  • Diced strawberries and Chocolate chips

Instructions
 

  • Preheat your oven to 180 C. Grease a loaf pan. You can use 8"*4" or 9"*5".
  • In a large bowl, combine the softened butter and jaggery powder or sugar.
  • Beat well using a whisk or an electric beater until creamy.
  • Add the eggs and vanilla extract, and beat well.
    If the mixture looks curdled, don't worry, and continue with the recipe!
  • Mix in the mashed bananas.
  • Sift the flour, baking powder, and baking soda into the bowl.
  • Mix until no white streaks remain. Please do not overmix.
  • Fold in the flour-tossed strawberries and chocolate chips.
  • Transfer the batter to the prepared pan. Top with extra strawberries and chocolate chips, if you wish.
  • Bake at 180 C for 50-60 minutes or until a skewer inserted in the center comes out clean with just a few moist crumbs attached.
  • Let the cake cool in the pan for 10 minutes before turning it out on a cooling rack to cool
  • Dust with icing sugar if you wish. Slice and serve. Enjoy!

Video

Notes

  • Siftingย the dry ingredientsย breaks big lumps, makes mixing the banana bread with strawberries easier, and gives a consistent batter.
  • Tossย your dicedย strawberriesย inย a little bit ofย flourย before you fold them into the batter so theyย donโ€™t sinkย to the bottom of the strawberry loaf cake.
  • Donโ€™t overmixย the batter in this strawberry banana bread recipe, or youโ€™ll have a dense loaf.
  • My strawberry banana bread was baked in about an hour. When aย skewerย inserted in the centerย comes out clean,ย thatโ€™s when yours is done.
  • If you notice the top of the breadย browningย too much,ย loosely coverย itย with aluminum foil.

Nutrition

Serving: 1 SliceCalories: 364kcalCarbohydrates: 51gProtein: 5gFat: 16gSaturated Fat: 9gPolyunsaturated Fat: 1gMonounsaturated Fat: 3gTrans Fat: 0.5gCholesterol: 74mgSodium: 265mgPotassium: 232mgFiber: 2gSugar: 26gVitamin A: 475IUVitamin C: 15mgCalcium: 80mgIron: 2mg
Tried this recipe?Let us know how it was!

Easy Korean Strawberry Milk

January 8, 2024

Easy Korean Strawberry Milk

Get ready to be truly addicted to Korean strawberry milk! A super refreshing and delightful drink, itโ€™s made with just 3 ingredients: strawberry, milk, and sugar!

Strawberry Milk in a glass with a glass straw and ingredients in the background.

I am the biggest K-drama fan. Given me anything Korean, I will dive into it, and their recipes are God to me. From Korean pickled radish to Korean braised potatoes to Korean corn cheese, Iโ€™ve tried it all.

So, even though itโ€™s cold, when I learned about Korean strawberry milk, I just had to make it. Plus, with berries in season, I didnโ€™t want to miss the opportunity to create another healthy, happy (and somewhat indulgent) drink!

My home has had it for a couple of weeks now. Itโ€™s devastatingly good and a fantastic break from the hearty, heavy winter food!

Strawberry milk in a glass with a glass straw on a small plate.
[feast_advanced_jump_to]

What Is Korean Strawberry Milk?

Strawberry milk is an iconic beverage in South Korea known for its dreamy pink hue and luscious flavor. It's taken the world by storm because it is ridiculously easy to make and just as delicious.

You purรฉe plump, ruby-red strawberries and sugar into a velvety concoction. Pour a generous helping of creamy milk, and what you get is sweet and tart bliss.

Itโ€™s also known as a Korean strawberry latte, even though there is no caffeine because sometimes itโ€™s served with frothed milk or whipped cream.

Why You'll Love This Recipe

  • Swell way to brighten up mornings.
  • A great dessert to conclude dinner with a sweet note
  • Thereโ€™s something about the cool, creamy sip of strawberry and milk that just hits!
  • Pretty, pink, and full of fresh strawberry flavor in different textures, from purรฉe to chunks, the drink is a sensationโ€”visually enchanting and mouth-watering.

Recipe Ingredients

Strawberries: There areย two ways toย make this Korean strawberry milk drink. You canย either cook the berriesย (as I did)ย or directly use the maceratedย strawberries. The latter is more perishable and works if youโ€™re planning to make the sweet drink the same day. On the other hand, cooking preserves the syrup and increases its shelf life.

Milk: My preference for this Korean drink recipe was homemade almond milk. Trust me, once youโ€™ve tried fresh, creamy almond milk made at home, youโ€™ll never return to store-bought. Cashew milk or oat milk will also work here.

Sugar: The original recipe for this Korean sweet drink calls for a 1:1 ratio of sugar and fruit. But that is just too much sugar for me, so I use far less. Itโ€™s also why I needed to cook the strawberry sugar. 

If you stick to the original ratio, then even without cooking, the macerated berries will last a long time. Why? Because the sugar acts as a preservative, prolonging its shelf life.

See the recipe card for full information on ingredients and quantities.

How To Make Korean Strawberry Milk

Step 1: Wash the strawberries well.

Step 2: Dry and slice into small pieces.

chopped strawberries on a wooden chopping board.

Step 3: Toss them with sugar and set aside for 5 minutes for the juices to macerate.

Strawberries mixed with sugar in a bowl.

Step 4: Transfer to a saucepan and, on low-medium heat, cook till the berries soften, and the juices start running. About 5 to 7 minutes.

strawberry and sugar mixture in a saucepan.

Step 5: Cool the strawberry syrup mixture completely.

strawberries getting cooked in a saucepan.

Step 6: Transfer to a sterilized jar.

 Strawberry syrup in a glass jar.

Step 7: When youโ€™re ready to make fresh Korean strawberry milk, put 3 to 4 tablespoons of the syrup in a glass.

a few spoonfuls of strawberry syrup in glass placed on a small plate.

Step 8: Top with your milk of choice. Garnish with diced strawberries.

Milk for the strawberry milk in a glass pitcher.

Final Step: Serve the fresh strawberry milk!

homemade Korean strawberry milk in a glass with a glass straw on a small plate.

Pro Tips

  • How to clean strawberries:ย Give theย fruit a good rinse.ย Then soak in a big bowl of water mixed with baking soda and vinegar. The froth of the two chemicals pulls out all impurities. Drain the water. Rinse the berries again, so there is no trace of baking soda. Spread it on a kitchen towel to dry.
  • Donโ€™t feel like cutting fruit? Blitz the strawberriesย into a purรฉe. Keep it smooth or a little chunkyโ€”the choice is yours.
  • Constantly stirย the berries while cooking the Korean strawberry syrup so it doesnโ€™t burn.
  • Homemade strawberryย syrup stays good in the refrigeratorย for a couple of weeks, soย make it aheadย and keep using portions of it to whip up Korean strawberry milk whenever the mood strikes. You can also use this syrup to make strawberry madeleines or strawberry poke cake!
  • Donโ€™t forget toย sterilize the jar.ย It kills all germs and bacteria and makes the syrup last longer.
  • Never transfer hot strawberry syrup into a cool glass jar. It will shatter. So, make sure the strawberries have cooled completely.

How To Serve

While youโ€™re welcome to enjoy Korean strawberry milk as-is, I have to say that with whipped cream or a scoop of vanilla ice cream, itโ€™s true heaven.

But even in its most basic form, milk with strawberries is an absolute delight during the bleak winter months!

More Korean Recipes For You

  • Korean Cream Cheese Garlic Bread
    Korean Cream Cheese Garlic Bread
  • Best Korean Sausage Bread
    Best Korean Sausage Bread
  • Easy Korean Banana Milk
    Easy Korean Banana Milk
  • Korean Corn Cheese in a cast iron skillet.
    Korean Corn Cheese Recipe

Half the joy of cooking is sharing it with others. Thatโ€™s why Iโ€™m always eager to hear from you. So go right ahead and drop a comment or reach out onย Instagram,ย Pinterest,ย YouTube, orย Facebook. I hope you love this Korean strawberry milk as much as we do!

๐Ÿ“– Recipe

Easy Korean Strawberry Milk

Easy Korean Strawberry Milk

Natasha Minocha
Get ready to be truly addicted to Korean strawberry milk. A super refreshing and delightful drink, itโ€™s made with just 3 ingredients: strawberry, milk, and sugar!
No ratings yet
Print Recipe Pin Recipe
Prep Time 20 minutes mins
Cook Time 10 minutes mins
Course Drinks
Cuisine Korean
Servings 6 Servings
Calories 86 kcal

Ingredients


  • 14 oz Strawberries
  • 1/2 cup Sugar
  • Milk of choice I used Almond Milk

Instructions
 

  • Wash the strawberries well. Drain and cut into small cubes.
  • Toss them with the sugar and set aside for 5 -7 minutes.
  • Transfer this mixture to a saucepan, and on low-medium heat, cook till the berries soften and juices start running. About 5-7 minutes.
  • Cool the strawberry syrup completely, then transfer to a sterilized jar.
  • When you're ready to make fresh strawberry milk, put 3-4 tbsp of the syrup in a glass.
  • Top with milk of your choice. Mix well.
  • Garnish with chopped strawberries. Serve and enjoy!

Video

Notes

  • How to clean strawberries:ย Give theย fruit a good rinse.ย Then soak in a big bowl of water mixed with baking soda and vinegar. The froth of the two chemicals pulls out all impurities. Drain the water. Rinse the berries again, so there is no trace of baking soda. Spread it on a kitchen towel to dry.
  • Donโ€™t feel like cutting fruit? Blitz the strawberriesย into a purรฉe. Keep it smooth or a little chunkyโ€”the choice is yours.
  • Constantly stirย the berries while cooking the Korean strawberry syrup so it doesnโ€™t burn.
  • Homemade strawberryย syrup stays good in the refrigeratorย for a couple of weeks, soย make it aheadย and keep using portions of it to whip up Korean strawberry milk whenever the mood strikes. You can also use this syrup to make strawberry madeleines or strawberry poke cake!
  • Donโ€™t forget toย sterilize the jar.ย It kills all germs and bacteria and makes the syrup last longer.
  • Never transfer hot strawberry syrup into a cool glass jar. It will shatter. So, make sure the strawberries have cooled completely.
  • If serving one glass at a time, refrigerate the remaining strawberry syrup.

Nutrition

Serving: 4 tbspCalories: 86kcalCarbohydrates: 22gProtein: 0.4gFat: 0.3gSaturated Fat: 0.01gPolyunsaturated Fat: 0.1gMonounsaturated Fat: 0.03gSodium: 1mgPotassium: 102mgFiber: 1gSugar: 20gVitamin A: 8IUVitamin C: 39mgCalcium: 11mgIron: 0.3mg
Tried this recipe?Let us know how it was!

Cranberry Brie Puff Pastry Bites

December 28, 2023

Cranberry Brie Puff Pastry Bites.

Cranberry Brie puff pastry bites are a real showstopper. If youโ€™re looking for easy savory snacks with puff pastry, these are the best appetizers. Super simple puff pastry pinwheels look gourmet and complicated but are made with just 5 ingredients. Thatโ€™s it!

Cranberry Brie Puff Pastry bites on parchment paper with fresh rosemary.

Crispy, a little sweet, and nicely savoryโ€”there's something magical about the combination of gooey melted brie and the tart pop of cranberries.

It's like a flavor explosion wrapped up in flaky, buttery puff pastry and what I call a savory appetizer deluxe. But here's the best partโ€”I couldnโ€™t imagine making anything easier and faster than cranberry brie puff pastry bites.

I'm talking about minimal effort for maximum flavor. Honestly, I canโ€™t even call it a recipe. Whether you're hosting a festive get-together or just treating yourself to a night of indulgence, these puff pastry appetizers (savory) are bliss.

[feast_advanced_jump_to]
Cranberry Brie Puff Pastry Bites on parchment paper with fresh rosemary sprigs.

Why You'll Love This Recipe

Compelling, addictive, and seductive, the easiest appetizer there is!

They look super fancy and impressive.

Super quick, and everyone loves them.

Perfect for an elegant get-together, a laid-back brunch, or an evening snack!

Ingredients For Cranberry Brie Puff Pastry Bites

Puff pastry: While you can make your own, I found it easier to use store-bought puff pastry for these savory pinwheels (about 17 ounces / 500 grams).

Cheese: Brie melts into this beautiful concoction. Itโ€™s the most crowd-pleasing cheese ever. But Iโ€™d suggest using whatever is locally available to youโ€”feta, goat cheese, or Camembert.

Cranberry (along with brie) is the star of these brie puff pastry bites. Dried cranberries are the best here, not fresh or frozen.

Nuts: You can leave out the walnuts or swap them with pecans, almonds, or hazelnuts; just chop them up finely.

Butter lends that extra punch of savory flavor to the appetizer and also helps the filling adhere to the pastry.

Optional toppings: Add a dollop of honey or a dusting of powdered sugar on hot-out-of-the-oven brie puff pastry bites if you like.

Recipe Variations

Make itย herby: Add choppedย rosemary or thymeย to the fillingย andย sprinkle it as soon as the puff pastry pinwheels come out of the oven for that heady aroma.

Make itย sweeter: I find the sweet and savory combination utterly delicious, and for me, this recipe finds the perfect balance. But if you want to make the puff pastry bites sweeter,ย sprinkle cinnamon and drizzle some honeyย in the filling.

How To Make

Step 1: Set the oven to preheat. Line your baking tray with Silpat or parchment paper.

Step 2: Lightly flour your work surface and roll the puff pastry into a largish rectangle (say, about 16" by 8" inches).

Rolled out puff pastry brushed with butter.
Small pieces of brie on top of the rolled out pastry.
cranberries, cheese and walnuts sprinkle on top of rolled out pastry.

Step 3: Brush the rolled pastry with butter. Cut the brie into small pieces and spread it, followed by walnuts and cranberries.

puff pastry with the cheese and cranberry filling getting rolled into a tight log.

Step 4: Roll the cranberry brie-topped puff pastry into a tight log starting from the long side. Brush with melted butter.

Cut pastry slices on parchment lined baking tray.

Step 5: Slice the log into 1/4-inch-thick pastry wheels with a sharp knife. Place on your prepped tray.

Step 6: Bake for 20 to 22 minutes until the cranberry tartlets are crispy and golden. Garnish with rosemary sprigs if you want.

Step 7: Cool for a couple of minutes and serve warm!

Cranberry Brie Puff Pastry Bites

Top Tips

  • If the puffed pastry brie cranberry log feels too soft, refrigerate it till it firms up.
  • To get clean cuts from the puff pastry log, make sure the dried cranberries and walnuts are chopped finely.
  • I removed most of the rind from the brie to make the puff pastry savory snacks as smooth as possible. Keep as much or as little of it as you want.
  • You can store these cranberry brie bites in an air-tight container in the refrigerator for up to 5 days. Reheat in the oven or air-fryer.
  • You can make the puff pastry log with the filling a day in advance, wrap tightly in plastic wrap and refrigerate until ready to slice and bake.
Cranberry Brie Puff Pastry Bites

More Easy Appetizer Ideas

  • pumpkin cranberry crackers in a bowl on a plaid napkin.
    Pumpkin Cranberry Crackers
  • Easy Air Fryer Falafel Recipe
    Easy Air Fryer Falafel Recipe
  • Pumpkin Pie Spiced Almonds | Pumpkin Spiced Roasted Almonds
    Pumpkin Pie Spiced Almonds
  • A silver cheese platter with cheese, soup sticks, crackers,fruits, olives, nuts and jam.
    How To Make The Perfect Cheese Board

Half the joy of cooking is sharing it with others. Thatโ€™s why Iโ€™m always eager to hear from you. So go right ahead and drop a comment or reach out onย Instagram,ย Pinterest,ย YouTube, orย Facebook. I hope you love these brie puff pastry bites as much as we do!

๐Ÿ“– Recipe

Cranberry Brie Puff Pastry Bites.

Cranberry Brie Puff Pastry Bites

Natasha Minocha
Brie puff pastry bites are a real showstopper. If youโ€™re looking for easy savory snacks with puff pastry, then these are the best appetizers. Super simple puff pastry pinwheels look gourmet and complicated but are made with just 5 ingredients!
No ratings yet
Print Recipe Pin Recipe
Prep Time 10 minutes mins
Cook Time 22 minutes mins
Course Appetizer
Cuisine American, World
Servings 22 pinwheels
Calories 182 kcal

Ingredients


  • 17 oz Puff pastry
  • 2 tbsp Melted butter
  • 6 oz Brie, cut into small pieces
  • 1/2 cup Chopped walnuts
  • 1/2 cup Dried cranberry
  • Fresh rosemary for garnish Optional

Instructions
 

  • Set the oven to preheat to 190 C. Line your baking tray with Silpat or parchment paper.
  • Lightly flour your work surface and roll the puff pastry into a large rectangle (say, about 16 by 8 inches).
  • Brush the rolled pastry with butter. Cut the brie into small pieces and spread it, followed by chopped walnuts and cranberries.
  • Roll the cranberry brie-topped puff pastry into a tight log starting from the long side.
  • Brush the log with melted butter and slice it into 1/4-inch-thick pastry wheels with a sharp knife.
  • Place on your prepped tray.
  • Bake for 20 to 22 minutes until the cranberry pinwheels are crispy and golden.
  • Cool for a couple of minutes and serve warm. Garnish with rosemary sprigs. Enjoy!

Video

Notes

  • If the puffed pastry brie cranberry log feels too soft, refrigerate it till it firms up.
  • To get clean cuts from the puff pastry log, make sure the dried cranberries and walnuts are chopped finely.
  • I removed most of the rind from the brie to make the puff pastry savory snacks as smooth as possible. Keep as much or as little of it as you want.
  • You can store these cranberry brie bites in an air-tight container in the refrigerator for up to 5 days. Reheat in the oven or air-fryer.
  • You can make the puff pastry log with the filling a day in advance, wrap tightly in plastic wrap, and refrigerate until ready to slice and bake.

Nutrition

Serving: 1 PinwheelCalories: 182kcalCarbohydrates: 13gProtein: 4gFat: 13gSaturated Fat: 4gPolyunsaturated Fat: 2gMonounsaturated Fat: 6gTrans Fat: 0.04gCholesterol: 10mgSodium: 112mgPotassium: 39mgFiber: 1gSugar: 2gVitamin A: 78IUVitamin C: 0.04mgCalcium: 20mgIron: 1mg
Tried this recipe?Let us know how it was!

The BEST Cranberry Pound Cake

December 27, 2023

The BEST Cranberry Pound Cake

Cranberry pound cake is outrageously delicious. With a dense but moist crumb crammed with juicy bites of tart cranberries, itโ€™s one of my best cream cheese pound cake recipes. Charming and festive, itโ€™s topped with a flood of zingy citrus icing!

 The BEST Cranberry Pound Cake

Slice the pound cake with cranberries, and you have a stunner on your hands. Strikingly gorgeous, the cake with cranberries has a scrumptious balance of sweetness and tanginess in every luscious bite.

The cranberries burst into fruity goodness, complementing the nutty flavor of the walnuts. The orange zest adds jazz and brightness to the crumb thatโ€™ll have you dancing with joy and the word โ€œloveโ€ flying about.

[feast_advanced_jump_to]
 The BEST Cranberry Pound Cake

WHY TRY THIS CRANBERRY POUND CAKE?

The recipe for this bundt cake with cranberries is a keeper.

Bright and citrus-kissed, itโ€™s exceptionally good with tea time.

The pound cake with cream cheese is a brunch favorite, with its rich, moist texture and cranberry-infused filling.

Delicious as dessert during a New Yearโ€™s party and fantastic as a homemade gift for holidays and beyond!

HOW TO MAKE CRANBERRY BUNDT CAKE?

Step 1: Set your oven to preheat. Mix vinegar with warm milk and set aside till it curdles into buttermilk.

Step 2: Beat softened butter and cream cheese.

Step 3: Mix in the vanilla extract, followed by the buttermilk.

Step 4: In another bowl, sift the baking powder, baking soda, and flour.

Steps for making batter for  Cranberry Pound Cake

Step 5: Combine the wet and dry ingredients.

batter for Cranberry Pound Cake

Step 6: Fold in lots of orange zest, finely chopped walnuts, and frozen cranberries.

Fold in frozen cranberries, chopped walnuts, orange zest

Step 7: Transfer the cranberry cream cheese pound cake batter to the bundt pan.

cranberry pound cake batter in a bundt pan

Step 8: Bake the pound cake for 50 minutes, or until a skewer inserted comes out with a few moist crumbs attached.

Baked Cranberry Pound Cake

Step 9: Cool the cranberry pound cake in the pan for 10 to 15 minutes.

Step 10: Carefully turn it over on a wire rack and then cool completely.

 Cranberry Pound Cake on a serving platter

Optional step: Whisk together icing sugar and orange juice, and then pour the glaze over the cooled cranberry bread.

Final step: Garnish with orange zest and gold sugar sprinkles, and then serve!

 The BEST Cranberry Pound Cake

CRANBERRY ORANGE BUNDT CAKE RECIPE NOTES

  • Donโ€™t thaw the frozen cranberries; they cook as the eggless bundt cake bakes.
  • Toss your cranberries in flour before you fold them into the cranberry orange bundt batter so they donโ€™t sink to the bottom.
  • Liberally grease your bundt pan. Then dust it with flour so the baked cake slides right out.
  • Fresh orange zest does wonders for the cake, filling the crumb with a flavor that nothing else can impart. So, use an entire orange. It may seem like a lot, but itโ€™s needed, so donโ€™t skimp.
  • Use the juice of the same orange to make the glaze.

HOW TO STORE CREAM CHEESE POUND CAKES?

My cranberry pound cake disappeared in less than 3 days. But it keeps well for a week on the countertop. If itโ€™s not cold in your corner of the world, refrigerate it. Nuke it in the microwave for 15โ€“20 seconds before eating.

 Orange Cranberry Pound Cake

ORANGE CRANBERRY BUNDT CAKE SUBS & SWAPS

Butter: Make sure itโ€™s softened. I used regular salted. For unsalted butter, add a quarter teaspoon of salt to the dry ingredients of the cranberry bundt cake.

Cream cheese: Store-bought or homemade cream cheese are both fine; just make sure itโ€™s softened so it mixes well in the batter.

Sugar: Regular, caster or cane sugar will work like a charm in this recipe for cranberry pound cake.

a bite of  Cranberry Pound Cake on a fork

Buttermilk: White or regular vinegar - either can be used to make buttermilk at home. If youโ€™re not too confident about it, stick to store-bought. It keeps your bakes super moist and adds a kick of flavor youโ€™ll love.

Flour: All-purpose, whole wheat, or 50-50 of both; pick whatever tickles your palate.

Cranberries: I got my hands on a bag of frozen cranberries, so thatโ€™s what went into the bundt cake, but fresh berries are good too. If frozen or fresh cranberries are not available to you, try dried, like I did for my cranberry orange loaf.

Nuts: You can leave the walnuts out or substitute them with pistachios and make a Christmas cranberry pound cake with red and green color pops.

Slice of Cranberry Pound Cake

MORE EASY NEW YEARโ€™S DESSERTS

Mulled Wine Cake

Cream Cheese Pound Cake

Chocolate Peppermint Fudge

Strawberry Cream Cheese Pound Cake

Chocolate Raspberry Brownie Bites

Half the joy of cooking is sharing it with others. Thatโ€™s why Iโ€™m always eager to hear from you. So go right ahead and drop a comment or reach out on Instagram, Pinterest, YouTube, or Facebook. I hope you love this cranberry pound cake as much as we do!

๐Ÿ“– Recipe

The BEST Cranberry Pound Cake

The BEST Cranberry Pound Cake

Natasha Minocha
Cranberry pound cake is outrageously delicious. With a dense but moist crumb crammed with juicy bites of tart cranberries, itโ€™s one of my best cream cheese pound cake recipes. Charming and festive, itโ€™s topped with a flood of zingy citrus icing!
No ratings yet
Print Recipe Pin Recipe
Prep Time 20 minutes mins
Cook Time 50 minutes mins
Course Dessert
Cuisine American
Servings 10 Servings
Calories 347 kcal

Ingredients


  • 1 1 /4 cup Milk
  • 1 tbsp Vinegar
  • 2 1/4 cup All-purpose flour
  • 2 tsp Baking powder
  • 1/2 tsp Baking soda
  • 1/2 cup Butter, softened I used salted butter. If using unsalted butter, add 1/4 tsp salt to the dry ingredients
  • 1/2 cup Cream cheese softened
  • 3/4 cup Granulated sugar
  • 1.5 tsp Vanilla extract
  • 1.5 cup Frozen cranberries
  • 1/2 cup Chopped walnuts
  • Zest from 1 whole orange

Orange Glaze

  • 1/3 cup Icing sugar
  • 2-3 tbsp Orange juice

Instructions
 

  • Preheat your oven to 180C. Grease your bundt pan very very well. You can also use an 8" or 9" round cake tin.
  • In a small bowl, mix the milk and vinegar. Set aside for a few moments. This is your buttermilk.
  • While the milk curdles, sift all-purpose flour, baking powder, and baking soda.
  • In another bowl, using an electric beater, cream the butter, cream cheese, and sugar till light and fluffy.
  • Add in the buttermilk along with vanilla extract.
  • Add the dry ingredients to it to form a thick, smooth batter.
  • Fold in orange zest, chopped walnuts, and frozen cranberries ( tossed in 1 tsp of flour).
  • Pour the batter into the prepared Bundt pan and bake at 180 C for 40-50 minutes or until a skewer inserted in the thickest part of the cake comes out clean.
  • Allow to cool in the pan for 10-15 minutes before turning it out on a cooling rack.

Orange Glaze

  • Combine icing sugar and orange juice in a small bowl until a smooth, thick mixture is formed.
  • Pour over the cooled cake. Garnish with more orange zest and gold sugar sprinkles.
  • Let the glaze set for 5-6 minutes. Slice and serve. Enjoy!

Nutrition

Serving: 1 SliceCalories: 347kcalCarbohydrates: 47gProtein: 7gFat: 15gSaturated Fat: 7gPolyunsaturated Fat: 3gMonounsaturated Fat: 3gTrans Fat: 0.4gCholesterol: 30mgSodium: 318mgPotassium: 179mgFiber: 2gSugar: 23gVitamin A: 360IUVitamin C: 4mgCalcium: 160mgIron: 2mg
Tried this recipe?Let us know how it was!

Chocolate Raspberry Brownie Bites

December 22, 2023

Chocolate Raspberry Brownie Bites

These chocolate raspberry brownie bites are rich, fudgy, and packed with deep chocolate flavor with bursts of juicy raspberries. Quick, easy, and perfectly portioned, they're an easy, fun chocolate treat you'll want on repeat!

Chocolate Raspberry Brownie Bites

With crackly tops, soft, gooey centers, and a perfect balance of sweet and tart, these thick fudgy brownie bites come together quickly with simple ingredients. Whether you're baking for a party, gifting, or an everyday treat, this easy chocolate raspberry brownie recipe is always a hit!

Looking for more fun treats? Try these homemade cosmic brownies, chocolate peanut butter oatmeal bars, and easy Biscoff truffles!

[feast_advanced_jump_to]
Chocolate Raspberry Brownie Bites

Why You'll Love This Recipe

โœจ Raspberries and chocolate are a classic match. Their sweet- tart flavor pairs beautifully with rich, fudgy chocolate.

โœจ The brownies come together easily and quickly with simple steps. Great for beginner bakers.

โœจ Cute, bite-sized, and festive, they are for Valentine's Day and any other celebration!

โœจ Easy to serve and share, these mini brownie bites are wonderful for parties and potlucks!

Recipe Ingredients

Butter: I used the regular, salted butter. Add a quarter teaspoon of salt to the brownie bites recipe if you have unsalted butter.

Flour: All-purpose flour works the best here.

Eggs: For moisture and richness. Make sure your eggs are at room temperature.

Sugar: I love the thick, caramelly flavor of muscovado sugar. Plus, it keeps the chocolate raspberry brownie moist. That said, brown sugar, caster sugar, or granulated sugar are good substitutes.

Vanilla extract:ย For rounding up the flavors. Use store-bought or homemade vanilla extract.

Chocolate: As I always say, findย good-quality couverture chocolate,ย and your bakes will go from good to wow. My recipe has 55% dark chocolate, but you can use whatever kind you prefer.

Cocoa powder: For a really deep chocolate flavor!

Raspberries: Use fresh or frozen raspberries. If using frozen berries, there is no need to thaw them.

Please see the recipe card below for full information about the ingredients and quantities.

How To Make Chocolate Raspberry Brownie Bites

Step 1: On a double boiler or in the microwave, combine butter and chocolate chips.

butter and chocolate chips in a glass bowl.

Step 2: Stir until you have a glossy mixture, and then add sugar.

mixing sugar in melted butter chocolate mixture.

Step 3: Mix well and let the brownie batter cool for 5 minutes.

Step 4: Whisk in the eggs and vanilla extract. Mix well.

Eggs and vanilla extract on top of chocolate mixture in a bowl.

Step 5: Sift in flour and cocoa powder. Donโ€™t overmix. Combine just until no dry streaks are visible.

Flour and cocoa powder on top of the chocolate mixture in a bowl.

Step 6: Fold in chocolate chips and frozen raspberries.

chocolate chips and frozen raspberries on the brownie batter.

Step 7: Working with quick hands (I explain in the notes why), drop 2 to 2.5 tablespoons of the chocolate raspberry brownie batter into the cavities of a liberally greased mini muffin pan.

Brownie batter in a mini muffin tray.

Step 8: Level the top slightly. Garnish with a frozen raspberry and a couple of more chocolate chips (if your heart so desires).

Step 9: Bake for 12 to 14 minutes.

Final step: Cool for a good 15โ€“20 minutes. Carefully remove from the pan, cool, and serve. These brownie bites are best served chilled!

Baked brownies in a muffin tray.

Top Tips

  • The trick to baking brownies in a mini muffin tin is toย grease the cavities really, really well. Or line them with silicone liners.ย 
  • Use room-temperature ingredients. They mix faster and give the best result.
  • There is no need to thaw the raspberries. Use them frozen, with a gentle hand so they donโ€™t break.
  • Dust off yourย digital kitchen scale and measureย each ingredient. I cannot emphasize enough how useful it is, particularly with theย flour, too muchย of which makes the chocolateย brownies dense.
  • Once you add the raspberries to the batter,ย work super quicklyย because, as they thaw, they can create a liquid mess.
  • Do not overbakeย these raspberry brownie bites. Slide them out of the oven as soon as you notice the brownie top is shiny and crackly.
  • Itโ€™sย important to let the brownies coolย before you remove them from the muffin pan. Use the tip of your knife to loosen the edges. Take out the brownies and then finish cooling on the wire rack.
  • Chill in the refrigerator for the fudgiest texture.
Chocolate brownies with raspberries on a platter.

Recipe FAQs

Can I bake chocolate raspberry brownie bites in a brownie pan?

Absolutely!ย You can bake these in an 8" or 9" square baking tin. Just remember to adjust the baking time.

How to store chocolate raspberry brownies?

Since this is a brownie with raspberries, it can get a little funky on the countertop. They are best stored in the refrigerator, in an airtight container, where they will be good for 10 days.

Can I freeze chocolate raspberry brownie bites?

Yes, these brownie bites freeze well. Cool the brownies, then store them in an airtight container for up to 1 month in the freezer. Thaw in the refrigerator or at room temperature before serving.

Can I use frozen raspberries for these brownie bites?

Yes, you can use frozen raspberries. Do not thaw them before using, as that can make the batter very wet.

How do I keep brownie bites fudgy and not cakey?

For fudgy raspberry brownie bites, avoid overmixing the batter and don't overbake them. Take them out when the centers are just set. That slight softness in the center gives you the rich, gooey texture.

Half a brownie on a plate to show the fudgy texture.

More Holiday Brownies

  • Squares of brownies with frosting and sprinkles on a parchment paper.
    Cosmic Brownies
  • Sourdough Peanut Butter Brownie| Egg;ess chocolate brownie recipe
    Sourdough Peanut Butter Brownies
  • Miso brownies cut into 16 squares on parchment paper with a knife.
    Fudgy Miso Brownies
  • Easy Gluten-Free Chocolate Brownies
    Easy Gluten-Free Chocolate Brownies

Half the joy of cooking is sharing it with others. Thatโ€™s why Iโ€™m always eager to hear from you. So go right ahead and drop a comment or reach out onย Instagram,ย Pinterest,ย YouTube, orย Facebook. I hope you love these chocolate raspberry brownie bites as much as we do!

๐Ÿ“– Recipe

Chocolate Raspberry Brownie Bites

Chocolate Raspberry Brownie Bites

Natasha Minocha
Indulgence takes on a whole new meaning with these divine chocolate raspberry brownie bites. The bite-sized morsels of sheer bliss embrace the happy juices of warm raspberry within their rich chocolatey goodness.
No ratings yet
Print Recipe Pin Recipe
Prep Time 25 minutes mins
Cook Time 20 minutes mins
Course Dessert
Cuisine American
Servings 30 Brownies
Calories 118 kcal

Ingredients


  • 1/2 cup Butter
  • 1 cup Dark chocolate chips 55% Dark chocolate
  • 1 cup Muscovado sugar You can also use brown sugar or regular granulated sugar
  • 2 Eggs
  • 1 tsp Vanilla extract
  • 3/4 cup All-purpose flour
  • 2 tbsp Cocoa powder
  • 1/3 cup Dark chocolate chips 55% dark chocolate
  • 1 cup Raspberry, frozen You can also use fresh raspberries

Instructions
 

  • Preheat your oven to 180 C/ 350 F. Butter the cavities of 2 12-cup mini-muffin pans.
  • Combine butter and chocolate chips in a large bowl. Place this bowl over a pan of just simmering water.
    You can also microwave these for 1.5 minutes - in spurts of 30 seconds.
    1/2 cup Butter, 1 cup Dark chocolate chips
  • Mix the chocolate and butter until melted.
  • Take it off the heat. Stir until the mixture is smooth and glossy.
  • Whisk in the sugar.
    1 cup Muscovado sugar
  • Let this mixture cool for 5 minutes, then add the eggs and vanilla extract. Whisk well for 1 minute.
    2 Eggs, 1 tsp Vanilla extract
  • Fold in the flourย and cocoa powder.
    3/4 cup All-purpose flour, 2 tbsp Cocoa powder
  • Fold in the chocolate chips and frozen raspberries.
    1/3 cup Dark chocolate chips , 1 cup Raspberry, frozen
  • Scoop the batter into the grease muffin tin. Top with a raspberry and a couple of chocolate chips.
  • Bake at 180 C / 350 F for 18 to 20 minutes or until the brownies are set and the tops are cracked and shiny. Let cool in the pan on a wire rack for 10 minutes.
  • Using the tip of a knife, carefully remove the brownies from the muffin molds and cool on a cooling rack.
  • Chill the brownies for at least 30 minutes before serving. Enjoy!
  • These keep well in the refrigerator, in an air-tight container, for 10-12 days.

Video

Notes

  • The trick to baking brownies in a mini muffin tin is toย grease the cavities really, really well. Or line them with silicone liners.ย 
  • Use room-temperature ingredients. They mix faster and give the best result.
  • There is no need to thaw the raspberries. Use them frozen, with a gentle hand so they donโ€™t break.
  • Dust off yourย digital kitchen scale and measureย each ingredient. I cannot emphasize enough how useful it is, particularly with theย flour, too muchย of which makes the chocolateย brownies dense.
  • Once you add the raspberries to the batter,ย work super quicklyย because, as they thaw, they can create a liquid mess.
  • Do not overbakeย these raspberry brownie bites. Slide them out of the oven as soon as you notice the brownie top is shiny and crackly.
  • Itโ€™sย important to let the brownies coolย before you remove them from the muffin pan. Use the tip of your knife to loosen the edges. Take out the brownies and then finish cooling on the wire rack.
  • Chill in the refrigerator for the fudgiest texture.

Nutrition

Serving: 1 BrownieCalories: 118kcalCarbohydrates: 15gProtein: 2gFat: 6gSaturated Fat: 4gPolyunsaturated Fat: 0.2gMonounsaturated Fat: 1gTrans Fat: 0.1gCholesterol: 19mgSodium: 40mgPotassium: 81mgFiber: 1gSugar: 10gVitamin A: 114IUVitamin C: 1mgCalcium: 35mgIron: 0.4mg
Tried this recipe?Let us know how it was!

Easy Mint Chocolate Chip Cookies Recipe

December 21, 2023

Easy Mint Chocolate Chip Cookies Recipe

The mint chocolate chip cookie recipe is phenomenal! Chunky and so flavorful, these are Christmas-day cookies. A must-have with a tall glass of milk!

Easy Mint Chocolate Chip Cookies Recipe

These are the easiest cookies to put together. They need just one bowl, one whisk, and the simplest ingredients.

A take on my gluten-free chocolate chip cookies, one bite of these peppermint extract cookies (or 4) will have you convinced that they are the best mint and chocolate chip cookies youโ€™ve ever had.

And if you chop up chocolate by hand (like I did), youโ€™d be in for the joy of big molten chunks bursting with mint flavor through each bite!

Easy Mint Chocolate Chip Cookies Recipe
[feast_advanced_jump_to]
Easy Mint Chocolate Chip Cookies Recipe

TRY THIS MINT CHOCOLATE CHIP COOKIE RECIPE

An easy one-bowl cookie for Christmas.

The soft cookie recipe doesn't require a lot of time or baking skills.

Fantastic chocolate chip cookie dough that you can customize in any way you want โ€“ add nuts, remove mint, or mix in cocoa.

Butter, eggs, brown sugar, caster sugar for making the mint chocolate chip cookies

HOW TO MAKE CHOCOLATE CHIP MINT COOKIES?

Step 1: Whisk together the melted, cooled butter with eggs, caster sugar, and brown sugar.

Step 2: Add in peppermint and vanilla extract.

Mix eggs, butter, caster sugar, brown sugar in a bowl

Step 3: Sift in flour, baking powder, baking soda, and salt (if using unsalted butter).

Sift in flour, baking soda baking powder into the egg butter mixture

Step 4: With a spatula, combine all the ingredients until they come together into a dough.

Step 5: Fold in mint chocolate chips. Mix until the chips are evenly distributed.

Add chocolate chunks to the cookie dough
Ready cookie dough

Step 6: Scoop the cookie dough with an ice cream scoop or two spoons onto a parchment paper-lined tray.

chill the cookie dough balls

Step 7: Chill the cookie dough balls for a minimum of 1 hour or up to 12 hours.

Bake the cookies

Step 8: Bake the chilled cookies in a preheated oven for 10 to 12 minutes.

Step 9: Sprinkle sea salt the second you take these cookies with mint out of the oven.

Baked cookies

Final step: Enjoy!

MINT CHOCOLATE CHIPS COOKIES NOTES

  • Melted, cooled butter is a lot easier to incorporate into the dough.
  • Keep all the ingredients at room temperature, especially if youโ€™re cutting up baking chocolate bars. Cold chocolate will crumble instead of breaking into chunks.
  •  Refrigerating the cookie helps โ€œsolidifyโ€ it and develops the flavors. Chilling also prevents the cookies from spreading in the oven and becoming thin.
  • Underbake these cookies. They are meant to be soft-baked with gooey pools of chocolate, surprising you. They harden as they cool, so if you overbake them, youโ€™ll get crunchy cookies. That said, if you prefer crispier mint choco cookies, give them another minute in the oven.
  • I love thick and chunky cookies. For flatter cookies, press the dough slightly with your palms before you bake.
  • The cookies stay well in an airtight container for a week to 10 days.
Easy Mint Chocolate Chip Cookies

INGREDIENTS FOR CHOCOLATE CHIP COOKIES

Chocolate: will make or break this mint chocolate chip cookie, so splurge on good quality. I couldnโ€™t find mint chocolate chips, so I got dark chocolate bars with mint flavor and chopped them up in chunks.

Theyโ€™re easily available online. I used Paul and Mike, Didier & Frank, and Lindt. If you get your hands on any other brand, use those. As long as you are generous with the chocolate, everything is golden. You want the cookies to be crammed with it.

Easy Mint Chocolate Chip Cookies

All-purpose flour: is the best choice, but buckwheat will also do well. Another option is half whole wheat flour and half all-purpose flour.

Egg: My peppermint and chocolate cookies have one full egg and one yolk. They add to the richness and give the cookies a lovely texture.

Flax eggs are a good substitute if you want eggless mint chocolate chip cookies. Mix 1 tablespoon flaxseed powder with 3 tablespoons of water to make 1 flax egg. To compensate for the egg yolk, add 2 flax eggs.

Brown sugar: lends the cookies a fantastic caramelly dimension that youโ€™ll start craving in all your bakes. Donโ€™t have it? Use muscovado sugar. Some swaps for caster sugar are cane and raw sugar.

Vanilla extract: Homemade or store-bought, both work.

Easy Mint Chocolate Chip Cookies

MORE COOKIE RECIPES

White Chocolate Cranberry Cookies

Peanut Butter Blossom Cookies

Lemon Crinkle Cookies

Eggless Chocolate Chip Cookies

Sourdough Oatmeal Walnut Cookies

Half the joy of cooking is sharing it with others. Thatโ€™s why Iโ€™m always eager to hear from you. So go right ahead and drop a comment or reach out on Instagram, Pinterest, YouTube, or Facebook. I hope you love these mint chocolate chip cookies as much as we do!

๐Ÿ“– Recipe

Easy Mint Chocolate Chip Cookies Recipe

Easy Mint Chocolate Chip Cookies Recipe

Natasha Minocha
The mint chocolate chip cookie recipe is phenomenal! Chunky and so flavorful, these are Christmas-day cookies. A must-have with a tall glass of milk! They are the easiest cookies to put together. They need just one bowl, one whisk, and the simplest ingredients.
No ratings yet
Print Recipe Pin Recipe
Prep Time 1 hour hr 15 minutes mins
Cook Time 14 minutes mins
Course Cookies, Snack
Cuisine American
Servings 24 Cookies
Calories 125 kcal

Ingredients


  • 1/2 cup Butter
  • 1 Egg
  • 1 Egg yolk
  • 1/3 cup Caster sugar
  • 1/4 cup Brown sugar
  • 2 tsp Vanilla extract
  • 1/2 tsp Peppermint extract
  • 1 3/4 cup All-purpose flour
  • 1/2 tsp Baking powder
  • 1/4 tsp Baking soda
  • 3/4 cup Dark mint chocolate, cut into small pieces You can also use mint-flavored chocolate chips
  • Sea salt for sprinkling on top

Instructions
 

  • Melt and cool the butter.
  • Add both sugars, egg, egg yolk, vanilla extract, and peppermint extract in the bowl and mix well.
  • Add the flour, baking powder, and baking soda and combine with a spatula or wooden spoon.
  • Fold in the mint chocolate chunks.
  • Drop by rounded tablespoon on a parchment paper-lined baking sheet. Chill the cookie dough for at least 1 hour up to 12 hours.
  • When you're ready to bake, preheat your oven to 180C.
  • Place the chilled cookie dough balls on a baking tray. Keep a little space between the cookies as they will spread a bit.
  • Bake for 12-14 minutes or until the cookie is lightly browned and just firm to touch.
    They do firm up further as they cool, so take care not to overbake them.
  • Sprinkle some sea salt on top as soon as the cookies come out of the oven.
  • Let the cookies sit on the tray for a minute then transfer to a wire rack to cool completely.
  • Serve warm or at room temperature. Enjoy!
  • These cookies keep very well in an air-tight container for up to 2 weeks.

Nutrition

Serving: 1 CookieCalories: 125kcalCarbohydrates: 15gProtein: 2gFat: 6gSaturated Fat: 4gPolyunsaturated Fat: 0.3gMonounsaturated Fat: 2gTrans Fat: 0.2gCholesterol: 26mgSodium: 55mgPotassium: 49mgFiber: 1gSugar: 7gVitamin A: 143IUCalcium: 15mgIron: 1mg
Tried this recipe?Let us know how it was!

Chocolate Peppermint Fudge - 4 Ingredients Only!

December 19, 2023

Chocolate Peppermint Fudge - 4 Ingredients Only!

Silky, minty, and fudgy, chocolate peppermint fudge is easy to love and super easy to make. Itโ€™s a 4-ingredient peppermint fudge recipe that barely takes 10 minutes to make but tastes as if you fussed over it for hours!

Chocolate fudge with crushed candy cane pieces on a plate.

Itโ€™s the tastiest time of the year, which means whipping up fudge without fail. I absolutely love making this homemade Christmas candy because itโ€™s delicious,ย absurdly simpleย to make, andย works like a charm!

This particular recipe for peppermint fudge is a take on my chocolate fudge recipes with condensed milk. The dreamy and beautiful combo of minty freshness and chocolate is always a win.ย 

[feast_advanced_jump_to]

Why You'll Love This Recipe

โœจ This is an easy chocolate peppermint fudge recipe. You donโ€™t need a long list of ingredients or equipment. Just melt, mix, pour, and chill.ย 

โœจ You can skip the stovetop and make the peppermint fudge in a microwave, too!ย 

โœจThe magical holiday combo of chocolate and peppermint works with dark, milk, or white chocolate: choose your favorite.

โœจ Whether youโ€™re making homemade Christmas gifts (like gingerbread kiss cookies), a last-minute dessert for dinner, or something to snack on while watching holiday movies, this chocolate-and-peppermint fudge is the recipe to keep on repeat.

โœจ This fudge has a long, long shelf life. Make it on Christmas Eve, and itโ€™ll keep well till New Year's!

Recipe Ingredients

4 ingredients for making peppermint fudge.

Condensed Milk: The base of this peppermint fudge is condensed milk. It keeps the fudge smooth, creamy, and perfectly sweet. Use regular sweetened condensed milk or homemade coconut condensed milk.

Butter: I used salted butter. If using unsalted butter, add a quarter teaspoon of salt.

Peppermint Extract is the star! It gives the fudge that holiday flavor.  I recommend finding the best quality you can.

Chocolate: ย Use any kind you love. I used 55% dark chocolate. But you can also try 70% dark chocolate for intense, rich dark chocolate peppermint fudge. If you prefer a softer, sweeter bite, then make white chocolate and peppermint fudge.

Sea Salt is magical. It balances the sweetness and makes the fudge more chocolatey. My advice? Donโ€™t skip it. I love adding sea salt to my chocolate desserts like these dark chocolate bark and chocolate orange tart. It just elevates the flavor so much!

Please see the recipe card below for full information about the ingredients and quantities.

Variations

Crushed candy cane is optional. I say go for it for the sparkle, texture, and extra peppermint joy.

Coffee: A teaspoon of powder intensifies the chocolate flavor.

Nuts: Add chopped pistachios or almonds for a nutty, crunchy fudge.

Swirl: Combine melted white chocolate and dark chocolate for a swirled peppermint fudge moment. Love pretty swirly desserts? Then, do try my white chocolate matcha bark and pumpkin cheesecake bars!

How To Make Chocolate Peppermint Fudge

Step 1: In a large heatproof bowl, combine room-temperature butter, couverture chocolate, and condensed milk. You can either microwave it in 30-second spurts or use a double boiler on the stovetop.

Butter, condensed milk, and chocolate in a large bowl.

Step 2: When everything is melted (takes about 1.5 - 2 minutes), let the shiny, glossy mixture cool a tad.

Step 3: Now add the peppermint extract.

Melted chocolate, butter, and condensed milk mixture in a mixing bowl.

Step 4: Pour the choc peppermint fudge into a square dish lined with parchment paper. Smooth the top slightly.

Step 5: Sprinkle crushed candy canes and press them down, pressing gently so they stick. Top with sea salt. Refrigerate until set.

Fudge mixture in parchment lined pan.

Final step: Slice and serve!

Fudge cut into squares on parchment paper.

Pro Tips

  • Donโ€™t overheat the chocolate. Stir constantly so the chocolate doesnโ€™t seize or burn.
  • Make sure all the ingredients are at roomย temperature.ย This helps in even and quick blending and also ensures that the chocolate doesn't seize.
  • Make sure the mixture cools a bit before you whisk in the peppermint extract.
  • Give the chocolate and peppermint fudge a lot of time in the fridge to set properly.
  • A hot, sharp knife makes clean cuts. Dip in warm water, wipe, slice.
  • The fudge tastes best at room temperature. So be sure to take it out of the refrigerator at least 30 minutes before serving.
Chocolate fudge squares on parchment paper.

How To Decorate

  • Top with crushed candy cane for a classic Christmas look.
  • Drizzle melted white chocolate across the top for a pretty design, as I did with my Biscoff shortbread.
  • Add red and green sprinkles for festive flair, as I did with my almond ricotta cookies.
  • Press in mini marshmallows for a hot-chocolate-inspired version.
  • Sprinkle edible gold dragรฉes (much like my Baileys Cheesecake) for a New Yearโ€™s Eve dessert moment.
Chocolate fudge with crushed candy cane in a plate with one half eaten piece.

Recipe FAQs

Can I make this peppermint fudge in the microwave?

Absolutely! Just microwave the chocolate, butter, and condensed milk in 30-second bursts, stirring well after each. Avoid overcooking.

Why is my chocolate peppermint fudge grainy?

Whether you are melting the butter, chocolate, and condensed milk mixture in a microwave or on the stove top, keep the heat low and don't overcook the mixture. Remove from heat as soon as everything starts melting, then stir well until glossy and well combined.

How long will peppermint fudge last?

It keeps perfectly in the fridge for 10โ€“15 days in an air-tight container. Remember to take it out at least 30 minutes before serving. This chocolate fudge tastes best at room temperature.

Can I freeze chocolate peppermint fudge?

Yes, you can. Wrap well in foil or cling wrap, and then place in a container before storing in the freezer for up to 2 months. Thaw before you serve.

More Chocolate Treats

  • Baileys Chocolate Truffles easy fun recipe for Valentines Day
    Baileys Chocolate Truffles
  • Easy Chocolate Salami Recipe
    Easy Chocolate Salami Recipe
  • Chai Spiced Chocolate Truffles | Easy Chocolate Truffles Recipe
    Chai Spiced Chocolate Truffle
  • pieces of chocolate bark with marshmallows and almonds on a plate.
    Rocky Road Chocolate Bark

Half the joy of cooking is sharing it with others. Thatโ€™s why Iโ€™m always eager to hear from you. So go right ahead and drop a comment or reach out onย Instagram,ย Pinterest,ย YouTube, or Facebook. I hope you love this chocolate peppermint fudge as much as we do!

๐Ÿ“– Recipe

Chocolate Peppermint Fudge - 4 Ingredients Only!

Chocolate Peppermint Fudge - 4 Ingredients Only!

Natasha Minocha
Chocolate peppermint fudge is an easy, 4-ingredient, superfast recipe. Silky, fudgy, and with a fabulous peppermint flavor, this chocolate Christmas fudge stays well for up to 2 weeks!
No ratings yet
Print Recipe Pin Recipe
Prep Time 5 minutes mins
Cook Time 2 minutes mins
Chilling Time 2 hours hrs
Course Dessert
Cuisine American
Servings 36 pieces
Calories 96 kcal

Ingredients


  • 14 oz Sweetened condensed milk
  • 2 cups Dark chocolate chips 55%
  • 2 tbsp Butter I used salted butter. You can use unsalted butter and add 1/4 tsp salt to the mixture.
  • 1/2 tsp Peppermint extract
  • Crushed candy canes for topping Optional
  • Sea salt flakes for topping

Instructions
 

  • Combine the condensed milk, chocolate chips, and butter in a large heat-proof bowl.
  • Melt it all together in the microwave. Stirring every 30 seconds, until the mixture is smooth, thick, and shiny. This took me 1.5 minutes.
    You can use a double-boiler or place the ingredients in a heavy-bottomed pan and melt on low heat. If you use these methods, it will take about 8-10 minutes for everything to melt. Please make sure you are constantly stirring this mixture.
  • Let the mixture cool for a few minutes, then add the peppermint extract. Mix well.
  • Pour into a parchment paper-lined 8" square pan.
  • Smoothen the top and sprinkle some crushed candy cane and sea salt flakes if you want. Press them down gently.
  • Refrigerate for 2 hours or until set. Cut into small squares and serve. Enjoy!
    For the best taste, serve at room temperature!

Video

Notes

  • Donโ€™t overheat the chocolate. Stir constantly so the chocolate doesnโ€™t seize or burn.
  • Make sure all the ingredients are at roomย temperature.ย This helps in even and quick blending and also ensures that the chocolate doesn't seize.
  • Make sure the mixture cools a bit before you whisk in the peppermint extract.
  • Give the chocolate and peppermint fudge a lot of time in the fridge to set properly.
  • A hot, sharp knife makes clean cuts. Dip in warm water, wipe, slice.
  • The fudge tastes best at room temperature. So be sure to take it out of the refrigerator at least 30 minutes before serving.

Nutrition

Serving: 1 PieceCalories: 96kcalCarbohydrates: 12gProtein: 2gFat: 5gSaturated Fat: 4gPolyunsaturated Fat: 0.1gMonounsaturated Fat: 0.5gTrans Fat: 0.03gCholesterol: 6mgSodium: 30mgPotassium: 105mgFiber: 0.4gSugar: 9gVitamin A: 50IUVitamin C: 0.3mgCalcium: 62mgIron: 0.2mg
Tried this recipe?Let us know how it was!

Soft Lemon Crinkle Cookies Recipe

December 16, 2023

lemon crinkle cookies on a platter with Christmas decorations around.

Crackly and chewy, these lemon crinkle cookies are a burst of sunshine. Soft, lemony, and bright, these lemon cookies are totally irresistible!

Soft Lemon Crinkle Cookies Recipe

Adapted from Sallyโ€™s Baking Addiction, these lemon crinkle cookies are a spot of refreshing air, especially after a month of deep, chocolatey, and cinnamon flavors!

The perfect balance of citrus and sweetness, these soft lemon cookies are absolutely lovely to nibble on while you bask in the sun, sipping a cup of hot tea. They fit right into your festive Holiday cookie box! I promise these melt in the mouth, brighten up any occasion, and leave your taste buds singing with delight!

Love lemony flavor in your cookies? Then you must try my lemon crescent cookies, almond cinnamon cookies, and Christmas wreath cookies!

lemon crinkle cookies on a platter with Christmas decorations around.
[feast_advanced_jump_to]

Why You'll Love This Recipe

โœจ Bright lemon flavor from fresh lemon juice and zest!

โœจ Soft, cake-like texture! Thanks to the cornstarch, these lemon cookies are tender and melt-in-your-mouth!

โœจ The sugary, crackly tops make these lemon crinkle cookies so pretty and festive.

โœจ Make-ahead friendly - The dough stays well for up to 3 days in the fridge, so you can make the cookies on demand!

โœจ Easy to make! With simple ingredients and straightforward steps, these soft lemon cookies are easy to master, even for a beginner baker!

Reader Love โค๏ธ

Loved by my family โ€ฆI was a bit apprehensive as they were quite different from the choco chip
variety that kids love but they were a hit. - Pratibha

Lemon crinkle cookies on a serving platter.

Recipe Ingredients

Butter: Make sure the butter is softened for the best texture. You can use salted or unsalted butter. Do add a quarter teaspoon of salt if using unsalted.

Cornstarch: Also known as cornflour. This is what makes the lemon crinkle cookies soft and tender.

Sugar: I used caster sugar as it blends easily. But cane, raw or granulated, works like a charm too in this recipe for lemon sugar cookies. We also use icing sugar ( powdered sugar) and granulated sugar for coating the dough balls, like I did for my gingerbread kiss cookies.

Flour: All-purpose flour makes the tenderest cookies, so thatโ€™s what I go for. Buckwheat flour is a great option for gluten-free crinkle cookies.

Egg: For structure and richness. To make eggless lemon crinkle cookies, swap the egg with yogurt, as I did for my gingerbread crinkle cookies and chocolate crinkle cookies.

Lemon: The best choice for these Christmas cookies with lemon is fresh lemon juice and freshly grated zest. Avoid bottled lemon juice. Use a hefty amount, and if you want an extra punch of lemony flavor, add a good-quality lemon extract.

Please see the recipe card for full information about the ingredients and quantities.

How To Make Lemon Crinkle Cookies

Step 1: Whisk together all-purpose flour, cornstarch, baking powder, and salt (if using unsalted butter). Set aside.

Dry ingredients for the cookies in a glass bowl.

Step 2: In a large mixing bowl, cream together the softened butter and caster sugar until light and fluffy. Mix in lemon juice, eggs, lemon zest, and vanilla extract.

Add eggs, vanilla extract, lemon zest, lemon juice to a bowl of creamed butter and sugar.

Step 3: Gradually add the dry ingredient mixture to the wet ingredients, mixing with a spatula just until you have a soft cookie dough.

Cookie dough for in a mixing bowl.

Step 4: Cover the dough and refrigerate for at least 1 hour or up to 3 days.

Step 5: When you're ready to bake, preheat the oven and line a baking tray with Silpat or parchment paper.

Balls of cookie dough on a pink silicone mat.

Step 6: Take tablespoon-sized portions of chilled dough (or scoop them using an ice cream scoop) and roll them into 1-inch balls using your palms.

Cookie dough balls rolled in granulated sugar on a pink silicone mat.

Step 7: Coat each ball in granulated sugar and then icing sugar liberally.

Cookie dough balls rolled in icing sugar on  parchment paper.

Step 8: Place the sugar-coated lemon holiday cookies on the prepared baking sheet, leaving some space between each cookie.

Step 9: Bake for 10โ€“12 minutes, or until the edges are golden and the tops are crackly.

Baked lemon crinkle cookies on parchment paper.

Step 10: Cool completely on a wire rack before transferring to an airtight container.

Crinkle cookies on a serving plate with Christmas decorations around.

Pro Tips

  • Want the signature crackly tops of crinkle cookies? Chill the dough. If youโ€™re short on time, even 30 minutes will do. Or, you can make the cookie dough ahead of time and refrigerate it for up to 3 days.
  • Chilling also helps with the easier rolling of the cookie dough balls in sugar.
  • Although itโ€™s optional, I like to roll the cookies in granulated sugar first and then give the lemon crinkles an icing sugar-coating. Why? It prevents the icing sugar from being absorbed into the dough while baking.
  • Donโ€™t overbake the cookies. Keep in mind that they harden as they cool, and you want that soft, cakey texture in the center.
  • You can freeze lemon-crinkle cookie dough for up to a month. When youโ€™re ready to bake, thaw the cookie dough balls for 30 minutes in the refrigerator.
 One cookie cut in half to show the soft texture.

How To Store Lemon Crinkle Cookies

These cookies stay well for 4-5 days in an air-tight container.

Baked cookies can also be frozen, in an airtight container, for up to 1 month.

You can also freeze the cookie dough for up to 1 month. Scoop out the dough and roll it into balls. Place on a tray and freeze for 1-2 hours. Transfer the frozen cookie dough into a freezer-friendly container or bag. Thaw at room temperature for 20-30 minutes, roll in sugars, and bake.

More Holiday Cookie Recipes

  • almond ricotta cookies with sprinkles on top on a white platter.
    Almond Ricotta Cookies
  • Gingerbread kiss cookies on a round serving platter with more cookies and Christmas decor in the background.
    Gingerbread Kiss Cookies
  • A plate full of cranberry cookies on a red napkin.
    Cranberry Almond Shortbread Cookies
  • Chocolate chip cookies on a platter.
    Easy Chocolate Chip Shortbread Cookies

Half the joy of cooking is sharing it with others. Thatโ€™s why Iโ€™m always eager to hear from you. So go right ahead & drop a comment or reach out on Instagram, Pinterest, YouTube, or Facebook. I hope you love these soft lemon crinkle cookies as much as we do!

๐Ÿ“– Recipe

lemon crinkle cookies on a platter with Christmas decorations around.

Soft Lemon Crinkle Cookies Recipe

Natasha Minocha
Crackly and chewy, these lemon crinkle cookies are a burst of sunshine. Soft, lemony, and bright, if youโ€™re looking for an easy Christmas cookie, these are it!
5 from 1 vote
Print Recipe Pin Recipe
Prep Time 15 minutes mins
Cook Time 12 minutes mins
Chilling Time 3 hours hrs
Course Cookies
Cuisine American
Servings 30 cookies
Calories 114 kcal

Ingredients


  • 2.5 cups All-purpose flour
  • 1 tsp Cornstarch / Corn flour
  • 1 tsp Baking powder
  • 1/4 tsp Salt Omit if using salted butter
  • 3/4 cup Butter, softened
  • 3/4 cup Caster sugar
  • 1 Egg
  • 1/4 cup Lemon juice
  • 2 tbsp Lemon zest
  • 1 tsp Vanilla extract
  • 2-3 tbsp Granulated sugar For rolling
  • 1/2 cup Icing sugar For rolling

Instructions
 

  • In a large bowl, whisk together the flour, baking powder, cornstarch, and salt ( if using).
  • In another bowl, beat together the butter and caster sugar until light and fluffy.
  • Add the egg, lemon juice, lemon zest, and vanilla extract. Mix until well combined.
  • Mix the flour mixture into the butter mixture and combine using a spatula until a soft dough is formed.
  • Refrigerate the dough until firm, at least 3 hours.
    You can refrigerate the dough for up to 3 days at this point.
  • When you're ready to bake, preheat the oven to 180 C / 350 F and line a baking tray with Silpat or parchment paper.
  • Scoop out the dough into 1" balls and coat in granulated sugar, then liberally in icing sugar.
  • Place on the prepared tray and bake at 180 C/ 350 F for 10-12 minutes, or until the tops of cookies are slightly firm to the touch.
  • Let the cookies rest on the tray for 5 minutes before placing them on a cooling rack.
  • Cool completely before transferring them to an air-tight container. Enjoy!
  • These cookies will stay well for about 10 days.

Video

Notes

  • Want the signature crackly tops of crinkle cookies? Chill the dough. If youโ€™re short on time, even 30 minutes will do. Or, you can make the cookie dough ahead of time and refrigerate it for up to 3 days.
  • Chilling also helps with the easier rolling of the cookie dough balls in sugar.
  • Although itโ€™s optional, I like to roll the cookies in granulated sugar first and then give the lemon crinkles an icing sugar-coating. Why? It prevents the icing sugar from being absorbed into the dough while baking.
  • Donโ€™t overbake the cookies. Keep in mind that they harden as they cool, and you want that soft, cakey texture in the center.
  • You can freeze lemon-crinkle cookie dough for up to a month. When youโ€™re ready to bake, thaw the cookie dough balls for 30 minutes in the refrigerator.

Nutrition

Serving: 1 CookieCalories: 114kcalCarbohydrates: 16gProtein: 1gFat: 5gSaturated Fat: 3gPolyunsaturated Fat: 0.2gMonounsaturated Fat: 1gTrans Fat: 0.2gCholesterol: 18mgSodium: 73mgPotassium: 19mgFiber: 0.3gSugar: 8gVitamin A: 152IUVitamin C: 1mgCalcium: 12mgIron: 1mg
Tried this recipe?Let us know how it was!

Easy Soft Gingerbread Crinkle Cookies Recipe

December 13, 2023

Easy Soft Gingerbread Crinkle Cookies Recipe

How could anyone NOT love these gingerbread crinkle cookies? Crispy on top and gooey in the center, these melt-in-your-mouth treats are the crinkle cookies your Christmas platter is missing.

Easy Soft Gingerbread Crinkle Cookies Recipe

Cookie season is in full swing, but I promise these easy-crinkle cookies are not to be missed. Full of warming spices, the heady aroma fills the home even when youโ€™re mixing the gingerbread spice in the dough.

And once they start to bake, theyโ€™ll draw everyone to the kitchen with their tantalizing scent. Thatโ€™s how you know the chewy crinkle cookies are a total winner!

[feast_advanced_jump_to]
Easy Soft Gingerbread Crinkle Cookies Recipe

THE PERFECT LAST-MINUTE CHRISTMAS COOKIE

Basic pantry ingredients needed

Comes together in no time (or you can make it ahead)

Fills the home with instant holiday spirit with a spice-kissed aroma

Tasty, classic, and the most delicious crinkle Christmas cookies youโ€™ll ever sink your teeth into

Easy Soft Gingerbread Crinkle Cookies Recipe

HOW TO MAKE GINGERBREAD CRINKLE COOKIES?

Step 1: In a bowl, sift together flour, baking soda, gingerbread spices, and salt.

Step 2: In a separate bowl, whisk together the oil, Greek yogurt, and muscovado sugar.

wet and dry ingredients for the gingerbread crinkle cookies

Step 3: Combine the wet mixture with the dry ingredients to make a nice, soft, crinkle ginger cookie dough.

Step 4: Cover and refrigerate it for at least 1 hour (or up to 3 days if youโ€™re making ahead) until it reaches a firm consistency thatโ€™s easy to handle.

Dough for the gingerbread crinkle cookies in a glass bowl

Step 5: Preheat the oven and line a baking tray with Silpat or parchment paper.

Step 6: Use an ice cream scoop to portion the dough, and then roll it between your palms to form 1-inch-sized balls.

cookie dough balls on a parchment lined baking tray

Step 7: Roll each ball first in granulated sugar ( this is OPTIONAL) and then in powdered sugar to thoroughly coat them.

cookie dough balls coated with granulated sugar

Step 8: Place the coated dough balls on the prepared baking tray.

cookie dough balls coated in icing sugar

Step 9: Bake for 10โ€“12 minutes until the tops are firm to the touch.

Step 10: Allow the cookies to cool on a wire rack before storing them in an airtight container.

Baked gingerbread crinkle cookies

Final step: Enjoy your delightful gingerbread crinkle cookies!

GINGERBREAD CRINKLE COOKIE RECIPE NOTES

  • The trick to getting perfect crackly top crinkle gingerbread cookies is to chill the dough. While a short half hour is enough, you can refrigerate it for up to 3 days if you want a make-ahead easy Christmas cookie recipe. This chill time helps get the desired "crack" effect.
  • Rolling the gingerbread crinkles in granulated sugar first makes sure that the icing sugar is not absorbed into the cookies while they bake. Although optional, Iโ€™d recommend not skipping this step.
  • Avoid overbaking if you want chewy gingerbread cookies. Remember that they harden as they cool off.
Easy Soft Gingerbread Crinkle Cookies Recipe

GINGER CRINKLE COOKIES INGREDIENT SWAPS

Flour: All-purpose makes the softest, tenderest gingerbread crinkle cookies, but you can do half whole wheat and half all-purpose flour too!

Sugar: Muscovado sugar lends each soft Christmas cookie a lovely, gooey texture. You can use light or dark brown sugar instead.

Eggs: Substitute the Greek yogurt with 2 eggs.

Oil: Any regular vegetable oil will do, or you can try coconut oil, as I did for my chocolate crinkle cookies.

Spices: You can buy gingerbread spices, but making it at home is just as quick, and the fresh spices have a kick that I simply love. To make it, mix:

  • 1.5 teaspoons of ginger powder
  • 1.5 teaspoons of cinnamon powder
  • 1/2 teaspoon of clove powder
  • 1/4 teaspoon of nutmeg powder
  • I didnโ€™t have any, but you can also mix in a quarter teaspoon of allspice.

If you donโ€™t want to make old-fashioned ginger crinkle cookies, add 2 tablespoons of cocoa powder to give them a chocolate-y twist.

Or, you can replace a tablespoon of all-purpose flour with instant coffee to make coffee-flavored ginger crackle cookies. Whatever you choose, donโ€™t skimp on the spices. Load the dough with a generous dose.

Easy Soft Gingerbread Crinkle Cookies Recipe

NEED ANOTHER HOLIDAY COOKIE RECIPE?

Matcha Pinwheel Cookies

Spiced Brown Butter Madeleines

Chocolate Ginger Cookies

Thumbprint Cookie Recipe

Mocha Gingerbread Biscotti

Chocolate Chip Shortbread Cookies

Half the joy of cooking is sharing it with others. Thatโ€™s why Iโ€™m always eager to hear from you. So go right ahead and drop a comment or reach out on Instagram, Pinterest, YouTube, or Facebook. I hope you love this gingerbread crinkle cookie recipe as much as we do!

๐Ÿ“– Recipe

Easy Soft Gingerbread Crinkle Cookies Recipe

Easy Soft Gingerbread Crinkle Cookies Recipe

Natasha Minocha
How could anyone not love these gingerbread crinkle cookies? Crispy on top and gooey in the center, these melt-in-your-mouth treats are the crinkle cookies your Christmas platter is missing!
No ratings yet
Print Recipe Pin Recipe
Prep Time 15 minutes mins
Cook Time 12 minutes mins
1 hour hr
Course Cookies, Snack
Cuisine American
Servings 20 Cookies
Calories 150 kcal

Ingredients


  • 2 cups All-purpose flour
  • 1 tsp Baking soda
  • 1/4 tsp Sea salt
  • 1.5 tsp Ginger powder
  • 1.5 tsp Cinnamon powder
  • 1/2 tsp Clove powder
  • 1/4 tsp Nutmeg, grated
  • 1/2 cup Greek yogurt, plain
  • 3/4 cup Muscovado sugar You can use brown sugar instead
  • 1/2 cup Vegetable oil
  • 3-4 tbsp Granulated sugar Optional
  • 1/2 cup Icing sugar

Instructions
 

  • In a large bowl, sift together the flour, baking soda, cinnamon powder, ginger powder, clove powder, nutmeg, and salt.
  • In another bowl, combine the yogurt with oil and muscovado sugar.
  • Pour the wet ingredients into the dry ingredients and mix well, until a soft dough is formed.
  • Refrigerate the dough until firm, about 60 minutes.
    You can refrigerate the dough for up to 3 days at this point or freeze the dough balls for a month. Let the frozen cookie dough balls thaw for 30 minutes before rolling them in icing sugar and baking.
  • When you're ready to bake, preheat the oven to 180 C and line a baking tray with Silpat or parchment paper.
  • Pour the icing sugar into a shallow bowl. Roll the dough into 1-inch balls and roll the balls in the icing sugar.
    You can also roll the dough balls in granulated sugar before rolling them in icing sugar. This will prevent the icing sugar from getting absorbed into the dough.
  • Place cookies on a baking sheet, being sure to leave space between each of the cookies. Bake for 10-12 minutes or until the tops of the cookies are slightly firm to the touch.
    The cookies will harden as they cool, so please don't overbake.
  • Cool completely on a wire rack before transferring to an air-tight container. Enjoy!
  • These cookies will last 10-12 days in an air-tight container.

Nutrition

Serving: 1 CookieCalories: 150kcalCarbohydrates: 23gProtein: 2gFat: 6gSaturated Fat: 1gPolyunsaturated Fat: 3gMonounsaturated Fat: 1gTrans Fat: 0.04gCholesterol: 0.3mgSodium: 88mgPotassium: 35mgFiber: 0.5gSugar: 13gVitamin A: 1IUVitamin C: 0.01mgCalcium: 17mgIron: 1mg
Tried this recipe?Let us know how it was!

Biscoff Shortbread Recipe

December 10, 2023

Biscoff Shortbread Recipe

Biscoff shortbread transforms the ordinary into the extraordinary, giving the timeless charm of classic shortbread cookies a delightful twist. Quick and easy, this flavored shortbread is sweet, short, and delectably buttery.ย 

Biscoff Shortbread Recipe

As any good shortbread should, Biscoff shortbread cookies have that lovely short (i.e., crumbly) texture thatโ€™s just calling to be dunked in a cup of tea or coffee. With the irresistible duo of cinnamon, and cookie butter, these Christmas cookies have the perfect seductive combination.

What makes the easy Biscoff shortbread even more special is the ease with which the recipe comes together. And itโ€™s more than that. It's an opportunity for quality family time, especially if you have little ones at home.

Get everyone in the holiday spirit as you whip up these cookies with Biscoff, creating cherished memories that linger long after the last cookie is savored.

Biscoff Shortbread Recipe
[feast_advanced_jump_to]
Biscoff Shortbread Cookies

WHY TRY THIS RECIPE FOR BISCOFF SHORTBREAD?

1 bowl, 5 ingredients, and a 10-minute job to make the dough.

Slice and bake: no cookie cutter, no rolling pin, just a knife.

Fantastic way to switch things up from the usual shortbread cookie recipes.

Perfect, ready-to-bake cookies for spontaneous guests (or uncontrolled cookie cravings).

The most delicious treats for Christmas cookie swaps or holiday parties.

Biscoff Shortbread Recipe

HOW TO MAKE BISCOFF SHORTBREAD COOKIES?

Step 1: Beat softened butter with icing sugar and Biscoff spread until creamy.

creamed butter and icing sugar in abowl

Step 2: Mix in the cinnamon powder and flour.

Add flour and cinnamon powder to the butter -sugar mixture

Step 3: Use a spatula or your hands to squish everything together into a soft and pliable dough. The Biscoff shortbread dough comes together quickly.

ready cookie dough

Step 4: On a sheet of parchment paper, shape the dough into two logs about 1 1/2 inches in diameter.

shape the dough into logs

Step 5: Chill the dough until firm, at least 30 minutes (or up to 3 days ).

Step 6: Preheat the oven. Line a cookie sheet with parchment paper. Slice the chilled dough log into ยฝ or eighth-of-an-inch-thick slices.

Cut the logs into slices

Step 7: Place the cookies on the lined baking tray. Bake until the cookies are lightly golden, about 12 to 14 minutes.

baked Biscoff Shortbread cookies

Optional Step: These cookie butter cookies look like plain Janes, but they pack a ton of flavor from the cookie spread, vanilla extract, and that extra shot of spice. So, while you can enjoy the Biscoff shortbread cookies as is, I decorated them with white chocolate and golden sprinkles for that festive spirit.

Drizzle the cookies with melted white chocolate and sugar sprinkles

BISCOFF BUTTER COOKIES RECIPE NOTES

  • For this recipe for Biscoff cookies, ensure the butter is soft to achieve a tender texture. Avoid using frozen, cold, or melted butter.
  • If the dough seems a bit dry, incorporate room-temperature milk gradually. Begin by adding a tablespoon or two during step 3 until the desired consistency is reached.
  • Give the shortbread cookie butter dough enough time to chill completely in the fridge before slicing. This is crucial. Itโ€™ll not only make your job easier but also give you that scrumptious texture these cookies are known for.
  • You can plan ahead with these cookies. Double-wrap (in beeswax, foil, or cling wrap) and freeze the dough logs for up to 3 weeks. When youโ€™re ready to bake, you donโ€™t have to thaw the dough. Just bring the temperature down enough that you can slice the cookies.
  • These cookies harden as they cool, so depending on how crisp you want them, keep an eye on them after the 12-minute mark.
Biscoff Shortbread Cookies

STORING BISCOFF-FLAVORED SHORTBREAD

In an airtight container, Biscoff shortbread stays good for 2 to 3 weeks, making it a convenient and delightful treat during the holiday season.

INGREDIENTS FOR BISCOFF SHORTBREAD COOKIES

Cookie spread: I had Biscoff (the smooth version) at hand; you can use any cookie butter or speculoos cookie spread to give the soft Christmas cookies that spiced caramelly flavor.

Egg: This is an eggless shortbread cookie recipe. If you want to make it with eggs, simply add 1 egg after beating the sugar and butter.

Biscoff Shortbread Cookies

More Easy Holiday Cookies

Eggless Brownie Cookies

Biscoff Truffles With Chocolate

Chai Spice Chocolate Cookies

White Chocolate Cranberry Cookies

Half the joy of cooking is sharing it with others. Thatโ€™s why Iโ€™m always eager to hear from you. So go right ahead and drop a comment or reach out on Instagram, Pinterest, YouTube, or Facebook. I hope you love these Biscoff shortbreads as much as we do!

๐Ÿ“– Recipe

Biscoff Shortbread Recipe

Biscoff Shortbread Recipe

Natasha Minocha
Biscoff shortbread transforms the ordinary into the extraordinary, giving the timeless charm of classic shortbread cookies a delightful twist. Quick and easy, this flavored shortbread is sweet, short, and delectably buttery.ย 
No ratings yet
Print Recipe Pin Recipe
Prep Time 10 minutes mins
Cook Time 14 minutes mins
1 hour hr
Course Cookies, Snack
Cuisine American, British
Servings 42 small cookies
Calories 69 kcal

Ingredients


  • 3/4 cup Butter, softened
  • 1/3 cup Biscoff spread
  • 3/4 cup Icing sugar
  • 1 3/4 cup All-purpose flour
  • 1.5 tsp Cinnamon powder
  • Melted white chocolate for drizzling on top and Gold sugar sprinkles Optional

Instructions
 

  • In a large bowl, beat the softened butter, Biscoff spread, and icing sugar until light and fluffy.
  • Add all-purpose flour and cinnamon powder.
  • Bring everything together into a dough using a spatula or your hands.
  • You may need to add a tablespoon or two of milk if the dough is dry-ish.
  • Your dough should be soft and pliable.
  • Divide the dough into half. Roll each half into a 10" log.
  • Place the logs carefully on a parchment-lined baking tray. Refrigerate for at least 1 hour or up to 2 days.
  • When you're ready to bake, preheat the oven to 180C.
  • Cut each log into slices, about 1/8" in thickness.
  • Place the slices on the prepared trays. Make sure there is a little gap between them as they will spread a bit during baking.
  • Bake for 12-14 minutes or until lightly golden.
  • Let the cookies cool for a few minutes before transferring them to a cooling rack. They will firm up as they cool.
  • Decorate the cooled cookies by drizzling with melted white chocolate if you wish and top with some gold sugar sprinkles.
  • Let the chocolate set and enjoy!
  • Store the cooled cookies in an air-tight container. These will last 2-3 weeks.

Nutrition

Serving: 1 CookieCalories: 69kcalCarbohydrates: 7gProtein: 1gFat: 4gSaturated Fat: 2gPolyunsaturated Fat: 0.1gMonounsaturated Fat: 1gTrans Fat: 0.1gCholesterol: 9mgSodium: 27mgPotassium: 7mgFiber: 0.2gSugar: 3gVitamin A: 103IUVitamin C: 0.003mgCalcium: 3mgIron: 0.3mg
Tried this recipe?Let us know how it was!

Easy Chocolate Chip Shortbread Cookies

December 6, 2023

Chocolate chip cookies on a platter.

These easy chocolate chip shortbread cookies are buttery, tender, soft, and crumbly, along with pops of delicious gooey dark chocolate chips. With an easy and make-ahead recipe, you just have to try these holiday cookies for Christmas!

Chocolate chip cookies on a grey metal tray.

I'm not going to lieโ€”it took a few attempts to nail the perfect shortbread cookie recipe down. But once I did (with my rose shortbread version), I got the tastiest possible cookie recipe for Christmas.

I promise it brings the bakery right into your kitchen. The best part about these chocolate holiday cookies is that youโ€™ll have all the ingredients at home! And they are perfect for your Holiday cookie box!

[feast_advanced_jump_to]
Chocolate chip cookies on a grey metal tray.

Why You'll Love This Recipe

โœจ Easy shortbread cookies, you can whip up in no time with no fancy ingredients or complicated steps.

โœจ Buttery, crisp, and with a melt-in-your-mouth texture, these are the cookies you dream of!

โœจ Perfect for fuss-free and stress-free Holiday baking, gifting, and cookie exchange!

โœจ The cookie dough is freezer-friendly, so making these chocolate shortbread cookies anytime is a breeze!

Recipe Ingredients

ingredients for making chocolate chip shortbread cookies.

The list of ingredients for shortbread and chocolate cookies is incredibly short. So, you want the chocolate and spices to be of the best quality.

Flour: All-purpose flour gives the flakiest texture, but whole wheat flour can also work in this recipe.

Chocolate: I used mini dark chocolate chips, but feel free to add in whatever type of chocolate speaks to your palate. Or, you can cut up a slab of baking chocolate to make shortbread chocolate chunk cookies.

Just remember, you donโ€™t want very chunky pieces for this shortbread cookie recipe, so cut the chocolate into small pieces.

Icing sugar: Mix 2 tbsp cornstarch with 1 cup of powdered sugar and use that instead, if you don't have icing sugar handy.

Sea salt: Itโ€™s optional, but Iโ€™ve found that shortbread tastes a bit boring without it.

Add-ins: You can skip the vanilla extract and use cinnamon powder or a couple of drops of mint to make the loveliest mint chocolate chip shortbread cookies.

Want to spice them up? Mix in a gingerbread spice mix or pumpkin pie spice. Want to make the shortbread chocolate chip cookies nutty? Combine finely chopped almonds, walnuts, or cranberries in the dough as I did with my cranberry almond cookies.

Please see the recipe card below for full information about the ingredients and quantities.

How To Make Chocolate Chip Shortbread Cookies

Step 1: Cream together softened, room-temperature butter and icing sugar until light and fluffy.

Step 2: Whisk in vanilla extract, followed by flour. Gently fold in the chocolate chips until evenly distributed.

Flour and chocolate chip added to a mixture of butter and icing sugar.

Step 3: Use a spatula or your hands to squish everything together into a soft and pliable dough. The dough comes together quickly.

ready dough for chocolate chip shortbread cookies in a mixing bowl.

Step 4: Divide the chocolate chip shortbread cookie dough in half and roll each half into a cylindrical or squarish log. The exact shape is irrelevant. The log just simplifies the cookie-making process compared to using a cookie cutter.

cookie dough divided in half and rolled into logs.

Step 5: Place the logs on a baking sheet and refrigerate for 30 minutes.

Step 6: Set the oven to preheat. With a sharp knife, slice the dough into chocolate shortbread cookies about 1/8" thick. Place the cookies on a baking sheet, spaced apart.

 sliced cookie dough on a baking tray.

Step 7: Bake for 12 to 14 minutes. Keep an eagle eye on the cookies towards the end.

Final step: Sprinkle sea salt on top of the hot, just-out-of-the-oven shortbread cookies. It balances the flavors so well.

Baked cookies on parchment paper.

Top Tips

  • The butter has to be at room temperature for a crumbly, tender texture.
  • If the dough feels a touch too dry, add room-temperature milk. Start with a tablespoon or two.
  • The key to making buttery, crumbly shortbread with chocolate is chilling the dough. If your shortbread cookies are spreading in the oven, you havenโ€™t refrigerated the dough long enough. Chilling firms up the dough.
  • Keep an eye on the cookies to avoid over-browning. You donโ€™t want pale cookies or over-the-top crispness. What youโ€™re after is toasty golden on the edges (where the cookies touch the tray) and light golden on top.

How To Make-Ahead And Store

Besides being a sweet treat for the senses, what I love about chocolate chip shortbread cookies is that I can prep ahead. Given that it's cookie season, making them ahead is such a win!

You can keep the dough logs in the refrigerator anywhere from 1 hour to 3 days. Or you can freeze it for up to 3 weeks. Simply double-wrap the dough logs in beeswax, foil, or cling wrap.

When youโ€™re ready to bake the frozen dough, bring it to room temperature on the countertop. Slice and bake. The baked chocolate holiday cookies can be stored in an airtight container for 2 to 3 weeks.

Cookie halves placed in a stack to show the cross section.

More Easy Holiday Cookies

  • lemon crinkle cookies on a platter with Christmas decorations around.
    Soft Lemon Crinkle Cookies Recipe
  • Gingerbread madeleines on parchment paper.
    Gingerbread Madeleines
  • Easy Chocolate Salami Recipe
    Easy Chocolate Salami Recipe
  • decorated christmas wreath cookies on a plate with christmas decor around.
    Christmas Wreath Cookies

Half the joy of cooking is sharing it with others. Thatโ€™s why Iโ€™m always eager to hear from you. So go right ahead and drop a comment or reach out onย Instagram,ย Pinterest,ย YouTube, orย Facebook. I hope you love these chocolate chip shortbread cookies as much as we do!

๐Ÿ“– Recipe

Chocolate chip cookies on a platter.

Easy Chocolate Chip Shortbread Cookies

Natasha Minocha
Buttery, tender, soft, and crumbly, along with pops of delicious gooey dark chocolate chips. With an easy and make-ahead recipe, you just have to try these holiday cookies for Christmas!
5 from 1 vote
Print Recipe Pin Recipe
Prep Time 10 minutes mins
Cook Time 14 minutes mins
1 hour hr
Course Cookies, Snack
Cuisine American, British
Servings 50 Cookies
Calories 67 kcal

Ingredients


  • 3/4 cup Butter, softened
  • 1 cup Icing sugar
  • 2 cups All-purpose flour
  • 1 tsp Vanilla extract
  • 2 tbsp Milk
  • 3/4 cup Mini dark chocolate chips
  • 1 tsp Sea salt Optional

Instructions
 

  • In a large bowl, beat the softened butter and icing sugar until light and fluffy.
  • Add all-purpose flour, vanilla extract, milk, and chocolate chips.
  • Bring everything together into a dough using a spatula or your hands.
  • You may need to add a tablespoon or two of milk if the dough is dry-ish.
  • Your dough should be soft and pliable.
  • Divide the dough into half. Roll each half into a 10" log.
  • Place the logs carefully on a parchment-lined baking tray.
  • Refrigerate for at least 1 hour or up to 2 days.
  • When you're ready to bake, preheat the oven to 180C.
  • Cut each log into slices, about 1/8" in thickness.
  • Place the slices on the prepared trays. Make sure there is a little gap between them as they will spread a bit during baking.
  • Bake for 12-14 minutes or until lightly golden. Bake for an extra 1-2 minutes if you want crispier cookies.
    You can sprinkle some sea salt on the hot cookies if you wish.
  • Let the cookies cool for a few minutes before transferring them to a cooling rack. They will firm up as they cool.
  • Store the cooled cookies in an air-tight jar. Enjoy!

Video

Notes

  • The butter has to be at room temperature for a crumbly, tender texture.
  • If the dough feels a touch too dry, add room-temperature milk. Start with a tablespoon or two.
  • The key to making buttery, crumbly shortbread with chocolate is chilling the dough. If your shortbread cookies are spreading in the oven, you havenโ€™t refrigerated the dough long enough. Chilling firms up the dough.
  • Keep an eye on the cookies to avoid over-browning. You donโ€™t want pale cookies or over-the-top crispness. What youโ€™re after is toasty golden on the edges (where the cookies touch the tray) and light golden on top.

Nutrition

Serving: 1 CookieCalories: 67kcalCarbohydrates: 8gProtein: 1gFat: 4gSaturated Fat: 2gPolyunsaturated Fat: 0.1gMonounsaturated Fat: 1gTrans Fat: 0.1gCholesterol: 8mgSodium: 71mgPotassium: 7mgFiber: 0.2gSugar: 4gVitamin A: 93IUVitamin C: 0.02mgCalcium: 6mgIron: 0.3mg
Tried this recipe?Let us know how it was!

Biscoff Truffles

December 2, 2023

3 Ingredient Biscoff Truffles with Chocolate

These easy Biscoff truffles are rich, fudgy, and delightfully indulgent! Made with 3 ingredients, they look fancy, taste incredible, and come together so quickly and easily!

Biscoff truffles drizzled with Biscoff on a plate.

The best part is how effortless it is to make these chocolate Biscoff truffles. The mixture firms up quickly in the fridge, so you can roll and coat the truffles without any fuss.

Each bite is luxurious, smooth, sweet, and lightly spiced. They are perfect for Holiday gifting, Holiday dessert platters, or anytime you want a simple yet special homemade treat!

Love Biscoff? Then you must try this Biscoff tiramisu, Biscoff shortbread, and my super popular Biscoff icebox cake!

[feast_advanced_jump_to]

Why You'll Love This Recipe

โœจYou only need 3 ingredients to make these Biscoff chocolate truffles! If you don't already have them in your pantry, you can easily find them in your supermarket or online!

โœจRich and creamy texture with that signature lightly spiced Biscoff flavor that everyone loves!

โœจ Perfect for gifting! They look elegant and impressive, even though they are so easy to make.

โœจItโ€™s a holiday-friendly recipe you can make ahead. The recipe doubles beautifully and keeps well in the fridge - ideal for the busy holiday season!

Half a truffle on top of truffles to show the fudgy texture.

Biscoff Truffles Ingredients

Cream: Helps create the smooth, melt-in-your-mouth ganache center. I used 25% fat cream. Full-fat cream also works well.

Chocolate: Use good-quality baking chocolate. I used 55% couverture for deep flavor. Prefer darker? Try dark chocolate Biscoff truffles with 70% chocolate.

Biscoff spread: The cookie butter is the star, adding warmth, caramel notes, and the signature Biscoff flavor.

Please see the recipe card below for full information about the ingredients and quantities.

Variations

  • Biscoff gives the truffles a buttery, spiced flavor. Add ground cinnamon to increase the flavor, similar to chai-spiced truffles.
  • A splash ofย rum, brandy, or cognacย is a fantastic way to booze up the Biscoff truffle balls for Christmas, as I did with my Baileys truffles.
  • Use milk chocolate for sweeter Biscoff truffles.
  • Biscoff is naturally vegan! So, to make vegan Biscoff truffles, just swap cream for coconut cream and chocolate for dairy-free dark chocolate

How To Make Biscoff Truffles

Step 1: Heat cream to a gentle simmer.

Step 2: Pour the cream over the dark chocolate and melted Biscoff spread. Let it sit for 2-3 minutes.

Step 3: Stir until you have smooth, thick, and glossy ganache.

chocolate chips and melted biscoff on top of warm cream in a mixing bowl.
melted chocolate mixture in a bowl.

Step 4: Transfer to a shallow bowl and refrigerate until firm enough to scoop.

Chocolate truffle mixture in a glass pie dish with an ice cream scoop.

Step 5: Using a cookie scoop or melon baller, scoop out the truffle mixture in small portions. If you donโ€™t either, use two spoons.

Step 6: Place the scoops back in the fridge to firm up - about 10 -15 minutes.

Step 7: After the scoops have firmed up again, roll them into smooth balls and dip them in melted chocolate.

Melted chocolate in a small bowl, truffle balls and one chocolate dipped truffle on a plate.

Step 8: Refrigerate again until the chocolate sets. Serve!

Chocolate dipped truffles decorated with crushed cookies and melted biscoff on a plate.

Pro Tips

  • Aย kitchen scale is your best friendย in this Biscoff truffles recipe because the cream-to-chocolate ratio is critical to getting that heavenly, fudgy bite.
  • Donโ€™t overheat cream. Hot cream can split or burn chocolate.
  • Melt the Biscoff.ย Itโ€™s easier to mix.
  • Make sure all your ingredients are at room temperature. They will melt and blend easily.
  • A double boiler is safest to melt the chocolate. I explain in detail how to make one in my sourdough peanut butter brownie recipe. A microwave works in 20โ€“30-second bursts.
  • Chillingย the cookie butter truffles isย crucialย before you roll and coat them. Skip refrigeration, and youโ€™ll have a messy, melted mixture in your hands.

How To Decorate

You can keep these truffles simple. Put them in a tin with gingerbread kiss cookies, chocolate peppermint fudge, and lemon crescent cookies, and wrap them up as a Christmas gift!

You can also dress them up like holiday stars:

  • Drizzle the Biscoff truffles with Biscoff spread.
  • Roll the truffles in crushed Lotus cookies. Do it immediately after you dip the truffles in melted chocolate. Otherwise, the crumbs will not stick.
  • Dip in white chocolate for contrast.
  • Add gold dust or sprinkles for party flair.
 truffles on a plate with one half truffle to show the cross-section.

Recipe FAQs

Does Biscoff have chocolate?

No. Biscoff is a spiced, shortbread-type cookie (also called Speculoos). Biscoff spread is a cookie butter made from these cookies. Itโ€™s similar to peanut butter in texture and consistency. The chocolate in these Biscoff truffles comes from the ganache.ย 

Can I make Biscoff truffles ahead of time?

Yes! They store beautifully for up to 2 weeks in the fridge

Can I freeze truffles?

Yes, you can! Keep them in an air-tight container or freezer-safe bag for up to a month. Bring back to room temperature before serving.ย 

More Easy Christmas Treats

  • Lavender Chocolate Truffles vegan glutenfree dairyfree no bake recipe
    Lavender Chocolate Truffles
  • Coconut Almond Bliss Balls with Rose
    Coconut Almond Bliss Balls with Rose
  • 3 Almond Butter Cups stacked on top of each other.
    Almond Butter Cups
  • Easy Chocolate Salami Recipe
    Easy Chocolate Salami Recipe

Half the joy of cooking is sharing it with others. Thatโ€™s why Iโ€™m always eager to hear from you. So go right ahead and drop a comment or reach out onย Instagram,ย Pinterest,ย YouTube, orย Facebook. I hope you love these Biscoff truffles as much as we do!

๐Ÿ“– Recipe

3 Ingredient Biscoff Truffles with Chocolate

Biscoff Truffles

Natasha Minocha
These Biscoff truffles are the easiest little treats you can make - creamy, indulgent, and full of that spiced cookie butter flavor! With just 3 ingredients and no baking required, they come together easily and look so impressive. Perfect for gifting, snacking, or festive dessert trays!
No ratings yet
Print Recipe Pin Recipe
Prep Time 20 minutes mins
Chilling Time 2 hours hrs
Total Time 2 hours hrs 20 minutes mins
Course Dessert
Cuisine American
Servings 20 Truffles
Calories 223 kcal

Ingredients


  • 3/4 cup Cream
  • 2 1/4 cup Dark couverture chocolate, 55%
  • 1/4 cup Biscoff spread
  • 1/2 cup Dark couverture chocolate for dipping
  • Crushed Lotus cookies / Melted Biscoff spread, for topping

Instructions
 

  • Heat the cream in a small saucepan. On low heat, bring to a gentle simmer. Take off the heat immediately.
  • Add the warm cream and melted Biscoff spread to 400 gms of chocolate chips in a medium-sized bowl.
  • Set aside for 5 minutes. Gently stir till all the chocolate is melted and is smooth and shiny.
  • Transfer to a shallow bowl and refrigerate for 50-60 minutes. Using a small cookie scoop or 2 small spoons, scoop out small balls. Place the truffle balls on a parchment-lined tray.
  • Refrigerate the scooped-out portions for 20-30 minutes.
    Roll them into smooth balls and refrigerate again for a few minutes.
  • Dip the truffles into melted chocolate. Refrigerate for a couple of hours till completely set.
  • Store in refrigerator. Enjoy!!
  • Drizzle with melted Biscoff or top with crushed Lotus cookies.
    If topping with crushed cookies, do so immediately after dipping the truffles in chocolate.
    For the drizzle, let the chocolate coating set for a few minutes before drizzling the melted Biscoff on top.

Video

Notes

  • Aย kitchen scale is your best friendย in this Biscoff truffles recipe because the cream-to-chocolate ratio is critical to getting that heavenly, fudgy bite.
  • Donโ€™t overheat cream. Hot cream can split or burn chocolate.
  • Melt the Biscoff.ย Itโ€™s easier to mix.
  • Make sure all your ingredients are at room temperature. They will melt and blend easily.
  • A double boiler is safest to melt the chocolate. I explain in detail how to make one in my sourdough peanut butter brownie recipe. A microwave works in 20โ€“30-second bursts.
  • Chillingย the cookie butter truffles isย crucialย before you roll and coat them. Skip refrigeration, and youโ€™ll have a messy, melted mixture in your hands.

Nutrition

Serving: 1 TruffleCalories: 223kcalCarbohydrates: 18gProtein: 3gFat: 18gSaturated Fat: 11gPolyunsaturated Fat: 1gMonounsaturated Fat: 5gCholesterol: 10mgSodium: 4mgPotassium: 9mgFiber: 3gSugar: 12gVitamin A: 133IUVitamin C: 0.1mgCalcium: 6mgIron: 0.01mg
Tried this recipe?Let us know how it was!

Pumpkin Swirl Cake with Cream Cheese Frosting

November 24, 2023

Pumpkin Swirl Cake with Cream Cheese Frosting on a serving platter.

The pumpkin swirl cake is THE fall dessert. It brings all the comfy, warm flavors in one delicious slice: lovely, moist, and fluffy from the pumpkin puree, fabulously fudgy from the melted chocolate, and tangy with orange frosting.

Pumpkin Swirl Cake with Cream Cheese Frosting

Fall, Thanksgiving, and (dare I mention Christmas yet?) are about slowing down. I relax, breathe, drink a cup of tea, eat a cookie, and find my inner peace. And when I feel like it, make this pumpkin swirl cake. On repeat!

Why? Because itโ€™s that time of year again โ€“ when recipes are meant to be peppered with warm spice and everything nice. And this easy pumpkin cake, with its swoops and swirls of dark chocolate running like a ribbon of indulgence between gloriously spiced crumbs, is just heaven in a slice.

[feast_advanced_jump_to]
Pumpkin Swirl Cake with Cream Cheese Frosting

WHY TRY THIS PUMPKIN CAKE WITH CREAM CHEESE FROSTING?

Chocolate pumpkin cake is great for hosting.

Bakes like a stunning pound cake but with a lighter, fluffier crumb full of bold pumpkin flavor.

A simple pumpkin dessert recipe is delicious with the tangy cream cheese, warm spices, and earthy pumpkin.

HOW TO MAKE PUMPKIN SWIRL CAKE?

Step 1: While the oven preheats, grease and flour your cake tin.

Step 2: Mix milk and vinegar and set it aside until it curdles into buttermilk.

Step 3: Sift the dry ingredients: flour, baking soda, baking powder, salt, and pumpkin pie spice.

Dry ingredients in a large glass mixing bowl

Step 4: Beat eggs with sugar, then slowly drizzle in the oil, buttermilk, and vanilla extract. Stir in the pumpkin puree.

wet ingredients in a small glass bowl

Step 5: Fold the wet ingredients into the dry. Add orange zest to the batter.

Mixing the dry and wet ingredients

Step 6: Divide the batter into two equal portions. In one portion, stir in melted chocolate and cocoa powder.

pumpkin cake batter in a glass bowl
mixing in chocolate and cocoa powder in half of the pumpkin batter

Step 7: Pour the two batters into the cake by alternating between the pumpkin and chocolate-mixed ones.

chocolate and pumpkin batters in 2 bowls
swirled pumpkin and chocolate batters in the bundt cake tin

Step 8: Swirl the two batters with a knife or skewer, and your pumpkin marble cake is ready to be baked.

Step 9: Bake for 45 to 50 minutes.

Baked Pumpkin Swirl Cake

Step 10: While waiting for the chocolate swirl cake to cool (15 to 20 minutes), make the cream cheese frosting by whisking the cream cheese and icing sugar until smooth. Fold in the orange zest.

Final step: Spread the cream cheese frosting on the cooled cake. Top with more orange zest and walnuts, and serve!

Pumpkin Swirl Cake

MY PUMPKIN SWIRL CAKE RECIPE NOTES

  • Swirl cakes can be made in any cake tin, square, round, or rectangular. I prefer bundt pans because they instantly make the cake prettier.
  • Use your hands to butter the bundt pan liberally. I find a brush only reaches some nooks and crannies; there goes the entire cake!
  • Dust the cake tin with flour after you grease it, and the pumpkin chocolate swirl cake will slide right out.
  • The milk for the buttermilk has to be at room temperature. This is important for it to curdle properly.
  • Don't overmix the two batters; the pumpkin swirl effect will disappear.
  • Make sure the cream cheese is softened. When itโ€™s at room temperature, the frosting comes together super-fast.
  • To check if the pumpkin cake with cream cheese icing is done, insert a toothpick near the center. It should come out clean.
  • Always taste the frosting and adjust for sweetness before you fold in the orange zest.
Pumpkin Swirl Cake with Cream Cheese Frosting

CHOCOLATE PUMPKIN SWIRL CAKE INGREDIENTS & SWAPS

Flour: Iโ€™ve made multiple pumpkin cakes and know that all sorts of flours suit the recipe. All-purpose, whole wheat, or even half and half of both. For a gluten-free chocolate pumpkin marble cake, switch to buckwheat flour.

Pumpkin pie spice: Homemade or store-bought; either works like a charm.

Oil: Coconut is my go-to choice. Any neutral-tasting vegetable oil will do.

Buttermilk: I used toned milk, but full-fat, regular milk is an equally fantastic option. Use either white vinegar or apple cider vinegar.

Eggs give the chocolate swirl cake richness and a gorgeous structure to the cake crumb. But if you want a vegan recipe, flax egg (1 part flaxseed powder + 3 parts water) is possible. Switch to plant-based milk for the buttermilk and non-dairy cream for the frosting.

Slice of Pumpkin Swirl Cake with Cream Cheese Frosting on a small plate

Pumpkin puree: If youโ€™re not using canned puree, make it at home using any cooking or baking pumpkin you can find. I used butternut squash.

Chocolate: I would really suggest using 55% dark chocolate (the same as I did). If itโ€™s too dark for you, 35% or even milk chocolate works. Or you can go darker.

Cocoa Powder: My home absolutely loves the intensity of dark chocolate mixed with cocoa powder. Feel free to omit it and stick to just chocolate.

Orange zest lends the pumpkin swirl cake a lovely citrus ribbon of flavor, brightening the taste, and it pairs so beautifully with cozy fall spices, so I would not skip it. You can also up the citrus flavor by adding good-quality orange oil/ extract, to the batter and frosting.

Frosting: The frosting is optional. But it is ridiculously easy to make and embellishes the cake like a dream. Pumpkin swirl cake is fantastic as-is, but the frosting elevates it to just another level.

Pumpkin Swirl Cake with Cream Cheese Frosting

WANT ANOTHER CAKE RECIPE FOR FALL?

Cinnamon Cheesecake 

Cinnamon Roll Cake

Coffee Banana Cake

Apple Crumble Cheesecake

Cinnamon Streusel Coffee Cake

Half the joy of cooking is sharing it with others. Thatโ€™s why Iโ€™m always eager to hear from you. So go right ahead and drop a comment or reach out on Instagram, Pinterest, YouTube, or Facebook. I hope you love this pumpkin swirl cake as much as we do!

๐Ÿ“– Recipe

Pumpkin Swirl Cake with Cream Cheese Frosting on a serving platter.

Pumpkin Swirl Cake with Cream Cheese Frosting

Natasha Minocha
Moist chocolate cake swirling between gloriously spiced pumpkin cake, and finally bringing both of these together โ€“ tangy cream cheese frosting bursting with fresh orange flavor.
No ratings yet
Print Recipe Pin Recipe
Prep Time 20 minutes mins
Cook Time 40 minutes mins
Course Dessert
Cuisine American
Servings 12 Servings
Calories 304 kcal

Ingredients


Cake

  • 2 cups All-purpose flour
  • 1 1/2 tsp Baking powder
  • 1/2 tsp Baking soda
  • 1 1/2 tsp Pumpkin pie spice
  • 1/4 tsp Salt
  • 1 cup Milk
  • 1.5 tbsp Vinegar You can use white vinegar or Apple cider vinegar
  • 3 Eggs
  • 3/4 cup Caster sugar
  • 1/2 cup Coconut oil
  • 1 cup Pumpkin puree
  • 1 tsp Vanilla extract
  • 2 tsp Orange zest
  • 1/2 cup Dark chocolate 55%, melted
  • 1 tbsp Cocoa powder Optional

Orange Cream Cheese frosting

  • 1/2 cup Cream cheese softened
  • 1/3 cup Icing sugar
  • 1 tbsp Orange zest

Garnish

  • Orange zest and Chopped walnuts

Instructions
 

  • Preheat oven to 180 C. Grease and flour an 8" baking pan. I used a bundt pan.
  • In a small bowl, mix together milk and vinegar. Keep aside for 5 minutes until it curdles.
  • Sift the flour, baking soda, baking powder, salt, and pumpkin pie spice together in a large bowl.
  • In another large bowl or your mixer, beat the eggs and sugar very well. Slowly drizzle in the oil, milk-vinegar mixture, and vanilla extract. Stir in the pumpkin puree.
  • Fold in the sifted dry ingredients. Stir in the orange zest.
    Divide the batter in half. Add the melted chocolate and cocoa powder to half of the mixture.
  • Add the two batters to the prepared pan, alternating between pumpkin and chocolate. Swirl through the batter using a skewer or knife. Be careful not to overmix.
  • Bake in the preheated oven for 40 - 45 minutes at 180 C or until a toothpick inserted in the center comes out clean.
  • Let the cake cool in the pan for 15 - 20 minutes before turning it out on a cooling rack.
  • In the meantime, prepare the frosting:
    Whisk together the cream cheese and icing sugar until smooth. Taste and adjust for sweetness. Fold in the orange zest.
  • Spread the orange cream cheese frosting over the completely cooled cake. Sprinkle some orange zest and chopped walnuts on top and enjoy!

Notes

- I made my own pumpkin pie spice by simply combining 1 tsp cinnamon, 1/2 tsp ginger powder and 1/4 tsp nutmeg.
- Pumpkin puree is also super easy to make at home. ย Peel and dice 500 gms of pumpkin. This would yieldย 250 gms of puree. ย Steam in a saucepan with a tightly covered lid, for about 20 minutes. ย I just mashed the steamed pumpkin with a fork ย for this recipe. ย You could of course, use a blender to get a smooth puree.

Nutrition

Serving: 1 SliceCalories: 304kcalCarbohydrates: 41gProtein: 7gFat: 13gSaturated Fat: 11gPolyunsaturated Fat: 1gMonounsaturated Fat: 1gTrans Fat: 0.02gCholesterol: 44mgSodium: 249mgPotassium: 194mgFiber: 2gSugar: 21gVitamin A: 3313IUVitamin C: 2mgCalcium: 129mgIron: 2mg
Tried this recipe?Let us know how it was!

Easy Air Fryer Falafel Recipe

November 22, 2023

Easy Air Fryer Falafel Recipe

Crispy, golden, and bursting with fresh herbs, these air fryer falafels are everything you love about the classic, made simpler! No deep frying, no mess, just perfectly fluffy falafels that come together effortlessly in your kitchen!

falafels on a plate with a salad and pitas in the background.

Once you try making falafels in an air-fryer, there's no going back! Its an easy, hands off recipe that fits right into busy days yet is special enough when entertaining. Pile them into warm homemade pitas, with veggies and hummus, tuck them into wraps, or serve them over a salad, drizzled with a tahini dressing - they are wonderfully versatile and full of flavor in every bite.

[feast_advanced_jump_to]

What Is Air-Fryer Falafel?

Falafel is a fried patty made with chickpeas and spices. The popular Middle Eastern recipe originated in Egypt but has now become a much-loved dish all over the world. Although making falafel from scratch sounds complicated, itโ€™s rather simple to put together.ย 

Traditionally, falafels are deep-fried, but I wanted to take the easier route, so this I just air-fried them! In all honesty (and as a disclaimer), fried falafels taste amazing, but these air fryer falafels come close enough!

Why You'll Love This Recipe

โœจ You get that golden crispy crunch without frying! No hot oil, no mess, air-fryer does all the work!

โœจ These homemade falafels are easy, simple, and fuss-free to make.

โœจ No fancy ingredients. There's a good chance everything you need to make these falafels is already in your kitchen!

โœจ Perfect for meal prep! The falafel mixture keeps well in the refrigerator, so you can air-fry them whenever you want.

โœจ They are so versatile! Excellent with pita, in wraps, in salads, grain bowls or just as a yummy snack with your favorite dip!

Recipe Ingredients

Ingredients for making air fryer falafels.

Chickpeas:ย For best texture and flavor, use dry chickpeas. These need to be soaked for 12-24 hours. I do have a delicious vegetable cheese falafel recipe that uses cooked chickpeas, but for this recipe, I recommend only dry chickpeas!

Herbs: Garlic and onion are aromatics that add depth and complexity to the flavor. Besides them, you can useย any combinationย of herbs โ€“ cilantro, dill, parsley, or mint.ย 

Sesame seedsย bring in the nuttiness and that extra crunch.ย 

Baking powderย is a must! It gives the falafels an airy, soft texture.

Spices: Cumin and coriander are the traditional choices. I love the taste roasted cumin imparts. You can stick to regular cumin powder. Chili or paprika is optional. Use as little or as much as you like. If you want to make this crispy falafel recipe your own and up the heat, try green chilies.

Please see the recipe below for full information about ingredients and quantities.

How To Make Air Fryer Falafels

Step 1: Wash and soak chickpeas for 12 to 24 hours. 

Step 2:ย Rinse and drain the soaked chickpeas and then pulse in a food processor with a half-small onion, garlic, parsley,ย cuminย powder, coriander powder, salt, and paprika.ย 

ingredients for making falafels in a bowl.
falafel mixture in a bowl.

Step 3: Mince to a coarse and granular texture, not smooth.

Step 4: Transfer into a bowl. Combine with sesame seeds.

sesame seeds on top of falafel mixture.
shaped falafel patties on a plate.

Step 5: Cover and refrigerate for at least 1 hour to up to even overnight. 

Step 6: When youโ€™re ready to air fry falafel, mix in baking powder. Shape the mixture into balls. Flatten it slightly with your palm.

Falafel patties in air fryer basket.
cooked falafels in a airfryer basket.

Step 7: Brush both sides of the falafel with olive oil. Place in the basket of the air fryer in a single layer. Cook for 5 minutes.

Step 8: Flip the falafels and air fry for another 5 to 6 minutes or until crispy, brown, and cooked through.

Final step: Serve!

Falafels in a plate with ingredients in the background.

Top Tips

  • Pleaseย donโ€™tย grind air fryer falafel into aย very fineย mixture. We want it a bit coarse, for that wonderful texture. You pulse for a few seconds, scrape the sides, and then pulse gain till everything is blended but still has structure. Youโ€™ve reachedย the right textureย when you hold the mixture in your palms, whichย sticks together.ย 
  • Chilling the raw falafel helps the ingredients meld and ensures the mixture holds its shape better.
  • Donโ€™t overcrowd the air fryer. Leave sufficient space between falafels.ย 
  • 10 to 12 minutes worked for me, but I recommend keeping an eye on the falafels after the 8-minute mark because every air fryer is different. Yours may be faster or take longer!
A stack of falafels with one cut in half to show the texture.

How To Serve Air Fryer Falafels

Homemade falafel is a first-rate snack, but in my house, we love it in a meal with all the fixings.

  • Stuff it in a homemadeย pitaย to make a sandwich
  • Serve it as a wholesome side withย classic hummusย orย tzatzikiย 
  • Dip it withย labnehย or even yum yum sauce for an easy appetizer
  • Make it part of a mezze platter
  • Add them to salads like thisย Greek salad, roasted sweet potato and chickpea salad, or a buckwheat tabboulehย salad.
Filled pita pocket with falafel and salad on a plate.

How To Store Air Fryer Falafels

You can store cooked falafels in an air-tight container in the refrigerator for 2-3 days. Warm them up in the oven, stovetop, or air fryer.

You can also keep the falafel mixture in the refrigerator for 1-2 days.

Raw falafel patties can be frozen for 2 to 3 weeks. Store in a freezer-friendly bag.

More Easy And Delicious Sides

  • Easy Air fryer Pumpkin
    Easy Air Fryer Pumpkin
  • Korean Braised Potatoes Recipe
    Korean Braised Potatoes Recipe
  • Loaded cheesy baked potatoes on a plate on a kitchen towel.
    Cheesy Twice-Baked Potatoes
  • Sweet Potato Millet Cutlets with mint chutney on a plate.
    Sweet Potato Millet Cutlets

Half the joy of cooking is sharing it with others. Thatโ€™s why Iโ€™m always eager to hear from you. So go right ahead and drop a comment or reach out onย Instagram,ย Pinterest,ย YouTube, orย Facebook. I hope you love the air fryer falafel recipe as much as we do!

๐Ÿ“– Recipe

Easy Air Fryer Falafel Recipe

Easy Air Fryer Falafel Recipe

Natasha Minocha
Crispy, golden, and bursting with fresh herbs, these air fryer falafels are everything you love about the classic, made simpler! No deep frying, no mess, just perfectly fluffy falafels that come together effortlessly in your kitchen!
No ratings yet
Print Recipe Pin Recipe
Prep Time 14 hours hrs
Cook Time 10 minutes mins
Course Appetizer, Main Course
Cuisine Middle Eastern
Servings 25 Falafels
Calories 29 kcal

Ingredients


  • 1.5 cups Chickpeas
  • 1/2 Onion, chopped
  • 7-8 cloves Garlic
  • 1/2 cup Fresh parsley
  • 2.5 tsp Cumin powder I used roasted cumin powder
  • 2 tsp Coriander powder
  • 1.5 tsp Paprika
  • Salt to taste
  • 2 tbsp Sesame seeds
  • 1 tsp Baking powder
  • 1-2 tbsp Olive oil, for brushing on top

Instructions
 

  • Wash and soak the chickpeas for 12 to 24 hours.
  • Rinse and drain the chickpeas well.
  • Add the chickpeas, chopped onion, garlic cloves, parsley, cumin powder, coriander powder, paprika, and salt to your food processor.
  • Mince to a coarse texture.
  • Transfer to a bowl and mix in the sesame seeds.
  • Cover and refrigerate this mixture for at least 1 hour or up to overnight.
  • When you are ready to cook the falafels, mix in the baking powder.
  • Shape the mixture into balls and flatten them slightly.
  • Brush both sides of the falafels with olive oil and place them in the basket of your air fryer in a single layer.
  • Bake for 5 minutes at 200 C/ 400 F. Flip them and continue cooking for another 4-5 minutes or until crispy and browned.
  • Remove carefully from the basket and serve on a platter. Enjoy!

Video

Notes

  • Pleaseย donโ€™tย grind air fryer falafel into aย very fineย mixture. We want it a bit coarse, for that wonderful texture. You pulse for a few seconds, scrape the sides, and then pulse gain till everything is blended but still has structure. Youโ€™ve reachedย the right textureย when you hold the mixture in your palms, whichย sticks together.ย 
  • Chilling the raw falafel helps the ingredients meld and ensures the mixture holds its shape better.
  • Donโ€™t overcrowd the air fryer. Leave sufficient space between falafels.ย 
  • 10 to 12 minutes worked for me, but I recommend keeping an eye on the falafels after the 8-minute mark because every air fryer is different. Yours may be faster or take longer!

Nutrition

Serving: 1 FalafelCalories: 29kcalCarbohydrates: 4gProtein: 1gFat: 1gSaturated Fat: 0.2gPolyunsaturated Fat: 0.3gMonounsaturated Fat: 1gSodium: 19mgPotassium: 54mgFiber: 1gSugar: 1gVitamin A: 167IUVitamin C: 2mgCalcium: 28mgIron: 1mg
Tried this recipe?Let us know how it was!

Pumpkin Basque Cheesecake

November 18, 2023

Sliced pumpkin cheesecake on parchment paper with 2 forks.

Creamy, spiced, and with just the right amount of sweet, this pumpkin Basque cheesecake is a cozy twist on the classic. Itโ€™s a super simple, one-bowl recipe thatโ€™s great for fall and perfect for Thanksgiving!

Sliced pumpkin cheesecake on parchment paper with 2 forks.

My burnt Basque cheesecake recipe? Itโ€™s been popular since the day I shared it. And I just love how this pumpkin version of the Basque cheesecake recipe came out! 

The outside has that signature deeply burnished top, and the inside remains soft, custardy, and full of intense fall and pumpkin flavors!

[feast_advanced_jump_to]

Why You'll Love This Recipe

โœจThis Basque pumpkin cheesecake looks fancy, but it couldnโ€™t be easier to make. No crust, no water bath, no tricky stepsโ€”mix, bake, and let the oven work its magic.

โœจItโ€™s rich, custardy, and packed with that sweet, earthy pumpkin flavor we all love in fall desserts like pumpkin cinnamon rolls. The top gets beautifully dark and caramelized, while the center stays soft and creamy.

โœจYou can make the Basque cheesecake a day in advance, which makes it perfect for the Holidays or when youโ€™re hosting.

โœจIf youโ€™re torn between pumpkin pie and cheesecake, this dessert gives you the best of both. Itโ€™s like Fall in a slice!

Basque Pumpkin Cheesecake Ingredients

Ingredients for making pumpkin basque cheesecake.

Cream Cheese: Go with full-fat cream cheese for that rich, classic Basque cheesecake taste. You can use store-bought or homemade cream cheese. Just make sure itโ€™s softened. Cold cream cheese wonโ€™t mix well and can make your batter lumpy.

Sugar: I used caster sugar because it dissolves quickly, but regular granulated or cane sugar will work just fine too.

Pumpkin Purรฉe: I made mine using butternut squash because thatโ€™s what I had on hand. Any sweet pumpkin variety will do. You can use canned pumpkin if thatโ€™s easier. Just make sure itโ€™s pure pumpkin, not pie filling.

Cream is what gives this cheesecake its amazingly smooth and rich texture.

All-Purpose Flour: Just a small amount helps set the cheesecake and gives it structure.

Eggs: These are key! They help the cake hold together and give that custard-like, creamy texture we all love.

Pumpkin Pie Spice: You can use store-bought, but I like mixing my pumpkin spice blend at home. Itโ€™s easy, and you get to make it according to your preference.

Homemade Vanilla Extract: Adds warmth and rounds out the flavors. A little goes a long way.

Please see the recipe card for full information about the ingredients and quantities.

Variations

Matcha Basque Cheesecake: Just add a couple of teaspoons of matcha powder to the batter for an earthy twist that pairs beautifully with the rich, creamy base.

Orange Basque Cheesecake: Stir in some fresh orange zest and candied orange slices for a bright, citrusy version of the cake. 

How To Make Pumpkin Basque Cheesecake

Step 1: Preheat the oven and line your cake tin with parchment paper.

pumpkin puree, flour, eggs, cream cheese, pumpkin spice and sugar in a mixing bowl.

Step 2: Mix softened cream cheese with sugar until the sugar is dissolved, and you have a smooth consistency. Add eggs, pumpkin purรฉe, vanilla extract, all-purpose flour, and pumpkin pie spice.

cheesecake batter in a mixing bowl.

Step 3: Whisk well until you have a smooth, thick mixture.

pumpkin cheesecake batter in a parchment paper lined cake pan.

Step 4: Pour the burnt Basque pumpkin cheesecake batter into the prepared cake tin.

baked pumpkin cheesecake in a parchment lined cake pan.

Step 5: Bake for 50-55 minutes, until the cake is browned on top, but still jiggly in the center.

Step 6: Turn off the heat, crack the oven door open, and let the cake sit for a few minutes.ย 

Step 7: Transfer the cheesecake to the countertop until cool.

Step 8: Refrigerate overnight (or at least 8 to 10 hours). Gently remove the cake from the pan and peel the parchment paper away from the cake.ย ย 

Final Step: Slice, serve, and enjoy cold or at room temperature.ย 

Pumpkin basque cheesecake on parchment paper.

Pro Tips

  • Room temp ingredients are a must, especially the cream cheese, eggs, and cream. They blend so much better and give you a smoother batter.
  • Lumpy batter? No worries! Just pour it through a sieve. Itโ€™s the best trick in the book for a velvety Basque cheesecake.
  • Always line your cake pan with baking paper. Scrunch up the parchment paper and use it to line the cake pan. Don't worry about the creases in the paper. They help give the cheesecake a lovely rustic look.
  • Use one big sheet of parchment, not separate pieces for the bottom and sides. That way, the batter wonโ€™t leak out.ย 
  • Let the paper hang a couple of inches over the edge, too. Pumpkin Basque cheesecake puffs up quite a bit while baking.
  • Weigh your ingredients using a kitchen scale for better and consistent results!
A slice of cheesecake on a small wooden plate.

How To Serve 

Honestly, this pumpkin Basque cheesecake is so good on its own with a cup of coffee, tea, or even hot chocolate! Let it sit out for about 15 minutes after taking it out of the fridge. Room temperature is when the texture is at its best: super creamy and luscious. Though I do love it chilled too!

But if youโ€™re in the mood to dress it up a little, try a light dusting of icing sugar, a drizzle of dark chocolate for a richer bite, or a soft dollop of whipped cream. My favorite is melted Biscoff spread. That spiced cookie butter + pumpkin combo is chefโ€™s kiss, which is how I ended up baking a Biscoff Cheesecake too.

A slice of pumpkin cheesecake with Biscoff on a small plate with a bite taken.

Recipe FAQs

What is burnt Basque cheesecake?

Burnt Basque cheesecake (also called San Sebastiรกn cheesecake) is a crustless, creamy cheesecake thatโ€™s baked at a high temperature on purpose. Thatโ€™s what gives it its signature dark, almost โ€œburntโ€ top and edges. Itโ€™s rich, custardy inside. This style of cheesecake first became popular in the Basque region of Spain, and itโ€™s now loved pretty much everywhere.

What is the difference between American and Basque cheesecake?

The biggest difference between the two is in the texture and how theyโ€™re baked. American cheesecake is dense, smooth, and has a graham cracker crust. Itโ€™s often baked low and slow, usually in a water bath, to avoid cracks and keep it creamy.
Basque cheesecake, on the other hand, is crustless. Itโ€™s baked at a high temperature to get a deep caramelized flavor. Inside, itโ€™s much softer, sometimes even gooey in the center.

How to make pumpkin purรฉe?

Making fresh pumpkin puree is 100% worth it. The flavor is richer, sweeter, and more vibrant. Hereโ€™s how you can do it. Peel and dice your pumpkin into chunks. Cook the pieces using one of these methods:
Stovetop: Add pumpkin to a saucepan with a little water. Cover and simmer until soft.
Microwave: Add 2-3 tablespoons of water along with cubed pumpkin pieces in a bowl. Cover and microwave until tender.
Steamer: This is my go-to method. Steam until the pumpkin is fork-tender.
Once soft, mash with a fork or blitz in a blender or food processor until smooth.500 grams of raw pumpkin usually gives you around 250โ€“300 grams of purรฉe. If the purรฉe seems too watery, cook it down on the stove for a few minutes to get a thicker, richer texture.

When is the burnt pumpkin cheesecake done?

Youโ€™ll know the pumpkin burnt Basque cheesecake is ready when the top is beautifully dark brown (donโ€™t worry, itโ€™s supposed to look burnt!), the edges are set, and the center still has a slight jiggle. Resist the urge to open the oven door too early. This cheesecake needs that high heat to get its signature caramelized top.

How do you prevent the Basque cheesecake from cracking?

Cracks are totally normal in burnt Basque pumpkin cheesecake. It puffs up in the oven and then settles as it cools. That often means a few cracks here and there. Itโ€™s part of the rustic charm!
However, you can stop it from crackingย too much. The secret isย not to overmix the batter. Too much whisking = too much air = big cracks. Just mix until everything is smooth and combined, and youโ€™ll be good.

More Cheesecake Recipes

  • Cherry cheesecake topped with cherry compote on a tray with a slice taken out.
    Cherry Cheesecake
  • Oreo Cheesecake
    Oreo Cheesecake
  • Japanese cheesecake on a white platter with blueberries on top.
    Japanese Cheesecake
  • Baklava cheesecake garnished with pistachios and rose petals with flowers and a candle around.
    Baklava Cheesecake

Half the joy of cooking is sharing it with others. Thatโ€™s why Iโ€™m always eager to hear from you. So go right ahead and drop a comment or reach out onย Instagram,ย Pinterest,ย YouTube, orย Facebook. I hope you love this Pumpkin Basque Cheesecake as much as we do!

๐Ÿ“– Recipe

Sliced pumpkin cheesecake on parchment paper with 2 forks.

Pumpkin Basque Cheesecake

Natasha Minocha
Creamy, spiced, and with just the right amount of sweet, this pumpkin Basque cheesecake is a cozy twist on the classic. It's a super simple, one-bowl recipe that's great for Fall and perfect for Thanksgiving dessert!
No ratings yet
Print Recipe Pin Recipe
Prep Time 20 minutes mins
Cook Time 1 hour hr
8 hours hrs
Course Dessert
Cuisine Spanish
Servings 8 Servings
Calories 239 kcal

Ingredients


  • 2 cups Cream cheese
  • 1 cup Caster sugar
  • 2 Eggs
  • 1/3 cup Cream
  • 1/4 cup All-purpose flour
  • 1 1/4 cup Pumpkin puree
  • 2 tsp Pumpkin pie spice
  • 1 tsp Vanilla extract

Instructions
 

  • Preheat your oven to 200 C / 400 F.
  • Line your baking pan with parchment paper. Make sure the paper comes at least 2" above the sides of the pan.
    I used a 6" cake tin.
  • In a large bowl, beat together the cream cheese and sugar, until the cream cheese is creamy and sugar is dissolved.
  • Add the eggs, cream, all-purpose flour, vanilla extract, pumpkin puree, and pumpkin pie spice to the cream cheese mixture.
  • Mix well until a smooth batter is formed.
    If your batter is lumpy, you can sieve it to make it smooth.
  • Pour into the prepared pan and bake at 200 C / 400 F for 50-55 minutes, until the cake is browned on top, but still jiggly in the center.
  • Let the cake cool in the partially open oven for 30-40 minutes, then transfer to the refrigerator for it to set completely, for about 8-10 hours.
  • Gently remove the cake from the pan and peel the parchment paper away from the cake. Serve cold or at room temperature. Enjoy!

Video

Notes

  • Room temp ingredients are a must, especially the cream cheese, eggs, and cream. They blend so much better and give you a smoother batter.
  • Lumpy batter? No worries! Just pour it through a sieve. Itโ€™s the best trick in the book for a velvety Basque cheesecake.
  • Always line your cake pan with baking paper. Scrunch up the parchment paper and use it to line the cake pan. Don't worry about the creases in the paper. They help give the cheesecake a lovely rustic look.
  • Use one big sheet of parchment, not separate pieces for the bottom and sides. That way, the batter wonโ€™t leak out.ย 
  • Let the paper hang a couple of inches over the edge, too. Pumpkin Basque cheesecake puffs up quite a bit while baking.
  • Weigh your ingredients using a kitchen scale for better and consistent results!

Nutrition

Serving: 1 SliceCalories: 239kcalCarbohydrates: 37gProtein: 12gFat: 6gSaturated Fat: 3gPolyunsaturated Fat: 0.4gMonounsaturated Fat: 1gTrans Fat: 0.004gCholesterol: 59mgSodium: 423mgPotassium: 273mgFiber: 1gSugar: 30gVitamin A: 6283IUVitamin C: 2mgCalcium: 228mgIron: 1mg
Tried this recipe?Let us know how it was!
  • « Go to Previous Page
  • Page 1
  • Page 2
  • Page 3
  • Page 4
  • Page 5
  • Interim pages omitted …
  • Page 16
  • Go to Next Page »

Primary Sidebar

New-Cover-4-1024x934

Iโ€™m Natasha! Iโ€™m a self-taught baker and cook, sharing easy, fuss-free recipes that anyone can make with confidence. From breads and cookies to decadent desserts to simple meals, I hope youโ€™ll find your next favorite recipe here.

More about me โ†’

Sign Up For Email Updates

Get A Free E-Book With 8 Easy Bread Recipes For Beginner Bakers!

Popular Recipes

  • mushroom quiche on a platter with ingredients in the background.
    Mushroom Quiche
  • chocolate fudge squares stacked on top of each other on small plate.
    Chocolate Fudge With Condensed Milk
  • Easiest Homemade Cream Cheese | Homemade Cream Cheese Recipe
    Easiest Homemade Cream Cheese
  • Cinnamon Bread Pudding
    Cinnamon Bread Pudding
  • Korean Corn Cheese in a cast iron skillet.
    Korean Corn Cheese Recipe
  • Best Condensed Milk Bread Rolls (Soft & Fluffy)
    Best Condensed Milk Bread Rolls (Soft & Fluffy)

Mother's Day Recipes

  • The Best French Toast Casserole Recipe
    The Best French Toast Casserole Recipe
  • cherry puff pastry tarts on a white platter.
    Cherry Puff Pastry Tarts
  • Lemon Poppyseed Cupcakes on a cake stand.
    Lemon Poppyseed Cupcakes
  • Strawberry Crepes | Easy eggless strawberry Crepes | Eggless Crepes with Strawberry Jam
    Strawberry Crepes
  • mango chia pudding topped with coconut, mangoes, and blueberries in a glass.
    Mango Chia Pudding With Coconut Milk
  • avocado chocolate mousse in a glass cup with 2 spoons on the side.
    Avocado Chocolate Mousse

See More Mother's Day Recipes โ†’

Footer

โ†‘ back to top

Sign Up For Email Updates

Get A Free E-Book With 8 Easy Bread Recipes For Beginner Bakers!

Tashaโ€™s Artisan Foods

About

Work With Me

Connect With Me

Browse Recipes

Desserts
Snacks
Breads
Cakes
Baking Guides

Published with WordPress

PRIVACY POLICY

COPYRIGHT ยฉ 2026 TASHA'S ARTISAN FOODS

Rate This Recipe

Your vote:


A rating is required
A name is required
An email is required