• Skip to main content
  • Skip to primary sidebar

menu icon
go to homepage
  • Summer Recipes
  • Recipe Index
  • About Natasha
  • Free E-Book
subscribe
search icon
Homepage link
  • Summer Recipes
  • Recipe Index
  • About Natasha
  • Free E-Book
×
Home > Recipes

Homemade Pretzel Buns

February 17, 2025

Homemade pretzel buns on parchment paper.

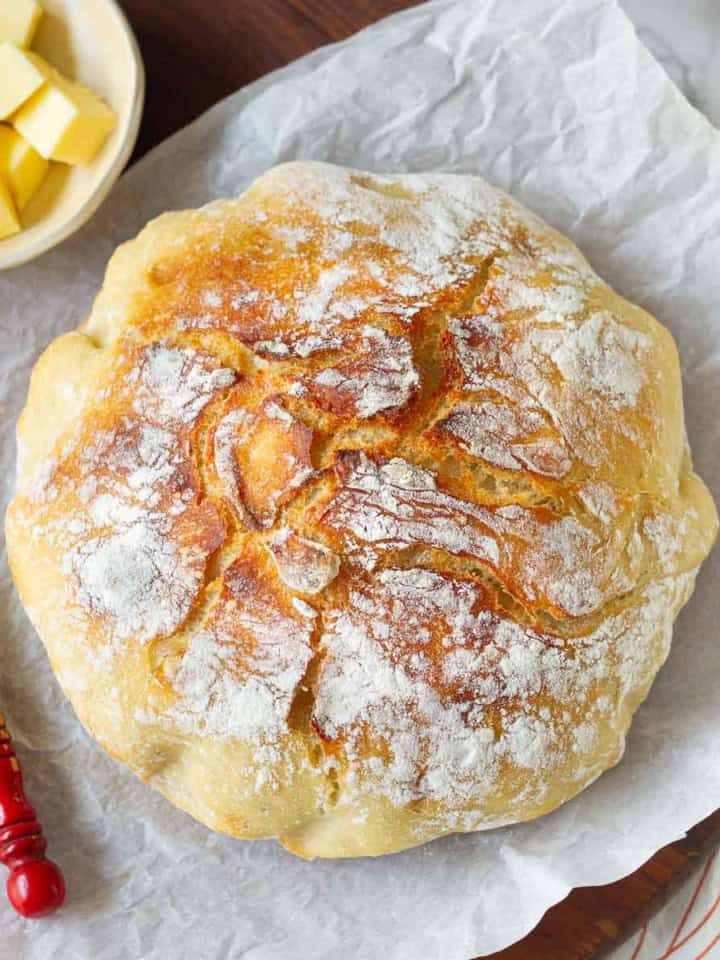
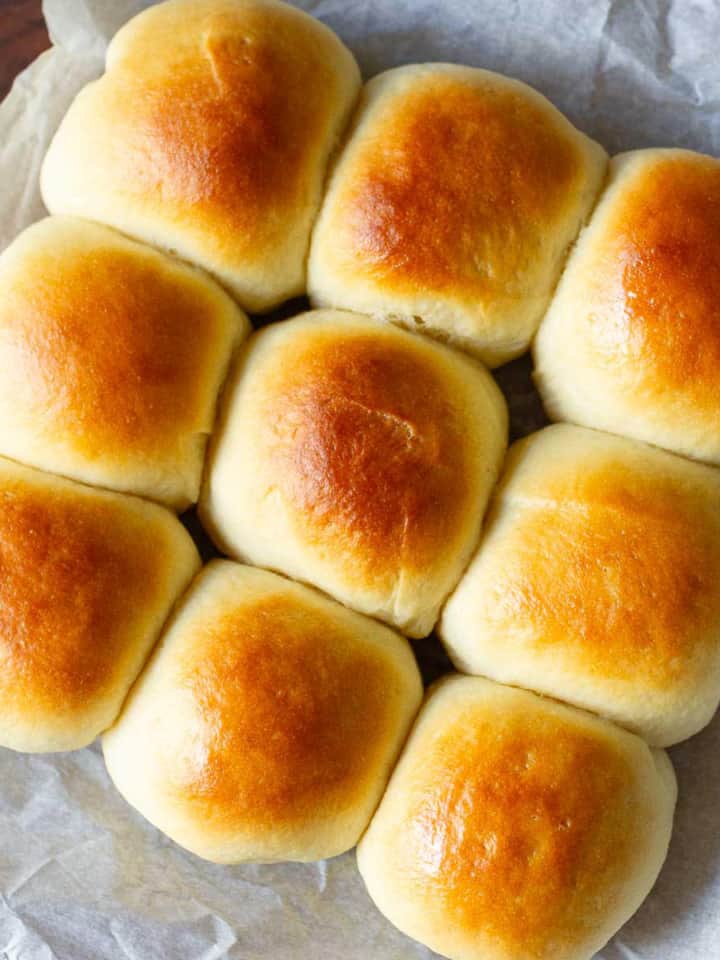
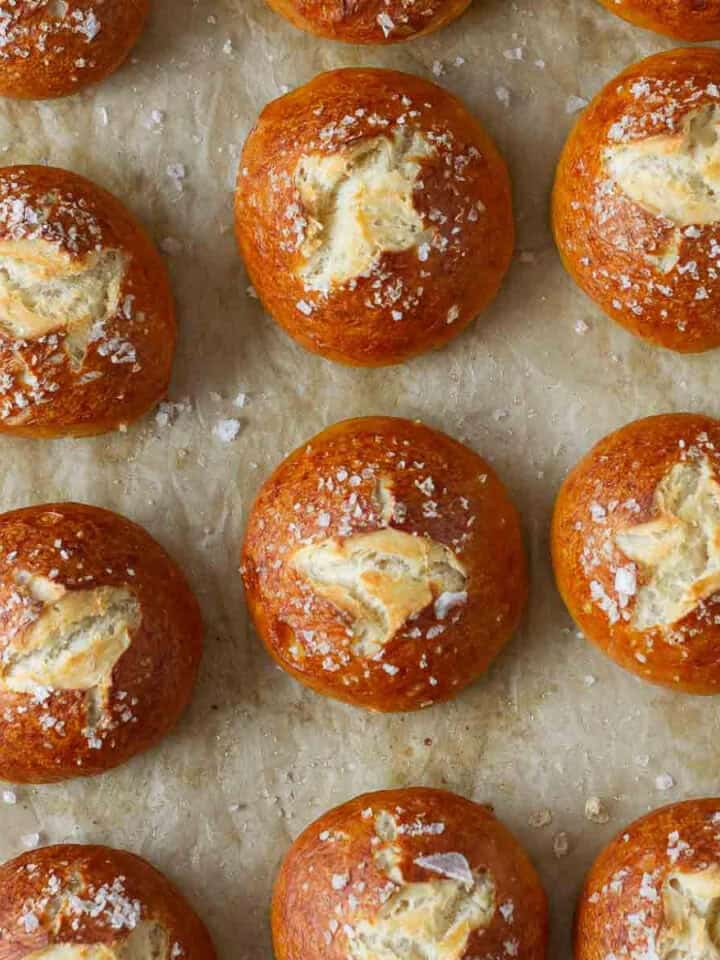
Homemade pretzel buns just hit differently. Golden brown, chewy, and with that signature salty crust, they turn any sandwich or burger into something special. And the best part? They’re way easier to make than you’d think!

Pretzel buns on a tray with one bun cut into half to show the texture.

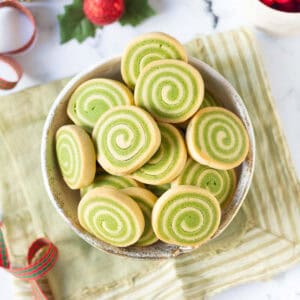
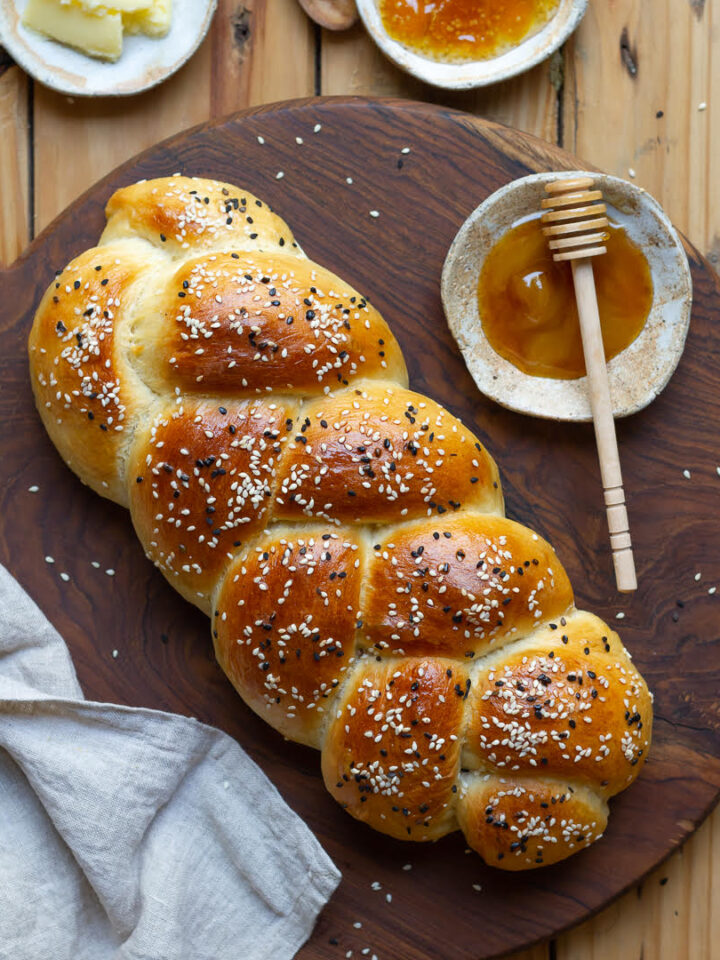
I’ve made a lot of bread, from everyday bread to soft and fluffy dinner rolls to more complicated challah bread. But these perfectly bronzed pretzel buns are by far one of the best.

The homemade pretzel recipe is adapted from King Arthur Baking. I made a few changes to suit my taste, and the rolls came out soft, chewy, and full of pretzel flavor.

If you’re one of the people who hear pretzels and think, “Oh, I can’t make those!” Believe me, you can. The pretzel bun recipe is really easy. Just follow the simple steps and trust me, you'll have the most gorgeous burnished soft pretzel rolls that you won't stop raving about!

[feast_advanced_jump_to]

Why You’ll Love This Recipe

An easy take on the popular soft pretzels.

Basic pantry ingredients.

No complicated steps here!

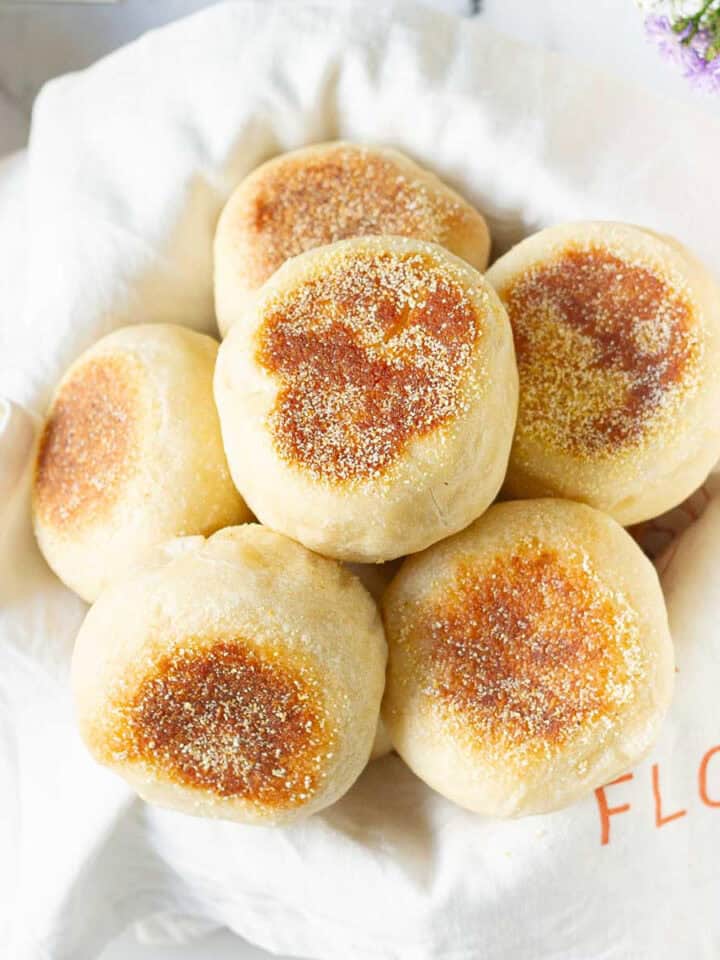
Freshly baked pretzel buns are on a whole other level.

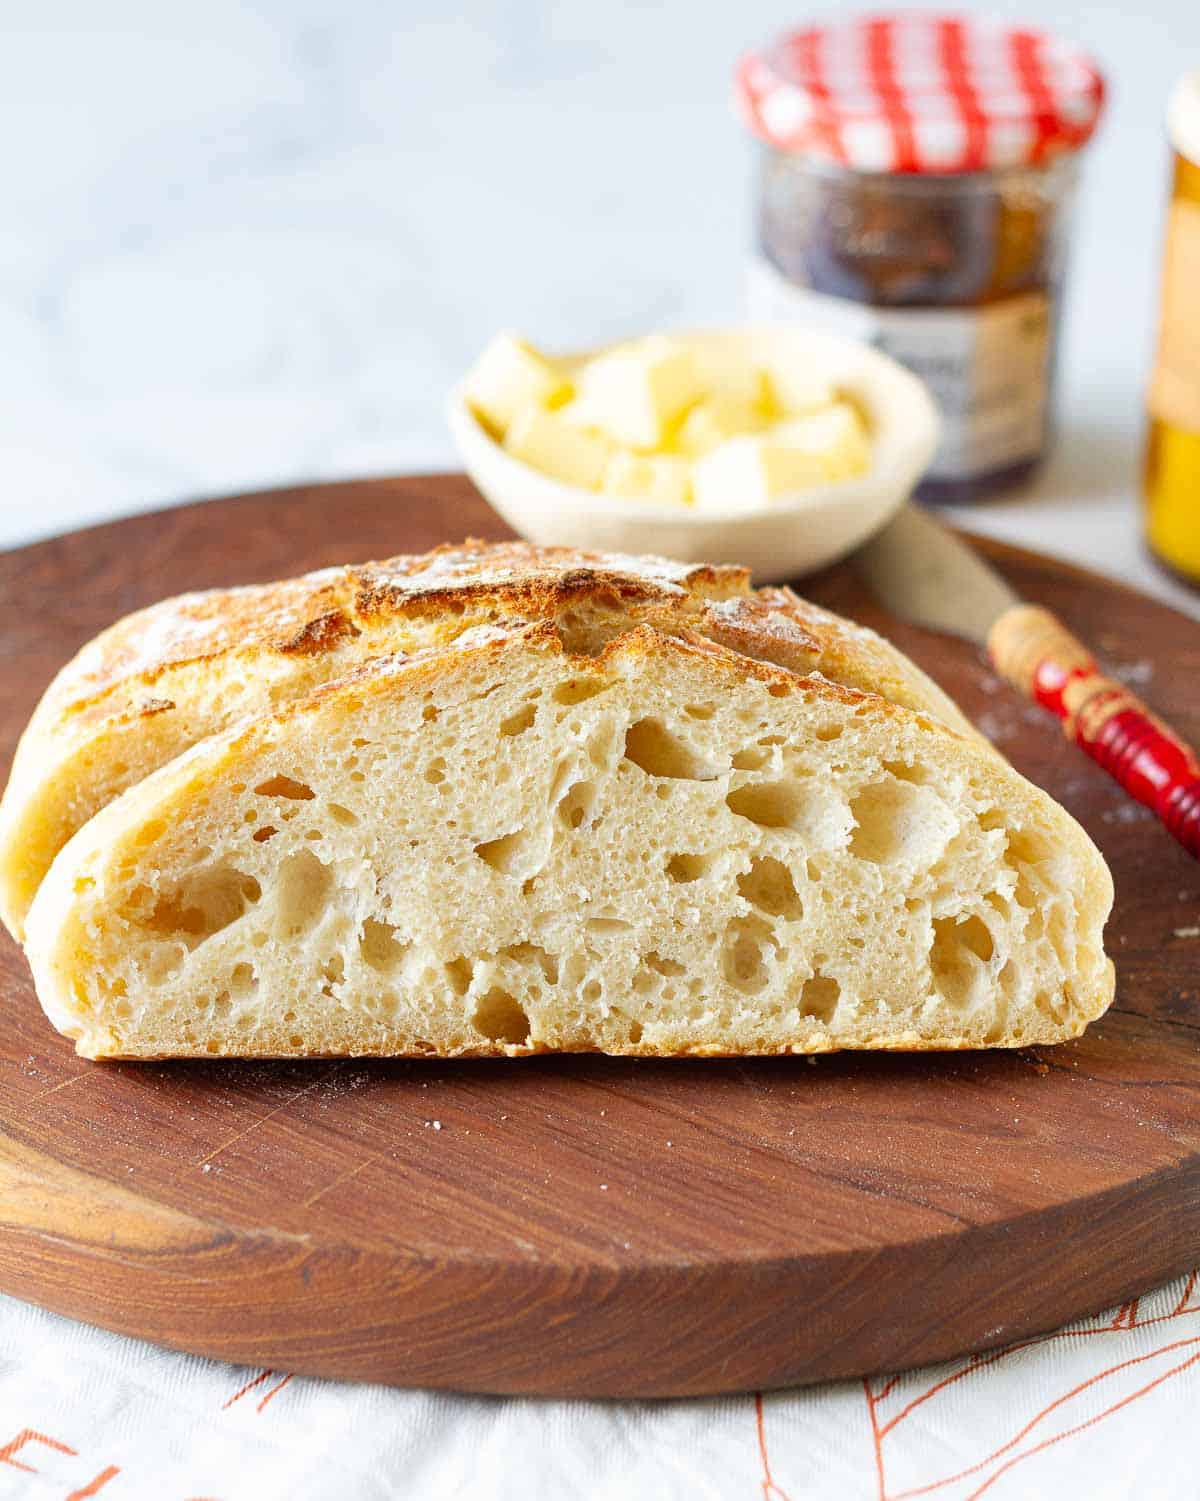
Crispy top, cotton-soft interior, and sprinkled with just the right amount of sea salt.

Use pretzel rolls for burgers and sandwiches, or just slather them with butter while they’re still warm.

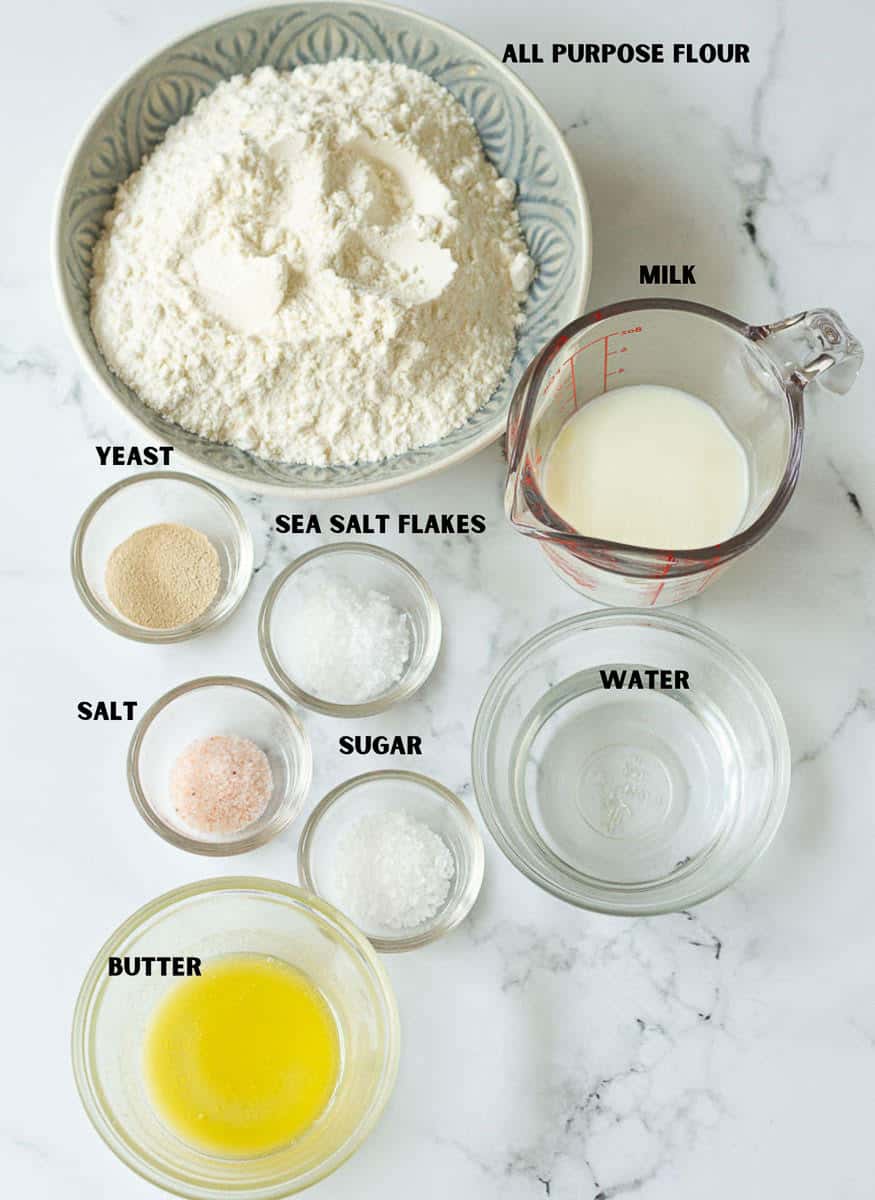
Easy Pretzel Recipe Ingredients

Ingredients for making pretzel rolls.

Yeast: I used dry active yeast. It needs to be activated before use. You can use instant yeast too. You won’t need to activate it. That said, I do like to test it beforehand by mixing half a teaspoon in half a cup of warm water. If it becomes frothy and bubbly in 5 -10 minutes, the yeast is good to use!

Water: Yeast loves warmth, but there’s a sweet spot—105°F (40.5°C) is just right. Too hot, and you’ll kill it. Too cold, and it won’t activate. So, stick with warm water to get that immaculate rise.

Flour: I like using all-purpose flour for these pretzel buns, but a mix of all-purpose and whole wheat gives a heartier bite. Want them extra chewy? Try bread flour!

Milk powder: Any brand works—it adds richness and sweetness to the homemade pretzel bun dough.

Oil: I used olive oil, but any neutral vegetable oil (or even softened butter) will do the trick.

Salt: I use coarse sea salt in this recipe, for the dough and topping.

Baking soda is needed for the water bath. This is what gives pretzel buns their signature deep golden crust and slight chew. Don’t skip it—it’s the magic ingredient!

Please see the recipe card for full information about ingredients and quantities.

How To Make Homemade Pretzel Buns

yeast and water mixture in a glass measuring cup.

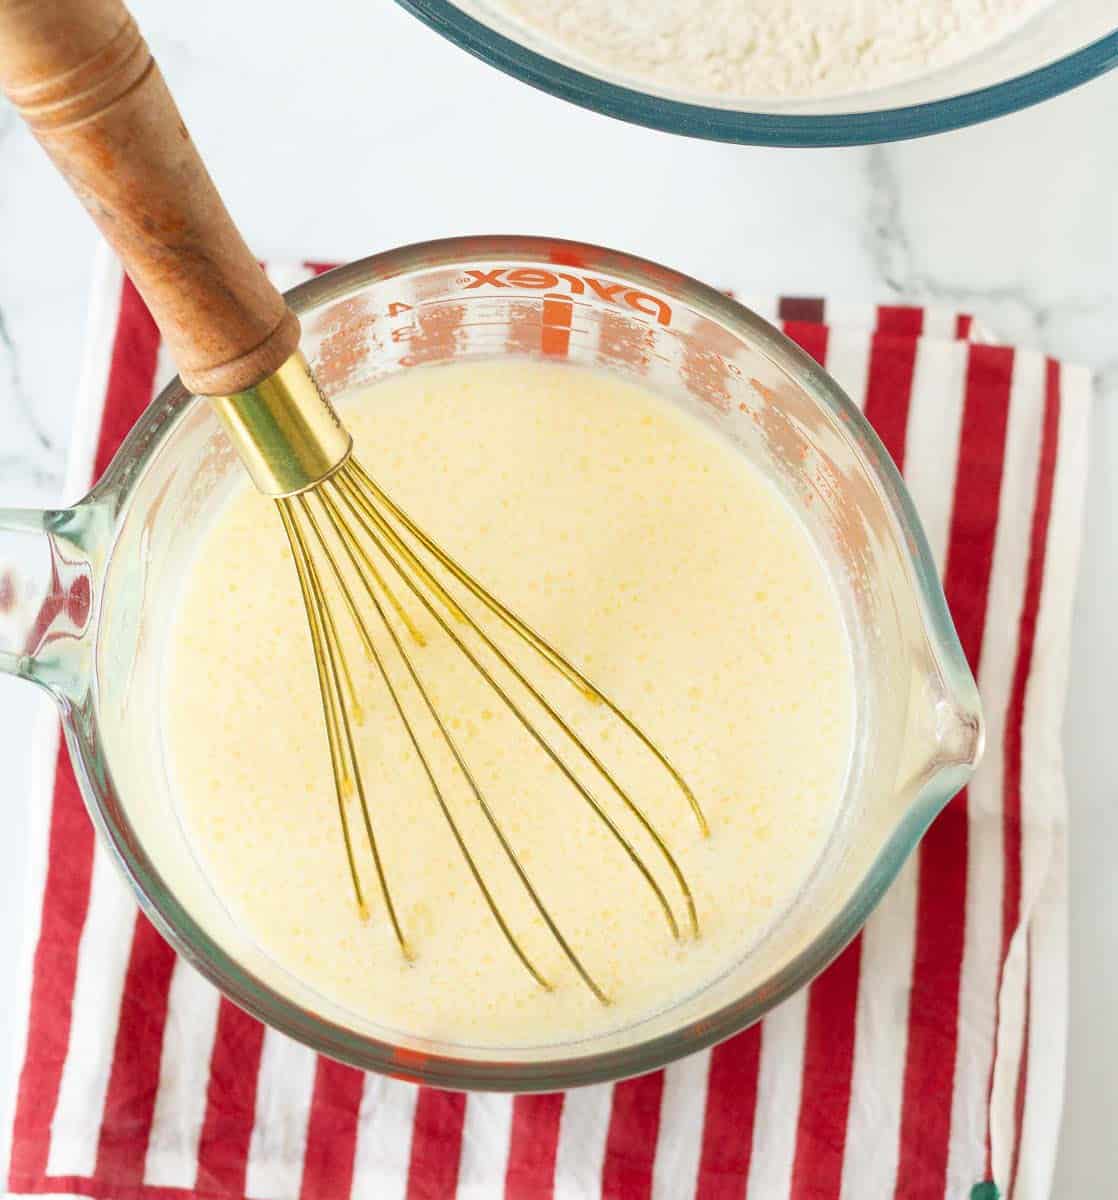
Step 1: Combine yeast and warm water in a small bowl. set aside until frothy.

a shaggy dough in a stand mixer's bowl.

Step 2: Combine the flour, milk powder, olive oil, and salt in the bowl of your stand mixer. Stir in the yeast mixture. Mix with a spatula until a shaggy dough forms.

ready dough ready for proofing in a glass mixing bowl.

Step 3: Knead on medium speed for 5-6 minutes until the dough is soft, smooth, and slightly sticky.

Proofed pretzel dough in a glass bowl.

Step 4: Transfer the dough to a greased bowl. Cover and proof for 60-90 minutes, or until it has doubled in volume.

pretzel dough divided into 12 equal pieces.

Step 5: Gently deflate the dough and divide it into 12 equal-sized pieces.

12 dough balls on parchment paper on a baking tray.

Step 6: Roll into smooth balls and place on a greased parchment-lined tray. Cover and let rest for 15 minutes.

taking a boiled pretzel ball in a spider from a wok full of boiling water.

Step 7: In the meantime, prepare the water bath and preheat your oven. Bring the water, baking soda, and salt to a rolling boil. Gently drop 3-4 balls at a time in the boiling water. Cook for 30 seconds, flip, and cook for another 30 seconds. Remove from the water using a slotted spoon.

12 dough balls scored and with salt on top on parchment paper lined tray.

Step 8: Repeat this with all the remaining balls. Make a cross on top of the balls using a sharp knife or scissors. Sprinkle with sea salt and bake for 20 -25 minutes.

Baked pretzel buns on parchment paper.

Step 9: Allow the soft pretzel rolls to cool for a few minutes. Serve warm and enjoy!

Pro Tips

  • The measurements for these rolls are also given in cups. My preference and strong recommendation is always to weigh the ingredients using a kitchen scale. This is the most accurate way to measure and gives the most consistent results.
  • Grease your parchment paper or baking tray. The soda bath releases starch, making the dough a little sticky. If you skip the grease, those gorgeous homemade pretzel buns might stick to the pan!
  • If it’s humid in your neck of the woods, you may need slightly less water to make the dough.
  • When prepping the baking soda bath, don’t fill your pot to the top! The baking soda makes the water bubble up like crazy, and an overflowing pot is no fun to clean.
  • Don’t panic if the pretzel dough balls look wrinkly after you take them out of the water bath. That’s exactly how they should be. Once they hit the oven, they’ll puff up beautifully.
  • Don't skip scoring the rolls. The scoring allows the rolls to expand as they bake, which ensures even the deepest center is cooked thoroughly. 
  • Reheat any leftover rolls in a toaster oven or a preheated oven for 5 minutes. Microwave will make them soggy.
Half of a bread roll to show the cross section placed on more rolls.

How To Serve

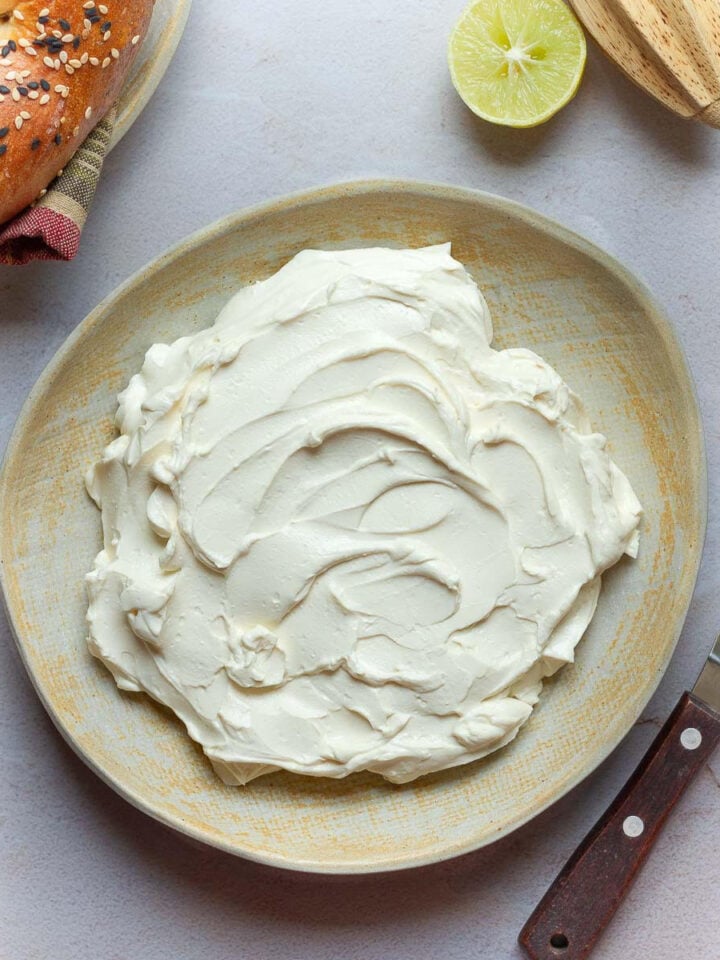
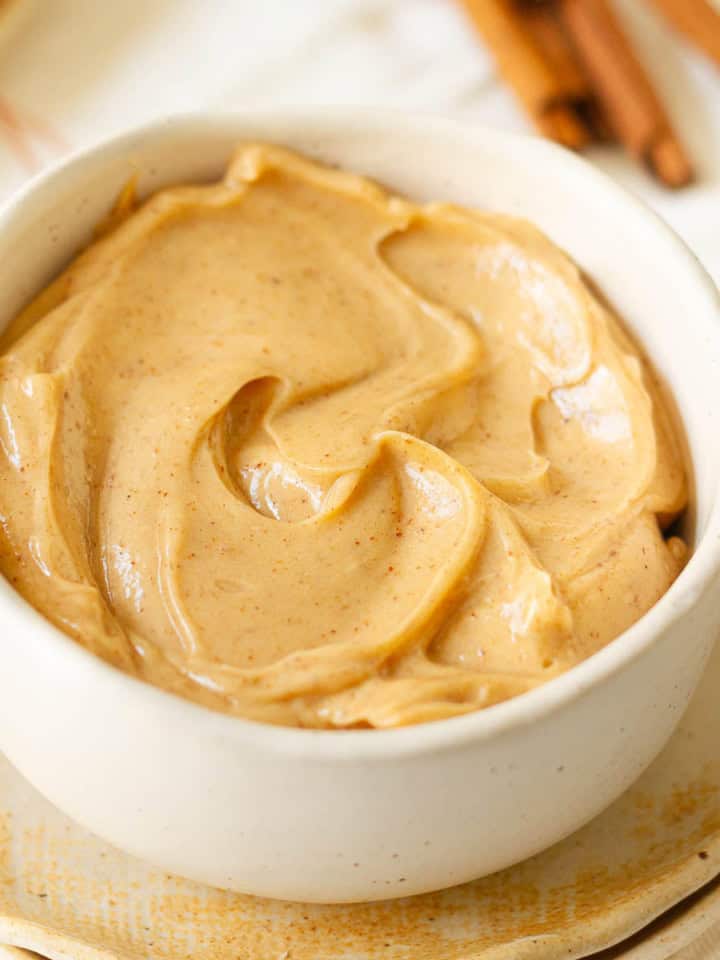
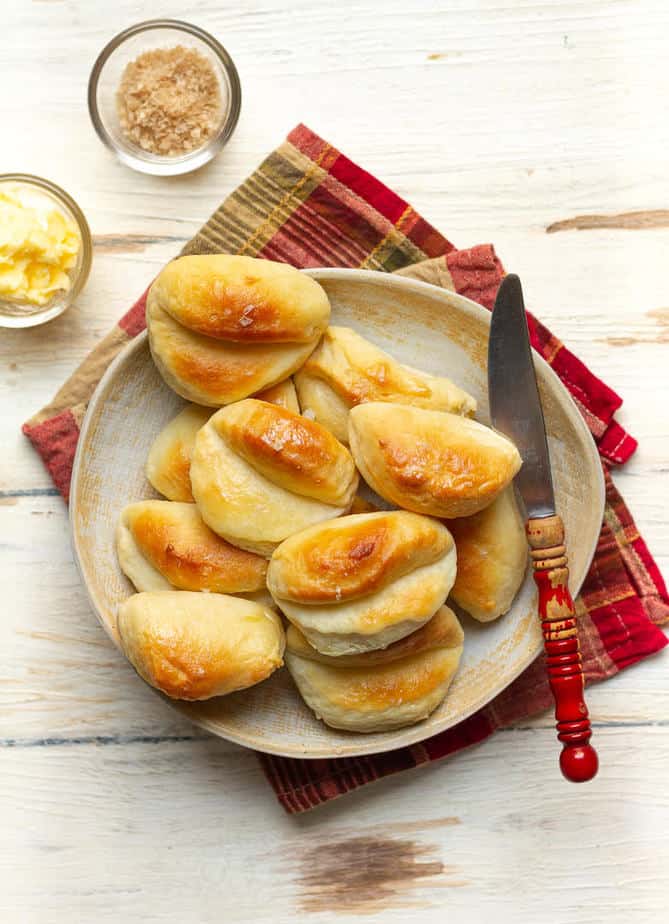
Fresh out of the oven, warm and golden, homemade pretzel buns are pure magic. Eat them warm. But they get even better slathered with cashew cheese, apple butter, or cinnamon honey butter.

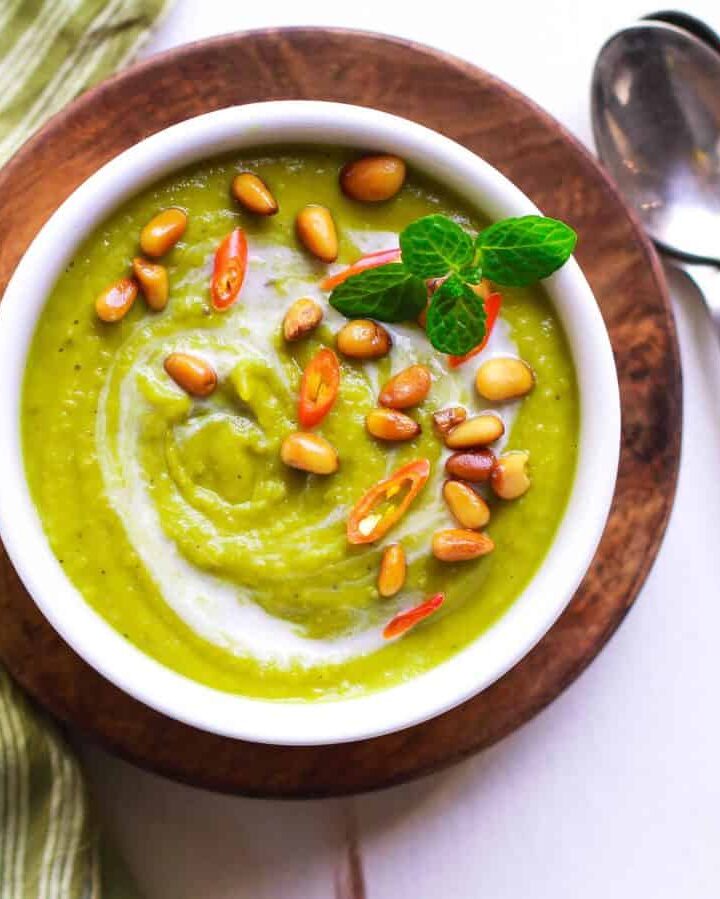
Serve them with roasted pumpkin soup or avocado egg salad. It’s the best kind of comfort food. The great thing about these easy soft pretzel rolls is that they’re delicious for any meal. So, you can use them to make sandwiches, serve with eggs, and mop up curries and stews such as this Moroccan vegetable stew.

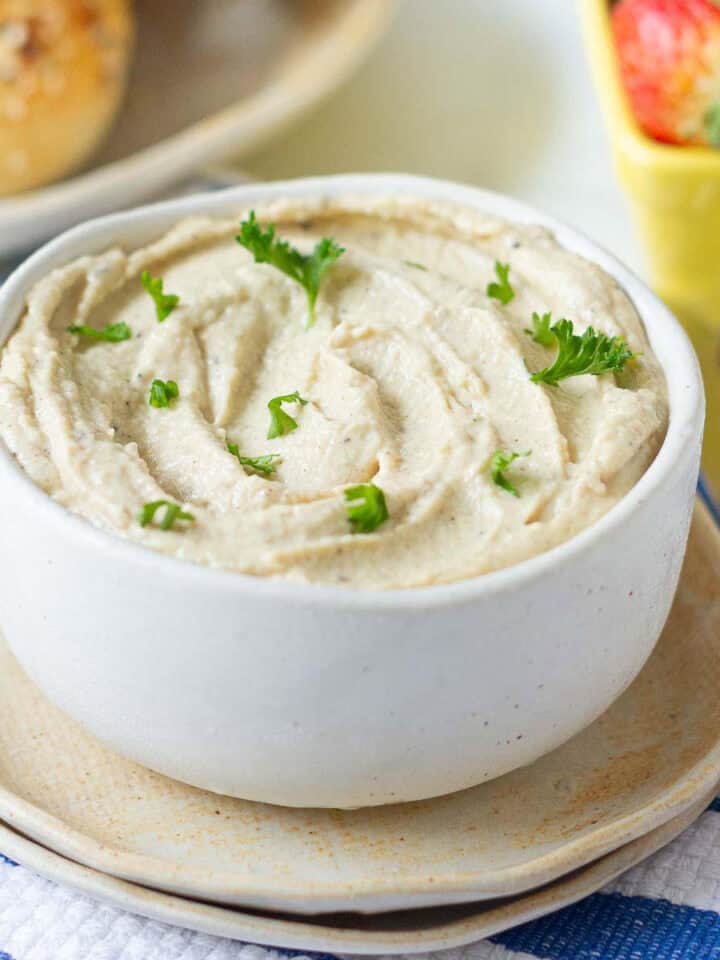
If you’re in the mood for something simpler, plate them with cashew roasted red pepper dip, vegan spinach artichoke dip, or whipped feta dip as an evening snack! You can even swap out regular burger buns for pretzel buns. Their chewy texture holds up beautifully to juicy patties.

How To Store Pretzel Buns

These rolls are the best the day they are made. But you can store the leftover rolls in an air-tight container for up to 3 days. You can also freeze them for up to 1 month.

The salt on top will draw out the moisture making the crust soft. Reheat in a toaster oven or a preheated oven for 5 minutes.

Recipe FAQs

How to roll pretzel dough?

The key to fluffy, well-shaped pretzel buns is a round, slightly tight dough ball. If they’re too loose, they’ll flatten out as they bake.

The trick? Roll the dough between your palms, applying light pressure. As you do, you’ll feel the top smooth out and firm up—that’s when you know it’s ready to go.

Why do pretzel rolls need a water bath?

That deep golden color, chewy crust, and iconic flavor? It all comes from the baking soda bath. Skipping it means missing out on that signature glossy finish and crisp texture.
The quick dip in hot, bubbly water is what gives pretzel buns their irresistible contrast—a lightly crunchy outside with a soft, pillowy center. And the flavor? It’s something you just have to taste to believe!

How to make pretzel rolls vegan?

To make the pretzel buns completely vegan, simply use powdered plant-based milk powder.

Can I make the buns in another shape?

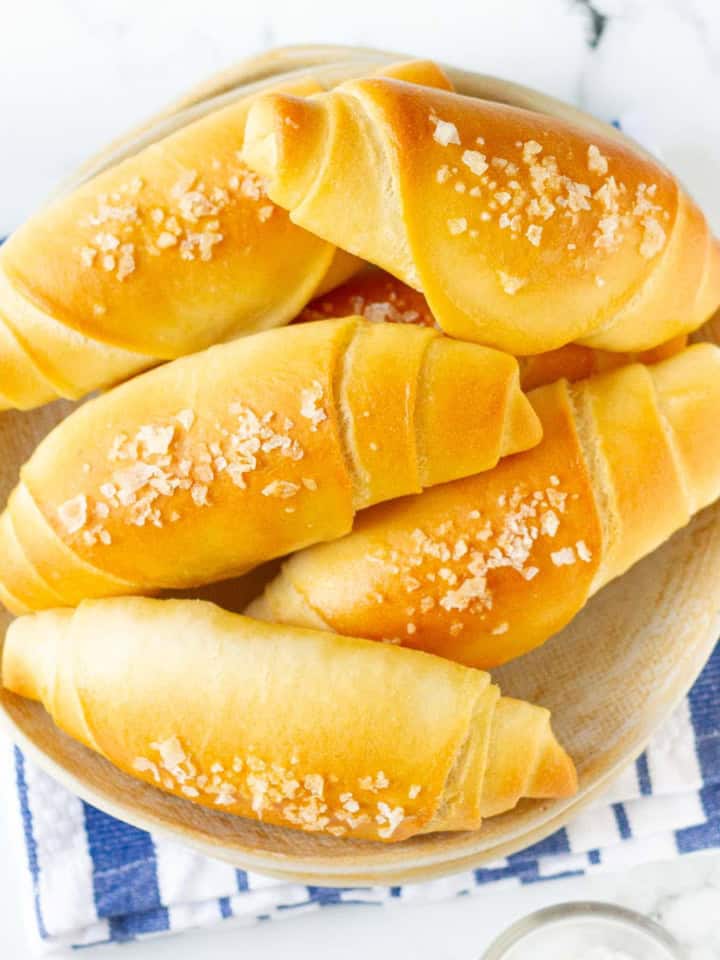
Absolutely! This dough isn’t just for homemade pretzel buns. Get creative. Twist it into classic soft pretzels, shape it into mini hot dog buns, or roll it out for sub-style sandwiches.

More Dinner Roll Recipes

  • pumpkin bread rolls piled up in a wooden tray.
    Pumpkin Bread Rolls
  • Parker House Rolls on a plate with a butter knife and butter.
    Parker House Rolls
  • Rolls in a bowl on a blue and white kitchen towel.
    Salted Butter Rolls Recipe
  • A basket of English muffins made without an oven.
    Homemade English Muffins

Half the joy of cooking is sharing it with others. That’s why I’m always eager to hear from you. So go right ahead & drop a comment or reach out on Instagram, Pinterest, YouTube, or Facebook. I hope you love these homemade pretzel buns as much as we do!

📖 Recipe

Tried this recipe?Let us know how it was!
Homemade pretzel buns on parchment paper.

Homemade Pretzel Buns

Natasha Minocha
Homemade Pretzel Buns - crispy top, cotton-soft interior, and nicely chewy texture with just a hint of salt to round off their signature, cracker-like flavor!
No ratings yet
Print Recipe Pin Recipe
Prep Time 2 hours hrs
Cook Time 20 minutes mins
Course Bread, Side Dish, Snack
Cuisine American
Servings 12 Rolls
Calories 209 kcal

Ingredients


  • 1 3/4 cups Warm water
  • 2 tsp Dried active yeast
  • 4.5 cups All purpose flour
  • 1/4 cup Milk powder
  • 3/4 tsp Salt
  • 2 tbsp Olive oil

Water bath

  • 2 ltrs Water
  • 1/4 cup Baking soda
  • 1 tbsp Salt

Topping

  • Sea salt

Instructions
 

Dough

  • Combine yeast and warm water in a small bowl. Set aside until frothy.
    1 3/4 cups Warm water, 2 tsp Dried active yeast
  • Combine the flour, milk powder, olive oil, and salt in the bowl of your stand mixer. Stir in the yeast mixture.
    4.5 cups All-purpose flour, 1/4 cup Milk powder, 3/4 tsp Salt, 2 tbsp Olive oil
  • Mix with a spatula until a shaggy dough forms.
  • Knead on medium speed for 5-6 minutes until you get a soft, smooth, slightly sticky dough.
    You can knead by hand also. This should take about 8 minutes.
  • If the dough seems too sticky, add flour, 1 tablespoon at a time. Be careful not to add too much flour, we want the dough to be soft and a bit tacky to the touch.
  • Place the dough in a greased bowl, and cover it with a damp tea towel. Let the dough rest for an hour or until it doubles in size.
  • Gently deflate the risen dough and divide it into 12 equal-sized balls, about 88 gms each.
  • Cover them and let them rest for 15 minutes, on a greased or parchment-lined tray. Please lightly grease the parchment too.

Water Bath

  • In the meanwhile, prepare the water bath and preheat your oven to 200 C.
  • Bring the water, baking soda, and salt to a rolling boil.
    2 ltrs Water, 1/4 cup Baking soda, 1 tbsp Salt
  • Gently drop 4 balls at a time in the boiling water.
  • Cook for 30 seconds, flip and cook for another 30 seconds.
  • Remove from the water using a slotted spoon.
  • Repeat this with all the remaining balls.
  • Make a cross on top of the balls using a sharp knife or scissors. Sprinkle with sea salt and bake for 20 -25 minutes. Or until they are deep golden brown.
  • Place the pretzel rolls on a cooling rack to cool. Enjoy warm as is or with butter!

Video

Notes

  • The measurements for these rolls are also given in cups. My preference and strong recommendation is always to weigh the ingredients using a kitchen scale. This is the most accurate way to measure and gives the most consistent results.
  • Grease your parchment paper or baking tray. The soda bath releases starch, making the dough a little sticky. If you skip the grease, those gorgeous homemade pretzel buns might stick to the pan!
  • If it’s humid in your neck of the woods, you may need slightly less water to make the dough.
  • When prepping the baking soda bath, don’t fill your pot to the top! The baking soda makes the water bubble up like crazy, and an overflowing pot is no fun to clean.
  • Don’t panic if the pretzel dough balls look wrinkly after you take them out of the water bath. That’s exactly how they should be. Once they hit the oven, they’ll puff up beautifully.
  • Don't skip scoring the rolls. The scoring allows the rolls to expand as they bake, which ensures even the deepest center is cooked thoroughly. 
  • Reheat any leftover rolls in a toaster oven or a preheated oven for 5 minutes. Microwave will make them soggy.
 

Nutrition

Serving: 1 RollCalories: 209kcalCarbohydrates: 38gProtein: 6gFat: 4gSaturated Fat: 1gPolyunsaturated Fat: 0.5gMonounsaturated Fat: 2gCholesterol: 3mgSodium: 1442mgPotassium: 92mgFiber: 1gSugar: 1gVitamin A: 26IUVitamin C: 0.2mgCalcium: 38mgIron: 2mg

Matcha Chia Pudding

February 9, 2025

matcha chia pudding in a glass cup topped with pomegranates and chocolate bits.

Thick, creamy, and delicious, matcha chia pudding is ridiculously easy to make. It takes all of 5 minutes to mix—then the fridge does the rest of the work overnight. So you have a refreshing, wholesome, and totally effortless breakfast ready the next morning!

matcha chia pudding in a glass cup on a small plate with a spoon.

Lightly sweetened with just the right hint of earthy matcha flavor, matcha chia seed pudding is healthy and filling. Whether you enjoy it as a grab-and-go breakfast, a midday snack, or even a light dessert, this chia pudding recipe is as delicious as it is nutritious.

It’s rich, creamy, and incredibly satisfying. Top it off with fresh fruit, nuts, mango curd, or strawberry chia jam, and you have a café-worthy treat right at home! One that will make you want to try chocolate chia pudding next.

[feast_advanced_jump_to]

Why You’ll Love This Recipe?

Matcha chia pudding is super easy and perfect for meal prep. I’d 100% recommend it to anyone having a hard time getting breakfast on time. The low-effort, minimal-ingredient pudding is the ideal grab-and-go breakfast.

It’s naturally sweetened, healthy, and energizing to keep you full and fueled. Plus, the pudding is completely customizable. Switch up the milk, toppings, or add-ins to make it exactly how you like it!

And I love that I can grab some for a lovely dessert too! It is a pudding after all!

Chia Pudding Ingredients

Ingredients for making matcha chia pudding.

Matcha is processed green tea that’s finely ground into a powder. It has an earthy, grassy taste. I highly recommend ceremonial grade matcha. You can also use culinary grade matcha, which is less expensive than ceremonial one. Some find it a little bitter, but I love it—especially in recipes like matcha granola, blueberry matcha latte, and strawberry matcha latte! I’ve also made pistachio matcha popsicles, mango matcha smoothies, matcha donuts, and delicious chocolate cups, and they’re always a hit (even with the kids!).

Chia seeds come from the desert plant Salvia hispanica. They’re tiny black and white seeds, but packed with energy. Literally! The word chia means energy booster. When you soak them in milk (or any other liquid), chia seeds expand into gel-like pearls with a thick consistency.

Milk: I am lactose intolerant, so my go-to option is always non-dairy milk. For this matcha chia pudding recipe, I used homemade almond milk. Oat milk, coconut milk, or even regular cow’s milk works well.

Sweetener: Since matcha does have a slightly bitter undertone, I used maple syrup to sweeten the pudding. You can substitute it with honey, agave syrup, or dates. Just taste and adjust as needed!

Vanilla extract: A splash ties everything together—homemade extract or store-bought will work.

Please see the recipe card for full information on ingredients and quantities.

Variations

Chia seed pudding is like a perfect, clean base. You can customize it in endless ways. Stir in some protein powder. Add layers of fruit for visual play, like blueberries and bananas. Add slivers of almond or cashew for texture. Coconut is another great option. I just love coconut mango chia pudding!

How To Make Matcha Chia Pudding?

I prefer to prepare the pudding in advance and chill it overnight. Why? Because the longer the chia soaks, the more liquid it absorbs, giving it that beautiful thick, creamy pudding consistency. 

Step 1: In a small bowl, combine almond milk, chia seeds, matcha powder, and your sweetener of choice. Whisk well.

Chia seeds, matcha powder, maple syrup, vanilla extract and almond milk in a glass bowl.

Step 2: Cover and chill in the refrigerator overnight.

matcha chia pudding in a bowl.

Step 3: Stir it well the next morning. Add a bit more milk, if the consistency is too thick for you. Taste and adjust for sweetness.

Step 4: Serve topped with fruits and nuts of your choice. Enjoy!

Top Tips

  • Add a couple of tablespoons of plain Greek yogurt or coconut yogurt to make this chia pudding even more creamy and luscious.
  • If you're new to matcha, I would suggest starting with a lesser amount of matcha, say half a teaspoon. Add more, if you prefer a stronger taste.
  • Please use real matcha powder, either culinary grade or ceremonial grade. The ceremonial one is pricier, but has a lovely mellow flavor.
  • I use non-dairy milk for my chia puddings. But feel free to use regular cow milk or goat milk if you prefer.
a spoonful of matcha chia pudding to show the texture.

How To Serve

There are so many ways to enjoy matcha chia seed pudding because the seeds don’t have their own taste. They borrow flavors from the liquid they are soaked in. So the best part is you can switch it up every time! I love topping mine with dark chocolate and pomegranate arils.

  • Fresh berries
  • Sprinkle of shredded toasted coconut
  • A spoonful of fresh strawberry sauce!
  • Sliced bananas and a drizzle of honey
  • A dollop of almond butter is absolute perfection.
  • Or a handful of crunchy homemade granola for some texture and wholesomeness.

In the mood for something extra? Layer it with yogurt. You can even turn it into a fancy dessert by topping it with whipped cream. However you serve it, this pudding is as versatile as it is delicious!

More Chia Pudding Recipes

  • strawberry chia pudding in a dessert cup with 2 spoons next to it.
    Strawberry Chia Pudding
  • Chocolate Orange Chia Pudding | Healthy Chocolate Orange Chia Pudding Recipe
    Chocolate Orange Chia Pudding
  • Cashew Chocolate Chia Pudding
    Cashew Chocolate Chia Pudding
  • Date & Cinnamon Chia Pudding | Easy Vegan Chia Pudding Recipe
    Date & Cinnamon Chia Pudding

Half the joy of cooking is sharing it with others. That’s why I’m always eager to hear from you. So go right ahead & drop a comment or reach out on Instagram, Pinterest, YouTube, or Facebook. I hope you love this matcha chia pudding as much as we do!

📖 Recipe

Tried this recipe?Let us know how it was!
matcha chia pudding in a glass cup topped with pomegranates and chocolate bits.

Matcha Chia Pudding

Natasha Minocha
Lightly sweetened with just the right hint of earthy matcha flavor, matcha chia seed pudding is healthy and filling. Whether you enjoy it as a grab-and-go breakfast, a midday snack, or even a light dessert, this chia pudding recipe is as delicious as it is nutritious.
5 from 1 vote
Print Recipe Pin Recipe
Prep Time 5 minutes mins
Chilling time 8 hours hrs
Total Time 8 hours hrs 5 minutes mins
Course Breakfast, Dessert, Snack
Cuisine American
Servings 2 Servings
Calories 141 kcal

Ingredients


  • 1 cup Almond milk
  • 3 tbsp Chia seeds
  • 1 tsp Matcha powder
  • 1 tbsp Maple syrup You can also use honey/Agave syrup or date syrup
  • 1/2 tsp Vanilla extract

Instructions
 

  • In a small bowl, combine the almond milk, matcha powder, chia seeds, vanilla extract, and maple syrup. Whisk well.
  • Cover and chill in the refrigerator overnight.
  • Stir it well the next morning. Add a bit more milk, if the consistency is too thick for you. Taste and adjust for sweetness.
  • Serve topped with fruits and nuts of your choice. Enjoy!

Notes

  • Add a couple of tablespoons of plain Greek yogurt or coconut yogurt to make this chia pudding even more creamy and luscious.
  • If you're new to matcha, I would suggest starting with a lesser amount of matcha, say half a teaspoon. Add more, if you prefer a stronger taste.
  • Please use real matcha powder, either culinary grade or ceremonial grade. The ceremonial one is pricier, but has a lovely mellow flavor.
  • I use non-dairy milk for my chia puddings. But feel free to use regular cow milk or goat milk if you prefer.

Nutrition

Serving: 1 ServingCalories: 141kcalCarbohydrates: 15gProtein: 5gFat: 7gSaturated Fat: 1gPolyunsaturated Fat: 5gMonounsaturated Fat: 1gTrans Fat: 0.03gSodium: 169mgPotassium: 97mgFiber: 7gSugar: 6gVitamin A: 110IUVitamin C: 0.3mgCalcium: 277mgIron: 2mg

Peanut Chocolate Protein Balls

February 5, 2025

peanut chocolate protein balls topped with peanuts and seasalt in a small bowl.

These peanut chocolate protein balls are the easiest, most delicious treat you can whip up! The best part about these oat and peanut butter balls? They take just 20 minutes to put together. The better part? The fudgy no-bake energy bites are so tasty they’re gone in seconds!

peanut chocolate protein balls topped with peanuts and seasalt in a small bowl.

I have kids that firmly fall in the “forever-hungry” zone. So, my pantry needs quick snacks and pick-me-ups at all times. Just like my peanut butter oat cups, these fabulous, fudgy, bite-sized, no-bake peanut butter balls fit the bill perfectly.

If you love a quick, healthy snack that tastes like dessert, the chocolate peanut butter balls will become your new favorite! They’re packed with peanut butter, chocolate, and just the right amount of sweetness—like a Snickers bar but way better!

[feast_advanced_jump_to]

Why You’ll Love This Recipe

Perfect for meal prep, pre- or post-workout fuel, or whenever that chocolate craving hits!

Super, super, super simple to make - no baking, no fuss, just mix, roll, and enjoy.

Refined-sugar-free and rich in protein to keep you going.

A make-ahead, no-bake recipe that we all need.

Chocolate PB Protein Balls Ingredients

Ingredients for making peanut protein balls.

Oats: I used rolled oats like I did for my chocolate peanut butter no-bake cookies, which work well. Make sure you use certified gluten-free oats to make gluten-free oats and peanut butter balls.

Peanut Butter: I like to use natural peanut butter. Stir it well before adding to the ingredients. A regular, commercial-brand peanut butter will also do as long as you melt it. We need a dripping consistency for this no-bake peanut butter balls recipe.

Sweetener: Maple syrup, honey, agave syrup, or date syrup – all of them work in adding sweetness and binding the dough.

Protein powder: I used a plant-based protein powder in chocolate flavor. Feel free to use your favorite brand.

Oil: I used melted coconut oil to help bind all the ingredients.

Milk: Don’t have homemade almond milk? Use oat milk, cashew milk, or regular milk.

Chocolate: I love 70% dark chocolate. I melted it to make chocolate-covered peanut butter balls. You can use whichever chocolate you love, or completely skip it.

Toppings are optional. I chose crushed peanuts for that extra texture and sea salt to balance the sweetness.

Protein Balls Variations

Nut butter: Not a peanut butter fan? No problem! Swap it out for almond, walnut, pecan, or cashew butter—whatever you love. Need a nut-free option? Sunflower seed butter works perfectly.

Seeds: Toss in some chia or flax seeds for an extra boost to these chocolate peanut butter protein balls.

If you’d rather skip the protein powder, just swap it for an equal amount of oats to make chewy oatmeal peanut butter protein balls. You can also mix in some dried fruit for a little natural sweetness. There’s no wrong way to customize these!

How To Make Peanut Chocolate Protein Balls

rolled oats, protein powder and cocoa powder in a mixing bowl.

Step 1: Combine rolled oats, cocoa powder, and protein powder in a blender or food processor and process until you get a fine powder.

Peanut butter, oil,maple syrup on top of dry ingredients in a mixing bowl.

Step 2: Add peanut butter, coconut oil, maple syrup, and almond milk.

Dough for the energy balls in a mixing bowl.

Step 3: Mix well to make a soft, slightly sticky dough. You may need to add more almond milk.

peanut butter chocolate dough rolled into 14 balls on a plate.

Step 4: Form into 14 even-sized balls.Place on a parchment tray and place in the fridge for 5-10 minutes.

chocolate energy balls dipped in melted chocolate on parchment paper.

Step 5: Dip each ball into the melted chocolate.

Energy balls dipped in chocolate and topped with peanuts and sea salt on parchment paper.

Step 6: Top with crushed peanuts and sea salt. Refrigerate for 10 minutes until set. Enjoy!

Protein balls topped with peanuts and sea salt on parchment paper.

Top Tips

  • You can add more peanut butter to make the energy balls softer and gooey.
  • Oat flour can be used instead of rolled oats.
  • Use any kind of protein powder you prefer. I added chocolate-flavored vegan protein powder. Even collagen powder will work here.
  • Up the nutritional boost by mixing in chia seeds or flax seeds. Keep them whole or use them in powder form.
  • Add more almond milk if the "dough" feels too dry and crumbly.
2 protein balls on a small plate with one half eaten to show the texture.

Recipe FAQs

How to make protein and peanut butter balls vegan?

Use plant-based protein powder and stick to maple or agave syrup instead of honey.

Can I use collagen instead of protein powders in no-bake energy bites?

Yes, you can! Mix in unflavored collagen powder.

How to store chocolate and peanut butter protein balls?

Once rolled, peanut chocolate protein balls are ready to eat right away. You can store them in the fridge in an air-tight container for an easy grab-and-go snack for 4 to 5 days. Bring them to room temperature before serving.

Can no-bake energy bites be frozen?

Yes, these are freezer-friendly without the chocolate coating and keep well for 3 months. Thaw them in the fridge before serving.

Do I need to dip no-bake protein balls in chocolate?

I wanted to make protein peanut butter balls covered in chocolate. It’s optional, but I highly recommend it. The extra indulgence of dipping in dark chocolate makes them irresistible.

More Easy No-Bake Treats

  • Easy Chocolate Caramel Peanut Clusters
  • Coconut Almond Bliss Balls with Rose
    Coconut Almond Bliss Balls with Rose
  • No-Bake Gingersnap Balls | Fun easy kid- friendly recipe
    No-Bake Gingersnap Balls
  • Peanut butter Rice Krispie squares cut into pieces on parchment paper.
    Peanut Butter Rice Krispie Squares

Half the joy of cooking is sharing it with others. That’s why I’m always eager to hear from you. So go right ahead & drop a comment or reach out on Instagram, Pinterest, YouTube, or Facebook. I hope you love these peanut chocolate protein balls as much as we do!

📖 Recipe

Tried this recipe?Let us know how it was!
peanut chocolate protein balls topped with peanuts and seasalt in a small bowl.

Peanut Chocolate Protein Balls

Natasha Minocha
These peanut chocolate protein balls are the easiest, most delicious treat you can whip up! They take just 20 minutes to put together. And these fudgy treats are so tasty they’re gone in seconds!
No ratings yet
Print Recipe Pin Recipe
Prep Time 10 minutes mins
Chilling Time 10 minutes mins
Total Time 20 minutes mins
Course Dessert, Snack
Cuisine American
Servings 14 Servings
Calories 139 kcal

Ingredients


  • 1 1/4 cup Rolled Oats
  • 1 tbsp Cocoa powder
  • 1/4 cup Protein powder
  • 3 tbsp Maple syrup/honey
  • 1.5 tbsp Coconut oil, melted
  • 5 tbsp Peanut butter
  • 4 tbsp Almond milk You may need more
  • 1/2 cup Dark chocolate (70%), melted

Topping ( optional)

  • Crushed peanuts and sea salt

Instructions
 

  • Place oats, protein powder, and cocoa powder in your food processor/blender. Blend until you get a fine powder.
  • Add peanut butter, coconut oil, maple syrup, and almond milk. Mix well.
    You may need to add more almond milk (1 tbsp at a time) to get a soft, pliable dough.
  • Taste and adjust for sweetness. Form into 14 even-sized balls.
    Place on a parchment tray and place in the fridge for 5-10 minutes.
  • Dip each ball into the melted chocolate, and sprinkle some crushed peanuts and sea salt. Return to the fridge for a few minutes until set. Enjoy!

Video

Notes

  • You can add more peanut butter to make the energy balls more soft and gooey.
  • Oats flour can be used instead of rolled oats.
  • Use any kind of protein powder you prefer. I added chocolate-flavored vegan protein powder. Even collagen powder will work here.
  • Up the nutritional boost by mixing in chia seeds or flax seeds. Keep them whole or use them in powdered form.
  • Add more almond milk if the "dough" feels too dry and crumbly.
  •  

Nutrition

Serving: 1 ServingCalories: 139kcalCarbohydrates: 14gProtein: 4gFat: 9gSaturated Fat: 4gPolyunsaturated Fat: 1gMonounsaturated Fat: 3gSodium: 28mgPotassium: 75mgFiber: 2gSugar: 6gCalcium: 20mgIron: 1mg

Chocolate Orange Tart

January 27, 2025

chocolate orange tart garnished with berries, orange zest, candied oranges on a white napkin.

This no-bake chocolate orange tart has a rich, creamy chocolate ganache filling that goes deliciously well with the chocolatey base made with oats and puffed rice! It’s the easiest chocolate tart recipe I’ve ever made, and you won’t even notice it’s refined sugar-free and vegan!

chocolate tart with berries, candied oranges  with one slice taken out on a plate.

If you’re anything like me, you love a dessert that feels fancy but doesn’t take hours to make, this dark chocolate orange tart checks all the boxes. The crust comes together effortlessly, and the silky, orange-scented ganache filling is unbelievably decadent.

You won’t believe how rich and chocolatey it tastes. And if you’re as hooked on simple, show-stopping tarts as I am, you’ll love my vegan matcha tart or zesty lemon tart next!

[feast_advanced_jump_to]

Why You’ll Love This Recipe

It takes no time at all to put it all together.

A great make-ahead, easy, fuss-free recipe!

Looks so gorgeous - guaranteed to impress everyone!

Dark chocolate and orange are a classic combination that works gorgeously well.

The no-bake dessert is great for summer too, when you don't want to turn on that oven!

Recipe Ingredients

ingredients for making chocolate orange tart.

Tart base: I used rolled oats and puffed rice, along with walnuts, cocoa powder, maple syrup, and coconut oil to make the no-bake tart crust. You can use quick-cooking oats too. If you can't find puffed rice, try popped amaranth or just leave it out altogether. Add an equivalent amount of oats!

You can also make the crust with cookies like Oreos or digestive biscuits like I did for my no-bake mango cheesecake.

Cocoa powder: For making a chocolate-flavored crust.

Walnuts: Any nuts would do, but I love the combination of chocolate with creamy, sweet walnuts.

Sweetener: I used maple syrup to make the base sweet. It also helps bind the "dough" for the no-bake crust. Feel free to use date syrup or honey.

Coconut oil: Melted coconut oil also helps bind the crust and give it a rich texture and flavor.

Sea salt: To enhance the overall flavor of the filling and crust.

Chocolate: I used 70% dark chocolate. Check the label to make sure the chocolate is dairy-free if you want a vegan tart.

Coconut milk: Full-fat coconut milk works the best here.

Orange zest: You’ll need 1 whole orange to give it that citrusy punch.

How To Make Chocolate Orange Tart

As fancy as this no-bake tart may look, it really comes together very easily!

oats, puffed rice, walnuts,and cocoa powder in a bowl.

Step 1: Pulse oats, puffed rice, walnuts, and cocoa powder in a food processor till they look like semi-fine bread crumbs.

Coconut oil and maple syrup on top of dry ingredients in a bowl.

Step 2: Add melted coconut oil and maple syrup and blend to form a sticky dough.

Dough for the chocolate tart crust in a bowl.

Step 3: Taste the dough and adjust for sweetness.

evenly press crust mixture into the bottom and sides of a tart pan.

Step 4: Transfer to a 6-inch pan and press evenly to form the crust. Refrigerate the crust while you make the chocolate ganache.

chocolate filling with orange zest in a glass mixing bowl.

Step 5: In a saucepan, heat milk to a gentle simmer and pour over the chocolate. Let it stand for a minute or two.
Then stir till the chocolate melts and you have a smooth, shiny mixture. Add orange zest, and mix well.

Chocolate ganache filling on the tart base topped with sea salt.

Step 6: Let the chocolate orange filling cool a bit. Then pour it onto the crust. Sprinkle sea salt on top. Refrigerate overnight (or at least 4 to 6 hours till the filling sets).

Step 7: Garnish with berries, orange zest, and candied oranges. Slice and serve!

Finished chocolate tart on a plate.

Pro Tips

  • Use your hands to press the no-bake chocolate orange tart crust firmly. Make sure the crumbs cover the side of the tin too.
  • If using a chocolate bar, chop or break it before pouring the warm coconut milk over it. It will melt faster.
  • Smoothen the top of the chocolate orange filling before you set it to chill. Use a toothpick to get rid of air bubbles.
  • Use a tart pan with a removable base. If you don't have one, line the bottom of your pan with parchment paper. That will help you remove the chilled tart easily.
  • Allow the no-bake crust to set in the refrigerator for at least 1 hour. You can also make the crust a day before. Keep it refrigerated.
  • Make sure the chocolate ganache has ample time to set. I like to keep it refrigerated overnight.
  • Let the chocolate tart come to room temperature before serving for the best flavor!

How To Serve The Chocolate Orange Tart

This chocolate orange tart is so rich and decadent that it needs no accompaniment at all. But, if you're in an indulgent mood, top it with a dollop of whipped cream! I like to serve it at room temperature, so do take it out of the refrigerator at least an hour before serving.

a slice of tart on a small plate with a bite taken with a fork .

Chocolate Orange Tart Recipe FAQs

Can you make a vegan chocolate orange tart ahead?

Yes, you can! You can make the crust a day before. Pour the ganache filling the next morning. Let this set in the refrigerator for 6-8 hours and garnish just before serving. You can also make the whole tart a day before!

How to garnish a no-bake chocolate tart?

You can dress up a salted chocolate orange tart any way you want. I chose berries, candied oranges, golden dragees, and more orange zest to give it color. Edible flowers, whipped cream, orange slices, or even a sprinkle of sea salt look beautiful.

Can I make the chocolate and orange tart in a smaller pan?

You can use the recipe to make individual desserts using 3-inch pans like I did for my granola breakfast tart recipe.

This recipe was originally posted in Feb'2019. It has now been retested and updated with new images and text.

More No-Bake Desserts

  • A jar of panna cotta garnished with pomegranate arils kept on a white platter with spoons.
    Lemon Panna Cotta
  • No-Bake Saffron Cheesecake
    No-Bake Saffron Cheesecake
  • Peanut Butter Oats Bites | Peanut Butter Chocolate Oats Cups
    Peanut Butter Oat Cups
  • Strawberry Tiramisu | Eggless Alcohol-free Strawberry Tiramisu Recipe
    Strawberry Tiramisu

Half the joy of cooking is sharing it with others. That’s why I’m always eager to hear from you. So go right ahead & drop a comment or reach out on Instagram, Pinterest, YouTube, or Facebook. I hope you love this chocolate orange tart as much as we do!

📖 Recipe

Tried this recipe?Let us know how it was!
chocolate orange tart garnished with berries, orange zest, candied oranges on a white napkin.

Chocolate Orange Tart

Natasha Minocha
Chocolate Orange Tart - A no-bake treat, so rich, creamy, and decadent that you won't even notice it's refined sugar-free, and vegan!
5 from 4 votes
Print Recipe Pin Recipe
Prep Time 25 minutes mins
Setting Time 6 hours hrs
Total Time 6 hours hrs 25 minutes mins
Course Dessert
Cuisine American
Servings 10 Servings
Calories 346 kcal

Ingredients
  

Tart

  • 1.5 cup Oats
  • 1/2 cup Puffed rice
  • 1/4 cup Walnuts
  • 2 tbsp Cocoa powder
  • 1/4 tsp Sea salt
  • 3-4 tbsp Maple syrup
  • 1/4 cup Coconut oil, melted

Filling

  • 1.5 cup Dairy free chocolate or Dark chocolate (70%)
  • 1/2 cup Coconut milk
  • Zest of one full orange
  • 1/4 tsp Sea salt

Instructions
 

Tart

  • Keep a 6-inch tart pan with removable base ready.
  • Combine oats, puffed rice, walnuts, cocoa powder in a food processor. Pulse till the mixture looks like semi-fine crumbs.
  • Add 3 tbsp of maple syrup and the melted coconut oil. Pulse again till combined. You should get a sticky dough. Taste and adjust for sweetness.
  • Press evenly into the tart pan. Refrigerate.

Filling

  • Heat the coconut milk in a saucepan till it comes to a gentle simmer. Add the chocolate. Let it stand for a minute. Mix well till all chocolate is melted and is smooth and shiny.
  • Stir in the orange zest. Let the mixture cool for a few minutes before pouring into the prepared tart base. Sprinkle the sea salt on top.
  • Refrigerate for 4-6 hours or overnight until the filling is completely set.
  • Garnish with berries, candied oranges, and more orange zest. Slice and serve. Enjoy!

Video

Notes

  • Use your hands to press the no-bake chocolate orange tart crust firmly. Make sure the crumbs cover the side of the tin too.
  • If using a chocolate bar, chop or break it before pouring the warm coconut milk over it. It will melt faster.
  • Smoothen the top of the chocolate orange filling before you set it to chill. Use a toothpick to get rid of air bubbles.
  • Use a tart pan with a removable base. If you don't have one, line the bottom of your pan with parchment paper. That will help you remove the chilled tart easily.
  • Allow the no-bake crust to set in the refrigerator for at least 1 hour. You can also make the crust a day before. Keep it refrigerated.
  • Make sure the chocolate ganache has ample time to set. I like to keep it refrigerated overnight.
  • Let the chocolate tart come to room temperature before serving for the best flavor!

Nutrition

Serving: 1 ServingCalories: 346kcalCarbohydrates: 32gProtein: 5gFat: 26gSaturated Fat: 16gPolyunsaturated Fat: 2gMonounsaturated Fat: 6gSodium: 121mgPotassium: 112mgFiber: 5gSugar: 16gVitamin A: 1IUVitamin C: 0.2mgCalcium: 19mgIron: 1mg

Homemade English Muffins

January 22, 2025

A basket of English muffins made without an oven.

These homemade English muffins are surprisingly easy to make: golden and crusty on the outside, and soft and chewy on the inside. Perfect for breakfast or brunch, these delicious muffins are so good with butter and jam!

SImple English muffins in a napkin lined basket.

I had English muffins for the first time while I was living in the US. And back then, I didn’t even realize the recipe was so simple. It doesn’t even need an oven. You can make them on the stovetop in a skillet!

All you need is a starter and for the dough to rise overnight.  While the overnight rise is not essential, it makes the flavors so much better- So much better than the store-bought ones!

[feast_advanced_jump_to]

What Are English Muffins?

English muffins are small, round flatbreads made from yeasty dough and cooked on a griddle. The inside is soft with nooks and crannies. This is where all the butter seeps in, making these muffins totally irresistible!

They make for great breakfast sandwiches. But we love them toasted. Smeared with apple butter, pear butter, or maybe some strawberry chia jam, they are the best toasts you will ever have.

Why You’ll Love This Recipe

Versatile – English muffins pair well with sweet or savory toppings.

Quick and easy - perfect for a fast breakfast, lazy weekend brunch, or snack. Make double the batch and freeze for later!

Best texture - crispy on the outside and soft inside, with nooks and crannies for toppings to soak in.

Great for recipes - use them in breakfast sandwiches, mini pizzas, or as a base for eggs benedict.

Ingredients For Making English Muffins

Ingredients to make homemade English muffins.

Yeast: I used dry active yeast here, as I do for all my breads. This recipe uses a starter as well. And that's what gives these English muffins a little tang and flavor!

Sugar helps activate the yeast.

Milk: I used soy milk. But you can use regular milk as well.

Oil: This recipe uses olive oil. But go ahead and use melted butter instead. They will come out just as well.

Salt balances the overall flavor.

Flour: All-purpose flour works fabulously, but you can make whole-wheat English muffins. Or use a mix of flours. Bread flour will give you chewier muffins.

Cornmeal for dusting the baking tray. You can also use semolina instead. This gives a crunchy crust to the homemade English muffins.

How To Make English Muffins

A bubbly starter mixture of water, yeast and flour.

Step 1: Mix the water, flour, and yeast in a small bowl, till smooth. Cover the bowl and put in a warm corner for 1 -12 hours. The starter will get bubbly and double in volume. 

Starter, yeast, and milk in the bowl of a standmixer.

Step 2: In the bowl of your stand mixer or large bowl, combine the bubbly starter, milk and yeast.

Flour on top of the liquid mixture ina mixing bowl.

Step 3: Whisk in the salt, sugar, and olive oil. Then add the flour.

A scraggy dough for English muffins in a mixing bowl.

Step 4: Use a spatula to bring all the ingredients together into a shaggy dough.With a dough hook on your stand mixer, knead the dough till it comes together.

Kneaded dough for English muffins in a glass mixing bowl.

Step 5: Transfer the dough to a lightly oiled bowl.

Proofed bread dough in a glass mixing bowl.

Step 6: Cover and refrigerate overnight. It will double in size. This dough can stay refrigerated for upto 3 days.

12 pieces of bread dough balls on a tray sprinkled with cornmeal.

Step 7: Turn the dough out on a well-floured surface and cut into 12 equal pieces. Roll into balls.Place on a baking tray sprinkled with cornmeal. Sprinkle the tops with some more cornmeal.

Proofed dough balls on a baking tray sprinkled with cornmeal.

Step 8: Place the tray in a warm spot until the dough doubles in size

4 English muffins dough balls in a white skillet.

Step 9: Heat a skillet pan to medium heat. Brush with oil and gently place the rolls 3-4 at a time onto the pan. Cook till the bottom of the muffins are golden brown 6-7 minutes. 

4 English muffins cooked on a white skillet.

Step 10: Flip carefully and cook on the other side for another 6-7 minutes. Repeat with all the other rolls. Let them cool for 10-15 minutes before slicing them.

An English muffin cut in half to show the texture.

Pro Tips

  • You can use the starter for making the dough after an hour, as long as it's bubbly and has doubled in bulk. But the longer the starter sits, the better the flavor.
  • You can use the dough the same day, after it's doubled, in about 1 - 1.5 hours. But again, longer proofing ensures more flavor.
  • If you're not sure if the English muffins have cooked through, you can place them in a preheated oven at 350 F / 180 C for 8-10 minutes.
  • Adjust the heat if your muffins are browning too much or too fast.
  • Wipe the skillet after cooking every batch of muffins. Brush with more oil or butter.
  • They taste the best when toasted.
  • You can certainly knead the dough by hand by a stand mixer is recommended as the dough is quite sticky.
  • Use a kitchen scale to measure the ingredients for the best results!

How To Serve

There are countless ways to serve them. You can make delicious crispy toasts out of them and slather homemade fig jam on top.

  • They are DELICIOUS toasted and topped with homemade cream cheese and eggless lemon curd.
  • Make English muffin baby pizzas with easy tomato sauce and cheese.
  • Make McMuffin-style sandwiches.
  • Use these for making eggs Benedict!
  • For a hefty breakfast, serve the vegan English muffins with veggie breakfast casserole or avocado egg salad, bacon/sausage, and oatmeal latte or this lovely iced strawberry matcha latte!
An English muffin cut in half and spread with butter on a small plate.

Recipe FAQs

What to put on English muffins?

Smear with regular butter, cinnamon honey, peanut butter, or any of your choice. Slather persimmon jam, cherry jam, or your favorite homemade jam. They taste just out of this world.

Can I make English muffins ahead of time?

Yes, you can make the dough for homemade English muffins a day before. It keeps well in the refrigerator for up to 3 days. You don't want to wait? After the dough has doubled, it is ready to be cooked. The flavor will be good, just milder. Or you can make the starter for the muffins a day before and make the dough on the day.

How to store homemade English muffins?

Store the leftover muffins on the counter-top in an airtight container or wrapped in a kitchen towel. They’ll last for 3–4 days and make for quick breakfasts on weekday mornings. You can also freeze them for up to 1 month.

Why is my dough so sticky?

The dough for English muffins is sticky! That's what makes them soft! It shouldn't be a wet dough though. You can add more flour, one or two tablespoons at a time, if it seems unmanageable.

More Recipes For Breakfast

  • strawberry turnovers on a white plate on a cloth napkin.
    Strawberry Turnovers
  • breakfast casserole with eggs and veggies in a baking dish on a metal trivet.
    Veggie Breakfast Casserole    
  • Apple Pancake Recipe
    Apple Pancake Recipe
  • Classic French Toast | Easy cinnamon French toast recipe
    Classic French Toast

Half the joy of cooking is sharing it with others. That’s why I’m always eager to hear from you. So go right ahead & drop a comment or reach out on Instagram, Pinterest, YouTube, or Facebook. I hope you love these homemade English muffins as much as we do!

📖 Recipe

Tried this recipe?Let us know how it was!
A basket of English muffins made without an oven.

Homemade English Muffins

Natasha Minocha
These homemade English muffins are surprisingly easy to make: golden and crusty on the outside, and soft and chewy on the inside. Perfect for breakfast or brunch, these delicious muffins are so good with butter and jam!
5 from 1 vote
Print Recipe Pin Recipe
Prep Time 2 days d 20 minutes mins
Cook Time 15 minutes mins
Total Time 2 days d 35 minutes mins
Course Bread, Breakfast, Snack
Cuisine American
Servings 12 English muffins
Calories 193 kcal

Ingredients


Starter

  • 3/4 cup All purpose flour
  • 1/2 cup Water
  • 1/2 tsp Dry active Yeast

Dough

  • 1 cup Soy milk You can use any milk of choice.
  • 1 tsp Dry active Yeast
  • 2 tbsp Sugar
  • 2 tbsp Olive oil You can use melted butter.
  • 1 tsp Salt
  • 3 cup All purpose flour You may need some extra while kneading.
  • 3-4 tbsp Cornmeal For the baking tray
  • 1-2 tbsp Oil/butter For the skillet

Instructions
 

Starter

  • Mix the water, flour and yeast in a small bowl, till smooth.
  • Cover the bowl and put in a warm corner for 1 -12 hours. The starter will get bubbly and double in volume. The longer you let the starter sit, the better the flavor of the English muffins.

Dough

  • In the bowl of your stand mixer or large bowl, combine the milk and yeast. Scrape in the starter and whisk well to combine it all.
  • Stir in sugar, olive oil, salt, and 3 cups of flour, till you get a rough scraggy dough.
  • With a dough hook on your stand mixer, knead the dough till it comes together. This took me about 10 minutes. Add extra flour if the dough is very sticky.
    I needed to add 2 tablespoons more.
    The dough is ready when it comes together in a smooth, soft ball. It will be tacky to touch but not too sticky.
  • You can knead this dough by hand as well, on a well floured surface. The dough is very sticky to begin with, but it does come together nicely while kneading.
  • Place the dough in a lightly greased bowl. Cover and refrigerate overnight. You can also use the dough the same day after letting it proof in a warm spot for 1.5 hours or until doubled in size.
    This dough can stay in the refrigerator for up to 3 days.
  • Turn the dough out on a well-floured surface and cut into 12 equal pieces. Roll into balls.
    Place on a baking tray sprinkled with cornmeal. Sprinkle the tops with some more cornmeal.
  • Place the tray in a warm spot until the dough doubles in size, typically 1 - 1.5 hours. Mine were really puffy in 30 minutes.
  • Heat a skillet/ saute pan to medium heat. Brush with oil/ butter and gently place the rolls 3-4 at a time onto the pan. Cook till the bottom of the muffins are golden brown 6-7 minutes. Flip carefully and cook on the other side for another 6-7 minutes.
  • Please adjust the heat if your muffins are browning too much or too fast. You can also finish these muffins in a preheated oven at 180C.
  • Cut the muffin horizontally, eat warm and fresh, slathered with butter. These are EXCELLENT toasted and keep well in the refrigerator for 5-6 days. Enjoy!!

Video

Notes

  • You can use the starter for making the dough after an hour, as long as it's bubbly and has doubled in bulk. But the longer the starter sits, the better the flavor.
  • You can use the dough the same day, after it's doubled, in about 1 - 1.5 hours. But again, longer proofing ensures more flavor.
  • If you're not sure if the English muffins have cooked through, you can place them in a preheated oven at 350 F / 180 C for 8-10 minutes.
  • Adjust the heat if your muffins are browning too much or too fast.
  • Wipe the skillet after cooking every batch of muffins. Brush with more oil or butter.
  • They taste the best when toasted.
  • You can certainly knead the dough by hand but a stand mixer is recommended as the dough is quite sticky.


Nutrition

Serving: 1 ServingCalories: 193kcalCarbohydrates: 35gProtein: 5gFat: 3gSaturated Fat: 1gPolyunsaturated Fat: 0.5gMonounsaturated Fat: 2gTrans Fat: 0.02gCholesterol: 2mgSodium: 205mgPotassium: 82mgFiber: 1gSugar: 3gVitamin A: 21IUVitamin C: 0.04mgCalcium: 31mgIron: 2mg

Cashew Ricotta Cheese

January 17, 2025

cashew ricotta cheese garnished with parsley in a small bowl place on 2 plates.

Cashew ricotta cheese is gooey, creamy, and so addictive. Made with basic ingredients, it’s a wonderful vegan cheese alternative. You’ll love it from the first bite!

cashew ricotta cheese garnished with parsley in a small bowl place on 2 plates.

I love a good cheddar or Parmesan, but being lactose intolerant, I’m forced to live without their velvety, melt-in-your-mouth goodness. Yes, there are vegan cheese substitutes available in stores. I’ve tried several, but they are a splurge!


So, I decided to make vegan cashew ricotta cheese at home. Take pre-soaked cashews and add salt, pepper, garlic, and lemon juice. Blend, and that's it! You've got one of the most delicious dairy-free cheese substitutes. The creaminess of the cashews is fantastic, and the texture is bang on!

[feast_advanced_jump_to]

Why You’ll Love This Recipe

Let me tell you, this cashew cheese is out of this world. The recipe is super easy, and you need just four ingredients: salt, garlic, cashews, and water. Everything else is optional.

Besides being a total cinch to make, cashew ricotta cheese is very versatile in terms of flavoring. Roasted red pepper cashew sauce is a must-try!

Cashew cheese is also a great vegan alternative and great in any recipe that needs a substitute for cheese.

Cashew Ricotta Cheese Ingredients

ingredients for making cashew ricotta cheese.

Cashews need to be soaked. You can either soak them overnight in the fridge in cold water. Or in boiling water for 10 to 15 mins. Or room-temperature water for 20 mins.

Seasoning: Use salt and pepper to taste.

Garlic is essential to the ricotta cheese recipe. It adds so much flavor!

Smoked paprika gives the cheese an imperceptibly smoked flavor and kick of chili.

Lemon juice enhances the ricotta's flavor and makes it tangy.

Nutritional yeast gives the ricotta a deep umami flavor. Don’t have it? Don’t worry. The vegan cheese still tastes great without it!

Variations

Flavoring: I love the flavor of garlic and paprika in ricotta, but pick your preference. Everything works perfectly with this creamy vegan ricotta cheese. Thyme and oregano make it herby and savory.

You can add dill, parsley, red chili flakes, or even chop up some fresh green onions. Roasted bell peppers, olives, and sun-dried or roasted tomatoes (like I did with my creamy whipped feta dip) are a great addition too.

Without yeast: Nutritional yeast is easily available in supermarkets and online. If you don’t have any, make the cheese without it. It turns out to be just as delicious.

How To Make Cashew Ricotta?

What's a great recipe? One that's done in 3 simple steps and is foolproof! I kid you not. The ricotta cheese is really that easy to make.

cashews soaked in water in a bowl.

Step 1: Soak the cashew nuts - You can soak them for 2-3 hours in room temperature water, or you can soak them in boiling water for 10-15 minutes. Drain them well.

ingredients in a blender jar on a blue striped napkin.

Step 2: Combine all the ingredients in your food processor.

blended ingredients in a blender jar on a blue striped napkin.

Step 3: Blend until smooth and creamy. Taste and adjust for seasoning. Transfer to an air-tight container and store in the refrigerator for 5-6 days.

Pro Tips

  • Soak the cashews. Soft and plump cashews are easier to blend and make the ricotta more flavorful.
  • Use a little water when blending the ingredients. If the texture is too thick, add more.
  • Ricotta cheese has a grainy texture, which is sometimes how I like it. To make a coarse cheese, pulse the ingredients in a blender or food processor.
  • For a silky cashew cheese, blend till completely smooth, like I did this time.
  • Taste test after blending and adjust for seasoning.
  • More lemon juice would make the cashew ricotta cheese piquant.
cashew cheese in a bowl with strawberries and bagels in the background.

How To Serve

I binged on this velvety soft cheese with my breakfast toast. Smear it on homemade bagels. Spread it thickly on slices of challah bread or use it for making sandwiches with this sandwich bread. For a sweet, savory taste, try the cashew cheese my quick fig bread!

  • Mix it into a pasta sauce (or top the pasta salad with it).
  • Spoon it on baked vegetables.
  • Substitute it for Parmesan in Italian salad dressing.
  • Toss it in a rice dish.
  • Stir it into soups like creamy pea soup.
  • Use it as a dip and smear it on crackers like these delicious cheese crackers with carom seeds and pumpkin crackers.
  • Or make it the centerpiece of a cheese board along with homemade crostini!
cashew cheese smeared over a sliced bagel on a plate with a knife.

Recipe FAQs

What can you use cashew ricotta cheese for?

You can use the ricotta as a dip, spread it on khachapuri or cheese stuffing for breads, add it to pasta, or use it in place of Greek yogurt for creamy salads like this creamy cucumber salad.

Can I use another nut to make ricotta?

I love the creaminess of cashews in ricotta cheese. But almonds can also be used in place of them.

How to store easy ricotta cheese?

Like every fresh cheese, cashew ricotta is also good for five to seven days in the fridge. The cheese is honestly so amazing that you’ll finish it within a week! Can you freeze ricotta cheese? I wouldn’t recommend it.

More DIY Pantry Essentials

  • Stovetop Apple Butter Recipe
    Stovetop Apple Butter
  • Easiest Homemade Cream Cheese | Homemade Cream Cheese Recipe
    Easiest Homemade Cream Cheese
  • How To Make Garlic Confit
    How To Make Garlic Confit
  • A jar with cherry jam on a wooden surface with a spoon on the side.
    Cherry Jam Recipe

Half the joy of cooking is sharing it with others. That’s why I’m always eager to hear from you. So go right ahead & drop a comment or reach out on Instagram, Pinterest, YouTube, or Facebook. I hope you love this cashew ricotta cheese recipe as much as we do!

📖 Recipe

Tried this recipe?Let us know how it was!
cashew ricotta cheese garnished with parsley in a small bowl place on 2 plates.

Cashew Ricotta Cheese

Natasha Minocha
Cashew ricotta cheese is gooey, creamy, and so addictive. Made with basic ingredients, it’s a wonderful vegan cheese alternative. You’ll love it from the first bite!
5 from 1 vote
Print Recipe Pin Recipe
Prep Time 10 minutes mins
Soaking Time 15 minutes mins
Total Time 25 minutes mins
Course Condiment
Cuisine American
Servings 10 Servings
Calories 77 kcal

Ingredients


  • 1 cup Cashews, soaked
  • 1 tbsp Nutritional yeast
  • 3/4 tsp Smoked paprika
  • 1.5 tbsp Lemon juice
  • 2 cloves Garlic, finely chopped
  • 1/4 cup Water You may need more
  • Salt and Black pepper to taste

Instructions
 

  • Soak the cashew nuts - You can soak them for 2-3 hours in room temperature water OR you can soak them in boiling water for 10-15 minutes.
  • Drain and rinse the soaked nuts.
  • Combine all the ingredients in your food processor. Process until creamy. Taste and adjust the seasoning.
    If it's too thick, add some more water.
  • Store in an airtight jar in the refrigerator for 5-6 days. You can use it immediately in any dish you like or serve with crackers/toasts. Enjoy!

Video

Notes

  • Soak the cashews. Soft and plump cashews are easier to blend and make the ricotta more flavorful.
  • Use a little water when blending the ingredients. If the texture is too thick, add more.
  • To get a grainy coarse textured cheese, pulse the ingredients in a blender or food processor.
  • For a silky cashew cheese, blend till completely smooth like I did this time.
  • Taste test after blending and adjust for seasoning.
  • More lemon juice would make the cashew ricotta cheese piquant.

Nutrition

Serving: 1 ServingCalories: 77kcalCarbohydrates: 5gProtein: 3gFat: 6gSaturated Fat: 1gPolyunsaturated Fat: 1gMonounsaturated Fat: 3gSodium: 2mgPotassium: 110mgFiber: 1gSugar: 1gVitamin A: 74IUVitamin C: 1mgCalcium: 7mgIron: 1mg

Strawberry Turnovers

January 13, 2025

strawberry turnovers on a white plate on a cloth napkin.

Warm, flaky, buttery, and bursting with fresh strawberry filling, these strawberry turnovers are easy to make and delicious to eat! Bake the strawberry turnovers with store-bought puff pastry for a quick treat. A drizzle of vanilla glaze adds sweetness and makes them look extra special.

strawberry turnovers on a white plate with ingredients in the background.

These little hand-held strawberry pastries are perfect for picnics and brunches, just like my cherry puff pastry tarts, apple hand pies, puff pastry apple donuts, and pop tarts. Pick one up and eat! Strawberry turnovers with puff pastry are a brilliant way to enjoy fresh, seasonal fruits while keeping things simple and delicious.

[feast_advanced_jump_to]

Why You’ll Love This Recipe?

Strawberry turnovers are the perfect treat for any time of the day—a quick breakfast, a snack with your coffee, or a light dessert.

They’re super easy to make. The best part? You only need to make the strawberry turnover filling at home. And they come together in no time thanks to the store-bought puff pastry.

Strawberry Turnover Recipe Ingredients

ingredients for making strawberry turnovers.

Puff pastry: Store-bought puff pastry is fantastic (especially if you love shortcuts in the kitchen like me). I’ve made strawberry puff pastry tarts and cranberry brie bites with it. Both were delicious! You can also make the pastry at home using your favorite recipe.

Strawberry: I love using fresh strawberries. Wash and dice them. You can use frozen ones too, to make strawberry puff pastry turnovers.

Sugar helps sweeten the filling. Increase or reduce the quantity based on how sweet your strawberries are.

Cornstarch thickens the strawberry filling.

Lemon juice balances the flavors, giving the filling a zing. You can also use homemade vanilla extract instead.

Egg: mix with a tablespoon of water to give the puff pastry an egg wash for that golden sheen!

Variations

Egg: Brush the pastry with cream instead of egg wash.

Fruit: This recipe for strawberry turnovers is very versatile. You can use any fruit you love, such as raspberries, apples, blueberries, cherries, or peaches.

Add-ins: Make strawberry and cream turnovers with cream cheese or add a few chocolate chips to the filling!

How To Make Strawberry Turnovers?

chopped strawberries and sugar in a white saucepan.

Step 1: Add the diced strawberries and sugar to a saucepan and cook for 2-3 minutes on medium-low heat.

strawberry filling in a white saucepan.

Step 2: Mix the cornstarch and water in a small bowl and add it to the strawberries. Stir in the lemon juice and cook for another 3-4 minutes, stirring occasionally, until the strawberries are softened and the mixture thickens.

rolled out puff pastry on a silicone mat.

Step 3: Preheat the oven to 200 C / 400 F. Roll out the puff pastry dough into a large rectangle.

Rolled out puff pastry cut into 8 pieces.

Step 4: Cut into 8 equal-sized squares or rectangles.

strawberry filling in the center of 4 squares of puff pastry.

Step 5: Place 2 tablespoons of the filling in the middle of each square or rectangle.

Four folded over puff pastry squares with crimped edges.

Step 6: Fold over to form a triangle and use a fork to crimp the edges together tightly. Poke holes with a knife or fork.

4 puff pastry turnovers  with eggwash on parchment paper on a baking tray.

Step 7: Brush the pastries with egg wash.

Four golden baked strawberry turnovers on parchment paper.

Step 8: Bake for 20 minutes until golden and puffy. Transfer to a cooling rack and allow to cool.

four turnovers with vanilla glaze on parchment paper.

Step 9: Drizzle with vanilla glaze and serve!

Pro Tips

  • Adjust the amount of sugar depending on how sweet or sour your strawberries are.
  • The strawberry filling must be cooled completely before adding to the pastry.
  • Ensure you crimp the edges tightly to prevent the filling from oozing out.
  • Allow the pastries to cool for at least 15 minutes before glazing them.
strawberry turnovers on a white plate.

How To Serve

These strawberry turnovers are best when warm. Pair the strawberry turnovers with a classic hot chocolate or oatmeal latte. So good for breakfast or brunch, just like these strawberry cream cheese rolls!

For an extra touch, I drizzled a vanilla glaze on top. But a quick sprinkle of powdered sugar is also lovely.

Make it extra special and serve it with vanilla ice cream or whipped cream for an indulgent, quick dessert after dinner.

cross section of a turnover to show the filling.

Recipe FAQs

How to store strawberry puff pastry turnovers?

Keep in an airtight container in the fridge for 2 to 3 days. You can also freeze strawberry turnovers. Cool them completely. Wrap in foil. Then place in a Ziplock bag before you freeze. Reheat in a preheated oven or air fry whenever the mood for something sweet strikes.

Can I use a different fruit in strawberry and puff pastry turnover?

Yes, you can. Use whichever fruit you love the most. Don’t have the time to make the filling? Make strawberry jam turnovers or use cherry jam or homemade fig jam!

Can you make turnovers ahead of time?

You can make the strawberry filling a day or two before. It keeps well in the refrigerator. So, on the day, you just need to assemble and bake the strawberry puff pastry. You can even freeze the unbaked turnovers. When you’re ready to bake, give them an egg wash and bake.

More Strawberry Recipes

  • Strawberry Star Bread | Vegan Star Bread Recipe
    Strawberry Star Bread
  • Strawberry Banana Muffins
    Strawberry Banana Muffins
  • pop tarts on a metal trivet with some cherries around.
    Easy Pop Tarts
  • strawberry jam donuts in a loaf pan lined with parchment paper.
    Strawberry Jam Donuts

Half the joy of cooking is sharing it with others. That’s why I’m always eager to hear from you. So go right ahead & drop a comment or reach out on Instagram, Pinterest, YouTube, or Facebook. I hope you love these strawberry turnovers as much as we do!

📖 Recipe

Tried this recipe?Let us know how it was!
strawberry turnovers on a white plate on a cloth napkin.

Strawberry Turnovers

Natasha Minocha
Warm, flaky, buttery, and bursting with fresh strawberry filling, these strawberry turnovers are easy to make and delicious to eat!
No ratings yet
Print Recipe Pin Recipe
Prep Time 20 minutes mins
Cook Time 20 minutes mins
Total Time 40 minutes mins
Course Breakfast, Dessert, Snack
Cuisine American
Servings 8 Servings
Calories 407 kcal

Ingredients


  • 2 cups Strawberries, washed, hulled, and diced
  • 1/4 cup Sugar
  • 1 tbsp Cornstarch
  • 2 tbsp Water
  • 1.5 tsp Lemon juice
  • 17 oz Puff pastry, thawed

Egg Wash

  • 1 Egg
  • 1 tbsp Water

Vanilla Glaze

  • 1/2 cup Powdered sugar / Icing sugar
  • 1 tbsp Milk
  • 1/2 tsp Vanilla extract

Instructions
 

  • Add the diced strawberries and sugar to a saucepan and cook for 2-3 minutes on medium-low heat.
  • Mix the cornstarch and water in a small bowl and add it to the strawberries. Stir in the lemon juice and cook for another 3-4 minutes, stirring occasionally until the strawberries are softened and the mixture thickens.
  • Take the pan off the heat and allow the strawberry filling to cool completely.
  • Preheat the oven to 200 C / 400 F. Line a baking tray with parchment paper.
  • Roll out the puff pastry dough into a large rectangle. Cut into 8 equal-sized squares or rectangles.
  • Place 2 tablespoons of the filling in the middle of each square or rectangle.
  • Fold over to form a triangle and use a fork to crimp the edges together tightly. Poke holes with a knife or fork.

Egg Wash

  • Beat an egg together with a tablespoon of water to make an egg wash. Brush the top of pastries with egg wash.
  • Bake at 200 C/ 400 F for 18-20 minutes, or until puffed and golden.
  • Transfer to a wire rack to cool.

Vanilla Glaze

  • In a small bowl, combine powdered sugar, milk, and vanilla extract to make a smooth and thick glaze.
  • Drizzle it over the turnovers and serve. Enjoy!

Video

Notes

  • Adjust the amount of sugar depending on how sweet or sour your strawberries are.
  • The strawberry filling must be cooled completely before adding to the pastry.
  • Make sure you crimp the edges very tightly to prevent the filling from oozing out.
  • Allow the pastries to cool for at least 15 minutes before glazing them.

Nutrition

Serving: 1ServingCalories: 407kcalCarbohydrates: 44gProtein: 5gFat: 24gSaturated Fat: 6gPolyunsaturated Fat: 3gMonounsaturated Fat: 13gTrans Fat: 0.004gCholesterol: 21mgSodium: 160mgPotassium: 104mgFiber: 2gSugar: 16gVitamin A: 37IUVitamin C: 22mgCalcium: 18mgIron: 2mg

Veggie Breakfast Casserole    

January 9, 2025

breakfast casserole with eggs and veggies in a baking dish on a metal trivet.

This veggie breakfast casserole with tons of sautéed spinach, onions, and bell peppers keeps you full for hours! The vegetarian breakfast recipe is perfect for a crowd, too. It’s easy. It’s adaptable. And it can be prepped overnight!

baked veggie breakfast casserole on a metal trivet.

I love it because it’s easy to make, and I can make it ahead of time. I have everything ready a day before, so in the morning, all I have to do is slide it in the oven. The family loves it because it’s hearty, flavorful, and simply delicious!

While we love a sweet start to the day with cinnamon bread pudding, croissant French toast casserole, or French toast casserole, a fully loaded savory breakfast casserole like this is just what you need on a cold January morning.

[feast_advanced_jump_to]

What Is Breakfast Casserole?

A breakfast casserole is a hearty, wholesome, comforting dish. The all-in-one recipe combines eggs, cheese, bread, and meats or vegetables. All of it is baked together in a casserole dish. It's delicious and versatile at the same time. Perfect for feeding a crowd or meal prepping for the week.

a slice of breakfast casserole on a pie server.

Why You’ll Love This Recipe?

It’s an easy crowd-sized breakfast recipe for vegetarians.

A great make-ahead recipe! Just assemble everything the night before and bake the next morning!

You can enjoy it on a weekday morning or a lazy Sunday.

Needs zero technique.

Very versatile with countless yummy mix-ins.

Veggie Breakfast Casserole Ingredients

ingredients for making breakfast casserole.

Vegetables: Onions, spinach, and all three colors of bell peppers were my choices. You can use any fresh veggies you have in your fridge; just remember to sauté them before you add them to the casserole.

Bread: I wanted to make breakfast casserole with sourdough bread. But any crusty bread, like my no-knead Dutch oven bread or easy everyday bread, will do. The older, the better, as it absorbs the egg custard better.

Eggs bind the make-ahead veggie breakfast casserole. I used 8 large ones.

Milk: Whole milk is preferable, but you can use toned milk too to whisk the eggs.

Cheese: I love the flavor of rich, salty cheddar cheese. I shredded some and added it to the casserole.

Seasoning: I used Italian seasoning along with salt and pepper.

Variations

Like quiches, casseroles are very versatile. You can use any vegetables you have, like mushrooms, tomatoes, broccoli, kale, asparagus, or green beans. Just cook them so the breakfast casserole is not soggy. Add finely minced garlic or even garlic confit, olives, and sun-dried tomatoes to enhance the flavor.

I kept my sourdough breakfast casserole vegetarian. You can turn it into a sausage egg breakfast casserole. Add any meat you please, such as ham, salami, or shredded chicken or pork.

You can replace the bread with cooked potatoes (roasted or pan-fried).

Don’t love cheddar? Goat cheese, mozzarella, Emmental cheese (as in my mushroom quiche), or even Monterey Jack will do. Feta is a fabulous addition here, too, like in my feta and spinach muffins!

How To Make Breakfast Casserole With Veggies?

sauteed veggies in a saucepan with seasoning on top.

Step 1: Heat olive oil in a saucepan. Add onions and saute for 2-3 minutes. Then add the chopped bell peppers, Italian seasoning, salt, and pepper. Cook for 3-4 minutes, until softened.

chopped spinach on top of sauteed veggies in a saucepan.

Step 2: Add chopped spinach to the cooked veggies. Cook until just wilted. Remove from heat.

a layer of cubed sourdough bread in a casserole dish.

Step 3: Lightly grease a baking dish and place the bread cubes at the bottom of the dish.

Cooked veggies layered on top of the cubed bread in a casserole dish.

Step 4: Spoon the cooked vegetables on top of the bread.

mixture of eggs, milk, and cheese in a mixing bowl.

Step 5: In a medium bowl, whisk together the eggs, milk, and cheese. Lightly season the mixture with salt and pepper.

egg-cheese mixture on top of the veggies and bread in a casserole dish.

Step 6: Pour on top of the bread and vegetable mixture. Cover and refrigerate for at least 1 hour or up to 24 hours.

baked breakfast casserole in a baking dish.

Step 7: Preheat your oven to 190 C / 375 F when you're ready to bake. Uncover the casserole and bake for 40-45 minutes until the top is golden and puffy and a skewer inserted in the center comes out clean.

Let the casserole rest for 15- 20 minutes before slicing and serving!

Pro Tips

  • Cook the veggies. You don’t want a watery sourdough bread breakfast casserole.
  • If using frozen spinach, thaw it and drain it well before using.
  • After assembling the egg veggie casserole, let it rest in the fridge for at least an hour, so the flavors can mingle. You can leave it for up to a day.
  • Season the casserole at each step. Season the veggies as you cook them. I also recommend seasoning the egg mixture.
  • The casserole will be puffy when it is baked through because of the eggs. But it will deflate as it cools.

How To Store

You can refrigerate breakfast casserole with veggies covered for up to 3 days. Reheat in a preheated oven for 5-6 minutes or in a microwave.

A slice of breakfast casserole on a plate with a fork on the side.

Vegetarian Breakfast Casserole FAQs

How to make fresh bread stale?

Don’t have old bread lying around? Cut fresh bread into cubes and bake for 10 minutes. When the cubes are crisp, they’re ready to soak up the egg custard.

Can you use frozen spinach in a breakfast casserole recipe?

Yes, you can. Make sure you thaw it and drain it well before using.

How to serve egg veggie breakfast casserole?

This casserole is amazing as-is. A drizzle of gochujang mayo, homemade chili oil, or pistachio pesto will really amp up the flavors. You can also serve with a side of hash browns, simple toasted bread, or even these cheesy pesto swirl rolls or Brazilian cheese bread!

Can you freeze veggie breakfast casserole?

Yes, you can. Wrap the unbaked casserole well in foil and freeze for up to a month.
You can even freeze the baked casserole. Thaw before reheating it in the oven.

More Breakfast Recipes

  • Carrot Cake Baked Oats Recipe
    Carrot Cake Baked Oats Recipe
  • Classic French Toast | Easy cinnamon French toast recipe
    Classic French Toast
  • 3 waffles on a plate, with cherries and peaches on the side.
    Easy Sourdough Waffles
  • Breakfast Granola Tarts easy no bake healthy recipe vegetarian vegan friendly
    Granola Breakfast Tarts

Half the joy of cooking is sharing it with others. That’s why I’m always eager to hear from you. So go right ahead & drop a comment or reach out on Instagram, Pinterest, YouTube, or Facebook. I hope you love this veggie breakfast casserole as much as we do!

📖 Recipe

Tried this recipe?Let us know how it was!
breakfast casserole with eggs and veggies in a baking dish on a metal trivet.

Veggie Breakfast Casserole

Natasha Minocha
This loaded veggie breakfast casserole keeps you full for hours! This easy make-ahead recipe is super versatile and is great for feeding a crowd too!
No ratings yet
Print Recipe Pin Recipe
Prep Time 25 minutes mins
Cook Time 45 minutes mins
Course Breakfast
Cuisine American
Servings 8 Servings
Calories 293 kcal

Ingredients
  

  • 6-7 slices Sourdough bread, cut into cubes
  • 1 tbsp Olive oil
  • 1 small Onion, finely chopped
  • 1 Red bell pepper, finely chopped
  • 1 Yellow bell pepper, finely chopped
  • 1 Green bell pepper, finely chopped
  • 3.5 oz Spinach, chopped
  • 1.5 tsp Italian seasoning
  • Salt & Pepper to taste
  • 8 Eggs
  • 1/2 cup Milk
  • 1 cup Shredded cheddar cheese

Instructions
 

  • Lightly grease a 3-quart baking dish.
  • Place the bread cubes at the bottom of the dish.
  • Heat the olive oil in a large saucepan and add the chopped onions. Saute for 2-3 minutes on medium-high flame until translucent.
  • Add the bell peppers, Italian seasoning, salt, and pepper, and cook for 4-5 minutes until the veggies soften.
  • Add the spinach and cook until it's just wilted. Take the pan off the heat and transfer the veggies on top of the bread.
  • In another bowl, whisk together the eggs, milk, and cheese with a pinch of salt and pepper.
  • Pour on top of the bread and vegetable mixture. Cover and refrigerate for at least 1 hour or up to 24 hours.
  • When you're ready to bake, take the casserole out of the fridge and preheat the oven to 190 C / 375 F.
  • Bake, uncovered at 190 C/ 375 F for 40-45 minutes until the top is golden brown and a skewer inserted in the center comes out clean.
  • Lett the casserole rest for 20 minutes before slicing and serving. Enjoy!

Video

Notes

  • Cook the veggies. You don’t want a watery sourdough bread breakfast casserole.
  • If using frozen spinach, thaw it and drain it well before using.
  • After assembling the egg veggie casserole, let it rest in the fridge for at least an hour, so the flavors can mingle. You can leave it for up to a day.
  • Season the casserole at each step. Season the veggies as you cook them. I also recommend seasoning the egg mixture.
  • The casserole will be puffy when it is baked through because of the eggs. But it will deflate as it cools.
  • This casserole keeps well in the refrigerator for up to 3 days. Reheat in the microwave or a preheated oven for 5-6 minutes.
 

Nutrition

Serving: 1 ServingCalories: 293kcalCarbohydrates: 30gProtein: 15gFat: 12gSaturated Fat: 5gPolyunsaturated Fat: 2gMonounsaturated Fat: 4gTrans Fat: 0.03gCholesterol: 179mgSodium: 464mgPotassium: 325mgFiber: 2gSugar: 5gVitamin A: 2117IUVitamin C: 62mgCalcium: 193mgIron: 3mg

Easy Party Appetizers Everyone Will Love

December 26, 2024

easy appetizers collage.

Be it holiday season entertaining or a cozy little gathering, these easy party appetizers are simple to make and so well-loved by everyone! These appetizer ideas are my secret to hosting like a pro, while still enjoying the celebration.

easy appetizers collage.

They are fun to make and eat and require minimal effort. I mean why spend hours and hours in the kitchen, when you can make a bunch of these little bites that deliver big flavors in a cinch?

These starters look so impressive and no one will know they took hardly any time to make! Try any of these recipes for a starter that will have your guests raving before the mains arrive.

Cranberry Brie Puff Pastry Bites

Crispy, a little sweet, and nicely savory—there's something magical about the combination of gooey melted brie and the tart pop of cranberries. With just 5 ingredients, these are a breeze to make!

Cranberry Brie Puff Pastry Bites.

Air-Fryer Tortilla Chips

These tortilla chips are healthier than deep-fried ones, and they still taste amazing! It's a simple recipe with a few basic ingredients that come together super fast.

air fryer tortilla chips in a serving dish with tomato salsa.

Korean Corn Cheese

Gloriously golden from the cheese, creamy from the mayo, and crunchy from the sweet, starchy kernels, it’s a delicious snack/ appetizer that comes together in minutes!

Korean Corn Cheese in a cast iron skillet.

Easy & Quick Cheese Straws

This cheese straw recipe is the cleverest appetizer idea because it uses just two ingredients: puff pastry and cheese. It doesn't get unbelievably simpler than this. 

cheese straws on a serving plate with shredded cheese in the background.

Caprese Salad Skewers

Caprese skewers are a perfect mingling of chewy mozzarella, sharp basil, and snappy tomatoes. These easy appetizers with a whiff of sweet yet tangy balsamic glaze will have you smitten and they are so delightful to look at!

Caprese Salad Skewers on a white serving platter.

Masala Roasted Nuts

From Diwali to Thanksgiving to Christmas, this garam masala roasted nuts mix will last you a long time. The recipe makes a huge batch without much effort. So, you can bake your holiday nuts jars way beforehand and share them with friends and family!

Masala Roasted Nuts in a blue serving dish.

The Perfect Cheese Board

Cheese boards are the quintessential party appetizers! Not only are they beautiful to look at, but they are also so easy to put together. A perfect cheese board has something for everyone. It satisfies salt and sweet cravings alike, lets you experiment with various combinations, and is the most fun finger food.

A silver cheese platter with cheese, soup sticks, crackers,fruits, olives, nuts and jam.

Easy Marinated Tomatoes

Bursting with fresh herbs, olive oil, and balsamic vinegar, these juicy marinated tomatoes are super easy to make. They are the perfect addition to your appetizer repertoire!

marinated cherry tomatoes in glass jar with a wooden spoon.

Baked Veg Spring Rolls

A cheat version of the popular spring rolls! These use readymade store-bought spring roll wrappers and a filling that comes together so fast. The oven does the rest of the work! Easy, yummy, and a crowd-pleaser!

A platter of spring rolls with one getting dipped in a dipping sauce.

Baked Camembert

Baked Camembert is a cheese like no other I've ever tasted. And making it is so simple. Just 4 ingredients and 15 minutes of oven time and you have a fancy appetizer ready! It makes Holiday entertaining so easy!

baked camembert with rosemary, olive oil, and chili flakes on baking paper.


Pumpkin Cranberry Crackers

The crunchy chewy pumpkin cranberry crisps are bursting with dried cranberries, pumpkin goodness, and cozy spices. The recipe is so easy - perfect for any time snacking and entertaining!

crackers in a plate.

Pumpkin Pie Spiced Almonds

Sweet and salty, aromatic and flavorful, these crunchy almonds are irresistible! It takes just 5 minutes of prep and 20 minutes of baking to make a big batch of these dreamy roasted nuts!

Pumpkin Pie Spiced Almonds in a small bowl.

Baked Brie With Fig Jam

Easy-baked brie with fig jam is a no-fuss, low-effort appetizer that gives you a gorgeous and grand result. With its savory creaminess with a touch of sweetness, this is a complete crowd-pleaser.

Baked Brie with a piece cut and topped with fig jam, walnuts and pistachios on top.

Tofu Potstickers

These tofu potstickers are flavored simply with garlic and ginger. Packed with veggies and wrapped in a perfectly crunchy exterior, these vegetarian potstickers are a sure-shot hit at parties!

Tofu Potstickers in a bowl with dipping sauce and red chopsticks.

Sourdough Crackers

One of my most popular recipes on the blog! These sourdough crackers are the quintessential snack – thin, crispy, and addictive. Eat them as-is, dip them in healthy hummus, or smear them with cream cheese, they are so well-loved and super simple to make!

Sourdough Crackers with hummus, olives and salad on the side.

Half the joy of cooking is sharing it with others. That’s why I’m always eager to hear from you. So go right ahead & drop a comment or reach out on Instagram, Pinterest, YouTube, or Facebook. I hope you love these easy party appetizers as much as we do!

Cranberry Pistachio Biscotti

December 20, 2024

cranberry pistachio biscotti in a golden serving bowl.

Cranberry pistachio biscotti are crunchy, chewy, and so flavorful. These festive cookies are beautifully studded with cranberries and pistachios and have a lovely lemon flavor! They are the perfect accompaniment to your cup of tea or coffee.

cranberry pistachio biscotti in a golden serving bowl.

Making cranberry and pistachio biscotti is easy. The recipe is rather forgiving, something I learned while baking my mocha gingerbread biscotti for the first time years ago. All you gotta do is combine, shape, bake, cut, and bake again.  

[feast_advanced_jump_to]


What Is Biscotti?

Biscotti are Italian biscuits. They take their name from the Latin word ‘biscoctus.’ When translated into English, it means twice-cooked, and that’s what we do in the recipe. We bake the dough two times, first as a log and then as sliced biscotti. This gives the cranberry pistachio biscotti a firm, crunchy texture and a long shelf life. Just like we did with my pumpkin cranberry crackers.

biscotti in a serving bowl.

Why You'll Love This Recipe

Crisp and crumbly, these pistachio biscotti have the perfect texture.

Studded with tart red cranberries, and lovely green pistachios, the biscotti are wonderful for the Holiday season and any occasion!

You can easily double or halve the recipe to make as much as you want.

Because they have a long shelf life, they are fabulous for gifting!

This cranberry pistachio biscotti recipe is so versatile. Use the same recipe to pack the biscotti with your preferred flavors: nuts of your choice, coffee, or even chocolate.

Cranberry Pistachio Biscotti Recipe Ingredients

ingredients for cranberry pistachio biscotti.

Flour: All-purpose works best. But you can try 100% whole wheat or half-and-half of all-purpose and whole wheat flour. Adding a portion of almond flour, about 1/4 cup, will give the biscotti a nutty flavor. 

Eggs bind the biscotti dough and give the biscotti structure. You can substitute them with flax eggs. I’ve made cranberry biscotti with them before, and they’re just as crispy and buttery.

Sugar: Granulated, cane or any sugar of your choice is great.

Vanilla extract: For rounding up the flavors. Store-bought or homemade vanilla extract can be used.

Lemon zest: This recipe really shows what a little bit of lemon zest can do. It gives the cranberry pistachio biscotti an incredibly fantastic flavor! When you open the oven, the heady aroma will make your mouth water. So, I recommend not skipping the lemon zest. In its place, you can use orange zest. 

See the recipe card for full information on ingredients and quantities.

Biscotti Variations

Vegan: Switch to plant-based butter.

Cranberries: Dried figs, apricots, or dried cherries are fantastic. (Have the time? Try cherry almond scones too). Raisins are another option, but for me, they do change the flavor profile.

Pistachios: Almonds, cashews, or pecans all make excellent nut substitutions. Use plenty if you love texture like me.

Chocolate: You can add white or dark chocolate chips to the dough. Please make sure it’s good quality baking chocolate. 

How To Make Cranberry Pistachio Biscotti

creamed butter and sugar with eggs, lemon zest and vanilla extract on top.

Step 1: Beat butter and sugar until light and fluffy. Add in the eggs, lemon zest, and vanilla extract.

dough for biscotti in a mixing bowl with a spatula.

Step 2: Sift the all-purpose flour and baking powder. Add it to the creamed mixture to form a dough.

dried cranberries and pistachios on top of the dough.

Step 3: Transfer the dough to a lightly floured surface. Add the cranberries and pistachios.

biscotti dough ball with cranberries and pistachios on a pink silicone mat.

Step 4: Make sure they are equally distributed through the dough. You’ll have a soft, pliable dough. Then divide the dough into equal halves.

2 logs of biscotti dough on a parchment-lined baking tray.

Step 5: Shape each half into a log and flatten them slightly. Place on a parchment-lined baking tray.

baked biscotti on a parchment-lined baking tray.

Step 6: Bake for 25 to 30 minutes till firm and golden.

sliced biscotti on a parchment-lined tray.

Step 7: Let the logs cool completely then cut into 1/4 inch thick slices.

baked biscotti on a parchment-lined tray.

Step 8: Bake for 12-15 minutes until crisp and golden. Cool completely before transferring in an air-tight container.

Pro Tips

  • You may need to use your hands to bring the dough together during step 4. Lightly flour your hands.
  • Make sure the chopped cranberries and pistachios are equally distributed through the dough.
  • Allow the logs to cool completely after the 1st bake before slicing them. If the logs are still warm, you'll get crumbly biscotti slices.
  • Use a sharp, serrated knife to slice the logs.
  • Keep an eye on the biscotti while baking the 2nd time. You want them crunchy, not overbaked and dry. Keep in mind that they get crispier as they cool.
biscotti in a serving bowl with Christmas decorations in the background.

Recipe FAQs

Can you make the pistachio cranberry biscotti recipe ahead of time?

Yes, yes, you can! Bake the log 1 day before. Slice and 2nd bake the biscotti the next morning.

How to cut biscotti logs without breaking them?

After baking the pistachio cranberry biscotti for the first time, wait for the log to cool completely. This is essential. Warm-baked logs are crumbly, and when you slice into them, they break.

How can I serve cranberry pistachio biscotti?

Personally, I love to see the green and red peeping from the biscotti sides. So, I don’t think they need any additional garnishing. The light, crunchy, and tart biscotti are ready for a dip in my morning tea. But if you’re baking these, especially for the holidays or for Christmas gifting, make them more festive. Give half of each biscotti a generous dunk in melted white chocolate.

What is the best way to store biscotti?

Pistachio and cranberry biscotti are easy to store. They’ll last well for 2 weeks in an airtight jar, at room temperature.

More Christmas Recipes

  • chocolate bark cut into pieces placed in a green bowl.
    Dark Chocolate Bark
  • Strawberry Star Bread | Vegan Star Bread Recipe
    Strawberry Star Bread
  • pecan tassies on a cake stand with a candle and pecans in the background.
    Pecan Tassies
  • sliced stollen bread on parchment paper.
    Stollen Recipe

Half the joy of cooking is sharing it with others. That’s why I’m always eager to hear from you. So go right ahead & drop a comment or reach out on Instagram, Pinterest, YouTube, or Facebook. I hope you love this cranberry pistachio biscotti as much as we do!

📖 Recipe

Tried this recipe?Let us know how it was!
cranberry pistachio biscotti in a golden serving bowl.

Cranberry Pistachio Biscotti

Natasha Minocha
Cranberry pistachio biscotti are crunchy, chewy, and so flavorful. These festive cookies are beautifully studded with cranberries and pistachios and have a lovely lemon flavor!
No ratings yet
Print Recipe Pin Recipe
Prep Time 20 minutes mins
Cook Time 45 minutes mins
Cooling Time 30 minutes mins
Total Time 1 hour hr 35 minutes mins
Course Cookies
Cuisine American, Italian
Servings 32 Biscotti
Calories 83 kcal

Ingredients


  • 2 cups All-purpose flour
  • 1.5 tsp Baking powder
  • 1/4 tsp Salt If using unsalted butter
  • 1/2 cup Butter, room temperature
  • 1/2 cup Sugar
  • 2 Eggs
  • 1 tsp Vanilla extract
  • Zest of 1 lemon
  • 1/3 cup Dried cranberries, chopped
  • 1/3 cup Pistachios, chopped

Instructions
 

  • Preheat your oven to 180C. Line a baking tray with Silpat or parchment paper.
  • Sift together the flour, baking powder, and salt ( only if your butter is unsalted) in a bowl.
  • In a separate bowl, beat together the butter and sugar until light and fluffy.
  • Add the eggs, lemon zest, and vanilla extract. Beat well.
  • Stir in the flour mixture. Mix well with a spatula. You may need to use your hands to bring the dough together.
  • Mix in the cranberries and pistachios. Make sure they are equally distributed through the dough.
  • Divide dough in half. Form the dough into two slightly flattened logs on the prepared baking sheet, approximately 12-inches long and 2.5-inches wide.
  • Bake for 20-25 minutes, until slightly firm to touch. and light golden brown. Take it out of the oven and let the logs cool completely.
  • Cut the cooled logs into 1/2” slices. Place on the baking tray and bake for 12-15 minutes until crisp and golden.
  • Wait for 3-4 minutes before taking them off the baking tray. Place on a cooling rack to cool completely. Enjoy!
  • Store in an airtight container.

Video

Notes

  • You may need to use your hands to bring the dough together while mixing in the cranberries and pistachios. Lightly flour your hands so the dough doesn't stick to your hands.
  • Make sure the chopped cranberries and pistachios are equally distributed through the dough.
  • Allow the logs to cool completely after the 1st bake before slicing them. If the logs are still warm, you'll get crumbly biscotti slices.
  • Use a sharp, serrated knife to slice the logs.
  • Keep an eye on the biscotti while baking the 2nd time. You want them crunchy, not overbaked and dry. Keep in mind that they get crispier as they cool.

Nutrition

Serving: 1 ServingCalories: 83kcalCarbohydrates: 11gProtein: 1gFat: 4gSaturated Fat: 2gPolyunsaturated Fat: 0.4gMonounsaturated Fat: 1gTrans Fat: 0.1gCholesterol: 18mgSodium: 65mgPotassium: 27mgFiber: 0.4gSugar: 4gVitamin A: 108IUVitamin C: 0.04mgCalcium: 16mgIron: 0.5mg

Pecan Tassies

December 17, 2024

pecan tassies on a cake stand with a candle and pecans in the background.

Pecan tassies are delightful bite-sized pecan pies. These little dessert treats are irresistible with a gooey caramelized pecan filling and golden cream cheese crust!

tassies on a cake stand with candles and christmas decor in the background.

The crust is flaky and crispy, and the filling is sweet and nutty. These indulgent, bite-sized pecan tarts are perfect for the Holidays and any time of the year! They are easy to make, store well, travel well, and are sure to impress everyone!

If you enjoy little mini-sized treats, you'll love my apple hand pies and homemade pop tarts!

[feast_advanced_jump_to]
pecan tassies piled up on a cake stand.

Why You'll Love This Recipe

  • These little pecan tarts are super easy and quick to make. They come together effortlessly. No special technique or equipment is needed —just an electric beater and two bowls!
  • This is a simple foolproof recipe that delivers every single time.
  • Pecan tassies are a wonderful little dessert. Not too sweet, flaky, and full of crunchy pecans in a gooey filling.
  • They look so impressive!
  • Perfect last-minute dessert for your Holiday table!

Pecan Tassies Recipe Ingredients

ingredients for making pecan tassies.

Butter: I used salted butter for this recipe for pecan tassies. However, you can use unsalted butter as well. If you do, please add 1/8 teaspoon salt to the dough and 1/4 teaspoon salt to the filling.

Cream cheese: It adds richness and also tanginess to balance out the sweetness of the mini pecan pies. You can use store-bought or homemade cream cheese.

All-purpose flour: It gives a lovely tender, flaky crust.

Honey: You can use corn syrup or maple syrup instead.

Brown sugar: For a lovely deep, caramel flavor. You can use light or dark brown sugar.

Eggs: They help bind the filling and add richness to the mini pecan tarts.

Pecans: Lightly toast the pecans in the oven or a skillet, for 5-6 minutes, for a crunchier texture.

See the recipe card for full information on ingredients and quantities.

Recipe Variations

Feel free to switch the nuts here. Walnuts, almonds, and hazelnuts, all would be amazing in this recipe.

You can add some chocolate or cinnamon chips to the filling too.

Make it boozy! A splash of Bourbon or spiced rum would be wonderful in this pecan tassie recipe.

How To Make Pecan Tassies

Preheat the oven and lightly grease your mini muffin pans. I used 2 12-cup mini muffin pans.

a fluffy mixture of butter and cream cheese in a glass mixing bowl.

Step 1: In a large bowl, combine butter and cream cheese. Using an electric beater, mix well until fluffy.

flour on top of the butter and cream cheese mixture.

Step 2: Add flour and mix well until a soft dough forms.

dough balls in a mini muffin pan.

Step 3: Divide the dough into 24 equal-sized pieces and roll them into balls. Place them in the cups on the mini muffin pans.

pressed dough in the cups of a mini muffin pan.

Step 4: Press the dough balls evenly on the bottom and sides of each cup. Place the trays in the freezer for a few minutes while you prepare the filling.

sugar, eggs, honey, butter in a mixing bowl for making pie filling.

Step 5: Combine melted butter, honey, and brown sugar in a small bowl. Whisk in the eggs, and vanilla extract and mix well.

pecans in the eggs, sugar, butter pie filling mixture.

Step 6: Stir in the pecans.

pie filling in tart cases in a mini muffin pan.

Step 7: Spoon the mixture into the prepared tart cases.

baked mini pecan pies in mini muffin pan.

Step 8: Bake for 20-25 minutes, or until the tops are brown and puffy.

Allow the tassies to cool in the pan for 5-10 minutes before turning them out on a cooling rack. Sprinkle icing sugar on top and serve.

Pro Tips

  • Please don't press the dough too thinly in the muffin pan cavities. If its too thin, the filling may ooze out of the tart case and stick to the pan.
  • Don't overfill the tart crust. Leave just a little space on top as the filling will puff up and spread as it bakes.
  • Make sure the butter and cream cheese for the pecan tassies crust are at room temperature. This will ensure a smooth dough.
  • Allow the tassies to cool in the baking pan for 5-10 minutes before taking them out. They are quite soft when hot and can break if not given some time to cool and set.
  • If any of the tassies are stuck to the pan, run a butter knife around the edges carefully to release them.
  • If you're using unsalted butter, please add 1/8 teaspoon salt to the dough and 1/4 teaspoon to the filling.
  • You will have some leftover pecan pie filling. You can freeze it for later use.
half of a pecan tassie to show the gooey filling.

Recipe FAQs

How long can I store the mini pecan pies?

Pecan tassies stay well for up to 3 days in an air-tight container. You can refrigerate them for up to 6 days.

Can pecan tassies be frozen?

Yes, the tassies freeze very well. They will keep for a month in an air-tight container in the freezer. Thaw in the refrigerator or countertop before serving.

How can I use leftover pecan pie filling?

You can freeze the leftover filling and use it in your next batch of pecan tassies. You can even add it to the custard for chocolate chip bread pudding, add it to your coffee banana cake batter or in your brownie batter!

More Holiday Desserts

  • Easy Chocolate Puff Pastry Braid
    Easy Chocolate Puff Pastry Braid
  • Easy Orange Cranberry Bread
    Easy Orange Cranberry Bread
  • walnut pie on a red napkin with a knife alongside.
    Easy Walnut Pie
  • sliced chocolate babka on a platter to show the swirls in the bread.
    Chocolate Babka Recipe

Half the joy of cooking is sharing it with others. That’s why I’m always eager to hear from you. So go right ahead & drop a comment or reach out on Instagram, Pinterest, YouTube, or Facebook. I hope you love these pecan tassies as much as we do!

📖 Recipe

Tried this recipe?Let us know how it was!
pecan tassies on a cake stand with a candle and pecans in the background.

Pecan Tassies

Natasha Minocha
Pecan tassies are delightful bite-sized pecan pies. With a gooey caramelized pecan filling and golden cream cheese crust, these little dessert treats are irresistible!
No ratings yet
Print Recipe Pin Recipe
Prep Time 20 minutes mins
Cook Time 25 minutes mins
Chilling Time 10 minutes mins
Course Dessert
Cuisine American
Servings 24 Tassies
Calories 141 kcal

Ingredients


Dough Ingredients

  • 1/2 cup Butter, softened
  • 3 oz Cream cheese, room temperature
  • 1 cup All-purpose flour

Filling Ingredients

  • 2 tbsp Butter, melted
  • 3/4 cup Brown sugar
  • 2 tbsp Honey
  • 2 Eggs
  • 1 tsp Vanilla extract
  • 1 cup Pecans, lightly toasted and chopped

Instructions
 

  • Preheat the oven to 180 C / 350 F. Lightly grease your mini muffin pans. I used 2 12-cup mini muffin pans.

Dough

  • In a large bowl, combine the butter and cream cheese.
  • Using an electric beater, mix well until fluffy.
  • Add the flour and mix well until a soft dough forms.
  • Divide the dough into 24 equal-sized pieces and roll them into balls.
  • Place them in the cups on the mini muffin pans. Press the dough balls evenly on the bottom and sides of each cup.
  • Place the trays in the freezer for a few minutes while you prepare the filling.

Filling

  • Combine melted butter, honey, and brown sugar in a small bowl.
  • Whisk in the eggs, and vanilla extract and mix well.
  • Stir in the pecans.
  • Spoon the mixture into the prepared tart cases.
  • Bake at 180 C / 350 F for 20-25 minutes, or until the tops are brown and puffy.
  • Allow the tassies to cool in the pan for 5-10 minutes before turning them out on a cooling rack.
  • Sprinkle icing sugar on top and serve. Enjoy!

Video

Notes

    • Please don't press the dough too thinly in the cavities of the muffin pan. If its too thin, the filling may ooze out of the tart case and stick to the pan.
    • Don't overfill the tart crust. Leave just a little space on top as the filling will puff up and spread as it bakes.
    • Make sure the butter and cream cheese for the pecan tassies crust are at room temperature. This will ensure a smooth dough.
    • Allow the tassies to cool in the baking pan for 5-10 minutes before taking them out. They are quite soft when hot and can break if not given some time to cool and set.
    • If any of the tassies are stuck to the pan, run a butter knife around the edges carefully to release them.
    • If you're using unsalted butter, please add 1/8 teaspoon salt to the dough and 1/4 teaspoon to the filling.

Nutrition

Serving: 1TassieCalories: 141kcalCarbohydrates: 13gProtein: 2gFat: 9gSaturated Fat: 4gPolyunsaturated Fat: 1gMonounsaturated Fat: 3gTrans Fat: 0.2gCholesterol: 30mgSodium: 57mgPotassium: 44mgFiber: 1gSugar: 9gVitamin A: 219IUVitamin C: 0.1mgCalcium: 17mgIron: 0.5mg

Delicious & Easy Holiday Cookies

December 12, 2024

Presenting my cookie season masterpiece - a roundup of more than 35 delicious & easy holiday cookies, each more scrumptious than the last! From classic cookie recipes to new family favorites.

collage of christmas cookies with title 35+ delicious and easy holiday cookies.

Today I am sharing with you delicious & easy holiday cookies that have been tried, tested, and devoured by yours truly. Every one of them is a winner in my books.

From the beloved Linzer cookie to a new take on Gingersnaps - there is plenty to choose from. Citrus cookies, chocolatey ones, fudgy ones. Some vegan, some gluten-free, some unabashedly decadent. Whether you use a bunch of these for your cookie box to give to loved ones, or just a joyful treat to brighten your holiday table, I promise that any of these cookies is sure to please. 

Almond Ricotta Cookies

They’re less cookie and more cake, with a soft, crumbly texture that tastes positively divine!

plate of decorated almond ricotta cookies.

Matcha Pinwheel Cookies

The pretty green spirals, the festive vibes, the buttery taste - these are the loveliest matcha shortbread cookies!

bowl of green spiral pinwheel cookies.

Lemon Crinkle Cookies

Soft and zinging with fresh lemon, if you’re looking for an easy cookie for Christmas, these are it!

Soft Lemon Crinkle Cookies Recipe

Easy Spritz Cookies

A quintessential holiday bake! These buttery, tender, and addictive treats fill up the cookie jar with one bake.

spritz cookies topped with sprinkles

Maple Pecan Cookies (No Egg Cookies)

The perfect blend of sugar, butter, and maple-hinted butter, these cookies are a universal favorite! Plus, they are super easy to make, with no chill time either.

maple pecan cookies

Christmas Wreath Sugar Cookies

The lemon-glazed sugar cookies are the easy, soft Christmas cookies you’ve been looking for. Lemony yum, nicely bright, and delightfully pretty, they are perfect for ringing in the holidays with joy and cheer!

The BEST Chocolate Crinkle Cookies!

These pretty crackly top cookies are crisp on the outside and like a moist fudgy brownie on the inside. Everyone will love these crinkle cookies!

Thumbprint Cookies with Raspberry Jam

These easy Thumbprint Cookies filled with Raspberry Jam are buttery soft, rich, and tender with a perfectly crisp exterior. This is a flavourful classic holiday cookie that everyone will love!

White Chocolate Cranberry Cookies

They are just lightly crisp on the outside, but the centers are tender, giving you that very satisfying bite. You have the homey warmth from the brown sugar, and the nuts, cranberries, and chocolate make them super flavorful!

Gingerbread Crinkle Cookies

Crispy on top and gooey in the center, these melt-in-your-mouth treats are the crinkle cookies your Christmas platter is missing.

Easy Soft Gingerbread Crinkle Cookies Recipe

Eggless Brownie Cookies

These have the consistency and appeal of both cookies and brownies: fudgy, chewy, and rich in the middle, + crispy, and crunchy around the edges! SO good.

Soft Lemon Crinkle Cookies

Soft and zinging with fresh lemon, these cookies are like a burst of sunshine! Personally, I love cheery bakes like this in winter.

Soft Lemon Crinkle Cookies Recipe

Classic Butter Cookies (Eggless)

The magic of butter, sugar, and flour personified! These little bites are tender, light, and dangerously addictive. 

Cranberry Pistachio Biscotti

These gorgeous biscotti are bright from the lemon, magnificent from the cranberry, and phenomenal from the pistachios. A total winner!

AND they are the perfect make-ahead cookie!

cranberry pistachio biscotti in a golden serving bowl.

Chocolate Ginger Cookies (Eggless)

Each bite of this fudgy, chocolatey cookie is utterly divine! With a slight crunch on the exterior and the beauty of sharp spices, it’s a recipe you’ll be making on repeat. 

Mexican Wedding Cookies (Eggless) 

With a crumbly, tender shortbread-like texture, these cookies are heavenly. Rolled in powdered sugar, they look like pretty little clouds! 

Almond Cinnamon Cookies (Vegan, Gluten Free, Eggless)

Chewy, zesty, spiced perfection! Made with only 5 basic ingredients, these Christmas cookies could not be easier to make. 

almond cinnamon cookies in star shapes

Biscoff Shortbread Recipe

Quick and easy, this flavored shortbread is sweet, short, and delectably buttery. 

Biscoff Shortbread Recipe

Lemon Crescent Cookies 

Ideal for beginners, these no-fuss cookies are a breeze to make! Just easy, melt-in-your-mouth, buttery goodness. 

lemon crescent cookies topped with powdered sugar

Mocha Gingerbread Biscotti 

The dream accompaniment for your cuppa! These biscotti are crispy, flavourful, and full of rustic charm. 

Almond Linzer Cookies (Gluten-free) 

Buttery soft cookies, sandwiched with a delicious fruit jam. Made with simple pantry ingredients and little effort!

No Bake Gingersnap Balls 

For when you want to forgo an oven - these no-bake gingersnap treats are going to be your new best friend. Chocolaty, fudgy bites that will leave everyone wanting more. A 5-ingredient miracle!

gingersnap balls

Chocolate Gingerbread Cookies

The quintessential holiday cookie! All your favorite spices come together with the help of some cocoa powder to create this comforting and delectable treat. 

gingerbread cookies on a cookie tray

Chai Spice Chocolate Cookies

These Chai Spiced Chocolate Cookies are the easiest holiday cookie recipe! Infused with heartening and warming spices like cinnamon & nutmeg, these rich & chewy cookies are irresistible.

Mint Chocolate Chip Cookies

These mint chocolate chip cookies could not be easier to make! They need just one bowl, one whisk, and the simplest ingredients. Serve with a glass of milk, and you have the perfect holiday cookie treat ✨

Easy Mint Chocolate Chip Cookies Recipe

Chocolate Peanut Butter Cookies (Vegan) 

Pools of chocolatey, peanut buttery goodness with layers of flavor and plenty of texture, all packaged in lusciously soft delights!

Double Chocolate Chip Cookies (Eggless)

You can truly never go wrong with a chocolate chip cookie! This wonderful bake has an extra dose of chocolate, slightly crisped edges, and a meltingly gorgeous soft center.

Eggless Double Chocolate Chip Cookies | Easy cookie recipe

Ginger Cranberry Oatmeal Cookies (Vegan) 

Chewy, gooey, and slightly crispy cookies. This is a quick bake and brings together some of the best classic holiday flavors!

Ginger Cranberry Oatmeal Cookies vegan dairyfree refined sugarfree baking

Classic Oatmeal Raisin Cookies

The oatmeal raisin cookies recipe makes for crispy outside and moist and chewy inside treats. The perfect beginner-friendly cookie that you can make ahead and freeze!

Family Favorite Oatmeal Raisin Cookies Recipe

Peanut Butter Blossom Cookies (no egg cookies)

These blossom cookies are just classic, soft peanut butter cookies, topped with a chocolate kiss. They are incredibly easy to make - simple pantry ingredients and just one bowl!

Chocolate Chip Shortbread

With an easy and make-ahead recipe, you just have to try these holiday cookies for Christmas! One of my favorite homemade xmas cookies.

Easy Chocolate Chip Shortbread Cookies Recipe

Wholewheat Chai Spiced Walnut Cookies (Eggless) 

Ready in less than 30 minutes to accompany your tea. These are the coziest, soft cookies that let the spices shine! Plus - a healthy addition to your baking spree. 

wholewheat chai spiced cookies

Waffle Cookies (Gluten Free) 

Adorable waffle-shaped cookies, with the easiest dough ever. These are endlessly customizable and such fun to decorate with the family!

Gluten-free Waffle Cookies | Eggless Waffle Cookies Recipe

No Bake Peanut Butter Chocolate Cookies

No time or space to turn on the oven? Make these no-bake cookies! They are quick, easy, and taste amazing. Fans of chocolate peanut butter desserts will LOVE them. Bonus - they're made with good for you ingredients.

Chocolate Peanut Butter No-Bake Cookies

Spiced Brown Butter Madeleines (Gingerbread Madeleines)

Not technically cookies, but these cookie-like cakes are a frequent addition to my holiday cookie tray! They are light and soft inside with a slightly crisp crust. These brown butter madeleines are so delicious and simple to make.

Spiced Brown Butter Madeleines

Half the joy of cooking is sharing it with others. That’s why I’m always eager to hear from you. So go right ahead & drop a comment or reach out on Instagram, Pinterest, YouTube, or Facebook. I hope you love these easy Christmas cookie ideas as much as we do!

Matcha Pinwheel Cookies

December 11, 2024

matcha pinwheel cookies in a bowl on a green napkin.

These Matcha Pinwheel Cookies are the perfect Christmas cookie! The pretty green spirals, the festive vibes, the buttery taste - These are the loveliest matcha shortbread cookies!

matcha cookies in a white bowl on a green napkin.

Now, the classic combination of chocolate and vanilla pinwheels has ruled our hearts, but these matcha babies are right there on top, too. The grassy, ever-so-slightly bitter taste of matcha ( which I love!) is not so evident in the final cookie, so don't you worry! What we have is a showstopper of a cookie that's mildly sweet, subtly flavored, and perfect with your cuppa.

If you enjoy matcha desserts, you'll love these easy vegan matcha donuts, creamy matcha Basque cheesecake, our Holiday favorite matcha white chocolate bark, and these gorgeous matcha pistachio madeleines!

[feast_advanced_jump_to]
pinwheel cookies in a serving bowl.

Why You’ll Love The Recipe

These matcha pinwheel cookies look fancy, but really they couldn’t be easier to make!

Apart from matcha tea powder, these cookies need just the basic pantry ingredients.

You can double up the recipe, roll out the dough into logs, tightly wrap them in foil or parchment paper, and freeze them, for you know, any cookie emergency that you may have!

This is such a versatile shortbread cookie recipe. Feel free to play around with flavors...lemon, orange, chocolate, and cinnamon. You can even scatter a thin layer of finely chopped nuts in between the cookie dough layers.

These matcha cookies are a dream with tea, coffee, and even a blueberry matcha latte!

So festive looking and great for your Holiday cookie table!

Recipe Ingredients

Ingredients for making matcha cookies.

Flour: All-purpose flour is the best for that light, crumbly texture.

Matcha powder: Japanese green tea powder that’s so popular now for tea and lattes ( like this mango matcha latte), also is great for baking! Please use a good-quality culinary-grade matcha or ceremonial matcha.

Butter: I used salted butter. Please add a quarter teaspoon of salt to the flour, in case you’re using unsalted butter.

Egg: It helps bind the dough and adds richness to the matcha cookies.

Sugar: This matcha pinwheel recipe uses icing sugar, also known as confectioner’s sugar or powdered sugar. It dissolves easily in the butter and gives that delicious melt-in-your-mouth texture.

Vanilla extract: For a balanced and deeper flavor.

See the recipe card for full information on ingredients and quantities.

How To Make Matcha Pinwheel Cookies

Egg and vanilla extract on whipped butter and sugar mixture in a bowl.

Step 1: Beat the butter and sugar till light and fluffy. Whisk in the egg and vanilla extract. Beat well.

flour on top of the whipped butter, egg, and sugar mixture.

Step 2: Combine flour and gradually stir it into the creamed mixture, until well combined.

cookie dough in a mixing bowl.

Step 3: Divide the dough into 2 halves.

matcha powder on cookie dough in a mixing bowl.

Step 4: Add matcha powder to one portion.

vanilla and matcha cookie dough wrapped in plastic wrap.

Step 5: Wrap both the cookie doughs in plastic wrap and refrigerate for 15-20 minutes.

vanilla and matcha cookie doughs rolled out and placed on top of each other.

Step 6: Lightly dust your work surface with flour. Roll each dough into a rough rectangle of 10 x 12 inches. Carefully place the matcha rectangle on top of the vanilla rectangle. Press the rectangles gently with a rolling pin. 

Rolled up cookie dough rectangles in a log.

Step 7: Starting from the longer end, roll up tightly into a log. Wrap in cling wrap or foil. Refrigerate the logs for at least 30-40 minutes, until firm.

cookie dough sliced on a wooden board.

Step 8: Unwrap the rolled-up log, and slice it into 1/4" slices, using a very sharp knife.

sliced cookie dough on parchment-lined baking tray.

Step 9: Preheat your oven to 180C. Place the sliced cookie dough on a parchment-lined baking tray.

baked matcha cookies on parchment-lined baking tray.

Step 10: Bake for 10-12 minutes until lightly golden. Allow the cookies to cool completely. They will firm up more as they cool. Store in an airtight container. 

Top Tips

  • You can use your hands to bring the dough together for these matcha pinwheel cookies.
  • If the cookie dough seems too soft, please refrigerate for a longer time until it is firm enough to handle.
  • You can roll out the cookie dough between two sheets of parchment paper for easier handling and less cleanup.
  • Once you have placed the rolled-out matcha cookie dough on top of the vanilla cookie dough, gently press both doughs together using a rolling pin so they stick to each other.
  • While rolling the cookie dough into a log, make sure you are rolling the dough tightly.
  • As always, it's best to use a weighing scale to measure ingredients for this matcha pinwheel cookie recipe.
matcha pinwheel cookies in a serving bowl with festive decor in the background.

Matcha Pinwheel Recipe FAQs

How long will these matcha pinwheel cookies last?

Stored in an air-tight container these cookies will be good for 2 weeks.

Can I freeze the cookie dough?

Yes, you can! Roll out the dough into logs, tightly wrap them in foil or parchment paper, and freeze them for up to 1 month. They slice neatly when frozen and bake for 15 -16 minutes.

Can I use any flavoring other than matcha powder?

Yes, absolutely. Substitute matcha with coffee powder, cinnamon, or cocoa powder. You can add lemon or orange zest to the dough. Spread the rolled-out plain cookie dough with Nutella to make Nutella pinwheel cookies. 

More Holiday Cookies!

  • Chocolate chip cookies on a platter.
    Easy Chocolate Chip Shortbread Cookies
  • Easy Spritz Cookies
    Christmas Spritz Cookies
  • linzer cookies piled up on a metal tray with green Christmas decorations.
    Gluten-free Linzer Cookies
  • Five Chocolate ginger cookies stacked up on parchment paper with a red string.
    Chocolate Ginger Cookies

Half the joy of cooking is sharing it with others. That’s why I’m always eager to hear from you. So go right ahead & drop a comment or reach out on Instagram, Pinterest, YouTube, or Facebook. I hope you love these matcha pinwheel cookies as much as we do!

📖 Recipe

Tried this recipe?Let us know how it was!
matcha pinwheel cookies in a bowl on a green napkin.

Matcha Pinwheel Cookies

Natasha Minocha
Matcha Pinwheel Cookies are not only spectacular to look at but are incredibly delicious as well! These festive cookies are perfect for your Christmas table!
5 from 1 vote
Print Recipe Pin Recipe
Prep Time 15 minutes mins
Cook Time 14 minutes mins
Chilling time 50 minutes mins
Course Cookies, Snack
Cuisine American
Servings 48 cookies
Calories 44 kcal

Ingredients


  • 1/2 cup Butter, softened I used salted butter. If using unsalted butter, please add 1/8 tsp salt
  • 1/2 cup Icing sugar
  • 1 Egg
  • 2 tsp Vanilla extract
  • 2 cups All purpose flour
  • 2 tsp Matcha powder

Instructions
 

  • Beat the butter and sugar till light and fluffy.
  • Whisk in the egg. Beat well. Add the vanilla extract.
  • Combine flour and salt ( if using) and gradually stir it into the creamed mixture, until well combined.
  • Divide the dough in half. Add matcha powder to one portion.
    If the weather is warm, you may need to refrigerate the dough for 15-20 minutes before rolling them out.
  • Lightly dust your work surface with flour. Roll each dough half to a rough rectangle of 10 x 12 inches.
    You can even roll the dough in between sheets of wax or parchment paper. That's my recommendation.
  • Carefully place the matcha rectangle on top of the vanilla rectangle. Press the rectangles gently with a rolling pin. Starting from the long end, roll up tightly into a log.
    Wrap in cling wrap or foil. Refrigerate the logs for at least 30-40 minutes, until firm.
  • **You can freeze the rolled up logs at this time for future baking.
  • Preheat your oven to 180C. Line your baking tray with parchment paper.
  • Unwrap the rolled-up logs, and slice them into 1/4" slices, using a very sharp knife. Bake for 10-12 minutes at 180 C until lightly golden.
  • Allow the cookies to cool completely. They will firm up more as they cool. Store in an airtight container. Enjoy!

Video

Notes

  • You can use your hands to bring the dough together for these matcha pinwheel cookies.
  • If the cookie dough seems too soft, please refrigerate for a longer time until it is firm enough to handle.
  • You can roll out the cookie dough between two sheets of parchment paper for easier handling and less cleanup.
  • Once you have placed the rolled-out matcha cookie dough on top of the vanilla cookie dough, gently press both doughs together using a rolling pin so they stick to each other.
  • While rolling the cookie dough into a log, make sure you are rolling the dough tightly.
  • As always, it's best to use a weighing scale to measure ingredients for this matcha pinwheel cookie recipe.

Nutrition

Serving: 1 ServingCalories: 44kcalCarbohydrates: 5gProtein: 1gFat: 2gSaturated Fat: 1gPolyunsaturated Fat: 0.1gMonounsaturated Fat: 1gTrans Fat: 0.1gCholesterol: 9mgSodium: 17mgPotassium: 8mgFiber: 0.1gSugar: 1gVitamin A: 73IUCalcium: 2mgIron: 0.3mg

Stollen Recipe

December 7, 2024

sliced stollen bread on parchment paper.

My stollen recipe makes a wonderfully flavorful, rich German Christmas bread, studded with dried fruits and almonds. The bread is soft and moist, topped with a lovely sweet glaze. This is a special festive Holiday treat the whole family will love!

sliced stollen bread on parchment paper.

This fabulous cake-like bread is Martha Stewart's stollen recipe. I followed it to a T and couldn't be happier with the classic Christmas bread!

The ingredient list is long and the dough is kneaded by hand (though you could use a stand mixer) but the homemade stollen is so rewarding! The spiced bread is buttery, mildly sweet, and crammed with rum-soaked fruits and nuts. It really tastes like Christmas!

[feast_advanced_jump_to]

What Is Stollen?

Stollen, also called Christstollen, is a traditional German Christmas bread. It's moist, heavy, fruit-filled, and coated with powdered sugar. It is usually oval-shaped, symbolizing Baby Jesus wrapped in swaddling clothes.

This German stollen is also often filled with marzipan and is gifted to friends and family during the Holiday season.

two slices of stollen kept flat to show the filling and texture.

Why You'll Love This Recipe

A festive bread that tastes like Christmas!

It can be made without a stand mixer or any special equipment.

You can switch the dried fruits to your taste and make it alcohol-free if you prefer.

You can make the stollen ahead of time. The flavor deepens as the bread soaks in the dried fruit.

It stores well for up to one week at room temperature, and you can freeze it for up to a month!

Stollen Recipe Ingredients

ingredients for making stollen.

Flour: I used all-purpose for this German Christmas fruit loaf recipe. You can use bread flour too for a chewier result.

Milk: Whole milk works the best here, for making the bread soft. Please make sure the milk is not cold.

Butter: I use salted butter. You can use unsalted butter. In case you do, please add a teaspoon of salt to the flour.

Eggs: They help in binding the dough and making the stollen richer.

Yeast: I used dry active yeast.

Spices: Traditionally mace and nutmeg are used in German stollen. Since I didn't have mace, I used cinnamon instead.

Sugar: Granulated sugar works just fine here.

Lemon zest: For a lovely citrusy flavor.

Dried fruits and nuts: Following Martha's stollen recipe, I used dried currants, golden raisins, dried apricots, candied citrus peel, and blanched almonds. The currants were soaked in rum ( you can use cognac too) and the raisins were soaked in orange juice.

How To Make

Step 1: Start by whisking together the dry active yeast and warm water. Keep aside until frothy.

dry and wet ingredients for the bread in a metal mixing bowl.

Step 2: Combine all-purpose flour, sugar, cinnamon powder, and nutmeg in a large bowl. Add the yeast mixture, eggs, milk, and melted butter to the dry ingredients.

all ingredients mixed to make a shaggy dough in a mixing bowl.

Step 3: Mix with a spatula until you get a shaggy dough.

dried fruits and nuts on top of bread dough.

Step 4: Transfer the dough to a floured surface and knead for 2-3 minutes. Add currants, raisins, chopped apricots, citrus peel, almonds, and lemon zest.

kneaded stollen dough on a silicone mat.

Step 5: Knead the dough for 10 minutes until all the fruits and nuts are well incorporated.

stollen dough in a mixing bowl.

Step 6: Transfer the dough to a lightly oiled bowl. Cover with a kitchen towel or plastic wrap. 

Proofed stollen dough in a mixing bowl.

Step 7: Let it rest in a warm place for 1.5 - 2 hours until the dough has doubled in size.

bread dough divided into 6 pieces.

Step 8: Punch down the risen dough gently. Transfer to a floured surface and divide the dough into 6 equal-sized pieces.

six dough pieces rolled into logs.

Step 9: Roll each dough piece into a 14-15-inch log.

process of braiding 3 dough logs.

Step 10: Take 3 logs together. Pinch them at the top and braid them.

braided bread dough.

Step 11: Tuck in the ends under the braid. Repeat with the other 3 logs.

proofed braided bread loaves on parchment paper.

Step 12: Transfer the loaves to a parchment-lined baking tray. Cover with a kitchen towel and let rise until doubled in size - About 1 hour. Meanwhile, preheat the oven to 180 C / 350 F.

two braided baked bread loaves on parchment paper.

Step 13: Bake the breads for 35-40 minutes at 180 c or 350 F or until golden brown. Brush 2 tbsp of melted butter on the hot stollen and let them cool completely.

stollen bread with white glaze on parchment paper.

Step 14: Whisk together the icing sugar and milk to make a thick, smooth glaze. Pour this over the cooled stollen and serve!

Pro Tips

  • Make sure the water, for dissolving the yeast, is warm. Hot water will kill the yeast and cold water doesn't activate it.
  • Soak the raisins and dried currants for at least 1 hour before making the dough. It's preferable to soak them overnight.
  • You can use orange juice in place of rum for soaking the dried currants if you prefer the German fruit bread alcohol-free.
  • You can use store-bought candied citrus or make it at home using my recipe for easy candied orange slices.
  • I like to brush the tops of the Christmas stollen as soon as it comes out of the oven for an extra sheen. You can omit this step if you wish.
  • If you want a more traditional look, you can leave out the glaze. Instead, brush the hot loaves with butter and then coat them liberally with powdered sugar.
  • This stollen recipe is without marzipan. If you like, you can also add store-bought or homemade marzipan in the middle of each roll. You can then shape it into an oval shape as authentic German Christmas stollen.
stollen bread loaf with two slices on parchment paper.

Stollen Recipe FAQs

How long will homemade stollen keep?

This bread will stay well on the countertop for up to a week. Store in an air-tight container. Refrigerate for up to 2 weeks.

Can I freeze Stollen?

Yes, wrap it well in plastic wrap and then aluminum foil and freeze it for up to 1 month.

How should I serve Christmas stollen?

Stollen is usually served with butter and honey. It's lovely at room temperature though you can warm it up in a toaster too - very much like my chocolate babka!

Can I make the classic stollen without alcohol?

Yes, you can. Simply substitute rum with orange juice.

Is the German stollen like a fruitcake?

No, German stollen is not a fruitcake rather it's a yeast bread filled with dried fruits and nuts. If you enjoy fruitcakes, you can try my Christmas rum cake recipe!

More Fabulous Christmas Recipes

  • sliced chocolate babka on a platter to show the swirls in the bread.
    Chocolate Babka Recipe
  • christmas rum cake on a serving platter on a colorful runner with a cake server.
    Christmas Rum Cake
  • Easy Challah Bread | Challah Bread Recipe
    Easy Challah Bread
  • Braided pesto bread on parchment paper with ingredients around.
    Braided Pesto Bread

Half the joy of cooking is sharing it with others. That’s why I’m always eager to hear from you. So go right ahead & drop a comment or reach out on Instagram, Pinterest, YouTube, or Facebook. I hope you love this Christmas stollen as much as we do!

📖 Recipe

Tried this recipe?Let us know how it was!
sliced stollen bread on parchment paper.

Stollen Recipe

Natasha Minocha
My stollen recipe makes a wonderfully flavorful, rich German Christmas bread, laden with dried fruits and almonds. This is a truly special festive Holiday treat!
5 from 1 vote
Print Recipe Pin Recipe
Prep Time 4 hours hrs 30 minutes mins
Cook Time 40 minutes mins
Total Time 5 hours hrs 10 minutes mins
Course Bread, Dessert
Cuisine German
Servings 2 Loaves (20 Servings)
Calories 339 kcal

Ingredients


  • 1 1/4 tbsp Dry active yeast
  • 1/4 cup Warm water (about 40.5 C or 105 F)
  • 5 1/2 cup All-purpose flour
  • 1/4 cup Sugar
  • 1/2 tsp Cinnamon powder
  • 1/4 tsp Nutmeg powder
  • 5 oz Melted butter I used salted butter
  • 1 cup Whole milk
  • 3 Eggs, lightly beaten
  • 4 oz Dried currants (soaked in 1/4 cup rum)
  • 7 oz Golden raisins (soaked in 1/4 cup orange juice)
  • 4 oz Blanched almonds, sliced
  • 4 oz Candied orange peel, chopped You can use store-bought too
  • 2 oz Dried apricots, chopped
  • Zest of 1 lemon
  • 2 tbsp Melted butter (for brushing on top)

Glaze

  • 3/4 cup Icing sugar
  • 3-4 tbsp Milk

Instructions
 

  • Whisk together the dry active yeast and warm water. Keep aside until frothy.
  • Combine all-purpose flour, sugar, cinnamon powder, and nutmeg in a large bowl.
  • Add the yeast mixture, eggs, milk, and melted butter to the dry ingredients. Mix with a spatula until you get a shaggy dough.
  • Transfer the dough to a floured surface and knead for 2-3 minutes.
  • Add currants, raisins, chopped apricots, citrus peel, almonds, and lemon zest.
  • Knead the dough for 10 minutes until all the fruits and nuts are well incorporated.
    This dough is a bit heavy to knead, but take your time, it comes together very well and is a beautiful dough.
    You can use a stand mixer to knead the dough.
  • Transfer the dough to a lightly oiled bowl. Cover with a kitchen towel or plastic wrap. Let it rest in a warm place for 1.5 - 2 hours until the dough has doubled in size.
  • Punch down the risen dough gently. Transfer to a floured surface and divide the dough into 6 equal-sized pieces.
  • Roll each dough piece into a 14-15-inch log.
  • Take 3 logs together. Pinch them at the top and braid them, tucking in the ends under the braid.
    Repeat with the other 3 logs.
  • Transfer the braids to a parchment-lined baking tray. Cover with a kitchen towel and let rise until doubled in size - About 1 hour.
  • Preheat the oven to 180 C / 350 F.
  • Bake the breads for 35-40 minutes at 180 c or 350 F or until golden brown.
  • Brush 2 tbsp of melted butter on the hot breads and let them cool completely.
  • Whisk together the icing sugar and milk to make a thick, smooth glaze.
  • Pour this over the cooled stollen breads and serve. Enjoy!

Video

Notes

  • Make sure the water, for dissolving the yeast, is warm. Hot water will kill the yeast and cold water doesn't activate it.
  • Soak the raisins and dried currants for at least 1 hour before making the dough. It's preferable to soak them overnight.
  • You can use orange juice in place of rum for soaking the dried currants if you prefer the German fruit bread alcohol-free.
  • If you want a more traditional look, you can leave out the glaze. Instead, brush the hot loaves with butter and then coat them liberally with powdered sugar.
  • This stollen recipe is without marzipan. If you like, you can also add store-bought or homemade marzipan in the middle of each roll. You can then shape it into an oval shape as authentic German Christmas stollen.

Nutrition

Serving: 1 ServingCalories: 339kcalCarbohydrates: 54gProtein: 7gFat: 11gSaturated Fat: 5gPolyunsaturated Fat: 1gMonounsaturated Fat: 4gTrans Fat: 0.3gCholesterol: 44mgSodium: 81mgPotassium: 265mgFiber: 3gSugar: 24gVitamin A: 379IUVitamin C: 1mgCalcium: 56mgIron: 2mg

Chocolate Babka Recipe

December 2, 2024

sliced chocolate babka on a platter to show the swirls in the bread.

This chocolate babka recipe is a labor of love. But the rich, moist, soft brioche bread (decadent with chocolate swirls) makes just the most special holiday treat!

loaf of babka on a white serving platter.

This recipe for chocolate babka comes from the cookbook of the famous chef Yotam Ottolenghi-Jerusalem. His glossy chocolate Krantz cakes looked soooo delicious on the page that I just knew I wanted to try them right away!

After trying (and devouring) homemade chocolate babka, I promise you’re missing out on the best recipe for the holidays. It is soft and rich yet not over the top. My family and I can't seem to get enough of babka cake!

[feast_advanced_jump_to]

What Is Babka Cake?

Babka is a Jewish recipe for a buttery, dense bread. Think of it as a cake-and-bread hybrid. It’s similar to brioche bread, enriched with eggs and butter, but it’s richer and wrapped around swirls of dark, luscious chocolate.

The crumb is soft, moist, and firm, unlike the cake crumb, which is spongy and tender. With a gooey chocolatey filling, each bite of babka bread is utterly divine! As Yotam Ottolenghi says, "It is scrumptiously soft and sweet, like a cross between a rum baba and a Danish pastry."

sliced babka on a white platter.

Why You'll Love This Recipe

Great for gifting; it’s a treat you’ll love to share.

All good things take time, like this chocolate babka recipe. But it is nothing short of incredible, making the time invested more than worthwhile.

You simply can't go wrong. Just follow the instructions, and it’s a fail-proof recipe.

Buttery, chocolatey, and absolutely scrumptious to satisfy the sweetest cravings.

Take away the time it takes to proof the bread; the easy chocolate babka recipe comes together quickly!

Chocolate Babka Recipe Ingredients

ingredients for making chocolate babka.

Flour: All-purpose works the best, like in most bread recipes.

Sugar: Powdered or caster sugar for the bread dough and icing sugar for the chocolate filling for babka.

Yeast: I used active dry yeast. Like always, test the yeast before you add it to the dry ingredients.

Butter: The original recipe for babka asks for unsalted butter. I used salted, softened butter and cut into cubes.

Nuts: My chocolate babka filling had walnuts, not pecans, like the original, because I didn’t have any. They worked great!

Chocolate: My preference is always dark, so I melted 70% dark chocolate. If you prefer lighter chocolate, go for it. 

Cocoa powder:  For an intense chocolate flavor!

See the recipe card for full information on ingredients and quantities.

How To Make Chocolate Babka

Step 1: In a large mixing bowl, combine flour, sugar, salt, and yeast.

Step 2: Stir in the eggs and water until the mixture comes together. Use a stand mixer or mix by hand.

dough for chocolate babka in a glass mixing bowl.

Step 3: Incorporate cubes of softened butter one by one until you have a shiny, smooth, and elastic babka dough.

Proofed babka dough in a mixing bowl.

Step 4: Place the dough in a greased bowl, cover it with plastic wrap, and refrigerate overnight.

cocoa powder, melted chocolate, sugar, and melted butter in a small bowl.

Step 5: Make the filling - combine melted chocolate, butter, icing sugar, and cocoa powder in a small bowl.

chocolate filling for babka in a glass bowl.

Step 6: Mix all ingredients well to make a spreadable chocolate paste.

dough rolled out into a rectangle for babka.

Step 7: Remove the dough from the fridge and divide it into two portions. Roll each portion into a rectangle, approximately 14" x 11".

chocolate filling, walnuts and sugar spread on top of the rolled out dough.

Step 8: Spread the chocolate filling evenly on both rectangles, leaving a 2 cm border. Sprinkle chopped walnuts and sugar over the chocolate filling.

half rolled dough on a silicon mat.

Step 9: Roll each rectangle tightly into a log, starting from the long side.

Rolled up dough with chocolate filling.

Step 10: Roll into a tight log. Cut the uneven ends and place the logs in the refrigerator for 15-20 minutes.

dough roll cut lengthways into two.

Step 11: Cut each log lengthwise into two. With the cut side facing up, pinch the ends of both sides together.

two dough halves braided together on a silicon mat.

Step 12: Braid the dough by placing the right-side dough over the left-side dough. Continue down the length. Gently tuck in both ends under themselves. Repeat with the second rectangle.

babka bread braids in 2 metal loaf pans.

Step 13: Line two loaf pans with parchment paper and place the braids, cut sides up, into the pans. Cover the pans with damp tea towels and let them rise in a draft-free area for 1.5–2 hours.

baked chocolate babkas in 2 loaf pans on a wire rack.

Step 14: Preheat the oven to 190°C. Bake for 30-40 minutes, or until a skewer inserted into the center comes out clean.

chocolate babka getting brushed with sugar syrup with a pastry brush.

Step 15: While the easy chocolate babka bakes, make the sugar syrup. In a saucepan, bring the sugar and water to a boil. Remove it from the heat and allow it to cool.

Step 16: As soon as the babka comes out of the oven, brush each loaf liberally with the sugar syrup.

Final step: Leave the bread in the pans until just warm, then transfer them to a cooling rack to cool completely.

Pro Tips

  • You can easily double or halve the chocolate babka recipe.
  • After step 10 (filling and rolling the dough into a log), I like to refrigerate the bread loaves for 15 -20 minutes. It is easier to cut and braid the bread when chilled. Plus, the chocolate is firmer, so less mess.
  • After the second proof, the bread will not double in size; it will increase by 15 to 20% only.
  • Give the bread ample time to rise during this second proof- about 90 minutes.
  • Don't skimp on the sugar syrup right at the end. Even if you think it will be too much sugar, keep pouring. Trust me, the recipe for chocolate babka calls for it. The cake will be perfectly sweetened and deeply flavored.
  • Let the bread cool after the sugar syrup. It’s the hardest part of the chocolate babka recipe because the bread smells amazing, but it’s essential.
  • Babka cake is great at room temperature, but you can eat it warm too. It’ll be a little crumbly, but, trust me, you won’t care.
  • I highly recommend weighing the ingredients using a kitchen scale.
sliced babka on a white serving platter.

Chocolate Babka Recipe FAQs

What else can I use in place of chocolate babka filling?

If you don’t want a chocolate filling for babka, use a spread like Nutella and save time. It lends the same moisture, lushness, and characteristic texture. Or you can make cinnamon babka with cinnamon sugar, just like we do with cinnamon roll muffins. You can also try apple babka using the delicious apple butter. A coffee cinnamon filling would be amazing too like in these coffee cinnamon rolls!

Can you store chocolate babka bread?

Babka cake keeps well for 2–3 days on the countertop. In the refrigerator, it lasts for 6 to 7 days.

Can you freeze braided chocolate babka?

Yes, you can! If you use 8 by 4 loaf pans like me, you’ll be able to make 2 krantz cakes. Enjoy one and freeze the other for later. Wrap it well (after it has cooled completely), and it’ll last for 2–3 weeks.

More Decadent Holiday Recipes

  • cherry chocolate chip cake with a knife on the side.
    Best Cherry Chocolate Chip Cake
  • Swedish chocolate cake topped with powdered sugar and hazelnuts on a tray.
    Swedish Chocolate Cake
  • chocolate cake with chocolate frosting and pomegranate arils on top on a platter.
    Stovetop Chocolate Cake
  • Mocha Cupcakes with Chocolate Cream Cheese Frosting infused with Baileys Glutenfree
    Mocha Cupcakes With Chocolate Frosting

Half the joy of cooking is sharing it with others. That’s why I’m always eager to hear from you. So go right ahead and drop a comment or reach out on Instagram, Pinterest, YouTube, or Facebook. I hope you love this chocolate babka recipe as much as we do!

📖 Recipe

Tried this recipe?Let us know how it was!
sliced chocolate babka on a platter to show the swirls in the bread.

Chocolate Babka Recipe

Natasha Minocha
Buttery, delicious, chocolatey this decadent Chocolate Babka is a must make. Your family & guests will be forever grateful to you!
5 from 1 vote
Print Recipe Pin Recipe
Prep Time 1 day d 2 hours hrs 45 minutes mins
Cook Time 40 minutes mins
Total Time 1 day d 3 hours hrs 25 minutes mins
Course Dessert
Cuisine Eastern European, European, Jewish
Servings 2 Loaves (20 Servings)
Calories 356 kcal

Ingredients


  • 4 1/4 cup All purpose flour
  • 1/2 cup Caster sugar/powdered sugar
  • 2 tsp Dried active yeast
  • 3 Eggs
  • 1/2 cup Water
  • 1 pinch Salt
  • 2/3 cup Butter, cut into small cubes and softened The recipe asks for unsalted, but I used salted butter
  • Vegetable oil for greasing the bowl

Chocolate filling

  • 1/3 cup Cocoa powder
  • 1/2 cup Icing sugar
  • 4.5 oz Dark chocolate 70%, melted
  • 1/2 cup Butter, melted The recipe asks for unsalted, but I used salted butter
  • 1/2 cup Walnuts, chopped
  • 2 tbsp Caster/ powdered sugar

Syrup

  • 1/2 cup Sugar
  • 1/3 cup Water

Instructions
 

Dough

  • Place the flour, sugar, salt, and yeast in a mixing bowl. Stir it all well. Add the eggs and water and mix it all well, for 5 minutes, till the dough starts coming together.
    A stand mixer works the best for this recipe, though you can do this dough by hand too.
  • Now start adding the softened cubes of butter, a few at a time. Continue mixing till the dough is shiny, smooth, and elastic, about 10 -12 minutes.
  • Place the dough in a big bowl, lightly greased with oil, cover tightly with plastic wrap, and leave it in the fridge overnight.

Filling

  • Mix together the melted chocolate, butter, icing sugar, and cocoa powder in a small bowl. This should be a spreadable chocolate paste.
  • Take the dough out of the refrigerator, and divide it into 2. Roll each half into a rectangle 14'* 11* roughly.
    Spread the chocolate filling evenly on both rectangles, leaving a 2 cm border all around. Sprinkle with the chopped walnuts and 2 tbsp caster sugar.
  • Roll the dough tightly into a log, starting from the long side. Cut the uneven ends of the logs.
    Refrigerate the logs for 15-20 minutes .
    Cut the log lengthwise into 2.
    With the cut side facing up, pinch the ends of both sides together.
  • Start with the right side dough, take it over the left side dough, and continue down the length, making a braid. Gently tuck in both ends under themselves.
    Repeat with the second rectangle.
  • Line 2 8"* 4" loaf pans with parchment paper.
    Place the 2 braids carefully with the cut sides showing on top.
    Cover the pans with damp tea towels and keep them in a draft-free area for 1.5 - 2 hours.
  • Preheat your oven to 190C. Bake for 30-40 minutes, or until a skewer inserted in the center comes out clean.

Syrup

  • Bring the sugar and water to a boil. Take it off the heat and allow it to cool.
  • As soon as the breads come out of the oven, brush each loaf liberally with the sugar syrup. Leave the breads in the pan till they are just warm.
    Take them out on a cooling rack to cool completely. We preferred to tear into the loaf while it was still warm! Enjoy!

Video

Notes

  • You can easily double or halve the chocolate babka recipe.
  • After filling and rolling the dough into a log, I like to refrigerate the bread loaves. It is easier to cut and braid the bread when chilled. Plus, the chocolate is firmer, so less mess.
  • The bread will not double in size after the 2nd proof. It will increase by 15 to 20% only.
  • Give the bread ample time to rise during this second proof- about 90 minutes.
  • Don't skimp on the sugar syrup right at the end. The cake will be perfectly sweetened and deeply flavored.
  • Let the bread cool well after coating it with the sugar syrup. 
  • Babka cake is great at room temperature, but you can eat it warm too. It’ll be a little crumbly, but, trust me, you won’t care.
  • I highly recommend weighing the ingredients using a kitchen scale.

Nutrition

Calories: 356kcalCarbohydrates: 46gProtein: 5gFat: 18gSaturated Fat: 9gPolyunsaturated Fat: 3gMonounsaturated Fat: 5gTrans Fat: 0.4gCholesterol: 54mgSodium: 101mgPotassium: 104mgFiber: 3gSugar: 23gVitamin A: 375IUVitamin C: 0.1mgCalcium: 20mgIron: 2mg

Dark Chocolate Bark

November 28, 2024

chocolate bark cut into pieces placed in a green bowl.

Dark Chocolate Bark has got to be hands-down the easiest candy to make! You need nothing fancy, just some good-quality chocolate and a handful of your favorite toppings. This fuss-free recipe is great for a quick holiday treat or gifting!

pieces of dark chocolate bark in a green square bowl on a red striped napkin.

I'm not much of a winter person—the cold weather and I do not get along. However, the holiday season is one of my favorite times of the year! Strings and strings of twinkling fairy lights in my house, Christmas cookies, hot chocolate, and holiday music are pure joy. Chocolate is, of course, always on the festive agenda! There's no easier way to make a quick chocolate treat than chocolate bark!

[feast_advanced_jump_to]
chocolate bark pieces studded with cranberries, pumpkin seeds, freeze-dried raspberries, and pistachios.

Why You'll Love This Recipe

This Christmas chocolate bark is a fabulous, foolproof recipe. With a few simple ingredients, nuts, or any of your favorite toppings - this is ready in no time.

It's perfectly sweet, smooth and delicious! You can use any chocolate you like -  dark,  milk, white, or a combination of these, even some high-quality dairy-free chocolate will be fabulous here.  

This is such a versatile recipe. Use any toppings you fancy. Flavor your chocolate with a sprinkling of sea salt, chili powder, or cinnamon!

Dark Chocolate Bark Ingredients

Ingredients for making chocolate bark.

Dark Chocolate: I love using dark chocolate for my desserts. The darker the better! I used 70% dark coverture chocolate in this recipe. You can use 55% or less as well.

White Chocolate: It's completely optional here, but I love the beautiful contrasting swirls. Please use a good quality baking chocolate, not a candy bar.

Pistachios: They add a gentle, sweet nutty flavor, texture, and a pop of green!

Pumpkin Seeds: I love the crunch and color they bring to this dark chocolate bark recipe.

Dried Cranberries: For a wonderful sweet-tart flavor and chewy texture.

Freeze-Dried Raspberries: Totally optional again. But they make the Holiday chocolate bark look so pretty and add a lovely tart flavor, a perfect foil to the sweetness!

Sea Salt: This rounds up the flavors so well...don't skip it!

See the recipe card for full information on ingredients and quantities.

What Toppings Can I Use For Chocolate Bark?

Any kind of nuts will do- raw, roasted plain, or you can even use spicy roasted nuts. Ditto for seeds. You can use sunflower, pumpkin, melon, sesame...all add that requisite crunch.

For additional texture strew some raisins, dried apricots, cherries, blueberries, prunes, toasted coconut; or anything that catches your fancy.

If you can get your hands on freeze-dried fruits, add those on too.

How about some popcorn and a drizzle of homemade vegan caramel sauce on top?

How to Make Dark Chocolate Bark?

Now that I've talked your ear off about how versatile these are, here is what you need to do to make the dark chocolate bark:

Step 1: Line a baking tray with parchment paper or Silpat. Then roughly chop cranberries and pistachios.

Step 2: Melt the dark chocolate - you can use either the double boiler method or microwave in 30-second increments. For the former method, place your chocolate in a heat-proof bowl. Put that bowl atop a saucepan of hot water and stir till the chocolate is melted.

Step 3: Once the chocolate is melted, pour it on the lined tray and spread evenly.

melted dark chocolate on a parchment-lined tray with swirls of melted white chocolate.

Step 4: Melt the white chocolate and add a few dollops over the dark chocolate. Swirl it with a toothpick.

melted chocolates topped with pumpkin seeds, pistachios, cranberries, and freeze-dried raspberries.

Step 5: Sprinkle the toppings all over the surface.

dark chocolate bark on parchment-lined tray.

Step 6: Let the chocolate bark cool in the refrigerator for at least 2 hours, to set well.

Final Step: Break into pieces and serve!

dark chocolate bark pieces in a green bowl.

How To Serve

When the chocolate has set for a few hours, break it into serving-sized pieces! I love the rustic effect of uneven, jagged shards - so I just break at random.

They make for great snacking, a post-meal sweet treat, or an edible gift that anyone would love. Stud them full of toppings.

Top Tips

  • Please use the best quality chocolate you can get for the chocolate bark recipe.
  • Coverture chocolates are the best here, not candy bars.
  • Though you can use a microwave for melting the chocolate, a double-boiler is the safest way. You will have more control over the melting chocolate.
  • Please don't skip the sea salt, it really brings the flavors together beautifully!

Recipe FAQs

How long will chocolate bark keep?

This will stay well in the refrigerator for up to 2 weeks. You can also freeze it, in an air-tight container for up to 2 months.

What is dark chocolate bark made of?

Dark chocolate barks are made using melted good-quality chocolate. Melted chocolate is spread on a lined tray or plate and topped with nuts, seeds, and dried fruits. You can also use marshmallows like I did for my rocky road bark.

What kind of chocolate should I use for making chocolate bark?

Please use good-quality chocolate for this dessert. Coverture chocolate or baking chocolates are the best for this recipe. You can pick from Callebaut, Valrhona, Ghirardelli, and Guittard are all wonderful. Amul dark chocolate also works very well for this chocolate bark recipe. You can read more about baking chocolates in this chocolate guide.

More Easy Chocolate Desserts

  • Pieces of white chocolate matcha bark with goji berries stacked.
    Matcha White Chocolate Bark
  • pieces of chocolate bark with marshmallows and almonds on a plate.
    Rocky Road Chocolate Bark
  • Chocolate Peppermint Fudge - 4 Ingredients Only!
    Chocolate Peppermint Fudge - 4 Ingredients Only!
  • 3 Ingredient Biscoff Truffles with Chocolate
    Biscoff Truffles

Half the joy of cooking is sharing it with others. That’s why I’m always eager to hear from you. So go right ahead & drop a comment or reach out on Instagram, Pinterest, YouTube, or Facebook. I hope you love this dark chocolate bark as much as we do!

📖 Recipe

Tried this recipe?Let us know how it was!
chocolate bark cut into pieces placed in a green bowl.

Dark Chocolate Bark

Natasha Minocha
Dark Chocolate Bark has got to be hands down the easiest candy to make, ever!   You don't need anything fancy, just some good-quality chocolate and a handful of your favorite toppings. This fuss-free recipe is great for a quick holiday treat or gifting!
No ratings yet
Print Recipe Pin Recipe
Prep Time 10 minutes mins
Cook Time 20 minutes mins
Total Time 2 hours hrs 30 minutes mins
Course Dessert, Snack
Cuisine American
Servings 10 Servings
Calories 299 kcal

Ingredients


  • 2 1/4 cup Dark chocolate I used 70% dark chocolate
  • 1/4 cup White chocolate optional
  • 2-3 tbsp Shelled pistachios
  • 3 tbsp Dried cranberries
  • 3 tbsp Pumpkin seeds
  • 3/4 tsp Sea salt flakes
  • 5-6 pieces Freeze-dried raspberries Optional

Instructions
 

  • Line a baking tray with parchment paper.
  • Roughly chop the pistachio and cranberries. Keep aside.
  • Place the dark chocolate in a large heat proof bowl. Place that bowl atop a saucepan of hot water. Keep stirring the dark chocolate till it melts. You can also melt chocolate in the microwave in 30 second increments.
  • Once melted, pour the chocolate over the lined tray. Spread evenly.
  • Now melt the white chocolate ( if using) in the double boiler or microwave.
  • Pour the white chocolate over the dark chocolate and using a wooden skewer, gently create swirls.
  • Sprinkle on all the toppings evenly all over the surface.
  • Transfer to the refrigerator for at least 2 hours to cool.
  • Once completely set, break into rough bite sized pieces. Enjoy!!

Notes

  • Please use the best quality chocolate you can get for the chocolate bark recipe.
  • Coverture chocolates are the best here, not candy bars.
  • Though you can use a microwave for melting the chocolate, a double-boiler is the safest way. You will have more control over the melting chocolate.
  • Please don't skip the sea salt, it really brings the flavors together beautifully!

Nutrition

Serving: 1 ServingCalories: 299kcalCarbohydrates: 23gProtein: 5gFat: 21gSaturated Fat: 11gPolyunsaturated Fat: 2gMonounsaturated Fat: 7gTrans Fat: 0.01gCholesterol: 2mgSodium: 187mgPotassium: 356mgFiber: 5gSugar: 13gVitamin A: 28IUVitamin C: 1mgCalcium: 43mgIron: 5mg

No-Knead Cranberry Walnut Bread

November 25, 2024

sliced no-knead cranberry walnut bread on a wooden board.

No-knead cranberry walnut bread is crammed with cranberries, chocolate, and walnuts. It’s crusty, delicious, and takes minimal effort to make. The recipe for cranberry walnut bread is a variation of my easy no-knead Dutch oven bread, just with more bells and whistles.

Sliced no-knead cranberry walnut bread on a wooden board.

This bread is super crusty on the outside and soft and fluffy on the inside. And it's on my weekly bake menu. Absolutely fantastic with a smear of cinnamon honey butter, we can't get enough of this no-knead cranberry bread!

[feast_advanced_jump_to]

Why You’ll Love This Recipe

The no-knead cranberry walnut bread with chocolate is very, very low effort. All it asks for is time.

It looks so beautifully rustic and artisanal without any effort at all!

The addition of chocolate makes the bread festive and perfect for the holiday season.

You can serve it for breakfast, or brunch, or make a dessert out of it!

No-Knead Cranberry Bread Recipe Ingredients

Ingredients for making no-knead cranberry walnut bread.

Flour: I use all-purpose flour for this recipe. You can swap half of it with whole wheat flour. It does make the no-knead bread a bit dense but delicious nonetheless.

Yeast: Instant and dry active yeast, either works here. Just make sure your yeast is active! Dissolve half a teaspoon in warm water and set aside for a few minutes. If you see the mixture bubbly and foamy, your yeast is good to use.

Water: Yeast blooms best at 105°F (40.5 °C). So, use warm water—not hot, not cold. Hot water will kill your yeast. Cold water will not activate it.

Salt: Balances all the flavors.

Sugar: Helps activate the yeast.

Dried cranberries: Give a lovely chewy texture and sweet-tart flavor to the no-knead cranberry walnut bread. Raisins, dates, or dried apricots are good substitutes.

Walnuts: While you can make this no-knead bread with any nuts you prefer (like pecans or almonds), I find walnuts give the best crunch and texture and work so well with chocolate and cranberries.

Chocolate: You can use dark chocolate chips, and chunks, or even chop a bar of good-quality baking chocolate.

See the recipe card for full information on ingredients and quantities.

How To Make No-Knead Cranberry Walnut Bread

Step 1: Mix the yeast, sugar, and warm water in a small bowl. Set aside for 5-10 minutes until bubbly and foamy.

flour and salt in a large mixing bowl.

Step 2: In a large bowl, combine the flour, salt, and the yeast -water mixture.

mixed bread ingredients in a glass mixing bowl.

Step 3: Mix well to form a shaggy dough. This is a very sticky dough.

proofed no-knead bread dough in a glass mixing bowl.

Step 4: Cover the bowl and let the dough rise for 3-4 hours until it's doubled and has small holes or bubbles on top. Sprinkle 1-2 tablespoons of flour on the dough. Flour your hands well and fold the dough on top of itself, 4 times.

dried cranberries, walnuts, and chocolate chips on top of the proofed bread dough in a bowl.

Step 5: Add the dried cranberries, walnuts, and chocolate chips to the dough and fold the dough over 3-4 times.

bread dough on top of parchment paper.

Step 6: Sprinkle a tablespoon of flour on a piece of parchment paper and place the dough on it.  Let the dough rest for 15-20 minutes. Meanwhile, place your Dutch oven (with lid) in the oven and heat the oven to 230 C / 450 F.

bread dough on a parchment paper in a Dutch oven.

Step 7: Place the rested dough with the parchment paper in the hot Dutch oven. Cover and bake for 40 minutes.

baked no-knead bread on a parchment paper in a Dutch oven.

Step 8: Carefully remove the lid and continue baking for another 10-15 minutes until the no-knead cranberry walnut bread is cooked through and golden brown.

Remove the bread loaf from the baking dish and let it cool completely for at least 2 hours before slicing.

baked cranberry walnut bread loaf on parchment paper.

Pro Tips

  • Weigh your ingredients on a kitchen scale to get the best result.
  • I prefer to add cranberries, walnuts, and chocolate to the bread dough after the first proof. You can add cranberries and walnuts to the bowl with the flour and salt in step 2. Add the chocolate later after the 1st proof.
  • The dough of this homemade cranberry walnut bread is meant to be super sticky, so don’t add too much extra flour.
  • Give the bread dough ample time to rise. This is important.
  • You don’t need to knead the bread but do fold it a few times with your hands or a spatula.
  • Let the crusty cranberry nut loaf of bread cool completely before you slice. Give it at least 2 hours.
  • You can easily double or halve the ingredient quantity to make a bigger (or smaller) loaf.

How To Serve The No-Knead Cranberry Walnut Bread

No-knead cranberry bread is so tasty eaten plain.

Serve it with apple butter made at home, persimmon jam, or homemade cream cheese, and it’s incredible!
The no-knead crusty cranberry nut bread is wonderful with baked brie or gooey Camembert. It even goes perfectly with an easy cheese board—perfect for the Holiday season!

You can also make French toast or cinnamon bread pudding with this delicious bread!

sliced cranberry chocolate bread on a wooden board.

Recipe FAQs

Can I use fresh or frozen cranberries for this no-knead bread?

No, fresh or frozen cranberries will add too much moisture to this bread. It's best to use dried cranberries.

Can I make chocolate, cranberry, and walnut bread without a Dutch oven?

Yes, you can. All a Dutch oven does is trap steam, which helps make the loaf crusty and crispy. If you don’t have one, make chocolate cranberry walnut bread in any heavy pot that has a lid and is oven-safe.
You can even bake the no-knead cranberry walnut bread in a pan or tray. Preheat your oven and place the tray on the center rack. On the lower one, add another metal pan or tray and add 2–3 cups of boiling water to it. Shut the oven quickly, so the steam from the boiling water gets locked inside.

How long should I proof the cranberry and walnut bread?

Ideally, the first proof should be 2 to 4 hours at the least. I suggest looking at the bread dough to judge if it’s proofed enough. The dough should be flat on top, doubled in volume, and have a few holes. If your kitchen is cold, then you can proof it overnight on the countertop too.

How to store the no-knead cranberry chocolate bread?

This bread will last 2-3 days, in an air-tight container, on the countertop, or 4-5 days if refrigerated.
You can even freeze no-knead bread for up to a month. Wrap it in plastic wrap and then in aluminum foil.

More Easy Bread Recipes

  • Homemade Cornbread Recipe
    Homemade Cornbread Recipe with Buttermilk
  • Apple Butter Bread recipe
    Apple Butter Bread
  • Easy Olive Bread
    Easy Olive Bread
  • Rolls in a bowl on a blue and white kitchen towel.
    Salted Butter Rolls Recipe

Half the joy of cooking is sharing it with others. That’s why I’m always eager to hear from you. So go right ahead & drop a comment or reach out on Instagram, Pinterest, YouTube, or Facebook. I hope you love this no-knead cranberry walnut bread as much as we do!

📖 Recipe

Tried this recipe?Let us know how it was!
sliced no-knead cranberry walnut bread on a wooden board.

No-Knead Cranberry Walnut Bread

Natasha Minocha
Crusty and delicious, this easy no-knead cranberry walnut bread with chocolate is a wonderful treat for the Holidays! This artisanal bread comes together so fast and is really low effort!
No ratings yet
Print Recipe Pin Recipe
Prep Time 10 minutes mins
Cook Time 50 minutes mins
4 hours hrs
Total Time 5 hours hrs
Course Bread, Breakfast, Dessert, Side Dish
Cuisine American
Servings 1 Loaf (10 Servings)
Calories 227 kcal

Ingredients


  • 3 1/4 cup All-purpose flour
  • 1.5 tsp Salt
  • 1.5 tsp Dry active yeast
  • 1.5 cup Warm water ( about 40.5 C or 105 F)
  • 1 tsp Sugar
  • 1/3 cup Dried cranberries, sliced
  • 1/3 cup Walnuts, chopped
  • 1/3 cup Dark chocolate You can use chocolate chips, or chunks

Instructions
 

  • In a small bow,l, mix the warm water, yeast, and sugar. Keep aside for 5-10 minutes until frothy.
  • In a large bowl, combine flour and salt. Pour in the yeast water mixture.
  • Mix well to form a shaggy dough. This is a very sticky dough.
  • Cover the bowl and let the dough rise for 3-4 hours until it's doubled and has small holes or bubbles on top.
  • Heat oven to 230 C / 450 F and place your Dutch oven with the lid in the oven. I used a 3.5 QT / 3.3 ltr Dutch oven, but you can use a smaller or bigger size too.
  • Sprinkle 1-2 tablespoons of flour on the dough. Flour your hands well and fold the dough on top of itself. Turn the bowl a quarter of the way and fold the dough over itself again. Do 3 more quarter turns of the bowl with folding over the dough each time.
  • Add the cranberries, walnuts, and chocolate to the dough. Sprinkle another tablespoon of flour on top and fold the dough over the add-ins a few times until they are evenly distributed through out the dough.
    This will take just 3-4 minutes. Flour your hands so the dough doesn't stick to your hands. You can also use a spatula for this step.
  • Sprinkle a tablespoon of flour on a piece of parchment paper and place the dough on it.  Let the dough rest for 15-20 minutes.
  • Take the hot Dutch oven out of the oven and remove the lid. Carefully transfer the dough, still on the parchment, into the Dutch oven. Cover and bake at 230 C / 450 F for 40 minutes.
  • Carefully remove the lid and bake for another 10-15 minutes until golden brown.
  • Cool the bread completely at least 2 hours before slicing. Enjoy!

Video

Notes

  • I prefer to add cranberries, walnuts, and chocolate to the bread dough after the first proof. You can add cranberries and walnuts to the bowl with the flour and salt in step 2, and add the chocolate later after the first proof.
  • As with all bread recipes, I highly recommend weighing the ingredients.
  • Dough of this homemade cranberry walnut bread is meant to be super sticky, so don’t add too much extra flour.
    Give the bread dough ample time to rise. This is important.
  • You don’t need to knead the bread but fold it a few times with your hands or a spatula.
  • Let the crusty cranberry nut loaf of bread cool completely before you slice. Give it at least 2 hours.

Nutrition

Serving: 1 ServingCalories: 227kcalCarbohydrates: 39gProtein: 6gFat: 6gSaturated Fat: 2gPolyunsaturated Fat: 2gMonounsaturated Fat: 1gTrans Fat: 0.002gCholesterol: 0.2mgSodium: 353mgPotassium: 110mgFiber: 2gSugar: 5gVitamin A: 4IUVitamin C: 0.1mgCalcium: 16mgIron: 3mg

Pumpkin Cranberry Crackers

November 18, 2024

pumpkin cranberry crackers in a bowl on a plaid napkin.

Pumpkin cranberry crackers are loaded with holiday flavors! The crunchy, chewy crisps are bursting with dried cranberries, pumpkin goodness, and cozy spices. The recipe for the pumpkin, seeds, and cranberry crackers is easy peasy - perfect for Thanksgiving or Christmas baking!

pumpkin crisps in a bowl on a plaid napkin with ingredients in the background.

I bookmarked the pumpkin cranberry crisps recipe ages ago (as I am sure we all do). And every year, during this season, I can’t resist making these vegan crackers with cranberries and seeds. I love to serve them with this warm vegan spinach artichoke dip....what a winning combo this is!

The crackers are easy to make - you don’t need to knead or take your electric mixer out. Whisk the dry and wet ingredients, stir together, and then bake twice to get pumpkin purée and cranberry crackers that are way better than anything you’d buy in a store.

[feast_advanced_jump_to]

Why You’ll Love This Recipe?

Crispy, crunchy, flavorful treats that are the ideal fall snack!

The crackers are full of fall flavors. So wonderful for the Holiday season!

Topped with a schmear of easy fried pickle dip or creamy whipped goat cheese, these rustic pumpkin cranberry crackers are delicious.

They’re great for holiday gifting. Put some in a pretty jar, add a ribbon, and gift to your friends and family!

Recipe Ingredients

ingredients for making pumpkin crackers.

Flour: I used a mix of all-purpose and wholewheat flour. You can make them with 100% whole wheat or 100% all-purpose flour.

Dried cranberries give the crackers a nice sweet and tart flavor.

Oats form the base of these crackers. I used rolled oats because they’re chewier and I like the texture, but quick or instant oats work just as well.

Seeds: I chose sunflower and flax seeds, but pumpkin, sesame, or even poppy seeds are just as delicious!

Herbs: Fresh herbs or dried—the choice is yours. I opted to mix and match with fresh rosemary and dried thyme.

Spices: Turmeric, nutmeg, and cinnamon gave the pumpkin cranberry crackers a lovely fall flavor.

Seasoning: Sea salt and black pepper do the trick,

Pumpkin purée: If you have the time, make the purée at home, like I did for my pumpkin snickerdoodle cookies. If you don’t, use canned pumpkin purée. Just make sure you don’t pick up a jar of pumpkin pie filling (more on this in the FAQs).

See the recipe card for full information on ingredients and quantities.

How To Make Pumpkin Cranberry Crackers?

Preheat the oven to 180°C and line a 9 by 4-inch loaf pan with parchment paper.

dry ingredients in a glass mixing bowl.

Step 1: Combine the flours, oats, cranberries, baking soda, sunflower, flax seeds, rosemary and thyme, turmeric, nutmeg, cinnamon, black pepper, and salt in a large bowl.

buttermilk, pumpkin puree and brown sugar combined in a cup.

Step 2: In a separate bowl, combine buttermilk, sugar, and pumpkin purée.

wet ingredients poured over the dry ingredients in a glass bowl.

Step 3: Pour the wet ingredients over the dry.

batter for pumpkin crackers in a glass mixing bowl.

Step 4: Mix the batter well.

cracker's batter in a parchment-lined loaf pan.

Step 5: Transfer the pumpkin and cranberry crackers batter to the prepared loaf pan.

baked batter in a parchment-lined loaf pan.

Step 6: Bake for 35 to 40 minutes. A toothpick or skewer inserted in the center should come back clean.

sliced crackers on a black baking tray.

Step 7: Let the pumpkin cranberry cracker loaf cool completely in the pan and then 1 hour in the freezer. Cut the loaf into thin slices and then halve each slice.

baked pumpkin cranberry crackers on a black baking tray.

Step 8: Lay out the sliced crackers on a lined baking tray. Bake again for another 20–25 minutes, or until crisp.

Final step: Cool completely and serve.

crackers in a plate.

Pro Tips

  • Homemade buttermilk works like a charm in this pumpkin crackers recipe with cranberries. Mix a tablespoon of vinegar or lemon juice in a cup of milk and let it sit for 5 minutes. You can use store-bought too.
  • Make sure the loaf is baked through. If it takes more than 40 minutes (because all ovens are different), then give it more time. Else, the crackers will have a gummy texture.
  • The cranberry pumpkin crackers loaf must cool completely before you slice.
  • Freezing the loaf helps in slicing the loaf neatly. I recommend 30 minutes minimum. You can freeze it for longer (or even overnight). Remember to thaw the loaf for 15-20 minutes before you cut, or else the loaf will be too hard.
  • Slice as thinly as possible so the crackers bake evenly.
  • These crackers get firmer and crisper as they cool.
  • Pop them back in an air fryer or preheated oven if the crackers get soggy.

How to Serve Pumpkin Cranberry Crackers

Crispy, hearty, and crammed with seeds, oats, and cranberries, these pumpkin crackers are amazing plain. But with soft cheese like baked Camembert or baked Brie, a homemade labneh, or a classic hummus, they’re so delicious.

You can also pair the crackers with a glass of red wine for before-dinner appetizers or tea and coffee for an evening snack. The crunchy, flavorful crisps are great on an easy cheese board, just like homemade crostini!

pumpkin crackers on a plate with ingredients in the background.

Pumpkin Cranberry Crackers Recipe FAQs

Can I use a different pan to bake the pumpkin crackers?

I like to use a 9" x 4" loaf pan for this recipe. You can even use a 9-inch round one too. You'll just have to cut the crackers into smaller squares before baking them the second time.

How do I make pumpkin purée at home?

It’s very easy to make pumpkin purée at home. Steam or roast diced pumpkin (about 75-100 gms). Let them cool and then blend them into a smooth paste or mash well with a fork.

Can I use store-bought pumpkin purée?

Yes, you can. Double-check that you’re not buying pumpkin pie filling. What’s the difference between purée and filling, you ask? Purée is cooked and mashed pumpkin. It has no added sugar or spices. Pumpkin pie filling is sweet. It is cooked, mashed pumpkin mixed with a sweetener and seasoning.  

How to make pumpkin crackers extra crispy?

Slice thin. Bake for longer. Keep in mind that they will get crispier after they’ve cooled. In case the crackers get soft, you can easily crisp them up in a preheated oven for 5 minutes or in an air-fryer.

How to store pumpkin and cranberry crackers?

If you’re not serving them immediately, store the cooled pumpkin cranberry crackers in an airtight container.

Seasonal Recipe Ideas

  • Sliced chocolate chip banana bread on a white platter.
    Chocolate Chip Banana Bread
  • Sliced cheese pizza on a wooden board with basil leaves on top.
    Quick Pizza Dough
  • 16 squares on blondies on parchment paper.
    Chocolate Chip Coffee Blondies
  • A picture collage of cherry cheesecake, cherry galette, popsicles and cake.
    10 Easy Cherry Dessert Recipes To Make This Summer

Half the joy of cooking is sharing it with others. That’s why I’m always eager to hear from you. So go right ahead & drop a comment or reach out on Instagram, Pinterest, YouTube, or Facebook. I hope you love these pumpkin cranberry crackers as much as we do!

📖 Recipe

Tried this recipe?Let us know how it was!
pumpkin cranberry crackers in a bowl on a plaid napkin.

Pumpkin Cranberry Crackers

Natasha Minocha
Pumpkin cranberry crackers are loaded with holiday flavors! The crunchy crisps are bursting with dried cranberries, pumpkin goodness, and cozy spices. The recipe for the pumpkin, seeds, and cranberry crackers is easy peasy - perfect for Thanksgiving or Christmas baking!
5 from 1 vote
Print Recipe Pin Recipe
Prep Time 10 minutes mins
Cook Time 1 hour hr
Cooling time 2 hours hrs
Total Time 3 hours hrs 10 minutes mins
Course Appetizer, Snack
Cuisine American
Servings 48 Crackers
Calories 32 kcal

Ingredients


  • 1/2 cup All-purpose flour
  • 1/2 cup Wholewheat flour
  • 1 tsp Baking soda
  • 1/2 cup Dried cranberries
  • 1/2 cup Oats
  • 1/4 cup Sunflower seeds
  • 1/4 cup Flax seeds
  • 1 tsp Fresh rosemary
  • 1/4 tsp Dried Thyme
  • 1/2 tsp Turmeric
  • 1/2 tsp Cinnamon powder
  • 1/4 tsp Nutmeg
  • 1/4 tsp Black pepper, coarsely ground
  • 1/4 tsp Salt
  • 1 cup Buttermilk Add 1 tbsp vinegar/lemon juice to 1 cup milk, let stand for 5 minutes. I used light coconut milk.
  • 3 Tbsp Pumpkin puree
  • 3 Tbsp Brown sugar

Instructions
 

  • Preheat the oven to 180 C. Line a loaf pan, 9" x 4" with parchment paper.
  • In a large bowl, combine all the dry ingredients- all-purpose flour, wholewheat flour, oats, cranberries, sunflower seeds, flax seeds, fresh rosemary, dried thyme, turmeric, cinnamon powder, nutmeg, salt, and pepper.
  • Whisk all the wet ingredients - buttermilk, brown sugar, and pumpkin puree in a small bowl. Pour over the dry ingredients. Mix well and put the batter in the prepared pan.
  • Bake at 180 C / 350 F for 35-40 minutes. A toothpick inserted in the center should come back clean.
  • Let this loaf cool completely then transfer to the freezer for at least 30 minutes.
  • Slice the loaf as thinly as possible and cut each slice in half.
  • Preheat the oven to 180 C / 350 F again.
    Lay out the sliced crackers on a baking tray and bake for another 20 minutes or until crisp. These will get crisper as they cool.
    Store the cooled crackers in an airtight jar.

Video

Notes

  • Store-bought buttermilk will work well in this recipe.
  • You can use canned pumpkin puree.
  • The loaf must cool completely before slicing.
  • Freezing the loaf for at least 30 minutes helps in cutting neat slices.
  • Slice as thinly as possible so the crackers bake evenly.
  • Pop them back in an air fryer or preheated oven if the crackers get soft.

Nutrition

Serving: 1 ServingCalories: 32kcalCarbohydrates: 5gProtein: 1gFat: 1gSaturated Fat: 0.2gPolyunsaturated Fat: 0.5gMonounsaturated Fat: 0.3gCholesterol: 1mgSodium: 41mgPotassium: 29mgFiber: 1gSugar: 2gVitamin A: 155IUVitamin C: 0.1mgCalcium: 11mgIron: 0.3mg

Creamy Roasted Pumpkin Soup

November 5, 2024

roasted pumpkin soup in a white soup mug with a spoon on a red check napkin.

This creamy roasted pumpkin soup is a bowl of creamy dreamy comfort that's simple to prepare, tastes amazing, and is so good for you! For roasting, add pumpkin, garlic, some onion, a few carrots, tomatoes, and bam - you have a hearty, super delicious soup ready in no time! This dairy-free pumpkin soup is a total fuss-free recipe!

roasted pumpkin soup in a white soup mug on a checkered napkin.

I've always enjoyed eating pumpkin, cooked the traditional Indian way.  My family, not so much.  So I've tried a bunch of recipes like my pumpkin swirl cake, vegan pumpkin muffins, and pumpkin bread rolls that appeal to everyone's taste.

And now this roasted pumpkin soup is one of the family faves! It's got rich, well-balanced flavors, has a thick creamy texture, and is the most comforting meal you could ask for.

[feast_advanced_jump_to]

Why You'll Love This Recipe

  • This vegan pumpkin soup is so easy to make and uses basic pantry ingredients.
  • Roasting the vegetables makes them soft, caramelized, and infused with the flavors of olive oil, herbs, and garlic.
  • This is a great make-ahead recipe. You can easily make it a day in advance then reheat and serve!
  • The soup is super creamy, healthy, and full of delicious pumpkin flavor.

Roasted Pumpkin Soup Recipe Ingredients

Ingredients for making roasted pumpkin soup.

Pumpkin: The star of the show! I use kabocha squash as it's very easily available here. But butternut squash and buttercup squash are also wonderful for this recipe.

Carrots: They add a wonderful flavor and color to this pumpkin soup.

Tomatoes: These bring a touch of acidity that balances out the sweetness of pumpkins.

Onions and Garlic: The aromatics that make the soup even more flavorful.

Coconut milk: This makes the soup super rich and creamy!

Olive oil: For roasting the vegetables.

Cumin powder and smoked paprika: For a touch of spice and a wonderful smoky flavor.

Lemon juice: This is added right at the end, and it just brings a pop of zingy zest to the pumpkin soup.

See the recipe card for full information on ingredients and quantities.

How To Make

Preheat the oven to 180 C (350F).

Prep all the vegetables -  Peel and dice the pumpkins, carrots, and onions. Cut the tomatoes into big chunks and peel the garlic cloves.

Chopped vegetables tossed with olive oil and seasonings on a baking tray.

Step 1: Toss all the prepped vegetables in olive oil, cumin powder, smoked paprika, salt, and pepper. Spread them out in an even layer on a baking tray.

roasted vegetables on a baking tray.

Step 2: Roast for 25-30 minutes, until the vegetables are cooked through.

roasted vegetables in a blender jar.

Step 3: Cool the vegetables and transfer them to a blender.

blended roasted vegetables in a blender jar.

Step 4: Puree them until smooth. Add some water to thin the consistency.

roasted pumpkin soup in a saucepan with coconut milk on top.

Step 5: Pour the soup into a saucepan. Let it come to a boil, on medium-high heat. Lower the heat. Gently stir in the coconut milk. Simmer for about 5 minutes.

A saucepan with pumpkin soup and a ladleful being taken out.

Step 6: Take it off the heat and add the lemon juice. Taste and adjust for seasoning. Serve warm and enjoy!

Top Tips

  • You can make the soup thick and creamy or, if you prefer a lighter consistency, just add some extra water or broth.
  • You can strain the soup through a sieve if you want a more creamy and velvety texture.
  • You can add whole milk or half and half instead of coconut milk to this roasted pumpkin soup.

How To Serve

I love to serve this pumpkin soup with a sprinkle of pumpkin seeds and a drizzle of coconut milk.

This soup is a wonderful addition to your Holiday table as it's an easy make-ahead recipe that can be easily doubled or tripled!

It's a great soup to pair with Brazilian cheese bread, sourdough crackers, or no-knead focaccia.

Serve it alongside Italian tortellini salad or roasted sweet potato chickpea salad to make a hearty meal.

Roasted pumpkin soup in a white mug with a red spoon and ingredients in the background.

Pumpkin Soup Recipe FAQs

Which pumpkin is best for roasting?

I like to use kabocha pumpkins and butternut squash a lot for roasting. Like I did for my air-fryer pumpkin recipe. That said, you can use any kind of pumpkin that's easily available. Pie pumpkins, Acorn squash, Buttercup squash, all of these will work very well for this soup recipe.

Why do I need to roast pumpkin for the pumpkin soup?

Roasting pumpkin ( and other vegetables) makes them soft and caramelized. The rich depth of flavor that comes through is truly incomparable. And it is a time-saver! You let the oven do most of the work, and all you need is 5-10 minutes on the stovetop to finish the soup!

What spices go well with pumpkin?

Pumpkins pair beautifully with warming spices like cumin, paprika, cinnamon, nutmeg, and ginger. You can add any of these to this soup recipe!

More Easy And Delicious Soup Recipes

  • A bowl of roasted carrot soup garnished with almonds on a tray.
    Roasted Carrot Lentil Soup
  • Creamy Pea Soup vegan dairyfree glutenfree healthy easy recipe
    Velvety Green Creamy Pea Soup
  • roasted sweet potato soup in a bowl garnished with croutons and thyme.
    Roasted Sweet Potato Soup
  • White Bean, Barley & Mustard Greens Soup
    Wholesome Barley Soup With Beans & Greens

Half the joy of cooking is sharing it with others. That’s why I’m always eager to hear from you. So go right ahead & drop a comment or reach out on Instagram, Pinterest, YouTube, or Facebook. I hope you love this creamy roasted pumpkin soup as much as we do!

📖 Recipe

Tried this recipe?Let us know how it was!
roasted pumpkin soup in a white soup mug with a spoon on a red check napkin.

Creamy Roasted Pumpkin Soup

Natasha Minocha
Creamy roasted pumpkin soup is hands down my new favorite soup! Just roast some pumpkin, onions, carrots, tomatoes, and garlic, blend, and you have a hearty, super delicious soup ready in no time!
No ratings yet
Print Recipe Pin Recipe
Prep Time 20 minutes mins
Cook Time 50 minutes mins
Total Time 1 hour hr 10 minutes mins
Course Side Dish, Soup
Cuisine American
Servings 6 Servings
Calories 195 kcal

Ingredients


  • 2 Onion, cut in quarters
  • 17 oz Pumpkin, peeled & cubed
  • 2 Carrots, cut in quarters
  • 2 Tomatoes, cut in quarters
  • 6-7 cloves Garlic, peeled
  • 2 tbsp Olive oil
  • 1/2 cup Coconut milk
  • 1 tsp Cumin powder
  • 1 tbsp Lemon juice
  • Salt & Pepper to taste

Instructions
 

  • Preheat the oven to 180C / 350F.
  • Prep all the vegetables -  Peel and dice the pumpkins, carrots, and onions. Cut the tomatoes into big chunks and peel the garlic cloves.
  • Toss all the prepped vegetables in olive oil, cumin powder, smoked paprika, salt, and pepper.
  • Spread them out in an even layer on a baking tray. Roast for 25-30 minutes at 180 C or 350 F, until the vegetables are cooked through.
  • Cool the vegetables slightly and puree them in a blender until smooth. Add some water to thin the consistency.
  • Pour the soup into a saucepan. On medium-high heat, let it come to a boil, and lower the heat.
  • Gently stir in the coconut milk. Simmer for about 5 minutes.
  • Take it off the heat and add the lemon juice. Taste and adjust for seasoning. Serve warm and enjoy!

Notes

  • Cut the vegetables in an even size so they all cook evenly.
  • You can make the soup thick and creamy or, if you prefer a lighter consistency, just add some extra water or broth.
  • You can strain the soup through a sieve if you want a more creamy and velvety texture.
  • You can add whole milk or half and half instead of coconut milk.

Nutrition

Serving: 1 ServingCalories: 195kcalCarbohydrates: 21gProtein: 4gFat: 13gSaturated Fat: 6gPolyunsaturated Fat: 1gMonounsaturated Fat: 5gSodium: 32mgPotassium: 817mgFiber: 3gSugar: 9gVitamin A: 15873IUVitamin C: 28mgCalcium: 72mgIron: 3mg

Persimmon Jam

October 28, 2024

persimmon chia jam in a glass jar with a wooden spoon on a small plate.

This easy 3-ingredient persimmon jam recipe is a fabulous one! Full of the delicious fresh fruity flavor of persimmons, this jam has no added sugar or pectin. And it comes together in less than 30 minutes!

persimmon jam in a  jar with a wooden spoon and ingredients in the background.

It's a healthy, delicious, refined sugar-free jam recipe that is super easy to make. I also have chia seeds in here for some fast-gelling action! This persimmon chia jam is perfect on toast, oatmeal, pancakes, and waffles.

[feast_advanced_jump_to]

Why You'll Love This Recipe

  • This persimmon chia jam needs no pectin or sugar! The persimmons are already so sweet, like candy, we don't need any additional sugar.
  • It's bursting with fresh flavors of persimmon.
  • The best way to preserve this lovely winter fruit.
  • We only need 3 ingredients to make this jam!
  • The persimmon jam recipe is very versatile, you can customize it in so many ways.

Persimmon Jam Recipe Ingredients

ingredients for persimmon jam recipe.

Persimmons: There are 2 types of persimmons available in the market - Fuyu and Hachiya. Fuyu has a flatter shape while Hachiya is taller. Fuyu can be enjoyed even if it's not very ripe. It will still be sweet and delicious. Hachiya, on the other hand, needs to be ripened completely before eating. Otherwise, it has a terribly astringent taste. For this recipe, we have Fuyu persimmons. Please choose very ripe ones as they will be super sweet!

Lemon juice: Since this jam is without pectin, you need citric acid to help the jam set properly. It also adds a little acidity to the homemade jam, balancing the sweetness of the fruit.

Chia seeds: They help thicken and set the persimmon jam without pectin. You can use chia seed powder as well.

See the recipe card for full information on ingredients and quantities.

Recipe Variations

This easy persimmon chia jam recipe is very versatile. You can add any of the following flavorings to it, to amp up the flavor!

Vanilla extract or vanilla bean paste, for a rich flavor.

Grated fresh ginger - for a lovely sharp contrast to the sweet jam.

Cinnamon powder for a warm, cozy flavor.

How To Make

peeled and diced persimmons and lemon juice in a saucepan.

Step 1: Place the peeled and diced persimmons and lemon juice in a thick-bottom saucepan.

softened, cooked persimmons in a saucepan.

Step 2: Bring to a boil over medium-high heat, then lower the heat and continue cooking for 20-25 minutes on medium-low heat.

Mashing the cooked persimmons with a potato masher.

Step 3: Keep stirring the fruit and mashing it as it cooks with a wooden spoon, potato masher, or fork.

chia seeds on the cooked, mashed persimmons.

Step 4: When the fruit is cooked through, add the chia seeds and cook for another 5 minutes.

persimmon chia seed mixture in a blender.

Step 5: Cool the mixture for a few minutes and put it in a blender.

blended persimmon chia jam in a blender jar.

Step 6: Blend until smooth.

You can skip this step if you like a chunky texture. Mash with a fork or wooden spoon and then transfer to a jar.

Final step: Transfer to a clean, sterilized jar, close the jar, and let the jam cool at room temperature. Enjoy!

persimmon jam in a glass jar with a wooden spoon on a small plate.

Top Tips

  • Choose very ripe Fuyu persimmons to make this jam. The riper the fruit, the sweeter they are, so adding additional sugar is unnecessary!
  • Taste your persimmons. They are usually very sweet. However, if you don't find them sweet enough, you can add some sugar to the saucepan along with the fruit and lemon juice.
  • If you like a chunky texture, you don't need to blend it. Mash with a fork or wooden spoon and then transfer to a jar.
  • This persimmon jam will last up to 2 weeks in the refrigerator. You can follow the proper canning process to make it last longer.

How To Use Persimmon Jam

I love using this jam in so many ways!

I enjoy it on thick slices of my no-knead Dutch oven bread or with crispy salted butter rolls.

It's wonderful on top of Dutch baby pancakes or sourdough discard waffles.

You can even top your baked Brie or baked camembert with this persimmon jam. So great in a Holiday cheese board!

persimmon jam spread on a toast on a small plate.

Recipe FAQs

Do I need to add pectin to make persimmon chia jam?

Persimmons are naturally high in pectin, so we don't need to add any. Also, the chia seeds in the recipe help thicken and set the jam. Chia seeds absorb liquid and swell up, thickening jams, like my strawberry chia jam, and puddings like my chocolate orange chia pudding.

Why is there no added sugar in the persimmon jam recipe?

Fuyu persimmons are very sweet naturally. So this jam really needs no sugar at all. It's got a lovely fresh, fruity flavor and taste that lets the fruit shine! Make sure your fruit is ripe though.

How long will this persimmon preserve last?

This jam will last up to 2 weeks in the refrigerator. You can follow the proper canning process to make it last longer for a few months.

More Easy Jam Recipes

  • A jar with cherry jam on a wooden surface with a spoon on the side.
    Cherry Jam Recipe
  • Homemade Fig Jam Recipe
    Homemade Fig Jam Recipe
  • 2 jars of strawberry chia jam with flowers and strawberries around.
    Strawberry Chia Jam
  • Mulberry jam in a glass jar with a red knife on the side.
    Mulberry Jam Recipe

Half the joy of cooking is sharing it with others. That’s why I’m always eager to hear from you. So go right ahead & drop a comment or reach out on Instagram, Pinterest, YouTube, or Facebook. I hope you love this persimmon jam as much as we do!

📖 Recipe

Tried this recipe?Let us know how it was!
persimmon chia jam in a glass jar with a wooden spoon on a small plate.

Persimmon Jam

Natasha Minocha
Easy to make, this 3- ingredient persimmon jam is super delicious! You can enjoy it on toast, swirled into yogurt, topped on warm oatmeal or pancakes!
5 from 1 vote
Print Recipe Pin Recipe
Prep Time 10 minutes mins
Cook Time 25 minutes mins
Total Time 30 minutes mins
Course Condiment
Cuisine American, World
Servings 20 Servings
Calories 46 kcal

Ingredients
  

  • 4 Persimmons
  • 2 tbsp Lemon juice
  • 1 tbsp Chia seeds
  • 2-3 tbsp Water You MAY need some.

Instructions
 

  • Peel and cut the persimmons into small cubes.
  • Place the diced persimmons and lemon juice in a thick-bottom saucepan. Stir well.
  • Bring to a boil over medium-high heat, then lower the heat and continue cooking for 20-25 minutes on medium-low heat.
    Keep stirring the fruit and mashing it as it cooks with a wooden spoon or potato masher or fork.
  • You may need to add 2-3 tbsp of water if the mixture is getting too thick.
  • When the fruit is cooked through, add the chia seeds and cook for another 5 minutes.
  • Take the jam off the heat and let it cool for a few minutes. Transfer to a blender and process until smooth.
  • Transfer to a clean, sterilized jar, close the jar, and let the jam cool at room temperature. Store in the refrigerator. Enjoy!

Video

Notes

  • Choose very ripe Fuyu persimmons to make this jam. The riper the fruit, the sweeter they are.
  • Taste your persimmons. They are usually very sweet. However, if you don't find them sweet enough, you can add some sugar to the saucepan along with the fruit and lemon juice.
  • If you like a chunky texture, you don't need to blend it. Mash with a fork or wooden spoon and then transfer to a jar.
  • This persimmon jam will last up to 2 weeks in the refrigerator. You can follow the proper canning process to make it last longer.

Nutrition

Serving: 1 ServingCalories: 46kcalCarbohydrates: 12gProtein: 0.4gFat: 0.3gSaturated Fat: 0.02gPolyunsaturated Fat: 0.1gMonounsaturated Fat: 0.01gTrans Fat: 0.001gSodium: 1mgPotassium: 108mgFiber: 0.2gSugar: 0.04gVitamin A: 0.4IUVitamin C: 23mgCalcium: 13mgIron: 1mg

Masala Chai Tiramisu

October 21, 2024

masala chai tiramisu in a blue dish with chai masala and other spices around.

Creamy, rich, and full of aromatic spices, this Masala Chai Tiramisu is a slice of heaven! A no-fuss, eggless, no-bake dessert that's as well-loved as the classic easy tiramisu!

 chai tiramisu in a blue dish with chai masala and other spices around.

Masala chai tiramisu is a fun twist on the classic tiramisu. It incorporates an exquisite mix of spices - chai masala, popularly used to make Indian masala tea. The flavor of these spices comes through with every bite, but without overwhelming your taste buds.

I used black tea brewed with chai spices instead of coffee for soaking the ladyfinger cookies and also added the spice mix to the eggless mascarpone cheese filling. Bringing all the elements of the chai tiramisu is a breeze, really! Once you have the cheese filling, soaking liquid, and the cookies, the tiramisu comes together in minutes.

[feast_advanced_jump_to]

Why You'll Love This Recipe

  • Chai tiramisu is a creamy, decadent no-bake dessert that is well loved by everyone- kids and adults alike.
  • The chai masala flavors make this tiramisu so cozy and comforting.
  • Making this eggless, alcohol-free tiramisu is really effortless and simple.
  • It's a wonderful make-ahead dessert. Making it a day in advance also helps the flavors of the chai masala meld and shine.
  • You can easily halve or double the recipe depending on the number of people you're serving it to.

Recipe Ingredients

Ingredients for making chai tiramisu.

Chai Masala: I love to make my chai spice blend at home. It takes no more than 5 minutes to grind up cardamom, fennel seeds, black peppercorn, cloves, and cinnamon along with ginger and nutmeg powder. You can use store-bought chai masala too.

Black tea: You can use black tea bags or loose tea leaves. My favorite brands to use are Twinning Assam Tea, Brooke Bond, and Wagh Bakri Tea.

Ladyfingers: I used store-bought because it saves time and they’re easily available. You can make them at home or use pound cake, sponge cake, or even homemade rusk instead.

Mascarpone cheese: This rich, velvety Italian cheese is perfect for making tiramisu. Make sure it's at room temperature so it blends quickly and well. You can use softened cream cheese as a substitute.

Whipping cream: Use chilled heavy cream for this recipe. I like to lightly whip the cream before adding it to the mascarpone cheese filling.

Sugar: I use icing or powdered sugar.

See the recipe card for full information on ingredients and quantities.

How To Make Masala Chai Tiramisu

Brewing black tea in a white saucepan.

Step 1: Add water to a saucepan. Bring it to a boil and add sugar, chai masala, and 2 tea bags. Brew for 5-7 minutes.

Strained black tea in a shallow bowl.

Step 2: Strain the sweetened black tea into a shallow bowl and let it cool.

Mascarpone cheese,sugar,chai masala, and cream in a glass bowl.

Step 3: Combine mascarpone cheese, whipping cream, sugar, and chai masala in a large bowl.

Whipped mascarpone cheese with chai flavors in a glass bowl.

Step 4: With a hand whisk or electric beater, whisk the ingredients until light and well combined.

Chai soaked ladyfinger cookies layered in a blue dish.

Step 5: Dip the ladyfinger cookies in the cooled black tea, one at a time. Arrange them in a single layer.

Whipped mascarpone cheese filling on top of ladyfinger cookies.

Step 6: Evenly spread half of the chai-spiced mascarpone cheese filling on the cookie layer.

Layer of chai soaked ladyfingers on top of whipped mascarpone.

Step 7: Arrange another layer of chai-dipped ladyfingers on top.

Whipped mascarpone cheese on top of the second layer of ladyfingers.

Step 8: Spread the remaining mascarpone cheese filling on top of the cookies.

Smoothened out whipped mascarpone cheese.

Step 9: Smoothen the mascarpone cheese mixture. Refrigerate for at least 8 hours or overnight to allow the flavors to develop.

Chai spiced tiramisu dusted with cocoa powder.

Step 10: Dust with cocoa powder and serve!

Pro Tips

  1. Make sure your mascarpone cheese is at room temperature. That helps in making a smoother mixture faster and more easily.
  2. Sift your confectioner's sugar (icing sugar) if it's lumpy. You don't want sugar lumps in the creamy chai-spiced cheese filling.
  3. You can also whip the cream before adding it to the mascarpone mixture. If you do that,  mix the ingredients with a spatula. You don't want to overbeat the cheese-cream mixture.
  4. You can add more chai masala to the black tea and mascarpone cheese mixture if you prefer a stronger flavor.
  5. You can add 3-4 tea bags if you like your black tea very strong.
  6. To avoid soggy cookies, give the cookies a quick dip in the cooled black tea, for about 1-2 seconds.
A slice of chai tiramisu on a small plate.

Masala Chai Tiramisu Recipe FAQs

What tea should I use in this Masala Chai Tiramisu?

Black tea is the best for this recipe for chai tiramisu. My favorite brands are Wagh Bakri, Brook Bond, and Twinnings Assam Tea. These are all easily available online or in Indian grocery stores. You can use tea bags or loose tea.

What kind of cookies can I use instead of ladyfingers?

Italian ladyfingers are the best for making tiramisu. But you can use Lotus Biscoff like I did for my Biscoff Tiramisu. You can also use rusk or pound cake.

Can I add alcohol to my Tiramisu?

Yes, you can stir in Marsala wine, dark rum, or even Bourbon to the cooled black tea.

More Delicious Tiramisu Recipes

  • Easy Tiramisu Recipe
    Easy Tiramisu Recipe
  • Easy Biscoff Tiramisu
    Easy Biscoff Tiramisu
  • Easy Lemon Tiramisu Recipe
    Easy Lemon Tiramisu Recipe
  • Strawberry Tiramisu | Eggless Alcohol-free Strawberry Tiramisu Recipe
    Strawberry Tiramisu

Half the joy of cooking is sharing it with others. That’s why I’m always eager to hear from you. So go right ahead & drop a comment or reach out on Instagram, Pinterest, YouTube, or Facebook. I hope you love this masala chai tiramisu as much as we do!

📖 Recipe

Tried this recipe?Let us know how it was!
masala chai tiramisu in a blue dish with chai masala and other spices around.

Masala Chai Tiramisu

Natasha Minocha
Rich and creamy, this Masala Chai Tiramisu is exquisitely flavorful and full of warm, aromatic spices. It comes together in minutes and is always a crowd-pleaser!
5 from 1 vote
Print Recipe Pin Recipe
Prep Time 15 minutes mins
Cook Time 10 minutes mins
Resting Time 8 hours hrs
Total Time 1 day d 8 hours hrs 25 minutes mins
Course Dessert
Cuisine Indian, Italian
Servings 10 Servings
Calories 370 kcal

Ingredients


  • 20-24 Ladyfinger cookies

Spiced Black Tea

  • 1.5 cup Water
  • 1.5 tsp Chai masala
  • 2 tbsp Sugar
  • 2 tea bags Black tea You can also use 2 tbsp loose black tea.

Chai Spiced Mascarpone Filling

  • 17 oz Mascarpone cheese, at room temperature
  • 1/2 cup Confectioner's sugar
  • 1.5 tsp Chai masala
  • 3/4 cup Whipping cream
  • Cocoa powder for dusting on top

Instructions
 

Spiced Black Tea

  • Add water to a small saucepan and bring it to a boil.
  • Lower the heat to medium-low and add sugar, chai masala, and 2 tea bags. Let the tea brew for 5-7 minutes.
  • Remove from the stove, strain into a shallow bowl, and let it cool.

Chai Spiced Mascarpone Filling

  • Add mascarpone cheese, sugar, chai masala, and whipping cream to a large mixing bowl.
  • With an electric beater or hand whisk, whisk the ingredients for 2-3 minutes until well combined and light.

Assembly

  • Dip the ladyfinger cookies in the cooled black tea, one at a time.
  • Arrange the soaked cookies in a single layer in your serving dish.
  • Evenly spread half of the chai spiced mascarpone cheese filling on the cookie layer.
  • Repeat with another layer of chai-soaked cookies and spread out the rest of the filling on top of the second layer.
  • Refrigerate for at least 8 hours or overnight to allow the flavors to develop.
  • Dust with cocoa powder and serve. Enjoy!

Video

Notes

  1. You can use homemade chai masala/chai spice or store-bought one.
  2. You can add more chai masala to the black tea and mascarpone cheese mixture if you prefer a stronger flavor.
  3. You can add 3-4 tea bags if you like your black tea very strong.
  4. Make sure your mascarpone cheese is at room temperature. That helps in making a smoother mixture faster and more easily.
  5. You can whip the cream before adding it to the mascarpone mixture. If you do that,  mix the ingredients with a spatula. You don't want to overbeat the cheese-cream mixture.
  6. Sift your confectioner's sugar (icing sugar) if it's lumpy. You don't want sugar lumps in the cheese filling.

Nutrition

Serving: 1 ServingCalories: 370kcalCarbohydrates: 24gProtein: 6gFat: 30gSaturated Fat: 18gPolyunsaturated Fat: 1gMonounsaturated Fat: 3gCholesterol: 117mgSodium: 66mgPotassium: 46mgFiber: 0.3gSugar: 3gVitamin A: 1065IUVitamin C: 0.2mgCalcium: 95mgIron: 1mg

Simple Apple Cider Recipe

October 14, 2024

Apple cider in a clear glass garnished with orange slices and star anise.

As the cool weather settles in, my need for a warm beverage increases immensely. Here's one of my old-time favorites - Simple Apple Cider Recipe! Cozy, and lightly spiced, the perfect drink for the family and for entertaining!

Apple cider in a glass on a wooden board with ingredients in the background.

I remember tasting my first apple cider in a quaint little store in Ann Arbor, Michigan. I walked in to buy candles, and there they had a huge pot of warm cider with a ladle. You could serve yourself in little cups as you browsed through the store. I can assure you - I mostly stayed by the pot! I was hooked from that day onwards.

Making apple cider at home is really so easy. It's as simple as cooking apples and spices with water in a pot! And while the stovetop apple cider is simmering, the whole house smells so incredibly warm and cozy!

[feast_advanced_jump_to]

What Is Apple Cider

Apple cider is essentially unfiltered, the unsweetened, non-pasteurized liquid extracted from apples. It's a seasonal nonalcoholic drink, usually made in autumn and winter. This is not to be confused with the fermented, alcoholic version called cider or hard cider.

Why You'll Love This Recipe

  • Making apple cider from scratch is incredibly easy - whether you make it on the stovetop or in a crock pot!
  • It transforms your home into a fragrant haven of warm spices and sweet apples is pure magic.
  • Imagine sipping on a cup of this cozy, homemade apple cider on a crisp autumn evening—it's like wrapping yourself in a warm blanket.
  • The best part? It tastes absolutely divine, with a depth of flavor that store-bought versions just can’t match. Once you try it, you’ll wonder why you didn’t make it sooner!
Apple cider in a glass with sliced oranges and star anise on a wooden board.

Simple Apple Cider Recipe Ingredients

Ingredients for making apple cider.

Apples- The star of the show! I used Red Delicious. But use any kind you like. A combination of sweet and tart apples is so good!

Orange- For a lovely zingy, citrusy flavor to the apple cider.

Cinnamon, vanilla, and cloves- These spices bring a wonderful warmth to the cider. You can also add fresh ginger, nutmeg, or allspice.

Brown sugar- You can also use granulated sugar, honey, or maple syrup.

Water- This is the liquid base of apple cider.

See the recipe card for full information on ingredients and quantities.

How To Make Simple Apple Cider

Making apple cider is a labor of love, just like this delicious stovetop apple butter. It does take time, but it hardly requires any supervision. While the apples and spices are brewing, the whole house is filled with the loveliest of aromas. Better than any potpourri. You immediately get warm and cozy vibes!

All ingredients in a white enamel pot.

Step 1: Add the apples, orange, cinnamon sticks, vanilla bean, cloves, and water to a large stockpot.

Apples, oranges, spices simmering in a pot.

Step 2: Cover the pot and cook for about 2 hours on medium-low heat.

Mashing the cooked fruit with a potato masher.

Step 3: Use a potato masher to mash all the fruits well.

Adding brown sugar to the apple cider.

Step 4: Add brown sugar and stir well.

Ready apple cider in a white enamel pot.

Step 5: Cook the apple cider for another 30 minutes.

A sieve on top of a measuring cup for straining the apple cider.

Step 6: Using a fine mesh strainer, strain the mixture. Discard the pulp.

Strained apple cider in a glass measuring cup.

Step 7: Taste and adjust for sweetness.

Apple cider in a clear glass pitcher on a wooden board.

Step 8: Serve warm!

How To Serve

You can serve the simple apple cider warm or cold. I love it warm, garnished with a slice of orange and star anise. It's so fabulous with a warm baked apple donut or a slice of moist apple bread, or a soft apple fritter cake.

It works fabulously well as a base for cocktails too, like this Apple Cider Hot Toddy. It's great with a splash of rum or bourbon is fantastic. Or use this to make a lovely nonalcoholic punch.

To serve the cider cold, let it come to room temperature, then transfer to a clean jar or bottle and refrigerate. This should stay well for 5-6 days.

Recipe FAQs

What kind of apples can I use?

You can use any variety of apples you like. You can even mix different varieties - sweet and tart for a wonderful flavor. Red Delicious, Golden Delicious, Pink Lady, Gala, Fuji, Granny Smith, and Braeburn are some of the apples you can pick from.

Do I need to add orange to this recipe?

Orange adds a zingy, citrusy flavor to the apple cider and complements the spices very well too.

Can I make cider in a crockpot?

Yes! Apple cider can be easily made in a crock pot, instant pot, or stove top as I did.

Apple cider garnished with orange slices and star anise.

More Easy Beverage Recipes

  • Mulled Wine Recipe | Spiced Wine | Holiday drink
    Mulled Wine Recipe
  • Classic Hot Chocolate | Easy and delicious hot chocolate recipe
    Classic Hot Chocolate
  • Apple Cider Hot Toddy
    Apple Cider Hot Toddy
  • Pomegranate Mimosa: Sparkling Wine Cocktail
    Pomegranate Mimosa: Sparkling Wine Cocktail

Half the joy of cooking is sharing it with others. That’s why I’m always eager to hear from you. So go right ahead & drop a comment or reach out on Instagram, Pinterest, YouTube, or Facebook. I hope you love this simple apple cider recipe as much as we do!

📖 Recipe

Tried this recipe?Let us know how it was!
Apple cider in a clear glass garnished with orange slices and star anise.

Simple Apple Cider Recipe

Natasha Minocha
Here's one of my old-time favorites - Simple Apple Cider! A Cozy, lightly spiced, perfect drink for the family and for entertaining!
5 from 1 vote
Print Recipe Pin Recipe
Prep Time 15 minutes mins
Cook Time 2 hours hrs 30 minutes mins
Total Time 2 hours hrs 45 minutes mins
Course Drinks
Cuisine American
Servings 8 servings
Calories 106 kcal

Ingredients


  • 5 Apples
  • 1 Orange
  • 2 Cinnamon sticks
  • 5-6 whole Cloves
  • 1 Vanilla bean, split lengthways.
  • 1/3 cup Brown sugar
  • 50 oz Water

Instructions
 

  • Slice the apples, remove the seeds. Slice the orange, remove the seeds.
  • Add the apples, orange, cinnamon sticks, vanilla bean and cloves to a large stockpot.
  • Add the water. Cover the pot and cook for about 2 hours on medium low heat.
  • Use a potato masher to mash all the fruits well. Cover and cook for another 30 minutes.
  • Using a fine mesh strainer, strain the mixture. Discard the pulp.
  • Add the brown sugar to sweeten the cider. Taste and adjust for sweetness.
  • Serve warm or cold. Enjoy!

Video

Notes

NOTE:
To serve the cider cold, let it come to room temperature then transfer to a clean jar or bottle and refrigerate. This should stay well for 5-6 days.

Nutrition

Serving: 1 ServingCalories: 106kcalCarbohydrates: 28gProtein: 1gFat: 0.3gSaturated Fat: 0.1gPolyunsaturated Fat: 0.1gMonounsaturated Fat: 0.02gTrans Fat: 0.001gSodium: 14mgPotassium: 174mgFiber: 4gSugar: 22gVitamin A: 102IUVitamin C: 14mgCalcium: 39mgIron: 0.4mg

Easiest No-Knead Dutch Oven Bread

October 1, 2024

no knead Dutch oven bread on parchment paper with butter and butter knife.

The no-knead Dutch oven bread is deliciously crusty on the outside and soft and chewy on the inside. This beginner-friendly no knead bread recipe is so easy and quick. It needs only 4 ingredients and 5 minutes of prep!

no knead Dutch oven bread on parchment paper with butter and butter knife.

The amazing Jim Lahey, the pioneer of no-knead bread, inspires my 4-ingredient Dutch oven bread. In my books, that’s the next best thing to sliced bread! My recipe is a variation of his. I love to serve it alongside my roasted carrot and lentil soup or top it with my small-batch stovetop apple butter. Delicious!

[feast_advanced_jump_to]

Why We Love This Recipe

  • Needs no kneading, no attention, and no effort.
  • Easy, 4-ingredient, and 5-minute prep recipe.
  • Great for beginners and pro-bakers.
  • It’s so versatile; you can add - cheese, herbs, or even this delicious garlic confit!
  • Prep it a day before and bake it just before lunch or dinner for freshly baked bread.

Recipe Ingredients

Ingredients for making no knead bread.

Flour: I stuck to my trusted all-purpose flour for this no-knead bread. But bread flour will work too. If you’re in the mood to experiment, try whole wheat flour. My suggestion would be to use half whole wheat and half all-purpose.

Yeast: Use dry active or instant yeast; just ensure it’s fresh. Always test it beforehand by mixing half a teaspoon in half a cup of warm water. If it becomes frothy and bubbly, in 5 -10 minutes, the yeast is good to go!

Salt: I used sea salt to make it more flavorful.

Water: The ideal temperature at which yeast blooms is 105 (40.5 °C). So, use warm water—not hot, not cold. Hot water will kill your yeast. Cold water will not activate it.

See the recipe card for full information on ingredients and quantities.

How To Make No-knead Dutch Oven Bread

Flour, yeast, salt, water mixed into a shaggy dough in clear glass bowl.

Step 1: Combine all-purpose flour, yeast, salt, and water in a large bowl. This is a very sticky dough.

Proofed dough after 4 hours in a glass bowl.

Step 2: Cover the dough and let it proof for 3-4 hours until doubled in size and dotted with small holes/ bubbles on top.

Bread dough in a glass bowl.

Step 3: Flour your hands well and fold the no-knead bread dough on top of itself, 8 times.

Bread dough on parchment paper.

Step 4: Carefully transfer the dough to a floured parchment paper. This dough is wet, sticky, and flat. That's the way it's meant to be, so don't worry!

Step 5: Sprinkle a little flour on the dough and cover with a kitchen towel. Let it rest for 30 minutes.

Step 6: While the dough is resting, place your Dutch oven (with lid) in the oven and heat the oven to 230 C / 450 F.

Bread dough on parchment paper in a Dutch oven.

Step 7: After the dough has rested, carefully remove the hot Dutch oven from the oven and take the lid off. Gently place the dough with the parchment paper in the pan, and cover it with the lid. Transfer to the oven.

Loaf of no knead dutch oven bread  on parchment paper in a dutch oven

Step 8: Bake for 40 minutes with the lid on. Carefully remove the lid and continue baking for another 10-15 minutes until the no knead Dutch oven bread is cooked through and is golden brown.

Remove the bread loaf from the baking dish and let it cool completely for at least 2 hours before slicing.

Pro Tips

  1. Let your Dutch oven heat well. Put it in the oven with the lid on for 30 - 40 minutes before you're ready to bake your bread. A hot pan will give your bread a nice crust and also the "oven spring"!
  2. You'll be handling a scorching hot baking dish, so please be careful and wear your oven mitts.
  3. Even though this is a no-knead bread, a few folds of the dough are important to give the bread some structure. Flour your hands well when you're handling the dough, it's a sticky one! Or use a floured spatula.
  4. Yes, the dough is supposed to be sticky, floppy, and wet!
  5. Give the no-knead artisan bread ample time to rise. Don’t be in a hurry.
  6. I highly recommend weighing your ingredients. A small kitchen scale is a good investment to get the best results when you're baking.
Half sliced loaf of bread on a wooden board with butter in a small dish.

How To Serve The No Knead Dutch Oven Bread

This glorious and beautiful loaf of no-knead bread can be served in so many ways.

  • Have it as-is.
  • Smear it with butter or the more delicious cinnamon honey butter.
  • Pair it with a warm bowl of creamy velvety pea soup or a garlicky roasted pumpkin thick soup.
  • Dip into your favorite dip, like an easy creamy avocado dip or whipped goat cheese.
  • It’ll taste delicious even with a drizzle of easy Chinese chili oil.
  • Use the leftover bread to make this delicious veggie breakfast or French toast casserole!

How To Store

Cool the easy no-knead Dutch oven bread completely (at least 2 hours) before you slice. Store the leftovers in an airtight container. They'll last 2-3 days on the countertop or 4-5 days if refrigerated.

You can even freeze no-knead bread for up to a month. Just remember to wrap it well in foil or plastic wrap.

Slice of no knead bread on a wooden board with butter and butter knife.

Recipe FAQs

How Long Should The No-Knead Bread Dough Rise?

I recommend proofing the bread for 3 to 4 hours at least. Look for visual signs to know if your dough has risen enough. It should be doubled in volume, flat on top, with a few holes in it. You can even refrigerate the quick, no-knead Dutch oven bread for 12 to 15 hours if you want to bake the next day.

What Size Dutch Oven Should I Use?

I used a 3.3-liter (3.5-qt) Le Creuset Dutch oven. You can use a smaller 2 3/4 qt size too.

How Can I Make No-Knead Bread Without a Dutch Oven?

You can use any oven-safe, lidded dish. The lid is important to trap the steam and make crusty, no-knead Dutch oven bread.
Alternatively, you can place the dough on a parchment paper-lined baking tray. On the lower rack of your oven, place a cup or two of boiling water for 5 minutes before sliding in the bread dough. Bake for 30 to 35 minutes.

More No-Knead Bread Recipes

  • No-Knead Focaccia with rosemary on parchment paper.
    Super Easy No-Knead Focaccia
  • mini no-knead focaccia
    Mini No-Knead Focaccia
  • Homemade Cornbread Recipe
    Homemade Cornbread Recipe with Buttermilk
  • Best Turkish Pide Bread Recipe!
    Best Turkish Pide Bread Recipe

Half the joy of cooking is sharing it with others. That’s why I’m always eager to hear from you. So go right ahead & drop a comment or reach out on Instagram, Pinterest, YouTube, or Facebook. I hope you love this no-knead Dutch oven bread as much as we do!

📖 Recipe

Tried this recipe?Let us know how it was!
no knead Dutch oven bread on parchment paper with butter and butter knife.

Easiest No Knead Dutch Oven Bread

Natasha Minocha
The no-knead Dutch oven bread is deliciously crusty on the outside and soft and chewy on the inside. This beginner-friendly no-knead bread recipe is so easy and quick. It needs only 4 ingredients and 5 minutes of prep!
5 from 2 votes
Print Recipe Pin Recipe
Prep Time 5 minutes mins
Cook Time 55 minutes mins
Resting Time 4 hours hrs
Total Time 4 hours hrs 50 minutes mins
Course Bread, Side Dish
Cuisine American
Servings 1 Loaf ( 10 servings)
Calories 157 kcal

Ingredients


  • 3 1/4 cup All-purpose flour
  • 1.5 tsp Sea salt
  • 1.5 tsp Active dry yeast or instant yeast
  • 1.5 cup Warm water ( about 40.5 C or 105 F)
  • 2-3 tbsp All-purpose flour for sprinkling

Instructions
 

  • Whisk together the flour, salt, and yeast in a large bowl. Add the warm water and mix well to form a shaggy dough. This is a very sticky dough.
  • Cover the bowl and let the dough rise for 3-4 hours until it's doubled and has small holes or bubbles on top.
    You can also refrigerate the dough for 12-15 hours.
  • Heat oven to 230 C / 450 F and place your Dutch oven with the lid in the oven. I used a 3.5 QT / 3.3 ltr Dutch oven. You can use a smaller or bigger size too.
  • Sprinkle a tablespoon of flour on the dough. Flour your hands well and fold the dough on top of itself. Turn the bowl a quarter of the way and fold the dough over itself again. Do 3 more quarter turns of the bowl with folding over the dough each time.
    Repeat this step one more time.
    You can also use a spatula for this step.
  • Sprinkle a tablespoon of flour on a piece of parchment paper and carefully transfer the dough on it. Sprinkle another tablespoon of flour on top.
    This dough is loose, sticky, and will look flat. It's okay!
  • Cover loosely with a kitchen towel and let the dough rest for 30 minutes.
  • Take the hot Dutch oven out of the oven carefully and remove the lid. Uncover the dough and place it in the Dutch oven holding the sides of the parchment paper. Cover the Dutch oven and place it in the oven.
  • Bake for 40 minutes with the lid on. Carefully remove the lid and bake for another 10-15 minutes until golden brown.
  • Cool the bread completely at least 2 hours before slicing. Enjoy!

Video

Notes

  1. Be careful when handling the Dutch oven. Please wear your oven mitts, the pan and its lid will be very hot!
  2. Make sure your yeast is fresh. To check, dissolve half a teaspoon in a cup of water, let it sit for 5-10 minutes. If the mixture is frothy and bubbly, your yeast is good!
  3. Don't have a Dutch oven? No problem! Place the dough on a parchment-lined baking tray. Add 2 cups boiling water to a baking dish and place in the lowest rack of your oven 5 minutes before putting the baking tray in. Bake for 35-40 minutes.
  4. I bake this bread in my 3.5 quart Le Creuset Dutch oven. You can also use a 2 3/4 quart Dutch oven to or a cast iron pot.

Nutrition

Serving: 1 SliceCalories: 157kcalCarbohydrates: 33gProtein: 5gFat: 0.5gSaturated Fat: 0.1gPolyunsaturated Fat: 0.2gMonounsaturated Fat: 0.1gSodium: 352mgPotassium: 50mgFiber: 1gSugar: 0.1gVitamin A: 1IUVitamin C: 0.001mgCalcium: 8mgIron: 2mg

Cinnamon Honey Butter Recipe

September 16, 2024

Cinnamon Honey Butter Recipe

Sweet and creamy cinnamon honey butter turns easy fall muffins, homemade dinner rolls, and everyday breads into a treat you can’t resist. It’s a 5-ingredient, 3-step recipe that comes together in 5 minutes and tastes even better than what you find at your favorite restaurant.

Cinnamon Honey Butter in a small bowl with a butter knife and ingredients in the background.

I think there is nothing I enjoy more than quick recipes. Especially if there is cinnamon involved. I adore cinnamon, if I haven’t mentioned it before. Not just with apple cinnamon cake; the fall spice goes pretty much with anything in my book- cinnamon coffee rolls, baked cinnamon donuts—you name it! Cinnamon always inspires me, and this honey butter proves it.

[feast_advanced_jump_to]

Why You’ll Love Cinnamon Honey Butter?

You can slather the whipped butter on apple cinnamon pancakes, Hawaiian banana bread, jalapeno cheddar bread, or warm milk bread rolls.

You shouldn’t, but you could; eat it by the spoonful; it’s that good!

The whipped butter is kid-approved and a hit with them.

It also stores and freezes really well.

Recipe Ingredients

Ingredients for making cinnamon honey butter.

Butter: Softened butter is easier to mix, ensuring all ingredients blend smoothly. Salted butter adds a subtle savory note, but you can use unsalted butter too. Even plant-based butter will work here.

Honey is a natural sweetener, and it beautifully complements the warmth of cinnamon. It also adds a smooth, velvety consistency. You can substitute any flavor-infused honey too. If you want to experiment, you can substitute honey with maple syrup for a slightly different flavor profile.

Cinnamon powder is a spicy kick that pairs perfectly with the sweetness of the honey. It makes this butter feel cozy and comforting, perfect for fall-inspired dishes.

Vanilla extract: Just a hint of homemade vanilla extract enhances the overall flavor of the butter, adding a layer of depth. You can also use vanilla bean paste for a more intense vanilla flavor.

Sea salt rounds off and balances the flavors of this flavored butter.

See the recipe card for full information on ingredients and quantities.

How To Make Cinnamon-Flavored Butter

This recipe is similar to the famous Texas Roadhouse cinnamon honey butter. The only difference is that I cut powdered sugar out completely and used more cinnamon because I wanted the honey and cinnamon flavor to shine.

Combine butter, honey, cinnamon, and vanilla extract in a bowl.

Step 1: Combine all ingredients - butter, honey, sea salt, cinnamon powder, and vanilla extract in a bowl.

Whisk the ingredients in a bowl with a whisk for making cinnamon honey butter.

Step 2: Mix well with a whisk or electric mixer until the mixture is light and creamy.

Whipped honey butter in a bowl.

Step 3: Transfer to a container or jar. Use immediately or store in the refrigerator. Bring to room temperature before serving!

Pro Tips

  • Make sure the butter is softened at room temperature. We don't want to use melted or cold butter for this cinnamon butter recipe.
  • This is best served at room temperature. Please don't microwave this, it will cause all the ingredients to separate!

How To Use?

A smear of honey butter on toast or homemade bagels instantly transforms them. Melt it over roasted vegetables or baked sweet potatoes for a subtly sweet flavor to savory dishes.

Overall, there are countless ways to serve and enjoy the honey butter recipe! I think these are some of the best:

  • Breakfast favorites: Slather it on warm apple pancakes, vegan carrot cake waffles, or easy classic French toast to add a sweet, spiced touch to your morning meal.
  • Baked goods: Spread it over my delicious no-knead cranberry walnut bread, old-fashioned homemade cornbread, mini no-knead focaccia, soft and fluffy milk dinner rolls, or easy vegan English muffins for an extra layer of flavor.
  • Top off sweet treats: It’s fantastic on apple bread, pumpkin and banana bread, cinnamon roll focaccia, or even a savory cheese scone.
cinnamon butter spread on toast on a small plate.

Recipe FAQs

How to store cinnamon butter?

The whipped butter stores really well. Keep it in the refrigerator, where it will stay fresh for up to 1 month.

Can you freeze honey butter?

If you want to keep it for an extended period, you can freeze the butter in an airtight container (or double-wrap in plastic) for up to 4 months.
When you’re ready to use it, thaw it gradually in the refrigerator or on the countertop—avoid microwaving it, as this can cause the ingredients to separate.

More Easy And Delicious Condiments

  • marinated cherry tomatoes in glass jar with a wooden spoon.
    Easy Marinated Tomatoes
  • How To Make Garlic Confit
    How To Make Garlic Confit
  • vegan mayonnaise in a glass jar with a spoon and ingredients in the background.
    Homemade Vegan Mayonnaise
  • Italian Salad Dressing Recipe
    Italian Salad Dressing Recipe

Half the joy of cooking is sharing it with others. That’s why I’m always eager to hear from you. So go right ahead & drop a comment or reach out on Instagram, Pinterest, YouTube, or Facebook. I hope you love this cinnamon honey butter recipe as much as we do!

📖 Recipe

Tried this recipe?Let us know how it was!
Cinnamon Honey Butter Recipe

Cinnamon Honey Butter Recipe

Natasha Minocha
Sweet and creamy cinnamon honey butter turns muffins, rolls, buns, and ordinary breads into a treat you can’t resist. It’s a 5-ingredient, 3-step recipe that comes together in 5 minutes and tastes even better than what you find at your favorite restaurant.
5 from 1 vote
Print Recipe Pin Recipe
Prep Time 5 minutes mins
Total Time 5 minutes mins
Course Breakfast, Condiment, Dessert
Cuisine American
Servings 10 Servings
Calories 96 kcal

Ingredients


  • 1/2 cup Salted butter, softened
  • 2 tbsp Honey
  • 1 tsp Cinnamon powder
  • 1/2 tsp Vanilla extract
  • 1/4 tsp Sea salt

Instructions
 

  • In a medium bowl, mix all the ingredients until well combined, light and creamy.
  • Transfer to a jar or container. Serve immediately or store in the refrigerator until ready to serve.
    Bring to room temperature before serving. Enjoy!

Video

Notes

  1. Please use room-temperature softened butter for this recipe to get the best creamy consistency.
  2. This whipped butter should be served at room temperature. Please do not microwave it. That will result in a runny, soupy mess!

Nutrition

Serving: 1 ServingCalories: 96kcalCarbohydrates: 4gProtein: 0.1gFat: 9gSaturated Fat: 6gPolyunsaturated Fat: 0.3gMonounsaturated Fat: 2gTrans Fat: 0.4gCholesterol: 25mgSodium: 132mgPotassium: 6mgFiber: 0.1gSugar: 3gVitamin A: 288IUVitamin C: 0.03mgCalcium: 5mgIron: 0.04mg

Homemade Cornbread Recipe with Buttermilk

September 10, 2024

Homemade Cornbread Recipe

A simple one-bowl bake, this homemade cornbread recipe with buttermilk takes 30 minutes from start to finish. Irresistibly moist and buttery with a golden crispy crust, the quick cornbread is delicious with a drizzle of honey or a bowl of hearty roasted pumpkin soup.

A plate of homemade cornbread squares stacked on each other.

Soft and moist, this homemade cornbread recipe with buttermilk is fantastic. Made from scratch, a warm slice of freshly baked cornbread is pure comfort food.

It’s a simple, timeless recipe that belongs in every kitchen. Whether you like your quick cornbread sweet, savory, or somewhere in between, you can tweak the recipe to get the right flavor. Just keep those oven mitts handy (you’ll see why in a moment).

[feast_advanced_jump_to]

Why you’ll love this cornbread recipe?

It’s incredibly easy to make with just a handful (and mostly) of pantry ingredients.

It comes together in just minutes, making it perfect for a last-minute addition to your meal.

It is a fantastic side dish that pairs well with a wide range of meals, whether it's my easy Moroccan vegetable stew, spicy minced mutton curry, avocado egg salad, or creamy pea soup!

Golden, crispy edges and the soft, tender crumb inside create an irresistible texture.

Subtly sweet with a slight tang from buttermilk makes every bite full of flavor.

cornbread squares stacked on top of each other, with a piece of butter on top.

Recipe ingredients

Ingredients for making easy homemade cornbread recipe.

Flour: All-purpose flour is the backbone of cornbread and makes sure it’s neither too crumbly nor too cakey.

Cornmeal is the star of the show. It’s what gives the bread the signature gritty texture, sweet, nutty flavor, and beautiful color. Yellow cornmeal is the traditional choice. You can use coarse or fine. But if you have neither, polenta will work in a pinch. White cornmeal is another great substitute, but it will not give the bread the yellow hue.

Buttermilk makes the bread moist and subtly tangy, something you’ll love with the sweetness of the cornmeal. Buttermilk also makes the bread rich without being too heavy.

Baking powder makes your cornbread light and fluffy.

Baking soda makes the bread rise and helps it brown. Make sure both the soda and powder are active and fresh.

Salt enhances and balances the overall flavor. Without it, the cornbread might taste flat and dull.

Sugar adds a touch of sweetness. You can use whatever is at hand—raw, cane, brown, or regular white. You can even make a cornbread recipe with honey.

Eggs bind the cornbread batter, holding the ingredients together while also adding moisture and richness. Lightly beating them helps distribute them evenly.

Butter makes the bread rich and buttery. I used salted butter for that lovely savory flavor. Keep a tablespoon of butter aside for greasing your baking pan.

See the recipe card for full information on ingredients and quantities.

Variations

The basic cornbread recipe is already delicious, but if you want to switch it up, there are plenty of ways to do it. You can make it a little sweeter, add some spice, or mix in your favorite ingredients. Here are some ideas:

  • Add jalapeños to the cornbread recipe for a spicy kick.
  • Mix in cheddar cheese for extra flavor like in these cheddar cheese scones.
  • Use creamed corn for a softer, almost pudding-like texture.
  • Fresh corn kernels. Canned corn works too—just make sure to drain it well.

You can also try adding bacon bits, fresh herbs, nuts, or even dried cranberries. With so many options, cornbread never gets boring!

How to make cornbread from scratch?

Preheat the oven. Grease an 8" x 8" pan with 1 tablespoon butter. Place the pan in the oven while it's preheating.

Mix all ingredients for cornbread in a large glass bowl.

Step 1: Combine the all-purpose flour, cornmeal, baking powder, baking soda, salt, and sugar in a large bowl. Add beaten eggs and buttermilk.

Mix all the ingredients for making cornbread in a large glass bowl.

Step 2: Whisk the ingredients until just combined.

Whisk melted butter in the cornbread batter.

Step 3: Gently mix in the melted butter. 

ready batter for homemade cornbread in a large glass bowl on a kitchen towel.

Step 4: Ready cornbread batter.

Cornbread batter in a hot square metal baking pan.

Step 5: Carefully remove the hot baking pan from the oven using oven mitts and pour the batter into the pan.

Baked cornbread in a square metal baking pan on a trivet and kitchen towel.

Step 6: Bake for 25-30 minutes or until the top is golden and a toothpick inserted in the center comes out clean.

Final Step: Let the cornbread rest for 30-40 minutes before cutting into squares and serving!

Homemade Cornbread cut into squares in a metal baking pan.

Pro tips

  • Use room-temperature ingredients.
  • Don’t overmix the batter.
  • The best way to make cornbread is in a cast-iron skillet, but a metal, glass, or ceramic baking pan works well too. Just ensure it’s heated before you pour the bread batter, which is why you’ll need oven mitts.
  • How do you heat the baking pan? Grease it and slide it into the oven while it’s set to preheat.
  • Grease the pan with butter. LIBERALLY. So, the cornbread doesn’t stick. More deliciously, as it bakes, the butter melts and sizzles, making the bottom and sides crisp, golden, and buttery.

Best way to serve

My favorite way to have cornbread is warm with a pat of butter and a drizzle of honey. It makes a great simple breakfast with cinnamon honey butter, homemade fig jam, strawberry chia jam, or this 3-ingredient orange marmalade.

The homemade cornbread recipe is also an ideal companion for soups, stews, and chili. The bread’s slightly sweet flavor contrasts beautifully with the rich, savory taste of these dishes.

Cornbread slice on a plate, topped with honey and a piece of butter.

Recipe FAQs

What’s the difference between a cornbread recipe with polenta vs cornmeal?

Cornmeal and polenta both come from ground corn, but they’re not quite the same. Cornmeal is usually finer, giving cornbread a smoother texture. Polenta is coarser because it’s processed differently. I’ve made this homemade cornbread recipe with buttermilk many times using either very successfully!

What’s a Southern cornbread recipe?

Southern cornbread has no sugar in the batter. If you’re aiming for an authentic Southern-style cornbread, skip the sugar. I’ve added a tiny bit of sugar to balance the flavors, but if you prefer a sweeter cornbread, you can easily double or triple the amount.

Can you make buttermilk at home?

Store-bought buttermilk will work fabulously in this basic cornmeal recipe, but you can just as easily make it at home using just two simple ingredients.
Mix one and a half tablespoons of vinegar or lemon juice in a cup and a half of milk. Stir the mixture and let it sit for about 5–10 minutes. The milk will thicken slightly and may look a bit curdled—that’s your homemade buttermilk! Whisk before you add it to the batter.

How to store cornbread?

In an airtight container, it keeps well on the countertop for 2 to 3 days. In hot and humid weather, it's better to refrigerate it, and it’ll last for 4 to 5 days.

Can you freeze buttermilk cornbread?

Yes, you can freeze cornbread! Cool completely, and then wrap tightly in plastic wrap or foil and store for up to a month.

More quick bread recipes

  • Apple Butter Bread recipe
    Apple Butter Bread
  • Sweet potato bread on a platter.
    Sweet Potato Bread Recipe
  • Sliced peach bread on a white platter.
    Peach Bread Recipe
  • Easy Orange Cranberry Bread
    Easy Orange Cranberry Bread

Half the joy of cooking is sharing it with others. That’s why I’m always eager to hear from you. So go right ahead & drop a comment or reach out on Instagram, Pinterest, YouTube, or Facebook. I hope you love this homemade cornbread recipe as much as we do!

📖 Recipe

Tried this recipe?Let us know how it was!
Homemade Cornbread Recipe

Homemade Cornbread Recipe with Buttermilk

Natasha Minocha
A simple one-bowl bake, this homemade cornbread recipe with buttermilk takes 30 minutes from start to finish. Irresistibly moist and buttery with a golden crispy crust, the quick cornbread is delicious with a drizzle of honey or a hearty bowl of chili.
No ratings yet
Print Recipe Pin Recipe
Prep Time 5 minutes mins
Cook Time 30 minutes mins
Course Bread, Side Dish
Cuisine American
Servings 16 Squares
Calories 151 kcal

Ingredients


  • 1 cup All-purpose flour
  • 1 cup Yellow cornmeal / Polenta
  • 2 tsp Baking powder
  • 1/2 tsp Baking soda
  • 1/2 tsp Salt
  • 1 tbsp Sugar
  • 1.5 cup Buttermilk
  • 2 Eggs, lightly beaten
  • 1/2 cup Butter, melted
  • 1 tbsp Butter for greasing the baking pan

Instructions
 

  • Preheat the oven to 200 c or 400 F. Grease an 8" x 8" pan with 1 tablespoon butter. Place the pan in the oven while it's preheating.
  • Combine the all-purpose flour, cornmeal, baking powder, baking soda, salt, and sugar in a large bowl.
  • Whisk in the beaten eggs and buttermilk. Mix until just combined.
  • Gently mix in the melted butter. Don't overmix.
  • Carefully remove the hot baking pan from the oven and pour the batter into the pan.
  • Bake at 200 c / 400 f for 25-30 minutes or until the top is golden and a toothpick inserted in the center comes out clean.
  • Let the cornbread rest for 30-40 minutes before cutting into squares and serving. Enjoy!

Video

Notes

  1. Don't overmix the batter. Ingredients should be just moistened.
  2. Make sure you're using oven mitts while taking the hot baking pan out of the oven. The pan will be scorching hot!

Nutrition

Serving: 1 SquareCalories: 151kcalCarbohydrates: 15gProtein: 3gFat: 8gSaturated Fat: 5gPolyunsaturated Fat: 1gMonounsaturated Fat: 2gTrans Fat: 0.3gCholesterol: 40mgSodium: 244mgPotassium: 81mgFiber: 1gSugar: 2gVitamin A: 269IUCalcium: 62mgIron: 1mg

Apple Pancake Recipe

September 3, 2024

Apple Pancake Recipe

These soft and fluffy apple pancakes are packed with juicy apples and infused with cinnamon's warm, comforting flavor. Topped with sweet, soft sautéed apples, this easy apple pancake recipe makes the perfect cozy breakfast for a fall morning.

A stack of apple pancakes topped with sauteed apples and maple syrup on a plate.

Packed with grated apples and a hint of cinnamon, these apple pancakes are super simple to make. Whether you're cooking for a crowd or just treating yourself, these pancakes bring warm autumnal vibes to the table with every bite.

[feast_advanced_jump_to]

Why You'll Love This Recipe

Incredibly quick and easy to make for a crowd, the batter makes 16-ish pancakes.

Great for meal prep! It’s never too early to cook these make-ahead cinnamon apple pancakes.

Whether you prefer to serve these with maple syrup, a dollop of whipped cream, or a handful of chopped nuts, these pancakes pair well with everything.

Bonus: full of your favorite fall flavors—apples and cinnamon!

A bite of pancakes on a fork.

Recipe Ingredients

Apple Pancake Recipe INGREDIENTS.

Apples: Any variety of apples will work in this cinnamon apple pancake recipe. Sweet tart ones are my favorite for baking and cooking!

  1. Granny Smith
  2. Gala
  3. Golden Delicious
  4. Honey crisp

Flour: I used all-purpose flour. For gluten-free apple pancakes, replace it with your favorite gluten-free flour, like I did for my easy banana pancakes.

Buttermilk makes the pancakes tender, light, and lovely. Store-bought is fine, or you can make it at home like I did for my soft and moist strawberry lemon bundt cake.

Baking soda and powder are leavening agents that help the pancakes rise and have that fluffy, light texture we all love.

Eggs: Use room-temperature eggs, and your batter will mix more easily and smoothly. To make eggless pancakes, use flax eggs as I did in my eggless chocolate chip cookies! 

Coconut Oil: If you prefer, you can substitute coconut oil with melted butter or any neutral-tasting vegetable oil.

Sugar: sweetens the batter and helps the pancakes caramelize and brown, giving them a nice golden color. Raw, cane, brown, or any sugar you prefer will do the job in a jiffy. You can also use coconut sugar like I did for my peanut butter apple muffins.

See the recipe card for full information on ingredients and quantities.

How To Make Apple Cinnamon Pancakes?

dry ingredients for making apple pancakes in a glass bowl.

Step 1: Whisk the flour, baking powder, baking soda, salt, sugar, and cinnamon powder in a bowl.

mixing wet ingredients for apple pancakes in a glass measuring cup.

Step 2: Mix buttermilk, egg, coconut oil, and vanilla extract in another bowl.

grated apples in the apple pancake batter.

Step 3: Mix the wet ingredients over the dry ones until combined. We want the batter to be just moistened. Fold in the grated apples.

Apple pancake batter in a glass bowl.

Step 4: Don't overmix the batter. It will be a bit lumpy and that's okay!

cooking 3 pancakes in a white skillet.

Step 5: Grease a skillet with oil and heat it. Pour a small ladle full of batter on the skillet. Let the pancake cook for 3-4 minutes till the underside is golden and there are a few bubbles on top of the pancake.

cooked apple pancakes in a white skillet.

Step 6: Carefully flip it over. Cook on the other side till golden brown, about 1-2 minutes. Repeat till all the batter is used up.

a bunch of apple pancakes on a plate with ingredients in the background.

Step 7: Serve warm with sautéed apples and maple syrup!

Pancake Toppings

For some, the only acceptable topping for apple cinnamon pancakes is maple syrup. Then you have homes like mine, where we love to experiment with food. So, I chose to top them with sautéed apples along with the classic maple syrup. You can try:

  • Honey
  • Homemade apple butter
  • Fresh fruits
  • Powdered sugar
  • Chopped nuts for crunch
  • Apple sauce, vegan caramel sauce, or chocolate sauce
  • Wonderful with creamy cashew ricotta
  • Ice cream to give the recipe for apple pancakes a dessert-like twist

Pro Tips

  1. Make sure your baking powder is fresh for the best apple pancake recipe. Check the expiration date before you add it.
  2. I’ve said this before, and I’ll say it again. Don’t overmix the batter if you want to make light and fluffy apple cinnamon pancakes. Even if there are a few lumps, let them be. They will disappear when you cook the pancakes. Too much mixing makes for dense pancakes.
  3. Allow the batter to rest for about 10 minutes before cooking. This helps the flour hydrate fully and results in fluffier pancakes.
  4. Cook at 190 to 200 °C (375 to 400 °F).
  5. Flip the pancakes only once and only when the underside is golden, the edges look set, and you see a couple of bubbles on the top (2–3 minutes).
  6. Flip very gently, and do not press it down.
stack of apple pancakes topped with maple syrup and apples on a white plate.

How To Store

You can meal-prep with this apple cinnamon pancake recipe because the pancakes store super well. Cool them completely before storing them, or they’ll become soggy.

Refrigerate - Stack the cooled pancakes in an airtight container or a resealable plastic bag and store them for up to 3 days.

Freeze- Place the apple cinnamon pancakes in a single layer on a baking sheet and freeze until solid (about 1-2 hours). Once frozen, transfer to a ziplock bag or airtight container. Add a piece of parchment or wax paper between two pancakes so they don’t stick together.

Reheat- Reheat refrigerated apple pancakes in a microwave or skillet for 20 to 30 seconds. You’ll need to cook the frozen pancakes for longer.

FAQs

How do you grate apples for pancakes?

Wash your apples thoroughly, and then peel them. Use a box grater to grate the apples using the coarse side. It works great!

How can I make sautéed apples for apple pancakes?

Heat butter or coconut oil in a skillet. Add diced apples and sprinkle a pinch of cinnamon powder. Cook for 5-6 minutes until the apples are just softened. We absolutely love these on top of our gluten-free apple waffles!

Sautéed apples in a glass bowl for Apple Pancakes

Popular Fall Apple Recipes To Try

  • Cinnamon Swirl Apple Cake on a platter with candle and apples around.
    Cinnamon Swirl Apple Cake
  • Upside Down Apple Cake Recipe
    Upside Down Apple Cake Recipe
  • Baked Apple Donuts with Cinnamon Sugar
    Baked Apple Donuts with Cinnamon Sugar
  • Apple Pie Cinnamon Rolls
    Apple Pie Cinnamon Rolls

Half the joy of cooking is sharing it with others. That’s why I’m always eager to hear from you. So go right ahead & drop a comment or reach out on Instagram, Pinterest, YouTube, or Facebook. I hope you love these apple pancakes as much as we do!

📖 Recipe

Tried this recipe?Let us know how it was!
Apple Pancake Recipe

Apple Pancake Recipe

Natasha Minocha
Packed with grated apples and a hint of cinnamon, these apple pancakes are easy to make and the ultimate comfort breakfast for any morning!
No ratings yet
Print Recipe Pin Recipe
Prep Time 15 minutes mins
Cook Time 20 minutes mins
Course Breakfast
Cuisine American
Servings 16 Small Pancakes
Calories 99 kcal

Ingredients


  • 1.5 cup All-purpose flour
  • 1.5 tsp Baking powder
  • 1/2 tsp Baking soda
  • 1/4 tsp Salt
  • 1 tsp Cinnamon powder
  • 1 tbsp Sugar
  • 1.5 cup Buttermilk
  • 1 Egg
  • 3 tbsp Coconut oil
  • 1 tsp Vanilla extract
  • 2 Apples, peeled and grated

Topping

  • Sautéed apples
  • Maple syrup

Instructions
 

  • Whisk the flour, baking powder, baking soda, salt, sugar, and cinnamon powder in a bowl.
  • Mix buttermilk, egg, coconut oil, and vanilla extract in another bowl.
  • Pour the wet ingredients over the dry ones and mix until just combined.
  • Gently fold in the grated apples. don't overmix. The batter will be a bit lumpy and that's okay!
  • Grease a skillet with oil and heat it. Pour a small ladle full of batter on the skillet.
    Let the pancake cook for 3-4 minutes till the underside is golden and there are a few bubbles on top of the pancake.
  • Carefully flip it over. Cook on the other side till golden brown, about 1-2 minutes. Repeat till all the batter is used up.
  • Serve warm with sautéed apples and maple syrup. Enjoy!

Video

Notes

  1. You can make use store-bought buttermilk or make your own. Combine 1.5 cups of milk and 1.5 tablespoons of vinegar, mix, and let it sit for 5-10 minutes until it curdles. Stir the buttermilk before using.
  2. For the fluffiest pancakes, don't overmix the batter. Just mix until the ingredients are combined.
  3. Your skillet should not be too hot. The ideal cooking temperature for making pancakes is - 190 to 200 °C (375 to 400 °F).

Nutrition

Serving: 1 PancakeCalories: 99kcalCarbohydrates: 14gProtein: 2gFat: 4gSaturated Fat: 3gPolyunsaturated Fat: 0.2gMonounsaturated Fat: 0.5gTrans Fat: 0.001gCholesterol: 13mgSodium: 139mgPotassium: 73mgFiber: 1gSugar: 4gVitamin A: 65IUVitamin C: 1mgCalcium: 54mgIron: 1mg

Cheddar Cheese Scones Recipe

August 23, 2024

Cheddar Cheese Scones Recipe

Cheddar cheese scones are buttery perfection—they are golden, flaky, and packed with sharp cheddar in every bite, making them the perfect treat for any time of day. These scones are irresistibly cheesy, easy to make, and a sure-shot winner!

a plate of several cheddar cheese scones fresh out of the oven, with ingredients in the background.

Bake the best cheese scones recipe ever that will have your kitchen filled with the irresistible aroma of freshly baked goodness. These savory cheese scones are incredibly fluffy and packed with sharp cheddar flavor, thanks to the addition of rich buttermilk that makes them melt-in-your-mouth delicious.

Whether you're a seasoned baker or a newbie in the kitchen, this easy cheese scones recipe comes together effortlessly and is perfect for breakfast, brunch, or a comforting snack. If you're a fan of savory scones, you will love my easy miso scones too!

Cheddar Cheese Scones Recipe
[feast_advanced_jump_to]

Why you’ll love the cheese scones recipe?

  • Cheddar herb scones are a super easy, simple eggless recipe.
  • Comes together in one bowl effortlessly!
  • Create a perfect blank canvas for your favorite herbs and add-ins.
  • The best savory snack, breakfast, or side for salad or soup.

Recipe ingredients

Ingredients for Cheddar Cheese Scones Recipe

Buttermilk helps bind the dough. I made my own by mixing milk and vinegar. You can use store-bought. Buttermilk makes the best scones—tender and fluffy, with the perfect rise. Like my very popular chocolate chip scones! Want richer scones? Use cream, like I did for my banana bread scones.

The butter has to be chilled. That’s what gives the savory cheese scones flakiness and crisp edges. Cutting cold butter into the flour also forms tiny pockets of richness throughout the scone.

Cheese is the most important ingredient in this easy recipe (these are cheese scones)! I love aged sharp cheddar. It's best to grate it at home instead of buying pre-grated cheese. The packaged ones contain non-caking agents that can give a powdery taste.

Flour: All-purpose flour is best, as it gives the softest crumb. But you can use wholewheat flour too. I used a mix of whole wheat and oat flour in my cinnamon chocolate chip scone recipe.

Baking powder is the leavening agent that gives the scones their lift, making them light and airy.

Dried parsley adds a subtle herbaceous note that complements the cheddar, giving the scones a lot of flavor and freshness.

See the recipe card for full information on ingredients and quantities.

Variations

Herbs: I added parsley for extra flavor. You can skip it altogether to make plain cheddar scones, or you can use any of your favorite dried or fresh herbs to make them, like cheddar and chive scones.

Cheese: Cheddar was my choice. Any cheese you enjoy will work in this easy cheese scones recipe, whether Gruyère, Gouda, feta, or goat cheese. If you like feta cheese, you'll love these easy and delicious feta spinach muffins!

Add-ins: These eggless cheese scones are very customizable. Try:

  • Ham
  • Bacon bits
  • Jalapeño
  • Garlic powder
  • Smoky paprika
  • Mustard
  • Or any other spice or mix you’re craving.

How to make cheese scones?

Step 1: Make the buttermilk - mix milk and vinegar in a bowl. Keep aside for 5 minutes. Whisk well before adding to the dough. You can also use store-bought buttermilk.

Step 2: Combine the flour and baking powder in a large bowl. Whisk in the grated cheddar cheese and dried parsley.

Step 3: Rub in the chilled cubed butter, using your fingertips or a pastry cutter, until the mixture forms coarse crumbs.

Step 4: Pour over the buttermilk. Mix with a fork until the dry ingredients are just moistened.

Step 5: Combine the ingredients gently using your hands until they all come together and you can form a shaggy ball with the dough.

cubed butter and dry ingredients for cheddar cheese scones in a glass bowl
Butter and dry ingredients mixed together in a glass bowl for making cheese scones
shredded cheese mixed into the butter and dry ingredients in a glass bowl
Ready dough for making cheese scones on a silicon mat

Step 6: Gently pat the dough to make a rectangle about 6" x 10". Cut the dough in half and place one on top of the other. Press the dough slightly, and again cut in half. Place the halves on top of each other, press them slightly, and repeat this process twice more.

Step 7: Roll out the dough into an 8" x 12" rectangle. Cut the dough into 10 small rectangles.

Cheese scone dough formed into a rectangle on a silicon mat
cheddar cheese scone dough divided into 2 halves
Cheese scone dough halves stacked on top of each other placed on a silicon mat
Rolled out dough for cheese scones cut into 12 rectangles

Step 8: Place the scones onto a lined baking sheet/tray.

Step 9: Transfer the baking tray to the refrigerator while preheating the oven.

Step 10: When the oven is preheated, brush the tops of the cold scones with milk and top with some cheese.

Baking the Cheddar Cheese Scones

Step 11: Bake the scones for 20-22 minutes or until golden on top.

Final step: Serve and savor!

Cheddar Cheese Scones

Pro tips

What’s the secret to tender, moist, and the best cheese scones ever? Chilled and cold butter. Besides that, follow these easy cheese scone recipe tricks:

  1. Gently handle the dough. Don’t knead or overmix it because we don’t want gluten strands to form, making the scones hard.
  2. Refrigerate the scones before baking them. Chilling them helps create flaky layers.
  3. Bake at high temperatures for a short time so they are fluffy and rise beautifully.
Cheddar Cheese Scones

Recipe FAQs

How long do these cheddar cheese scones stay refrigerated?

Buttermilk cheddar cheese scones stay well in the refrigerator for 2 to 3 days. Reheat in the oven or toaster.

Can you freeze these cheddar scones?

Yes, you can freeze the baked and cooled (this is important) scones for up to a month. Unbaked scones can be frozen for 2 months.

Place the unbaked cheddar cheese cones on a baking tray and freeze. Once they are frozen, transfer them into a Ziplock bag. Thaw on the countertop while your oven preheats, and then bake.

Cheddar Cheese Scones Recipe

More scone recipes

  • Chocolate chip scones on a wooden tray.
    Chocolate Chip Buttermilk Scones
  • Apple Cranberry Scones | Easy Eggless Scones Recipe
    Apple Cranberry Scones
  • Cherry Almond Scones | Easy eggless cherry almond scones recipe
    Cherry Almond Scones
  • scones on a cake stand with a candle, tea and plant in the background.
    Mango Coconut Scones

Half the joy of cooking is sharing it with others. That’s why I’m always eager to hear from you. So go right ahead & drop a comment or reach out on Instagram, Pinterest, YouTube, or Facebook. I hope you love these cheese scones as much as we do!

📖 Recipe

Tried this recipe?Let us know how it was!
Cheddar Cheese Scones Recipe

Cheddar Cheese Scones Recipe

Natasha Minocha
Cheddar cheese scones are buttery perfection—they are golden, flaky, and packed with sharp cheddar in every bite, making them the perfect treat for any time of day!
No ratings yet
Print Recipe Pin Recipe
Prep Time 15 minutes mins
Cook Time 20 minutes mins
Chilling Time 20 minutes mins
Course Side Dish, Snack
Cuisine British
Servings 12 Scones
Calories 290 kcal

Ingredients


  • 1 cup Milk
  • 1 tbsp Vinegar
  • 3 cup All-purpose flour
  • 1.5 tbsp Baking powder
  • 7 oz Grated cheddar cheese
  • 1 tbsp Dried parsley
  • 2/3 cup Butter, cubed and chilled

Topping

  • 1 tbsp Milk, for brushing the scones
  • 1-2 tbsp Grated cheddar cheese for topping

Instructions
 

  • Make the buttermilk - mix milk and vinegar in a bowl. Keep aside for 5 minutes. Whisk before adding to the dough.
  • Combine the flour and baking powder in a large bowl.
  • Mix in the grated cheese and dried parsley.
  • Rub in the chilled cubed butter, using your fingertips or a pastry cutter, until the mixture forms coarse crumbs.
  • Pour over the buttermilk. Mix with a fork until the dry ingredients are just moistened.
  • Combine the ingredients gently using your hands until they all come together and you can form a ball with the dough. Please don't knead the dough.
  • Gently pat the dough to make a rectangle about 6" x 10". Cut the dough in half and place one on top of the other. Press the dough slightly, and again cut in half.
    Place the halves on top of each other, press them slightly, and repeat this process twice more.
    This process helps create flaky layers.
  • Roll out the dough into an 8" x 12" rectangle. Cut the dough into 12 small rectangles.
  • Place the scones onto a lined baking sheet/tray.
  • Transfer the baking tray to the refrigerator while preheating the oven to 200 C / 400 f.
  • When the oven is preheated, brush the tops of the cold scones with milk and top with some cheese.
  • Bake the scones at 200 C / 400 f for 20-22 minutes until the scones are golden brown.
  • Serve warm and enjoy!

Video

Notes

  1. Handle the dough gently. This dough does not need to be kneaded. Simply bring it together with your hands.
  2. The butter should always be cold. I like to cut in cubes then freeze until I'm ready to use.
  3. Refrigerate the unbaked scones for at least 20 minutes before baking. this helps create flaky layers.

Nutrition

Serving: 1SconeCalories: 290kcalCarbohydrates: 26gProtein: 8gFat: 17gSaturated Fat: 10gPolyunsaturated Fat: 1gMonounsaturated Fat: 4gTrans Fat: 0.4gCholesterol: 46mgSodium: 365mgPotassium: 85mgFiber: 1gSugar: 1gVitamin A: 519IUVitamin C: 0.2mgCalcium: 245mgIron: 2mg

Cinnamon Swirl Apple Cake

August 20, 2024

Cinnamon Swirl Apple Cake on a platter with candle and apples around.

Cinnamon swirl apple cake is the perfect blend of sweet and spice, with tender apple slices nestled in a moist, buttery cake. Each bite bursts with the warmth of cinnamon and the natural sweetness of apples, creating a dessert that's both homely and irresistibly delicious.

Cinnamon Swirl Apple Cake on a cake platter with apples and candle in the background.

This apple cinnamon cake is a take on my very popular cinnamon roll cake! Swirls of cake and spice, interlaced with icing, now studded with bits of fresh apples, are simply heavenly. This delicious buttery apple cake has now become one of my go-to fall baking recipes!

Whether you're looking for a cozy treat to enjoy with your morning tea or coffee or a delectable fall dessert for a gathering, this cake promises to be a crowd-pleaser that you’ll want to bake again and again.

[feast_advanced_jump_to]

Why You'll Love This Recipe

  • This easy cinnamon swirl cake is soft, fluffy, buttery, and full of juicy, cinnamon-flavored apples.
  • It's an incredibly easy cake to make- just a bowl, whisk, and spatula.
  • The cinnamon swirl topping makes the cinnamon and apple cake so deliciously crunchy!
  • The milky glaze complements the juicy apples, crunchy cinnamon, and the buttery cake beautifully.
A slice of apple cake on a cake server.

Recipe Ingredients

ingredients for making Cinnamon Swirl Apple Cake.

Flour: I used all-purpose flour for this recipe. Wholewheat flour works very well too.

Butter: We are using melted butter here for the cake batter and the cinnamon swirl filling. You can use coconut oil or any other vegetable oil, too.

Eggs: For giving the cake structure, richness, and flavor. You can use flax eggs if you want to make an eggless cinnamon apple cake.

Sugar: We are using 2 types of sugar here. Brown sugar for the cinnamon swirl and granulated sugar for the cake batter. You can use brown sugar for the cake batter too, this will make the cake a bit darker.

Apples: Use any kind of apples that are easily available to you. I always prefer to use in-season, local varieties.

Cinnamon powder: I highly recommend a good-quality Ceylon cinnamon powder for baking! It has a delicate floral flavor that really enhances the taste of any dish it is added to.

Vanilla extract: For well-rounded, enhanced flavor! Use store-bought or homemade vanilla extract.

Please see the recipe card for full information about the ingredients and quantities.

How To Make Cinnamon Apple Cake ( Step-by-Step)

Get ready to fill your home with the irresistible scent of apple cake from scratch, fresh out of the oven!

Step 1: Preheat the oven. Grease an 8" cake tin and line the bottom with parchment paper.

Step 2: Make the cinnamon swirl - Combine the melted butter, brown sugar, and cinnamon powder in a small bowl.

Making cinnamon swirl for the cinnamon cake.

Step 3: Make cinnamon apples - Combine chopped apples with cinnamon powder and sugar. Keep aside.

cinnamon mixed with apples for apple cake.

Step 4: Cake batter- Whisk flour, baking powder, and sugar in a large bowl.

Step 5: Whisk in milk, eggs, and vanilla extract.

Step 6: Gently mix in melted butter.

Step 7: Fold in the cinnamon apples and transfer the apple cake batter to the prepared cake tin.

Steps to make Cinnamon Swirl Apple Cake.

Step 8: Place small spoonfuls of cinnamon butter mixture on the cake batter and create swirls using a skewer or a knife.

Cinnamon sugar mixture on the cake batter in a cake pan.

Step 9: Bake for 45-55 minutes or until a skewer inserted in the center comes out clean.

Step 10: While the cake is baking, make the milk glaze - mix the icing sugar and milk in a small bowl until smooth and thick. We want a thick pouring consistency for this cinnamon apple cake.

baked cinnamon cake on a wire rack.

Step 11: Turn out the apple cake on a serving platter and pour the glaze on the warm cake.

Step 12: Let the cake cool completely before slicing it.

Cake on a platter with glaze on top.

Pro Tips

  • Keep all the ingredients measured and handy. This will help bring together the apple cake quickly.
  • Any kind of apples will work here. Gala, Golden, Red Delicious, Granny Smith...all are good choices.
  • Make sure your melted butter is not hot. Melt it and let it cool for a few minutes before adding to the batter.
  • The eggs should be at room temperature and lightly beaten.
  • As you swirl the cinnamon butter mixture, make sure to push your skewer deep into the batter. This allows the moist apple cinnamon cake to rise while the filling settles in, creating cozy pockets that hold all the delicious gooeyness.
  • You can easily swap eggs for flax eggs to make this an eggless apple cake.
  • Let the cinnamon apple cake cool completely after you have poured the milky glaze on top. This will help the glaze set, and the cake will not be crumbly when you slice it.
  • You can make this apple coffee cake in an 8" x 8" square pan, like this cinnamon streusel coffee cake and apple fritter cake. Or in a loaf pan to make an apple loaf cake.

How To Store The Apple Cinnamon Cake

Store the cake in an air-tight container for 1-2 days at room temperature or in the refrigerator for up to 5 days.

You can also freeze the unglazed cake for up to 1 month. Make sure it's wrapped well. Thaw in the refrigerator, glaze the cake, and serve.

How To Serve

This apple swirl cake is so wonderful as-is. But you could-

  • Enjoy warm with a scoop of vanilla ice cream.
  • Serve with a cup of masala chai or coffee
  • Drizzle extra glaze, or for a richer dessert, top with a cream cheese glaze as in this cream cheese pound cake recipe.
Cinnamon Swirl Apple Cake

More Apple Recipes

  • Apple Butter Bread recipe
    Apple Butter Bread
  • Apple Marzipan Galette | Easy gluten-free apple galette with homemade marzipan
    Apple Marzipan Galette
  • Apple Crumble Cheesecake on a cake stand.
    Apple Crumble Cheesecake
  • Apple Pancake Recipe
    Apple Pancake Recipe

Half the joy of cooking is sharing it with others. That’s why I’m always eager to hear from you. So go right ahead & drop a comment or reach out on Instagram, Pinterest, YouTube, or Facebook. I hope you love this cinnamon swirl apple cake as much as we do!

📖 Recipe

Tried this recipe?Let us know how it was!
Cinnamon Swirl Apple Cake on a platter with candle and apples around.

Cinnamon Swirl Apple Cake

Natasha Minocha
This Cinnamon Swirl Apple Cake is the perfect blend of sweet and spice, with tender apple slices nestled in a moist, buttery cake. Each bite bursts with the warmth of cinnamon and the natural sweetness of apples, creating a dessert that's both homely and irresistibly delicious.
No ratings yet
Print Recipe Pin Recipe
Prep Time 20 minutes mins
Cook Time 55 minutes mins
Course Cakes, Dessert
Cuisine American
Servings 8 Servings
Calories 441 kcal

Ingredients


Cinnamon Swirl

  • 1/4 cup Melted Butter
  • 1/3 cup Brown sugar
  • 2 tsp Cinnamon powder

Apple Cake

  • 2 Apples peeled and chopped
  • 2 tbsp Sugar
  • 1 tsp Cinnamon powder
  • 2 cup All-purpose flour
  • 2 tsp Baking powder
  • 1/2 cup Sugar
  • 3/4 cup Milk
  • 2 Eggs, beaten
  • 1 tsp Vanilla extract
  • 1/2 cup Melted butter

Glaze

  • 1/3 cup Icing sugar
  • 1.5 tbsp Milk

Instructions
 

  • Preheat the oven to 180 C ( 350 f). Grease an 8" cake tin and line the bottom with parchment paper.

Cinnamon Swirl

  • Combine the melted butter, brown sugar, and cinnamon powder in a small bowl. Set aside.

Apple Cake

  • Combine chopped apples, sugar ( 2 tbsp), and cinnamon powder in a bowl. Keep aside.
  • Whisk the flour, baking powder, and sugar in a large bowl.
  • Add milk, beaten eggs, and vanilla extract.
    Gently stir in the melted butter.
  • Fold in the apples and transfer the batter into your prepared cake tin.
  • Put small spoonfuls of the topping on the cake batter and using a skewer or a knife, create swirls.
  • Bake the cake at 180 C for 45-55 minutes or until a skewer inserted in the center comes out clean.
  • Let the cake cool in the pan for 10 minutes and then carefully transfer to a serving platter.
  • Drizzle the glaze over the warm cake. Let the cake cool completely, then slice and serve. Enjoy!

Glaze

  • Combine the icing sugar and milk in a small bowl. Whisk until smooth and thick.

Video

Notes

  • Keep all the ingredients measured and handy. This will help bring together the apple cake quickly.
  • Any kind of apples will work here. Gala, Golden, Red Delicious, Granny Smith...all are good choices.
  • Make sure your melted butter is not hot. Melt it and let it cool for a few minutes before adding to the batter.
  • The eggs should be at room temperature and lightly beaten.
  • As you swirl the cinnamon butter mixture, make sure to push your skewer deep into the batter. This allows the moist apple cinnamon cake to rise while the filling settles in, creating cozy pockets that hold all the delicious gooeyness.
  • You can easily swap eggs for flax eggs to make this an eggless apple cake.
  • Let the cinnamon apple cake cool completely after you have poured the milky glaze on top. This will help the glaze set, and the cake will not be crumbly when you slice it.
  • You can make this apple coffee cake in an 8" x 8" square pan, like this cinnamon streusel coffee cake. Or in a loaf pan to make an apple loaf cake.

Nutrition

Serving: 1 SliceCalories: 441kcalCarbohydrates: 63gProtein: 6gFat: 20gSaturated Fat: 12gPolyunsaturated Fat: 1gMonounsaturated Fat: 5gTrans Fat: 1gCholesterol: 89mgSodium: 276mgPotassium: 155mgFiber: 2gSugar: 36gVitamin A: 652IUVitamin C: 2mgCalcium: 123mgIron: 2mg

Gluten-free Banana Pancakes

August 16, 2024

Gluten-free Banana Pancakes

These gluten-free banana pancakes are fluffy with just the right amount of sweetness. Made with ripe bananas and simple ingredients, they’re a perfect blend of comfort and nutrition and a breeze to whip up!

Gluten-free Banana Pancakes

When you’re craving something sweet and satisfying but still want to keep it healthy, make these fluffy banana gluten-free pancakes. The yogurt and bananas work together to make these babies soft and moist.

Whether you're whipping up a quick breakfast or a lazy weekend brunch, these healthy banana pancakes are easy to make, full of flavor, and sure to please everyone at the table.

Gluten-free Banana Pancakes
[feast_advanced_jump_to]

Why you’ll love these banana pancakes?

  • Absolutely delicious, soft, fluffy, and thick pancakes
  • Bursting with yummy banana and cinnamon flavors
  • The recipe is so simple and comes together super-fast
  • You only need 2 bowls, 1 whisk, and a skillet
  • Make the recipe ahead, and you can freeze the pancakes for meal prep.
Gluten-free Banana Pancakes

Recipe ingredients

Flour: I used gluten-free flour to make these vegan banana pancakes. My favorite for baking is buckwheat flour, but you can replace it with all-purpose or whole-wheat flour just as easily.

Baking powder and baking soda: The leavening agents are essential in this recipe because they make the gluten-free pancakes fluffy.

Salt balances all the flavors.

Cinnamon powder boasts a variety of flavors.

Sugar: Regular, raw, brown, cane, or brown sugar; use what you have. Jaggery powder works so well in this recipe. I've used it very often here.

Bananas: use the ripest bananas you have. The riper they are, the tastier your pancakes.

Oil: I prefer coconut oil, but any vegetable oil will work.

A tip: If all you have is fresh bananas, put them in the oven for 5 minutes at 180° until they become nice and soft.

Yogurt adds a creaminess to the banana pancake gluten-free recipe and keeps them moist and soft. Don’t have plain Greek yogurt? Switch to regular.

Vanilla extract adds depth to the flavor. Use the best quality you can get your hands on.

Gluten-free Banana Pancakes INGREDIENTS

How to make gluten-free banana pancakes?

Step 1: In a bowl, whisk flour, baking powder, baking soda, salt, and cinnamon powder.

Step 2: In another bowl, mash the ripe bananas.

Step 3: Add coconut oil, yogurt, vanilla extract, and sugar to the mashed bananas and whisk well.

Step 4: Add the dry ingredients to the wet and combine till you have a thick, slightly lumpy batter.

Steps for making Gluten-free Banana Pancakes

Step 5: Let the batter rest for 10–15 minutes.

Step 6: In the meantime, grease your skillet and let it heat.

Step 7: Pour the banana gluten-free pancake batter into the skillet.

Step 8: Cook for a few minutes until bubbles appear on top and the underside is golden.

Gluten-free Banana Pancakes

Step 9: Flip the banana pancake gently and cook for another minute or two.

Gluten-free Banana Pancakes

Step 10: Repeat for the rest of the batter.

Final step: Serve warm and savor!

How to make pancakes fluffy?

There are 5 tricks to making the fluffiest banana gluten-free pancakes:

  1. Make sure your baking powder is fresh. Check the expiration date before you add it.
  2. Don’t skip the baking soda. It helps the pancakes rise.
  3. Don't overmix the batter.
  4. Let the batter rest before cooking. This allows the baking powder to activate.
  5. When cooking, flip the pancake with a light hand. Don't press the pancakes down with the spatula.
Gluten-free Banana Pancakes

Recipe variations

The banana bread pancake recipe is very versatile. You can add a ton of delicious treats to the batter.

  • Walnuts
  • Dates
  • Peanut butter
  • Chocolate chips
  • Nutella

Gluten-free Banana Pancakes

Storing & Serving

These gluten-free, healthy pancakes keep well in the refrigerator in an airtight container for up to 3 days. You can even freeze the banana pancakes for a month.

  1. Cool completely before freezing to avoid condensation, which can lead to sogginess.
  2. Place parchment paper or wax paper between each pancake to prevent sticking.
  3. Double-wrap in foil and then plastic.
  4. Thaw in the refrigerator for a few hours and reheat in a skillet or microwave. Serve warm with sliced bananas, a drizzle of maple syrup, and a cup of tea or coffee.
Gluten-free Banana Pancakes

More pancake recipes

Mango Pancakes

Cinnamon Pancakes

Chocolate-stuffed pancakes

Half the joy of cooking is sharing it with others. That’s why I’m always eager to hear from you. So please drop a comment or reach out on Instagram, Pinterest, YouTube, or Facebook. I hope you love these gluten-free banana pancakes as much as we do!

📖 Recipe

Tried this recipe?Let us know how it was!
Gluten-free Banana Pancakes

Gluten-free Banana Pancakes

Natasha Minocha
Fluffy and soft gluten-free banana pancakes for your eating pleasure! With a wonderful banana and cinnamon flavor, these buckwheat pancakes are perfect for a healthy delicious breakfast or snack!
No ratings yet
Print Recipe Pin Recipe
Prep Time 10 minutes mins
Cook Time 15 minutes mins
Resting Time 15 minutes mins
Course Breakfast
Cuisine American
Servings 6 Pancakes
Calories 235 kcal

Ingredients


  • 1 1/4 cup Buckwheat flour
  • 1.5 tsp Baking powder
  • 1/2 tsp Baking soda
  • 1/4 tsp Salt
  • 1.5 tsp Cinnamon powder
  • 2 Bananas, ripe
  • 3 tbsp Coconut oil You can use any vegetable oil you prefer
  • 1/4 cup Sugar
  • 1 cup Greek yogurt
  • 1 tsp Vanilla extract

Instructions
 

  • Whisk the flour, baking powder, baking soda, salt, and cinnamon powder in a bowl.
  • In a large bowl, mash the bananas very well. Add coconut oil, sugar, yogurt, and vanilla extract. Whisk well.
  • Combine the wet and dry ingredients and mix well.
    Don't overmix. This will be a thick, slightly lumpy batter. Let the batter rest for 10 -15 minutes.
  • Grease a skillet with oil or butter and heat it. Pour a small ladle full of batter on the skillat.
    Let the pancake cook for 2-3 minutes till the underside is golden and a few holes form on top of the pancake.
    Carefully flip it over. Cook on the other side till golden brown, about 1-2 minutes. Repeat till all the batter is used up.
  • Serve warm with sliced bananas and maple syrup. Enjoy!

Nutrition

Serving: 1PancakeCalories: 235kcalCarbohydrates: 37gProtein: 7gFat: 8gSaturated Fat: 6gPolyunsaturated Fat: 0.4gMonounsaturated Fat: 1gTrans Fat: 0.002gCholesterol: 2mgSodium: 310mgPotassium: 338mgFiber: 4gSugar: 15gVitamin A: 28IUVitamin C: 3mgCalcium: 114mgIron: 1mg

Apple Butter Bread

August 13, 2024

Apple Butter Bread recipe

Apple butter bread is a delightful treat that combines the rich, warm flavors of spiced apples with a soft, moist crumb. This eggless apple butter bread recipe needs simple ingredients and is easy to follow.

Apple Butter Bread recipe

Apple butter bread is a delightful treat that combines the rich, warm flavors of spiced apples with a soft, moist crumb. The apple butter infuses the bread with a tender, melt-in-your-mouth texture that makes it comforting and satisfying.

Apple Butter Bread recipe
[feast_advanced_jump_to]

Why You’ll Love Apple Bread?

Easy to make fall dessert.

No bread machine or yeast is needed to make this quick apple butter bread recipe.

The healthy apple butter bread is great for breakfast or a mid-evening snack.

The smell of freshly baked apple butter bread wafting through the house is incredibly comforting.

Recipe Ingredients

Ingredients for making Apple Butter Bread.

Flour: The foundation of a good apple butter quick bread is all-purpose flour, but I’ve baked breads with whole wheat flour too, so I know that will be equally good. 

Cinnamon and nutmeg: are warm spices that complement the apple butter beautifully, adding a cozy, aromatic flavor.

Sugar: helps sweeten the bread. I used granulated white sugar. You can use brown sugar, cane, or even coconut sugar.

Oil: keeps the bread moist and tender. I used vegetable oil, but sunflower, coconut, or canola oil work too.

Yogurt: adds moisture and a slight tanginess to the bread. If you don’t have Greek yogurt, use homemade that’s been drained well so it’s thick.

Apple butter: is the star of the recipe. Baking with homemade apple butter is best, but store-bought will do in a pinch.

Optional add-ins: finely chopped walnuts add a delightful crunch and a nutty flavor that pairs perfectly with the apple butter and spices. You can leave them out or use pecans, raisins, or chopped apples.

Cinnamon sugar: cinnamon sugar topping is completely optional. But it does add an irresistible crunch to the crust. You can make it by simply combining sugar and cinnamon powder in a small bowl.

How To Make

Step 1: Preheat your oven to 180 C / 350 F. Grease a loaf pan well.

Step 2: Whisk the flour, baking powder, baking soda, salt, cinnamon powder, and nutmeg powder in a large bowl.

Step 3: Add the sugar and mix well.

Step 4: Whisk the oil, yogurt, and apple butter in a separate bowl.

Step 5: Pour over the dry ingredients and mix well until no white streaks of flour are visible. The batter will be thick.

Step 6: Fold in the chopped walnuts and transfer the batter to the prepared loaf pan. 

Step 7: Combine cinnamon powder and sugar in a small bowl and sprinkle on top of the cake batter.

Steps for making Apple Butter Bread recipe.

Step 8: Bake for 40-45 minutes, or until a skewer inserted in the center comes out clean.

Step 9: Let the cake cool in the tin for 10-15 minutes, before turning it out on a cooling rack to cool completely.

Step 10: Slice the completely cooled bread.

Final step: Savor and serve!

Baked Apple Butter Bread in a loaf pan on a red cloth napkin.

How To Store

Store the apple butter loaf cake in an airtight container, and it will stay fresh at room temperature for 2–3 days. If your kitchen is very warm, keep the wrapped loaf in the fridge, and it will last for 5–6 days.

Apple butter bread recipes are freezer-friendly. Double-wrap the loaf in plastic wrap and then in aluminum foil or a Ziplock bag, and it will stay good for up to 2 months. When you're ready to eat it, thaw the bread in the refrigerator overnight or at room temperature for a few hours.

Apple Butter Bread recipe

How To Serve?

This is the important bit: let the easy apple butter bread cool completely before you slice it. I’d suggest making it ahead and letting it rest overnight. The longer the bread sits, the more flavorful it gets.

  1. Plain and fresh: Slice the bread and enjoy it as is for breakfast or an afternoon snack.
  2. Toasted with butter: Lightly toast a slice and smear more regular butter on top.
  3. With a spread: Try it with a dollop of vegan cashew ricotta, homemade cream cheese, stovetop apple butter, or cinnamon honey butter.
Apple Butter Bread recipe

More Fall Apple Recipes

  • Easy Plum and Apple Cobbler | Easy vegan plum cobbler recipe
    Easy Plum And Apple Cobbler
  • Easiest Vegan Apple Crisp Recipe
    Easiest Vegan Apple Crisp Recipe
  • Upside Down Apple Cake Recipe
    Upside Down Apple Cake Recipe
  • Apple Cinnamon Waffles With Buckwheat
    Apple Cinnamon Buckwheat Waffles

Half the joy of cooking is sharing it with others. That’s why I’m always eager to hear from you. So go right ahead & drop a comment or reach out on Instagram, Pinterest, YouTube, or Facebook. I hope you love this apple butter bread as much as we do!

📖 Recipe

Tried this recipe?Let us know how it was!
Apple Butter Bread recipe

Apple Butter Bread

Natasha Minocha
A quick bread made with apple butter is a delicious and moist fall dessert full of sweet apple and cinnamon flavors. This apple butter bread recipe is eggless and easy to follow.
No ratings yet
Print Recipe Pin Recipe
Prep Time 20 minutes mins
Cook Time 50 minutes mins
Course Bread, Cakes
Cuisine American
Servings 8 Servings
Calories 315 kcal

Ingredients


  • 1.5 cup All-purpose flour
  • 1 1/4 tsp Baking powder
  • 1/2 tsp Baking soda
  • 1/4 tsp Salt
  • 1 tsp Cinnamon
  • 1/4 tsp Nutmeg powder
  • 1/2 cup Sugar
  • 1/3 cup Oil
  • 1 cup Greek yogurt
  • 3/4 cup Apple butter
  • 1/3 cup Walnuts, finely chopped

Cinnamon Sugar

  • 1/2 tsp Cinnamon powder
  • 2 tbsp Sugar

Instructions
 

  • Preheat your oven to 180 C. Grease an 8"*4" loaf pan well.
  • Whisk the flour, baking powder, baking soda, salt, cinnamon powder, and nutmeg powder in a large bowl.
  • Add the sugar and mix well.
  • Whisk the oil, yogurt, and apple butter in a separate bowl.
  • Pour over the dry ingredients and mix well until no white streaks of flour are visible. The batter will be thick.
    Add 1-2 tbsp of warm milk if the batter feels too dry.
  • Fold in the chopped walnuts and transfer the batter to your prepared loaf pan. 
  • Cinnamon sugar: Combine cinnamon powder ( 1/2 tsp) and sugar ( 2 tbsp) in a small bowl and sprinkle on top of the cake batter.
  • Bake at 180 C for 40-45 minutes, or until a skewer inserted in the center comes out clean.
  • Let the cake cool in the tin for 10-15 minutes, before turning it out on a cooling rack to cool completely.
  • Slice the completely cooled bread and serve. Enjoy!
  • The longer this bread is allowed to rest, the more delicious and flavorful it is. If possible, let it rest overnight before slicing.

Video

Nutrition

Serving: 1 ServingCalories: 315kcalCarbohydrates: 44gProtein: 6gFat: 13gSaturated Fat: 1gPolyunsaturated Fat: 5gMonounsaturated Fat: 6gTrans Fat: 0.04gCholesterol: 1mgSodium: 221mgPotassium: 109mgFiber: 2gSugar: 23gVitamin A: 9IUVitamin C: 0.2mgCalcium: 80mgIron: 1mg

Stovetop Apple Butter

August 9, 2024

Stovetop Apple Butter Recipe

Apple butter is a delicious way to enjoy the taste of fall year-round. This small-batch apple butter recipe transforms fresh apples into a rich, spreadable delight that's perfect on toast, pancakes, or straight from the jar!

Stovetop apple butter in a glass jar with a spoon on a plate with apple and apple butter in the background.

Stovetop apple butter is not cloyingly sweet. It has a beautiful, caramelly, velvety texture and a whiff of cinnamon in every bite. Made the old-fashioned way, without a slow cooker, the fruit butter is easy to make and like autumn in a spoon.

Try it on my no-knead cranberry walnut bread, jalapeno cheddar bread, or sourdough banana bread, it's such a fabulous combination!

[feast_advanced_jump_to]
stovetop apple butter in a glass jar with spoon on a small plate.

Apple Butter Vs. Apple Sauce

Apple butter and applesauce may start with the same main ingredient but differ in texture and flavor because of the cooking time.

Apple butter is cooked much longer, resulting in a thick, smooth, richly spiced spread with a deep caramelized apple flavor. Applesauce is typically lighter, chunkier, and less sweet, often used as a simple side dish or snack.

Recipe Ingredients

Ingredients for making Stovetop Apple Butter.

Apples: Use any variety you like. Red Delicious, Granny Smith, Golden Delicious, Fuji, any kind will work in this recipe.

Sugar: Both white granulated sugar and brown sugar are used for making apple butter.

Cinnamon powder: For making the apple butter super flavorful.

Lemon juice: For balancing flavors.

See the recipe card for full information on ingredients and quantities.

How To Make Stovetop Apple Butter?

Step 1: Core and dice the apples. There is no need to peel them! So easy!

Step 2: Transfer the apples to a large saucepan. Add water, granulated sugar, and lemon juice.

Step 3: Bring the mixture to a boil on medium-high heat, then reduce to medium-low heat. Cover and cook the apples until soft and mushy.

Step 4: Cool the softened apples for a few minutes. Then transfer to a blender. Blend until very smooth.

steps for making Stovetop Apple Butter.

Step 5: Put the apple puree back into your saucepan. Add the cinnamon powder, brown sugar, and salt.

Step 6: Continue cooking on low heat, stirring frequently, until the mixture is deep caramel and thick.

Steps for making Stovetop Apple Butter.

Step 7: Let it cool and then transfer it to a jar or an air-tight container. Keep refrigerated for up to 2 weeks.

Final Step: Serve and savor!

How To Use

This easy stovetop apple butter is incredibly versatile and can be used in many delicious ways. Here are some ideas :

  1. Enjoy it on warm toast, fresh homemade cornbread, easy homemade bagels, or vegan English muffins.
  2. Mix it into plain or vanilla yogurt for a tasty treat.
  3. Use it as a topping for fluffy cinnamon pancakes, sourdough waffles, cheesy scones, or classic French toast.
  4. Use it as a filling for pastries, easy crêpes, or turnovers.
  5. Stir a spoonful into your morning oatmeal for extra flavor.
  6. Use it as a glaze for pork, chicken, or turkey.
  7. Swirl it into baked goods like these peanut butter apple muffins or cake batter.
  8. Add it to BBQ sauce or salad dressings for a sweet twist.
  9. Drizzle it over vanilla ice cream for a unique dessert topping.
  10. Make an amazing grilled cheese sandwich with it.
Stovetop Apple Butter

FAQs

What are the best apples to use for apple butter?

Use whatever variety of apples is in season, locally and easily available. Both sweet and tart apples, like Fuji, Honeycrisp, Granny Smith, Red Delicious, and Gala, work wonderfully in the recipe.

Do you need to peel the apples?

No, peeling the apples is unnecessary because they contain natural pectin, which helps thicken the butter. Skipping this step is a great time saver too!

How do I make spiced apple butter?

Cinnamon is my go-to choice for any sweet treat with apples like these apple cinnamon rolls. You can also add:
- Ground cloves for a deep, aromatic spiciness
- Nutmeg for a slightly nutty, earthy flavor
- Ginger for a sharp kick of heat and zest
Feel free to mix and match these spices to suit your taste preferences! Or leave them out, and you’ll still have a rich and flavorful spread!

a spoonful of apple butter on a spoon to show its buttery texture.

How To Store

I make small batches of apple butter for my family. It stays well in the refrigerator for up to 2 weeks. You can also freeze the homemade butter for 2 months.

If you wish to store the butter for longer or are making a large batch, here is a good blog on canning homemade apple butter.

More Apple Recipes For Fall

  • Baked Apple Donuts with Cinnamon Sugar
    Baked Apple Donuts with Cinnamon Sugar
  • Upside Down Apple Cake Recipe
    Upside Down Apple Cake Recipe
  • Baked apple puff pastry tart
    The Best Apple Puff Pastry Tart
  • Apple Crumble Cheesecake on a cake stand.
    Apple Crumble Cheesecake

Half the joy of cooking is sharing it with others. That’s why I’m always eager to hear from you. So go right ahead & drop a comment or reach out on Instagram, Pinterest, YouTube, or Facebook. I hope you love this apple butter as much as we do!

📖 Recipe

Tried this recipe?Let us know how it was!
Stovetop Apple Butter Recipe

Stovetop Apple Butter

Natasha Minocha
Apple butter is a delicious way to enjoy the taste of fall year-round. This small-batch apple butter recipe transforms fresh apples into a rich, spreadable delight that's perfect on toast, pancakes, or straight from the jar!
4 from 1 vote
Print Recipe Pin Recipe
Prep Time 15 minutes mins
Cook Time 1 hour hr 30 minutes mins
Course Condiment
Cuisine American
Servings 2.5 Cups
Calories 327 kcal

Ingredients


  • 2.2 lbs Apples
  • 1/4 cup Granulated sugar
  • 2 tbsp Lemon juice
  • 1/2 cup Water
  • 1 tsp Cinnamon powder
  • 2 tbsp Brown sugar
  • 1/4 tsp Sea salt

Instructions
 

  • Core and dice the apples. No need to peel them.
  • Transfer the apples to a large saucepan.
  • Add water, granulated sugar, and lemon juice.
  • Bring to a boil on medium-high heat, then reduce to medium-low heat. Cover and cook the apples until soft and mushy. This took me about 45 minutes.
    You will need to stir them occasionally.
  • Cool the softened apples for a few minutes, then transfer to a blender. Blend until very smooth.
  • Now transfer the apple puree back to your saucepan, and add the cinnamon powder, brown sugar, and salt.
  • Continue cooking on low heat, stirring frequently until the mixture is deep caramel and very thick. This took me about 30 minutes.
  • Cool and transfer to a jar or an air-tight container. Keep refrigerated for upto 2 weeks.
    Enjoy!

Video

Nutrition

Serving: 1 CupCalories: 327kcalCarbohydrates: 86gProtein: 1gFat: 1gSaturated Fat: 0.1gPolyunsaturated Fat: 0.2gMonounsaturated Fat: 0.03gSodium: 242mgPotassium: 456mgFiber: 10gSugar: 71gVitamin A: 219IUVitamin C: 23mgCalcium: 42mgIron: 1mg

Chocolate Chip Muffins Recipe

August 6, 2024

Chocolate Chip Muffins on a round wire rack.

These fresh-from-the-oven chocolate chip muffins are irresistible, packed with chocolate chips and a soft, moist interior. You won’t need another eggless chocolate chip muffin recipe - with a hint of vanilla and a high golden muffin top, these are simply the best!

Chocolate chip muffins stacked on a round wire rack.

It’s easy to see why the simple chocolate chip muffin recipe is so popular. These bakery-style treats are not only big but also in flavor and texture. These are jumbo chocolate chip muffins that you can whip up in no time with simple pantry ingredients. I might have gone overboard with the chocolate, but that’s how we love them in my home!

Love chocolate chip bakes like I do, then you must try this eggless chocolate chip cake, chocolate chip buttermilk scones, chocolate chip bread pudding, and easy chocolate chip shortbread cookies!

[feast_advanced_jump_to]
muffins with chocolate chips stacked on a wire rack.

Why You'll Love This Recipe

✨ So soft, moist, and fluffy

✨ A straightforward, quick, and easy-to-follow recipe

✨ Tall, sky-high muffin top with perfect texture and flavor

✨ Every bite is choc-a-bloc with gooey, rich, chocolatey goodness.

✨ Everyone loves them, from kids to adults, and they are better than any bakery muffin.

Recipe Ingredients

Ingredients for making chocolate chip muffins.

Flour: All-purpose flour gives the best tender crumb, but you can use whole wheat flour without a problem.

Sugar: I used raw sugar. Feel free to swap with granulated white sugar, cane sugar, or even brown sugar.

Buttermilk: Adds flavor, helps create fluffy texture, and more rise, like in my homemade cornbread recipe , Irish soda bread, and buttermilk scones.

Oil adds fat and moisture. You can also use any vegetable oil or melted coconut oil if you prefer.

Vanilla extract is a must-have for delicious muffins. It adds a warm, sweet, and aromatic flavor.

Chocolate chips are the star of these buttermilk muffins, so make sure you're using good-quality baking chocolate. You can use semi-sweet, dark, or milk chocolate chips, depending on your preference. I opted for mini chocolate chips; you can use chunks or regular chips, too.

Please see the recipe card below for full information about ingredients and quantities.

How To Make Bakery-Style Chocolate Chip Muffins

Recipe Video

Step-By-Step Instructions

Step 1: Make the buttermilk - Combine milk and white vinegar in a bowl. Set aside for 5 minutes.

Step 2: Sift the flour, baking powder, baking soda, and salt in a large bowl.

Step 3: Whisk the buttermilk, oil, sugar, and vanilla extract in a separate bowl.

Step 4: Pour the liquid mixture into the dry ingredients. Gently stir with a spatula, just until moistened. 

Step 5: Toss the chocolate chips with 1 teaspoon of flour and fold them into the batter.

Steps for making Chocolate Chip Muffins.

Step 6: Divide the batter into the 12 muffin cavities and bake at 220 C / 425 F for 5 minutes. Then reduce the temperature to 190 C / 375 F for 12 -15 minutes or until a skewer inserted in the center comes out clean.

Muffin batter in a muffin tray.

Step 7: Let cool in the pan for a few minutes before turning them out on a cooling rack.

Final Step: Serve warm and enjoy!

Baked muffins with chocolate chips in a muffin tray.

Pro Tips

  • Don't overmix the batter for the most tender, moist, and best chocolate chip muffins.
  • Toss the moist chocolate chips in flour before adding them to the batter so they don’t sink to the bottom and remain evenly distributed throughout.
  • Bake the muffins at a high temperature for a few minutes initially. This creates air bubbles that expand the batter to help get tall muffins!
  • Don't overbake the eggless chocolate chip muffins. This will dry them out.
  • This recipe yields 12 regular-sized or 6 jumbo chocolate chip muffins.
A muffin cut in half on a small plate.

More Muffin Recipes

  • Blueberry Muffins on a blue striped napkin on a wire rack.
    Vegan Lemon Blueberry Muffins
  • Strawberry Banana Muffins
    Strawberry Banana Muffins
  • Muffins topped with chocolate chips on a white tray with a candle and oranges around.
    Orange Muffins
  • 7 Peanut butter apple muffins with cinnamon glaze on a round wire rack.
    Peanut Butter Apple Muffins

Half the joy of cooking is sharing it with others. That’s why I’m always eager to hear from you. So go right ahead & drop a comment or reach out on Instagram, Pinterest, YouTube, or Facebook. I hope you love these chocolate chip muffins as much as we do!

📖 Recipe

Tried this recipe?Let us know how it was!
Chocolate Chip Muffins on a round wire rack.

Chocolate Chip Muffins Recipe

Natasha Minocha
These fresh-from-the-oven, bakery-style chocolate chip muffins are so soft and fluffy! Easy to make with simple pantry ingredients, they are just irresistible!
No ratings yet
Print Recipe Pin Recipe
Prep Time 15 minutes mins
Cook Time 20 minutes mins
Course Breakfast, Snack
Cuisine American
Servings 12 Muffins
Calories 375 kcal

Ingredients


  • 1 1/4 cup Milk
  • 1 tbsp Vinegar I used white vinegar
  • 2 1/2 cup All-purpose flour
  • 1 tbsp Baking powder
  • 1 tsp Baking soda
  • 1/4 tsp Salt
  • 1/2 cup + 2 tbsp Sugar
  • 1/2 cup Oil I used Canola oil
  • 1.5 tsp Vanilla extract
  • 1 1/2 cup Chocolate chips
  • 1 tsp All-purpose flour

Instructions
 

  • Preheat the oven to 220 C / 425 F. Line your muffin tray cavities with paper liners.
  • Make the buttermilk - Combine milk and white vinegar in a bowl. Set aside for 5 minutes.
    You can also use store-bought buttermilk.
    1 1/4 cup Milk, 1 tbsp Vinegar
  • Sift the flour, baking powder, baking soda, and salt in a large bowl.
    2 1/2 cup All-purpose flour, 1 tbsp Baking powder, 1 tsp Baking soda, 1/4 tsp Salt
  • Whisk the buttermilk, oil, sugar, and vanilla extract in a separate bowl.
    1/2 cup + 2 tbsp Sugar1/2 cup + 2 tbsp Sugar, 1/2 cup Oil, 1.5 tsp Vanilla extract
  • Pour the liquid mixture into the dry ingredients. Gently stir with a spatula, just until moistened. 
  • Toss the chocolate chips with 1 teaspoon of flour and fold them into the batter.
    1 1/2 cup Chocolate chips, 1 tsp All-purpose flour
  • Divide the batter into the 12 muffin cavities and bake at 220 C / 425 F for 5 minutes.
    Then reduce the temperature to 190 C / 375 F for 12-15 minutes or until a skewer inserted in the center comes out clean.
  • Let cool in the pan for a few minutes before turning them out on a cooling rack.
  • Serve warm. Enjoy!

Video

Notes

  • Don't overmix the batter for the most tender, moist, and best chocolate chip muffins.
  • Toss the moist chocolate chips in flour before adding them to the batter so they don’t sink to the bottom and remain evenly distributed throughout.
  • Bake the muffins at a high temperature for a few minutes initially. This creates air bubbles that expand the batter to help get tall muffins!
  • Don't overbake the eggless chocolate chip muffins. This will dry them out.
  • This recipe yields 12 regular-sized or 6 jumbo chocolate chip muffins.

Nutrition

Serving: 1 MuffinCalories: 375kcalCarbohydrates: 46gProtein: 5gFat: 19gSaturated Fat: 6gPolyunsaturated Fat: 3gMonounsaturated Fat: 9gTrans Fat: 0.1gCholesterol: 3mgSodium: 260mgPotassium: 194mgFiber: 3gSugar: 22gVitamin A: 37IUVitamin C: 0.05mgCalcium: 107mgIron: 3mg

Easy Marinated Tomatoes

August 2, 2024

marinated cherry tomatoes in glass jar with a wooden spoon.

Bursting with fresh herbs, olive oil, and balsamic vinegar, these juicy marinated tomatoes are super easy to make. They are the perfect addition to any meal. You can add marinated tomatoes to your pasta, bruschetta, and so much more!

Easy Marinated Tomatoes

If you're looking for a way to jazz up your summer salads, sandwiches, or even just a fresh slice of toast, you’ve got to try these marinated tomatoes.

Whether you're a seasoned cook or a kitchen newbie, this best-marinated tomato recipe will have you feeling like a gourmet chef in no time.

So, grab those ripe tomatoes, and let’s get marinating!

[feast_advanced_jump_to]
Easy Marinated Tomatoes

Why We Love Marinated Tomatoes

Simple: Takes little prep using pantry ingredients

Flavor punch: Marinated tomato salad is packed with rich, tangy flavors

Versatile: The tomatoes fit perfectly into a variety of meals.

Healthy and fresh: Loaded with vitamins and antioxidants, it’s a nutritious addition to the summer menu.

Recipe Ingredients

Ingredients for making Marinated Tomatoes.

Tomatoes: Use ripe, juicy red tomatoes that are in season and locally available to you— Roma, Heirloom, Campari, Grape, or any other. Their natural sweetness and juicy texture make them perfect for marinating and soaking up all the delicious flavors. I used fresh, ripe cherry tomatoes.

Garlic: Fresh garlic adds a wonderful flavor to the marinade. Mince it finely to ensure it blends well and evenly coats the tomatoes. You can leave it out if the taste of garlic is not to your liking.

Sugar: is the magic ingredient in marinated cherry tomatoes. It draws out maximum flavor from the tomatoes and enhances their natural sweetness.

Olive Oil: Use extra virgin olive oil for the best flavor.

Balsamic vinegar: brings a tangy, slightly sweet, and complex flavor to the mix. It complements the tomatoes' sweetness and the olive oil's richness.

Herbs: I choose fresh basil leaves for that aromatic, herbaceous note. Shred them finely to release their full flavor and fragrance. Parsley, mint, or cilantro (or any combination of these) will work well.

Seasoning: Season with salt and freshly ground black pepper. Adjust according to your preference.

How To Make Marinated Tomatoes

Step 1: Halve the tomatoes if you’re making marinated grape tomatoes or cherry tomatoes. Slice thickly if you’re using bigger ones, like heirloom tomatoes.

Step 2: Place the cut tomatoes in a large bowl, and then add your herbs, oil, garlic, vinegar, and seasoning.

ingredients for marinated tomatoes in a mixing bowl.

Step 3: Stir, cover, and refrigerate for at least 2 hours, giving the tomatoes time to marinate.

Final Step: Serve at room temperature and savor!

How To Store

Marinated tomatoes with balsamic vinegar are best when eaten within a day because they get softer with time. You can store them in a clean, airtight container in the fridge for up to 3 days.

For the best flavor, take the balsamic marinated tomatoes out of the fridge for about 15–20 minutes before serving to allow them to come to room temperature.

Easy Marinated Tomatoes

How To Serve Marinated Tomatoes

Marinated tomatoes taste heavenly on their own. But let me tell you, there is nothing better than a marinated tomato salad. Although those magical juices are sublime!

  • As a fresh and flavorful topping for tacos, burritos, or quesadillas
  • Mixed into scrambled eggs or alongside a hearty omelet for breakfast.
  • Marinated tomatoes for bruschetta: Spoon them onto my toasted no-knead Dutch oven bread or no-knead seeded oat bread slices or top them on homemade crostini for an easy appetizer.
  • Toss them in a salad like my Italian tortellini pasta salad, or easy summer pasta salad, and take the flavors up a notch!
  • As a fresh, tangy topping for grilled chicken breasts, fish, or shrimp.
  • Layered into sandwiches or wraps to add a juicy, zesty twist.
  • As a side dish with your favorite grilled meats or BBQ dishes.
  • Add them to a delicious, easy cheese platter for a tangy contrast.
marinated tomatoes on toast

More Easy Delicious Condiments

  • Baked vegan spinach artichoke dip in a cast-iron pan.
    Vegan Spinach Artichoke Dip
  • Pear butter in a glass container with a wooden spoon on the side.
    Pear Butter Recipe
  • Yum yum sauce in a jar with a wooden spoon on the side.
    Yum Yum Sauce
  • Fried pickle dip in a serving bowl with veggies and chips around.
    Fried Pickle Dip

Half the joy of cooking is sharing it with others. That’s why I’m always eager to hear from you. So go right ahead & drop a comment or reach out on Instagram, Pinterest, YouTube, or Facebook. I hope you love these marinated tomatoes as much as we do!

📖 Recipe

Tried this recipe?Let us know how it was!
marinated cherry tomatoes in glass jar with a wooden spoon.

Easy Marinated Tomatoes

Natasha Minocha
Bursting with fresh herbs, olive oil, and balsamic vinegar, these juicy marinated tomatoes are super easy to make. They are the perfect addition to any meal!
No ratings yet
Print Recipe Pin Recipe
Prep Time 15 minutes mins
Total Time 15 minutes mins
Course Appetizer, Salad, Side Dish
Cuisine American, Mediterranean
Servings 6 Servings
Calories 142 kcal

Ingredients


  • 16 oz Cherry tomatoes
  • 1 tbsp Garlic, minced
  • 2 tbsp Sugar
  • 1/3 cup Olive oil
  • 3 tbsp Balsamic vinegar
  • 3-4 tbsp Shredded basil
  • Salt & pepper to taste

Instructions
 

  • Slice the cherry tomatoes in half.
  • Place in a large bowl. Add the minced garlic, sugar, basil, olive oil, balsamic vinegar, salt and pepper.
  • Gently stir to combine. Cover and transfer to the refrigerator to marinate for at least 2-3 hours.
  • Bring the tomatoes to room temperature before serving. Enjoy!

Video

Nutrition

Serving: 1 ServingCalories: 142kcalCarbohydrates: 8gProtein: 1gFat: 12gSaturated Fat: 2gPolyunsaturated Fat: 1gMonounsaturated Fat: 9gSodium: 9mgPotassium: 141mgFiber: 0.4gSugar: 7gVitamin A: 330IUVitamin C: 14mgCalcium: 13mgIron: 1mg

Cherry Jam Recipe

July 30, 2024

A jar with cherry jam on a wooden surface with a spoon on the side.

This 3-ingredient cherry jam is super simple, not overly sweet, and full of delicious cherry flavor. The lovely, juicy, soft-set homemade jam recipe is a great way to preserve cherries, or rather, any seasonal fruit!

cherry jam recipe

Nice, fresh, and quick to make, this is the best cherry jam you’ll ever have! Most cherry jam recipes use a 1:1 ratio of fruit and sugar. My recipe uses less sugar, which brings attention to the fruit and really helps it shine instead of being cloyingly sweet.

[feast_advanced_jump_to]
cherry jam recipe

Why You'll Enjoy This Recipe

Bursting with the sweet, juicy taste of fresh cherries

Homemade goodness with less sugar and purer ingredients

Versatile cherry jam recipe that spreads on toast, mixes in yogurts, and tops on desserts!

Recipe Ingredients

cherry jam recipe ingredients

Cherries: Use whatever variety of sweet cherries is locally and readily available. Bing cherries are my favorite for making jam. But you can also make this a black cherry jam recipe or a sour cherry jam. Adjust the amount of sugar if you're using sour cherries. Fresh cherries are definitely the best. That said, you can make homemade cherry jam using frozen cherries too.

Lemon juice: Since this cherry jam is without pectin, you need citric acid to help the jam set properly. It also adds a little zing to the homemade jam, balancing the sweetness of the cherries and preserving the jam for longer.

Sugar: I used regular, white granulated sugar. Cane or raw sugar works just as well.

Please see the recipe card for full information about ingredients and quantities.

How To Make Cherry Jam

Step 1: Remove stems and pits from the cherries.

Step 2: Place the cherries, sugar, and lemon juice in a medium-sized saucepan and stir well.

Step 3: Bring to a boil over medium-high heat, stirring continuously.

steps for making cherry jam

Step 4: Reduce the heat to medium-low and let the mixture cook for 25-30 minutes until the cherries have softened and the juices thickened. You will need to stir frequently.

cherry jam on the stove

Step 5: Transfer to a clean, sterilized jar, close the jar, and let the jam cool at room temperature. Store in the refrigerator.

cherry jam recipe

How To Store Cherry Jam

I don’t use a canning technique when I make jams for my family. I simply pour the no-pectin cherry jam into a sterilized glass jar (which is still warm and not completely cooled). It keeps well in the refrigerator for 3 weeks.

Canning cherry jam

To store the sweet cherry jam for longer, follow a proper canning method like this one. Once you open the jar, keep the cherry jam refrigerated and always use a clean spoon or knife to prevent spoilage.

cherry jam recipe

Recipe FAQs

How to pit cherries?

It's tedious to pit cherries, and the easiest way is to use a cherry pitter. If you don't have one, no worries! A metal straw or chopsticks work great for removing the seeds.

Can I use pectin in the sweet cherry jam recipe?

This recipe is for a soft-set cherry jam that doesn't require pectin. If you prefer a firmer texture, feel free to add pectin to suit your taste.

cherry jam recipe

How To Use Cherry Jam

There are a ton of ways to use this recipe for cherry jam:

  • With fresh homemade bread like my no-knead bread, easy sandwich bread, or my everyday bread!
  • On ice creams or frozen yogurts like this mango cherry frozen yogurt
  • Add this jam on top of frozen yogurt bark before freezing it
  • Swirled in cheesecakes like this strawberry swirl cheesecake or cake batter, as in this orange marmalade cake.
  • Serve with crepes or on top of these fluffy cinnamon pancakes
cherry jam on toast

More Homemade Jam Recipes

  • Homemade Fig Jam Recipe
    Homemade Fig Jam Recipe
  • Mulberry jam in a glass jar with a red knife on the side.
    Mulberry Jam Recipe
  • Easy Orange Marmalade | How to make orange marmalade
    Easy Orange Marmalade
  • persimmon chia jam in a glass jar with a wooden spoon on a small plate.
    Persimmon Jam

Half the joy of cooking is sharing it with others. That’s why I’m always eager to hear from you. So go right ahead & drop a comment or reach out on Instagram, Pinterest, YouTube, or Facebook. I hope you love this cherry jam as much as we do!

📖 Recipe

Tried this recipe?Let us know how it was!
A jar with cherry jam on a wooden surface with a spoon on the side.

Cherry Jam Recipe

Natasha Minocha
This 3-ingredient cherry jam is super simple, not overly sweet, and full of delicious cherry flavor. The lovely, juicy soft-set homemade jam recipe is a great way to preserve cherries!
No ratings yet
Print Recipe Pin Recipe
Prep Time 15 minutes mins
Cook Time 30 minutes mins
Course Condiment
Cuisine American, World
Servings 1.5 Cups
Calories 588 kcal

Ingredients


  • 1 lb Cherries, pitted
  • 3/4 cup Sugar
  • 3 tbsp Lemon juice

Instructions
 

  • Place the cherries, sugar, and lemon juice in a medium-sized saucepan.
    Stir well.
  • Bring to a boil over medium-high heat, stirring continuously.
  • Reduce the heat to medium-low and let the mixture cook for 25-30 minutes until the cherries have softened and the juices thickened.
    You will need to stir frequently.
  • You can mash the cherries if you like, using a potato masher. I skipped this step as I prefer a chunky cherry jam.
  • Transfer to a clean, sterilized jar, close the jar, and let the jam cool at room temperature. Store in the refrigerator. Enjoy!

Video

Nutrition

Serving: 1cupCalories: 588kcalCarbohydrates: 151gProtein: 3gFat: 1gSaturated Fat: 0.1gPolyunsaturated Fat: 0.2gMonounsaturated Fat: 0.1gSodium: 1mgPotassium: 704mgFiber: 6gSugar: 141gVitamin A: 195IUVitamin C: 33mgCalcium: 42mgIron: 1mg

Easy Avocado Egg Salad (No Mayo)

July 19, 2024

Easy Avocado Egg Salad (No Mayo)

This avocado egg salad is creamy, delicious, and protein-packed with Greek yogurt, not mayo. And the healthy egg salad recipe with avocado is light, wholesome, and comes together in 15 minutes!

Easy Avocado Egg Salad (No Mayo)

It’s the best avocado egg salad you'll try. It's a great summer recipe because you don’t need to stand in a hot kitchen to make it. We? We are big fans of it and I repeat the salad every 10 days!

[feast_advanced_jump_to]
Easy Avocado Egg Salad (No Mayo)

Why We Love Avo Egg Salad

It's great for meal prep.

A definite crowd-pleaser.

A lovely twist on classic egg salad.

Make it when you don’t know what to cook!

Salad Ingredients

Ingredients for Easy Avocado Egg Salad.

This easy avocado egg salad recipe ditches mayonnaise for Greek yogurt. It's protein-rich and full of good fats. In a nutshell, avocado egg salad (no mayo) is a healthier version of the classic one. Here’s what you need for it:

Eggs: These need to be hard-boiled. Follow my instructions to the tee to get perfect eggs.

Avocado: Pick nice ripe ones as they add good fat, creaminess, and great texture to the salad. I prefer to dice them; you can, of course, mash the avocados.

Vegetables: These add so much crunch, flavor, and texture to the salad. Celery stalks, scallions, and red onion. Dice them finely.

Herbs: I used parsley. You can add dill too - it's the classic choice for the egg salad with avocado recipe. I added what I had on hand.

Banana pepper is optional, and just for that tiny kick of heat. If you want a spicier salad, add plain or pickled jalapeños.

Dressing Ingredients

Ingredients for Easy Avocado Egg Salad  dressing
dressing for Easy Avocado Egg Salad (No Mayo)

Greek yogurt: For a creamy, tangy base.

Dijon mustard: This adds a great pop of flavor.

Lemon juice: For zingy citrus brightness.

Paprika: This gives a lovely spicy kick.

See the recipe card for full information on ingredients and quantities.

Variations

Vegetables: Avocado egg salad with Greek yogurt is welcoming to all vegetables, including tomatoes, cucumbers, bell peppers, and even leafy greens like finely chopped cabbage.

Add more protein to the egg salad with avocado with tuna, bacon bits, chicken, or shrimp.

Kick up the heat: Play around with the salad dressing; add paprika, sriracha, or this delicious easy chili oil to it.

Extra rich: Add homemade mayo to the Greek yogurt.

How To Make Avocado Egg Salad?

Step 1: Greek yogurt dressing: combine Greek yogurt, Dijon mustard, paprika, salt, and pepper in a small bowl. Whisk well and set aside.

Step 2: Make hard-boiled eggs: Place the eggs in a saucepan and cover with water. Bring to a boil, turn off the heat, and cover the pan.

Let the eggs cook for 12 minutes, then transfer to a bowl of cold water. This process stops the cooking.

Take the eggs out when they are comfortable to handle. Peel and coarsely chop them.

Step 3: Peel, deseed, and dice the avocado.

Step 4: Add the chopped eggs, avocado, parsley, celery, scallions, onions, and banana peppers to a large bowl.

Step 5: Mix the Greek yogurt dressing over the salad ingredients.

steps to make Easy Avocado Egg Salad (No Mayo)

Step 6: Sprinkle a little paprika and garnish with some scallions and parsley.

Step 7: You can serve it immediately or chill for a few hours and serve cold. 

Easy Avocado Egg Salad (No Mayo)

How To Serve

  1. Serve the avocado and hard-boiled egg salad along with my copycat Olive Garden bread sticks for lunch, dinner, or a snack. Everyone will love it.
  2. Add the egg & avocado salad on top of salad greens.
  3. Make it into an avocado egg salad sandwich with homemade bread.
  4. Spread it on toasted Dutch oven bread, on top of savory cheese scones, or with spinach feta muffins for a tasty breakfast or brunch.
Easy Avocado Egg Salad (No Mayo)

How To Store

There were no leftovers at my house—the salad was gone in minutes! It's best eaten the day it's made, but you can refrigerate it in an airtight container for up to 2 days. The avocados may turn slightly brown. To avoid too much browning, top the salad with lemon juice.

Easy Avocado Egg Salad (No Mayo)

More Healthy Salad Recipes

  • Peach Mozzarella Salad | Easy Summer Salad
    Peach Mozzarella Salad
  • Watermelon Blueberry Salad
    Watermelon Blueberry Salad
  • Smashed Asian Cucumber Salad
    Smashed Asian Cucumber Salad
  • Italian Tortellini Pasta Salad
    Italian Tortellini Pasta Salad

Half the joy of cooking is sharing it with others. That’s why I’m always eager to hear from you. So go right ahead & drop a comment or reach out on Instagram, Pinterest, YouTube, or Facebook. I hope you love this easy avocado egg salad as much as we do!

📖 Recipe

Tried this recipe?Let us know how it was!
Easy Avocado Egg Salad (No Mayo)

Easy Avocado Egg Salad ( No Mayo)

Natasha Minocha
This avocado egg salad is creamy, delicious, and protein-packed with Greek yogurt, not mayo. And the healthy egg salad recipe with avocado is light, wholesome, and comes together in 15 minutes!
No ratings yet
Print Recipe Pin Recipe
Prep Time 15 minutes mins
Cook Time 12 minutes mins
Course Salad
Cuisine American
Servings 6 Servings
Calories 153 kcal

Ingredients


  • 8 Eggs
  • 1 Avocado
  • 2 Celery stalks, finely chopped
  • 1/4 cup Parsley, finely chopped
  • 1/4 cup Scallions, finely chopped
  • 1/2 Red onion, finely chopped
  • 1 Banana pepper, finely chopped

Greek Yogurt Dressing

  • 4 tbsp Greek yogurt
  • 1 tbsp Dijon mustard
  • 2 tbsp Lemon juice
  • 1/2 tsp Paprika
  • Salt & Pepper to taste

Instructions
 

  • Make hard-boiled eggs: Place the eggs in a saucepan and cover with water. Bring to a boil, turn off the heat, and cover the pan.
    Let the eggs cook for 12 minutes, then transfer to a bowl of cold water. This process stops the cooking.
    Take the eggs out when they are comfortable to handle. Peel and coarsely chop them.
  • Peel, deseed and dice the avocado.
  • Add the chopped eggs, avocado, parsley, celery, scallions, onions, and banana peppers to a large bowl.
  • Pour the Greek yogurt dressing over the salad ingredients and mix well.
  • Sprinkle a little paprika and garnish with some scallions and parsley.
  • Serve immediately or chill for a few hours and serve cold. Enjoy!

Greek Yogurt Dressing

  • In a small bowl, combine the Greek yogurt, Dijon mustard, paprika, salt and pepper. Mix well.
    Taste and adjust for seasonings.

Video

Nutrition

Serving: 1 ServingCalories: 153kcalCarbohydrates: 6gProtein: 10gFat: 11gSaturated Fat: 3gPolyunsaturated Fat: 2gMonounsaturated Fat: 6gTrans Fat: 0.02gCholesterol: 219mgSodium: 121mgPotassium: 317mgFiber: 3gSugar: 2gVitamin A: 718IUVitamin C: 12mgCalcium: 60mgIron: 2mg

Peach Bread Recipe

July 16, 2024

Sliced peach bread on a white platter.

Sweet and buttery peach bread is the best way to make the most of summer’s favorite fruit. An easy-to-make recipe and a crowd-pleaser, the crunchy streusel topping makes this quick peach bread absolutely irresistible!

Sliced peach bread on a platter.

This peach bread truly celebrates the peach season. Juicy peaches are studded in a soft, tender crumb, topped with a buttery, cinnamon-spiced crumble! Enjoy it plain, or toasted with a pat of butter, or even cream cheese, or with a scoop of ice cream. This quick bread recipe is a keeper!

Love peaches? Then you must try my peach cheesecake and peach cobbler cake. I even have a delicious peach mozzarella salad and peach cold brewed iced tea!

[feast_advanced_jump_to]

Why You'll Love This Recipe

✨ Full of sweet, juicy flavors, this quick bread is lovely way to use fresh seasonal peaches.

✨ Thanks to the fresh peaches and buttermilk, this bread is so soft and moist!

✨ Simple ingredients and prep make this recipe easily doable by anyone, anytime!

✨ It's sweet enough for dessert, a teatime treat or even breakfast!

✨ This peach bread is perfect on its own. But you can easily dress it up with a dollop of cream or ice cream!

Reader Love ❤️

5 stars

I made this today, it was AMAZING!! Had some extra peaches at home and I didn’t want them to go bad. Will be buying more to keep making this 😄

Sliced peach bread on a  white platter.

Recipe Ingredients

Peach Bread Ingredients

Peaches: Use the freshest, ripest fruits because they have the most amazing sweet flavor, and that’s what you need for the bread recipe to shine. If using frozen peaches, please thaw and drain before using. Drain canned peaches thoroughly before using.

Buttermilk: Either buy cultured buttermilk from the store or mix milk and vinegar to make it at home. Buttermilk keeps the peach loaf soft and moist.

Flour: I used all-purpose flour, but you can also use whole wheat flour.

Eggs: Bind the sweet bread ingredients together and give it structure.

Cinnamon powder: enhances the natural sweetness of peaches.

Sugar: I used raw sugar, but brown or regular white sugar also works.

Olive oil: I love the fruitiness it adds to the cake. Swap it with vegetable oil if that’s what you have at hand.

Vanilla extract: Enhances the overall flavor profile of the peach loaf bread recipe. Use store-bought or homemade vanilla extract.

Streusel Ingredients

ButterCinnamon Powder
All-purpose FlourRaw Sugar

Please see the recipe card below for full information about the ingredients and quantities.

Variations

Eggless: Substitute eggs with flax eggs to make eggless peach bread.

Lemon: Instead of cinnamon, use lemon juice or zest to give this fresh peach bread recipe a lemony, fresh flavor, like my blueberry and lemon bread.

Nuts: Almonds, pecans, walnuts, or even pistachios will add a TON of texture to the bread. Remember to chop the ingredients finely and add them to the batter or streusel.

How To Make Peach Bread

Step 1: Make the streusel topping - Combine sugar, flour, butter, and cinnamon in a small bowl. Refrigerate until later.

Ingredients for making streusel and streusel in a small bowl.

Step 2: Make the buttermilk - mix milk and vinegar in a small bowl and keep aside for 5 minutes.

Step 3: In a large bowl, whisk together the flour, baking powder, baking soda, salt, and cinnamon powder.

Step 4: In another medium-sized bowl, whisk together the eggs and sugar for 1-2 minutes using a balloon whisk or an electric beater.

Step 5: Add the buttermilk, olive oil, and vanilla extract. Mix well.

Step 6: Pour the wet ingredients over the dry ingredients. Avoid over-mixing.

Steps for making Peach Bread.

Step 7: Keep aside 2 tbsp of diced peaches, toss the rest with a tsp of flour, and fold into the batter.

Step 8: Transfer the batter to the greased loaf pan and evenly sprinkle half the streusel. Scatter the saved diced peaches on top and the remaining streusel over them.

Batter for peach bread with struesel on top in a loaf pan.

Step 9: Bake for 55-60 minutes or until a skewer inserted in the center comes out clean.

Step 10: Allow the bread to cool in the pan for 15 minutes, then turn it onto a cooling rack to cool completely.

Baked peach bread with streusel in a loaf pan.

Step 11: Let the bread cool completely before slicing!

Pro Tips

  • Toss the diced peaches in flour to keep them from sinking to the bottom of the loaf.
  • Don't overmix the batter. Mix the batter only until the ingredients are combined. This will help make the best peach bread and keep it fluffy and moist.
  • Grease your pan well to prevent sticking, especially when using fresh fruit in a bread recipe. Or, line it with parchment paper.
  • Allow the peach quick bread to cool completely before slicing. The resting time helps the bread to set properly and gives cleaner slices.
  • If your bread starts browning too quickly, tent it loosely with foil.
  • Fresh ripe peaches will give you the best flavor. But you can use frozen or canned peaches. Please drain them well, as you don't want excess moisture, which can make the texture gummy.

How To Store

This peach quick bread is best enjoyed fresh the day it's baked. If you have leftovers, wrap them in beeswax paper or plastic wrap and store them in the fridge for up to 3 days. To reheat, microwave the peach loaf cake for 15–20 seconds before serving.

Sliced bread with peaches on a white rectangular platter.

Recipe FAQS

What is a quick bread?

Quick bread doesn’t use yeast. Instead, it uses baking powder, baking soda, or both, which makes the dough rise faster without needing kneading or proofing. This saves time. Quick bread is denser than cake and usually has more add-ins like fruits and nuts.

Do I need to peel the peaches?

Peaches have soft skin that disappears while baking, so you don't need to peel them for this old-fashioned peach bread recipe.

How long should I let the peach quick bread cool?

Let the bread cool completely before slicing. This is important because warm peach bread is crumbly and will fall apart if cut too soon. Wait at least 2 hours before slicing.

More Quick Bread Recipes

  • Fig bread on parchment paper with a knife on the side.
    Fig Bread
  • Banana Carrot Bread | Eggless banana carrot bread
    Banana Carrot Bread
  • Apple Butter Bread recipe
    Apple Butter Bread
  • Sliced avocado bread on a platter.
    Avocado Bread Recipe

Half the joy of cooking is sharing it with others. That’s why I’m always eager to hear from you. So go right ahead & drop a comment or reach out on Instagram, Pinterest, YouTube, or Facebook. I hope you love this peach bread as much as we do!

📖 Recipe

Tried this recipe?Let us know how it was!
Sliced peach bread on a white platter.

Peach Bread Recipe

Natasha Minocha
Sweet and buttery peach bread is the best way to make the most of summer’s favorite fruit. An easy-to-make bread recipe and a crowd-pleaser, the crumbly streusel topping makes this quick peach bread recipe irresistible!
5 from 2 votes
Print Recipe Pin Recipe
Prep Time 20 minutes mins
Cook Time 1 hour hr
Total Time 1 hour hr 20 minutes mins
Course Bread, Breakfast, Dessert, Snack
Cuisine American
Servings 8 Servings
Calories 393 kcal

Ingredients


Streusel Topping

  • 3 tbsp Sugar
  • 2 tbsp All-purpose flour
  • 2 tbsp Butter, softened
  • 1/2 tsp Cinnamon powder

Peach Bread

  • 1/2 cup Milk
  • 1/2 tbsp Apple cider vinegar You can also use white vinegar
  • 1 3/4 cup All-purpose flour
  • 1 1/4 tsp Baking powder
  • 1/2 tsp Baking soda
  • 1/4 tsp Salt
  • 1 tsp Cinnamon powder
  • 1/2 cup + 2 tbsp Sugar
  • 2 Eggs
  • 1/2 cup Olive oil
  • 1.5 tsp Vanilla extract
  • 5 Peaches, diced

Instructions
 

  • Preheat the oven to 180 C / 350 F. Grease a 9"x5" loaf pan.

Streusel Topping

  • Combine all the ingredients - sugar, flour, butter, and cinnamon powder in a small bowl.
    Mix with a fork until a crumbly mixture forms. Keep in the refrigerator for later use.
    3 tbsp Sugar, 2 tbsp All-purpose flour, 2 tbsp Butter, softened, 1/2 tsp Cinnamon powder

Peach Bread

  • Make the buttermilk - mix milk and vinegar in a small bowl and keep aside for 5 minutes.
    1/2 cup Milk, 1/2 tbsp Apple cider vinegar
  • In a large bowl, whisk together the flour, baking powder, baking soda, salt, and cinnamon powder.
    1 3/4 cup All-purpose flour, 1 1/4 tsp Baking powder, 1/2 tsp Baking soda, 1/4 tsp Salt, 1 tsp Cinnamon powder
  • In another medium-sized bowl, whisk together the eggs and sugar for 1-2 minutes using a balloon whisk or an electric beater.
    2 Eggs, 1/2 cup + 2 tbsp Sugar
  • Add the buttermilk, olive oil, and vanilla extract. Mix well.
    Buttermilk, 1/2 cup Olive oil, 1.5 tsp Vanilla extract
  • Pour the wet ingredients over the dry ingredients and mix well. Avoid over-mixing.
  • Keep aside 2 tbsp of diced peaches, toss the rest of the peaches with a tsp of flour, and fold into the batter.
  • Transfer the batter to the loaf pan and evenly sprinkle half the streusel over it. Scatter the saved diced peaches on top and the remaining streusel over them.
  • Bake at 180 C / 350 F for 55-60 minutes or until a skewer inserted in the center comes out clean.
  • Allow the bread to cool in the pan for 15 minutes, then turn it out on a cooling rack to cool completely.
  • Let the bread cool completely before slicing it. Serve and enjoy!

Video

Notes

  • Toss the diced peaches in flour to keep them from sinking to the bottom of the loaf.
  • Don't overmix the batter. Mix the batter only until the ingredients are combined. This will help make the best peach bread and keep it fluffy and moist.
  • Grease your pan well to prevent sticking, especially when using fresh fruit in a bread recipe. Or, line it with parchment paper.
  • Allow the peach quick bread to cool completely before slicing. The resting time helps the bread to set properly and gives cleaner slices.
  • If your bread starts browning too quickly, tent it loosely with foil.
  • Fresh ripe peaches will give you the best flavor. But you can use frozen or canned peaches. Please drain them well, as you don't want excess moisture, which can make the texture gummy.

Nutrition

Serving: 1 ServingCalories: 393kcalCarbohydrates: 56gProtein: 4gFat: 17gSaturated Fat: 4gPolyunsaturated Fat: 2gMonounsaturated Fat: 11gTrans Fat: 0.1gCholesterol: 9mgSodium: 250mgPotassium: 172mgFiber: 2gSugar: 32gVitamin A: 410IUVitamin C: 4mgCalcium: 68mgIron: 2mg

Salted Butter Rolls Recipe

July 9, 2024

Rolls in a bowl on a blue and white kitchen towel.

Salted butter rolls, also called shio pan bread, are a delicious treat. Shaped like croissants, they are soft and fluffy inside with the crispiest crust you can imagine, all full of buttery goodness!

Bread rolls topped with sea salt in a bowl.

I first saw salted butter rolls in Korean food vlogs, and when I found them at a local Korean bakery, I had to try one. After tasting the sea salt bread, I knew I had to make it at home.

After a lot of experimenting, I found a salted butter rolls recipe I love. It's adapted from South Korean YouTuber and blogger Mukgling.

Salted Butter Rolls Recipe
[feast_advanced_jump_to]

What Is Shio Pan Bread?

Salted butter rolls are a popular bakery item in Japan and South Korea. They’re buttery and soft inside and crispy like a baguette outside. The name "shio pan" means "salt bread" in Japanese, highlighting the key ingredient that makes these rolls unique.

And that’s what sets these rolls apart from other dinner rolls or breads—the log of butter tucked inside the dough. As the rolls bake, the butter inside melts and infuses the bread with its rich, savory goodness.

A quick note: When the butter melts, it will spill over on the tray, leaving the center of the roll hollow. That’s normal. Don’t panic. It just makes the bottom of the rolls crisp and crunchy.

Why You'll Love This Recipe

  • These rolls are soft, golden, and packed with rich, buttery goodness. Each bite melts in your mouth with just the right touch of salt, pure comfort food bliss!
  • These are so good for breakfast, slathered with jam for tea time, or served warm with soups and curries - these rolls fit into every meal!
  • This recipe is easier than you think! Simple steps, basic ingredients, and a foolproof process make it totally doable, perfect even for beginners!
  • These salt bread rolls are so addictive and easy to make that they will become your go-to for any occasion!

Reader Love ❤️

5 stars

Thank you Natasha for sharing your amazing recipe.Made Salted butter rolls this evening...wow... - Genny


5 stars

I went to Korea in the Spring and had some amazing salt bread! I was missing it and this recipe came out amazing! - Victoria

Recipe Ingredients

Labelled ingredients for making salted butter bread rolls.
Water
(Lukewarm)
Milk
(Lukewarm)
Yeast
(Dried active)
Flour
(All-purpose)
Salted Butter
(frozen)
Salted Butter
(melted)
SugarSalt  Sea Salt Flakes

How To Make Salt Butter Rolls

Step 1: In a large bowl, combine water, milk, and yeast. Stir well.

Step 2: Whisk in the sugar, salt, and melted butter.

Step 3: Now add the flour and mix well using a spatula or your hands. The dough will be soft and slightly sticky to the touch.

Steps for making the dough for Salted Bread Rolls.

Step 4: Cover the bowl and let the dough rest for 50 minutes.

Step 5: After 50 minutes are over, it's time for the first fold. Bring a quarter of the dough over to the center. Repeat 3 more times, with each quarter of the dough.

Steps showing how to fold bread dough in a mixing bowl.

Step 6: Cover the bowl again and let the dough proof for 1 hour or until doubled in size.

Bread dough in a mixing bowl before and after proofing.

Step 7: Gently deflate the dough and transfer it to your work surface.

Bread dough divided in 6 pcs.

Step 8: Divide the dough equally into 6 pieces, approximately 70 grams each.

Step 9: Roll each dough piece into a ball and place the dough balls on a parchment-covered baking tray. Cover the tray with plastic wrap or a damp kitchen towel and let the dough balls rest for 20 minutes.

Dough balls and preshaped dough balls into tear drop shape for making rolls.

Step 10: Preshape - Roll each dough ball into a teardrop shape. Place on the tray, cover with plastic wrap or a damp kitchen towel, and rest for 30 minutes.

Step 11: Using a rolling pin, roll out each dough into a long triangle, about 18" long and 3"-3.5" wide at the base.

Steps for final shaping of the dough for making salt bread.

Step 12: Place a frozen log of butter on the wide end of the triangle and start rolling the dough over the butter so it's completely covered with the dough, then keep rolling the dough until the tapered end of the dough. Repeat with other dough pieces.

Step 13: Place the shaped rolls on the baking tray, cover them with plastic wrap or a damp kitchen towel, and place them in a draft-free place for 1 hour or until the rolls are puffy.

Shaped salt bread rolls before and after final proofing.

Step 14: When the rolls are puffy, spray them evenly with water, sprinkle some sea salt flakes on top, and bake for 20 minutes or until golden brown.

Step 15: Some of the butter would have melted out onto the baking sheet. Use a pastry brush to spread this butter on the rolls.

Step 16: Transfer the rolls to a cooling rack and allow them to cool for 15 minutes before digging in!

Baked salt bread rolls on parchment paper.

Pro Tips

  • Make sure the logs of butter you place in the rolled-out triangle are frozen. This ensures the flaky buttery texture these rolls are popular for.
  • Each log of butter should be 10 grams (2.5” wide). After slicing, freeze them for a couple of hours so they’re frozen solid.
  • Spray the puffed-up salt bread rolls with water before baking. This will give you a crispy crust.
  • For extra crispy shio pan bread, toss a cup of ice in the bottom tray of your preheated oven right when you slide in the rolls.
  • When the butter melts, it will spill over on the tray, leaving the center of the roll hollow. This will make the bottom of the rolls crisp and crunchy, so it's all good!
  • Though cup measurements are very convenient, this recipe for salted butter rolls needs accuracy. So, do use a kitchen scale.
Bread roll cut in half to show the cross-section.

How To Serve

Japanese salt bread is fantastic, fresh out of the oven. The warm, crispy exterior and the melt-in-your-mouth, buttery interior is THE experience you want. Want to make more out of these buttery rolls?

  • Breakfast: Pair the Japanese butter rolls with this easy strawberry chia jam, orange marmalade, pear butter, or apple butter. For a savory twist, smear a bit of cream cheese and top with a slice of smoked salmon. Serve with a refreshing strawberry matcha latte - yum!
  • Meals: An excellent side dish alongside salads like this Italian tortellini salad or smashed chickpea salad. They are wonderful dunked in soups like my roasted pumpkin soup or creamy pea soup.
  • Sandwiches: The sturdy and tender texture holds up well to a variety of fillings: ham, cheese, roasted vegetables, fresh mozzarella, and pesto.

Recipe FAQS

Can you make salt bread rolls ahead of time?

Yes, you can! After the first fold (step 5 in my shio pan bread recipe), you can refrigerate the dough. The next day, when you’re ready to bake, continue from step 6 of the recipe.

What kind of butter should be used for salted bread rolls?

This recipe uses salted butter. I used Amul. Whatever is easily available to you will do here. Just in case you’re feeling fancy, switch to creamy European-style butter.

How to store Japanese Rolls?

These rolls are best eaten the same day. Any leftovers should be wrapped (or kept in an airtight container) and refrigerated. Reheat in an oven or air fryer. Don’t use a microwave, as it will make the rolls soggy.

More Dinner Rolls For You

  • pumpkin bread rolls piled up in a wooden tray.
    Pumpkin Bread Rolls
  • Mallorca bread rolls on a platter.
    Best Mallorca Sweet Bread Recipe
  • Best Condensed Milk Bread Rolls (Soft & Fluffy)
    Best Condensed Milk Bread Rolls (Soft & Fluffy)
  • Homemade pretzel buns on parchment paper.
    Homemade Pretzel Buns

Half the joy of cooking is sharing it with others. That’s why I’m always eager to hear from you. So go right ahead & drop a comment or reach out on Instagram, Pinterest, YouTube, or Facebook. I hope you love these salted butter rolls as much as we do!

📖 Recipe

Tried this recipe?Let us know how it was!
Rolls in a bowl on a blue and white kitchen towel.

Salted Butter Rolls Recipe

Natasha Minocha
Salted butter rolls, also called shio pan bread, are a delicious treat. Shaped like croissants, they are soft and fluffy inside with the crispiest crust you can imagine, all full of buttery goodness.
5 from 2 votes
Print Recipe Pin Recipe
Prep Time 3 hours hrs 50 minutes mins
Cook Time 20 minutes mins
Total Time 4 hours hrs 10 minutes mins
Course Bread
Cuisine Japanese, Korean
Servings 6 Rolls
Calories 248 kcal

Ingredients


  • 75 gm Water, lukewarm
  • 84 gm Milk, lukewarm
  • 1 tsp Dried active yeast
  • 1.5 tsp Sugar
  • 1 tsp Salt
  • 1 tbsp Salted butter, melted
  • 240 gm All-purpose flour
  • 60 gms Salted butter, cut into small logs about 2.5" wide and frozen

Instructions
 

  • In a large bowl, combine water, milk, and yeast. Stir well.
    75 gm Water, lukewarm, 84 gm Milk, lukewarm, 1 tsp Dried active yeast
  • Whisk in the sugar, salt, and melted butter.
    1.5 tsp Sugar, 1 tsp Salt, 1 tbsp Salted butter, melted
  • Now add the flour and mix well using a spatula or your hands. The dough will be soft and slightly sticky to the touch.
    240 gm All-purpose flour
  • Cover the bowl and let the dough rest for 50 minutes.
  • After 50 minutes are over, it's time for the first fold. Bring a quarter of the dough over to the center.
    Repeat 3 more times, with each quarter of the dough.
  • Cover the bowl again and let the dough proof for 1 hour or until doubled in size.
  • Gently deflate the dough and transfer it to your work surface.
  • Divide the dough equally into 6 pieces, approximately 70 grams each.
  • Roll each dough piece into a ball and place the dough balls on a parchment-covered baking tray.
    Cover the tray with plastic wrap or a damp kitchen towel and let the dough balls rest for 20 minutes.
  • Now we preshape:
    Roll each dough ball into a teardrop shape.
    Place on the tray, cover with plastic wrap or a damp kitchen towel, and rest for 30 minutes.
  • Using a rolling pin, roll out each dough into a long triangle, about 18" long and 3"-3.5" wide at the base.
  • Place a frozen log of butter on the wide end of the triangle and start rolling the dough over the butter so it's completely covered with the dough, then keep rolling the dough until the tapered end of the dough.
    Repeat with the other dough pieces.
    60 gms Salted butter, cut into small logs about 2.5" wide and frozen
  • Place the shaped rolls on the baking tray, cover with plastic wrap or a damp kitchen towel, and place in a draft-free place for 1 hour or until the rolls are puffy.
  • Meanwhile, preheat your oven to 200 C / 392 F.
  • When the rolls are puffy, spray them evenly with water, sprinkle some sea salt flakes on top, and bake at 200 C / 392 F for 20 minutes or until golden brown.
  • Some of the butter would have melted out onto the baking sheet. Use a pastry brush to spread this butter on the rolls.
  • Transfer the rolls to a cooling rack and allow to cool for 15 minutes, then enjoy!

Video

Notes

  • Make sure the logs of butter you place in the rolled-out triangle are frozen. This ensures the flaky buttery texture these rolls are popular for.
  • Each log of butter should be 10 grams (2.5” wide). After slicing, freeze them for a couple of hours so they’re frozen solid.
  • Spray the puffed-up salt bread rolls with water before baking. This will give you a crispy crust.
  • For extra crispy shio pan bread, toss a cup of ice in the bottom tray of your preheated oven right when you slide in the rolls.
  • When the butter melts, it will spill over on the tray, leaving the center of the roll hollow. This will make the bottom of the rolls crisp and crunchy, so it's all good!
  • Though cup measurements are very convenient, this recipe for salted butter rolls needs accuracy. So, do use a kitchen scale.

Nutrition

Serving: 1 RollCalories: 248kcalCarbohydrates: 32gProtein: 5gFat: 11gSaturated Fat: 7gPolyunsaturated Fat: 1gMonounsaturated Fat: 3gTrans Fat: 0.4gCholesterol: 28mgSodium: 474mgPotassium: 72mgFiber: 1gSugar: 2gVitamin A: 332IUVitamin C: 0.002mgCalcium: 27mgIron: 2mg

Italian Tortellini Pasta Salad

July 5, 2024

Italian Tortellini Pasta Salad

Italian tortellini salad is an unbeatable choice, combining the heartiness of pasta with the freshness of a salad. This cheese tortellini pasta salad with Italian dressing is delicious and hearty. Load it up however you want, and it can hold its own as a main course, which is how we enjoy it.

Italian Tortellini Pasta Salad
[feast_advanced_jump_to]

Why You'll Love This Recipe

Made for any occasion: Casual family dinners, elegant garden parties, or barbecues.

Easy to make: It feeds a crowd and is simple to transport and serve, making it a go-to dish for picnics and potlucks.

Versatile: adapt to whatever fresh vegetables or meat you have and make it your own.

Make ahead: the flavors will meld and intensify, making it even more delicious the next day.

Reader Love!

5 stars

Tried this with store bought tortellini and it was the bomb! Thanks Natasha for always sharing such fool proof and simple to make recipes.

Italian Tortellini Pasta Salad

Recipe Ingredients

Ingredients for Italian Tortellini Pasta Salad

Tortellini: I used cheese-filled tortellini, which gave the pasta salad a rich and creamy base.

Cherry Tomatoes: Bring a burst of juicy sweetness and a pop of color to the cheese tortellini pasta salad. Use whole or halve them to evenly distribute.

Olives: Add a burst of salty goodness. I used green-stuffed ones. But black, pitted, sliced, halved, or a mix of anything will work.

Banana Peppers: These are optional, but I loved the mild heat, zing, and crunch they gave the Italian tortellini salad. You can replace them with jalapeños.

Bell Pepper: Gives a crisp texture and a sweet, slightly peppery flavor. Dice into bite-sized pieces so they mix well.

Cucumber: Fresh, seedless cucumbers give a lovely crunch.

Fresh Mozzarella: Cut into small, bite-sized pieces to make the salad more indulgent.

Fresh Basil: The fragrant leaves lend a pop of green and herbaceous, refreshing notes.

Italian Dressing: You can use a store-bought one or take a few minutes and whip up one at home. This homemade Italian dressing is so easy to make and is so fresh and tasty. I literally put it on everything!!

Please see the recipe card for full information on ingredients and quantities.

Recipe Variations

Tortellini: The recipe is very flexible. I used dried cheese tortellini. You can use fresh tortellini with cheese or any other kind you prefer.

Vegetables: Add as many or as few vegetables as you like. Add red onions; use all colors of bell peppers. Red, yellow, or orange—all are great choices.

Herbs: Switch basil with parsley, if that’s what you have.

Nuts: Want more crunch and texture? Add the nuts of your choice.

Add heft: Make tortellini pasta salad with salami or pepperoni.

How To Make Tortellini Salad

Step 1: Start by cooking the tortellini according to the package instructions. Once cooked, drain, rinse well, and cool.

Step 2: While the tortellini are cooking, chop the vegetables.

Step 3: In a large bowl, combine the cooked and cooled tortellini with the vegetables.

All the ingredients for Italian Tortellini Pasta Salad in a glass bowl

Step 4: Add Italian dressing and stir gently to coat all the ingredients evenly.

Pour the italian dressing on top of the Italian Tortellini Pasta Salad

Step 5: Taste and adjust for seasoning.

Step 6: Let the tortellini pasta salad with Italian dressing chill in the fridge for an hour.

Final step: Serve and savor!

Italian Tortellini Pasta Salad

How To Serve The Italian Tortellini Salad

You can serve the tortellini salad at room temperature or cold, straight from the refrigerator. Either way, it's fabulous!

I can eat just bowls full of this pasta salad on its own. But I also like to serve it alongside a roasted carrot soup or a creamy pea soup.

It's so good with cheesy garlic bread, pull-apart pizza bread, and pesto bread! Or serve it restaurant-style with my copycat Olive Garden bread sticks. I LOVE eating this pasta salad with my favorite crispy salted butter rolls or Korean cream cheese buns!

Recipe FAQs

Can you make the tortellini salad ahead?

For sure! You can prepare the tortellini beforehand; just remember to add olive oil (or Italian dressing) when storing it so it doesn’t stick together.
You can also prep all the vegetables for the cold Italian tortellini salad recipe ahead of time, so you just have to assemble everything at the last moment.
Add a bit of Parmesan before you serve. Freshly grated cheese has the best texture and flavor.

How to store tortellini salad with Italian dressing?

This salad recipe is fantastic as a leftover because it gets better as it sits. So, you can keep it refrigerated for up to 2 days in an airtight container. Give it a good stir before you serve.

Italian Tortellini Pasta Salad

Loved Cold Tortellini Salad? Try:

  • Creamy Cucumber Salad with Greek Yogurt
    Creamy Cucumber Salad with Greek Yogurt
  • The Easiest Smashed Chickpea Salad
    Easiest Smashed Chickpea Salad
  • Greek Salad healthy vegetarian easy recipe glutenfree
    Greek Salad With Avocado
  • Watermelon Feta Salad | Easy summer salad
    Watermelon Feta Salad

Half the joy of cooking is sharing it with others. That’s why I’m always eager to hear from you. So go right ahead & drop a comment or reach out on Instagram, Pinterest, YouTube, or Facebook. I hope you love this Italian Tortellini Salad as much as we do!

📖 Recipe

Tried this recipe?Let us know how it was!
Italian Tortellini Pasta Salad

Italian Tortellini Pasta Salad

Natasha Minocha
Italian tortellini salad is an unbeatable choice, combining the heartiness of pasta with the freshness of a salad. This cheese tortellini pasta salad with Italian dressing is delicious and hearty.
5 from 1 vote
Print Recipe Pin Recipe
Prep Time 20 minutes mins
Cook Time 15 minutes mins
Course Salad
Cuisine Italian
Servings 6 Servings
Calories 244 kcal

Ingredients


  • 10 oz Cheese tortellini
  • 2 Cucumber, peeled and diced
  • 7 oz Cherry tomatoes, halved
  • 1 Red bell pepper, diced
  • 2 Banana peppers, diced
  • 1/4 cup Olives, sliced
  • 1/3 cup Fresh mozzarella, diced
  • A handful fresh basil leaves
  • Italian dressing

Instructions
 

  • Bring a pot of salted water to a boil and cook the cheese tortellini according to the package instructions.
  • Drain and rinse with cold water. Let it cool for a few minutes.
  • Transfer the tortellini to a large bowl.
  • Add all the ingredients to the bowl - cucumbers, cherry tomatoes, bell peppers, banana peppers, mozzarella, and olives.
  • Pour the Italian dressing on top and mix well. Add the basil and give it another mix.
  • Cover and refrigerate for at least 30 minutes before serving.
  • This salad tastes wonderful cold and also at room temperature. Enjoy!

Video

Nutrition

Serving: 1 ServingCalories: 244kcalCarbohydrates: 32gProtein: 9gFat: 9gSaturated Fat: 3gPolyunsaturated Fat: 0.2gMonounsaturated Fat: 1gCholesterol: 35mgSodium: 561mgPotassium: 279mgFiber: 4gSugar: 4gVitamin A: 854IUVitamin C: 34mgCalcium: 122mgIron: 1mg

Italian Salad Dressing Recipe

July 2, 2024

Italian Salad Dressing Recipe

Nothing does the job quite like Italian dressing in transforming a simple bowl of salad into a delicious masterpiece. This classic 3-step recipe for Italian salad dressing is easy, quick, simple, and versatile.

Italian Salad Dressing Recipe

Homemade Italian salad dressing has become a staple in my kitchen. It’s the perfect balance of tangy, savory, and herbaceous flavors. It’s not just a vinaigrette; it’s an experience - the kind of dressing that excites even kids about eating vegetables!

[feast_advanced_jump_to]

Why you'll love Italian dressing?

Super easy and tastes so much better than anything you’d buy from the store

Free of preservatives and emulsifiers and with no excess sodium

All the ingredients are in your control and pantry staples

A go-to for a quick weeknight dinner or a festive gathering

Very versatile: toss as vinaigrette with veggies that need to be used up, marinade for grilled chicken, paneer, or tofu, or sauce for any meal

dressing Ingredients for italian salad

Recipe ingredients

Oil: It’s the fat that enhances the flavor of the dressing.

Lemon juice: the acid brightens the dressing. Fresh or bottled will do.

Honey: balances the acidity.

Vinegar: red wine or white vinegar. If you don’t have either, use apple cider vinegar.

Aromatics: minced garlic or powder along with onion powder.

Spices: dried parsley, dried basil, dried oregano for the herby taste, and red chili flakes (just for a kick of heat).

Seasoning: salt and pepper according to your taste.

Parmesan: freshly, finely grated Parmesan cheese to add oomph to the Italian salad dressing.

How to make Italian dressing?

Step 1: Add or pour all the ingredients into a bowl.

ingredients for the Italian salad dressing in a glass measuring cup

Step 2: Give it a good whisk.

Step 3: Taste and adjust the seasoning to your liking.

whisking the ingredients for Italian Salad

Final step: Pour over your favorite salad and savor!

How to store?

Transfer the (really) easy Italian salad dressing into a jar or any airtight container. It’ll keep well for 10 days in the refrigerator.

It may solidify in the fridge and that’s normal. Just leave it on the countertop and it’ll melt at room temperature. Give the homemade salad dressing a good whisk, and use as required.

Italian Salad Dressing Recipe

FAQS

How else can I use homemade Italian dressing?

1. It really is the best Italian dressing for salads, like:
- roasted sweet potato salad
- greek salad
- red rice & mango salad with Sriracha
2. Use the Italian dressing for pasta salads like summer pasta salad.
3. On burgers and grilled or roasted veggies, like this oven-roasted Brussels sprouts. It’s the most delicious topping.
4. I also love it as a marinade, so I always make extra and keep it stored for ready use with chicken, fish, or tofu.

What is the difference between Italian dressing and vinaigrette?

The basic recipe for both is the same. But the Italian dressing has more ingredients like garlic, cheese, and herbs.

recipe for Italian Salad Dressing

Loved Italian dressing recipe? Try

  • vegan mayonnaise in a glass jar with a spoon and ingredients in the background.
    Homemade Vegan Mayonnaise
  • Easiest Homemade Cream Cheese | Homemade Cream Cheese Recipe
    Easiest Homemade Cream Cheese
  • Easy Creamy Avocado Dip
    Easy Creamy Avocado Dip
  • How To Make Garlic Confit
    How To Make Garlic Confit

Half the joy of cooking is sharing it with others. That’s why I’m always eager to hear from you. So go right ahead & drop a comment or reach out on Instagram, Pinterest, YouTube, or Facebook. I hope you love this Italian dressing as much as we do!

📖 Recipe

Tried this recipe?Let us know how it was!
Italian Salad Dressing Recipe

Italian Salad Dressing Recipe

Natasha Minocha
Nothing does the job quite like Italian dressing in transforming a simple bowl of salad into a delicious masterpiece. This classic 3-step recipe for Italian salad dressing is easy, quick, simple, and versatile.
No ratings yet
Print Recipe Pin Recipe
Prep Time 10 minutes mins
Total Time 10 minutes mins
Course Condiment
Cuisine Italian
Servings 6 Servings
Calories 135 kcal

Ingredients


  • 1/3 cup Olive oil
  • 2 tbsp Red wine vinegar
  • 2 tbsp Lemon juice
  • 1 tbsp Honey
  • 3 tbsp Parmesan, grated
  • 2 cloves Garlic, minced
  • 1/2 tsp Onion powder
  • 1 tsp Dried parsley
  • 1 tsp Dried basil
  • 1 tsp Dried oregano
  • 1/2 tsp Red chilli flakes
  • Salt & Pepper to taste

Instructions
 

  • In a small bowl, combine all the ingredients - olive oil, red wine vinegar, lemon juice, honey, grated parmesan, minced garlic, onion powder, dried parsley, dried basil, dried oregano, salt, and pepper.
  • Give it all a good whisk. Taste and adjust the seasonings.
  • Transfer to a jar and store in the refrigerator for 10-12 days.
  • Whisk well before using. Enjoy!

Video

Nutrition

Serving: 1 ServingCalories: 135kcalCarbohydrates: 4gProtein: 1gFat: 13gSaturated Fat: 2gPolyunsaturated Fat: 1gMonounsaturated Fat: 9gCholesterol: 2mgSodium: 48mgPotassium: 32mgFiber: 0.3gSugar: 3gVitamin A: 79IUVitamin C: 2mgCalcium: 35mgIron: 0.5mg

Almond Poppy Seed Bread

June 27, 2024

Almond Poppy Seed Bread

Almond poppy seed bread uses simple ingredients and it's an easy poppy seed bread recipe and so, so versatile. Have it with tea, a smear of butter, or a dollop of cream; each slice is delightfully sweet, nutty, tangy, and warm and comforting.

Almond Poppy Seed Bread

Few things compare to the aroma of freshly baked bread wafting through the kitchen and when it's a quick bread, it's even better.

Almond poppy seed bread is a delightful twist to your traditional quick bread recipe. Moreover, with its tender crumb and nutty flavor, this poppyseed loaf is the ideal companion to your morning coffee or afternoon tea break.

Almond Poppy Seed Bread
[feast_advanced_jump_to]

Why You'll Love This Recipe

It's a moist and fluffy interior, much like a pound cake but not as dense

Bursting with the rich, buttery essence of almonds and the subtle crunch of poppy seeds

You can whip up a loaf whenever the craving strikes

Enjoy it fresh out of the oven or toasted with your favorite spread

Almond Poppy Seed Bread

Recipe Ingredients

Almond Poppy Seed Bread Ingredients

Flour: Use a mix of all-purpose and almond flour (store-bought or homemade). You can even use almond meal.

Poppy seeds: These little seeds are not just for texture. They bring a hint of depth that complements the almond flavor beautifully. Plus, they are a great source of dietary fiber and essential minerals like calcium and magnesium. 

Eggs: Act as a binding agent, providing structure and rich texture to the almond poppyseed loaf. They also lend the bread moisture and a slight richness.

Vegetable oil: ensures the bread stays moist and tender with a fine, soft crumb that makes each slice of bread melt in your mouth.

Sugar: to sweeten the bread.

Milk: keeps the loaf moist. Use whole milk for a richer taste, or opt for low-fat milk if you prefer.

Vanilla extract amplifies the overall flavor.

Almond extract is the star of this bread recipe making it rich, nutty taste, and deeply satisfying.

Almond flakes: give an extra layer of texture and a pleasant crunch.

Salt: a small but essential ingredient that rounds the bread’s flavor.

How To Make Almond Poppy Seed Bread

Step 1: Set your oven to preheat and grease your loaf tin. I used an 8 by 4 inch one.

Step 2: Sift flour, almond flour, baking soda, baking powder, and salt in a bowl. Mix.

Step 3: Whisk in poppy seeds and set the dry ingredients aside.

sifting all the dry ingredients and whisk in poppy seeds

Step 4:  In another larger bowl, beat eggs and sugar till light and creamy—about 2 minutes.

Step 5: Pour the oil, milk, vanilla extract, and almond extract and mix well.

Whisking all wet ingredients together for the almond poppy seed bread batter

Step 6: Add the wet ingredients to the dry ingredients and mix well.

Step 7: Pour the batter into the prepared tin. Top with almond flakes and sugar.

Almond Poppy Seed Bread batter

Step 8: Bake until a skewer inserted in the center comes out clean.

Step 9: Let the quick bread cool in the pan before turning it on a wire rack.

Final step: Serve and savor.

Almond Poppy Seed Bread

Pro Tips

  • Room-temperature eggs and milk make it so much easier to mix the bread batter, and it makes the crumb nice and light.
  • Don’t overmix the batter. Mix just enough, so no white streaks are visible, and you'll have the softest almond flour poppy seed bread.
Almond Poppy Seed Bread

Almond Poppy Seed Bread Recipe FAQs

Can I use almond meal instead of almond flour in this bread?

Indeed, you can. The texture of the bread will be a bit crumbly because almond meal is coarser than almond flour, but it will still taste fabulous!

Can I make this almond bread without eggs?

Yes, you can make the recipe without eggs by substituting it with flax eggs.

How should I store the almond poppyseed bread?

I like to store this bread in the refrigerator in summer. It stays well in the fridge, in an air-tight container, or wrapped in plastic wrap or beeswax paper for 4-5 days.

Can this bread be frozen?

Yes, you can slice the bread and freeze it, well-wrapped in plastic wrap for up to a month.

Can I make almond poppy seed bread with glaze?

Absolutely! Glaze for almond poppy seed bread is easy to make and utterly delicious. Use my lemon almond poppy seed bread blog for the recipe.

Almond Poppy Seed Bread

More Delicious Quick Bread Recipes

  • Sliced poppyseed bread on a platter.
    The Best Lemon Poppy Seed Bread
  • Apple Butter Bread recipe
    Apple Butter Bread
  • Homemade Cornbread Recipe
    Homemade Cornbread Recipe with Buttermilk
  • Sliced peach bread on a white platter.
    Peach Bread Recipe

Half the joy of cooking is sharing it with others. That’s why I’m always eager to hear from you. So go right ahead & drop a comment or reach out on Instagram, Pinterest, YouTube, or Facebook. I hope you love this almond poppy seed bread as much as we do!

📖 Recipe

Tried this recipe?Let us know how it was!
Almond Poppy Seed Bread

Almond Poppy Seed Bread

Natasha Minocha
Almond poppy seed bread uses simple ingredients and it's an easy poppy seed bread recipe and so, so versatile. Have it with tea, a smear of butter, or a dollop of cream; each slice is delightfully sweet, nutty, tangy, and warm and comforting.
No ratings yet
Print Recipe Pin Recipe
Prep Time 15 minutes mins
Cook Time 36 minutes mins
Course Dessert, Snack
Cuisine American, World
Servings 8 Servings
Calories 371 kcal

Ingredients


  • 1 1/4 cup All-purpose flour
  • 1/2 cup Almond flour
  • 1 tsp Baking powder
  • 1/2 tsp Baking soda
  • 1/4 tsp Salt
  • 2 tbsp Poppy seeds
  • 2 Eggs
  • 1/2 cup + 2 tbsp Sugar
  • 1/2 cup Milk
  • 1/2 cup Vegetable oil
  • 1 tsp Vanilla extract
  • 1 tsp Almond extract

Topping ( Optional)

  • 3 tbsp Almond flakes
  • 1 tbsp Sugar

Instructions
 

  • Set your oven to preheat at 180 C or 350 F and grease your loaf tin. I used an 8 by 4 inch one.
  • Sift flour, almond flour, baking soda, baking powder, and salt in a bowl.
  • Whisk in poppy seeds and set the dry ingredients aside.
  • In another larger bowl, beat eggs and sugar till light - about 2 minutes.
  • Pour the milk, oil, vanilla extract, and almond extract and mix well.
  • Add the wet ingredients to the dry ingredients and mix well.
  • Pour the batter into the prepared cake tin. Top with almond flakes and sugar.
  • Bake at 180 C or 350 F for 35-40 minutes or until the top is golden and a skewer inserted in the center comes out clean.
  • Let the bread cool in the pan for 10 minutes before turning it out on a cooling rack.
  • Slice and serve. Enjoy!

Video

Nutrition

Serving: 1 ServingCalories: 371kcalCarbohydrates: 39gProtein: 7gFat: 22gSaturated Fat: 3gPolyunsaturated Fat: 9gMonounsaturated Fat: 5gTrans Fat: 0.1gCholesterol: 42mgSodium: 218mgPotassium: 103mgFiber: 2gSugar: 21gVitamin A: 75IUVitamin C: 0.1mgCalcium: 114mgIron: 2mg
  • « Go to Previous Page
  • Page 1
  • Page 2
  • Page 3
  • Page 4
  • Interim pages omitted …
  • Page 16
  • Go to Next Page »

Primary Sidebar

New-Cover-4-1024x934

I’m Natasha! I’m a self-taught baker and cook, sharing easy, fuss-free recipes that anyone can make with confidence. From breads and cookies to decadent desserts to simple meals, I hope you’ll find your next favorite recipe here.

More about me →

Add us as a Trusted Site

Sign Up For Email Updates

Get A Free E-Book With 8 Easy Bread Recipes For Beginner Bakers!

Popular Recipes

  • mushroom quiche on a platter with ingredients in the background.
    Mushroom Quiche
  • chocolate fudge squares stacked on top of each other on small plate.
    Chocolate Fudge With Condensed Milk
  • Easiest Homemade Cream Cheese | Homemade Cream Cheese Recipe
    Easiest Homemade Cream Cheese
  • Cinnamon Bread Pudding
    Cinnamon Bread Pudding
  • Korean Corn Cheese in a cast iron skillet.
    Korean Corn Cheese Recipe
  • Best Condensed Milk Bread Rolls (Soft & Fluffy)
    Best Condensed Milk Bread Rolls (Soft & Fluffy)

Summer Recipes

  • Mango Tres Leches Cake
    Mango Tres Leches Cake
  • Strawberry cream cheese rolls stacked on a cake stand with strawberries on the side.
    Strawberry Cream Cheese Rolls
  • cherry bread pudding in 3 ramekins with spoons on the side on a wooden board.
    Cherry Bread Pudding
  • Frozen Yogurt Bark on a white platter.
    Frozen Yogurt Bark - Easy Summer Recipe
  • Sliced lemon blueberry bread on a white platter.
    Blueberry And Lemon Bread
  • Mango Mousse
    The Best Mango Mousse Recipe! (3 Ingredients)

See More Summer Recipes →

Footer

↑ back to top

Sign Up For Email Updates

Get A Free E-Book With 8 Easy Bread Recipes For Beginner Bakers!

Tasha’s Artisan Foods

About

Work With Me

Connect With Me

Browse Recipes

Desserts
Snacks
Breads
Cakes
Baking Guides

Published with WordPress

PRIVACY POLICY

COPYRIGHT © 2026 TASHA'S ARTISAN FOODS

Rate This Recipe

Your vote:


A rating is required
A name is required
An email is required