• Skip to main content
  • Skip to primary sidebar

menu icon
go to homepage
  • Summer Recipes
  • Recipe Index
  • About Natasha
  • Free E-Book
subscribe
search icon
Homepage link
  • Summer Recipes
  • Recipe Index
  • About Natasha
  • Free E-Book
×
Home > Recipes

Lemon Panna Cotta

May 16, 2022

A jar of panna cotta garnished with pomegranate arils kept on a white platter with spoons.

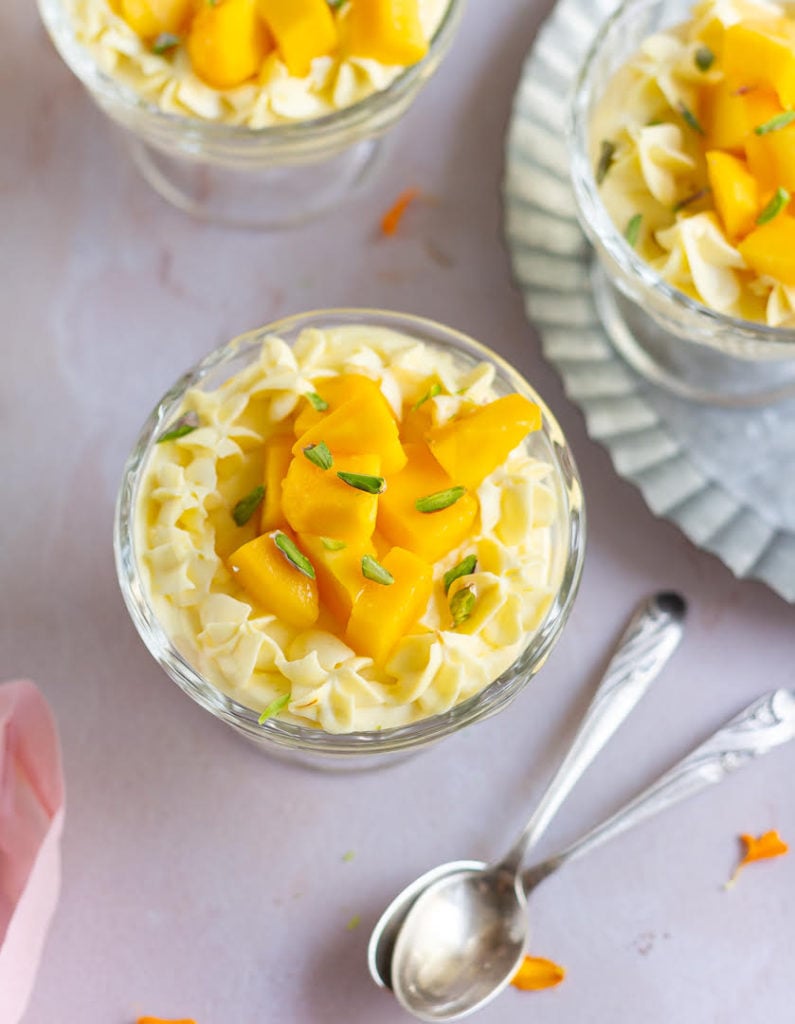
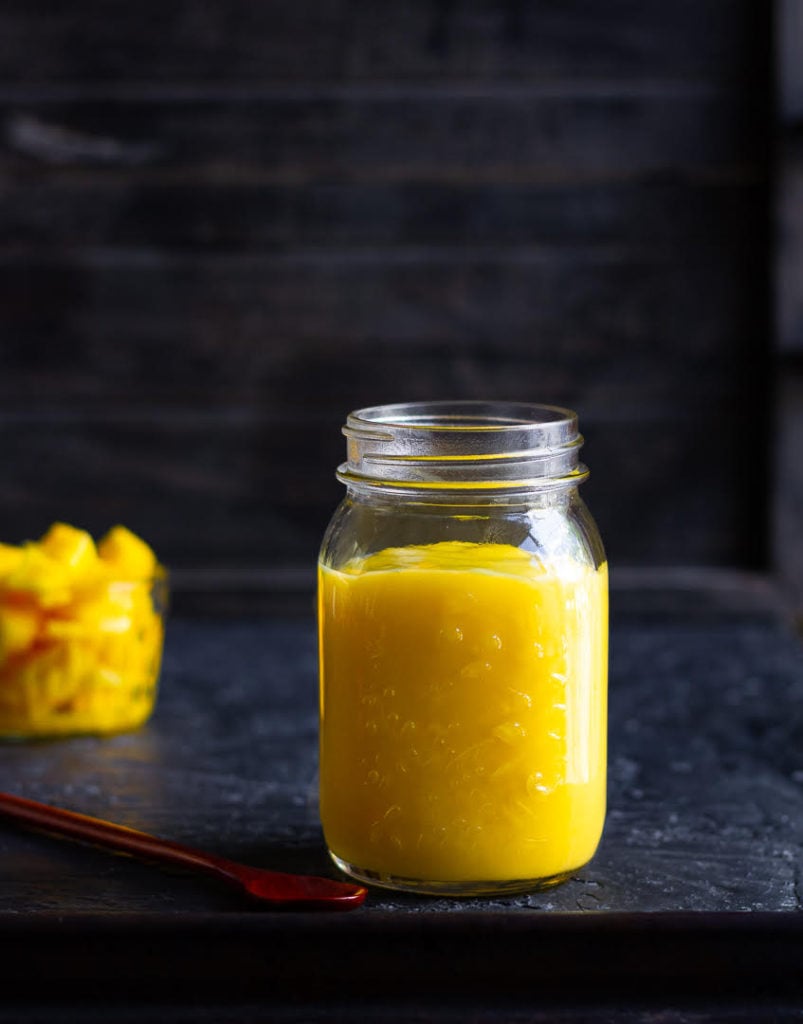
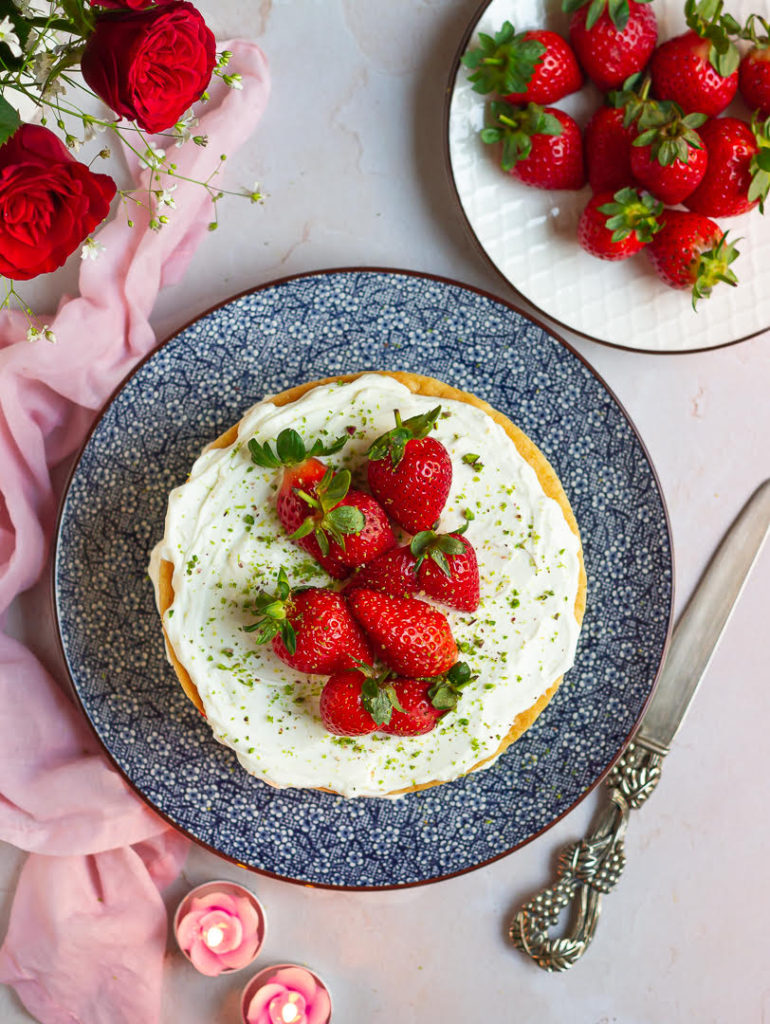
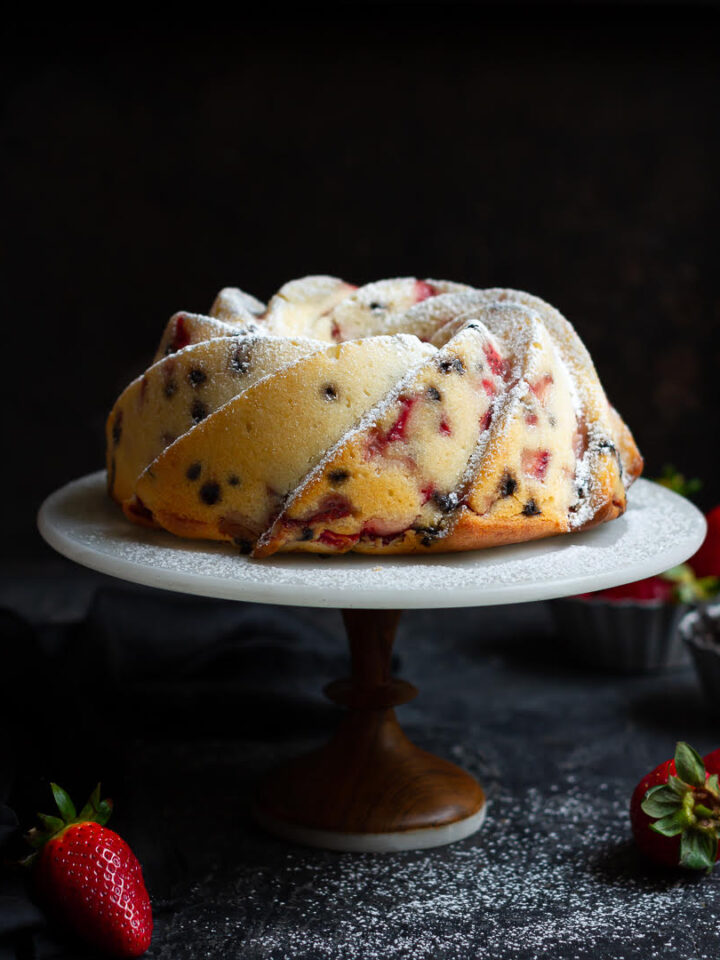
This lemon panna cotta is light, creamy, silky smooth, and bursting with fresh lemon flavor. Made with just a handful of ingredients, this panna cotta without gelatin is super easy to make. It’s an elegant dessert, perfect for parties and weeknights.

A jar of panna cotta garnished with pomegranate arils kept on a white platter with spoons.

If you're looking for easy no-bake desserts, this bright, citrusy, and luscious homemade lemon panna cotta is a wonderful one for spring and summer. This Italian-inspired classic dessert is easy to prepare ahead, sets beautifully in the refrigerator, and pairs so well with a sprinkling of nuts, fresh berries, and fruit compotes.

[feast_advanced_jump_to]

Why You'll Love This Recipe

✨ This lemon panna cotta is incredibly easy to make with just a few simple ingredients.

✨ Light, creamy, silky smooth, and with that delightful wobble, it’s a refreshing no-bake dessert for hot summer months.

✨ The fresh lemon flavor keeps the panna cotta bright and balanced, never too heavy.

✨ A wonderful make-ahead dessert for parties, potlucks, and stress-free entertaining.

✨ This creamy lemon dessert is wonderful on its own, but also pairs exceptionally well with fresh fruits, fruit sauces, or even with a simple drizzle of honey.

⭐️ Made this recipe? Please consider leaving a review. Your comments and star ratings help other readers find and trust my recipes.

Recipe Ingredients

labelled ingredients for making lemon panna cotta.

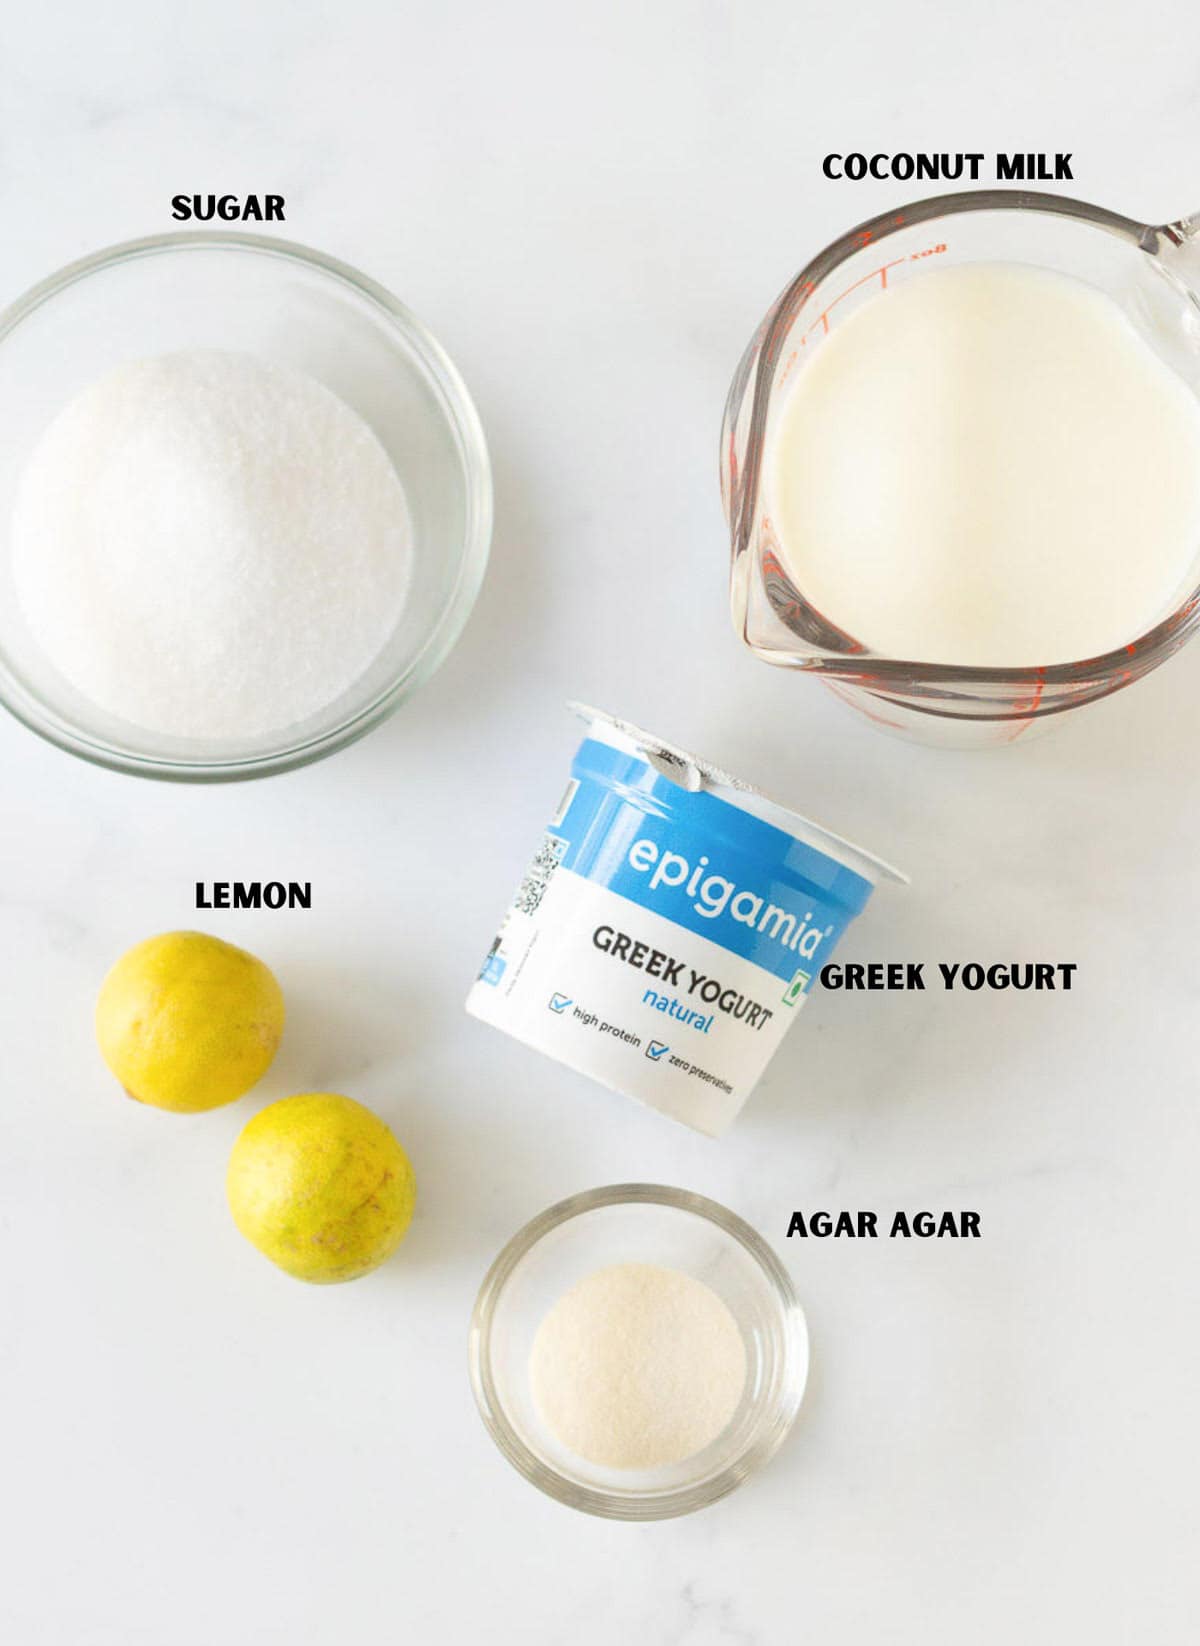
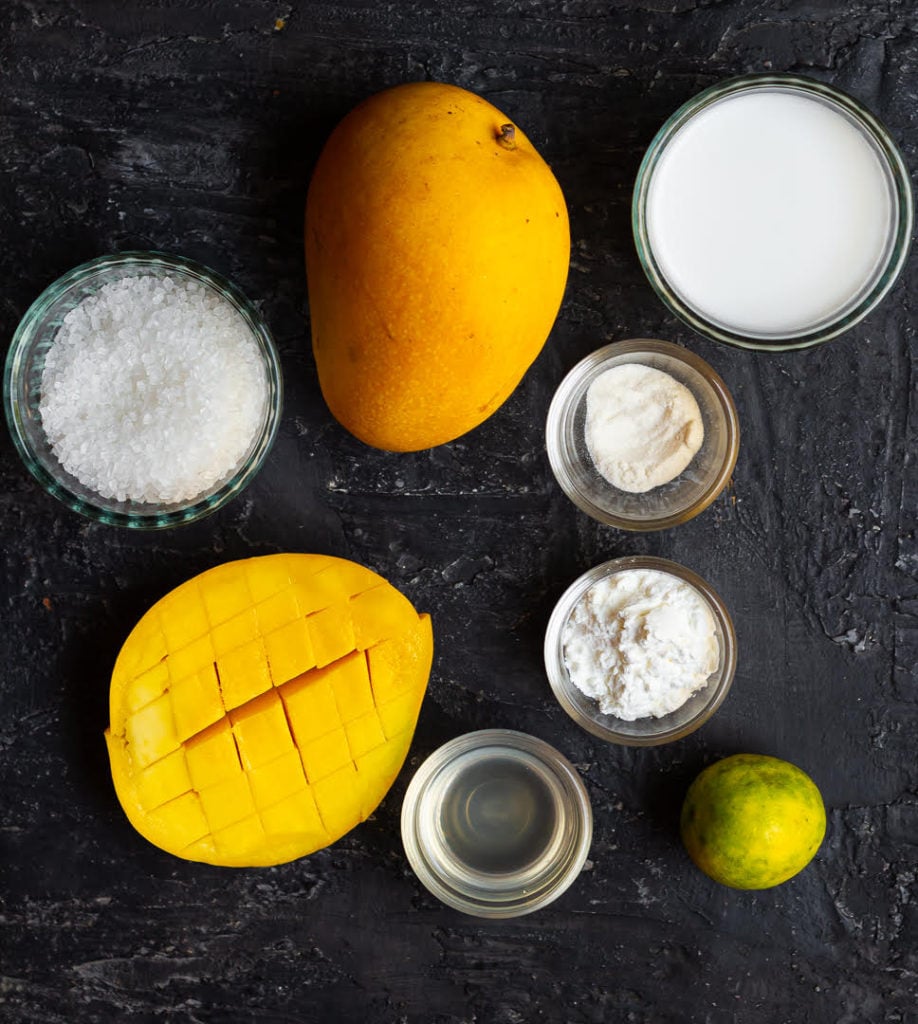
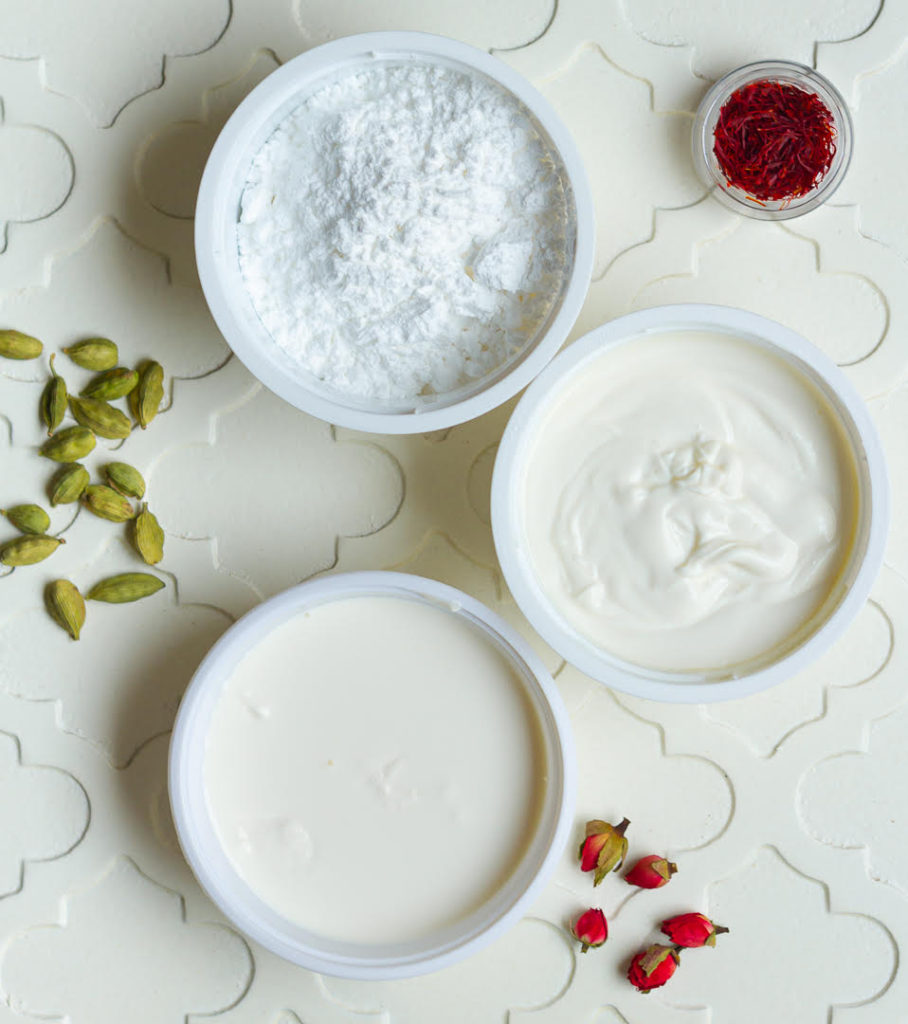
Milk: Classic panna cotta is made with cream, mixed with some whole milk. But I love making it with full-fat coconut milk. If you want, you can swap this with cream.

Sugar: Regular granulated sugar works well to sweeten the panna cotta.

Greek yogurt: This helps give a smooth, luxurious texture and adds a subtle tang.

Agar agar: This is a vegan alternative to gelatin. The plant-based setting agent comes from red algae. It sets firmer than gelatin, so a little goes a long way.

Lemon: Fresh lemon juice and zest are what make this easy panna cotta a citrusy kick and zing! Avoid bottled lemon juice.

Please see the recipe card below for full information about the ingredients and quantities.

 Panna cotta in a jar and a spoon with lemon slice and pomegranate seeds.

How To Make Lemon Panna Cotta

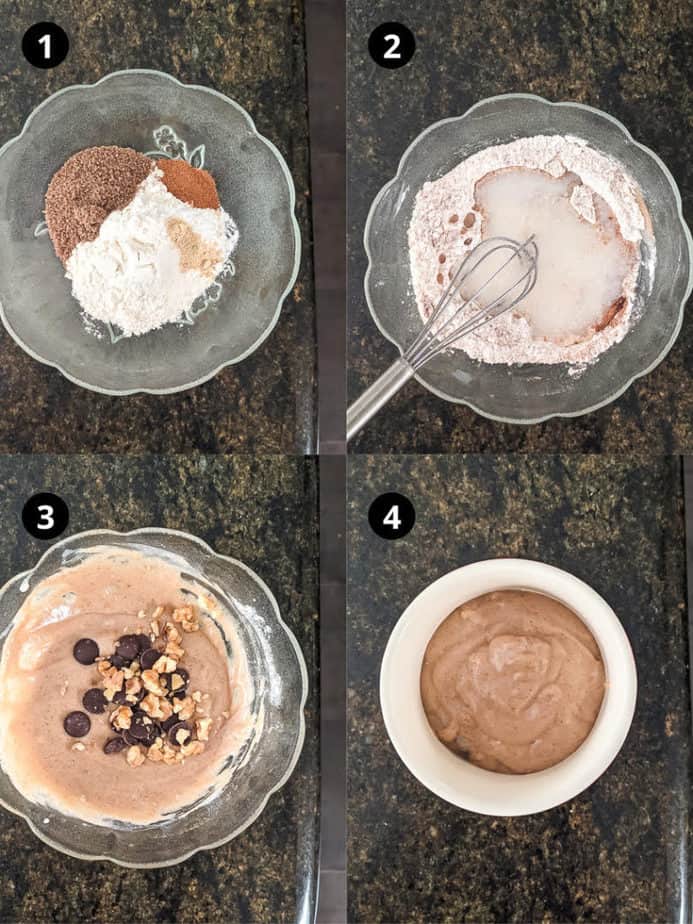
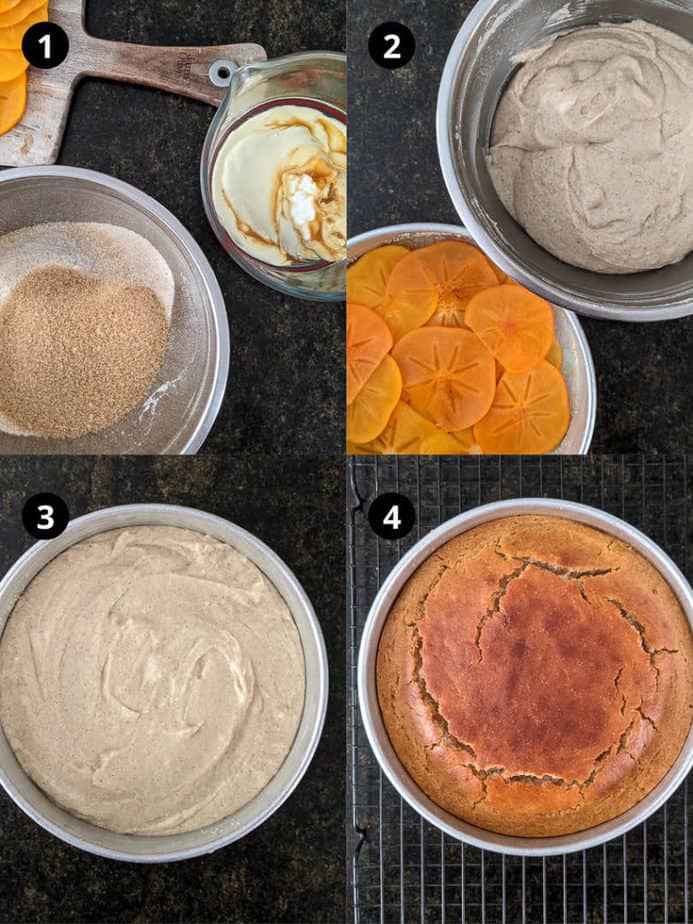
Step 1: Gently heat coconut milk with sugar and lemon zest till the sugar dissolves.

Step 2: Remove from the heat and stir in the agar-agar.

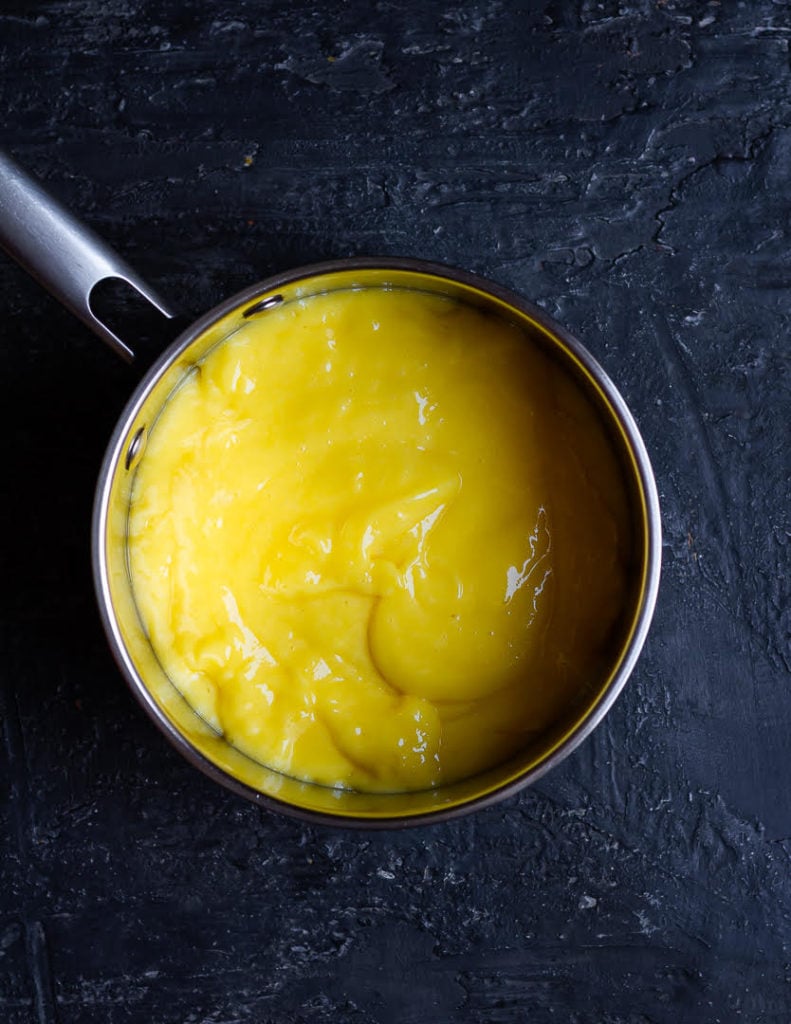
Step 3: Continue whisking. Put the pan back on low heat and bring it to a simmer.

Step 4: Strain the mixture at this point to remove any lumps.

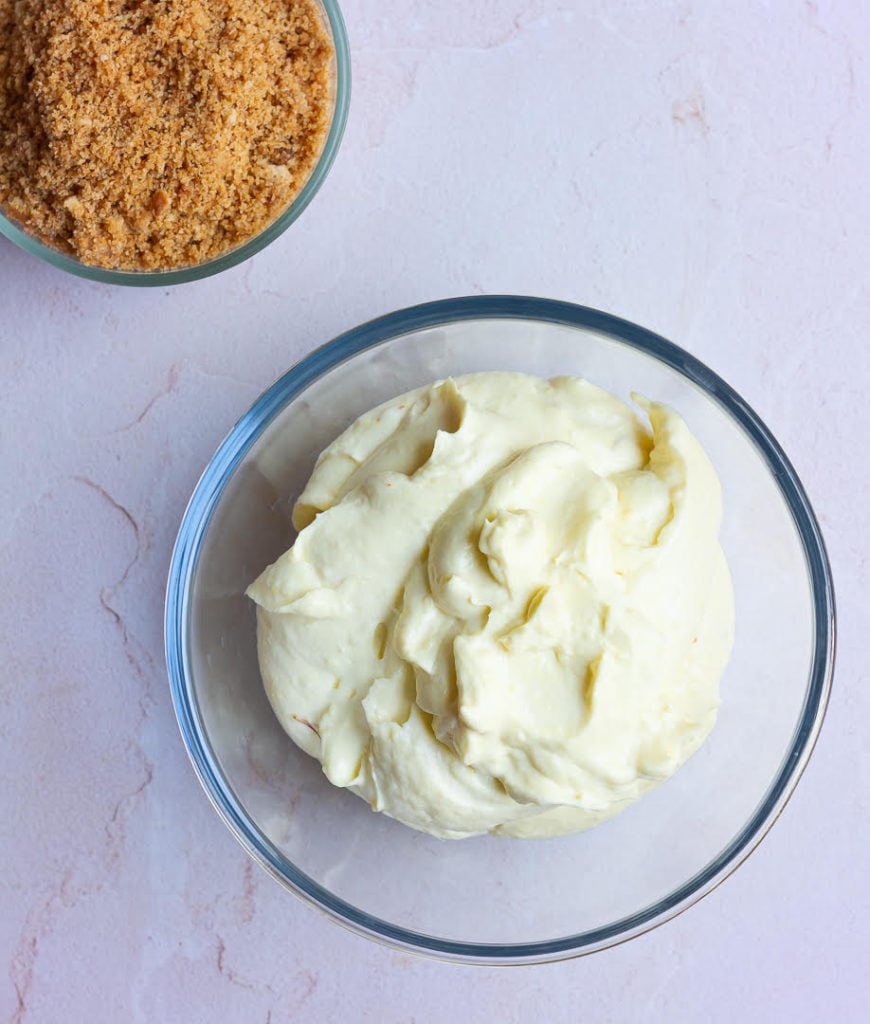
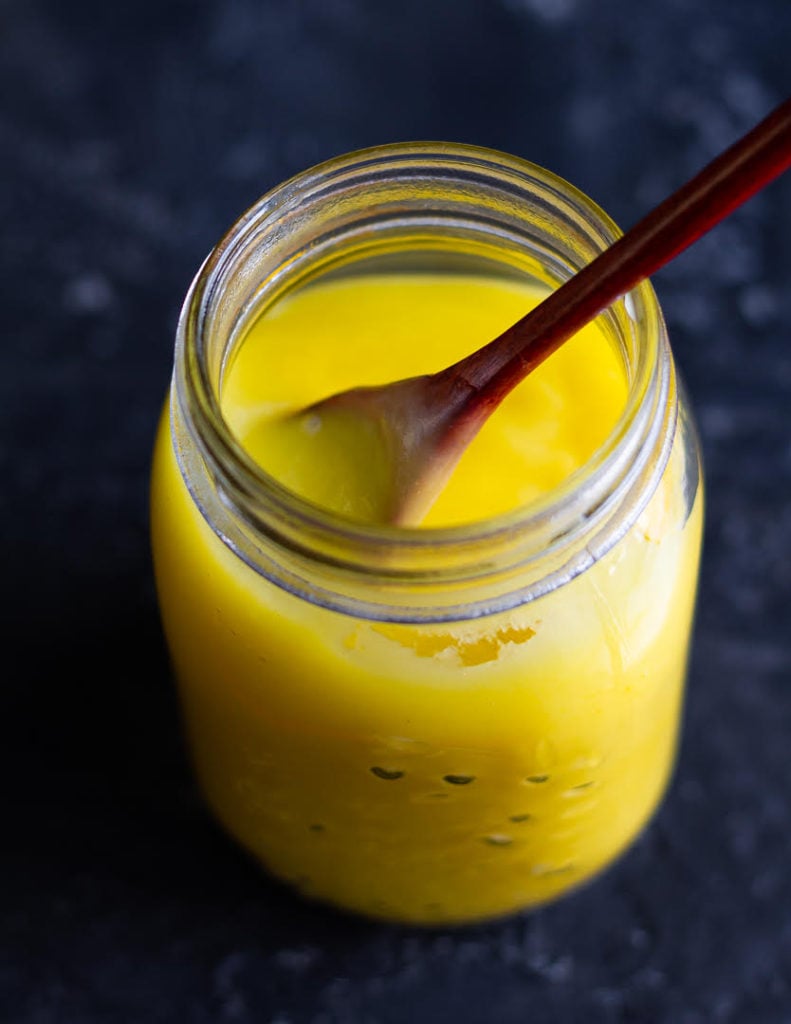
Step 5: Allow the panna cotta to cool slightly, about 10 minutes. When it’s lukewarm, add lemon juice, lemon zest, and some Greek yogurt for tangy creaminess.

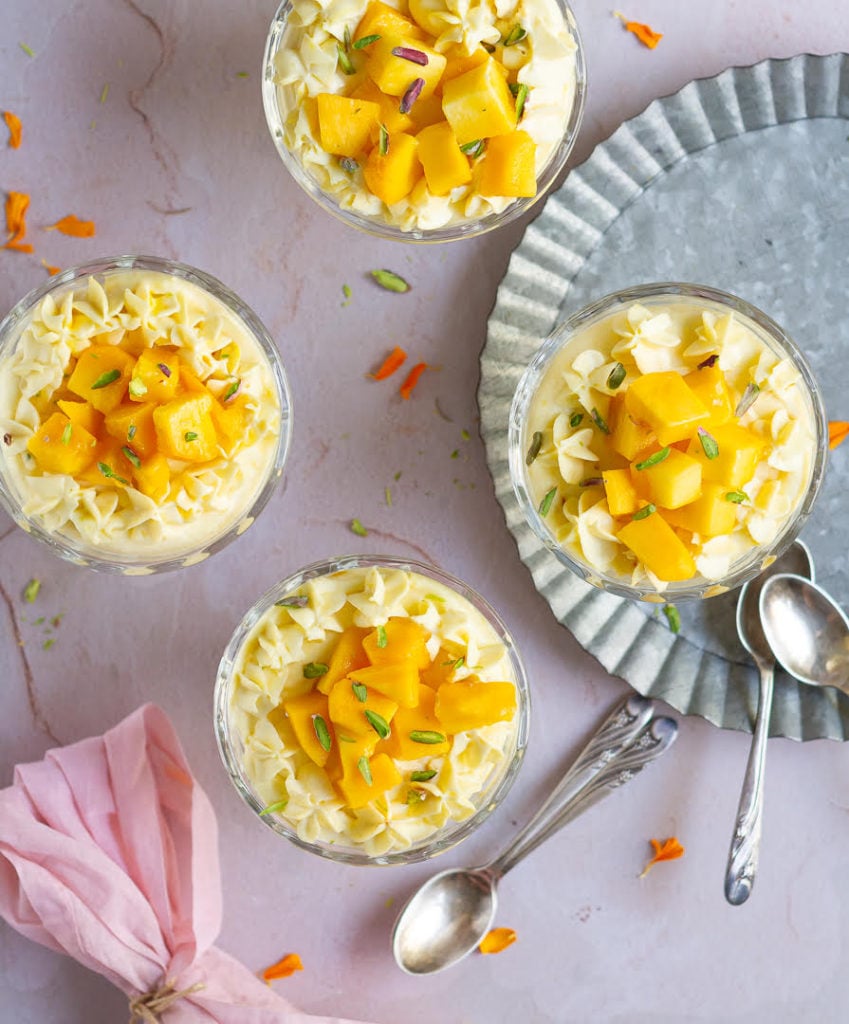
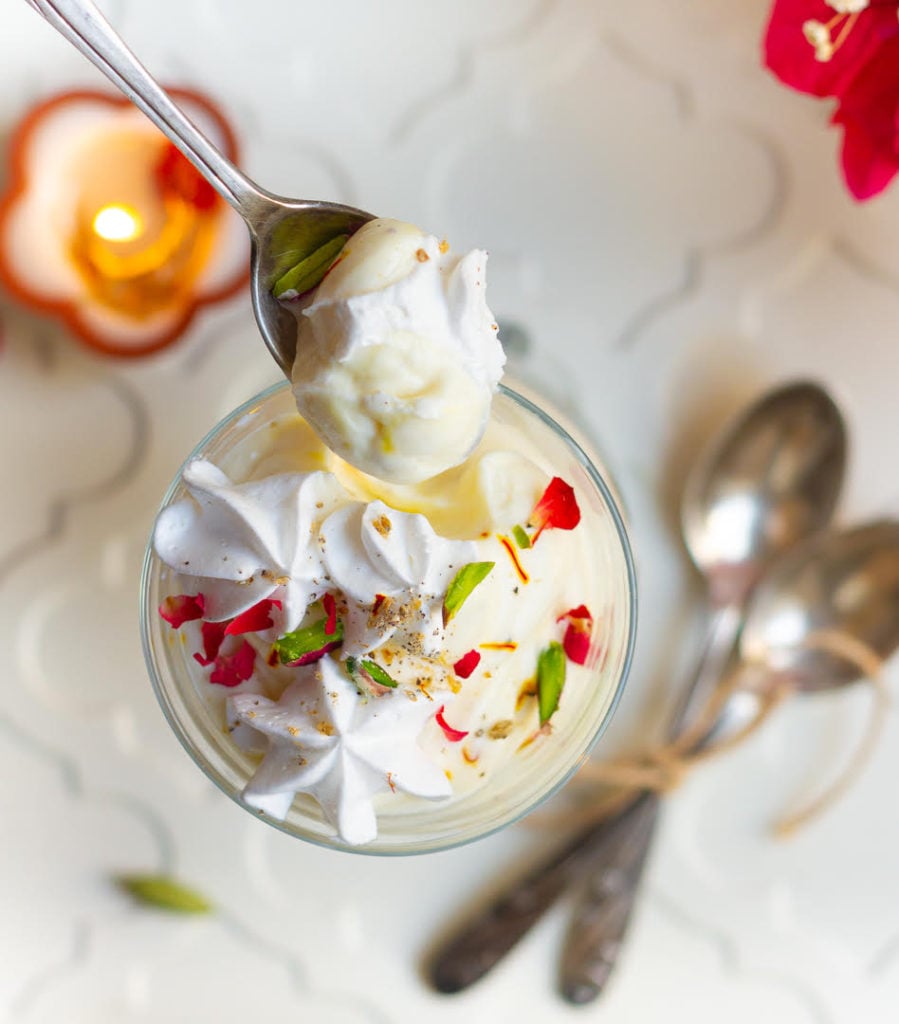
Step 6: Divide into serving cups, bowls, or glasses and let it chill for 4-6 hours or even overnight.

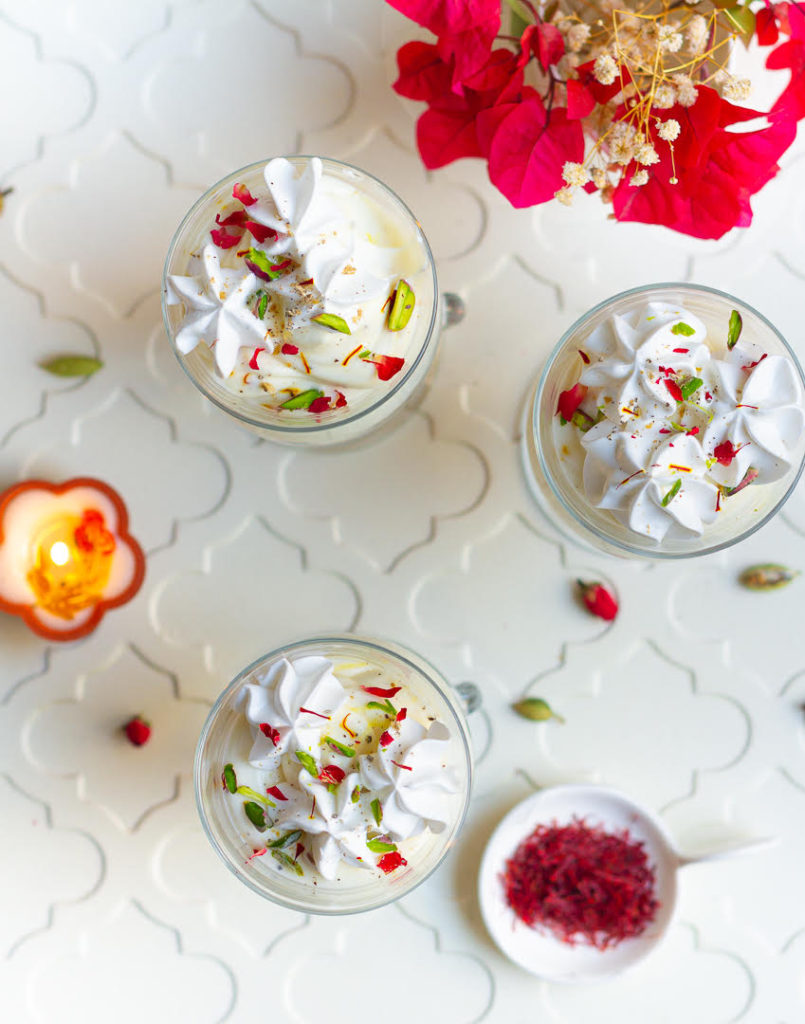
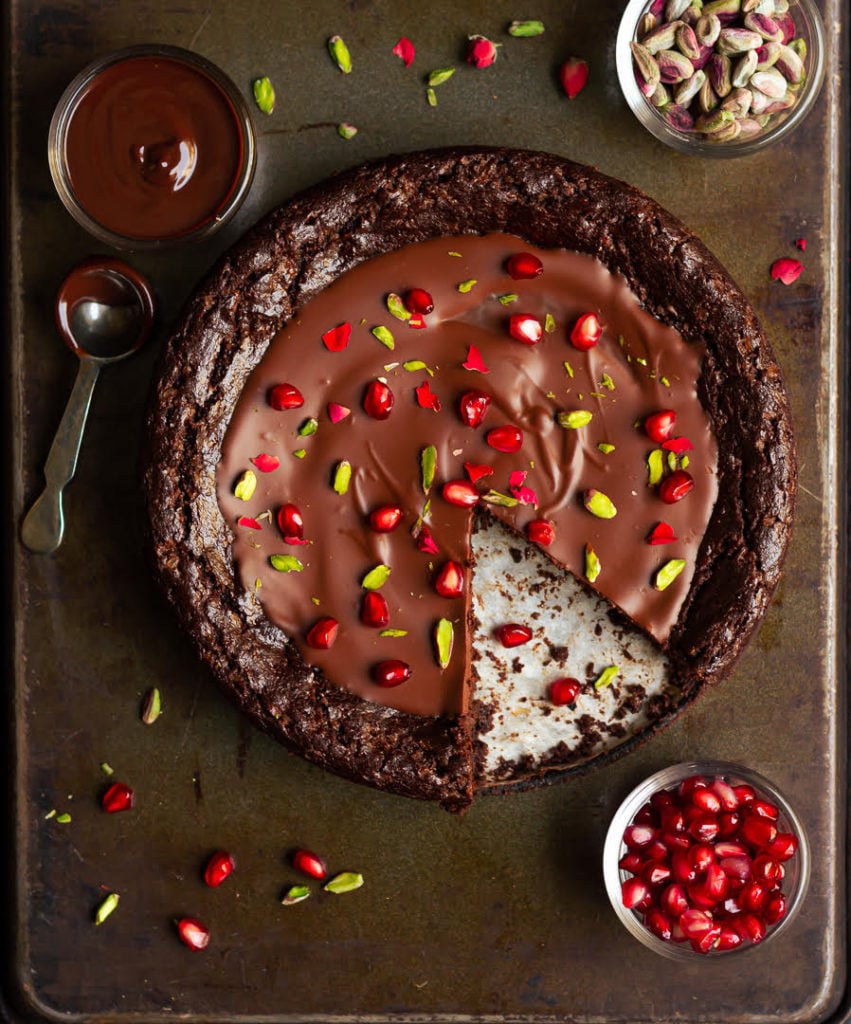
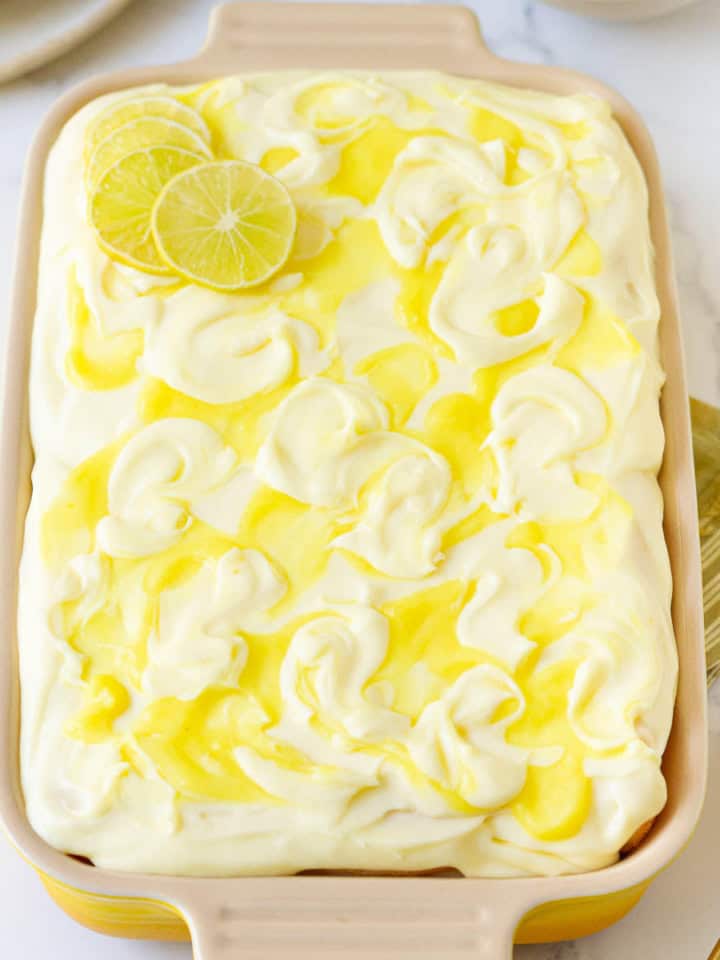
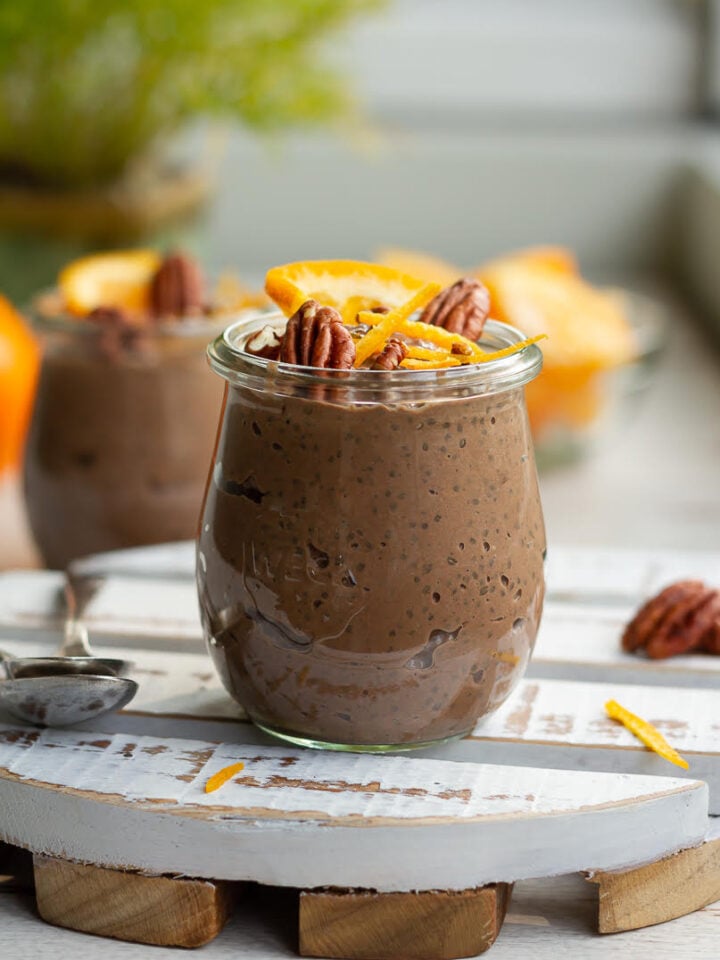
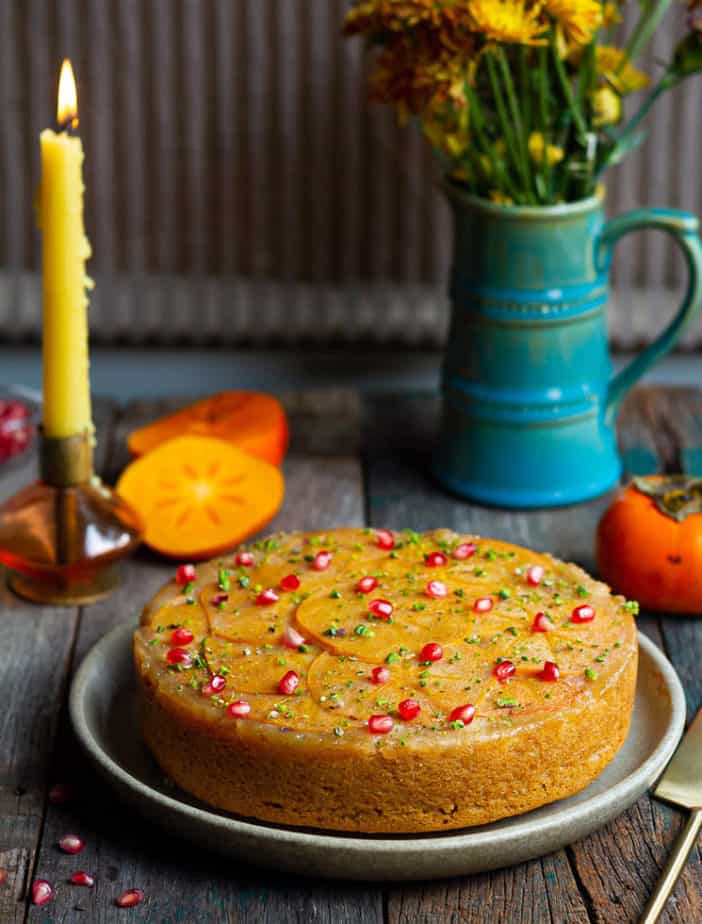
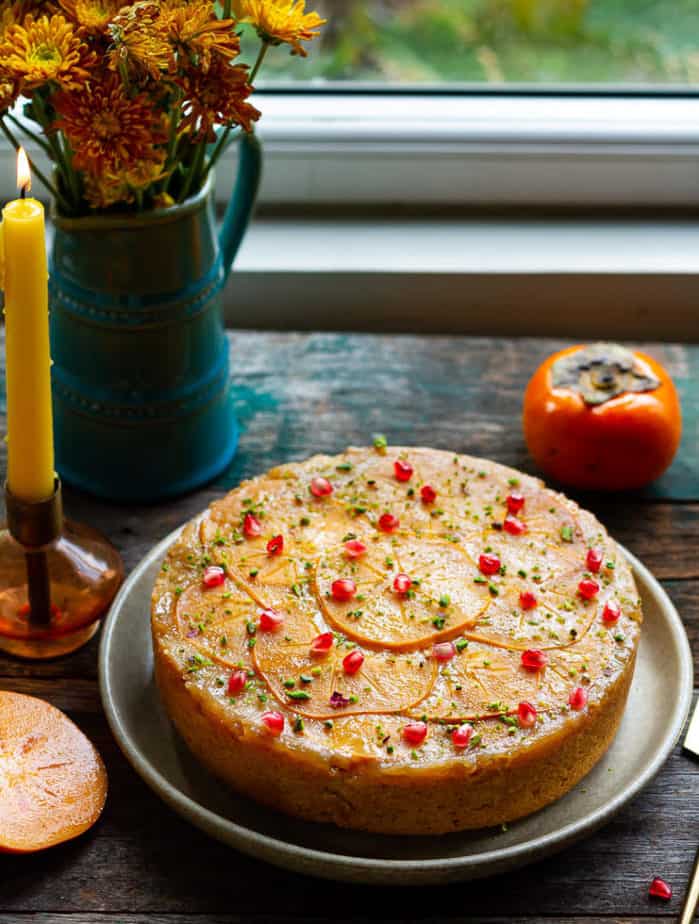
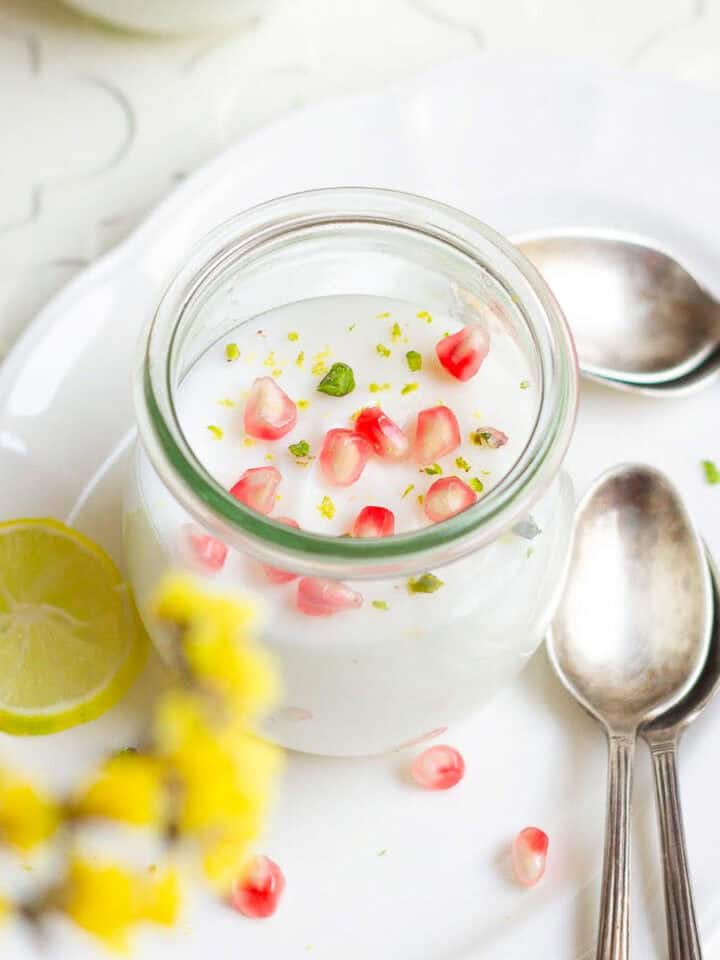
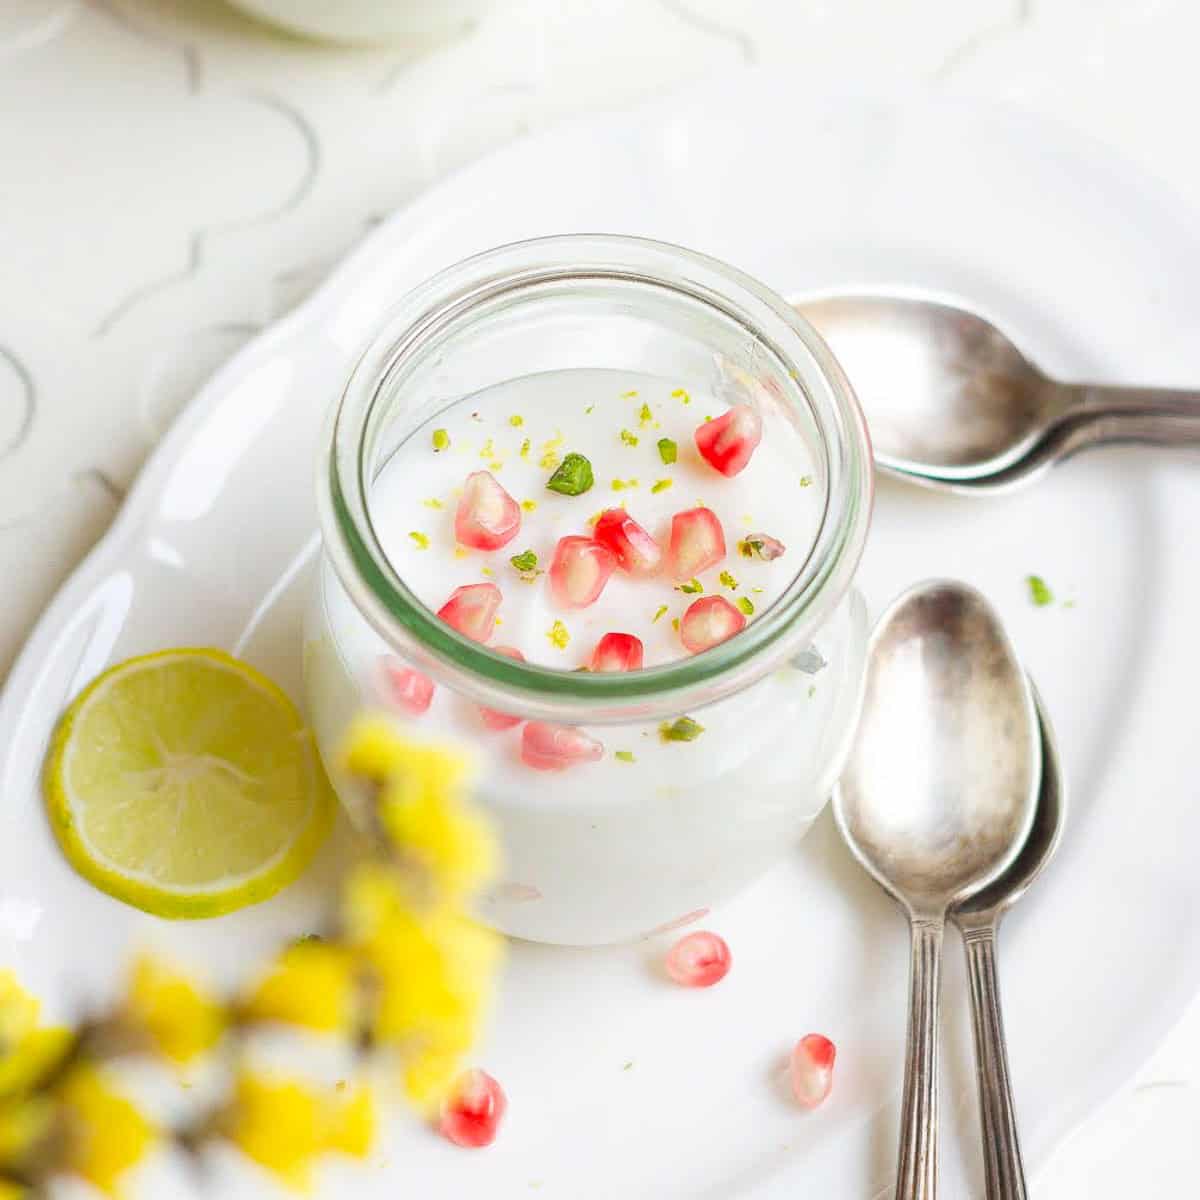
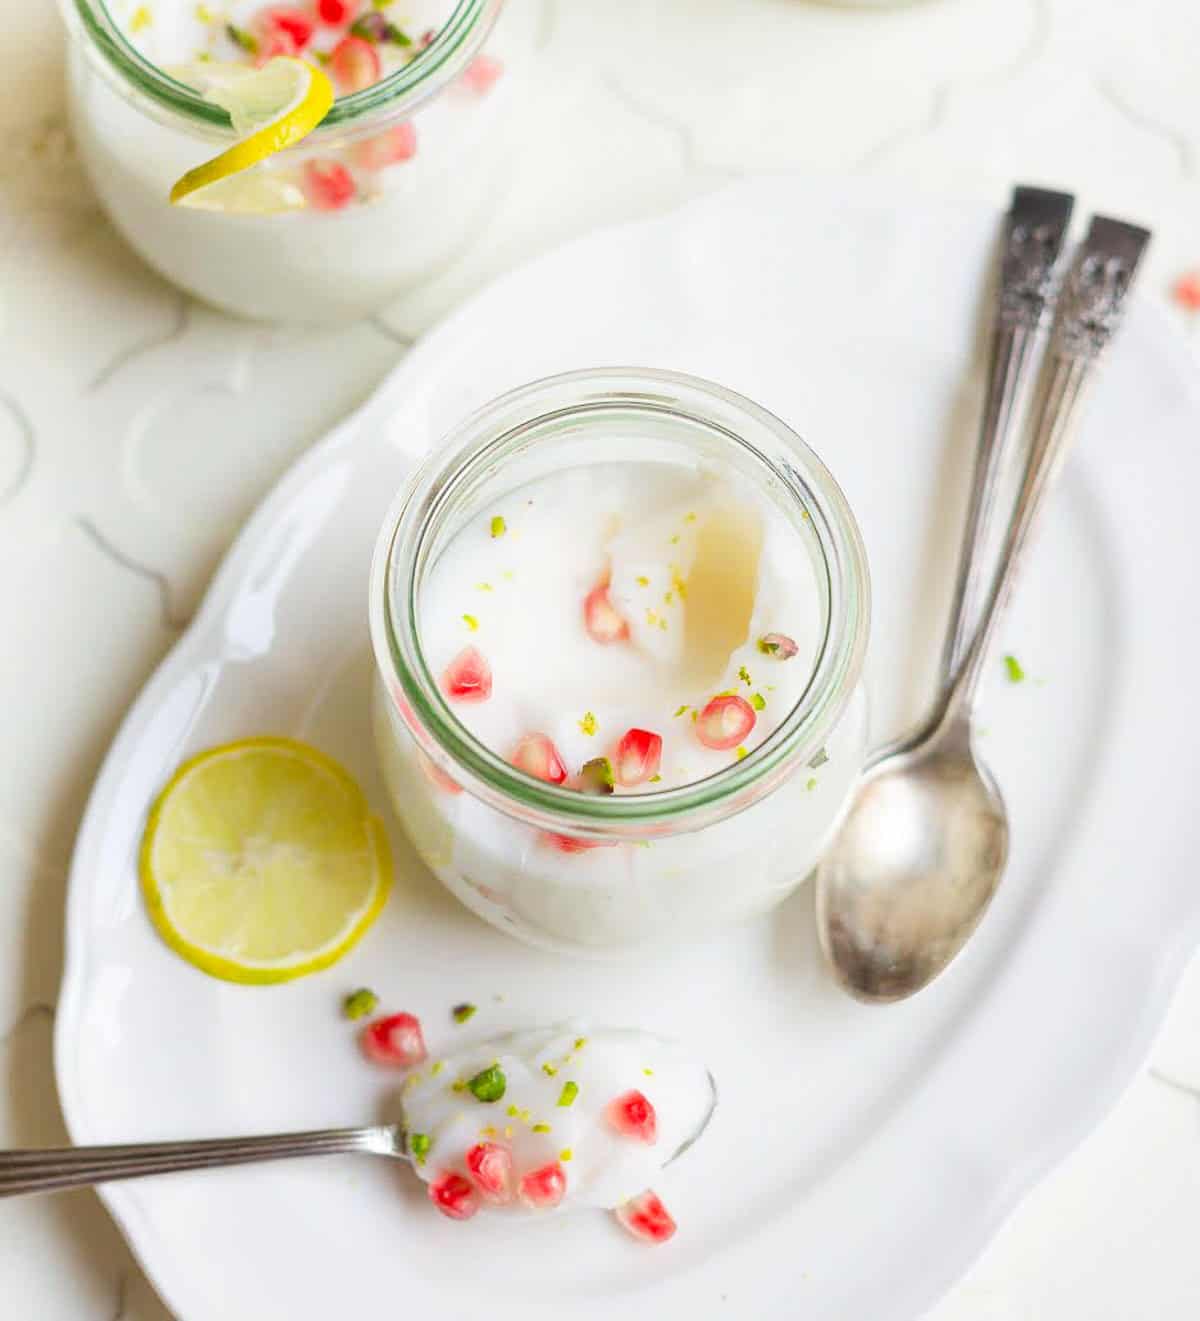
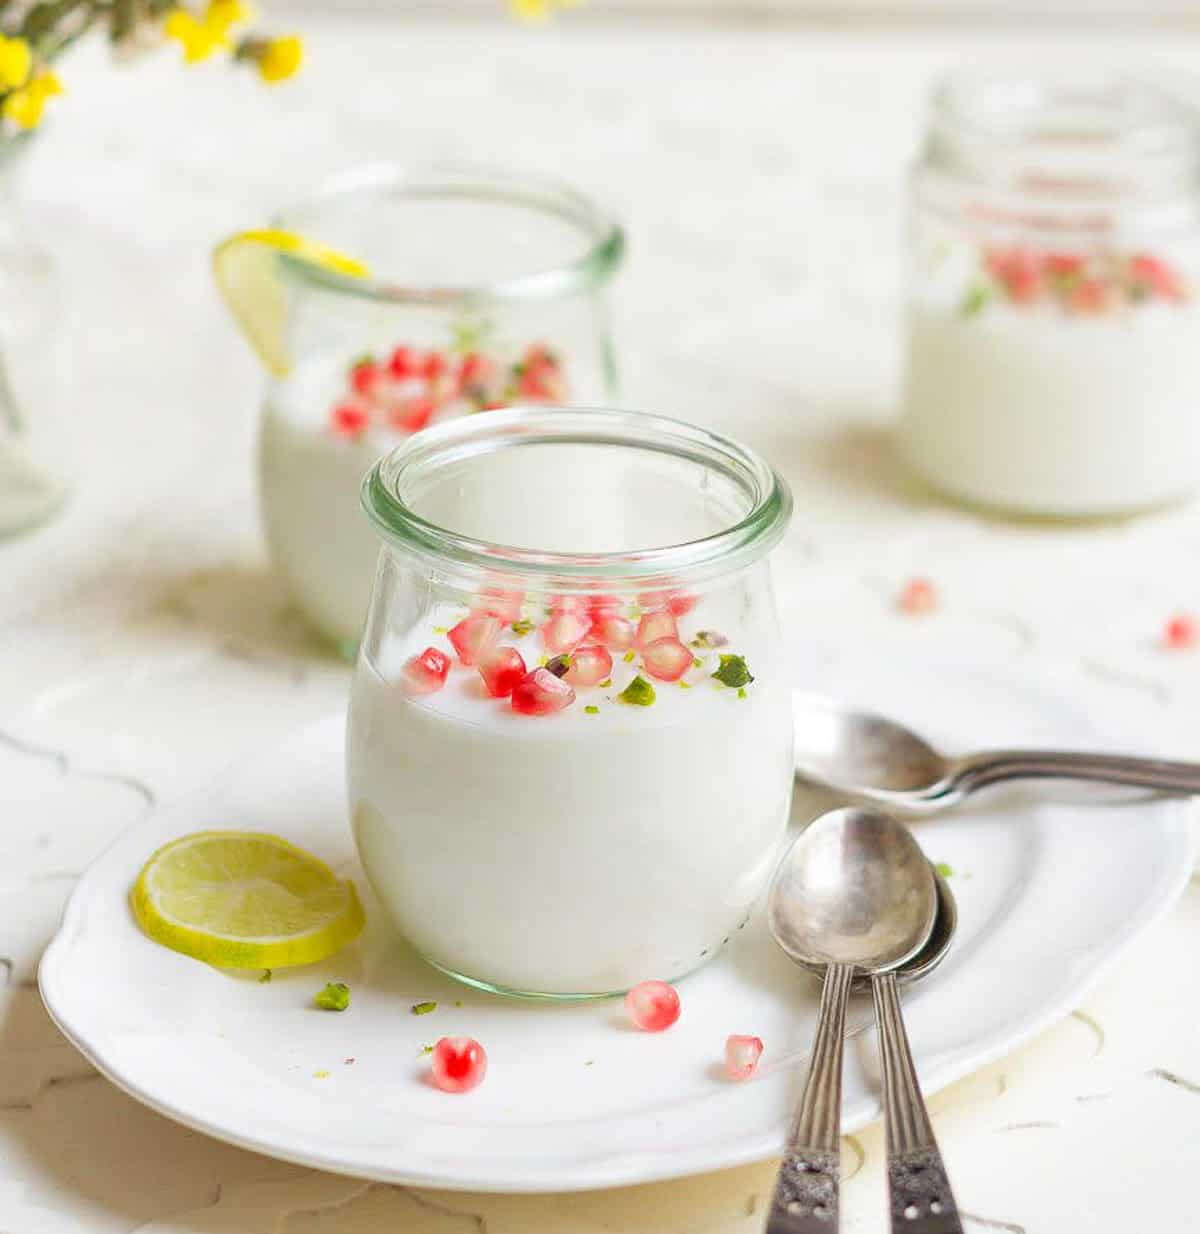
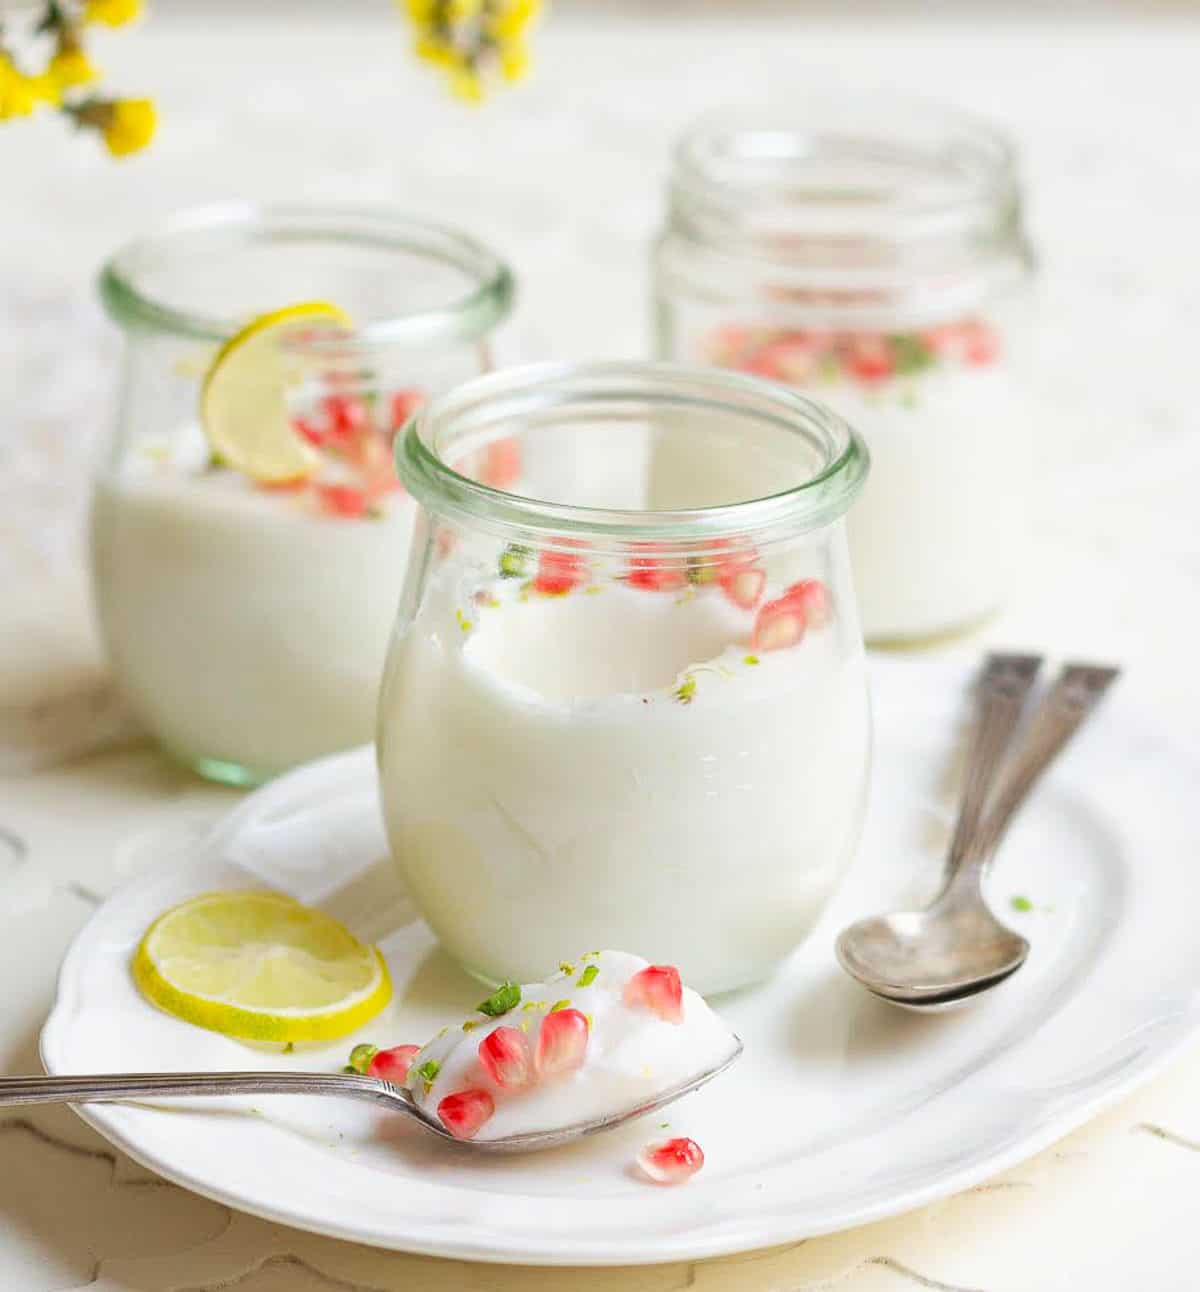
Step 7: Top the lemon panna cotta without gelatin with nuts, pomegranate arils, and lemon zest. Serve chilled.

3 jars of panna cotta with pomegranates and lemon slices, yellow flowers, and spoons on the side.

Top Tips

  • Measure your agar carefully. Too much agar, and your lemon panna cotta will be hard and rubbery instead of jiggly and creamy.
  • Mix the agar agar well. It needs to dissolve properly for the lemon panna cotta to set smoothly. Stir well and simmer gently.
  • Keep the heat low. Overheating damages the gelling power of agar agar. So don’t bring it to a boil. When you see tiny bubbles around the edges of the pan, take it off the stove.
  • For a satiny smooth panna cotta, pour the mixture through a sieve to ensure there are no lumps.
  • Lemon flavor mellows as the panna cotta chills, so taste it before pouring into your serving glasses or molds. Add some more if needed.
  • Allow the lemon panna cotta to set for at least a few hours in the refrigerator for the best texture.
  • If your panna cotta hasn't set after a few hours in the refrigerator, pour it back into a saucepan and reheat until it reaches a boiling point.
  • If you plan to serve panna cotta on a plate, remember to lightly grease your bowl or ramekin with oil before pouring in the mixture.

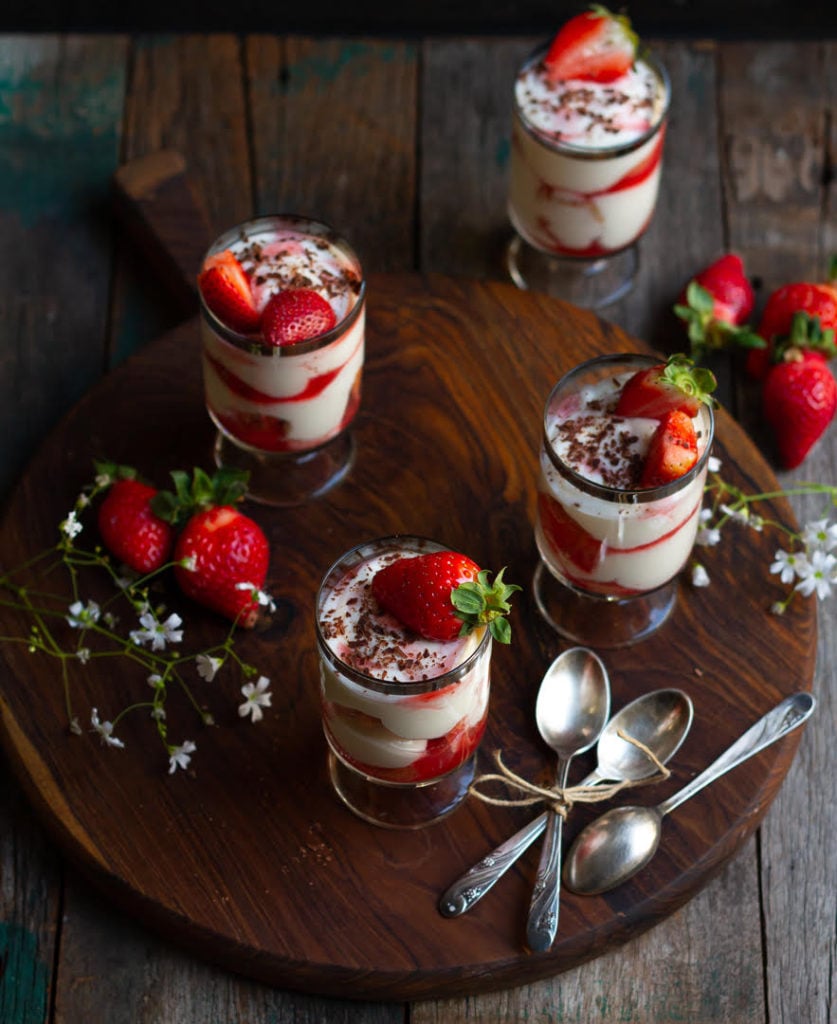
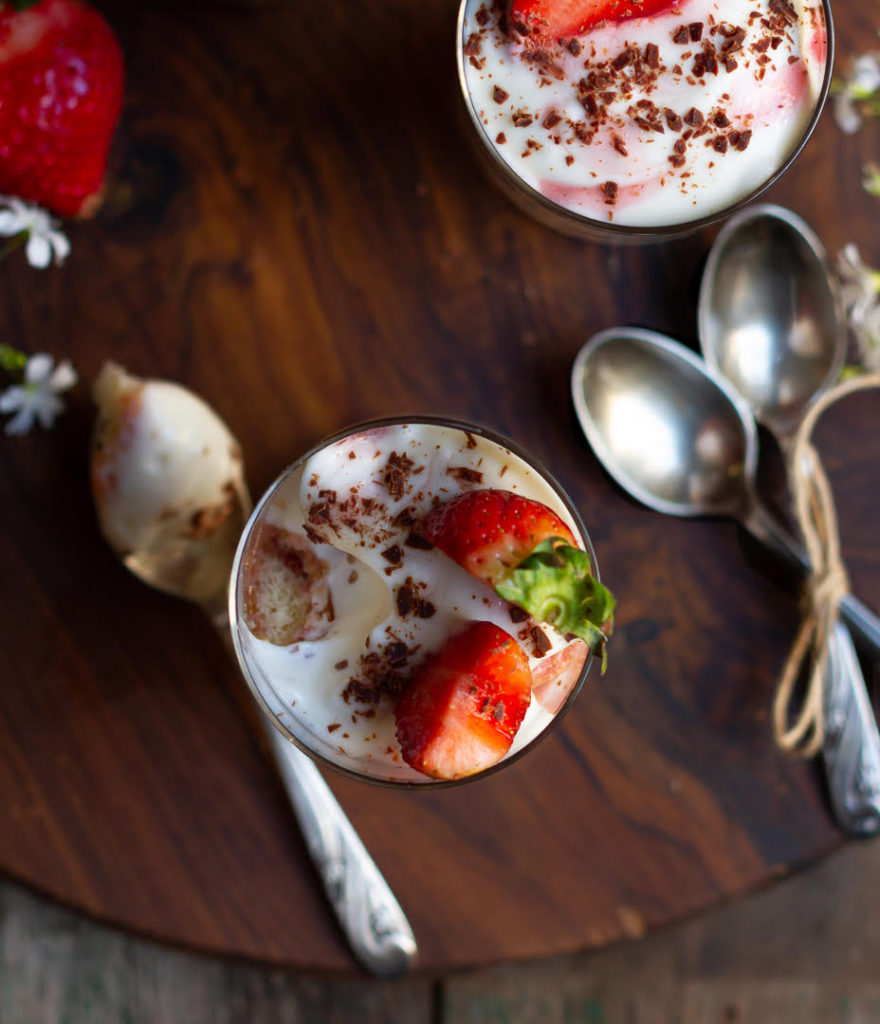
How To Serve Lemon Panna Cotta

Lemon panna cotta is a great make-ahead recipe. It takes barely 15 minutes on the stovetop, and the rest is all cooling and chilling!

When it comes to the actual serving, there are endless possibilities with panna cotta, from sparkling glasses to plated desserts.

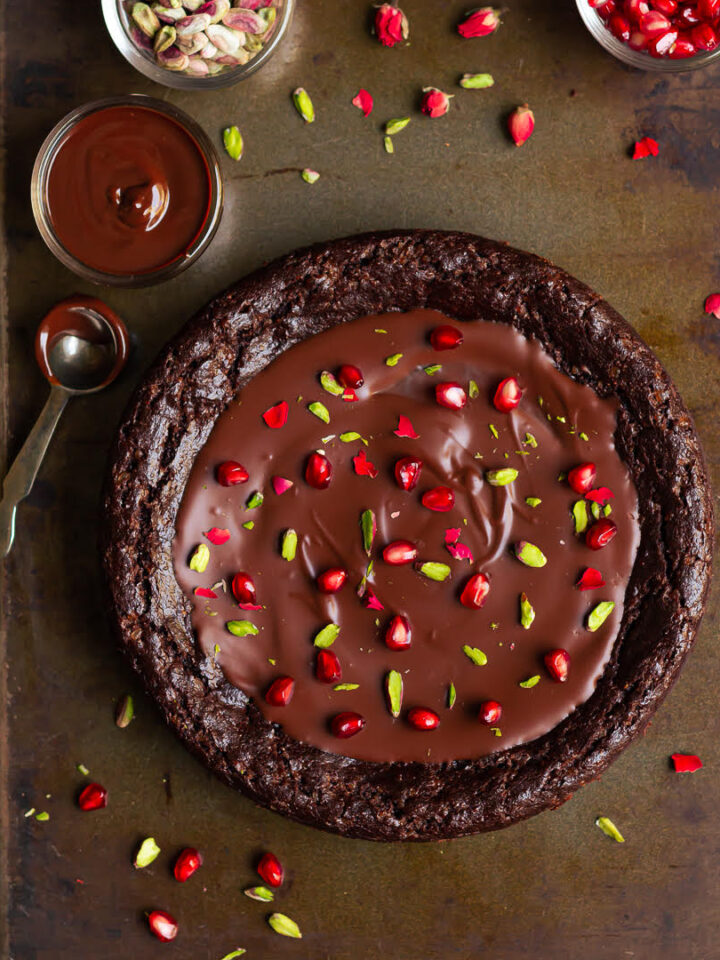
  • I like to garnish with lemon zest, pomegranate arils, and finely chopped pistachios.
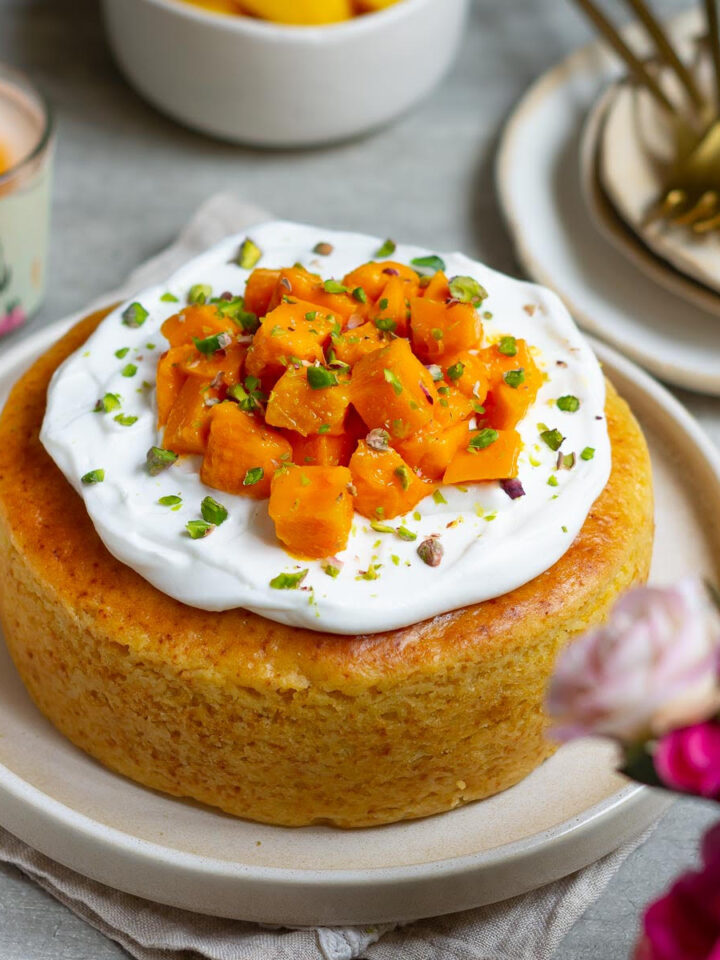
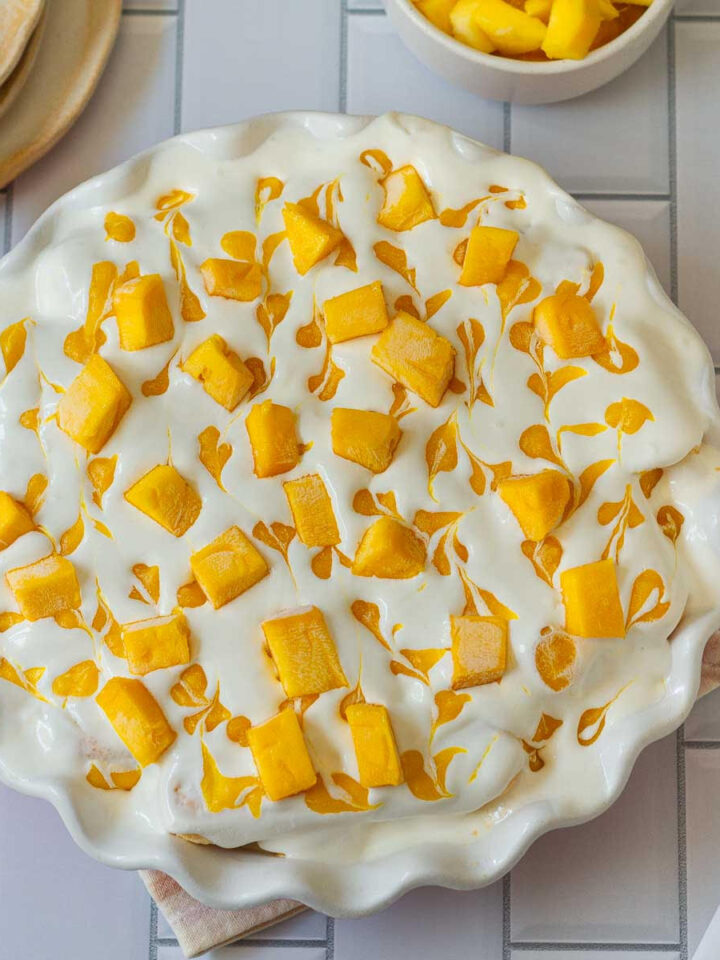
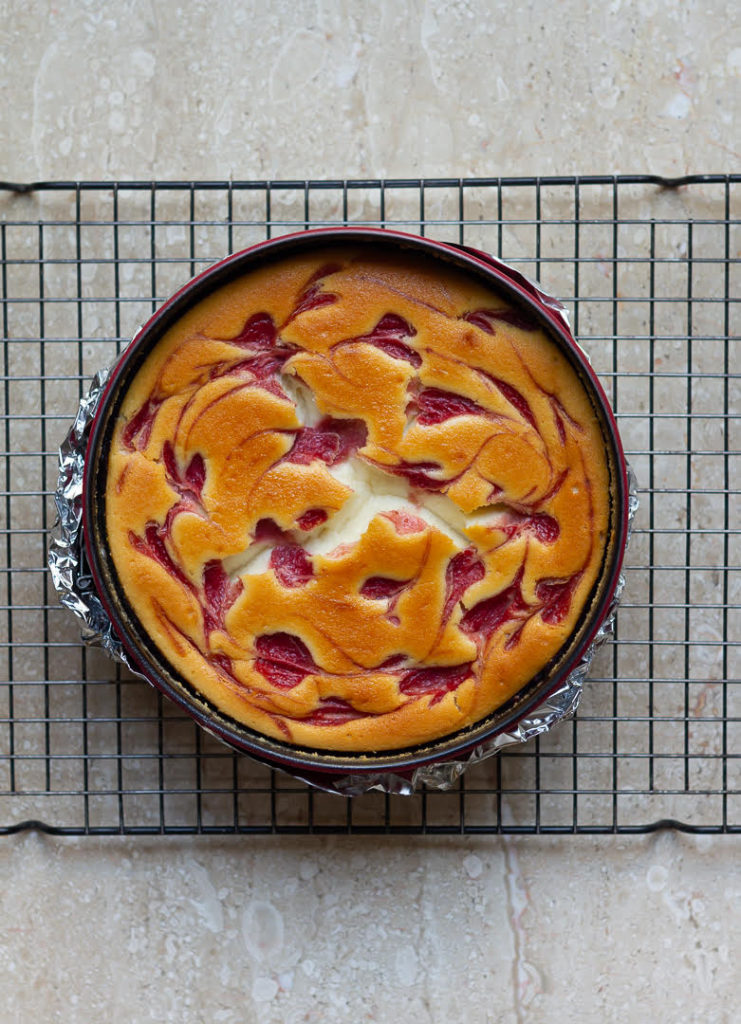
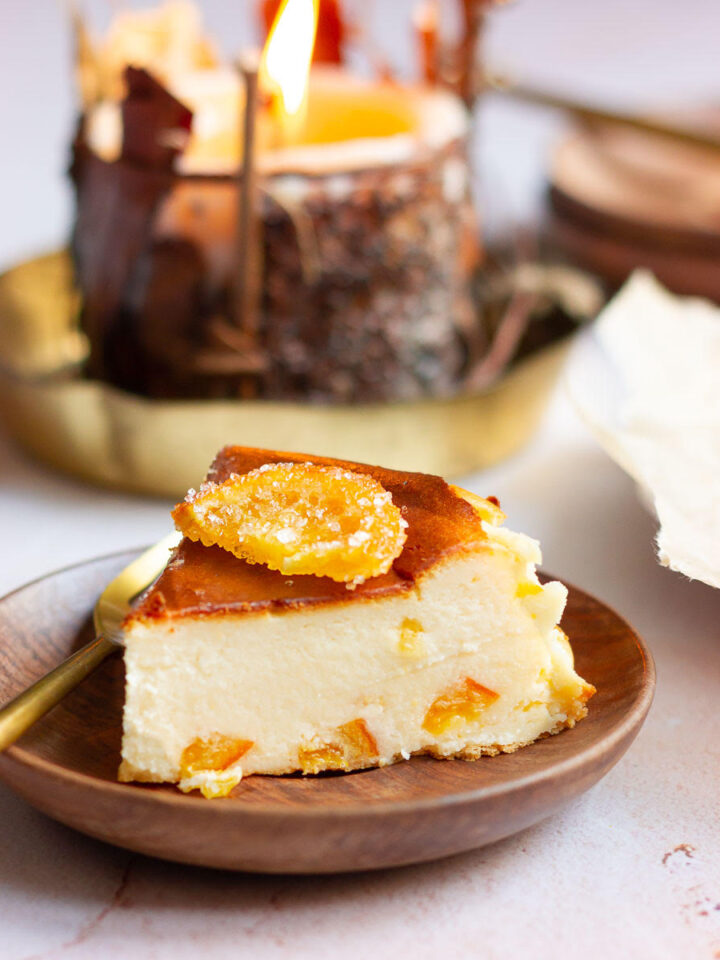
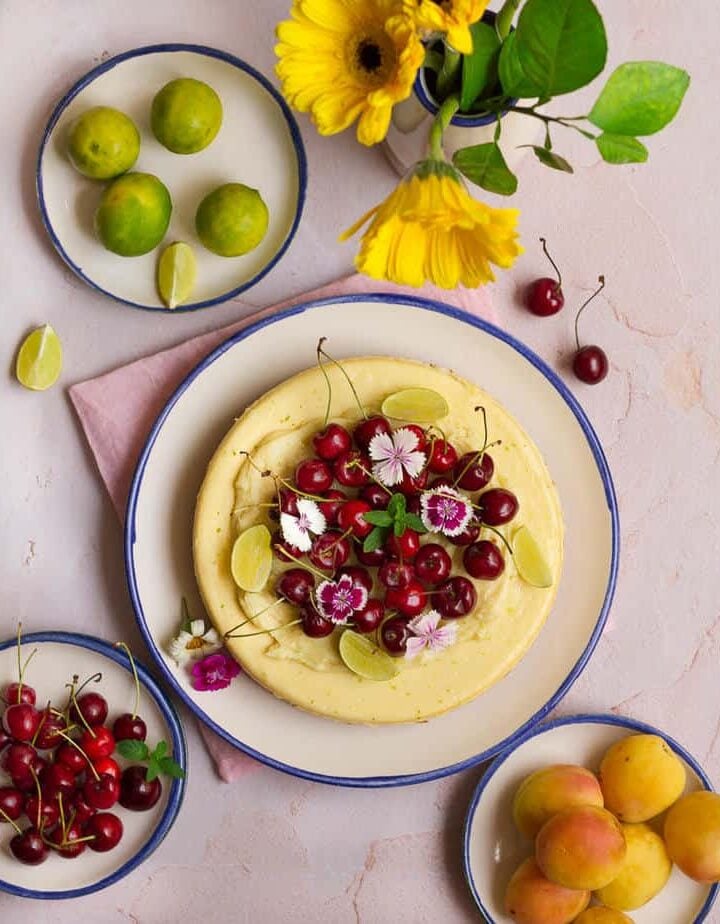
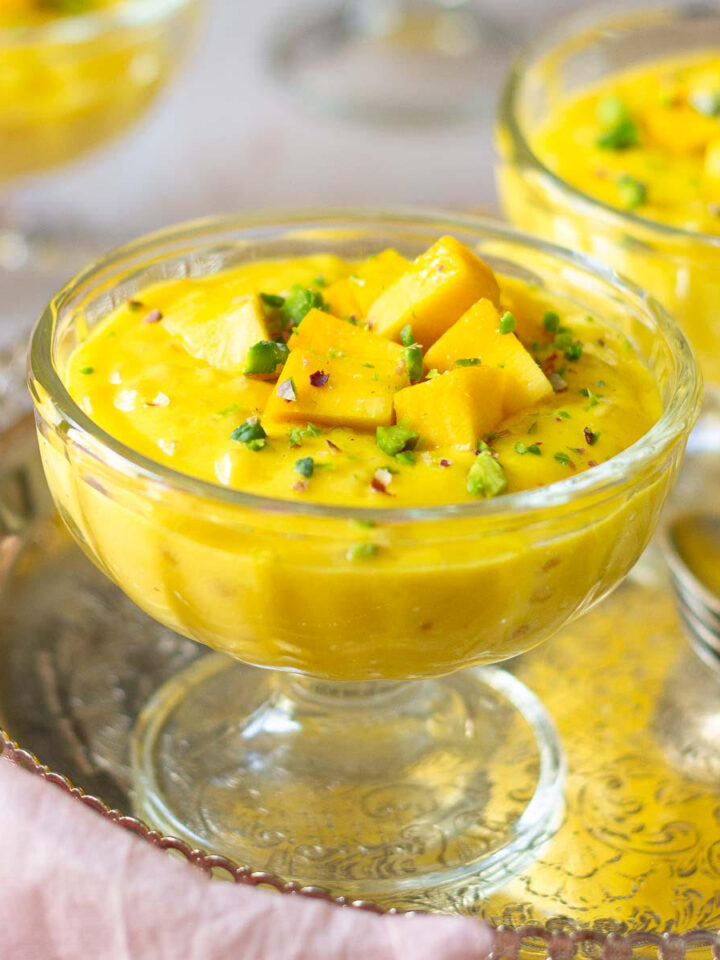
  • You can also top it with fresh fruits as I did for my mango coconut panna cotta.
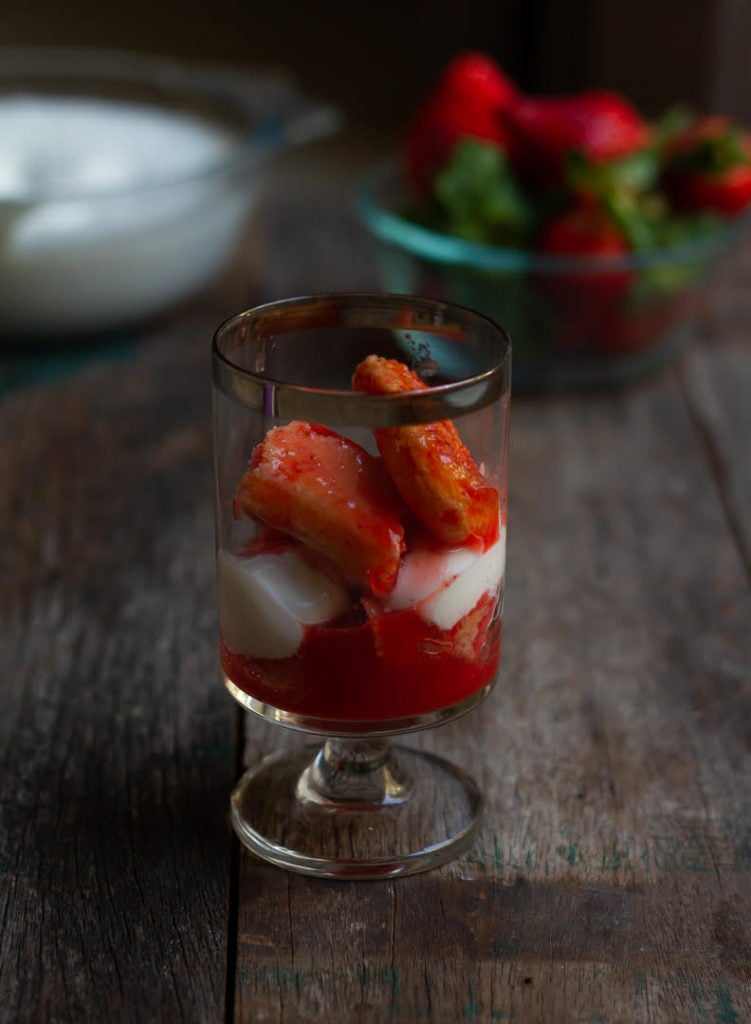
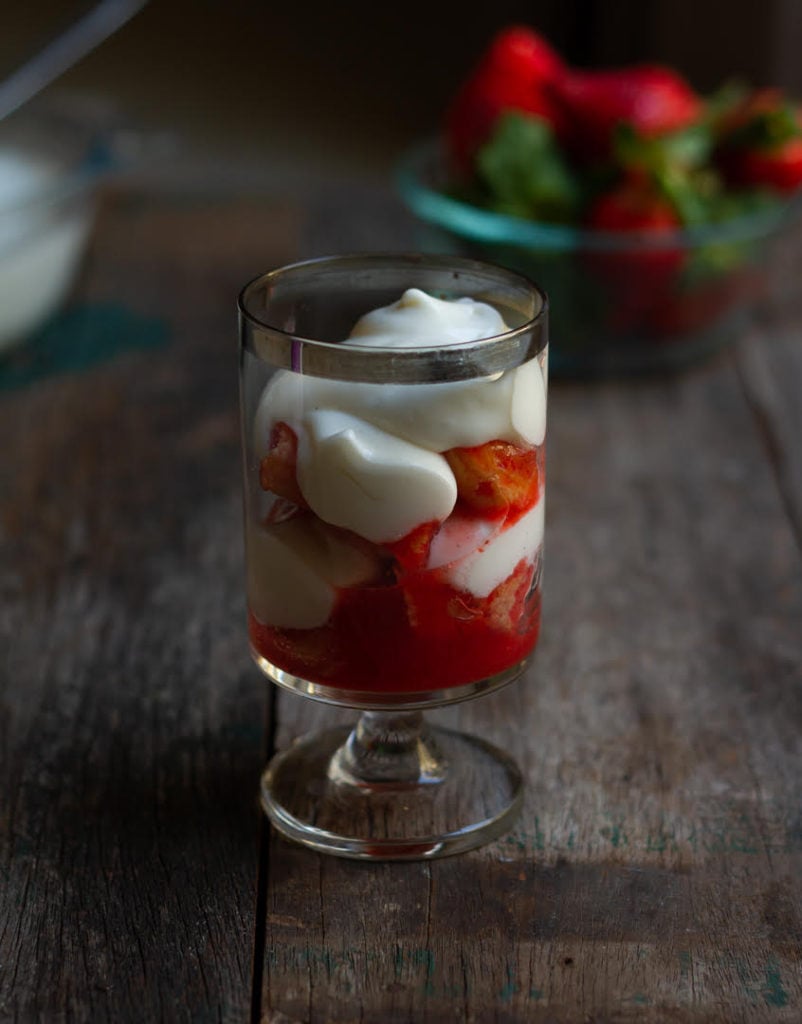
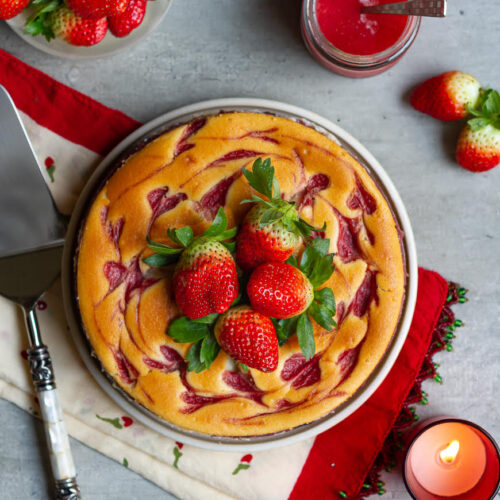
  • A strawberry sauce like on my coconut panna cotta will also pair really well.
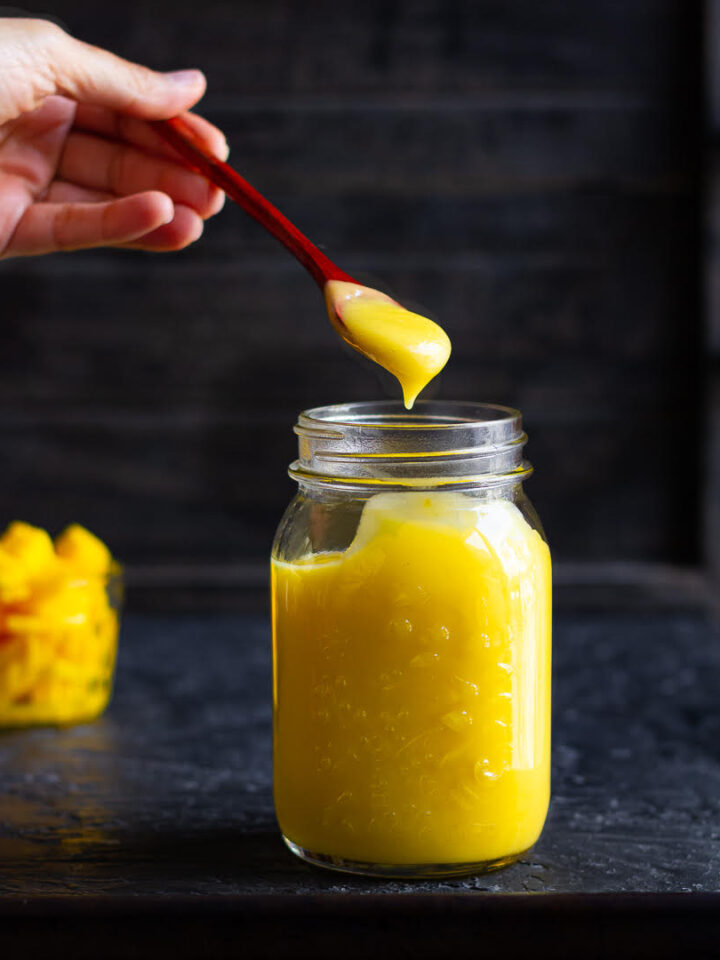
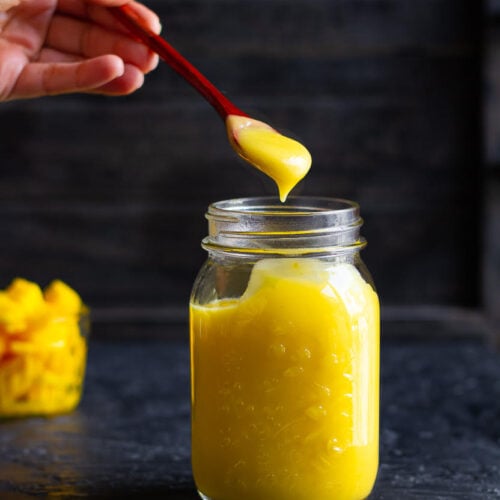
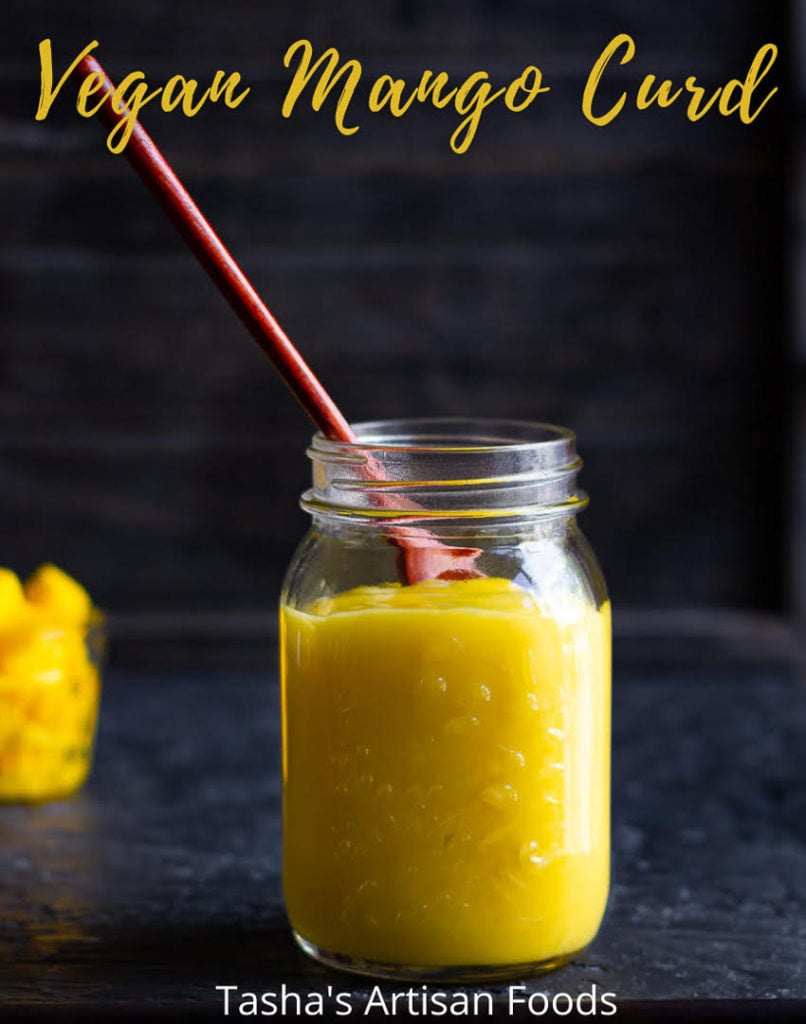
  • Mango curd or lemon curd are great for serving with easy lemon panna cotta.
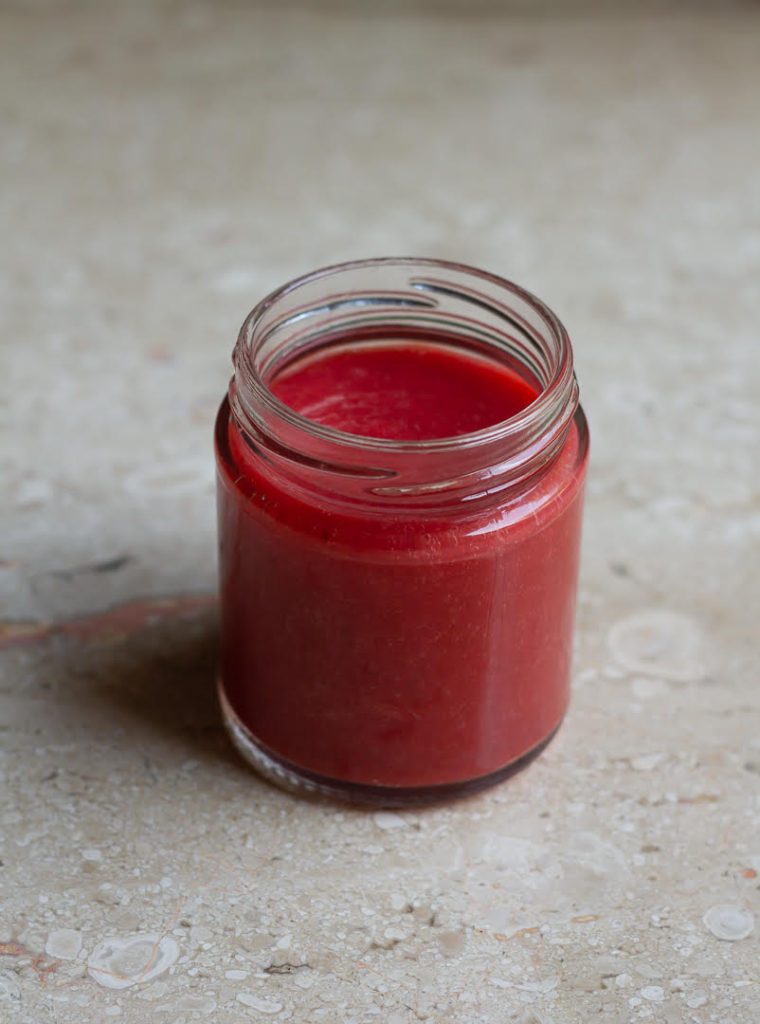
  • A spoonful of strawberry chia jam, cherry jam, or mulberry jam would be lovely on top.
3 jars of panna cotta with one spoonful of panna cotta on a platter.

Recipe FAQs

What is panna cotta?

Panna cotta is a classic Italian dessert made with cream, sugar, and a setting agent like gelatin. It has a light, silky, custard-like wobbly texture and is usually served chilled.

Can I make panna cotta without gelatin?

Yes, absolutely. This easy lemon panna cotta is made with agar agar instead of gelatin, making it a perfect vegetarian option.

Why didn't my panna cotta set?

Agar agar needs to be heated properly to be activated. If the mixture wasn't simmered long enough or the agar agar wasn't properly dissolved, the panna cotta may not set correctly. So if your panna cotta hasn't set, simply reheat it, and then chill it to set.

How to store lemon panna cotta?

This will stay well covered in the refrigerator for up to 3 days.

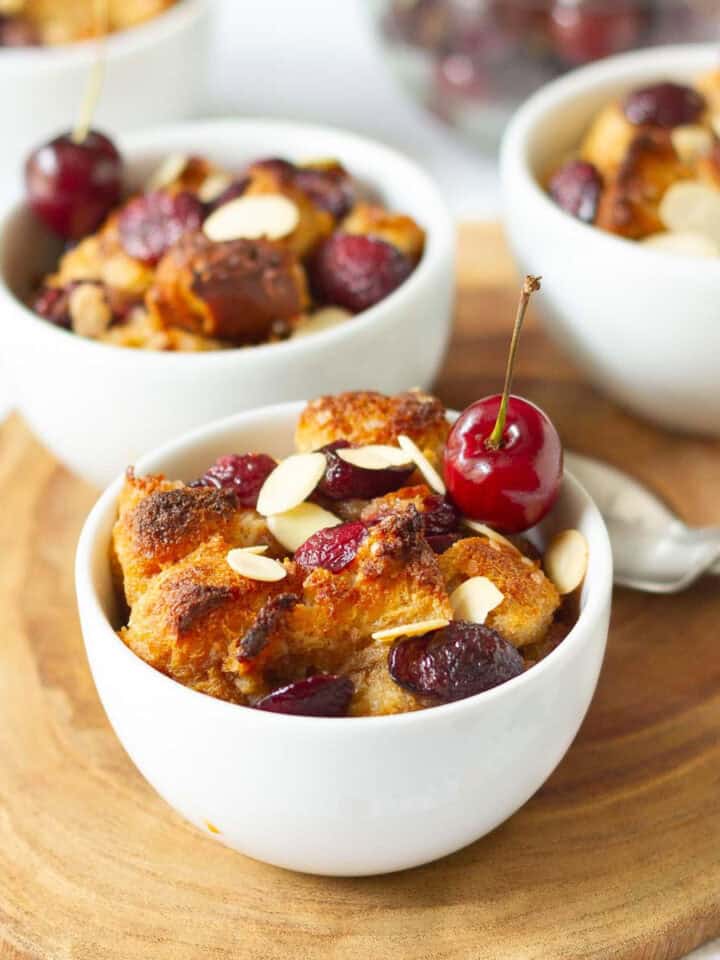
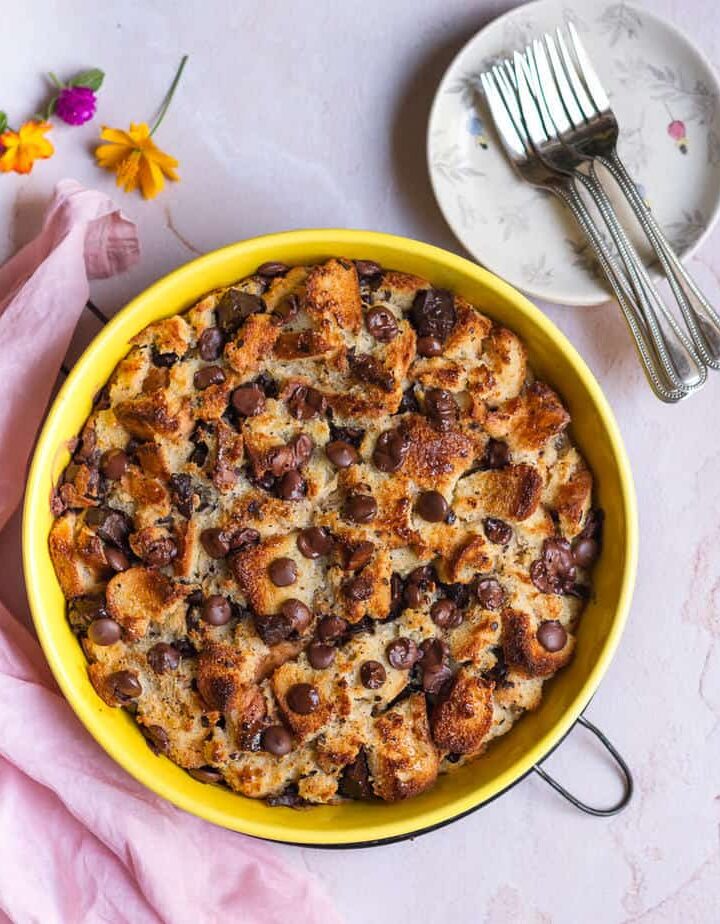
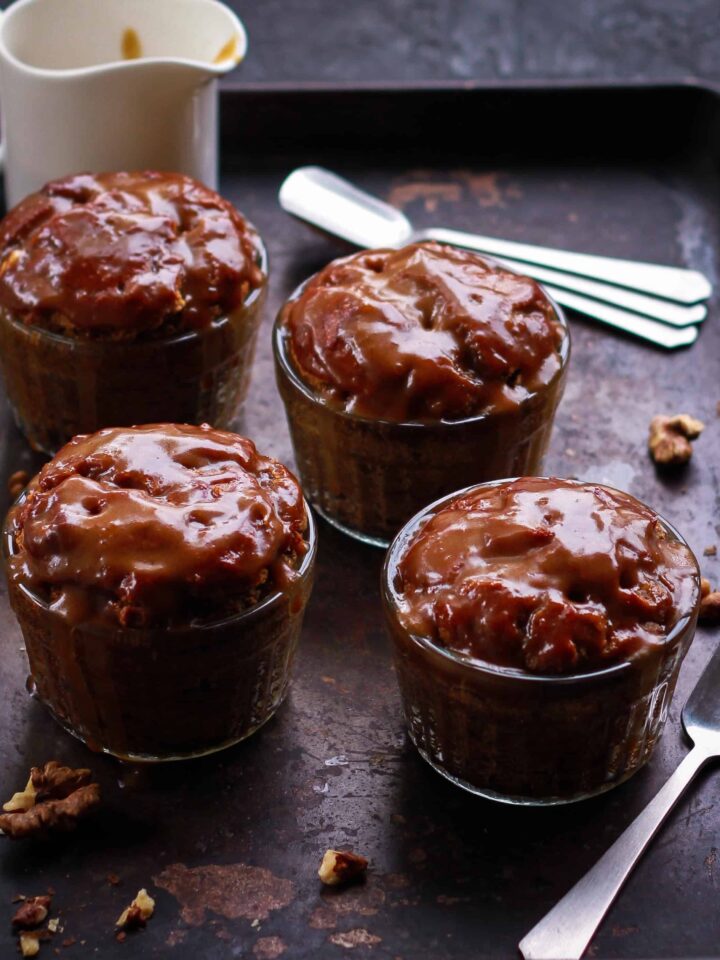
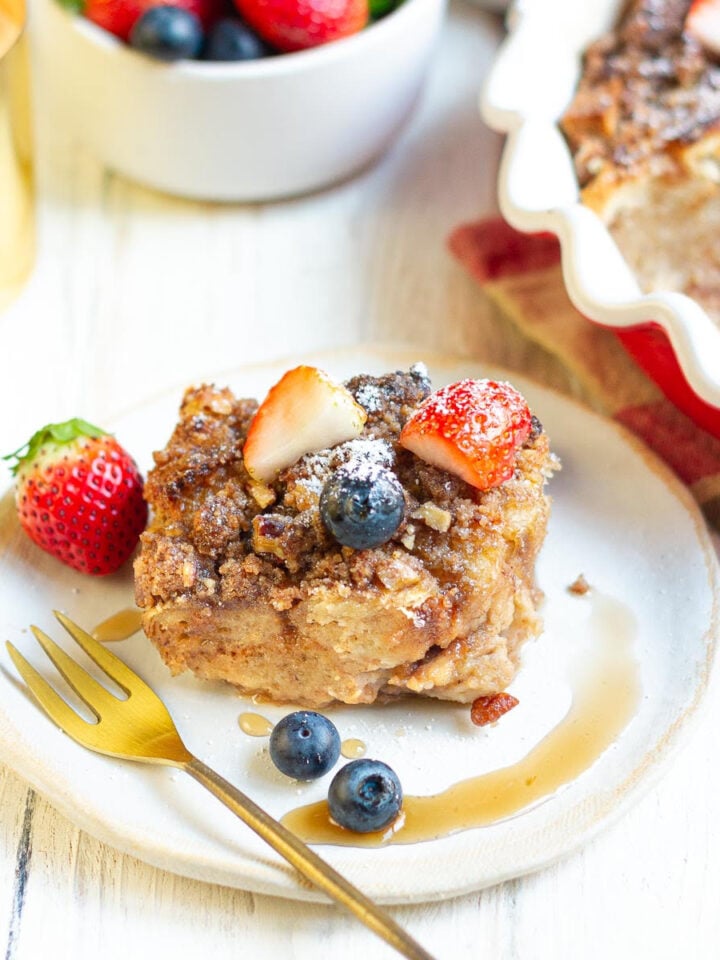
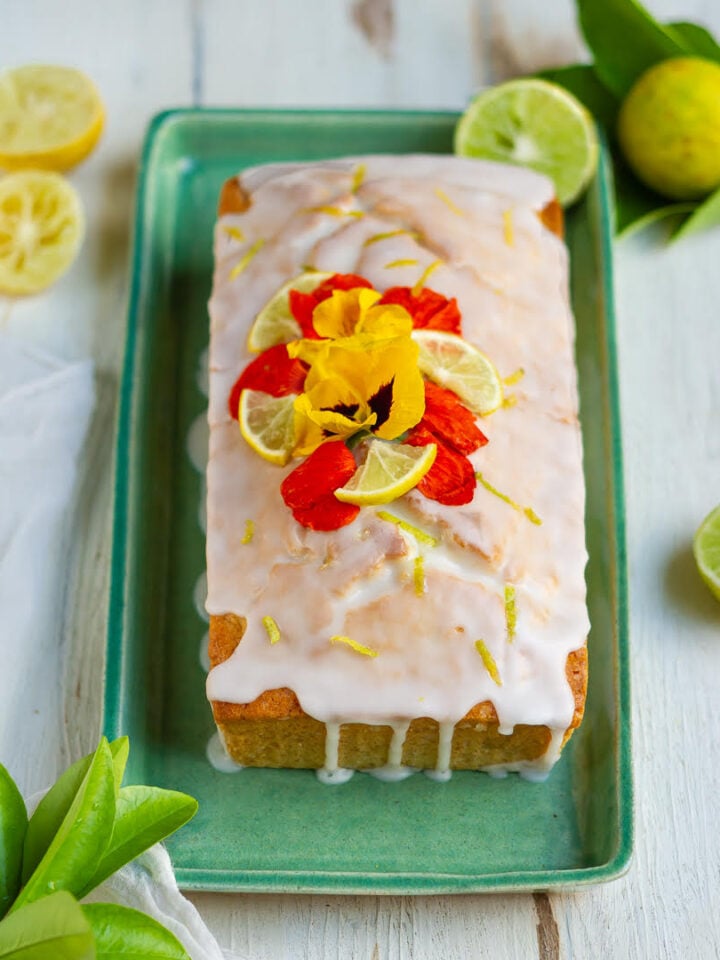
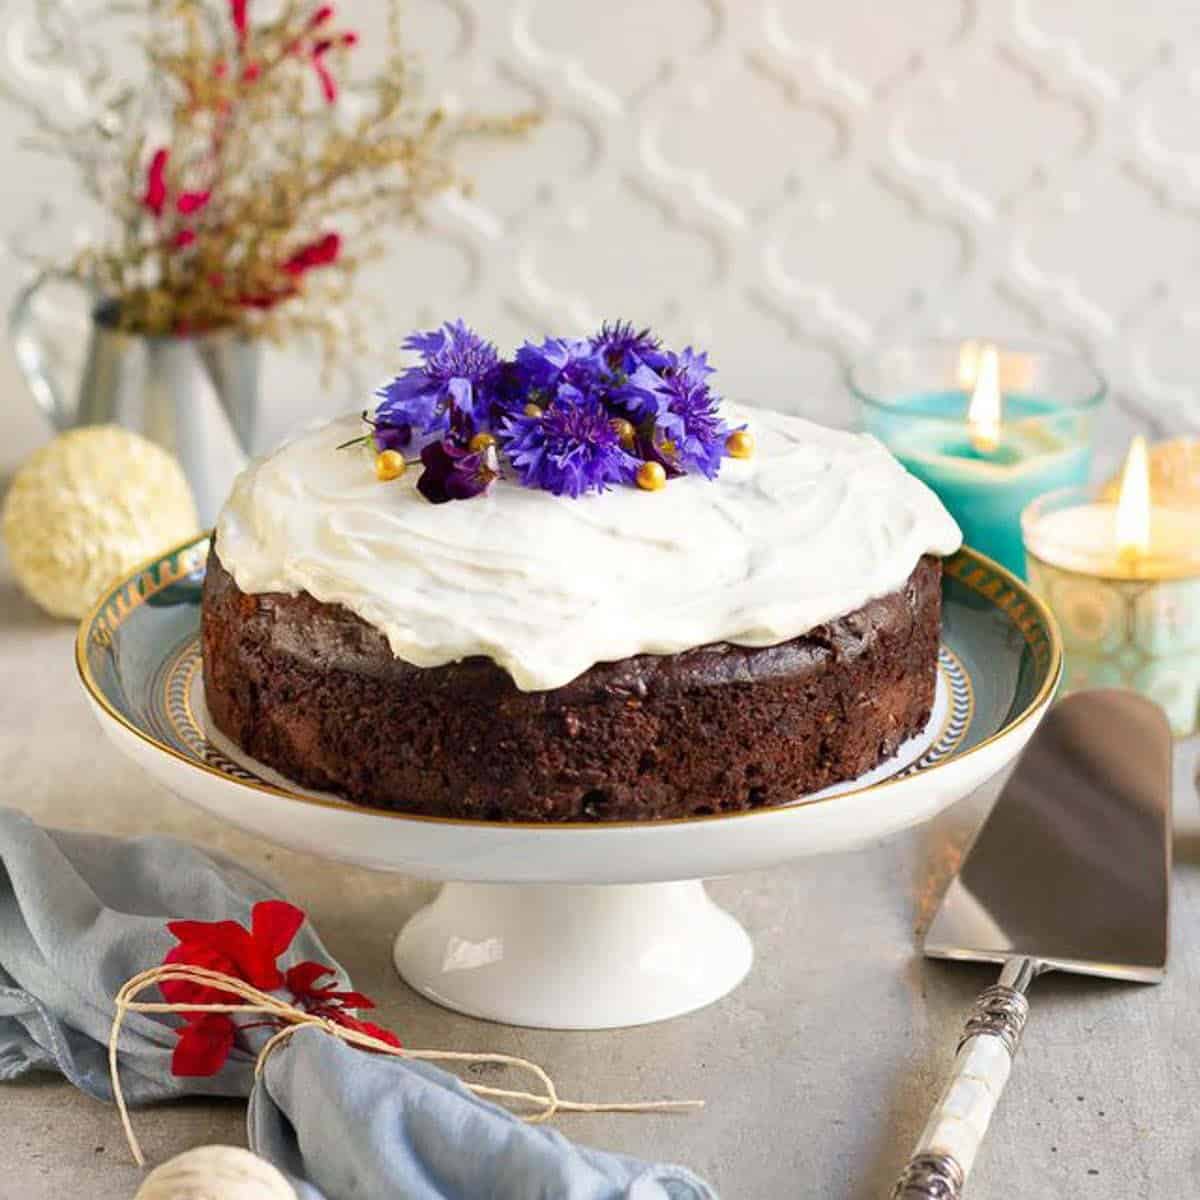
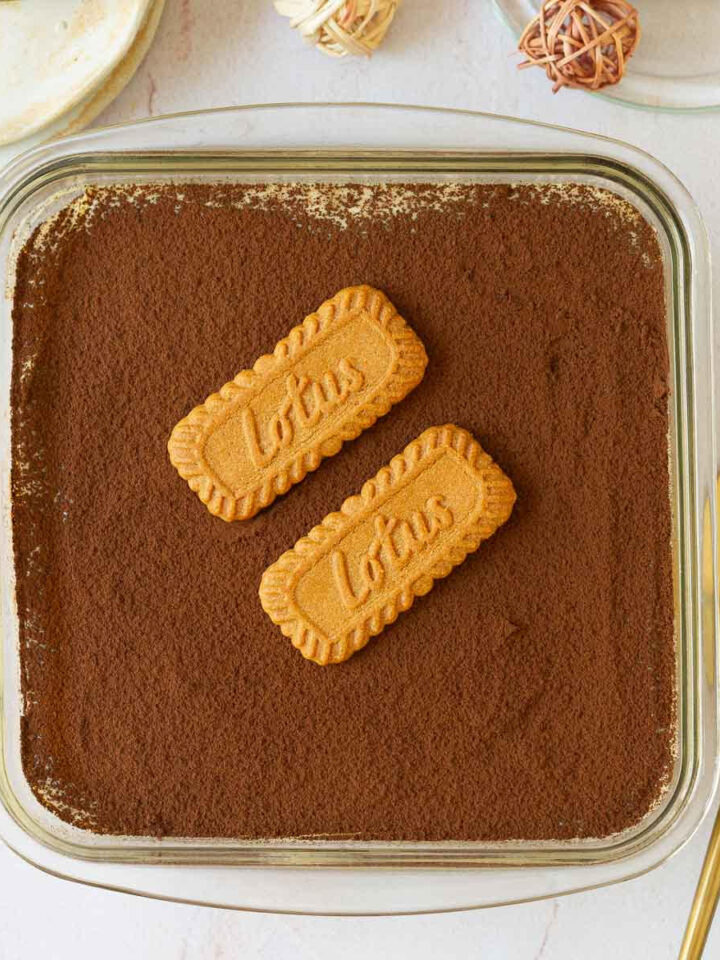
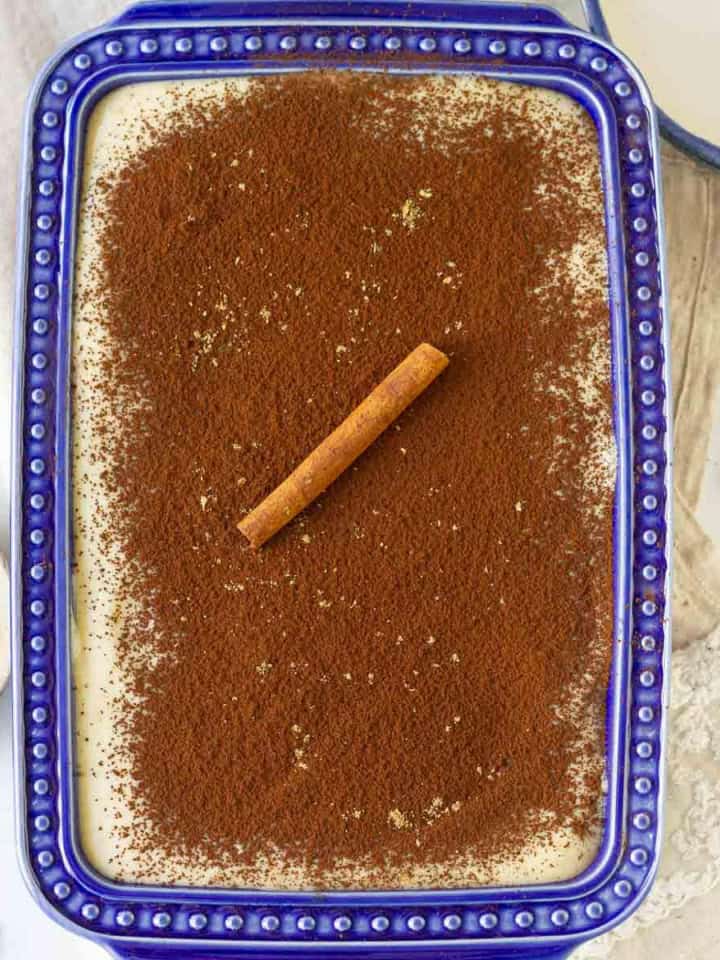
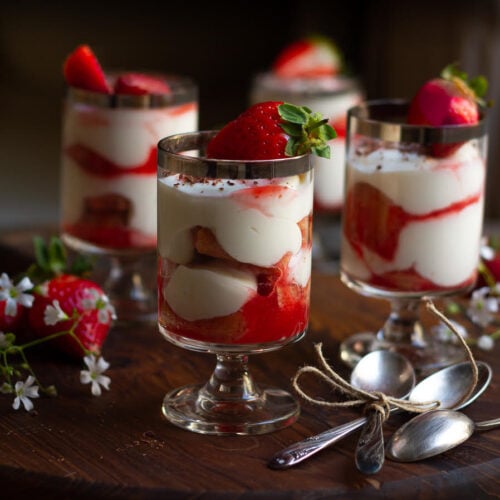
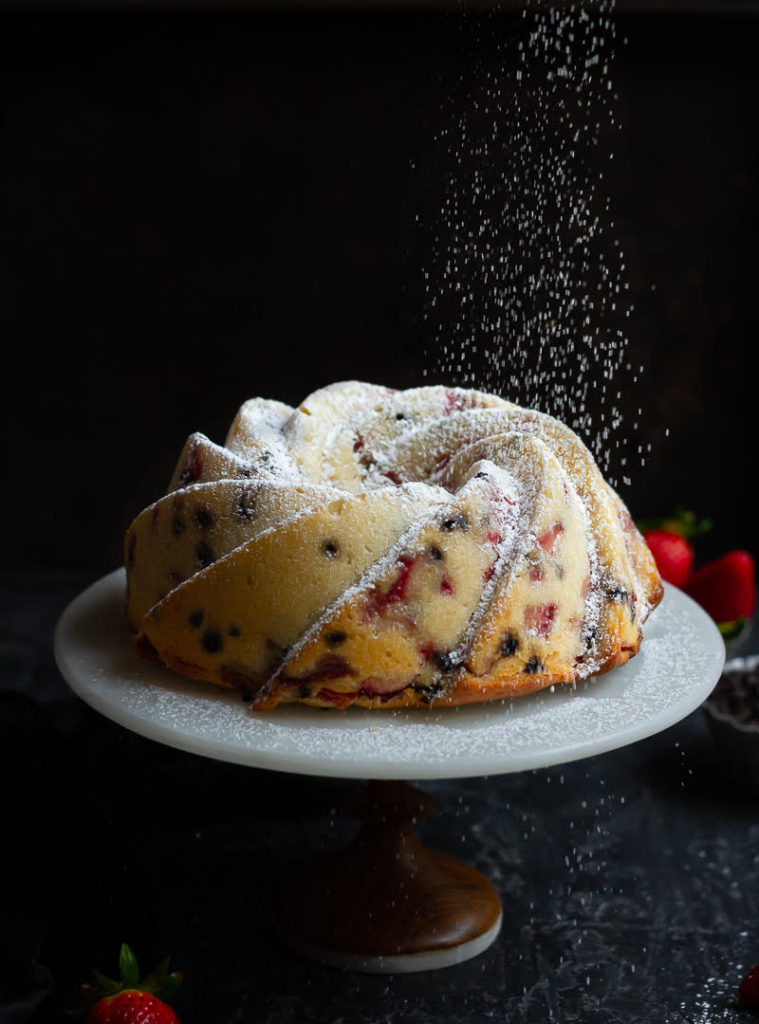
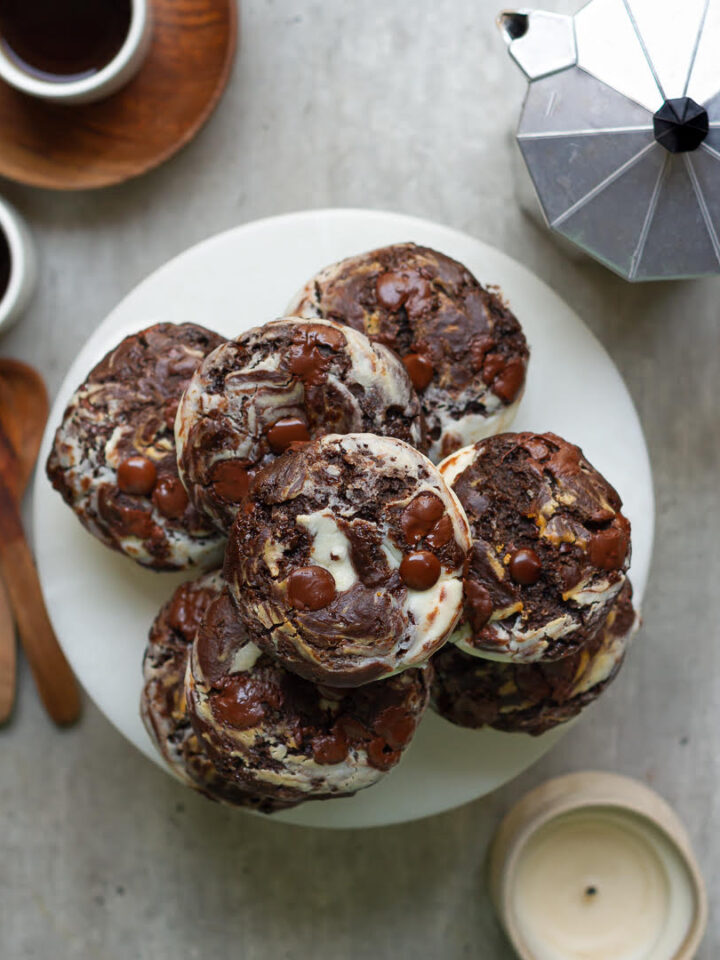
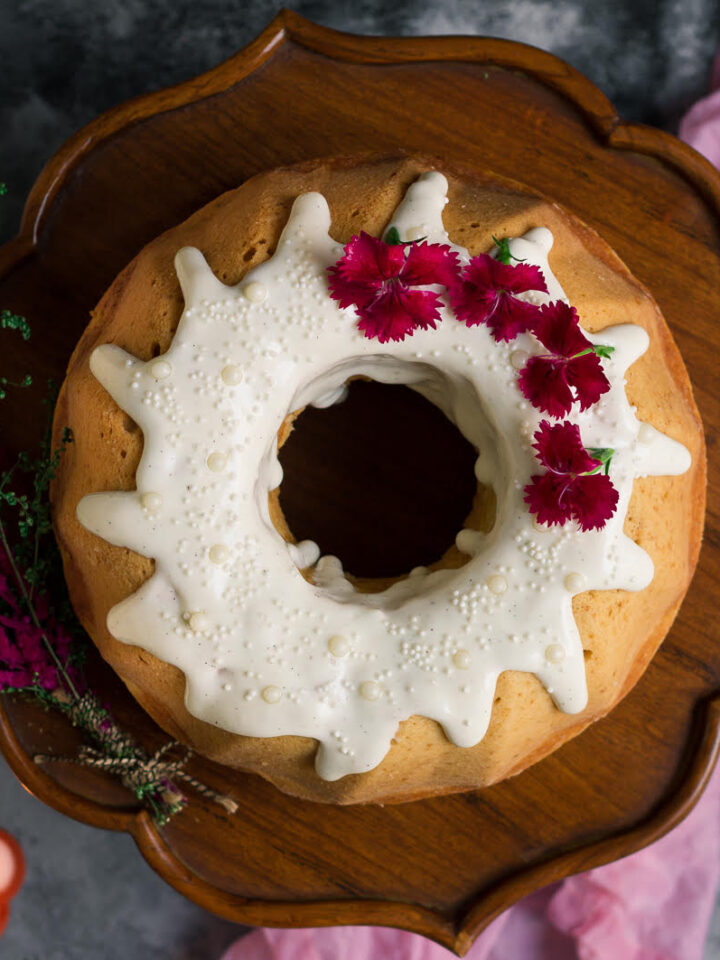
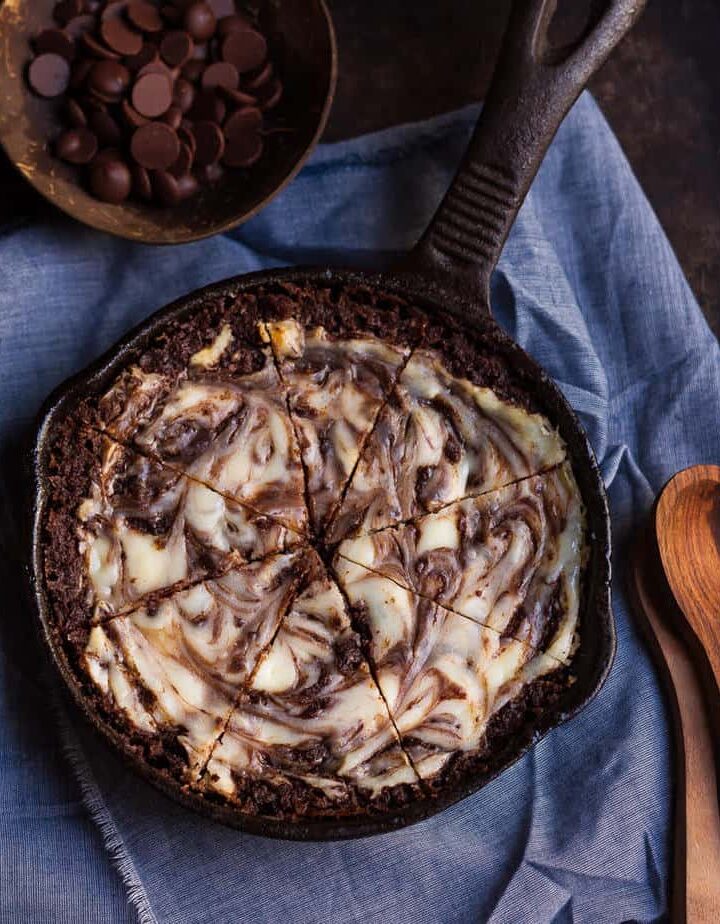
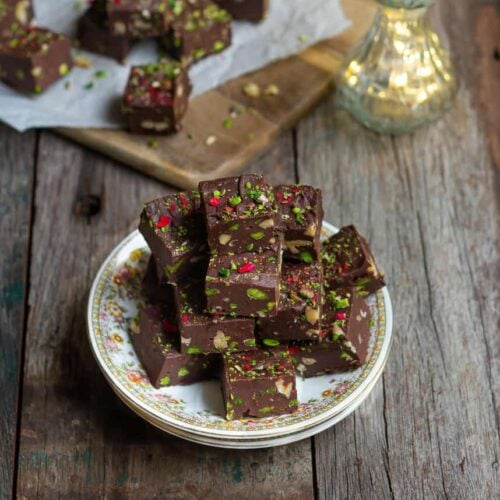
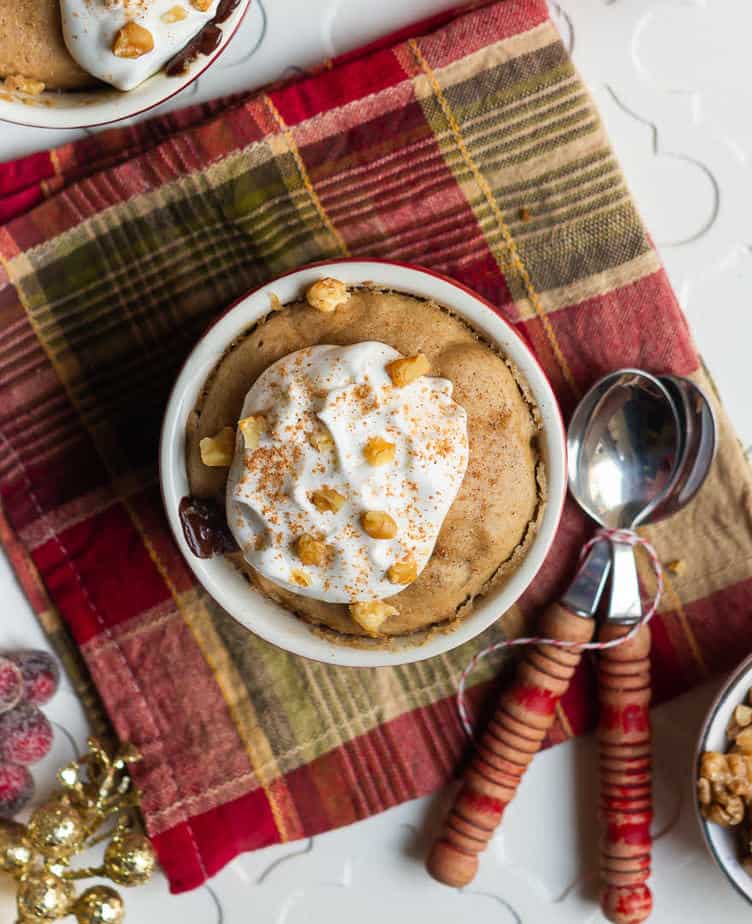
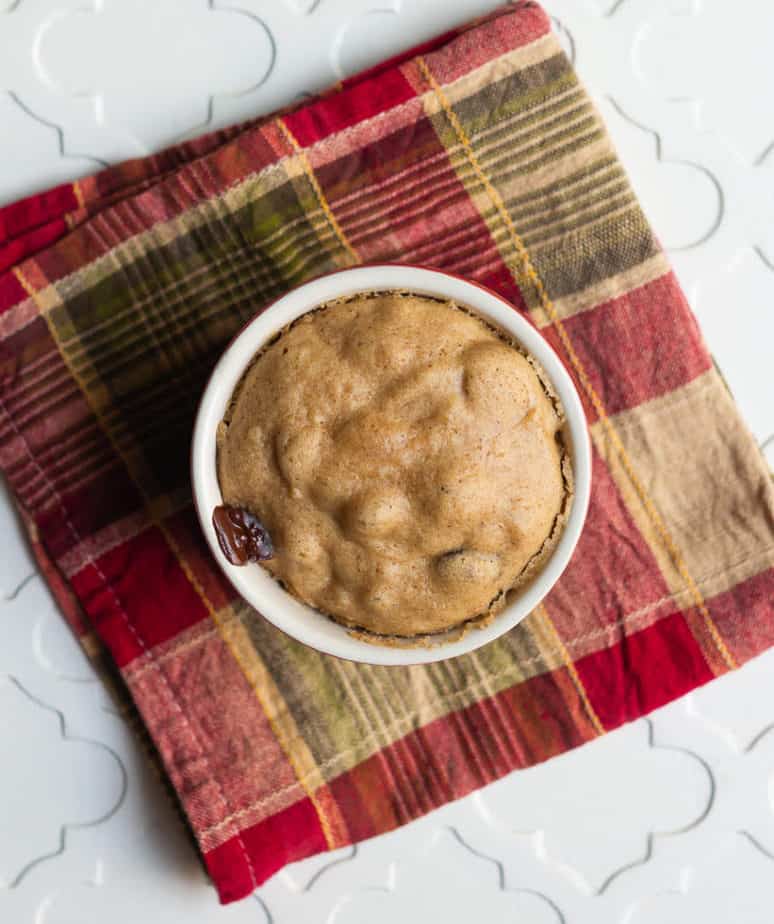
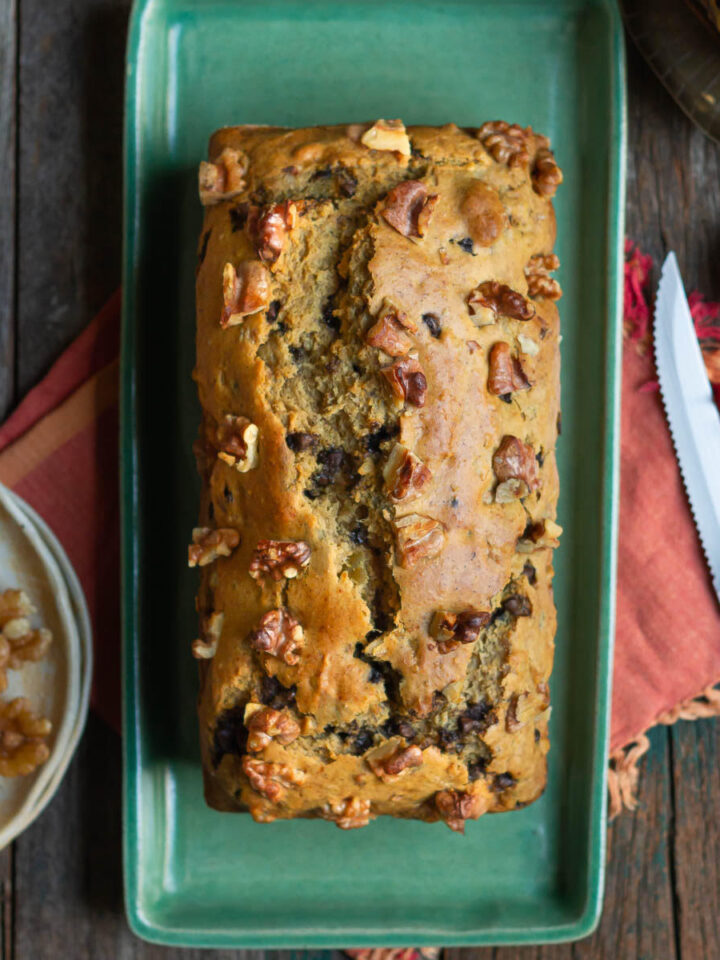
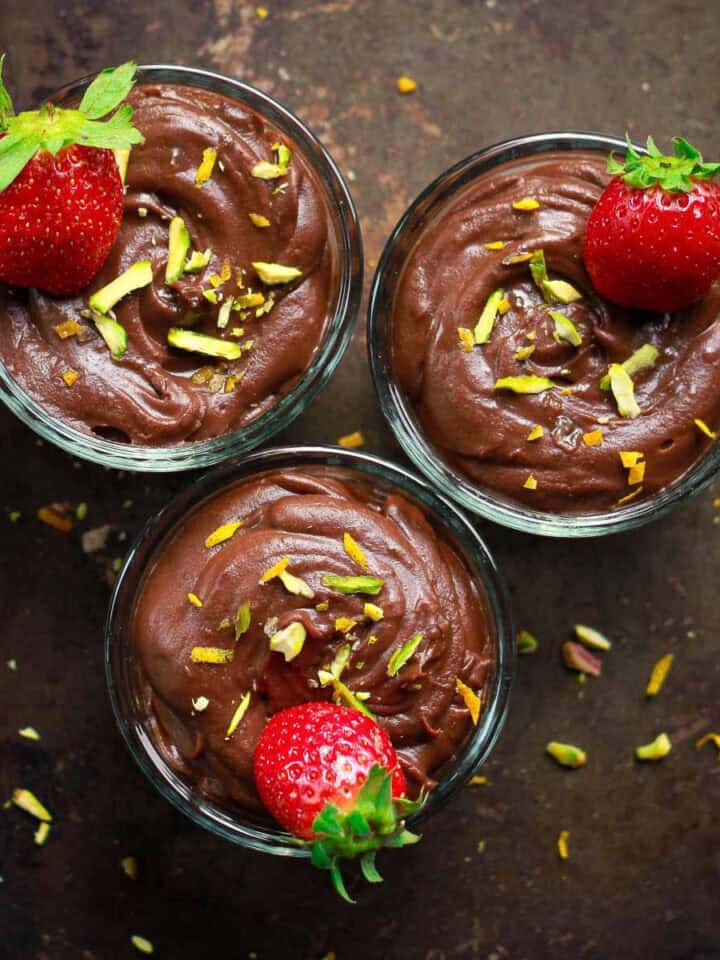
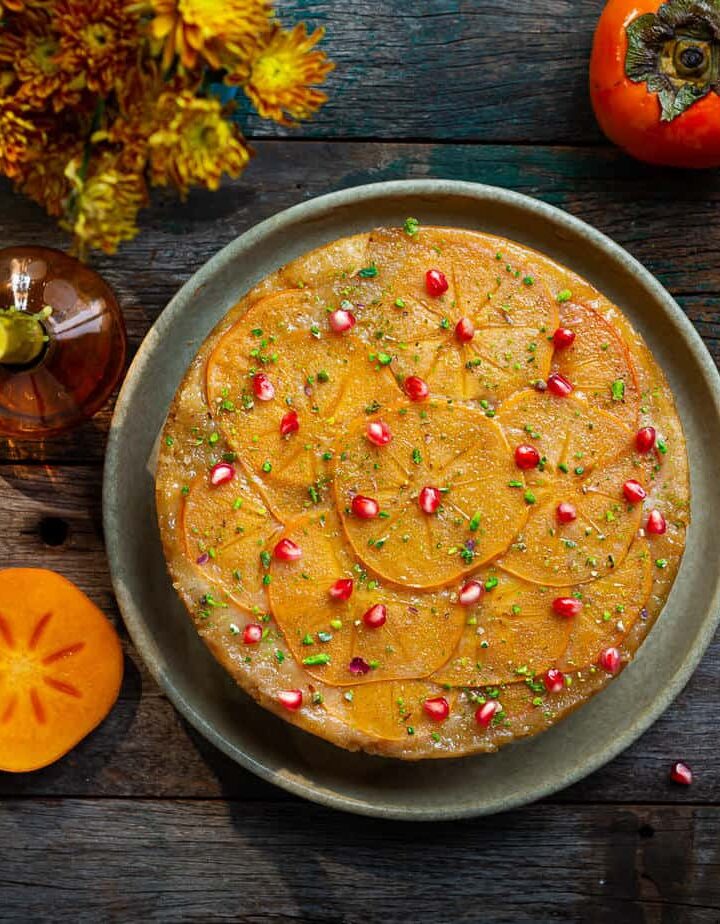
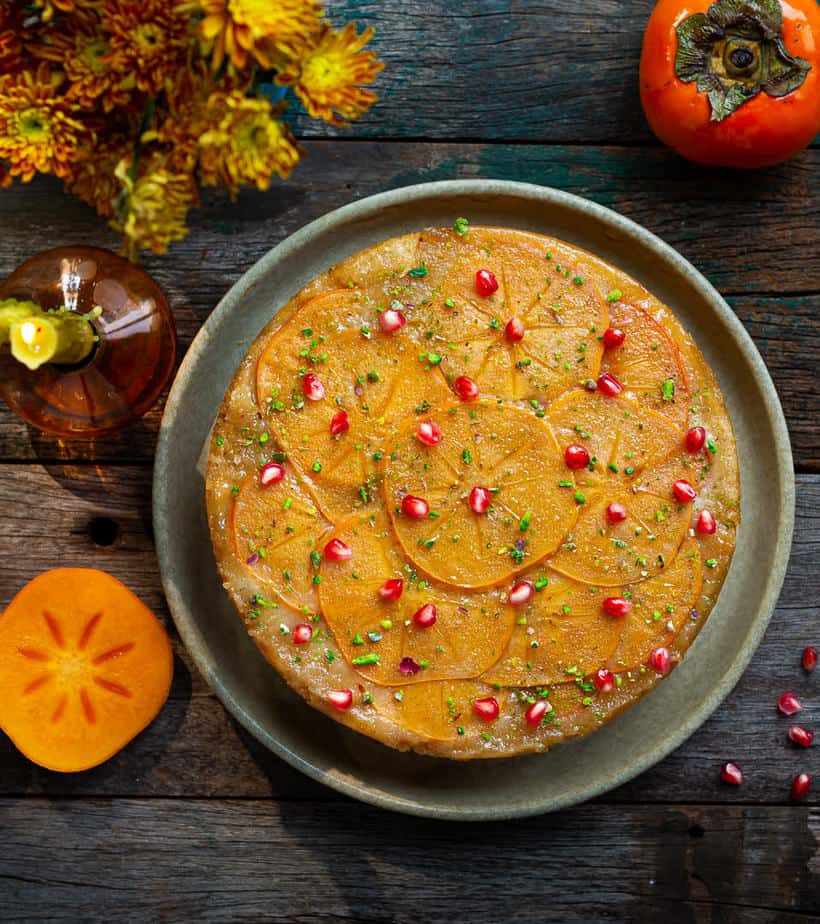
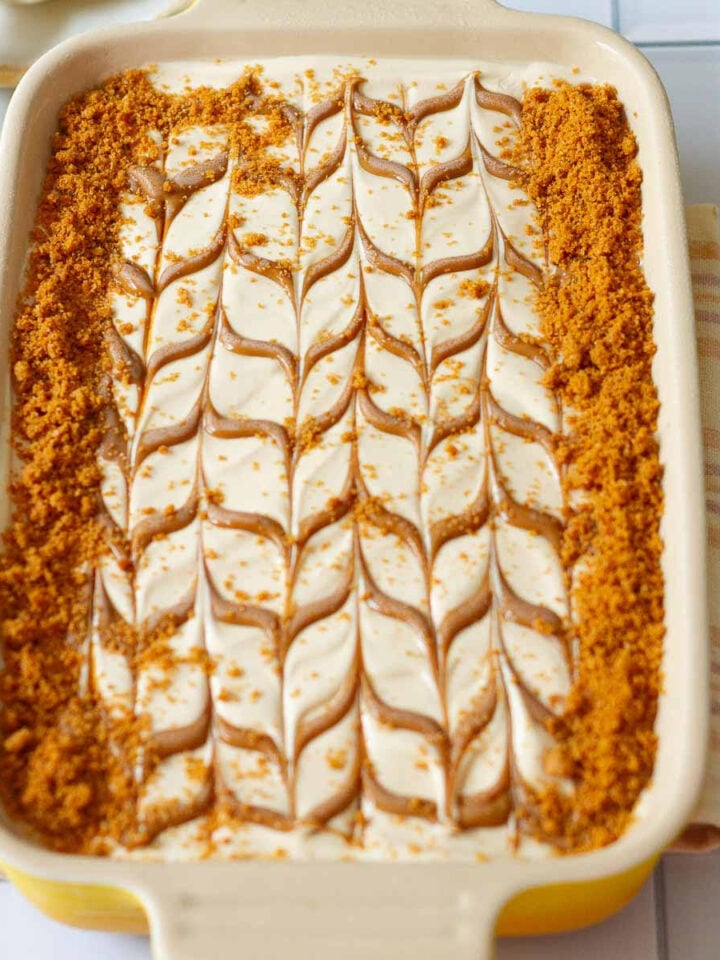
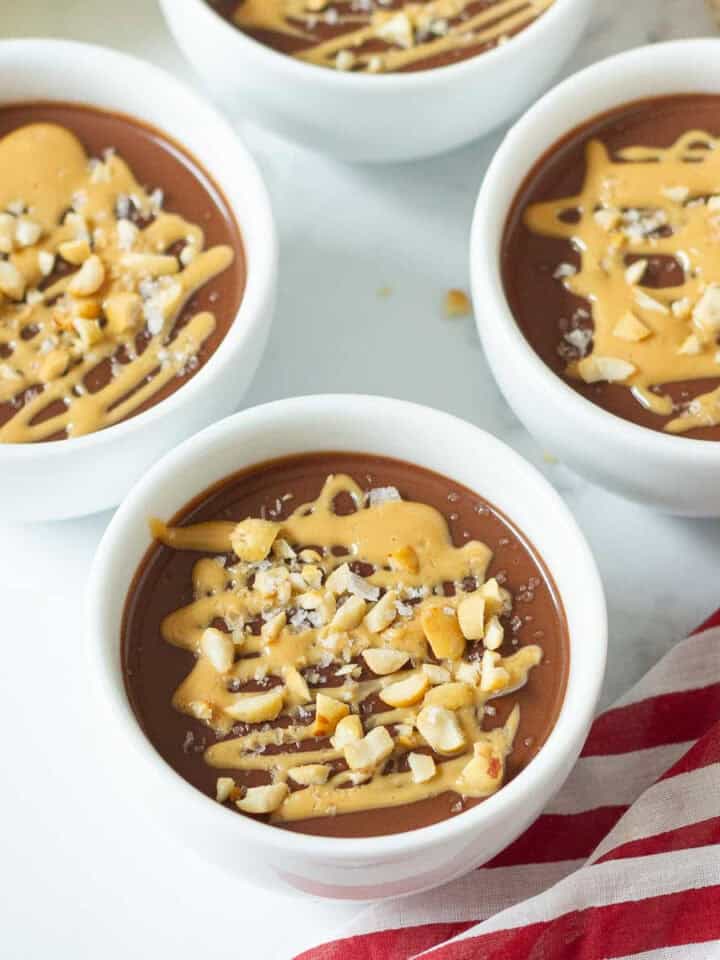
More No-Bake Desserts

  • Biscoff Icebox Cake Recipe
    Biscoff Icebox Cake Recipe
  • Mango Sago Dessert
    Mango Sago Pudding
  • No-Bake Saffron Cheesecake
    No-Bake Saffron Cheesecake
  • bowls of chocolate pudding with peanut butter drizzled on top.
    Chocolate Peanut Butter Pudding

Did you try this recipe? I'd love to hear how it turned out. Please drop a comment below or reach out on Instagram, Pinterest, YouTube, or Facebook. I hope you love this lemon panna cotta as much as we do!

📖 Recipe

Tried this recipe?Let us know how it was!
A jar of panna cotta garnished with pomegranate arils kept on a white platter with spoons.

Lemon Panna Cotta

Natasha Minocha
This lemon panna cotta is light, creamy, and bursting with fresh lemon flavor. Made with agar agar and a few simple ingredients, it's an easy make-ahead dessert - perfect for spring and summer!
No ratings yet
Print Recipe Pin Recipe
Prep Time 10 minutes mins
Cook Time 15 minutes mins
Chilling time 2 hours hrs
Course Dessert
Cuisine Italian
Servings 4 Servings
Calories 294 kcal

Ingredients


  • 13.5 oz Coconut milk, full fat
  • 1/3 cup Sugar
  • 2.5 tsp Agar-agar
  • Zest of 1 lemon
  • 1/4 cup Greek yogurt, plain
  • 2 tsp Lemon juice
  • 1 tsp Lemon zest

Instructions
 

  • In a medium-sized saucepan, bring the coconut milk, sugar, and lemon zest just to a gentle boil until sugar dissolves.
    13.5 oz Coconut milk, full fat, 1/3 cup Sugar, Zest of 1 lemon
  • Take off the heat. Whisk in the agar-agar.
    2.5 tsp Agar-agar
  • Bring back to a gentle simmer. Keep stirring frequently. Don't let the mixture come to a boil. You want to cook until you see small bubbles on the surface.
    Pour the mixture through a sieve to ensure there are no lumps.
  • Cool the mixture for 10 minutes, until lukewarm.
  • Stir in the yogurt, lemon juice, and lemon zest. Mix well.
    1/4 cup Greek yogurt, plain, 2 tsp Lemon juice,1 tsp Lemon zest
  • Pour into your serving bowls and refrigerate to set completely for 2-3 hours. You can even let it set overnight.
  • Just before serving, top with pomegranate arils, pistachio, and some more lemon zest. Enjoy!

Notes

  • Measure your agar carefully. Too much agar, and your lemon panna cotta will be hard and rubbery instead of jiggly and creamy.
  • Mix the agar agar well. It needs to dissolve properly for the lemon panna cotta to set smoothly. Stir well and simmer gently.
  • Keep the heat low. Overheating damages the gelling power of agar agar. So don’t bring it to a boil. When you see tiny bubbles around the edges of the pan, take it off the stove.
  • For a satiny smooth panna cotta, pour the mixture through a sieve to ensure there are no lumps.
  • Lemon flavor mellows as the panna cotta chills, so taste it before pouring into your serving glasses or molds. Add some more if needed.
  • Allow the lemon panna cotta to set for at least a few hours in the refrigerator for the best texture.
  • If your panna cotta hasn't set after a few hours, pour it back into the saucepan and cook it again until the mixture reaches the boiling point.
  • If you plan to serve panna cotta on a plate, remember to lightly grease your bowl or ramekin with oil before pouring in the mixture.

Nutrition

Serving: 1 ServingCalories: 294kcalCarbohydrates: 23gProtein: 4gFat: 23gSaturated Fat: 20gPolyunsaturated Fat: 0.3gMonounsaturated Fat: 1gCholesterol: 1mgSodium: 19mgPotassium: 275mgFiber: 2gSugar: 21gVitamin A: 1IUVitamin C: 4mgCalcium: 30mgIron: 2mg

Chocolate Chip Buttermilk Scones

May 9, 2022

Chocolate chip scones on a wooden tray.

Buttery, tender, and flaky, these chocolate chip buttermilk scones are a perfect cozy bake that feels special but is so simple to make!

Chocolate Chip Buttermilk Scones

With all the earmarks of a classic scone, they melt in your mouth. Wonderfully light and so, so moist, it’s the delicate magic of buttermilk at work. Each bite has chocolatey hints playing hide and seek in golden layers. 

[feast_advanced_jump_to]

Why You'll Love This Recipe

These chocolate chip scones are beautifully golden with perfectly crisp edges and flaky centers. Buttermilk gives them that dreamy light texture that keeps you reaching for just one more.

Pockets of melty chocolate make them totally irresistible!

They are perfect for a special breakfast or a cozy afternoon treat with a cup of tea or coffee. I love them with a tall glass of Vietnamese iced coffee or a strawberry matcha latte!

They are so easy to make and use simple pantry ingredients.

Make a big batch and freeze for those busy days! Just pop them in the oven for a few minutes and enjoy!

Chocolate chip scones in a wooden tray with one scone cut in half.

Recipe Ingredients

Flour: I've used all-purpose flour in this recipe. It gives a wonderful, soft, and tender result. But you can use wholewheat flour too, like I did for my cherry almond scones.

Sugar: White granulated sugar works well, though you can use raw or cane sugar as well. 

Buttermilk: For an incredibly light and fluffy texture! You can use store-bought or homemade. You can easily swap with regular cream or full-fat milk.

Chocolate: Chocolate is the star of these scones, so good-quality dark chocolate is the ideal option. Since I lean towards very lightly sweetened treats as opposed to cloyingly so, my scones had 70%. But if all you have is 55%, 50%, or any other, use that. Just about any good baking chocolate will work here.

Other add-ins: Raisins and dates are two alternates you can whisk in with your eyes closed. Or just leave the buttermilk scones plain and enjoy them with a pat of butter or strawberry jam, or cherry jam. They are so delicious with a smear of cream cheese, too!

Please see the recipe card for full information about ingredients and quantities.

How To Make Chocolate Chip Buttermilk Scones 

Step 1: Combine the milk and vinegar in a small bowl and set it aside for 5 minutes.

Step 2:  In a large mixing bowl, whisk together the flour, baking powder, baking soda, salt, and sugar until no lumps remain.

Step 3: Add cubes of chilled butter and rub and crush them into the dry ingredients with either 2 forks, a pastry cutter, or your fingertips. This is called cutting the butter. Do this repeatedly till the mixture resembles bread crumbs.

Steps for making Chocolate Chip Buttermilk Scones

Step 4: By now, the buttermilk will be ready. Form a well in your dry ingredients and pour it in. With a fork, and using a circular motion, mix everything till you have a shaggy dough.  

Step 5: Once it is combined, turn the dough out onto a lightly floured surface.

Step 6: Quickly and gently bring the dough together with your hands. It’ll take no more than a couple of minutes, and you won’t need to knead it. 

Step 7: Flatten the dough with your hands and then sprinkle chocolate chips across the surface. Press them down so they are embedded in. 

Step 8: With your pastry cutter, divide the dough into two. Then place one layer over the other with the side studded with chocolate facing upwards. 

Step 9: Press the layers so they flatten a bit and stick to each other. Cut them in half once more and place one over the other. Press and then cut again. Essentially, you repeat the press-cut-place process 3 to 4 times till all your chocolate chips are uniformly distributed in the dough.

Step 10: Dust a little flour on the dough and then flatten it into an 8-inch sheet about 2.5 inches thick. You can use a rolling pin, but scone dough is so soft that you won’t need one. 

Step 11: Dip your cookie cutter in loose flour (so it doesn’t stick to the dough) and cut scones in the shape you prefer. I went with a round cookie cutter. 

Step 12: Gently recombine any leftover dough. Roll it and cut out scones again. Repeat till no dough is left. 

Step 13: Brush the scones with egg wash (1 egg beaten in a teaspoon of water). 

Optional Step: Sprinkle granulated sugar on top for some amazing crunch.

ready to bake scones on parchment paper.
Baked scones on parchment paper.

Final step: Bake until risen and golden, about 19 minutes for me. Let them cool on the tray for 5 minutes, then transfer to a wire rack. 

Chocolate Chip Buttermilk Scones

Top Tips

  • Don’t overmix: Do not knead the dough. You simply push and pat till it comes together.
  • Chill, chill, chill: The butter has to be (has to be) chilled. I cannot reiterate this enough. My tip? Cut the butter into cubes, then pop it in the freezer for a few minutes before you begin rubbing it into the flour.
  • Work quickly: The faster you work, the less the chance the butter softens and spreads around. You don’t want that. So be quick and work steadily. It should take 3 to 4 minutes to cut the butter into the flour. 
  • Cool the dough: It’s 40 degrees Celsius here! Needless to say, the refrigerator was my best friend for this scone recipe. Instead of adding unnecessary flour, if your dough feels sloppy or just unmanageable, slide it into the fridge for 15 minutes. 
  • Don’t knead the add-ins: Stick to the folding method for the add-ins. If you knead the dough to evenly spread the chips, you’ll form a gluten network. And that will make your chocolate chip scones dense, not lighter than air. 
Chocolate Chip Buttermilk Scones

Recipe FAQs

Why use buttermilk in chocolate chip scones?

Generally, scones use milk or cream as the primary wet ingredient. But buttermilk makes the texture so flaky and tender! 
It activates the leavening agent, baking powder, and creates steam, which makes the flaky layers rise beautifully. So, you have this utterly moist middle with pockets of gooey chocolate wrapped in the most tender crust. It’s hands down the best scone I’ve eaten!

How to make buttermilk at home?

You can use store-bought buttermilk for these chocolate chip buttermilk scones, but homemade works really well, too. Simply mix regular white vinegar into milk and let it rest for 5-10 minutes until the mixture curdles. Whisk and use.

Chocolate Chip Buttermilk Scones

More Scone Recipes

  • Banana scones with walnuts and chocolate chips in a bowl with a napkin.
    Banana Scones
  • Apple Cranberry Scones | Easy Eggless Scones Recipe
    Apple Cranberry Scones
  • scones on a cake stand with a candle, tea and plant in the background.
    Mango Coconut Scones
  • Easy Miso Scones |eggless Miso Scones/ Biscuits
    Easy Miso Scones

Half the joy of cooking is sharing it with others. That’s why I’m always eager to hear from you. So go right ahead & drop a comment or reach out on Instagram, Pinterest, YouTube, or Facebook. I hope you love these chocolate chip buttermilk scones as much as we do!

📖 Recipe

Tried this recipe?Let us know how it was!
Chocolate chip scones on a wooden tray.

Chocolate Chip Buttermilk Scones

Natasha Minocha
Buttery, tender, and flaky, these chocolate chip buttermilk scones are simply sublime! With all the earmarks of classic scones, they melt in your mouth. Wonderfully light and so, so moist, it’s the delicate magic of buttermilk at work.
5 from 1 vote
Print Recipe Pin Recipe
Prep Time 20 minutes mins
Cook Time 20 minutes mins
Course Cookies, Dessert, Snack
Cuisine American, British
Servings 16 scones
Calories 221 kcal

Ingredients


  • 3 cup All-purpose flour
  • 1/3 cup Sugar
  • 2.5 tsp Baking powder
  • 1/2 tsp Baking soda
  • 1/8 tsp Salt
  • 3/4 cup Butter, cubed and chilled
  • 1 cup Buttermilk Make your own buttermilk: Combine 1 cup milk + 1 tbsp vinegar and let sit for 5 minutes.
  • 1/2 cup Dark chocolate chips I used 70% dark chocolate

Topping

  • Egg wash - 1 egg beaten with 1 tsp water
  • Granulated sugar Optional

Instructions
 

  • Preheat your oven to 200 C. Line a baking tray with parchment paper.
  • In a large bowl, whisk the dry ingredients – all-purpose flour, baking powder, baking soda, sugar, and salt. 
  • Rub in the chilled cubed butter, using your fingertips or a pastry cutter, until the mixture forms coarse crumbs.
  • Pour over the buttermilk. Mix with a fork until the dry ingredients are just moistened.
  • Combine the ingredients gently using your hands until they all come together and you can form a ball with the dough. Please don't knead the dough.
  • Turn the dough on a floured surface and gently pat into an even circle, about 6" in diameter.
  • Sprinkle the chocolate chips on the surface. Press them down slightly. Cut the dough in half and place one on top of the other. Press the dough slightly, and again cut in half.
    Place the halves on top of each other, press it slightly and repeat this process twice more.
    This helps the chocolate chips get dispersed evenly through the dough without overworking it. It also helps create flaky layers.
  • Press into an 8" circle, about 2" in thickness. Use a cookie cutter to cut out into any shape you like. I used a 2" round cookie cutter. Gently place on the prepared tray.
  • Brush lightly with egg wash and sprinkle some granulated sugar on top.
  • Bake for about 20 minutes or until lightly golden and cooked through. Remove from the oven and allow to cool for a few minutes.
  • Serve warm and enjoy!

Video

Notes

  • Don’t overmix: Do not knead the dough. You simply push and pat till it comes together.
  • Chill, chill, chill: The butter has to be (has to be) chilled. I cannot reiterate this enough. My tip? Cut the butter into cubes, then pop it in the freezer for a few minutes before you begin rubbing it into the flour.
  • Work quickly: The faster you work, the less the chance the butter softens and spreads around. You don’t want that. So be quick and work steadily. It should take 3 to 4 minutes to cut the butter into the flour. 
  • Cool the dough: It’s 40 degrees Celsius here! Needless to say, the refrigerator was my best friend for this scone recipe. Instead of adding unnecessary flour, if your dough feels sloppy or just unmanageable, slide it into the fridge for 15 minutes. 
  • Don’t knead the add-ins: Stick to the folding method for the add-ins. If you knead the dough to evenly spread the chips, you’ll form a gluten network. And that will make your scones dense, not lighter than air. 

Nutrition

Serving: 1 ServingCalories: 221kcalCarbohydrates: 26gProtein: 4gFat: 11gSaturated Fat: 8gPolyunsaturated Fat: 0.5gMonounsaturated Fat: 2gTrans Fat: 0.4gCholesterol: 25mgSodium: 211mgPotassium: 85mgFiber: 1gSugar: 7gVitamin A: 296IUVitamin C: 0.03mgCalcium: 78mgIron: 1mg

Cinnamon Bread Pudding

May 6, 2022

Cinnamon Bread Pudding

This cinnamon bread pudding turns simple stale bread into a comforting dessert! Full of warm, cinnamon flavor, soft and custardy inside, crunchy and golden on top, so delicious!

Cinnamon Bread Pudding with caramel on a trivet.

It's an easy, no-fuss recipe that’s so good for brunch or dessert. Serve it plain, with cream or ice cream and a drizzle of caramel! This bake never disappoints!

[feast_advanced_jump_to]

Why You'll Love This Recipe

✨ Great use for stale bread, and you can use any kind of bread here! 

✨ This dessert just spells comfort! Bread, cinnamon, butter, and a quick custard bake up together to make an irresistible dessert!

✨ Everyday ingredients and simple steps make this cinnamon raisin bread pudding totally fuss-free and easy.

✨ It’s so versatile-  Serve it plain or dress it down, add nuts, seeds, chocolate chips, or even fruits, like I did in my cherry bread pudding recipe!

✨ Perfect for a cozy dessert or brunch, I love it for an afternoon snack too!

bread pudding in a baking dish with caramel on top.

Recipe Ingredients

Bread: 2-3 days old stale bread works very well for making bread pudding. I used my eggless Brioche, but feel free to use regular white bread or try it with Challah.

Sugar: I used raw sugar. You can easily substitute with cane, palm, coconut, brown, or regular white sugar. Everything works for this recipe. 

Eggs: For richness and structure, very important for making that soft, gooey custard!

Milk: I love making bread and butter puddings with coconut milk. It’s creamier, which makes the pudding richer. However, any milk you prefer will do. Homemade almond milk, oat milk, cashew milk, or regular cow milk all work.

Cinnamon powder: For that unmistakable aroma and warm flavor! I always prefer to use Ceylon cinnamon.

Vanilla: Okay, so this is important because a lot of bread puddings have an eggy taste. The best way to mask it is with liberal use of good-quality vanilla extract. 

Raisins: Cinnamon pairs exceptionally well with golden raisins, but black raisins will do in a pinch here. Add as many or as few as you want.

Nuts: I used pecans here, but go ahead and add almonds, walnuts, or hazelnuts. You can keep the pudding nut and raisin-free as well, because there are no hard and fast rules and plenty of room to experiment with add-ins. You can also try adding chocolate chips like I did in my chocolate chip bread pudding!

Please see the recipe card below for full information about ingredients and quantities.

How To Make Cinnamon Bread Pudding

This recipe is super simple - It's just bread baked in a mixture of milk, eggs, sugar, and a whole lot of cinnamon. But it really turns into a dessert so sublime that it's impossible not to love it!

Step 1: Start with stale, dry bread and cut into cubes (or tear into small pieces). You can cut off the crusts or leave them be. 

Step 2: Toss the pieces with raisins and pecans, then set aside. 

bread cubes with raisins and pecans in a mixing bowl.

Step 3: In another bowl, whisk coconut milk, eggs, vanilla extract, and sugar. Add a hefty spoonful of cinnamon to the custard.

Step 4: Pour the mixture on your bread cubes, and pack it down gently so the bread soaks in the custard.

Bread and nuts soaked in custard mixture in a mixing bowl.

Step 5: Set your oven to preheat and let the mixture sit for 10 to 15 minutes. You may need more time in case your bread is quite stale. 

Step 6: Transfer to an 8 or 9-inch baking pan.

Optional step: Right before I set the bread pudding to bake, I drizzled melted butter on top with a sprinkle of cinnamon sugar. This makes the top golden, crispy, and crunchy!

Baked cinnamon pudding in a baking pan on a coaster.

Final step: bake for 40 odd minutes till the custard has completely set along the sides and the top is crisp and golden.  

Top Tips

  • We need stale bread here, but make sure the bread is not too stale. If it's really hard and dry, please don't use it for bread pudding.
  • You can cut the bread into cubes or tear it into chunks using your hands.
  • If you're working with fresh bread, cube it and bake it in the oven at 150 °C / 300°F for 10-15 minutes. Or leave it out for one to two hours.
  • Allow the bread to soak in the egg mixture for at least 30 minutes. This will ensure a soft, gooey texture inside.  
Cinnamon Bread Pudding in a baking dish with caramel drizzled over the top.

How To Serve Bread Pudding

Bread puddings are best served warm or at room temperature, though I love them, "straight from the fridge", cold too! I like to let the pudding cool just a bit (10-15 minutes) and then dig in while it’s still warm.

Bread pudding can also be as simple or as extravagant as you want, depending on your mood. I made my Vegan Caramel Sauce with a good splash of rum and spooned some on top.

Serve it with lightly whipped cream, custard, or ice cream.

Cinnamon bread pudding with ice cream in a bowl.

Recipe FAQs

Which is the best bread for bread and butter pudding?

Regular store-bought white bread is good enough! I've made my Chocolate Chip Bread Pudding with regular white bread, and it turned out to be flawlessly decadent. 
That said, if you have enriched bread (those with high-fat content), like brioche or challah, keep them as your first preference. They’re easy to make, delicious to eat, and fantastic for bread pudding. 
Do avoid sourdough, crusty breads, and seeded breads.

Why does bread pudding need stale bread?

Stale is better. I recommend using one that is a day or two old. Its slightly dry texture ensures the pudding doesn’t get soggy after the bread soaks up the custard. 
Have just fresh bread at hand and are craving bread pudding? Leave it out for a couple of hours, or bake it at a low temperature for about 20 minutes.

How do you know when cinnamon bread pudding is done?

Look for a golden baked top and a set custard. When the pudding is no longer jiggly, it's done!

A spoon in a bowl of bread pudding with ice cream on top.

More Easy Desserts

  • cherry bread pudding in 3 ramekins with spoons on the side on a wooden board.
    Cherry Bread Pudding
  • Chocolate Chip Bread Pudding in a yellow round dish with forks on the side.
    Chocolate Chip Bread Pudding
  • Vegan Sticky Toffee Pudding Glutenfree Dairyfree Refined Sugarfree Dessert
    Vegan Sticky Toffee Pudding
  • The Best French Toast Casserole Recipe
    The Best French Toast Casserole Recipe

Half the joy of cooking is sharing it with others. That’s why I’m always eager to hear from you. So go right ahead & drop a comment or reach out on Instagram, Pinterest, YouTube, or Facebook. I hope you love this cinnamon bread pudding as much as we do!

📖 Recipe

Tried this recipe?Let us know how it was!
Cinnamon Bread Pudding

Cinnamon Bread Pudding

Natasha Minocha
This cinnamon bread pudding turns stale bread into a comforting dessert! Full of warm, cinnamon flavor, soft and custardy inside, crunchy and golden on top!
No ratings yet
Print Recipe Pin Recipe
Prep Time 25 minutes mins
Cook Time 40 minutes mins
Course Brunch, Dessert
Cuisine American, British
Servings 8 Servings
Calories 443 kcal

Ingredients


  • 10-12 slices Brioche bread,cubed You can use regular white bread too
  • 1/2 cup Raisins
  • 1/3 cup Pecans, roughly chopped
  • 3 Eggs
  • 1.5 cups Coconut milk You can use any milk you prefer
  • 3/4 cup Raw sugar You can use white sugar
  • 1 tsp Vanilla extract
  • 1.5 tsp Cinnamon powder
  • 1 tbsp Butter, melted
  • 2 tsp Cinnamon sugar, for topping Optional
  • Caramel sauce for serving Optional

Instructions
 

  • Combine the bread, raisins, and pecans in a large bowl.
    10-12 slices cubed Brioche bread, 1/2 cup Raisins, 1/3 cup Pecans, roughly chopped
  • Whisk together the eggs, coconut milk, sugar, vanilla extract, and cinnamon powder in a small bowl.
    3 Eggs, 1.5 cups Coconut milk, 3/4 cup Raw sugar,1 tsp Vanilla extract, 1.5 tsp Cinnamon powder
  • Pour over the bread mixture.
  • Press the bread down a bit so it absorbs the custard mixture well.
  • Let the mixture stand for at least 15 minutes so most of the custard gets soaked.
  • Preheat your oven to 180C.
  • Pour the bread mixture into a pan, 8"/9" in diameter.
  • Spoon over the melted butter and sprinkle some cinnamon sugar on top.
    1 tbsp Butter, melted, 2 tsp Cinnamon sugar
  • Bake for 35-40 minutes till the pudding looks golden brown on top and the custard is set.
  • Serve warm with a scoop of ice cream and caramel sauce. Enjoy!

Notes

  • We need stale bread here, but make sure the bread is not too stale. If it's really hard and dry, please don't use it for bread pudding.
  • You can cut the bread into cubes or tear it into chunks using your hands.
  • If you're working with fresh bread, cube it and bake it in the oven at 150 °C / 300°F for 10-15 minutes. Or leave it out for one to two hours.
  • Allow the bread to soak in the egg mixture for at least 15 minutes. This will ensure a soft, gooey texture inside.  

Nutrition

Serving: 1 ServingCalories: 443kcalCarbohydrates: 48gProtein: 9gFat: 25gSaturated Fat: 15gPolyunsaturated Fat: 1gMonounsaturated Fat: 3gTrans Fat: 0.1gCholesterol: 140mgSodium: 243mgPotassium: 219mgFiber: 1gSugar: 19gVitamin A: 511IUVitamin C: 1mgCalcium: 54mgIron: 3mg

Easy Challah Bread

May 2, 2022

Easy Challah Bread | Challah Bread Recipe

Challah is one badass bread, all pillowy inside and golden-brown soft on the outside. Don’t let the fancy facade fool you. There’s a reason I call the recipe easy challah bread. There’s not much technique to it, and you’ll need only basic pantry ingredients. 

Easy Challah Bread | Challah Bread Recipe

Jump to 

Challah recipe

Ingredient alternatives

FAQs

More bread recipes

What is challah?

Challah is a braided, enriched bread, meaning it uses yeast and contains over 10% fat, eaten by Jewish communities on Shabbat and other major holidays. Across Eastern Europe, it’s known by many other names like hallah, kitke, berches, chałka, khale, etc. It can be easily made at home, irrespective of your experience level. 

How do you pronounce challah?

Challah, a Hebrew word that appears in the Bible, is not pronounced with the hard “ch” sound like in chip or chai. Keep the “c” silent and sound it like “haa·luh”

What does challah taste like?

Challah is not like the usual white loaves of bread that taste plain. It has a hint of sweetness to it and feels rich and soft on the palate. And if you’re wondering if it tastes as decadent as it looks, then the answer is an emphatic yes. 

Easy Challah Bread | Challah Bread Recipe

How to make challah bread?

There are 5 steps to making challah: you knead, you proof twice, you shape, and you bake. It seems complicated, but it’s not. You'll have an absolutely stunning, show-stopping loaf ready in about 3 hours and an afternoon well spent.

Prepare the challah dough

Step 1: Combine eggs, water, yeast, olive oil, and honey in the bowl of your stand mixer.

Step 2: Add in the flour and mix till it forms a rough mass. 

Step 3: If you’re going to knead by hand, transfer the shaggy dough to a floured surface and knead it for a good 10 to 12 minutes. I used my stand mixer, and at a low setting, it took about 9-10 minutes to form a soft, supple, and smooth dough. Whichever route you choose, it’s important to knead well so the braids of challah don’t split during baking. 

Dough for challah bread

First proof of challah

Step 4: Grease a mixing bowl, place the dough in it and cover with a damp kitchen towel. A cling wrap is also fine, but I’ve found that in dry heat like the one here, a damp towel works better. It keeps the dough moist.

Step 5: Allow the dough to rise and double in volume. It’s sweltering hot here, so my challah dough took 45 minutes to rise. But in cooler kitchens, it can take one and a half to two hours. 

Proofed dough for challah

Divide and shape the dough into strands

Step 6: Punch the dough down to help it deflate, then divide it into 6 equal pieces.

Step 7: Roll each piece into a ball, cover with a damp towel again, and set aside for 5 minutes.

Step 8: Taking one ball at a time, roll it into a 6- to 7-inch long rope while covering the rest.

Step 9: Going back to the first rope, roll it again till it forms a 12-inch-long strand. 

Step 10: Repeat for all 6 strands. 

Making the challah bread

Step 11: Pick 3 dough strands and arrange them side by side at 90-degrees to you. Pinch their ends (the one farthest from you) together. 

Step 12: Then start braiding like you’re making a plait. Make sure you apply the same tension throughout the process, or else some sections of the braid will be loose and some tight, creating a misshapen loaf. 

Step 13: When you reach the bottom of the braid, pinch the loose ends together and fold it under the loaf. Make sure you tuck the top end of the braid in the same fashion. 

Step 14: Take the remaining three dough strands and repeat the process. 

Braiding the challah bread

Second proof challah dough

Step 15: Place the loaves on a parchment paper-covered tray. Cover with a kitchen towel again and let it rise for a second time till puffy. For me, it took about 35 minutes.

Step 16: Brush the top with egg wash (one whole egg whisked in a splash of water) for that shiny glaze. 

Step 17: Dust with sesame seeds and bake for 24 to 30 minutes. (Challah bakes at a lower temperature. So, preheat at 200, but bake at 180.)

Step 18: Let challah cool on a rack, and then dig in. 

Ready to bake Easy Challah Bread | Challah Bread Recipe

Substitute ingredients for this easy challah bread recipe

Honey: use regular white sugar.

Olive oil: any vegetable oil you prefer.

Sesame seeds: sprinkle poppy instead.

Egg wash: try milk or lightly beaten cream.

Eggs: I’ve not tried eggless challah, but those who have said to just omit the eggs and increase the amount of water.

Easy Challah Bread | Challah Bread Recipe

Good to know when making challah bread

  • There are many ways to braid challah, from 4 strands to 14 strands. The easiest is obviously the 3 strands, so stick to it if it is your first go-around. 
  • You have to give the bread ample time to proof so it rises to its absolute maximum. When challah is not proofed enough, it’s denser and the braids tend to split. 

How do you know when your challah is proofed and ready to bake?

You’ll know when you see the dough. It’ll be puffy and twice its size. Or you can do a poke test. Press a knuckle or fingertips and if the challah dough springs back instantly, it needs more time. 

On the other hand, if it leaves a trace or mark of your knuckle on the dough, it’s ready to be baked. Another way to know if the dough is ready to bake is to give it a wobble. If it jiggles, it’s time for the oven.

Easy Challah Bread | Challah Bread Recipe

Is challah dough sticky?

The dough of challah bread should feel smooth, elastic, and stretchy. It should not stick to the bowl sides or your hands. If it’s sticky, add a spoonful of flour and continue kneading till you get the consistency right. The key here is to use as little additional flour as you can. 

What’s the difference between brioche and challah bread?

Both eggless brioche (French origin) and challah (Jewish origin) are enriched breads, so they seem similar, but there are distinct differences. For one, challah doesn’t have any dairy in it. So, while brioche is made with butter, challah is made with oil. That also makes brioche a little richer than challah. 

Easy Challah Bread | Challah Bread Recipe

Leftover challah bread uses

Challah is lovely as-is, with morsels torn right from the loaf. But even after 3 days in the fridge (albeit properly covered), it was as soft as day 1. So, it makes fabulous bread for sandwiches, soups, and whatnots. 

Try it with honey, butter, or jam. It’s also marvelous for French toast and bread puddings because the texture holds up really well. 

Easy Challah Bread | Challah Bread Recipe

More pillowy soft bread recipes

Pineapple Buns

Parker House Rolls

Cheesy Garlic Bread

Strawberry Star Bread

Braided Pesto Bread

Cheese Beer Bread

📖 Recipe

Tried this recipe?Let us know how it was!
Easy Challah Bread | Challah Bread Recipe

Easy Challah Bread

Natasha Minocha
Challah is one showstopper of a bread, all pillowy inside and golden-brown soft on the outside. It's incredibly easy to make and is totally irresistible!
4.43 from 7 votes
Print Recipe Pin Recipe
Prep Time 20 minutes mins
Cook Time 30 minutes mins
Proof Time 2 hours hrs
Course Side Dish
Cuisine Eastern European
Servings 2 loaves
Calories 1251 kcal

Ingredients


  • 2 Eggs
  • 7 oz Water, lukewarm
  • 2 tsp Dried active yeast
  • 1/4 cup Honey
  • 1 1/4 tsp Salt
  • 2 tbsp Oil I used olive oil. Feel free to use any vegetable oil
  • 4 cup All-purpose flour

Topping

  • 1 Egg, beaten with 1 tsp water for eggwash
  • Black and white sesame seeds

Instructions
 

  • Combine the eggs, water, yeast, salt, honey, and oil in a large bowl or in the bowl of your stand mixer. Whisk them well.
  • Add in the flour and combine well until a rough mass is formed. Take the dough out on a lightly floured surface and knead for about 10 -12 minutes.
    You could also use your stand mixer for kneading. Knead at low speed for about 8 -9 minutes.
  • The dough is ready when its smooth and soft.
  • Place in a lightly greased bowl, cover, and let proof in a warm place for 1- 11/2 hours or until it doubles in size.
  • Punch the proofed dough and divide into 6 equal-sized pieces.
  • Roll each piece into a ball. Cover with a damp kitchen towel and let it rest for 5 minutes.
  • Roll out each ball into a rope, about 7" in length. Repeat for all the dough balls.
  • Now starting with the first one we rolled out, roll each strand to a length of 12".
  • Now take 3 strands together. Pinch them at the top and braid them, tucking in the ends under the braid.
  • Repeat with the other 3 strands.
  • Carefully place on a parchment-lined baking tray.
  • Cover with a damp kitchen towel or cling wrap and place in a warm place for about 1 hour or until puffy and pillowy
  • Preheat your oven to 250C.
  • Brush the loaves with egg wash, and sprinkle with sesame seeds.
  • Bake for 25-30 minutes at 180C or until golden brown.
  • Cool the loaves on a cooling rack until just barely warm. Slice and enjoy!

Nutrition

Serving: 1LoafCalories: 1251kcalCarbohydrates: 231gProtein: 33gFat: 21gSaturated Fat: 3gPolyunsaturated Fat: 6gMonounsaturated Fat: 11gTrans Fat: 0.1gCholesterol: 164mgSodium: 1529mgPotassium: 384mgFiber: 8gSugar: 36gVitamin A: 243IUVitamin C: 0.2mgCalcium: 70mgIron: 13mg
Easy Challah Bread | Challah Bread Recipe PIN

Peanut Butter Oat Cups

April 29, 2022

Peanut Butter Oats Bites | Peanut Butter Chocolate Oats Cups

Peanut butter oat cups are a healthy yet lush combination of dark chocolate, gooey peanut butter, and chewy oats. Made with just 4-ingredients, these delicious treats are super simple to make. These no-bake peanut butter oat cups are a huge hit with everyone and will, for sure, become a part of your recipe repertoire!

Peanut Butter Oat Cups on a white tray with peanut butter in a small bowl
[feast_advanced_jump_to]
 Peanut Butter Chocolate Oat Cups on a white tray with ingredients in the background

Why we love peanut butter oat cups

4-ingredient, 5-steps super simple recipe

Healthier than an average in-between snack

Mini-sized, so ideal for portion control 

Hit the spot for something sweet after dinner 

Even a big batch stores well for weeks in the fridge

Super tasty on-the-go treat, especially if you have a kid sitting for exams (like me!)

Recipe ingredients and variations

Ingredients for making Peanut Butter Oats Cups|

Oats: I used old-fashioned rolled oats for these peanut butter chocolate cups, and they are extra chewy for sure. If you don’t enjoy the heartier texture, use instant oats to give the cups less of a bite. While oats are naturally gluten-free, grab only certified gluten-free oats, if you're looking to make them gluten-free.

Peanut butter: Natural and organic peanut butter is what I prefer for my no-bake recipes like these chocolate peanut butter balls. Homemade will work wonders!

Almond butter is a great choice, or for those with allergies, seed butter. 

Chocolate: Anytime I want to bump up the overall flavor of any of my recipes, like for my peanut butter stuffed dates, I sneak in dark chocolate. And these peanut butter oat bites were no different. The 70% dark chocolate was insanely good and brought balance to the creamy peanut butter. 

You can also use 55% dark chocolate or milk chocolate.

Maple syrup: Chocolate and PB make a decadent duo, but maple syrup ties the two layers together. Other sweeteners that pair well in these peanut butter chocolate cups are honey or date syrup. 

How to make peanut butter oat cups?

There will come a time when I’m ready to turn on the oven again. That time is not now. So, I’m happy to continue with my no-bake recipe streak, like with my well-loved no-bake oatmeal peanut butter bars!

If you love and adore the idea of having chocolate not just for dessert but any time of the day or night, don’t sleep on this recipe!

Step 1: Make your oat base by mixing rolled oats, peanut butter, and maple syrup until everything is well moistened and clumpy. 

Step 2: Spoon the mixture into silicone cups, press it down, and then place them in the freezer for a few minutes to set. 

Making the oats base in silicon mold in a mini muffin pan

Step 3: Melt dark chocolate in a double boiler like I did for my eggless brownie cookies. Add peanut butter. Then whisk, whisk, whisk till it’s glossy.

Step 4: Pour over the oat base. Sprinkle chopped peanuts on top. 

Step 5: Place them back in the refrigerator till completely set.

melted chocolate and peanut butter mixture on the oats base in silicon cups in a mini muffin tray
ready to eat Peanut Butter Chocolate Oat Cups in a mini muffin tray

Pro tips

  • I used smooth peanut butter for these peanut butter oats snacks. But after having 2 (or 3) of these cups, I’d say crunchy peanut butter would have been wonderful too!
  • To make it easier to transport the peanut butter oat bites, put your silicone cups in a mini muffin tray. Don’t have silicone liners? Mini muffin paper cups work just as well. 
  • Don’t rush the chilling time. Give these tiny bites of healthy heaven at least 2 to 3 hours of refrigerator time to get that perfect texture and consistency. 
  • Don’t have time for the cups to firm up? Expedite things by sliding them into the freezer. 
  • I’ve made plenty of batches by now, and all of them had a good shelf-life. Just transfer the peanut butter oat cups into an airtight container and store them in the fridge. They will stay well for up to 2 weeks.
 Peanut Butter Chocolate Oat Cups on a white tray with one half eaten peanut butter cup
 Peanut Butter Chocolate Oat Cups

More chocolate peanut butter desserts 

  • peanut chocolate protein balls topped with peanuts and seasalt in a small bowl.
    Peanut Chocolate Protein Balls
  • bowls of chocolate pudding with peanut butter drizzled on top.
    Chocolate Peanut Butter Pudding
  • Easy Chocolate Peanut Butter No-Bake Cookies
    Easy Chocolate Peanut Butter No-Bake Cookies
  • Easy Chocolate Caramel Peanut Clusters

Half the joy of cooking is sharing it with others. That’s why I’m always eager to hear from you. So go right ahead & drop a comment or reach out on Instagram, Pinterest, YouTube, or Facebook. I hope you love these peanut butter oat cups as much as we do!

📖 Recipe

Tried this recipe?Let us know how it was!
Peanut Butter Oats Bites | Peanut Butter Chocolate Oats Cups

Peanut Butter Oat Cups

Natasha Minocha
Peanut Butter Oat Cups are tiny morsels of healthy pleasure and a lush combination of dark chocolate, gooey peanut butter, and chewy oats! So simple to make with just 4 ingredients, they are wonderful for a quick snack or dessert.
5 from 1 vote
Print Recipe Pin Recipe
Prep Time 10 minutes mins
Chilling time 1 hour hr
Total Time 1 hour hr 10 minutes mins
Course Dessert, Snack
Cuisine American
Servings 12 servings
Calories 95 kcal

Ingredients


Crust

  • 1/2 cup Rolled oats
  • 2 tbsp Peanut butter
  • 2 tbsp Maple syrup

Filling

  • 1/2 cup Dark chocolate chips 70%
  • 2 tbsp Peanut butter
  • Chopped peanuts for topping

Instructions
 

Crust

  • Mix all the ingredients in a bowl. The mixture should be well moistened and clumpy.
  • Drop small spoonfuls in small silicon cups or mini muffin tray, lined with paper liners.
  • Press down well and freeze for 5-10 minutes.

Filling

  • Melt the chocolate and mix in the peanut butter until the mixture is smooth.
  • Drop spoonfuls of this mixture on top of the oats crust.
  • Top with chopped peanuts if you like.
  • Refrigerate until set. Store in an air-tight container in the refrigerator. Enjoy!

Video

Nutrition

Serving: 1 ServingCalories: 95kcalCarbohydrates: 10gProtein: 2gFat: 5gSaturated Fat: 3gPolyunsaturated Fat: 1gMonounsaturated Fat: 1gCholesterol: 0.1mgSodium: 32mgPotassium: 98mgFiber: 1gSugar: 5gVitamin A: 1IUVitamin C: 0.04mgCalcium: 31mgIron: 0.3mg
Peanut Butter Oats Bites | Peanut Butter Chocolate Oats Cups PIN

No-Bake Mango Cheesecake

April 23, 2022

A dessert cup of no-bake mango cheesecake with fresh mangoes and pistachios.

Tangy, cool, and so delicious, this no-bake mango cheesecake is bursting with fresh, juicy mango flavor! The velvety, creamy saffron-hued filling, combined with a buttery crunchy cookie base makes this no-bake cheesecake a mango lover's dream come true!!

Mango Cheesecake in a dessert cup, garnished with mangoes and pistachios.

Come summer, and the abundance of mangoes in the market is forever tempting me to buy them by the cart loads! While we LOVE eating the fruit in all its glory, it also is fabulous in desserts. The ripe, bright, luscious mangoes make any dessert absolutely irresistible!

The no-bake mango cheesecake is no exception. Super easy to make, this cheesecake is as effortless as it can get. A jar of mango curd helps making it in a jiffy! A sureshot winner, this mango cheesecake recipe is totally fool-proof and so well loved by everyone.

If you love mangoes as much as I do, do try this easy 3-ingredient mango mousse, mango float, and mango ricotta cheesecake!

[feast_advanced_jump_to]
No-bake mango cheesecake in a dessert cup with 2 spoons on the side.

Why You'll Love This Recipe

✨No need to turn on the oven, making this an ultimate summer dessert! Cool, creamy and totally fuss-free!

✨Bursting with bright, juicy mango flavors, this no-bake cheesecake is a mango-lover's delight!

✨This mango cheesecake has a smooth, silky texture with a buttery biscuit base that adds a lovely crunch. Absolutely irresistible!

✨This cheesecake is a great make-ahead dessert. Perfect for easy entertaining and weeknight dessert cravings!

How To Make No-Bake Mango Cheesecake

The basic recipe is essentially the same as my no-bake saffron cheesecake, but it’s dressed up with mangoes and complementary endnotes of lemon and saffron. 

Step 1: Crush your digestive biscuits. You can use a rolling pin or your food processor.

Step 2: Combine it with melted butter.

Step 3: Spoon the crumb into individual glasses or dessert bowls and set them aside. 

Filling and cookie crust for no-bake mango cheesecake in 2 bowls.

Step 4: Stir together saffron and 1 tablespoon cream. Keep aside for 5 minutes.

Step 5: Whisk cream, cream cheese, icing sugar with homemade mango curd, and a dash of lemon juice with an electric beater till it is thick and creamy. 

Step 6: Whisk in lemon juice and the saffron-soaked cream.

Step 7: Taste the filling and adjust for sweetness.

Step 8: Spoon or pipe the mango cheesecake filling on top of the cookie crust. Smoothen the top. You can also pipe some of the filling along the edge of the bowl for a decorative pattern, using a star nozzle.

Step 9: Place the 1/4 cup filling in a piping bag and pipe little stars along the edges of the dessert cup.

Step 10: Chill for at least 2 to 3 hours. And if you’re not pressed for time, even more.

Step 11: Top with chopped chunks of mango and a few slivers of pistachio and serve.

4 dessert bowls  filled with mango cheesecake with spoons and a pink napkin on the side.

Pro Tips

  • Cold ingredients are harder to whip into a smooth, lump-free filling. So, make sure all your ingredients are at room temperature. 
  • You can use store-bought or homemade mango curd. It's so so good in these mango-filled donuts too!
  • To adjust the consistency of the filling, stir in more cream if it's too thick. Add more cream cheese if it's too soft.
  • Garnish with mango pieces and pistachios right before you serve.
  • The longer you let the no-bake cheesecake chill, the better it gets. So, if you can, make it a day before and let the filling set beautifully.
  • I made 5 servings with this recipe, but you can just as easily double or halve it!
A bowl of mango cheesecake with a spoonful of the cheesecake.

More No-Bake Recipes

  • No-Bake Saffron Cheesecake
    No-Bake Saffron Cheesecake
  • Chocolate peanut butter oatmeal bars cut into 16 squares on parchment paper.
    Chocolate Peanut Butter Oatmeal Bars
  • chocolate orange tart garnished with berries, orange zest, candied oranges on a white napkin.
    Chocolate Orange Tart
  • Easy Chocolate Peanut Butter No-Bake Cookies
    Easy Chocolate Peanut Butter No-Bake Cookies

Half the joy of cooking is sharing it with others. That’s why I’m always eager to hear from you. So go right ahead & drop a comment or reach out on Instagram, Pinterest, YouTube, or Facebook. I hope you love this no-bake mango cheesecake as much as we do!

📖 Recipe

Tried this recipe?Let us know how it was!
No-Bake Mango Cheesecake

No-Bake Mango Cheesecake

Natasha Minocha
Tangy, cool, and so delicious, this no-bake mango cheesecake is bursting with fresh, juicy mango flavor! The velvety, creamy saffron-hued filling, combined with a buttery crunchy cookie base makes this no-bake cheesecake a mango lover's dream come true!!
No ratings yet
Print Recipe Pin Recipe
Prep Time 20 minutes mins
Chilling time 2 hours hrs
Total Time 2 hours hrs 20 minutes mins
Course Dessert
Cuisine American, Indian
Servings 5 Servings
Calories 436 kcal

Ingredients


Cookie Base

  • 3/4 cup Digestive biscuits, crushed
  • 1/4 cup Butter, melted

Mango Cheesecake Filling

  • 1 1/4 cup Mango curd
  • 1 cup Cream cheese
  • 1/2 cup Icing sugar
  • 1 cup Cream I used Amul cream, with 25% fat
  • 1 tsp Lemon juice
  • 1 tsp Saffron dissolved in 1 tbsp cream
  • Mango cubes, pistachio slivers for topping

Instructions
 

Cookie Base

  • Combine the melted butter and crushed cookies in a small bowl. This mixture should have the consistency of wet sand. Keep aside.

Mango Cheesecake Filling

  • Combine saffron with 1 tbsp cream. Keep aside for a few minutes.
  • With a hand whisk or electric beater, beat mango curd, cream, cream cheese, and icing sugar till you have a nice, thick, creamy mixture.
  • Whisk in lemon juice and saffron-soaked cream.
  • Taste and adjust for sweetness and flavor.

Assembly

  • Spoon the crushed cookie mixture into the bottom of your dessert glasses. Press it down slightly.
  • Pipe the cream cheese filling on top of the crust base. Smoothen the top.
  • You can also pipe some cheesecake filling flowers along the edge of the bowl for a decorative pattern, using a star nozzle.
  • Chill well for at least 2 hours.
  • Top with fresh mangoes, and pistachio slivers before serving. Enjoy!

Notes

  • Cold ingredients are harder to whip into a smooth, lump-free filling. So, make sure all your ingredients are at room temperature. 
  • You can use store-bought or homemade mango curd. It's so so good in these mango-filled donuts too!
  • To adjust the consistency of the filling, stir in more cream if it's too thick. Add more cream cheese if it's too soft.
  • Garnish with mango pieces and pistachios right before you serve.
  • The longer you let the no-bake cheesecake chill, the better it gets. So, if you can, make it a day before and let the filling set beautifully.
  • I made 5 servings with this recipe, but you can just as easily double or halve it!

Nutrition

Serving: 1 ServingCalories: 436kcalCarbohydrates: 37gProtein: 10gFat: 29gSaturated Fat: 18gPolyunsaturated Fat: 2gMonounsaturated Fat: 7gTrans Fat: 0.4gCholesterol: 85mgSodium: 476mgPotassium: 308mgFiber: 1gSugar: 28gVitamin A: 1722IUVitamin C: 24mgCalcium: 213mgIron: 1mg

Mango-Filled Donuts

April 19, 2022

mango-filled donuts on a cake stand.

These mango-filled donuts are a party in your mouth. Soft and pillowy with a luscious mango filling, these donuts are surprisingly easy to make! They are golden, light and absolutely irresistible!

Donuts filled with mango curd stacked on a cake stand with ingredients in the background.

This vegan mango donut recipe is an adaptation of my strawberry jam donuts. The mango filling is my easy and delicious eggless mango curd. It's fresh, creamy, and bright, perfect for the soft, melt-in-your-mouth donuts!

A warm, fresh batch of these mango-filled Italian doughnuts is just so lovely for an afternoon pick-me-up, with your mid-morning cuppa, or even dessert!

[feast_advanced_jump_to]

Why You'll Love This Recipe

✨These mango doughnuts are everything a good doughnut should be! Light and airy with a crisp golden crust!

✨The homemade mango filling is rich and creamy. It's packed with fresh mango flavor that takes these mango bombolinis to a new level of deliciousness!

✨Yes, we are frying these golden balls of dough to perfection, and it may seem intimidating. But this really is a very easy and simple recipe to follow.

✨And so versatile, use any filling of your choice like these strawberry jam donuts, or Nutella, pastry cream, or even lemon curd!

✨These mango-filled donuts are a decadent treat bursting with summer fruit freshness! If you're a mango lover like me, this is for sure a fun way to enjoy them in a dessert!

Recipe Ingredients

Flour: Regular all-purpose flour works well for making donuts.

Yeast: I used dry active yeast. Instant yeast will also work. No matter which yeast you use, please make sure it's fresh.

Oil: Since I wanted to make vegan mango donuts, I used softened coconut oil. You can easily replace it with softened butter. 

Milk: I used almond milk for this recipe. Feel free to use any plant-based milk of your choice or regular dairy milk.

FilIing: I used my homemade mango curd as a filling. You can use a store-bought one or any filling of your choice!

Please see the recipe card for full information about the ingredients and quantities.

How To Make Mango-Filled Donuts

Step 1: Start by mixing dry active yeast with lukewarm milk (not hot). Set aside for 10-15 minutes until the mixture is frothy and bubbly.

Step 2: Make the dough for mango doughnuts - Sift your flour and combine it with sugar, salt, and melted coconut oil in your stand mixer bowl.

Step 3: Make a well in the center and then pour in the yeast mixture.

Step 4: Using the hook attachment of your stand mixer, combine all the ingredients. Start with the lowest speed setting and gradually increase it to 4 as the dough begins to form. 

Step 5: In 4 or 5 minutes, when the dough begins to leave the sides, the dough is ready to be proofed. 

Step 6: Turn the smooth and elastic dough on your work surface, knead it for a minute, and then transfer it into a greased bowl. Cover and let the dough rest till it doubles in size.

Step 7: Punch down the dough and turn it over on your lightly floured surface.

Step 8: Divide the dough into 16 equal portions.

Step 9: Shape each portion into a tight, smooth bun and then place on a lightly floured baking tray. Make sure you leave room between each donut ball. You can also cut 16, 4" squares of parchment paper and place each dough ball on a parchment square.

Step 10: Cover your tray and let it rest for about 30 minutes or until the dough balls are puffy.

Dough for mango-filled donuts in a mixing bowl.
Steps for making donuts.

Step 11: Heat oil in a deep pan, gently lift each dough ball so it doesn’t deflate, and fry each side of it till golden brown. If using parchment paper, lift each dough piece using the parchment and drop dough side down into the hot oil.

Step 12: Fry for 2-3 minutes on each side. Remove using a spider and drain on paper towels.

Step 13: Wait for the donuts to cool and then fill them with mango curd using a piping bag attached with a long nozzle to make sure the filling goes all the way in. Simply sink the nozzle in and push till a bit of the mango cream filling peeks out. 

Serve warm and enjoy!

Fried donuts on parchment paper lined tray.
Piping bag and donuts filled with mango curd.

Top Tips

  • Make sure the oil is hot enough before you start frying the donuts. If you're using a thermometer, it should read around 148 °C or 300°F.
  • If you don't have a thermometer, dip one end of a wooden spoon or a chopstick into the oil. If bubbles start forming and rising to the top, the oil is hot enough to fry the donuts. 
  • Don't overcrowd your pan while frying. Fry 2-3 doughnuts at a time so they have room to expand and cook evenly.
  • Do use a kitchen scale to measure your ingredients for better and consistent results every time.
  • Be very careful when dropping the dough balls into the hot oil. You can place the dough balls on 4" parchment squares. Use the parchment to pick them up and drop dough side into the hot oil. Use tongs to take the parchment out of the oil.
  • Allow the donuts to cool before filling them with mango curd.
  • These vegan mango donuts taste the best the day they are made. Store the leftovers in an airtight jar in the refrigerator for up to 3 days.
Mango bombolinis on a cake stand with ingredients around.

Recipe FAQs

Do I need to have a stand mixer to make vegan mango donuts?

No, you don't! You can knead the dough by hand for 10-12 minutes. The dough should be soft, smooth, and just slightly tacky.

Can I use a cookie cutter to make the mango doughnuts?

Yes! After the first proof, roll the dough to about ¼” thickness and then cut out the donuts using a round cookie cutter. 

How to check if the oil is ready for deep-frying without a thermometer?

Dip one end of a wooden spoon or a chopstick into the oil. If bubbles start forming and rising to the top, the oil is hot enough to fry the donuts. 

How many mango donuts can you fry at a time?

I used a small pan that could fit only 2 donuts at a time. If yours is a bit bigger, you can easily fry 3 donuts simultaneously. But please don’t crowd the pan. Besides, it barely takes 2 minutes to fry each side, so you won’t have to stand in front of the stove for long, even with a small pan. 

How can I make mango curd at home?

It takes all of 10 minutes to make mango curd at home, and it’s so worth it. All you have to do is blend all the ingredients, cook the mixture till it thickens, let it cool, and it’s ready. This is my tried and tested mango curd recipe.

Mango donuts on a plate with one donut half on top to show the filling inside.

More Mango Desserts

  • Easy Mango Cake - Eggless Recipe
    Easy Mango Cake - Eggless Recipe
  • Mango Sago Dessert
    Mango Sago Pudding
  • Mango Tres Leches Cake
    Mango Tres Leches Cake
  • Mango Float Recipe
    Mango Float Recipe

Half the joy of cooking is sharing it with others. That’s why I’m always eager to hear from you. So go right ahead & drop a comment or reach out on Instagram, Pinterest, YouTube, or Facebook. I hope you love these mango-filled donuts as much as we do!

📖 Recipe

Tried this recipe?Let us know how it was!
mango-filled donuts on a cake stand.

Mango-Filled Donuts

Natasha Minocha
These mango-filled donuts are a party in your mouth. Soft and pillowy with a luscious mango filling, these donuts are surprisingly easy to make! They are golden, light and absolutely irresistible!
No ratings yet
Print Recipe Pin Recipe
Prep Time 3 hours hrs
Cook Time 20 minutes mins
Course Dessert
Cuisine American
Servings 16 Donuts
Calories 131 kcal

Ingredients


  • 250 ml Almond milk, lukewarm You can use any plant-based milk or regular milk too
  • 2 tsp Dry active yeast
  • 425 gms All-purpose flour
  • 1/4 tsp Salt
  • 2 tbsp Sugar
  • 3 tbsp Coconut oil You can use melted butter
  • 1/3 cup Mango curd
  • Oil for frying
  • Powdered sugar for sprinkling on top

Instructions
 

  • In a small bowl, combine warm almond milk and yeast. Keep aside for 10 minutes until frothy.
  • Combine all-purpose flour, sugar, salt, and coconut oil in your stand mixer bowl.
  • Make a well in the center of your dry ingredients and pour in the yeast mixture.
  • Combine the dry and wet ingredients using the hook attachment of your stand mixer. Set the speed at the lowest (1). Increase it to 3 or 4 as the ingredients mix.
  • When the dough begins to leave the bowl’s sides and forms a ball, it is ready. This will take about 4 to 5 minutes.
  • Bring the dough onto your work surface. Knead briefly for a minute. The dough should be soft, supple and just slightly tacky to touch.
  • Place the dough in a greased bowl. Cover and rest the dough for 1-2 hours, or until the dough has doubled in size.
  • Take the dough out of the bowl onto your work surface, knead briefly for 2-3 minutes.
  • Divide the dough equally into 16 pieces of approximately 45 gms each.
  • Roll each piece into a ball.
  • Place on a floured tray. Cover the dough balls with a kitchen towel and rest for 30-40 minutes, until puffy.
  • In a deep pan, heat oil to 148 C or 300 f.
  • Lift and slide the dough balls gently into the oil, making sure that the donuts do not deflate. I worked with 2 donuts at a time. Don't crowd your pan.
  • Each side will take just 2-3 minutes to fry. Take them out using a spider and drain on kitchen towels.
  • Let the golden donuts cool enough to be handled. Then sprinkle them with powdered sugar.
  • Fill a piping bag with the mango curd and attach a long sharp-tipped icing nozzle to the bag. Pick a still warm donut and plunge the nozzle into its side. Push the curd in till it begins to ooze out.
  • Serve immediately. Enjoy!

Notes

    • Make sure the oil is hot enough before you start frying the donuts. If you're using a thermometer, it should read around 148 °C or 300°F.
    • If you don't have a thermometer, dip one end of a wooden spoon or a chopstick into the oil. If bubbles start forming and rising to the top, the oil is hot enough to fry the donuts. 
    • Don't overcrowd your pan while frying. Fry 2-3 doughnuts at a time so they have room to expand and cook evenly.
    • Do use a kitchen scale to measure your ingredients for better and consistent results every time.
    • Be very careful when dropping the dough balls into the hot oil. You can place the dough balls on 4" parchment squares. Use the parchment to pick them up and drop dough side into the hot oil. Use tongs to take the parchment out of the oil.
  •  
    • Allow the donuts to cool before filling them with mango curd.
    • These donuts taste the best the day they are made. Store the leftovers in an airtight jar in the refrigerator for up to 3 days.

Nutrition

Serving: 1 DonutCalories: 131kcalCarbohydrates: 23gProtein: 3gFat: 3gSaturated Fat: 2gPolyunsaturated Fat: 0.3gMonounsaturated Fat: 0.3gSodium: 59mgPotassium: 41mgFiber: 1gSugar: 2gVitamin A: 59IUVitamin C: 2mgCalcium: 25mgIron: 1mg

Vegan Mango Curd

April 15, 2022

Vegan Mango Curd | Easy Mango Curd Recipe

Vegan mango curd puts every other mango recipe I’ve tried to weepy shame. The jazzy interplay of sweet and tart makes the creamy curd tempting. But it’s the gorgeous buttery texture that makes it one hundred percent irresistible. 

Vegan Mango Curd | Easy Mango Curd Recipe

And for those wondering, the mango curd recipe is nothing like my mango coconut panna cotta or mango cherry frozen yogurt. Rather it’s inspired by the filling of my vegan lemon tarts.

Super easy to make, it is the first of a whole bunch of mango recipes that I’m whipping up this month. So be ready for more. So much more, because there’s a place called paradise, and it’s filled with mangoes. 

Vegan Mango Curd | Easy Mango Curd Recipe

What’s vegan fruit curd?

Fruit curd originated in England way back in the late 19th century when it was served during tea time as a spread for scones. Think of it as a jam substitute that wears a dozen other hats too, like filling for cakes or tarts. 

Typically, it uses citrus fruits like lemon. Nevertheless, I wanted to make it with what I consider a national treasure – mangoes. Eggs and sugar are added to make the curd shine, but vegan fruit curd is eggless. 

Ingredients for Vegan Mango Curd | Easy Mango Curd Recipe

How to make vegan mango curd?

It’s a great irony of my life that summer offers a bounty of fruits whose bright floral notes are a perfect foil for so many recipes. It’s also the only time of the year when I quake to turn on the oven.

This is why I loved making the homemade mango curd, a recipe that I adapted from Domestic Gothess. I didn’t need to crank up the oven in this combusting heat, and the cooking time was less than 4 minutes!  

Step 1: Blitz chopped mangoes with coconut milk, sugar, cornstarch, and agar-agar in your blender till smooth. If you want, up the ante in the mango curd recipe by adding lemon juice. 

Step 2: Pour the mixture into a saucepan placed over low heat. Cook for 3 to 4 minutes while continuously stirring. 

Step 3: When the mixture reaches a simmer and bubbles appear around the edges, remove the pan from the heat.

Step 4: Allow it to cool slightly before whisking in the coconut oil.

Step 5: Cool to room temperature, transfer to a jar and then refrigerate. 

Cook the mixture in a saucepan

My tips for the best mango curd

  • Any mangoes you can get your hands on work for this eggless mango curd recipe. Just make sure they’re ripe. 
  • There is no dearth of fresh mangoes here, but if they’re unavailable in your corner of the world, puréed mangoes will do in a pinch. 
  • Also, taste test your fruit before blending to see how tart or sweet they are, and then adjust the amount of sugar accordingly. Keep in mind, that you can always add more sugar after blending.
  • You can’t taste the lemon juice in the creamy mango curd. Its acidity merely brightens the flavor. Omit it, if your mangoes have more notes of sour than sweet. 
  • For that silky, ultra-smooth texture, sieve the mixture. 
  • You don’t want the curd to be undercooked, overcooked, or plain burnt. So, utilize a heavy-bottom pan and whisk, whisk, whisk. It’s barely for a few minutes, so don’t take your eyes off it. The moment it begins to boil, remove it from the heat. 
  • The homemade mango curd is good for a week, but if you want to make it last longer, store it in sterilized jars. 
Sieving the Vegan Mango Curd | Easy Mango Curd Recipe

How to sterilize jars to store fresh mango curd?

Option 1: Boil your glass jars in water for 10 minutes. Let them dry and cool, and then transfer the eggless mango curd into them. 

Option 2: Use soap and water to clean your jars. Rinse and then let them dry thoroughly in an oven heated to 120°C. Place them in your oven tray, with the lids kept separately, for about 10 to 15 minutes. 

Cool the jars before you add the vegan fruit curd. The glass may crack if the jar is hot and the curd is cold, or vice versa. 

Vegan Mango Curd | Easy Mango Curd Recipe

What to do with vegan mango curd?

As the fresh mango curd cooked, it looked so much like my seasonal favorite mango shrikhand (it’s not) that I was tempted to finish it straight out of the jar. But trust me, it’s even better when:

  • Topped on pavlova 
  • Blended in smoothies
  • Spread on toasts, crêpes, and pancakes
  • Spooned on muffins and scones
  • Scooped on ice cream or even oatmeal
  • Swirled into a regular bowl of yogurt for instant dessert
  • Slathered between layers of Victoria sponge cake. Use it as a filling, topping, or mix a couple of tablespoons into your whipped cream.
  • Stuffed in tarts, as I did with lemon curd in my vegan lemon tarts. Go ahead and try the tart recipe with my homemade mango curd as a substitute. 
  • Swirl it in yogurt to make frozen yogurt bark!

Why do you absolutely have to try the mango curd recipe!

It’s short and sweet.

It’s absurdly rich, almost buttery, but bursting with fresh flavor.

You can serve mango curd in dozens of ways. The only limit is your imagination. 

Vegan Mango Curd | Easy Mango Curd Recipe

More mango recipes to binge on this summer:

Mango Pancakes

Mango Thandai Popsicle

Mango Coconut Scones

Red Rice & Mango Salad with Sriracha Vinaigrette

📖 Recipe

Tried this recipe?Let us know how it was!
Vegan Mango Curd | Easy Mango Curd Recipe

Vegan Mango Curd

Natasha Minocha
Vegan Mango Curd is incredibly easy to make! It's full of juicy sweet and tart mango flavor and has a buttery, velvety smooth texture that is irresistible. You'll want to eat this mango curd by the spoonfuls!
No ratings yet
Print Recipe Pin Recipe
Prep Time 5 minutes mins
Cook Time 5 minutes mins
Course Condiment, Dessert
Cuisine American
Servings 2 cups
Calories 597 kcal

Ingredients


  • 2 cups Mango, peeled and chopped
  • 1 cup Coconut milk
  • 1/3 cup Sugar
  • 1.5 tbsp Cornstarch
  • 1 tsp Agar-agar
  • 1 tsp Lemon juice
  • 2 tbsp Coconut oil

Instructions
 

  • Combine the mango, coconut milk, sugar, cornstarch, agar-agar, and lemon juice in a blender.
  • Blend until smooth.
  • Pour into a saucepan and cook the mixture on low heat for 4-5 minutes just until it thickens and starts to come to a gentle simmer.
  • Take it off the heat and whisk in the coconut oil.
  • Strain the curd to make sure there are no lumps remaining.
  • Cool and pour into a jar. Refrigerate for a week. Use a sterilized jar in case you want to store for a longer time. Enjoy!

Nutrition

Serving: 1CupCalories: 597kcalCarbohydrates: 68gProtein: 4gFat: 39gSaturated Fat: 33gPolyunsaturated Fat: 1gMonounsaturated Fat: 2gSodium: 18mgPotassium: 537mgFiber: 3gSugar: 57gVitamin A: 1811IUVitamin C: 63mgCalcium: 40mgIron: 4mg
Vegan Mango Curd | Easy Mango Curd Recipe PIN

Easy Tiramisu Recipe

April 11, 2022

Easy Tiramisu Recipe

The first bite of this easy tiramisu recipe completely floors you. It’s so luxuriously creamy and soft that your fork literally glides through it, bringing with it a symphony of notes. 

Easy Tiramisu Recipe

The coffee-soaked ladyfingers have a serious caffeine kick, and the buzz is intensified by the rich, velvety rum-laced mascarpone surrounding them.

The effect is transcendent.

And, did I tell you it is extraordinarily easy to make and will surely please everyone?

Easy Tiramisu Recipe
[feast_advanced_jump_to]

What is tiramisu?

Tirami sù is an Italian expression. Translate it into English, and you’re literally saying “pick me up.” The name is not a surprise, given that the light and almost fluffy dessert is made with coffee spiked with alcohol wrapped in sugar!

A typical tiramisu recipe is made by layering ladyfingers soaked in coffee, topped with a sweetened mascarpone and cream mixture with a finishing of sprinkled cocoa.

Easy Tiramisu Recipe

Why you simply have to try this easy tiramisu recipe?

It's an easy fuss-free eggless recipe

Light, creamy, and so delicious

Serve in individual portions or as a big dish

This one is always a hit at parties - totally irresistible!

How to make tiramisu?

My tiramisu recipe is by no means traditional. My take on the dessert is eggless and simple. No baking and no cooking. It’s not overly sweet and it’s so good that I’ve stopped enjoying tiramisu, even from the best of restaurants!

Tiramisu Ingredient List

1. Rum

2. Cream

3. Icing sugar

4. Mascarpone cheese

5. Coffee powder / Espresso

6. Savoiardi/ Ladyfinger cookies

Ingredients for making tiramisu

Start with a mascarpone mixture

Step 1: Whisk mascarpone, cream, and icing sugar. Don’t overmix. 

Step 2: Add one-fourth cup of rum (or brandy or marsala wine), if desired, and mix well.

Step 3: Slide the mixture into your refrigerator while you make hot black coffee. 

Layer the coffee soaked ladyfinger cookies

Move on to the coffee syrup

Step 4: In a saucepan, boil water, add 2 to 3 tablespoons of coffee powder (You can use espresso here if you wish) and a tablespoon of icing sugar. The strength of your coffee will make or break this tiramisu recipe. We like a strong coffee-flavored tiramisu!

Step 5:  Stir, bring to a boil, then remove from heat and set aside to cool. 

Step 6: This step is completely optional. If you want, spike the coffee with rum or the alcohol of your preference after it has cooled down. 

Assemble the tiramisu

Step 7: Dip each ladyfinger into the coffee syrup. The trick is to dunk them long enough for a good soak but remove them before they fall apart.

If you’re using homemade ladyfinger cookies, it’ll be a really quick dip as they're softer and more porous. For cookies with a hardier texture, the dunk will be a little longer, but not by much. 

Step 8: Arrange the soaked cookies in a single layer in your serving dish. Use whatever catches your fancy – a round plate, rectangle dish, or square pie dish. We’re looking for a 2 layered tiramisu. So, pick the size accordingly. 

Step 9: Drizzle a couple of spoons of the coffee mixture on the cookies. Then spread half of the mascarpone mixture on top. 

Step 10: Repeat the layers. Dip the cookies, arrange them on top of the first layer of cream, and pour the rest of your coffee, followed by the remaining mascarpone mixture. 

Optional: I used a piping bag fitted with a star nozzle to create a pattern on top of the second layer of mascarpone, just to give the tiramisu a fancier touch.

Layer on the mascarpone cheese mixture

The final step of the tiramisu recipe

Step 11: Cover with cling wrap and refrigerate for a good 6 to 8 hours. Right before you serve, generously dust the tiramisu with cocoa powder. 

If coffee is the backbone of tiramisu, then chilling gives it body. If I’m serving the dessert for dinner, I like to make it first thing in the morning, so it’s done and dusted and gets adequate time to develop the flavors. 

In case you have to serve it for lunch, my advice is to make a day ahead. Remember, even if you’re in a huge rush, tiramisu still needs a couple of hours to chill. 

Easy Tiramisu Recipe

FAQs

What can I substitute for ladyfingers in tiramisu?

Ladyfinger cookies are easily available online or in supermarkets. If you still can’t source them, make them at home. Here’s a recipe for it.  Or you could use digestives, ginger snaps, or even pound cake. You won’t get the original feel and taste of tiramisu, but it’s still equally delectable. 

Can you make tiramisu without the rum?

Yes, absolutely. Try brandy or the classic option: marsala wine. Also, alcohol is not a must. The first documented recipe for tiramisu was without alcohol. So, you can easily make it without them.

Is tiramisu gluten-free?

No, this tiramisu recipe is not gluten-free because the ladyfinger cookies may contain gluten. However, you can simply substitute them with gluten-free ladyfingers.

How to make vegan tiramisu?

The easiest way to make vegan tiramisu is to use plant-based cream and mascarpone.

Easy Tiramisu Recipe

More easy dessert recipes

Strawberry Tiramisu

No-Bake Saffron Cheesecake

Peanut Butter Stuffed Dates

Chocolate Peanut Butter Pudding

No-Bake Oatmeal Peanut Butter Bars

Tiramisu scooped out on a small plate

📖 Recipe

Tried this recipe?Let us know how it was!
Easy Tiramisu Recipe

Easy Tiramisu Recipe

Natasha Minocha
The first bite of this easy tiramisu recipe completely floors you. It’s so creamy and soft that your fork literally glides through it. This recipe is so easy to make, and it's always a sure shot hit with everyone! 
5 from 2 votes
Print Recipe Pin Recipe
Prep Time 30 minutes mins
Resting Time 8 hours hrs
Total Time 8 hours hrs 30 minutes mins
Course Dessert
Cuisine Italian
Servings 10 servings
Calories 425 kcal

Ingredients


  • 2/3 cup Water
  • 2-3 tbsp Coffee powder I used instant coffee powder
  • 2 cups Mascarpone cheese
  • 1 cup Cream
  • 1/2 cup Icing sugar
  • 1/4 cup Rum/Brandy/Marsala wine You can leave this out, if you want an alcohol-free version.
  • 24 Ladyfinger cookies
  • Cocoa powder for sprinkling on top

Instructions
 

  • In a small saucepan, bring together water, coffee powder, and 2 tablespoons of icing sugar to a boil, stirring occasionally.
  • Take this off the heat. Cool slightly. You can add 1-2 tablespoons of rum/ brandy/marsala to this mixture if you like.
  • In a large bowl, combine the mascarpone cheese, remaining icing sugar, and cream. Beat together until well blended.
    Note- At this point, you can taste the cheese mixture and add more icing sugar if required per your preference.
  • Whisk in the rum/brandy/ Marsala wine. Keep aside.

Assembly

  • Dip each ladyfinger into the coffee syrup.
    The trick is to dunk them long enough for a good soak, but remove them before they fall apart.
  • Arrange the soaked cookies in a single layer in your serving dish. Use whatever catches your fancy – round plate, rectangle dish, or square pie dish.
  • Drizzle a couple of spoons of the coffee mixture on the cookies. Then spread half of the mascarpone mixture on top. 
  • Repeat the layers. Dip the cookies, arrange them on top of the first layer of cream, and pour the rest of your coffee, followed by the remaining mascarpone mixture. Spread it evenly.
  • You can place some of the cheese mixture in a piping bag, fitted with a star nozzle and pipe some on top of the cheese layer. This step is completely optional.
  • Cover with cling wrap and refrigerate for a good 6 to 8 hours. Right before you serve, generously dust the tiramisu with cocoa powder. 
  • Using a large spoon, scoop the tiramisu into individual plates. Enjoy!

Nutrition

Serving: 1 ServingCalories: 425kcalCarbohydrates: 24gProtein: 7gFat: 32gSaturated Fat: 19gPolyunsaturated Fat: 1gMonounsaturated Fat: 3gCholesterol: 131mgSodium: 72mgPotassium: 88mgFiber: 0.3gSugar: 7gVitamin A: 1141IUVitamin C: 0.1mgCalcium: 94mgIron: 1mg
Easy Tiramisu Recipe PIN

Cinnamon Streusel Coffee Cake

April 5, 2022

cinnamon streusel coffee cake squares on a wire rack.

The buttery cinnamon streusel coffee cake is not just good. It is an obsession that has you reaching for the second and third slice in no time. A genuine melt-in-the-mouth recipe, the crunch from the streusel ribboned in and on the cake hooks you in with the contrasting texture.

Cinnamon Streusel Coffee Cake

Packed with spoons full of cinnamon, the aroma of the baking cake makes you drop everything and just relish it. The best part about the cake? It can be eaten with coffee or tea. The coffee drinkers enjoyed it with their cuppa and I with my tea. We all happily report A+ results. 

Jump to:

What’s a coffee cake?

Coffee cake recipe

Tips

Variations

More streusel recipes

What is a coffee cake?

Like tea cakes that are bereft of chai masala or tea leaves in their batter, coffee cakes are not seasoned with the rich, deep aroma and flavor of coffee. So why is it called a coffee cake when, in fact, it doesn’t contain any? Well, because it is meant to be shared with family and friends over a cup of coffee. 

It’s a light sponge cake topped with a streusel spiced with cinnamon (and sometimes a pinch of cardamom), so the taste comes alive when relished between sips of coffee. 

How to make cinnamon streusel coffee cake?

I love cakes, cookies, pies, and really desserts in any form, but what I can’t absolutely stand is the dictatorship of sugar in cloying, overly sweet treats. So, while this coffee cake is packed with sugar in the streusel, in the batter, and in the glaze, it’s not overwhelming, make-your-teeth-ache sweet. I deliberately kept the amount of sugar on the lower side, creating a balance where the flavors shine.

Start with streusel topping

Step 1: Grease your pan. I used an 8" square one and set the oven to preheat.

Step 2: Whisk all-purpose flour, white sugar, and brown sugar with a generous, generous dose of cinnamon.

Step 3: Add very, very finely chopped pecans, and then pour melted butter. Get your hands in and combine (or use a fork) until everything is nicely moistened and clumpy. 

Streusel and batter for making Cinnamon Streusel Coffee Cake
Layering the batter and streusel

Coffee cake batter

Step 4: Combine flour, baking powder, baking soda, and salt (if you’re using unsalted butter).

Step 5: In a separate bowl, cream softened butter and sugar together until light and fluffy. Add in 2 eggs along with vanilla extract. Beat well.

Step 6: Fold the dry ingredients into the wet in 3 parts, alternating with sour cream. So, you begin with a portion of the dry ingredients, mix, then add in half your sour cream, mix again, follow with another third of the dry ingredients, then the rest of the sour cream, and finally the last of the dry ingredients. 

Ready to bake Cinnamon Streusel Coffee Cake

Bake the coffee streusel cake

Step 7: Spoon half of the thick, beautiful batter into the prepared pan, even it out, and then top with an avalanche of crumbly streusel. Don’t use it all because we’re going to pile some on top of it, too.

Step 8: Make a second layer of the cake batter and then top it with the remaining streusel. 

Step 9: Press it down slightly and with a feather touch, then bake for 35 to 45 minutes.

Cinnamon Streusel Coffee Cake

My notes on the sour cream streusel coffee cake

  • Be gentle when combining the dry and wet ingredients, and don’t overmix.
  • Insert a skewer into the cake to check for doneness. It should come out clean. Another test is to check if the center feels springy.
  • Let it cool before you cut it into squares and serve.
  • Unadorned, the cinnamon streusel coffee cake is bewitching. But if you’re feeling festive and want to turn up the volume, drizzle with cinnamon glaze.
  • To make, whisk icing sugar with milk and cinnamon till thick. 
  • Thanks to the sour cream, the coffee cake stays moist for a couple of days, even when left on the countertop. 
  • My corner of the world is reaching 40 degrees Celsius (104 F), so it just had to be refrigerated. But microwaving the leftovers for a couple of seconds did the trick. 

Variations

Nuts: Adding pecans to the streusel is completely optional. Don’t have them at hand? Walnuts or any other nut you prefer are an excellent substitute. 

Add-ins: The easiest (and tastiest) add-in for the batter is cocoa powder to make it chocolaty. Coffee is another option. Who says coffee cake should never contain coffee? Pander to your palate. 

Fruits: Blueberries are the traditional choice for coffee cake with streusel. But again, don’t let that limit your imagination. Fold in any fruit you prefer in the batter. 

Sour cream: Greek yogurt is an alternative. While it won’t give you the same tender texture as sour cream, the flavor still has that tangy note, and the crumb a little lighter. Homemade yogurt is also an option; just make sure it is well strained because you’ll need that very, very thick consistency. 

Glaze: Honestly, it’s up to you whether to decorate the cake or leave it as-is. But a draping of salted caramel would be a delicious choice. 

Give the cinnamon streusel coffee cake a whirl. It’s:

Soft and fluffy to a fault

A great make-ahead treat

Accompanies a cup of coffee unbelievably

As satisfying to eat warm as it is at room temperature

Not heavy, despite the richness of butter and sour cream

A wonderful recipe to have in your baking repertoire

Recipes with streusel

Apple Crumble Cheesecake

Peanut Butter Apple Muffins

Plum & Cardamom Muffins

Recipes with cinnamon

Baklava Baklava Cinnamon Rolls

Date & Cinnamon Chia Pudding

Cinnamon Cheesecake Recipe

Vegan Baked Cinnamon Donuts

Banana Cinnamon Pancakes

📖 Recipe

Tried this recipe?Let us know how it was!
cinnamon streusel coffee cake squares on a wire rack.

Cinnamon Streusel Coffee Cake

Natasha Minocha
Cinnamon Streusel Coffee Cake is no-fuss, easy to make & so delicious. Every bite is layered with crunchy cinnamon streusel and the softest, buttery cake crumb!
No ratings yet
Print Recipe Pin Recipe
Prep Time 15 minutes mins
Cook Time 40 minutes mins
Course Dessert
Cuisine American
Servings 9 servings
Calories 453 kcal

Ingredients


Streusel

  • 3/4 cup All-purpose flour
  • 1/4 cup White sugar
  • 1/4 cup Brown sugar
  • 1/3 cup Butter, melted
  • 2 tsp Cinnamon powder

Cake

  • 2 cup All-purpose flour
  • 1.5 tsp Baking powder
  • 1/2 tsp Baking soda
  • 1/4 tsp Salt If using unsalted butter.
  • 1/2 cup Butter, softened
  • 1/2 cup Sugar
  • 2 Eggs, at room temperature
  • 1.5 tsp Vanilla extract
  • 3/4 cup Sour cream You can also use plain Greek yogurt

Cinnamon Glaze (Optional)

  • 1/4 cup Icing sugar
  • 2 tbsp Milk
  • 1/2 tsp Cinnamon powder

Instructions
 

  • Preheat your oven to 180C. Grease an 8" pan well.

Streusel

  • Combine flour, both the sugars, and cinnamon powder in a small bowl.
  • Stir in the melted butter. Combine with a fork until the mixture is moistened and a little clumpy. Set aside.

Cake

  • In a large bowl, sift together the flour, baking powder, and baking soda.
  • In another bowl, cream together the butter and sugar until fluffy, about 2-3 minutes.
  • Add the eggs and vanilla extract. Beat well.
  • Now add in the flour mixture ( in 3 additions), alternating with sour cream ( in 2 additions). Beginning and ending with the flour mixture.
  • Transfer half the batter into your prepared pan. Top evenly with the streusel.
  • Add the remaining batter on top and sprinkle the rest of the streusel. Press it down gently.
  • Bake the cake for 35-40 minutes at 180 C, or until a skewer inserted in the center comes out clean.
  • Cool the cake completely in the pan. Drizzle over the glaze. Cut into squares and enjoy!

Cinnamon Glaze

  • Whisk all 3 ingredients in a small bowl until a smooth, thick glaze is formed.

Nutrition

Serving: 1 ServingCalories: 453kcalCarbohydrates: 57gProtein: 6gFat: 22gSaturated Fat: 13gPolyunsaturated Fat: 1gMonounsaturated Fat: 6gTrans Fat: 1gCholesterol: 94mgSodium: 616mgPotassium: 101mgFiber: 1gSugar: 22gVitamin A: 713IUVitamin C: 0.2mgCalcium: 90mgIron: 2mg
Cinnamon Streusel Coffee Cake PIN

Easy Chili Oil

April 2, 2022

Chili oil in a glass jar on a wooden board with ingredients in the background.

Spicy, aromatic, tingly, and flavor-packed, chili oil is a condiment that detonates all your senses and makes your mouth water. This fiery seasoning is an absolute must-have for all kitchens and is ready in just 15 minutes!

Chili oil in a glass jar on a wooden board with ingredients in the background.

A simple recipe that transforms even a plain pot of rice into a delicious bowl of flavors. Think of it as a pick-me-up that will nose its way into the most random dishes on your table and detonate addictive bombs.

[feast_advanced_jump_to]

Why We Love Homemade Chili Oil

I know there is no dearth of chili oils in the market, but the one you make at home is incomparable. The amazing aroma, the vibrant color, and the zingier, spicier flavor just seep into you. You’ll savor every bite. 

Plus, you have complete control over the quality, how much oil to use, which oil to use, and the level of heat. It’s fresher, more textured, and super, super easy to make because all the ingredients are already in your pantry.

And, oh, did I mention it makes a great gift for friends who enjoy spicy, savory, and sharp dimensions in their food? Pack the chili oil in a glass jar, top it with twine or ribbon, and you have a small something to bring a smile to any face. 

Chinese chili oil in a glass jar on a wooden surface.

How To Make Chili Oil

Dry ingredients for chili oil.

I want to begin by saying that this chili oil recipe is by no means authentic. It’s my adaptation of Yeung Man Cooking’s fabulous recipe.

And the result was amazing, the most flavorful chili oil I've ever made!

Also, you can use a mason jar or a bowl. In either case, make sure the glass is heatproof because you’re handling hot oil.

Step 1: Combine sesame seeds, red chili powder, bay leaf, cinnamon stick, star anise, and sesame oil along. The original recipe doesn’t have salt and sugar, but I found that they balanced the flavors.

Dry ingredients for making chili oil in a glass bowl.

Step 2: In a small pan, heat peanut oil on low for 4 to 5 minutes.

Step 3: Add a small piece of ginger when the oil is hot (not bubbling). This forms the base of your chili oil. Let it fry till nicely brown, then remove and discard. 

oil in a saucepan and a knob of ginger on the side.
hot oil on top of the dry ingredients in a glass bowl.

Step 4: Take the oil off the heat and pour it over the spice mixture. Be very careful because the oil sizzles as you pour.

Step 5: Stir and let the spice flavors infuse into the oil. Cool completely before you transfer it into an airtight jar and refrigerate. It should last for a good 3 weeks.

Recipe FAQs

Can you use the chili flakes you get with pizza?

No, the chili flakes we get as pizza toppings don’t really work because they are made by crushing seeds that could burn in the hot oil.
For chili oil, what you need is a powder made from the skin to give the oil that gorgeous color and a zing of smokiness. 
The best choice is Sichuan pepper powder, which is available at an Asian grocery store. Can’t get your hands on it? Don’t let that stop you from trying this Chinese chili oil.
This is what I did for this chili oil recipe- 
Very lightly dry roast whole red chilies in a pan. Just a couple of minutes.
Let them cool.
Grind them before you mix them with other spices.

What aromatics and spices to use in hot chili oil?

 Spices like cloves, green, and black cardamom bring lovely additional layers of heat to the oil. You can even stir in soy sauce but do it after the oil has cooled. Although I will say this, chili oil really doesn’t need anything extra. 

What oil is used in chili oil?

I prefer peanut oil for making this oil. Apart from it, any neutral oil, like sunflower or canola, makes a fantastic choice.

Chili oil in a glass jar on a wooden surface.

How To Use

There are so many possibilities with chili oil that I promise it’ll become a permanent fixture on your dining table. It elevates any dish from meh to wow in seconds.

  • Dress up your roasted pumpkin soup with this
  • Stir it in noodles like these spicy Thai peanut noodles
  • Top it on fried eggs
  • Mix it in salads like this smashed Asian cucumber salad
  • Drizzle on top of baked sweet potatoes
  • This is a great dip for crunchy crispy potstickers

More Homemade Condiment Recipes

  • DIY Infused OIls | Easy Homemade Flavored Oils
    DIY Infused Oils
  • Sambal Oelek sauce in a glass jar with a spoon on a wooden plate.
    Sambal Oelek Recipe
  • vegan mayonnaise in a glass jar with a spoon and ingredients in the background.
    Homemade Vegan Mayonnaise
  • How To Make Garlic Confit
    How To Make Garlic Confit

Half the joy of cooking is sharing it with others. That’s why I’m always eager to hear from you. So go right ahead & drop a comment or reach out on Instagram, Pinterest, YouTube, or Facebook. I hope you love this homemade easy chili oil recipe as much as we do!

📖 Recipe

Tried this recipe?Let us know how it was!
Chili oil in a glass jar on a wooden board with ingredients in the background.

Easy Chili Oil

Natasha Minocha
Spicy, aromatic, tingly, and flavor-packed, this chili oil is a condiment that detonates all your senses and makes your mouth water. This fiery seasoning is an absolute must-have for all kitchens!
No ratings yet
Print Recipe Pin Recipe
Prep Time 15 minutes mins
Total Time 15 minutes mins
Course Condiment, Side Dish
Cuisine Asian
Servings 8 Servings
Calories 213 kcal

Ingredients


  • 3/4 cup Peanut oil
  • 2" pc Ginger
  • 4 tbsp Chili powder From Asian grocery store or simply dry roast dried chillies and grind them.
  • 2 tbsp Sesame seeds
  • 1 Bay leaf
  • 1 Cinnamon stick
  • 2 pc Star anise
  • 1 tsp Salt I used Himalayan pink salt
  • 1 tsp Sugar
  • 1 tsp Sesame oil
  • 1 tsp Sichuan peppercorns, coarsely ground

Instructions
 

  • Combine the sesame seeds, chili powder, bay leaf, cinnamon stick, star anise, salt, sugar, and sesame oil in a heat-proof bowl or jar.
  • Heat the peanut oil on low flame for 3-4 minutes. Add the ginger. Once the ginger fries, take the pan off the heat and remove the ginger.
  • Carefully pour the hot oil over the sesame chili mixture.
  • Let this cool completely before transferring it to a jar. Cover and refrigerate. Use over dumplings, noodles, eggs. Enjoy!

Nutrition

Serving: 1ServingCalories: 213kcalCarbohydrates: 3gProtein: 1gFat: 23gSaturated Fat: 4gPolyunsaturated Fat: 8gMonounsaturated Fat: 10gSodium: 357mgPotassium: 94mgFiber: 2gSugar: 1gVitamin A: 1189IUVitamin C: 0.1mgCalcium: 39mgIron: 1mg
Easy Chili Oil | Chinese Chili Oil PIN

Lemon Pound Cake

March 23, 2022

Lemon Pound Cake

This buttery lemon pound cake is drenched in lemon juice, lemon oil, and lemon glaze, so every bite is filled with delicious tartness. The cake is unapologetically simple, with no frills. Just comforting goodness that proudly announces the summer season. 

...

Read More

Chocolate Zucchini Cake

March 17, 2022

chocolate zucchini cake with cream cheese frosting and edible flowers on a cake stand.

This chocolate zucchini cake is rich, fudgy, and so moist. And no, you can't taste the zucchini! With a mega chocolate flavor, this is truly a dream cake for all chocolate lovers!

chocolate zucchini cake with cream cheese frosting and edible flowers on a cake stand.

The best part? Making this zucchini chocolate cake is as easy as it can get! With no fancy equipment and no complicated steps, it's perfect for beginner bakers. With simple steps, this cake comes together quickly and always always turns out amazingly delicious!

Enjoy baking with zucchini? Do give my moist and fudgy chocolate zucchini bread and comforting carrot zucchini bread a go!

[feast_advanced_jump_to]

Why You'll Love This Recipe

✨Chocolatey, super moist, and decadent, this cake is a total crowd-pleaser! Great for parties, picnics, everyday treat, or an after-school snack!

✨The luxurious, creamy, tangy cream cheese frosting takes this easy chocolate zucchini cake to the next level of deliciousness!

✨A clever way to sneak veggies into your dessert! Trust me, no one will know, and everyone will just want more of this fabulous cake.

✨So simple to make- No mixers, special equipment, or fancy ingredients are needed to make this rich chocolate zucchini cake.

Recipe Ingredients

Ingredients for making chocolate zucchini cake.

Flour: All-purpose is the best here as it gives a lovely, tender crumb.

Almond meal: This adds texture and nuttiness to the cake, like in my very popular orange semolina cake and honey almond cake recipe! You can use store-bought or simply grind almonds in your food processor to make your own.

Oil: I used sunflower oil, but feel free to use any vegetable oil that you like.

Eggs: They add richness and structure to the cake. I haven’t tried the eggless version of this recipe, but flax eggs are a safe substitute.

Sugar: Brown sugar brings a caramel flavor to the zucchini cake. But raw sugar and coconut sugar make excellent alternatives.

Zucchini: Feel free to increase the amount of zucchini. I used a cup of shredded zucchini( tightly packed), but one and a half cups or even two will not be a problem. Just remember that the cake may take longer to bake since the moisture content will be higher. 

Cocoa powder: For a deep chocolate flavor.

Chocolate chips: They make the cake more gooey and decadent!

See the recipe card for full information on ingredients and quantities.

How To Make Chocolate Zucchini Cake?

Step 1: In a large bowl, whisk together all-purpose flour, almond meal, cocoa powder, baking soda, and a pinch of salt. 

Step 2: In a blender, blitz together coconut oil, vanilla extract, eggs, and brown sugar till you have a smooth mixture. 

Dry ingredients in a bowl and wet ingredients in a blender for making cake.

Step 3: Add the wet ingredients to your dry ingredients. Stir in lukewarm milk.

Step 4: Stir in the shredded zucchini and dark chocolate chips.

chocolate chips and shredded zucchini on chocolate cake batter.
chocolate zucchini cake batter in a round cake pan.

Step 5: Pour the batter into a greased cake tin. And bake for 45 to 50 minutes, till a skewer comes out clean or just a couple of moist crumbs attached. As ever, I advise you to keep an eye on the bread after the 35-minute mark, as all oven temperatures vary. 

baked chocolate zucchini cake in a round cake pan.

Step 6: Allow the chocolate cake to cool for 5 minutes before turning it out onto a wire rack.

Step 7: Cool completely and top with the cream cheese frosting. Slice and serve!

Moist chocolate zucchini cake with frosting on a cake stand.

Top Tips

  • There is no need to squeeze moisture out of the zucchini for this cake. That's what makes this a super moist chocolate zucchini cake. You can lightly blot it if it's too wet.
  • I used 1 cup of tightly packed shredded zucchini, but feel free to use up to 1.5 cups if you wish. The baking time may increase by a few minutes for the cake.
  • You also don't need to peel the zucchini!
  • Don't overmix the batter. That can make the cake dense instead of light and tender.
  • Don't overbake the cake. The cake will be ready when a skewer inserted in the center comes out with a few moist crumbs attached.
  • Store the leftovers in an air-tight container in the refrigerator for up to 3 days.
A slice of chocolate cake on a small plate.

How To Serve

The zucchini chocolate cake is wonderful as-is. But if you want to turn it into an indulgent dessert, top it with cream cheese frosting!

It’s my favorite frosting, and it truly elevates the experience. To make the frosting, whisk together the cream cheese, cream, and icing sugar until smooth and lump-free. Slather it on top of the zucchini cake. Add some edible flowers and sprinkles to dress it up even more!

How To Store The Chocolate Zucchini Cake

Store the leftovers in an air-tight container for up to 3 days in the refrigerator. You can also freeze the unfrosted cake for up to 1 month. Wrap it tightly in plastic wrap and place it in a freezer-friendly bag.

A slice of chocolate cake on a plate with a bite taken out on a fork.

Recipe FAQs

Why use zucchini in baking?

Zucchini is not a vegetable we typically associate with dessert, but trust me, it is completely at home in this chocolate cake. It lends no flavor to the cake.
It just adds a ton of moisture and texture to the crumb. Being 95% water, zucchini simply keeps the bread moist for a long, long time.

Do I need to peel the zucchini for the cake?

No, you don’t need to peel the zucchini for this chocolate cake. Grate it coarsely with the skin on, and you’ll love the colorful specks playing hide-and-seek in the crumb. 

How can I make vegan chocolate zucchini cake?

Substitute the eggs with flax eggs by mixing water with flaxseed powder, and use plant-based milk and dairy-free chocolate.

More Delicious Cake Recipes

  • Mango Tres Leches Cake
    Mango Tres Leches Cake
  • Chocolate Chickpea Cake | Eggless Chocolate Cake with Chickpea Flour | Glutenfree Chocolate Cake
    Chocolate Chickpea Cake
  • Easy Baklava Cake Recipe
    Easy Baklava Cake
  • Pistachio cake topped with chopped pistachios and rose petals on a cake stand.
    Pistachio Cake Recipe

Half the joy of cooking is sharing it with others. That’s why I’m always eager to hear from you. So go right ahead & drop a comment or reach out on Instagram, Pinterest, YouTube, or Facebook. I hope you love this chocolate zucchini cake as much as we do!

📖 Recipe

Tried this recipe?Let us know how it was!
chocolate zucchini cake with cream cheese frosting and edible flowers on a cake stand.

Chocolate Zucchini Cake

Natasha Minocha
Fluffy, decadent, and gooey, chocolate zucchini cake is a quick and easy dessert! With the tangy cream cheese frosting playing off the flavors of rich chocolate, the cake has quickly become an easy favorite in my home. 
No ratings yet
Print Recipe Pin Recipe
Prep Time 20 minutes mins
Cook Time 40 minutes mins
Course Cakes, Dessert
Cuisine American
Servings 8 servings
Calories 492 kcal

Ingredients


  • 1 cup All-purpose flour
  • 1/2 cup Almond meal
  • 1/2 cup Cocoa powder
  • 1 tsp Baking soda
  • 1/4 tsp Salt
  • 2 Eggs
  • 1/2 cup Oil
  • 1 tsp Vanilla extract
  • 3/4 cup Brown sugar
  • 1/3 cup Milk, lukewarm
  • 1 cup Shredded zucchini
  • 1/2 cup Dark chocolate chips

Cream Cheese Frosting

  • 1/2 cup Cream cheese, room temperature
  • 3 tbsp Cream
  • 1/3 cup Powdered sugar

Instructions
 

  • Preheat your oven to 180 C / 350 F. Grease an 8" cake tin.
  • Whisk together the all-purpose flour, almond meal, cocoa powder, baking soda, and salt.
    1 cup (130g) All-purpose flour, 1/2 cup (65g) Almond meal, 1/2 cup (45 g) Cocoa powder,1 tsp Baking soda,1/4 tsp Salt
  • Combine the eggs, oil, brown sugar, and vanilla extract in a blender. Blend until smooth.
    2 Eggs, 1/2 cup (100g) Oil, 3/4 cup (115g) Brown sugar,1 tsp Vanilla extract
  • Add to the dry ingredients and mix well. Add lukewarm milk.
    1/3 cup ( 80g) Milk, lukewarm
  • Fold in the grated zucchini and chocolate chips.
    1 cup (120 g) Shredded zucchini, 1/2 cup (90 g) Dark chocolate chips
  • Pour the batter into the prepared pan and bake at 180 C / 350 F for 35-40 minutes or until a skewer inserted in the center comes out clean.
  • Cool the cake in the pan for a few minutes before turning it out on a cooling rack.
  • Spread the cream cheese frosting on the cooled cake. Decorate with edible flowers and sprinkles. Slice and serve. Enjoy!

Cream cheese frosting

  • Combine the cream cheese, cream, and icing sugar in a small bowl until light and fluffy.
    1/2 cup (115g) Cream cheese, 3 tbsp Cream, 1/3 cup (40g) powdered sugar

Video

Notes

  • There is no need to squeeze moisture out of the zucchini for this cake. That's what makes this a super moist chocolate zucchini cake. You can lightly blot it if it's too wet.
  • I used 1 cup of tightly packed shredded zucchini, but feel free to use up to 1.5 cups, if you wish. The baking time may increase by a few minutes for the cake.
  • You also don't need to peel the zucchini!
  • Don't overmix the batter. That can make the cake dense instead of light and tender.
  • Don't overbake the cake. The cake will be ready when a skewer inserted in the center comes out with a few moist crumbs attached.

Nutrition

Serving: 1 ServingCalories: 492kcalCarbohydrates: 51gProtein: 8gFat: 31gSaturated Fat: 10gPolyunsaturated Fat: 5gMonounsaturated Fat: 12gTrans Fat: 0.1gCholesterol: 63mgSodium: 297mgPotassium: 297mgFiber: 4gSugar: 31gVitamin A: 385IUVitamin C: 3mgCalcium: 115mgIron: 2mg

No-Bake Saffron Cheesecake

March 12, 2022

No-Bake Saffron Cheesecake

The no-bake saffron cheesecake has all the makings of a classic cheesecake, just layered over each other in individual dessert glasses. A crumbly crust topped with a creamy filling bursting with the floral notes of saffron and rose water finished with a crown of velvety whipped cream. 

No-Bake Saffron Cheesecake

Light, refreshing, and with an embarrassingly easy recipe, this no-bake cheesecake is the perfect dessert for a Holi get-together (or any other day).

The taste is reminiscent of my Saffron Cardamom Cheesecake, but the recipe is even simpler and made in a jiffy. 

No-Bake Saffron Cheesecake
[feast_advanced_jump_to]

Why try the no-bake saffron cheesecake

  • Easy-to-make, foolproof recipe
  • Great make-ahead recipe
  • A fabulously luxurious dessert full of saffron and cardamom flavor
  • Easy to serve in individual dessert cups or even shot glasses

How to make no-bake saffron cheesecake?

For me, there is nothing more joyful than bringing a burst of seasonal flavors and color to my bakes. So, that’s what I did with this cheesecake-in-a-glass. It has a clean flavor profile, with the distinctive earthy saffron marrying the sweetness of cardamon and then living happily ever after with rose water. It’s almost like eating freshly made mithai without all the effort!

Step 1: The classic choice is Marie biscuits (or graham crackers), but digestives work just as well. Crush the biscuits.

Step 2: Combine the crumbs with the melted and cooled butter. 

Ingredients for cheesecake filling

Step 3: With a hand whisk or electric beater, beat cream, cream cheese, and icing sugar till you have a nice, thick, creamy mixture.

Step 4: Combine a hefty dose of saffron and cardamom powder to it. 

Step 5: And because in my book rosewater completes the trio of flavors, add 2 teaspoons of it. I am completely in love with the combination, but if you find it overpowering, reduce the rose water to 1 teaspoon.

Cheesecake filling and cookie crumble for making No-Bake Saffron Cheesecake

Step 6: Pack the crust into the bottom of your dessert glass.

Step 7: Either spoon or pipe the cream cheese filling on top of the crust base. I prefer a piping bag because it’s faster, neater, and less fussy. 

Step 8: I also dolled up the saffron cheesecake with dollops of whipped cream, but this is entirely optional. 

Step 9: Let it sit in the fridge for a minimum of 1 hour because while you don’t need to bake them, you need to chill no-bake cheesecakes. 

No-Bake Saffron Cheesecake

Pro tips for making no-bake saffron cheesecake

  • All your ingredients must be at room temperature. It is easier to whip up a smooth, lump-free cream cheese filling as cold ingredients take longer.
  • Taste and check for sweetness before you scoop the filling into glasses. 
  • If your filling is too thick, stir in more cream to reach a soft, dropping consistency. 
  • The longer you let the no-bake cheesecake chill, the better it gets. Keep them overnight and the crust soaks up the flavors, the filling firms up and sets beautifully, which also means you can make them a day in advance. Always a plus in my books. 
  • My recipe makes enough for 3 large glasses or 6 medium-sized glasses. I opted for the former, but the decadent dessert was shared between 6 people. 
  • In case you plan this recipe for a Holi ( or any )party, you can even utilize shot glasses. The saffron cheesecake dessert is pretty to look at and immensely satisfying if you’re a saffron-lover like me. 
No-Bake Saffron Cheesecake

How do you garnish the saffron cardamom cheesecake?

Right before you’re ready to serve, sprinkle with dried rose petals, slivers of pistachio, cardamom powder, and strands of saffron. Hand over a glass to everyone, and you’re good to go!

No-Bake Saffron Cheesecake

No-Bake Saffron Cheesecake

More quick, no-bake recipes

No-Bake Mango Cheesecake

No-Bake Jamun Cheesecake

No-Bake Peanut Butter Chocolate Cookies

No-Bake Oatmeal Peanut Butter Bars

No-Bake Gingersnap Balls

No-Bake Saffron Cheesecake

Half the joy of cooking is sharing it with others. That’s why I’m always eager to hear from you. So go right ahead & drop a comment or reach out on Instagram, Pinterest, YouTube, or Facebook. I hope you love this no-bake saffron cheesecake as much as we do!

📖 Recipe

Tried this recipe?Let us know how it was!
No-Bake Saffron Cheesecake

No-Bake Saffron Cheesecake

Natasha Minocha
Light, refreshing, and with a super easy recipe, the no-bake saffron cheesecake is the perfect dessert for your next get-together!
No ratings yet
Print Recipe Pin Recipe
Prep Time 20 minutes mins
Chilling time 1 hour hr
Total Time 1 hour hr 17 minutes mins
Course Dessert
Cuisine American, Indian
Servings 6 Servings
Calories 442 kcal

Ingredients


Cookie Base

  • 3/4 cup Marie or digestive biscuits, crushed
  • 1/4 cup Butter, melted

Cheesecake Filling

  • 1 cup Cream cheese at room temperature
  • 1/2 cup Icing sugar
  • 1/2 cup Cream at room temperature
  • 1 heaped tsp Saffron
  • 1 tsp Cardamom powder
  • 2 tsp Rosewater Optional

Garnish

  • Whipped cream, pistachio slivers, rose petals, cardamom powder, saffron strands

Instructions
 

Cookie Base

  • Combine the melted butter and crushed cookies in a small bowl. This mixture should have the consistency of wet sand.
    Keep aside.

Cheesecake Filling

  • With a hand whisk or electric beater, beat cream, cream cheese, and icing sugar till you have a nice, thick, creamy mixture.
  • Stir in the saffron, cardamom, and rosewater.
  • Taste and adjust for sweetness and flavor.

Assembly

  • Spoon the crushed cookie mixture into the bottom of your dessert glasses. Press it down slightly.
  • Either spoon or pipe the cream cheese filling on top of the crust base. I prefer a piping bag because it’s faster, neater, and less fussy. 
  • Now you can top it with whipped cream, pistachios, rose petals, cardamom powder, and a few saffron strands.
  • Refrigerate your dessert cups for at least 1 hour. Serve chilled. Enjoy!

Nutrition

Serving: 1 ServingCalories: 442kcalCarbohydrates: 36gProtein: 5gFat: 31gSaturated Fat: 18gPolyunsaturated Fat: 3gMonounsaturated Fat: 8gTrans Fat: 0.3gCholesterol: 82mgSodium: 343mgPotassium: 130mgFiber: 1gSugar: 19gVitamin A: 1052IUVitamin C: 0.3mgCalcium: 77mgIron: 1mg
No-Bake Saffron Cheesecake PIN

Chocolate Chickpea Cake

March 7, 2022

Chocolate Chickpea Cake | Eggless Chocolate Cake with Chickpea Flour | Glutenfree Chocolate Cake

This gluten-free chocolate chickpea cake is rich, fudgy, and deeply chocolatey. You'd never guess it's made with chickpea flour! It's the kind of cake that feels indulgent but comes together in one bowl in minutes!

chocolate cake with ganache, pistachios and pomegranates on a tray.

The chickpea flour gives the cake structure and protein, while keeping it naturally gluten-free. This easy, eggless, one-bowl chocolate cake recipe comes together in minutes with simple ingredients. Serve it plain, dust it with cocoa, or top it with a luscious chocolate ganache - either way, it's bound to disappear fast!

The cake is such a joy to make, and the consistency is very similar to my Swedish Chocolate Cake.

If you love chocolate desserts as much as I do, then you must try my chocolate lava cake, easy stovetop chocolate cake, and chocolate sheet cake!

chocolate cake with ganache, pomegranates, and pistachios with a slice taken out.
[feast_advanced_jump_to]

Why You'll Love This Recipe

✨ Every bite is moist, soft, and full of deep chocolate flavor! Perfect for chocolate lovers!

✨ Chickpea flour and almond flour keep the cake naturally gluten-free. No special mixes or substitutions.

✨ This gluten-free chocolate cake recipe is quick and easy. Just one bowl, a few pantry staples, and minimal prep!

✨ This delicious, wholesome cake is perfect for any festive occasion - it's always a hit!

A slice of chocolate cake on a small plate.

Recipe Ingredients

Chickpea flour: The star of this cake - giving it a moist, gooey texture while keeping it gluten-free.

Almond flour: Adds richness, nuttiness, and a soft crumb.

Cocoa powder: For a deep, chocolately flavor.

Dark chocolate and Butter: I used 55% dark chocolate and salted butter. Together, these two are melted to make the cake fudgy and decadent.

Sugar: I used raw sugar; feel free to use regular white sugar or even brown sugar.

Soy milk: For making the batter smooth and creamy. Use unsweetened soy milk.

Rose water: This is optional, but it does add a lovely floral note that goes so well with chocolate.

Please see the recipe card below for full information about the ingredients and quantities.

How To Make Chocolate Chickpea Cake

Step 1: Set your oven to preheat. Grease your springform pan well, and then line it with parchment paper. 

Step 2: Melt chocolate with butter in a double boiler (a pan placed over another pan of simmering water). Stir till the chocolate melts, and you have a glossy, smooth mixture.

Step 3: Take it off the heat and combine it with the sugar while it’s still warm.

Step 4: Sift chickpea flour (besan/gram flour) and almond flour into the same bowl.

Step 5: Sift in cocoa powder and baking powder, and whisk everything together really well. 

Steps for making Chocolate Chickpea Cake.

Step 6: Stir in the warm soy milk and rosewater. You should have a nice, shiny, thick batter.

Step 7: Pour the thick cake batter into your prepped pan, smooth the top, and bake for 35 to 40 minutes, until done.

Baked chocolate chickpea cake.

Pro Tips

  • Use room temperature ingredients for easier blending.
  • I highly recommend using a kitchen scale to measure the ingredients for the best results.
  • There is no proper way to test if the chickpea cake is done. Because the eggs and flour are missing, it doesn’t behave like a regular cake. I deem the cake done when the top is cooked, and the center is just a tad wobbly.
  • The cake will rise a bit during baking and will sink as it cools. Don't worry, this is normal!
  • Soy milk should be warm, so it doesn’t seize the chocolate when you mix it in.
  • Don’t overbeat the batter.
  • Don’t risk using a regular cake tin. A spring-form pan is your best bet here! 
  • If you’re worried about overbaking, keep an eye out after you cross the 30-minute marker. Resist opening the oven door to check.
  • Tent the cake with foil in case the top starts browning too fast.
  • Let the cake cool in your pan, and then place it in the fridge. Don’t be in a hurry; give it at least an hour. It should do the trick, but it’s best to keep it overnight. A chilled cake makes your life so much easier by sliding right out of the pan. 
Chocolate sauce being poured on the cake with a spoon.

How To Serve

Okay, so here’s a trigger warning for bakers: the cake deflates. Don’t panic when you see a little crater forming. It’s par for the course for this recipe.

This cake is delicious served cold or at room temperature.

You can serve the as-is, it's fabulous! Or you could -

  • Dust with powdered sugar or cocoa powder
  • Top it with whipped cream and fresh berries
  • Add some chocolate ganache, like I did. A luscious layer of chocolate sauce, some slivers of pistachios, a handful of rose petals, and pomegranate arils (my go-to cake garnish). This is how I love to serve this.
Chocolate cake with a slice taken out to show the gooey inside.

Recipe FAQs

How to make a vegan chocolate chickpea cake?

You can easily make this cake vegan by switching to dairy-free chocolate and plant-based butter.

Do I need to use rose water for this gluten-free chocolate cake?

Rosewater is optional in the chocolate chickpea cake recipe. It adds a nice floral note that goes very well with chocolate. But you can leave it out if you're not a fan. 

How do I know when the cake is done?

Since this is not a regular cake with flour and eggs, inserting a skewer in the center doesn't work. I find that when the top is cooked and the center still has a little wobble to it, the cake is done. This cake needs to be cooled well, on the countertop, and then in the refrigerator. This also ensures a dense, fudgy consistency.

A slice of chocolate cake on a plate with a bite taken out on a fork.

More Chocolate Desserts

  • avocado chocolate mousse in a glass cup with 2 spoons on the side.
    Avocado Chocolate Mousse
  • chocolate orange tart garnished with berries, orange zest, candied oranges on a white napkin.
    Chocolate Orange Tart
  • chocolate cake with chocolate frosting and pomegranate arils on top on a platter.
    Stovetop Chocolate Cake
  • Chocolate lava cake with vanilla ice cream on top on a plate with a spoon.
    Eggless Chocolate Lava Cake

Half the joy of cooking is sharing it with others. That’s why I’m always eager to hear from you. So go right ahead & drop a comment or reach out on Instagram, Pinterest, YouTube, or Facebook. I hope you love this chocolate chickpea cake as much as we do!

📖 Recipe

Tried this recipe?Let us know how it was!
Chocolate Chickpea Cake | Eggless Chocolate Cake with Chickpea Flour | Glutenfree Chocolate Cake

Chocolate Chickpea Cake

Natasha Minocha
The chocolate chickpea cake is rich, fudgy, and naturally gluten-free. A dessert that's decadent but comes together easily with simple ingredients in one bowl!
No ratings yet
Print Recipe Pin Recipe
Prep Time 20 minutes mins
Cook Time 35 minutes mins
Course Cakes, Dessert
Cuisine American, Indian
Servings 10 Servings
Calories 324 kcal

Ingredients


  • 1 cup Dark chocolate (55%) chips
  • 6 Tbsp Butter
  • 1/2 cup Raw sugar You can use regular white sugar too
  • 1/2 cup Chickpea flour/ Besan
  • 1/4 cup Almond flour
  • 1/3 cup Cocoa powder
  • 1/4 tsp Baking soda
  • 1/2 cup Soy milk, warm
  • 1 tsp Rosewater Optional

Chocolate Ganache

  • 1/4 cup Cream
  • 1/4 cup Dark chocolate chips

Instructions
 

  • Preheat your oven to 170 C / 340 F. Grease an 8" spring-bottom pan and line the bottom with parchment paper.
  • Melt the chocolate and butter in a large bowl placed over a pan of simmering water.
    1 cup Dark chocolate (55%) chips, 6 Tbsp Butter
  • Take the bowl off the heat and stir in the sugar.
    1/2 cup Raw sugar
  • Sift in the chickpea flour, almond flour, cocoa powder, and baking soda.
    1/2 cup Chickpea flour/ Besan, 1/4 cup Almond flour, 1/3 cup Cocoa powder, 1/4 tsp Baking soda
  • Mix well.
  • Stir in the warm soy milk and rosewater ( optional). Don't overmix. You should have a nice, shiny, thick batter.
    1/2 cup Soy milk, warm, 1 tsp Rosewater
  • Transfer to the prepared pan, smooth the top, and bake at 170 C / 340 F for 35-40 minutes or until the top of the cake looks cooked and has the slightest wobble in the center.
  • Let the cake cool completely in the pan. Then refrigerate for at least 1 hour before taking it out of the pan.
  • Serve as is or top with chocolate ganache. Decorate with pistachio slivers, dried rose petals, and pomegranate arils. Enjoy!

Chocolate Ganache

  • Gently heat the cream, add the chocolate chips, stir well until you get a smooth, shiny mixture. Let it cool before pouring on the cake.

Notes

  • Use room temperature ingredients for easier blending.
  • I highly recommend using a kitchen scale to measure the ingredients for the best results.
  • There is no proper way to test if the chickpea cake is done. Because the eggs and flour are missing, it doesn’t behave like a regular cake. I deem the cake done when the top is cooked, and the center is just a tad wobbly.
  • The cake will rise a bit during baking and will sink as it cools. Don't worry, this is normal!
  • Soy milk should be warm, so it doesn’t seize the chocolate when you mix it in.
  • Don’t overbeat the batter.
  • Don’t risk using a regular cake tin. A spring-form pan is your best bet here! 
  • If you’re worried about overbaking, keep an eye out after you cross the 30-minute marker. Resist opening the oven door to check.
  • Tent the cake with foil in case the top starts browning too fast.
  • Let the cake cool in your pan, and then place it in the fridge. Don’t be in a hurry; give it at least an hour. It should do the trick, but it’s best to keep it overnight. A chilled cake makes your life so much easier by sliding right out of the pan. 

Nutrition

Serving: 1 ServingCalories: 324kcalCarbohydrates: 31gProtein: 5gFat: 23gSaturated Fat: 14gPolyunsaturated Fat: 1gMonounsaturated Fat: 6gTrans Fat: 0.3gCholesterol: 25mgSodium: 100mgPotassium: 152mgFiber: 5gSugar: 21gVitamin A: 349IUVitamin C: 1mgCalcium: 50mgIron: 1mg

Carrot Cake Waffles

March 5, 2022

Waffles on a wooden board with fruits, walnuts, and maple syrup.

Carrot cake waffles are the golden cousin of carrot cake. Soft inside, crispy on top, and lightly spiced, these vegan waffles are healthy and easy, and you can have them sizzling on the waffle iron in under 15 minutes!

Waffles on a wooden board with fruits, walnuts, and maple syrup.

These wholesome, easy vegan carrot cake waffles come together fast. Just mix, pour, and let the waffle iron do its thing. Oodles of cinnamon make them smell sinful, and the boatload of walnuts gives them a gorgeous crunch. Enjoy them for a hearty breakfast any time of the week!

[feast_advanced_jump_to]

Why You’ll Love This Recipe

These vegan carrot waffles bring all the warm spices, sweet carrots, and nutty goodness of carrot cake into a crispy, golden waffle that's perfect for breakfast. Top them with some cream cheese frosting, and they are wonderful for dessert too!

Made with everyday pantry ingredients, these waffles are soft on the inside, lightly crisp on the outside, and naturally sweetened—comforting, nourishing, and delicious!

The carrot cake waffle recipe batter comes together in minutes, and the waffles freeze beautifully. Pop them in the toaster and you've got a cozy treat ready anytime!

Waffles stacked on a wooden board with fruits around.

Carrot Waffles Ingredients

Flour: All-purpose is amazing, but I wouldn’t blink twice before using whole wheat flour instead. Even half-and-half of both is a good combo. You can also add a portion of almond meal. Or make gluten-free carrot cake waffles with buckwheat flour, like I did with my apple cinnamon waffles.

Carrots: Feel free to use as many carrots as you want in the carrot cake batter. Sneak in more of the veggie. You don’t have to stick to my quantity. 

Milk: As I always say, use any milk you prefer. I lean towards soy milk as it gives more structure to the batter. Almond milk, oat milk, or cashew milk - all are wonderful choices.

Oil: I use coconut, but any light vegetable oil will work like a charm. You can substitute it with melted butter, too.

Spices: Cinnamon and homemade vanilla extract give the eggless carrot cake waffles a wonderful taste.

Flaxseed powder gives the waffles some structure, as this is an eggless recipe.

Nuts: Walnuts pair the best with carrots, but again, the choice is yours. Chop them finely.

Please see the recipe card below for full information on ingredients and quantities.

How To Make Carrot Cake Waffles? 

Step 1: Whisk together the soy milk and vinegar in a mixing bowl and set aside.

Step 2: Sift all-purpose flour, baking powder, baking soda, and a pinch of salt. Mix in cinnamon powder and flaxseed powder.

Step 3: Add vanilla extract and melted coconut oil to the milk-vinegar mixture.

Steps for making carrot waffles.

Step 4: Pour the wet ingredients into the dry to form a thickish batter.

Step 5: Fold in grated carrots and very, very finely chopped walnuts.

Step 6: Ladle the batter into your well-greased (and hot) waffle iron and cook.

Final Step: Serve and savor!

Pro Tips

  • If the vegan carrot cake waffle batter is too thick, add a tablespoon or two of milk to loosen it.
  • I love a thick consistency to my waffle batter as it makes for crispy waffles with a soft, custardy interior! If you prefer waffles to be crispy through and through, thin the batter with more milk.
  • These waffles freeze very well. Allow them to cool completely, then pack them in a single stack in a ziplock bag. Freeze for up to 1 month.
  • You can make the batter the night before. Give a good stir and make the waffles the next day.
Carrot waffles topped with pumpkin seeds on a wooden board.

How To Serve

However you serve them, these easy carrot cake waffles are all about slow mornings and happy bellies. Because honestly, isn’t life just better when your morning smells like cake?

Serve with a pat of butter and a drizzle of maple syrup. Since this is a sugar-free waffle recipe (carrots give it natural sweetness), you can be heavy-handed with maple syrup. Honey and date syrup work too.

You can also serve a platter of these waffles with homemade strawberry jam or cherry jam. Add a spoonful of yogurt or a dusting of powdered sugar if you’re feeling fancy. Pair with an oatmeal latte, freshly squeezed orange juice, a strawberry matcha latte, or tea spiced with chai masala.

a bite of the waffle on a fork on a plate.

Recipe FAQs

Can I prep carrot cake waffles in advance?

This waffle recipe is a quick one! You can make the batter the night before or prep the ingredients the night before and just mix them in the morning.

Can I freeze carrot waffles?

Yes, you can! Let the waffles cool down to room temperature completely. In a single layer, put them in a freezer-safe bag and store them for up to a month. 

How do you reheat waffles?

Waffles are best eaten fresh off the waffle maker. However, leftovers are still delicious. The best way to reheat waffles is to pop them in your toaster for 30 seconds to 1 minute. Make sure they don’t get burnt!

More Waffle Recipes

  • Lemon Poppyseed Waffles | Vegan lemon poppyseed waffles recipe
    Lemon Poppyseed Waffles
  • Apple Cinnamon Waffles With Buckwheat
    Apple Cinnamon Buckwheat Waffles
  • 3 waffles on a plate, with cherries and peaches on the side.
    Easy Sourdough Waffles
  • Sweet Potato Cornmeal Waffles easy healthy glutenfree recipe
    Sweet Potato Waffles (Gluten-Free)

Half the joy of cooking is sharing it with others. That’s why I’m always eager to hear from you. So go right ahead & drop a comment or reach out on Instagram, Pinterest, YouTube, or Facebook. I hope you love these carrot cake waffles as much as we do! 

📖 Recipe

Tried this recipe?Let us know how it was!
Waffles on a wooden board with fruits, walnuts, and maple syrup.

Carrot Cake Waffles

Natasha Minocha
Made with everyday pantry ingredients, these vegan carrot cake waffles are soft on the inside, lightly crisp on the outside, and naturally sweetened—comforting, nourishing, and delicious!
5 from 3 votes
Print Recipe Pin Recipe
Prep Time 15 minutes mins
Cook Time 20 minutes mins
Course Breakfast, Snack
Cuisine American
Servings 8 Waffles
Calories 175 kcal

Ingredients


  • 1 cup Soy milk You can use regular milk as well
  • 1 tsp Apple cider vinegar You can also use white vinegar
  • 1.5 cup All-purpose flour
  • 1.5 tsp Baking powder
  • 1/2 tsp Baking soda
  • 1/4 tsp Salt
  • 1 tsp Cinnamon powder
  • 2 tbsp Flaxseed powder
  • 3 tbsp Coconut oil, melted
  • 1 tsp Vanilla extract
  • 1/2 cup Shredded carrots, tightly packed
  • 2-3 tbsp Finely chopped walnuts

Instructions
 

  • Mix soy milk with vinegar in a small bowl and let it sit for 5-6 minutes.
  • In the meanwhile, combine all the dry ingredients – flour, baking powder, baking soda, salt, cinnamon powder, and flaxseed powder.
  • Mix coconut oil and vanilla extract in the milk and vinegar mixture. Pour into the dry ingredients.
  • Fold in the grated carrots and chopped walnuts.
  • Whisk until smooth and thick. The batter should have a soft dropping consistency, like a cake batter.
  • Preheat your waffle iron according to the manufacturer's instructions.
  • Grease the waffle cavities well and pour a ladleful of batter in the cavity. Let the batter cook for 4-5 minutes, until golden and crisp.
  • Repeat with the rest of the batter. Serve warm. Enjoy!

Notes

  • If the vegan carrot cake waffle batter is too thick, add a tablespoon or two of milk to loosen it.
  • I love a thick consistency to my waffle batter as it makes for crispy waffles with a soft, custardy interior! If you prefer waffles to be crispy through and through, thin the batter with more milk.
  • These waffles freeze very well. Allow them to cool completely, then pack them in a single stack in a ziplock bag. Freeze for up to 1 month.
  • You can make the batter the night before. Give a good stir and make the waffles the next day.

Nutrition

Serving: 1 ServingCalories: 175kcalCarbohydrates: 21gProtein: 4gFat: 8gSaturated Fat: 5gPolyunsaturated Fat: 2gMonounsaturated Fat: 1gSodium: 242mgPotassium: 121mgFiber: 2gSugar: 1gVitamin A: 1475IUVitamin C: 3mgCalcium: 102mgIron: 2mg

Banana Carrot Bread

March 2, 2022

Banana Carrot Bread | Eggless banana carrot bread

The selling point of most banana breads is using overripe bananas languishing in your fruit bowl. This banana carrot bread is a little different. Make it because it’s the softest, moistest, and most successful loaf you’ll ever bake. 

Banana Carrot Bread on a wooden board with 2 forks on the side.

And it’s pretty, with speckles of carrot orange peeking through, lending a delicate crunch to the crumb. For me, there's no better way to celebrate the natural sweetness of bananas and make yummy use of the last of our red winter carrots. 

Love banana bread? Then you must try my eggless chocolate chip banana bread, Biscoff banana bread, and pumpkin banana bread.

[feast_advanced_jump_to]

Why You'll Love This Recipe

Makes the most of seasonal bounty

Uses simple, easy pantry ingredients

A healthy way to satisfy a raging sweet tooth

Lighter recipe ideal for the spring in the air

Perfect everyday cake to have with tea or coffee

Banana Carrot Bread | Eggless banana carrot bread

Recipe Ingredients & Variations

Flour: Compared to most desserts, carrot bread is healthy. Want to make it more so? I’d leave out the all-purpose flour and go for 100% whole-wheat. The earthiness of it pairs excellently with bananas and carrots. 

Sugar: I love baking with raw sugar, but any sugar will do the trick here – cane, coconut, or plain, old, white sugar. 

Vegan: Replace regular yogurt and milk with plant-based yogurt and milk to make vegan banana carrot bread. 

Oil: I have used coconut oil here, but you can use regular vegetable oil or melted and cooled butter. 

Nuts: Traditionally, it’s raisins that are used in carrot bread, but I was all out of them. If you have them around, throw some in. However, walnuts add all the character you need to the loaf. You can use any nut you prefer. That is your choice, but I would urge you to add them. They really are the silent heroes of banana carrot bread. You can even try cranberries, black currants, or finely chopped dates. 

Seeds: For those allergic to nuts, seeds are a scrumptious substitute for making carrot bread hearty. 

Frosting: Midway between bread and a dessert, this quick bread doesn’t need anything more, but if you want to go the extra mile, try the cream cheese frosting I made for my coffee banana bread. It’s exquisite for a special event or celebratory mood. 

Banana Carrot Bread | Eggless banana carrot bread

How To Make Banana Carrot Bread

Like all banana bread ever made, this one is a big loaf of comfort too. You know, something delicious is coming your way, which, by the by, you can have as a super, very totally healthy dessert. It is very moist and delicate, just the way you want your teacake to be.

  • Start by sifting all the dry ingredients into a bowl. I know it’s easy to just dump them, but please don’t skip the sifting. It breaks up lumps and makes the batter more consistent.  
  • Spice it up with cinnamon and nutmeg powder, and then mix in raw sugar. 
  • In a separate bowl, mash the ripest bananas you have very well.. And I mean the spottiest, brownest ones because they are full of natural sugar, which lends the sweetest, luscious flavor to the bread. 
  • Whisk in coconut oil, yogurt, and vanilla extract to the bananas. 
  • All that’s left is to fold the wet and dry ingredients. Pour the wet into the dry and fold gently, without beating or overmixing. Why no overmixing? Because it makes the loaf too dense. Just evenly combine everything with no dry streaks visible. 
  • I admittedly had to add 3 or 4 tablespoons of warm milk because the batter was too stiff. It has to be thick but not dry at all. Make sure you add warm milk.
  • For the final touch, fold in grated carrots. 
  • Chopped walnuts and pecans are welcome additions because they impart so much texture to banana bread, and you don’t want to miss that. 
  • Pour the batter into a greased pan, top with pecan halves, and bake for 45 - 50 minutes.
  • As all ovens and their temperature levels are different, I say keep an eye on the carrot bread after the 35-minute mark. 
Steps for making Banana Carrot Bread | Eggless banana carrot bread

Recipe FAQs

How do you tell if banana bread is done?

Insert a skewer into the banana carrot bread, and it should come out with a few moist crumbs attached. You can also check using an instant read thermometer. When inserted in the center of the loaf, it should register 200 -205 F.

How long does the banana carrot bread last?

This banana bread keeps well for 3-5 days in the refrigerator. The carrots and bananas keep it nicely moist, and it doesn't dry out. Reheat in the microwave or toaster oven.

How to serve banana and carrot bread?

You can serve it warm with a cup of tea or coffee. It's lovely toasted and smeared with butter. Banana carrot bread is fantastic in any incarnation.

Banana Carrot Bread | Eggless banana carrot bread

More Banana Bread Recipes

  • Hawaiian Banana Bread with Pineapple and Coconut
    Hawaiian Banana Bread With Pineapple And Coconut
  • Walnut & Fig Banana Bread easy wholegrain baking
    Walnut & Fig Banana Bread
  • Cream Cheese Swirl Banana Bread | Easy Banana Bread with Cream Cheese
    Cream Cheese Swirl Banana Bread
  • Perfect Strawberry Banana Bread Recipe
    Perfect Strawberry Banana Bread Recipe

Half the joy of cooking is sharing it with others. That’s why I’m always eager to hear from you. So go right ahead & drop a comment or reach out on Instagram, Pinterest, YouTube, or Facebook. I hope you love this banana carrot bread as much as we do!

📖 Recipe

Tried this recipe?Let us know how it was!
Banana Carrot Bread | Eggless banana carrot bread

Banana Carrot Bread

Natasha Minocha
Banana Carrot Bread- it’s the softest, moistest, and most successful loaf you’ll ever bake. And, it’s so pretty, with speckles of carrot orange peeking through, lending a delicate crunch to the crumb.
No ratings yet
Print Recipe Pin Recipe
Prep Time 15 minutes mins
Cook Time 45 minutes mins
Course Dessert, Snack
Cuisine American
Servings 8 servings
Calories 307 kcal

Ingredients


  • 1 cup All-purpose flour
  • 1/2 cup Wholewheat flour
  • 1.5 tsp Baking powder
  • 1/2 tsp Baking soda
  • 1/8 tsp Salt
  • 1 tsp Cinnamon powder
  • 1/2 tsp Nutmeg
  • 1/2 cup Raw sugar
  • 2 Bananas
  • 1/3 cup Coconut oil, melted
  • 1/3 cup Yogurt, plain
  • 1 tsp Vanilla extract
  • 2-3 tbsp Warm milk
  • 1 cup Shredded carrots, tightly packed

Add ins

  • 1/4 cup Chopped walnuts
  • 1/4 cup Chopped pecans

Instructions
 

  • Preheat your oven to 180C. Grease and flour an 8" by 4" loaf pan.
  • Sift together the flours, baking soda, salt, cinnamon powder, and nutmeg powder.
  • Stir in the sugar.
  • In a separate bowl, mash the bananas well. Add the coconut oil, yogurt, milk, and vanilla extract.
  • Pour the wet ingredients into the dry ingredients and combine well.
  • Fold in the carrots, walnuts, and pecans.
  • Pour the mixture into the prepared pan and top with pecan halves ( optional).
  • Bake at 180C for 40-45 minutes or until a skewer inserted in the center comes out clean.
  • Cool in the pan for 15 minutes before taking it out and cooling on a wire rack. Serve at warm. Enjoy!

Nutrition

Serving: 1 ServingCalories: 307kcalCarbohydrates: 41gProtein: 4gFat: 15gSaturated Fat: 8gPolyunsaturated Fat: 3gMonounsaturated Fat: 2gCholesterol: 2mgSodium: 203mgPotassium: 241mgFiber: 3gSugar: 18gVitamin A: 2751IUVitamin C: 4mgCalcium: 82mgIron: 2mg

Pineapple Bun Recipe

February 28, 2022

A red platter stacked with pineapple buns.

The pineapple bun recipe has no pineapple. But it does have a crunchy, crackly top and the softest, most pillowy bun you can imagine. It’s the kind of treat that makes you reach for a second one before you’ve finished the first!

A red platter stacked with pineapple buns.

Freshly baked pineapple buns have that heady aroma of yeast, butter, and toasted sugar. With a little patience, this recipe helps you recreate the magic of Asian bakery-style pineapple buns right in your own kitchen.

It’s a labor of love, but let me tell you, the silence that falls over the room when people start eating homemade pineapple buns is totally worth it!

[feast_advanced_jump_to]

Why You’ll Love This Recipe

✨ These Chinese pineapple buns have a crunchy, crackled, cookie-like crust and a soft, fluffy bun. That contrast in textures? It’s everything.

✨ The recipe uses the tangzhong method - also known as the water roux method, it completely changes how soft homemade bread can be. Once you try it, you’ll want to use it in all your bread baking.

✨ The buns are perfect for breakfast, dessert, or a snack (like my soft homemade pretzel bites). Serve them for brunch, add them to your Chinese New Year fest, or enjoy them with tea in the evening.

✨ You can make the dough in advance and bake it the next day. The texture remains great. And even though they look fancy, pineapple bun ingredients are actually pantry staples you’ll likely already have.

A stack of pineapple buns on a red plate.

Pineapple Bun Ingredients

Flour: All-purpose flour keeps the buns light and tender.

Sugar: Adds gentle sweetness to both the bun and the topping.

Milk to activate the yeast. Make sure it’s lukewarm, around 105°F (40.5°C).

Yeast: I used dried active yeast to help the dough rise and get fluffy.

Condensed milk is the secret to that signature milky richness and extra soft texture, much like in chocolate fudge with condensed milk. You can use homemade coconut condensed milk.

Butter is for flavor and tenderness. I used salted butter.

Eggs give structure and richness to the dough. You’ll need an additional yolk for the crust topping.

Vanilla extract gives a warm, aromatic sweetness to the bun topping. I love to use homemade vanilla extract.

Turmeric powder is a natural way to get that iconic yellow color. But feel free to use yellow food color instead.

Please see the recipe card for full information about ingredients and quantities.

How To Make Pineapple Buns

Tangzhong paste

  • Make the Tangzhong paste - Combine the flour and water in a small saucepan. Cook this mixture on low heat, whisking continuously till you get a thickish paste. Transfer the paste into a bowl and keep aside to cool. This will thicken more as it cools.

Dough

  • Whisk together the sugar, milk, and yeast in a small bowl. Keep in a draft-free place for 10-15 minutes until it's frothy.
  • Combine the all-purpose flour, salt, condensed milk, egg, melted butter, tangzhong, and the yeast mixture in the bowl of your stand mixer.
  • Mix the dough, using the dough hook, on low for 8-10 minutes, until the dough is smooth and elastic.
  • Turn it out on your work surface and knead for 2 minutes. Place it in a well-greased bowl, cover with a wet kitchen cloth, and let it rest till it doubles in size. 
Bread dough in a stainless steel bowl.
Proofed bread dough in a stainless steel bowl.

Topping

  • Beat together the butter and sugar.
  • Add the egg yolk, milk, and vanilla extract.
  • Sift together the flour, baking powder, and turmeric and add to the butter mixture.
  • Bring the dough together using your hands. Kneading it very briefly, just 1-2 minutes, till you get a smooth dough.
  • Cover and keep aside for later use.
Yellow dough in a bowl.

Shape The Dough

  • When your dough has doubled in volume, take it out of the bowl and gently deflate it.
  • Divide the dough into 12 equal balls and place on a tray.
  • Cover and let them double in size.

Bake The Buns

  • While the buns are proofing, make the topping discs.
  • Divide the dough into 12 equal portions. 
  • Use your palms to shape each portion into a ball. Place it between two sheets of wax or parchment paper and roll out each portion into a flat disc. 
  • Carefully drape each disc onto the buns. Make sure the bottom of the topping doesn't touch the tray.
6 dough balls on parchment paper.
Dough balls covered with discs of yellow dough.

Bake The Pineapple Buns

Brush it with egg wash and bake at 190 C for 15-17 minutes, until the topping is burnished yellow. Let the buns cool on the tray for a few minutes before transferring to a wire rack.

Serve warm!

Baked pineapple buns on a tray lined with parchment paper.

Pro Tips

  • Have all the ingredients laid out beforehand. It makes following the recipe so much simpler.
  • Use a kitchen scale to measure the pineapple bun ingredients. Baking any bread is much easier when everything is precise.
  • If your yeast doesn’t froth in 5 to 10 minutes, it means the yeast has expired, or your milk was too hot.
  • Don’t rush or skip the tangzhong. This simple flour-and-water paste is what gives the buns their cloud-like texture.
  • Make sure the size of the topping disc is smaller than the bun because the topping expands as it bakes. 

How To Serve

Hands down, pineapple buns are best the day they’re made. Warm, fresh from the oven, mildly sweet, with a crunchy crown and soft center. They’re as buttery and golden as my soft and pillowy eggless brioche and condensed milk rolls!

Traditionally, they’re served warm with a slice of butter tucked inside. The heat melts the butter instantly, and honestly? It’s heavenly.

We love them with cups of tea spiced with homemade chai masala, but they’re also wonderful with coffee. You can even add a little strawberry chia jam if you like a sweeter bite.

Half a bun on a small plate to show the fluffy interior.

Recipe FAQs

What is a pineapple bun?

A pineapple bun is a classic Chinese bakery bread. Known as Bo Lo Bao in Cantonese, these are a staple of Hong Kong food culture. They are so iconic that they've actually been listed as a piece of "intangible cultural heritage"! They are essentially a soft bread roll with a crumbly, sugary, crackly crust on top.

Why are they called pineapple buns?

Commonly made during the Chinese New Year, the crusts of these buns look like pineapple skin. The color and sweetness also add to the illusion.

What does a pineapple bun taste like? 

This Chinese pineapple bun recipe does not contain any fruit. So, no, these buns don’t taste like pineapple. They’re lightly sweet and buttery with a crunchy topping.

How to store pineapple buns?

These buns are best the day they are baked. But they do keep well for 3-4 days in the refrigerator.
To reheat, just pop them in the microwave for 25-30 seconds.

More Delicious Bread Rolls

  • Best Condensed Milk Bread Rolls (Soft & Fluffy)
    Best Condensed Milk Bread Rolls (Soft & Fluffy)
  • Cheesy pesto swirl rolls in a round baking dish.
    Cheesy Pesto Swirl Rolls
  • Mallorca bread rolls on a platter.
    Best Mallorca Sweet Bread Recipe
  • Tiger Bread Recipe | Dutch Crunch Bread
    Tiger Bread Recipe

Half the joy of cooking is sharing it with others. That’s why I’m always eager to hear from you. So go right ahead and drop a comment or reach out on Instagram, Pinterest, YouTube, or Facebook. I hope you love these pineapple buns as much as we do!

📖 Recipe

Tried this recipe?Let us know how it was!
A red platter stacked with pineapple buns.

Pineapple Bun Recipe

Natasha Minocha
This pineapple bun recipe shows you how to make soft, fluffy buns with a golden, crunchy, sweet topping using simple pantry ingredients. Easy to follow and perfect for breakfast, tea time, or snacking.
No ratings yet
Print Recipe Pin Recipe
Prep Time 2 hours hrs 30 minutes mins
Cook Time 15 minutes mins
Course Side Dish, Snack
Cuisine Chinese
Servings 12 Buns
Calories 362 kcal

Ingredients


Tangzhong Paste

  • 2 tbsp All-purpose flour
  • 1/4 cup Water

Bun Dough

  • 4.9 oz Milk, lukewarm
  • 2 1/4 tsp Dried active yeast
  • 1.5 tbsp Sugar
  • 4 cup All-purpose flour
  • 1 tsp Salt
  • 1/4 cup Condensed milk
  • 1 Egg
  • 1/4 cup Butter, melted

Topping

  • 1/4 cup Butter, softened
  • 2/3 cup Caster sugar
  • 1 Egg yolk
  • 1 tbsp Milk, lukewarm
  • 1 tsp Vanilla extract
  • 1 cup All-purpose flour
  • 1/4 tsp Baking powder
  • 1/4 tsp Turmeric powder

Egg Wash

  • 1 Egg
  • 1 tbsp Milk

Instructions
 

Tangzhong Paste

  • Combine the flour and water in a small saucepan.
    2 tbsp All-purpose flour, 1/4 cup Water
  • Cook this mixture on low heat, whisking continuously till you get a thickish paste. This will take about 2-3 minutes.
  • Transfer the paste into a bowl and keep aside to cool. This will thicken more as it cools.

Bun Dough

  • Whisk together the sugar, milk, and yeast in a small bowl. Keep in a draft-free place for 10-15 minutes until frothy.
    4.9 oz Milk, lukewarm, 2 1/4 tsp Dried active yeast, 1.5 tbsp Sugar
  • Combine the all-purpose flour, salt, condensed milk, egg, melted butter, tangzhong, and the yeast mixture in the bowl of your stand mixer.
    4 cup All-purpose flour, 1 tsp Salt, 1/4 cup Condensed milk, 1 Egg, 1/4 cup Butter, melted
  • Mix the dough, using the dough hook, on low for 8-10 minutes, until the dough is smooth and elastic.
    You can certainly knead the dough with your hands. It will take a bit longer - 10-12 minutes.
  • Turn it out on your work surface and knead for 2 minutes. Place it in a well-greased bowl, cover with a wet kitchen cloth, and let it rest till it doubles in size. 

Topping

  • While the dough for the buns is resting, make the dough for topping.
  • Beat together the butter and sugar.
    1/4 cup Butter, softened, 2/3 cup Caster sugar
  • Add the egg yolk, milk, and vanilla extract.
    1 Egg yolk, 1 tbsp Milk, lukewarm,1 tsp Vanilla extract
  • Sift together the flour, baking powder, and turmeric and add to the butter mixture.
    1 cup All-purpose flour, 1/4 tsp Baking powder,1/4 tsp Turmeric powder
  • Bring the dough together using your hands. Kneading it very briefly, just 1-2 minutes, till you get a smooth dough.
  • Cover and keep aside for later use.
  • When your bun dough has doubled in volume, take it out of the bowl and punch it down.
  • Knead to get rid of any surplus trapped air. Then divide the dough into 12 equal balls.
  • Line a baking tray with parchment paper.
  • Place each ball on a lined baking tray. 
  • Once more, cover with a kitchen towel and then let them rise to 1.5x their original size.
  • Preheat your oven to 190 C / 375 F.
  • While the buns are proofing, make the topping discs.
  • Split the dough into 12 equal portions. 
  • Use your palms to shape each portion into a ball and then place it between two sheets of wax paper (or you can use two plastic sheets).
  • Roll out each portion into a flat disc. Make sure the size of the disc is smaller than the bun.
  • Carefully drape each disc onto the buns. Make sure the bottom of the topping doesn't touch the tray, it will burn!
  • Brush it with egg wash and bake at 190 C / 375 F for 15-17 minutes, until the topping is burnished yellow.
    Let the buns cool on the tray for a few minutes before transferring to a wire rack.
  • Serve warm, fresh out of the oven, and enjoy!

Egg wash

  • Whisk together the egg and milk in a small bowl.
    1 Egg, 1 tbsp Milk

Notes

  • Have all the ingredients laid out beforehand. It makes following the recipe so much simpler.
  • Use a kitchen scale to measure the pineapple bun ingredients. Baking any bread is much easier when everything is precise.
  • If your yeast doesn’t froth in 5 to 10 minutes, it means the yeast has expired, or your milk was too hot.
  • Don’t rush or skip the tangzhong. This simple flour-and-water paste is what gives the buns their cloud-like texture.
  • Make sure the size of the topping disc is smaller than the bun because the topping expands as it bakes. 
  • This recipe has been adapted from Healthy Nibbles by Lisa Lin

Nutrition

Serving: 1 ServingCalories: 362kcalCarbohydrates: 59gProtein: 8gFat: 10gSaturated Fat: 6gPolyunsaturated Fat: 1gMonounsaturated Fat: 3gTrans Fat: 0.3gCholesterol: 68mgSodium: 291mgPotassium: 124mgFiber: 2gSugar: 17gVitamin A: 341IUVitamin C: 0.2mgCalcium: 58mgIron: 3mg

Victoria Sponge Cake

February 15, 2022

Victoria Sponge Cake | Strawberry Victoria Sponge Cake Recipe

The Victoria sponge cake looks more complicated than it is, and that’s the beauty of it. It’s the simplest cake recipe but gives you the prettiest results. Loaded with fresh strawberries and a hint of lemon that act as a naturally tart counterpoint to the sweetness of mascarpone, the sponge cake has the butteriest, tenderest character.

Victoria Sponge Cake | Strawberry Victoria Sponge Cake Recipe

And, oh, did I mention you can use your favorite sponge cake recipe and any fruits that are threatening to die on you and mix them with my mascarpone filling?

Victoria Sponge Cake | Strawberry Victoria Sponge Cake Recipe

Jump to:

Victoria sponge cake recipe

Light and fluffy cake tips and FAQs

Ingredient substitutes

More easy cake recipes

Why is it called Victoria sponge cake? How is it different from sponge cake?

What’s in a name? A lot if the Victoria sponge cake is anything to go by. The name says it all. It is called so because it was invented (in the 19th century) by the cooks of Queen Victoria as the centerpiece for tea parties.

Made with butter, eggs, sugar, flour, and baking powder, it differs from other sponge cakes in the filling. True Victoria sandwich (as it is also known) has two cake layers with a fruit jam filling and a dusting of caster sugar.

Over the years, delicious variations have risen that include buttercream or whipped cream filling accompanied by fruits. 

Victoria Sponge Cake | Strawberry Victoria Sponge Cake Recipe

How to make Victoria sponge cake with mascarpone and strawberries?

As I said, the original recipe for Victoria sponge asks for jam sandwiched between two light and bubbly cake layers. The jam? Strawberry or raspberry. That’s how the Queen loved it. 

But I can never resist adding Tasha Twists to recipes. So, this Victoria sponge cake has mascarpone cheese, of which I had boxes lying around dangerously close to the expiration date. I topped the cake with fresh strawberries that I ordered from Mahabaleshwar!

Plain sponge cake for Victoria Sponge Cake | Strawberry Victoria Sponge Cake Recipe

How to bake a simple sponge cake?

  • Beat softened butter with sugar by hand until it is creamy, light, and fluffy. 
  • Now add your eggs, one at a time, beating thoroughly with each addition. 
  • Mix in vanilla extract.
  • In a separate bowl, sift flour and baking powder.
  • Gently fold the dry ingredients into the wet.
  • Grease two 8-inch cake pans and line the bottoms with parchment paper. Divide the cake batter equally into the pans.
  • Bake for 25 minutes till the sponges are golden. 
  • Let the cake cool in the pans for a bit. Then turn them out on your cooling rack. 

Making the mascarpone cream for sponge cake

  • While you wait for the sponge to cool completely, beat the mascarpone cheese, and cream with icing sugar till it’s smooth with soft peaks.
  • Add lemon zest to the frosting. 
Mascarpone Cheese Filling for Victoria Sponge Cake | Strawberry Victoria Sponge Cake Recipe
  • Now comes the fun part of assembling the sponge cake. 
  • Take one of the cakes and place it right side down. Scoop 3/4th of the filling on top of the layer and spread it. 
  • Take your strawberries (whole or halved, the choice is yours), and go to town with them on the mascarpone layer. 
  • Very carefully place the other cake on top, with the right side facing up, and press gently. Use just enough pressure that a little bit of the filling starts to peek out.
  • Spread the rest of the mascarpone filling and garnish with more strawberries.
  • Serve as dessert or with a pot of tea in the evening. 
Victoria Sponge Cake | Strawberry Victoria Sponge Cake Recipe

My tips for making the lightest and fluffiest sponge cake

  • Always sift the dry ingredients because it aerates them, making the cake crumb full of bubbly holes. 
  • If the batter feels too thick, add a tablespoon of lukewarm milk to loosen it. 
  • Make sure the batter is thoroughly mixed and has a lot of air trapped inside. Undermixing will give you a dense sponge. 
Victoria Sponge Cake | Strawberry Victoria Sponge Cake Recipe
How to check for Victoria sponge cake doneness?

Insert a toothpick or skewer in the middle to check if the Victoria sponge is cooked through. The skewer should come out clean. Another method is to tap the center of the cake with two of your fingers. If it springs back, the cake is ready. 

Can you make Victoria sponge ahead of time?

Yes, because the sponges have to be cooled through and through before you can add the filling. So, my advice is to bake the cake a day ahead and fill it on the day of. 

Can you bake a classic sponge cake in one tin?

Absolutely!

Using two tins, to begin with, merely makes it easier to assemble the sponge cake. However, you can bake the entire batter in one pan and then slice it into two layers.

Want a taller cake with thinner layers? Go ahead and divide the two layers into four.

How do you decorate a Victoria sponge cake?

Sponge cake needs no embellishment. A dusting of icing sugar is more than sufficient, but I wanted the simple tea cake to look like it got dressed up for a party.

That’s why it was bursting with juicy red berries and crowned with finely chopped pistachios (for the pop of green) and a bit of lemon zest (to balance the luscious richness of mascarpone).

Victoria Sponge Cake | Strawberry Victoria Sponge Cake Recipe

What else can you use in a Victoria sponge cake?

Eggless or vegan options: You can use flax eggs if you want an egg substitute. To make the filling vegan, try dairy-free mascarpone. Since it’s not available in India ( to the best of my knowledge), and if you live here, use chilled coconut cream instead. Beat it with icing sugar and follow the rest of the recipe as-is. 

Just make sure you chill the coconut cream can overnight. The next day, don’t shake it. Scoop out only the thick part, and you’ll get the loveliest, creamiest sponge filling. 

Lemon zest: It’s optional in both the cake batter and the filling. I adore the citrus taste counterbalancing the sweet-tart flavor of strawberries. So, choose to include it. Want to give the cake more of a bracing punch? Whisk in lemon juice in the batter.

Filling: Don’t have mascarpone? Regular whipped cream will work gorgeously. Or you can go the easy route and spread any jam your taste buds desire, like mulberry, and orange.

Fruit: Strawberry is the traditional choice with Victoria sponge cake, but don’t let that stop you. Whatever fruit is in season and catches your fancy, make use of it. Grapes, mangoes, raspberries, everything works like a charm.

Victoria Sponge Cake | Strawberry Victoria Sponge Cake Recipe

More light, easy, everyday cake recipes

Coconut Cardamom Cake

Coffee Banana Cake

Strawberry Jam Cake

Orange Marmalade Cake

Rosemary Lemon Olive Oil Cake

Victoria Sponge Cake | Strawberry Victoria Sponge Cake Recipe

📖 Recipe

Tried this recipe?Let us know how it was!
Victoria Sponge Cake | Strawberry Victoria Sponge Cake Recipe

Victoria Sponge Cake

Natasha Minocha
Victoria Sponge Cake - It’s the simplest cake recipe but gives you the prettiest results. Loaded with fresh strawberries and a hint of lemon that act as a naturally tart counterpoint to the sweetness of mascarpone, the sponge cake has the butteriest, tenderest character.
No ratings yet
Print Recipe Pin Recipe
Prep Time 25 minutes mins
Cook Time 25 minutes mins
Course Dessert
Cuisine British
Servings 10 Servings
Calories 507 kcal

Ingredients


Victoria Sponge Cake

  • 1 cup Butter, softened
  • 3/4 cup Raw sugar You can also use regular white sugar
  • 3 Eggs
  • 1.5 tsp Vanilla extract
  • 1 3/4 cup All-purpose flour
  • 2 tsp Baking powder
  • 1/4 tsp Salt, if using unsalted butter
  • 2-3 tbsp Milk, warm
  • Zest of 1 lemon

Mascarpone Cheese Filling

  • 1 1/4 cup Mascarpone cheese
  • 1/4 cup Cream
  • 1/2 cup Icing sugar
  • 2 tsp Lemon zest
  • 1 cup Strawberries, chopped Plus extra for decorating the top

Instructions
 

  • Preheat your oven to 180C. Grease 2 8" pans very well. Line the bottom of the cake tins with parchment paper.
  • Sift together the flour and baking powder in a bowl.
  • In another large bowl, beat together the butter and sugar until light and fluffy.
  • Add the eggs, one at a time, beating well after every addition.
  • Whisk in the vanilla extract and lemon zest.
  • Fold in the dry ingredients until no white streaks are visible.
  • If your batter is too thick, add warm milk, 1 tbsp at a time, until you get a thick, smooth batter.
  • Divide the batter equally between the 2 prepared pans.
  • Bake at 180C for 20-25 minutes or until a skewer inserted in the center comes out clean.
  • Let the cakes cool n the pans for a few minutes before turning them out on a cooling rack.

Mascarpone Cheese Filling

  • Beat together the mascarpone cheese, cream, and icing sugar in a medium - sized bowl until soft peaks form.
  • Taste and adjust for sweetness. Fold in lemon zest.

Cake Assembly

  • Once the cakes have cooled completely, place one cake right side down on a serving platter.
  • Spread about 3/4 of the filling on top of the cake. Arrange the chopped strawberries on top.
  • Place the second cake, right side up on top of the strawberries.
  • Spread the balance filling on top. Decorate with more strawberries.
  • Sprinkle some chopped pistachio and lemon zest. This is optional.
  • Slice and serve. Enjoy!

Nutrition

Serving: 1 ServingCalories: 507kcalCarbohydrates: 41gProtein: 7gFat: 35gSaturated Fat: 22gPolyunsaturated Fat: 1gMonounsaturated Fat: 6gTrans Fat: 1gCholesterol: 134mgSodium: 329mgPotassium: 87mgFiber: 1gSugar: 22gVitamin A: 1142IUVitamin C: 9mgCalcium: 115mgIron: 1mg
Victoria Sponge Cake | Strawberry Victoria Sponge Cake Recipe

Strawberry Tiramisu

February 14, 2022

Strawberry Tiramisu | Eggless Alcohol-free Strawberry Tiramisu Recipe

The strawberry tiramisu is a big glass of love, more or less. More for someone like me who is irrevocably fond of strawberries. The dessert is balanced to perfection, with vanilla-scented delicate, velvety mascarpone, strawberry-soaked ladyfinger cookies, and sweet juicy strawberries - all in a cup!

Strawberry Tiramisu served in 4 dessert glasses topped with fresh strawberries.

It's not cloyingly sweet or too rich. I know classic tiramisu calls for coffee, but with this recipe, I stay true to the Italian expression tirami sù, or as we’d say it in English, "pick me up."

It’s reminiscent of the blooming spring. And with the cold still clinging to us, it’s lovely to have something so light, bright, and upbeat. The feel-good factor is off the charts.

tiramisu in 4 dessert glasses topped with fresh strawberries and chocolate shavings.
[feast_advanced_jump_to]

Why You'll Love This Recipe

This eggless, alcohol-free tiramisu is so easy to make. No baking is needed, just whisking and layering!

A great make-ahead dessert that EVERYONE loves!

Sunnier, brighter take on the classic tiramisu. Think of it as a light pudding with all the tiramisu feels!

You can easily halve or double the recipe depending on the number of people you're serving it to.

Recipe Ingredients

Ingredients for making Strawberry Tiramisu.

Strawberry puree: I made it fresh by blending strawberries, sugar, and water. You can also use homemade strawberry syrup as I did for my Korean strawberry milk.

Ladyfingers: I used store-bought because it saves time and they’re easily available. You can make them at home or use pound cake, sponge cake, or even homemade rusk instead.

Mascarpone cheese: This rich, velvety Italian cheese is the best for making tiramisu. Make sure it's at room temperature so it blends quickly and well. You can use softened cream cheese as a substitute.

Cream: I used 25% fat cream for this recipe. You can use heavy cream as well.

Sugar: Powdered sugar, also known as icing sugar works the best for this recipe.

See the recipe card below for full information on ingredients and quantities.

Variations

Vanilla: I love the depth and dimension vanilla brings out in the tiramisu. You can use vanilla extract instead of bean paste. I prefer the latter because I find the tiny vanilla specks shining through the cream stunning.

Another substitute for vanilla is lemon or orange zest. Pairing strawberries with any citrus tang doesn’t even require an explanation. The aromatics bring a wonderful lightness to the dessert. 

More fruit: Top each layer of tiramisu with more fresh strawberries!

How To Make Strawberry Tiramisu

Step 1: Make the strawberry puree. Combine the strawberries, sugar, and water in a blender. Blend until you get a smooth puree. Taste and adjust for sweetness.

Step 2: Make the mascarpone filling. Combine the mascarpone cheese, cream, icing sugar, and vanilla bean paste in a bowl. Beat them together, using an electric beater, until thick and creamy.

Step 3: Assemble the strawberry tiramisu.

layers of strawberry soaked ladyfinger cookies with mascarpone cheese in a dessert glass.
  • Start by dunking the ladyfingers into the purée. Then arrange it on the bottom of the glass.
  • Because I made individual portions of the tiramisu in wine glasses, I had to break my ladyfingers into pieces. If you’re using glasses too, divide each into 2 to 3 parts so they fit easily. 
  • Plop a spoonful of purée on top of the ladyfinger base and follow it with a dollop of the mascarpone mixture. 
  • Repeat the layers one more time, cover, and then refrigerate for at least 4 hours. Good tiramisu needs to be chilled to give the flavors time to meld and develop.
  • Right before you serve, feel free to top with fresh strawberries and chocolate shavings.
Assembled strawberry tiramisu with layers of mascarpone cheese and strawberry soaked ladyfingers in a glass.

Top Tips

  • To avoid soggy cookies, give the cookies a quick dip in the strawberry puree.
  • The sweetness of your strawberry puree depends on how sweet or tart your strawberries are. If they’re tart, add more sugar. If they’re sweet, use less.
  • We’re not looking for a thick purée here. That’s why we’re adding water to thin it down. 
  • Make sure your mascarpone cheese is at room temperature. That helps in making a smoother mixture faster and more easily.
  • Allow the tiramisu to chill in the refrigerator for at least 4 hours.
4 dessert glasses of strawberry tiramisu on a wooden board with silver spoons and white flowers.

Recipe FAQs

Can you make strawberry tiramisu with alcohol?

Some say the original tiramisu didn’t have any alcohol. Others say it had a drop of Marsala wine. I say, pander to your palate. Spike it with prosecco, rum, brandy, or even strawberry or orange liqueur. 
Lace the strawberry purée with the alcohol of your choice and pour a spoonful in the mascarpone cheese. Or keep the tiramisu alcohol-free, as I did. 

Do I have to serve strawberry tiramisu in a glass?

Serving them in wine glasses was a completely personal choice for me. If you’re feeling inspired, try any dessert glass or make it in a regular serving dish, as I have with my chai tiramisu and lemon tiramisu.

Can I make the strawberry tiramisu ahead of time?

Yes! Tiramisu is always better when made ahead as the flavors get time to meld together well. You can make this in advance and refrigerate for up to 1 day.

Strawberry tiramisu in a glass with a bite taken with a spoon on a wooden board.

More Easy Tiramisu Recipes

  • Easy Biscoff Tiramisu
    Easy Biscoff Tiramisu
  • Easy Lemon Tiramisu Recipe
    Easy Lemon Tiramisu Recipe
  • masala chai tiramisu in a blue dish with chai masala and other spices around.
    Masala Chai Tiramisu
  • Easy Tiramisu Recipe
    Easy Tiramisu Recipe

Half the joy of cooking is sharing it with others. That’s why I’m always eager to hear from you. So go right ahead & drop a comment or reach out on Instagram, Pinterest, YouTube, or Facebook. I hope you love this strawberry tiramisu as much as we do!

📖 Recipe

Tried this recipe?Let us know how it was!
Strawberry Tiramisu | Eggless Alcohol-free Strawberry Tiramisu Recipe

Strawberry Tiramisu

Natasha Minocha
Strawberry Tiramisu - The dessert is balanced to perfection, with vanilla-scented delicate, velvety mascarpone, strawberry-soaked ladyfinger cookies, and sweet juicy strawberries - all in a cup!
No ratings yet
Print Recipe Pin Recipe
Prep Time 30 minutes mins
Chilling Time 4 hours hrs
Total Time 4 hours hrs 30 minutes mins
Course Dessert
Cuisine Italian
Servings 8 Servings
Calories 301 kcal

Ingredients


  • 16 Ladyfinger cookies

Strawberry Puree

  • 1.5 cup Strawberries
  • 2-3 tbsp Sugar
  • 1/2 cup Water

Mascarpone Mixture

  • 1 cup Mascarpone cheese
  • 1/2 cup Cream
  • 1/3 cup Icing sugar
  • 1/2 tsp Vanilla bean paste
  • Fresh strawberries and Chocolate shavings for topping

Instructions
 

  • Keep 8 dessert glasses/bowls handy.

Strawberry Puree

  • Combine the strawberries, sugar, and water in a blender. Blend until you get a smooth puree. Taste and adjust for sweetness.

Mascarpone Mixture

  • Combine the mascarpone cheese, cream, icing sugar, and vanilla bean paste in a bowl.
  • Beat them together, using an electric beater, until thick and creamy.

Assembly

  • Dip a ladyfinger cookie in the strawberry puree. Place it at the bottom of the serving glass. you may need to break it into 2-3 pieces to make it fit.
  • Add 1-2 tsp of the puree on top.
  • Add a heaped tablespoon of the cheese mixture. You may need to add more, depending on the glass you are using.
  • Add one more layer of cookie, puree, and then cheese mixture. Add a little bit of the puree on top of the last cheese layer.
  • Repeat for all the dessert glasses.
  • Refrigerate for at least 4 hours.
  • Top with fresh strawberries and chocolate shavings before serving. Enjoy!

Notes

    • To avoid soggy cookies, give the cookies a quick dip in the strawberry puree.
    • The sweetness of your strawberry puree depends on how sweet or tart your strawberries are. If they’re tart, add more sugar. If they’re sweet, use less.
    • We’re not looking for a thick purée here. That’s why we’re adding water to thin it down. 
    • Make sure your mascarpone cheese is at room temperature. That helps in making a smoother mixture faster and more easily.
    • Allow the tiramisu to chill in the refrigerator for at least 4 hours.

Nutrition

Serving: 1 ServingCalories: 301kcalCarbohydrates: 24gProtein: 5gFat: 20gSaturated Fat: 12gPolyunsaturated Fat: 1gMonounsaturated Fat: 2gCholesterol: 94mgSodium: 53mgPotassium: 81mgFiber: 1gSugar: 10gVitamin A: 747IUVitamin C: 16mgCalcium: 65mgIron: 1mg


Strawberry Cream Cheese Pound Cake

February 11, 2022

Strawberry Cream Cheese Pound Cake | Eggless Strawberry Cream Cheese Cake

The strawberry cream cheese pound cake is pure pleasure in a bite! The buttery pound cake is packed with luscious, juicy strawberries and tiny chocolate chips. Totally irresistible!

Strawberry Pound Cake on a cake stand with strawberries and chocolate chips in the background.

The cream cheese makes it heftier. Think somewhere between the heavenly road from cheesecake to pound cake. 

All in all, the comes out richly flavored yet not too heavy. Believe me, the creaminess and tanginess make it the best everyday cake you’ll ever have. By far. 

If you enjoy baking with fresh strawberries, you'll love my strawberry turnovers, easy strawberry banana muffins, and this light and fresh strawberry lemon bundt cake!

[feast_advanced_jump_to]

Why You'll Love This Recipe

We are using simple, pantry ingredients for this recipe.

This eggless cake just a few minutes to prepare.

Rich, buttery cake with loads of strawberries and yummy bits of chocolate.

Perfectly moist and tender.

It's such a pretty cake, it needs no frosting!

Perfect for dessert and with your evening cuppa!

strawberry cake on a cake stand with one slice on a cake server to show the texture.

Recipe Ingredients

Flour: All-purpose or "plain" flour is the best for this recipe. It will give you a lovely, tender crumb.

Buttermilk: For making the cake soft and moist. You can use store-bought or homemade as I did by combining coconut milk and vinegar. You can use any milk you prefer.

Leavening agents: Because this is an eggless pound cake, we are adding baking soda and baking powder to the batter. This helps in giving the cake a nice rise and texture.

Cream cheese: You can use store-bought full-fat cream cheese or homemade cream cheese. Both will work well here.

Butter: This adds richness and flavor. Salted butter works well, but if you use unsalted butter, please add 1/8 teaspoon of salt to the dry ingredients.

Sugar: I used raw sugar, but feel free to use caster sugar or granulated sugar.

Strawberries: Fresh or frozen, both will work well in this cream cheese pound cake.

Chocolate chips: I used mini chocolate chips for extra oomph! But they are optional, you can easily leave them out if you wish.

See the recipe card for full information on ingredients and quantities.

How To Make Strawberry Cream Cheese Pound Cake

A riff off of my simple cream cheese pound cake, this recipe is an ode to my love for strawberries, which is real and endless. If you want to make full use of the seasonal fruit, this is the perfect place to start.

Step 1: Grease your bundt pan very very well and preheat your oven.

Step 2: Make the buttermilk by mixing the coconut milk and vinegar. Set aside for a few moments.

Step 3: Sift all-purpose flour, baking powder, baking soda, and salt. Stir in raw sugar.

Step 4: In another bowl, using an electric beater, cream butter, and cream cheese till light and fluffy. This will take 2-3 minutes.

Steps for making Strawberry Cream Cheese Pound Cake.

Step 5: Add in the curdled milk along with vanilla extract.

Step 6: Add the dry ingredients to it to form a thick, smooth batter. Fold in the strawberries and mini chocolate chips.

Step 7: Pour the batter into the prepared bundt pan and bake for 45-50 minutes or until a skewer inserted in the thickest part of the cake comes out clean.

Step 8: Allow to cool in the pan for 20-25 minutes before turning it out on a cooling rack. Sprinkle with powdered sugar and enjoy!

Strawberry Cream Cheese Pound Cake  on a cake stand.

Top Tips

  • You can use storebought buttermilk or make your own as I did, by combining milk and vinegar in a bowl. Allow it to sit for a few minutes, then use the curdled milk as buttermilk.
  • Don't overmix the dry and wet ingredients. Mix them just enough so there are no visible dry flour streaks in the batter.
  • Toss the strawberries and chocolate chips with 1 or 2 teaspoons of flour. This will prevent them from sinking to the bottom of the cake.
  • You can use frozen strawberries in this recipe.
  • Please grease your Bundt pan very very well. I like to use my hands to make sure all the nooks and crannies of the pan get buttered well.
  • Allow the cake to cool in the pan for 20 -25 minutes before turning it out on a cooling rack.

How To Serve

Studded with juicy, red strawberry bits and chocolate chips, the cake is delicious and gorgeous as-is.  

Or you could jewel it up with some icing sugar or powdered sugar, as I did, or give it a heftier texture with a quick glaze. Think dark chocolate drizzle dripping down the sides or strawberry icing crowing the top. It’s totally up to you. 

Powdered sugar getting sprinkled on cream cheese pound cake on a cake stand.

More Cream Cheese Recipes

  • Chocolate Cream Cheese Muffins | Eggless Chocolate Cream Cheese Muffins
    Chocolate Cream Cheese Muffins
  • Cream Cheese Swirl Banana Bread | Easy Banana Bread with Cream Cheese
    Cream Cheese Swirl Banana Bread
  • Cream Cheese Pound Cake | Eggless Cream Cheese Pound Cake Recipe
    Cream Cheese Pound Cake
  • Cheesecake Swirl Brownie
    Cheesecake Swirl Brownie

Half the joy of cooking is sharing it with others. That’s why I’m always eager to hear from you. So go right ahead and drop a comment or reach out on Instagram, Pinterest, YouTube, or Facebook. I hope you love this strawberry cream cheese pound cake as much as we do!

📖 Recipe

Tried this recipe?Let us know how it was!
Strawberry Cream Cheese Pound Cake | Eggless Strawberry Cream Cheese Cake

Strawberry Cream Cheese Pound Cake

Natasha Minocha
The strawberry cream cheese pound cake is pure pleasure in a bite. The buttery pound cake is packed with luscious, juicy strawberries and tiny chocolate chips. Totally irresistible!
No ratings yet
Print Recipe Pin Recipe
Prep Time 25 minutes mins
Cook Time 45 minutes mins
Course Dessert
Cuisine American
Servings 10 Servings
Calories 368 kcal

Ingredients


  • 1 cup Coconut milk
  • 1.5 tbsp White vinegar
  • 2.5 cup All-purpose flour
  • 2 tsp Baking powder
  • 1/2 tsp Baking soda
  • 1/4 tsp Salt If using unsalted butter
  • 2/3 cup Raw sugar You can use regular white sugar
  • 2/3 cup Cream cheese, softened
  • 1/2 cup Butter, softened I used salted butter
  • 1 tsp Vanilla extract
  • 1.5 cup Strawberries, chopped
  • 1/2 cup Mini chocolate chips Optional
  • 2 tsp All-purpose flour

Instructions
 

  • Preheat your oven to 180C. Grease your bundt pan very very well. You can also use an 8" or 9" round cake tin.
  • In a small bowl, mix the coconut milk and vinegar. Set aside for a few moments.
  • While the milk curdles, sift all-purpose flour, baking powder, baking soda, and salt.
  • Stir in raw sugar.
  • In another bowl, using an electric beater, cream butter, and cream cheese till light and fluffy. This will take 2-3 minutes.
  • Add in the curdled milk along with vanilla extract.
  • Add the dry ingredients to it to form a thick, smooth batter.
  • Toss the strawberries and mini chocolate chips with 2 teaspoons of flour. Fold them into the batter gently.
  • Pour the batter into the prepared bundt pan and bake at 180 C for 45-50 minutes or until a skewer inserted in the thickest part of the cake comes out clean.
  • Allow to cool in the pan for 20-25 minutes before turning it out on a cooling rack.
  • Sprinkle with icing sugar and serve. Enjoy!
  • You can store the leftover cake ( covered well) in the refrigerator.

Notes

  • You can use storebought buttermilk or make your own as I did, by combining milk and vinegar in a bowl. Allow it to sit for a few minutes, then use the curdled milk as buttermilk.
  • Don't overmix the dry and wet ingredients. Mix them just enough so there are no visible dry flour streaks in the batter.
  • Toss the strawberries and chocolate chips with 1 or 2 teaspoons of flour. This will prevent them from sinking to the bottom of the cake.
  • You can use frozen strawberries in this recipe.
  • Please grease your Bundt pan very very well. I like to use my hands to make sure all the nooks and crannies of the pan get buttered well.
  • Allow the cake to cool in the pan for 20 -25 minutes before turning it out on a cooling rack.

Nutrition

Serving: 1 ServingCalories: 368kcalCarbohydrates: 48gProtein: 7gFat: 17gSaturated Fat: 12gPolyunsaturated Fat: 1gMonounsaturated Fat: 3gTrans Fat: 0.4gCholesterol: 28mgSodium: 390mgPotassium: 168mgFiber: 2gSugar: 21gVitamin A: 320IUVitamin C: 13mgCalcium: 128mgIron: 3mg

Peanut Butter Stuffed Dates

February 8, 2022

Peanut butter stuffed dates dipped in chocolate and topped with pistachios on a plate.

These peanut butter-stuffed dates are my go-to whenever I'm craving something sweet, satisfying, and super easy! They are sweet-salty, gooey, creamy, and need just 3 ingredients and come together in a few minutes!

Peanut Butter Stuffed Dates on a plate.

These peanut butter stuffed dates are so so easy that you don't even need a recipe! But you've got to try them just once, and you'll always want a batch in your fridge! They are great for snacking, for a quick dessert, or a little pick-me-up in your lunchbox.

If you love easy, wholesome snacks like this, be sure to check out my no-bake chocolate peanut butter cookies, almond butter cups, coconut almond bliss balls, and my very popular homemade granola bars!

[feast_advanced_jump_to]
Peanut butter stuffed dates with chocolate and nuts on a plate.

Why You'll Love This Recipe

✨Ridiculously easy to make, and you need just 3 ingredients!

✨A wholesome treat with no added sugar. The rich, caramel-like sweetness of dates is more than enough!

✨This recipe is so versatile! Use any nut butter, dip in chocolate, top with sea salt, nuts, toasted coconut, or anything you are craving!

✨Great for anytime snacking or dessert!

✨Great for meal prep! Make a bunch of these and store them in an air-tight container in the refrigerator for the week.

Recipe Ingredients

Ingredients for making Peanut Butter Stuffed Dates.

Peanut butter: Creamy, crunchy, sweetened, unsweetened, choose whichever peanut butter you prefer. I leave that decision between you and your palate. However, find the very best quality peanut butter you can. 

It’s very, very important because when a recipe has so few ingredients, they really need to shine. Homemade is best, but a good store-bought one works fabulously.

For those with peanut allergies: try almond or cashew butter. Even seed butter like sunflower makes an ace choice. Or try tahini!

Chocolate: Dipping the stuffed dates is not a mandatory step, but I will say this. Once you see those chocolate-covered dates, they will test your willpower mercilessly. Want to make the snack extra, extra decadent? Go for the full dip instead of half. 🙂

Toppings: Like chocolate, they are optional. Don’t like pistachios? Pick any nut you prefer. Don’t want to give the dates a crunch? Dust them with sea salt. For a pop of color, use pomegranate arils. Or just leave them plain.

See the recipe card for full information on ingredients and quantities. 

How To Make Peanut Butter-Stuffed Dates

Recipe Video

Step-By-Step Instructions

With stuffed dates, we’re looking at a healthy recipe that’s also indulgent and the kind of dessert (or snack) that takes no effort. If you have kids, make it a fun family affair with different stations set up to pit, fill, and dip the dates. 

  • Cut a slit on the dates lengthwise to split them open and remove the pit. 
  • Stuff the open pocket with peanut butter using a small teaspoon.
  • Then, with your fingers, gently squeeze the two halves of the date so they stick together.
dates stuffed with peanut butter on a plate.

You can stop right now and pop the stuffed date into your mouth as the most nutritious snack. Or you could spend 5 more minutes loading up the gooey treats with dark chocolate decadence. 

  • Melt your dark chocolate.
  • Dip the stuffed dates in the melted chocolate, halfway or fully.

Again, you can stop right here and enjoy these chocolate-covered dates. Or you could sprinkle a topping of your choice. I went with finely chopped pistachios and toasted sesame seeds. 

Stuffed dates dipped in chocolate and topped with pistachios and sesame seeds on a plate.

Pro Tips

  • Use soft fresh dates as they are moist and easier to stuff.
  • If your dates are soft, you can open them with your hands to fill with the peanut butter. If they’re harder, use a butter knife. 
  • For very sticky dates, the trick is to refrigerate for a bit. It makes them easier to handle.
  • Use softened peanut butter for the filling. It will be easier to fill and less messy.
  • Pop the chocolate-dipped dates in the refrigerator for a few minutes so the chocolate can set quickly.
  • Store these peanut butter dates in the refrigerator in an air-tight container for up to 1 week.
Stuffed dates on a plate with one date cut in half to show the inside.

More Recipes With Dates

  • fig smoothie with dates in a glass with sliced fig.
    Fig Smoothie With Dates
  • Date and nut rolls | Vegan Date and nut rolls | khajur rolls
    Date and Nut Rolls
  • Almond Date Granola | Easy Breakfast Recipe
    Almond Date Granola
  • Date & Cinnamon Chia Pudding | Easy Vegan Chia Pudding Recipe
    Date & Cinnamon Chia Pudding

Half the joy of cooking is sharing it with others. That’s why I’m always eager to hear from you. So go right ahead & drop a comment or reach out on Instagram, Pinterest, YouTube, or Facebook. I hope you love these peanut butter-stuffed dates as much as we do!

📖 Recipe

Tried this recipe?Let us know how it was!
Peanut butter stuffed dates dipped in chocolate and topped with pistachios on a plate.

Peanut Butter Stuffed Dates

Natasha Minocha
Peanut Butter Stuffed Dates -The delicious, healthy snack made with the addictive combination of just 3 ingredients—caramel-tinged dates, gooey peanut butter, and deep, rich chocolate!
No ratings yet
Print Recipe Pin Recipe
Prep Time 15 minutes mins
Total Time 12 minutes mins
Course Dessert, Snack
Cuisine American, Middle Eastern
Servings 15 Dates
Calories 66 kcal

Ingredients
  

  • 15 Dates
  • 4 tbsp Peanut butter
  • 4 tbsp Dark chocolate 70%
  • Toasted sesame seeds and finely chopped pistachios for topping

Instructions
 

  • Carefully cut each date lengthways and remove the pits.
  • Add half a teaspoon of peanut butter into each date. Lightly press the dates to help the filling adhere well.
  • You can place the dates in the refrigerator for a few minutes to help it set better.
  • Melt the dark chocolate. Dip each date halfway into the melted chocolate.
  • Sprinkle the toppings on the dates and let them set for a few minutes.
  • Eat immediately. Store in an air-tight container in the refrigerator. Enjoy!

Video

Notes

  • Use soft fresh dates as they are moist and easier to stuff.
  • If your dates are soft, you can open them with your hands to fill with the peanut butter. If they’re harder, use a butter knife. 
  • For very sticky dates, the trick is to refrigerate for a bit. It makes them easier to handle.
  • Use softened peanut butter for the filling. It will be easier to fill and less messy.
  • Pop the chocolate-dipped dates in the refrigerator for a few minutes so the chocolate can set quickly.
  • Store these peanut butter dates in the refrigerator in an air-tight container for up to 1 week.

Nutrition

Serving: 1 ServingCalories: 66kcalCarbohydrates: 8gProtein: 1gFat: 4gSaturated Fat: 1gPolyunsaturated Fat: 1gMonounsaturated Fat: 2gSodium: 19mgPotassium: 70mgFiber: 1gSugar: 6gVitamin A: 1IUVitamin C: 0.03mgCalcium: 5mgIron: 0.1mg

Chocolate Orange Chia Pudding

February 3, 2022

Chocolate Orange Chia Pudding | Healthy Chocolate Orange Chia Pudding Recipe

After a year of hiatus from chia puddings and almost a month from the blog, I’m back with a chocolate orange chia pudding recipe. It’s exactly the treat I needed after weeks of recovery from COVID-19. Thick and luscious, the delicious treat is rich and decadent without being heavy.

...

Read More

Strawberry Swirl Cheesecake

January 27, 2022

Strawberry Swirl Cheesecake | Baked strawberry cheesecake recipe

Supremely creamy, tangy, and rich, this gorgeous strawberry swirl cheesecake is full of irresistible fresh strawberry flavor! Serve with fresh strawberry sauce for an extra dose of deliciousness!

Strawberry cheesecake on a serving plate with strawberry sauce and strawberries on the side.

My love affair with cheesecakes is never-ending, but it's been a minute since I went on a date with one. With strawberries in season, I decided it was the best time to bake one with real strawberries!

Generally, the star of cheesecake is cream cheese. However, the fruit and the cream cheese play a dual role here. The richness and tanginess of the cheese are exquisitely counterbalanced by the big, bright burst of sweetness in every fruity bite! Try my strawberry cream cheese rolls for another take on this lovely combo!

If you enjoy cheesecakes with fresh fruits, you'll love my peach cheesecake, fresh cherry cheesecake, and this amazing baked ricotta mango cheesecake!

[feast_advanced_jump_to]

Why You'll Love This Recipe

This strawberry swirl cheesecake is a showstopper! The swirls on top and in the cheesecake look absolutely gorgeous!

This cheesecake uses REAL fresh strawberry sauce in the filling! Not just as a topping!

The filling has a super creamy and rich texture with the strawberries adding a refreshing balance of flavors and a buttery crispy cookie crust.

The strawberry sauce is great for so many recipes! Use it as a topping for crepes, pancakes, or ice cream, or swirl it in any cake batter.

The strawberry cheesecake recipe is simple to follow and needs no water bath!

A slice of strawberry swirl cheesecake on a plate topped with strawberry sauce.

Recipe Ingredients

Strawberries: Fresh or frozen strawberries will work here. The sweeter the berries, the less sugar you will need to add to the sauce. So I recommend taste-testing your strawberries!

Cream cheese: Use full-fat cream cheese for the best results. Store-bought or homemade cream cheese will work well. Make sure the cheese is at room temperature.

Cream: I used 25% fat cream in this recipe. You can use heavy cream for a richer consistency.

Eggs: They add structure and ensure the cheesecake sets properly. Please make sure the eggs are at room temperature.

Sugar: Regular granulated or caster sugar can be used here.

Flour: I use a small quantity of all-purpose flour in the filling to bind the moisture in the cheesecake. You can use cornstarch instead.

Cheesecake crust: I like to use crushed Marie biscuits for the crust, mixed with melted butter. Feel free to use Digestives or Graham Crackers instead.

See the recipe card for full information on ingredients and quantities.

How To Make Strawberry Swirl Cheesecake

Step 1: Make the strawberry sauce.

  • Blend the fresh strawberries with sugar, cornstarch (to thicken the sauce), and 2 or 3 tablespoons of water till you have a smooth purée.
  • Cook the purée on medium to low heat till it's nice, thick, and luscious. This takes about 15 to 20 minutes. 
  • Let it cool before incorporating it into the cake batter. 
  • Any leftover strawberry sauce can be stored in a jar or air-tight container in the refrigerator for up to 2 weeks. 
Fresh Strawberry Sauce in a glass jar.

Step 2: Make the crust.

  • Crush your Marie biscuits in the food processor. 
  • Pulse them again with melted butter till they have the consistency of wet sand. 
  • Pat this mixture down on the bottom of the springform pan. Make sure it’s an even layer and packed tightly. 
  • Bake for 10 minutes. 
Baked crust for Strawberry cheesecake in a round cake pan on a cooling rack.

Step 3: Make the cream cheese filling. 

  • Beat your cream cheese with sugar.
  • Then, one at a time, add your eggs. Move on to the next egg only after the first is completely incorporated into the cream.
  • Mix in vanilla extract, cream, and all-purpose flour until well combined, and you have a luscious batter. 
Strawberry sauce on top of the cheesecake batter in a round cake pan.

Step 4: Assemble the cheesecake.

  • Pour the cream cheese filling and the strawberry sauce alternatively on top of the baked crust.
  • Start with the cream cheese filling and make sure you leave a portion of strawberry sauce to serve as an aside.
  • With a knife, a wooden skewer, or the back end of a spoon, create swirls so the strawberry sauce and cheese filling take on a marbled effect. 
Strawberry sauce swirls on top of the cheesecake batter in a cake pan.

Step 5: Bake the strawberry cheesecake.

  • Bake the cake at 160 °C. 
  • Once baked, prop open the oven door and let the cake cool inside for at least 20 minutes.
  • Transfer to the counter and then to the fridge to chill overnight. 
Baked strawberry cheesecake in a round cake pan on a cooling rack.

Pro Tips

  • For the best creamy texture, don’t overbeat the batter. This will aerate the filling. Mix with a gentle hand.
  • Make sure all the ingredients are at room temperature.
  • Bake the strawberry cheesecake at a low temperature. Long and slow baking prevents the cheesecake from cracking.
  • Bake until the center of the cheesecake is slightly wobbly. Overbaking will make it dry.
  • Allow the cake to cool in the oven for at least 20 minutes with the oven door slightly ajar. This also ensures the cheesecake won't crack.
  • Make the cheesecake a day ahead so you can refrigerate them for 8 hours at least. It helps the cake set and enhances the texture to an addictive degree. 
Strawberry cheesecake on a platter with a slice taken out to show the texture.

Strawberry Cheesecake Recipe FAQs

How do I prevent my cheesecake from cracking?

- Make sure every ingredient, from the eggs to the cream cheese, is at room temperature. This is a must.
- After you bake the crust, lower the temperature of the oven. Bake cheesecake at low temperature as mentioned in the recipe.
- Keep the oven door partially open when the cheesecake is done. It allows heat to escape slowly, making sure the cake doesn’t crack.

What is the best way to bring eggs to room temperature quickly?

If you’ve taken the eggs out of the fridge at the last minute and are in a hurry to bake the cake, put them in a bowl of warm water. Leave them for a few minutes, and it’ll take away the chill. 

How can I soften cream cheese to room temperature quickly?

Use a double boiler to soften the cream cheese. Scoop it into your mixing bowl and then place it over a container with simmering water. In 2 to 3 minutes, the cream cheese will reach room temperature. Make sure, you don’t melt it in the process. 

More Cheesecake Recipes You'll Love

  • Biscoff cheesecake on a serving platter.
    The Perfect Biscoff Cheesecake Recipe (Lotus Cheesecake)
  • Pumpkin Swirl Cheesecake Bars Recipe
    Pumpkin Swirl Cheesecake Bars Recipe
  • Orange Basque Cheesecake
    Orange Basque Cheesecake
  • Lemon Cheesecake | Easy Lemon Cheesecake Recipe
    Lemon Cheesecake

Half the joy of cooking is sharing it with others. That’s why I’m always eager to hear from you. So go right ahead & drop a comment or reach out on Instagram, Pinterest, YouTube, or Facebook. I hope you love this strawberry swirl cheesecake as much as we do!

📖 Recipe

Tried this recipe?Let us know how it was!
Strawberry Swirl Cheesecake | Baked strawberry cheesecake recipe

Strawberry Swirl Cheesecake

Natasha Minocha
Supremely creamy, tangy, and rich, this gorgeous strawberry swirl cheesecake is full of irresistible fresh strawberry flavor! Serve with fresh strawberry sauce for an extra dose of deliciousness!
5 from 1 vote
Print Recipe Pin Recipe
Prep Time 40 minutes mins
Cook Time 1 hour hr
Chilling Time 1 day d
Course Dessert
Cuisine American
Servings 10 Servings
Calories 417 kcal

Ingredients


Strawberry Sauce

  • 1 1/2 cup Strawberries, roughly chopped
  • 2 tsp Cornstarch
  • 2 tbsp Sugar You can add more or less depending on the sweetness of your berries
  • 2-3 tbsp Water

Cheesecake Crust

  • 1.5 cup Marie biscuits, crushed
  • 1/2 cup Butter, melted

Cheesecake Filling

  • 2 cup Cream cheese
  • 3/4 cup Sugar
  • 3 Eggs
  • 1/4 cup Cream
  • 1/4 cup All-purpose flour
  • 1.5 tsp Vanilla extract

Instructions
 

Strawberry Sauce

  • Blend the fresh strawberries with sugar, cornstarch, 2 or 3 tablespoons of water till you have a smooth purée.
  • Cook the purée on medium heat till it's nice, thick, and luscious. Do give it a stir every few minutes. This takes about 15 to 20 minutes. Let the sauce cool.
  • Any leftover strawberry sauce can be jarred and kept for a couple of weeks in the refrigerator. 

Cheesecake Crust

  • Preheat your oven to 180C. Keep a springform 8" pan handy.
  • Combine the melted butter and crushed cookies in a small bowl. This mixture should have the consistency of wet sand.
  • Press it down evenly at the bottom of the pan. Bake for at 180 C for 10 minutes. Lower the oven temperature to 160C while you're preparing for the filling.

Cheesecake Filling

  • Beat the cream cheese and sugar in a large bowl with an electric mixer.
  • Add the eggs, one at a time.
  • Mix in the cream, flour, and vanilla extract. Whisk well until smooth.
  • Pour half of the cheesecake batter over the prepared crust. Add a third of the cooled strawberry sauce on top.
  • Cover the strawberry layer with the remaining cheesecake batter.
  • Drop small spoonfuls of the strawberry sauce on top and using a skewer, create swirls.
  • Carefully place the pan in the oven and bake for 50-55 minutes at 160C or until the center feels just a bit wobbly to touch.
  • Turn off the heat and slightly crack the oven door open and allow it to cool for 30 minutes.
  • Transfer to the counter and then to the fridge to chill overnight. 
  • Remove carefully from the pan, place it on your serving plate. Serve with strawberry sauce on the side. Enjoy!

Notes

  • For the best creamy texture, don’t overbeat the batter. This will aerate the filling. Mix with a gentle hand.
  • Make sure all the ingredients are at room temperature.
  • Bake the strawberry cheesecake at a low temperature. Long and slow baking prevents the cheesecake from cracking.
  • Bake until the center of the cheesecake is slightly wobbly. Overbaking will make it dry.
  • Allow the cake to cool in the oven for at least 20 minutes with the oven door slightly ajar. This also ensures the cheesecake won't crack.
  • Make the cheesecake a day ahead so you can refrigerate them for 8 hours at least. It helps the cake set and enhances the texture to an addictive degree. 

Nutrition

Serving: 1 ServingCalories: 417kcalCarbohydrates: 54gProtein: 12gFat: 17gSaturated Fat: 9gPolyunsaturated Fat: 3gMonounsaturated Fat: 4gTrans Fat: 0.4gCholesterol: 86mgSodium: 603mgPotassium: 258mgFiber: 2gSugar: 30gVitamin A: 475IUVitamin C: 13mgCalcium: 209mgIron: 2mg

Roasted Cauliflower

January 10, 2022

roasted cauliflower on a white serving platter with a spoon.

This crispy, golden roasted cauliflower is a fabulous side to any meal. Easy to make and delicious, the oven-roasted cauliflower is great as an appetizer, side dish, or part of pasta and salad like chickpeas and sweet potatoes!

roasted cauliflower on a platter garnished with cilantro, pomegranates and red chilies.

I made roasted cauliflower in the oven as roasting caramelizes them to perfection. Plus, it makes the recipe no-fuss, no-must. You cook the cauliflower florets in a very hot oven until tinged brown, insanely crisp on the outside, and tender inside.

[feast_advanced_jump_to]

Why You’ll Love The Recipe

  • You get to use seasonal produce.
  • A quick, easy side dish for any main course.
  • It requires no effort—simply chop and toss.
  • Chock-full of flavor because cauliflower tastes best when it’s crisped and browned.

Roasted Cauliflower Ingredients

Cauliflower: Use a large head and break the florets into equal sizes.

Oil: I find olive oil to be the best choice for this roasted cauliflower recipe.

Spices: Kashmiri red chili powder and Za'atar are my choices of roasted cauliflower seasoning. You can use any chili powder you prefer. 

See the recipe card for full information on ingredients and quantities.

Variations

Vegetable: Swap cauliflower with broccoli, or use a mix of the two. 

Flavoring: Keep it simple with salt and pepper, or turn up the heat with minced garlic, chili flakes, or sumac. Love an Indian touch? Add garam masala and turmeric to the roasted cauliflower florets.

Herbs: Dried or fresh parsley are great in this recipe.

Add-ins: Make roasted cauliflower with Parmesan for a creamier effect. For crunch and texture, add chopped nuts, seeds, or toasted bread crumbs to the spice blend. 

Toppings: Make the cauliflower more flavorful with homemade labneh, pistachio pesto, a creamy whipped feta dip, or homemade vegan mayonnaise. 

How To Make Roasted Cauliflower

cauliflower florets on a parchment-lined baking tray.

Step 1: Preheat your oven and cut the cauliflower into even-sized florets.

a mix of spices, seasonings, and olive oil in a small bowl.

Step 2: Combine olive oil, salt, pepper, Za'atar, and Kashmiri deggi mirch (red chili powder) in a bowl.

cauliflower florets tossed with olive oil and seasoning on a baking tray.

Step 3: Toss the cut florets with the spice blend and spread evenly and in a single layer on a baking sheet.

roasted cauliflower florets on a parchment-lined tray.

Step 4: Bake for 25 minutes at 220 °C. Transfer to a serving bowl, garnish and serve warm.

Pro Tips

  • Cut equal-sized florets so they roast uniformly, and you have that delicious contrast between the crunchy exterior and the meaty interior.
  • The red chili gives the oven-roasted cauliflower color and flavor, not heat. 
  • Use your hands to make sure every part of the florets is covered in spices.

How To Serve

I served it as a light snack first and then turned the leftovers into roasted cauliflower pasta. Toss the cooked pasta with the toasted cauliflower, top with Parmesan shavings and lemon zest, and serve.

By the way, that’s another reason I love this quick recipe. It lends taste, flavor, and texture in heaps to many dishes:

  • Roasted cauliflower with tahini or cashew-roasted red pepper sauce.
  • Add it to a pasta salad like this Italian tortellini salad.
  • Serve it on top of fried rice or Thai peanut noodles.
roasted cauliflower on a serving dish with pomegranate, red chilies and cilantro on top.

Recipe FAQs

How to cut cauliflower florets?

Remove the core first. Once that’s out of the way, it’s effortless to cut florets into chunks. I like to use medium-sized florets. But feel free to make them bigger or smaller. Adjust the baking time accordingly because some ovens run hotter, and you don’t want the tiny florets to burn. 

How to get crisp, crackly cauliflower?

If your florets are flabby and yellow, you’re not cooking them at a high enough temperature. If they’re charring, then you’re cooking them for too long.
My advice is to keep an eye out after 20 minutes, as all ovens are different. When they reach the perfect golden hue, take them out.
Keep in mind that we’re not looking for overcooked florets. We want it just done. In case it’s not crispy enough for you, slide it back into the oven for another minute or two.

How to garnish roasted cauliflower?

The dish is so good on its own, but I dressed mine up with pomegranate arils, sliced red chilies, and fresh cilantro leaves. 

More Delicious Veggie Recipes

  • Sticky Sesame Cauliflower easy vegetarian glutenfree vegan friendly meal
    Sticky Sesame Cauliflower
  • Easy Roasted Carrots In The Oven
    Easy Roasted Carrots In The Oven
  • roasted brussels sprouts on a white platter with spoon.
    Roasted Brussels Sprouts
  • Kung Pao Cauliflower
    Kung Pao Cauliflower

Half the joy of cooking is sharing it with others. That’s why I’m always eager to hear from you. So go right ahead & drop a comment or reach out on Instagram, Pinterest, YouTube, or Facebook. I hope you love this roasted cauliflower as much as we do!

📖 Recipe

Tried this recipe?Let us know how it was!
oven roasted cauliflowers on a white serving platter and silver spoon.

Roasted Cauliflower

Natasha Minocha
Easy to make, this crispy golden Roasted Cauliflower is a fabulous side to any meal. It's wonderful served as an appetizer or snack too. Healthy and delicious this cauliflower will on your weekly rotation!
No ratings yet
Print Recipe Pin Recipe
Prep Time 15 minutes mins
Cook Time 25 minutes mins
Course Appetizer, Side Dish, Snack
Cuisine American, World
Servings 4 Servings
Calories 116 kcal

Ingredients
  

  • 1 large head Cauliflower
  • 2-3 tbsp Olive oil
  • 1.5 tsp Kashmiri red chili powder or any chili powder you prefer
  • 2 tsp Záatar
  • Salt & Pepper to taste

Instructions
 

  • Preheat your oven to 220 C. Keep a baking tray handy.
  • Cut the cauliflower into florets.
  • In a large bowl, combine olive oil, chili powder, záatar, salt, and pepper.
  • Add the cauliflower to this spice mix. Toss well until the cauliflower florets are well coated with the mixture.
  • Arrange the cauliflower on the baking tray, evenly, in a single layer.
  • Bake for 20-25 minutes at 220 C or until the cauliflower is cooked through, golden, and crispy around the edges.
  • Serve hot immediately. Enjoy!

Nutrition

Serving: 1 ServingCalories: 116kcalCarbohydrates: 11gProtein: 4gFat: 8gSaturated Fat: 1gPolyunsaturated Fat: 1gMonounsaturated Fat: 5gSodium: 64mgPotassium: 645mgFiber: 4gSugar: 4gVitamin A: 369IUVitamin C: 101mgCalcium: 48mgIron: 1mg

French Hearts Recipe

January 6, 2022

French heart cookies in a small tray on a wooden board with old papers.

These French heart cookies (or palmiers) are the easiest cookies to bake. Ever! With just 3 ingredients and 12 minutes in the oven, you get shatteringly crisp, golden cookies that taste like they came straight from a Parisian bakery!

French palmiers in a small tray with lights and old papers around.

Every year, when the holidays hit, I’m suddenly the person who wants to bake gorgeous things but also wants to lie on the couch with a mug of tea made with homemade chai masala. This French hearts recipe satisfies both personalities beautifully!

Also known as French hearts, elephant ears, pig’s ears, palm leaves, and a dozen other adorable names, these flaky, buttery, and puffy cookies shatter in the mouth and have a recipe that is zero stress, zero mess, and zero drama.

[feast_advanced_jump_to]

Why You'll Love This Recipe

✨ Puff pastry, sugar, and cinnamon. That’s all you need for this Palmiers cookies recipe. Light, elegant, and yummy, it’s perfect with coffee, hot chocolate, or even a glass of cold milk.

✨ This French hearts recipe is super easy. You roll, cut, sprinkle, and bake. You get the perfect combination of crisp, buttery, flaky cookies, cinnamon, and melted sugar! 

✨ Palmiers are customizable in a hundred ways. Sweet, savory, chai-spiced, jam-filled. Go wild. They look fancy in all ways, like you totally spent all day making them.

✨ Wrap them in a tin with other holiday cookies (Christmas spritz cookies, wreath sugar cookies, chocolate crinkle cookies) and you have a stunning edible gift.

Cookies on a small tray on top of paper doily.

Recipe Ingredients

Sugar: Raw sugar is what I used for this French cookie recipe. It caramelizes and creates the signature crunchy shell. You can also use demerara sugar or regular granulated sugar.

Puff pastry is your shortcut to happiness. Use store-bought puff pastry to keep things easy. If you’re in the mood, homemade puff pastry absolutely works too.  Winter months are great to make puff pastry at home and try puff pastry apple donuts, or this easy chocolate puff pastry braid, or cranberry brie puff pastry bites.

Filling: Cinnamon is optional, but I highly recommend it because classic cinnamon sugar palmiers are just delicious. You can, of course, skip the cinnamon or make:

  • Make Masala Chai Palmiers (Cardamom, Clove, Ginger, Cinnamon, Black Pepper)
  • Make Vanilla Sugar Palmiers
  • Make Savory Palmiers With Parmesan And Herbs
  • Make Jam-Filled Palmiers With Cherry Jam Or Strawberry Chia Jam

Please see the recipe card below for full information about the ingredients and quantities.

How To Make French Heart Cookies

Step 1: Set the oven to preheat and line your baking tray.

Step 2: Bring puff pastry to room temp.

Step 3: Lightly dust your work surface with flour and roll the pastry into a rectangle.

Step 4: Sprinkle cinnamon sugar generously across the sheet. Press gently with a rolling pin so the sugar sticks.

Step 5: Fold the long sides inward toward the center until they meet. (It should look like two scrolls kissing.)

Puff pastry dough rolled out and sprinkled with sugar and cinnamon.
Rolled up puff pastry dough on a wooden board.

Step 6: Chill the rolled log for 15–20 minutes.

Step 7: Cut into ¼-inch slices and sprinkle more cinnamon sugar on top (optional but SO worth it).

Step 8: Bake 12–14 minutes until golden on top and caramelized on the bottom.

sliced cookie dough on a baking tray.
Baked French heart cookies on a baking tray.

Step 9: Dust with extra cinnamon sugar right out of the oven.

Step 10: Cool, serve, and enjoy!

Top Tips

  • Your pastry must be at room temperature when rolling it. So, if it’s frozen, thaw it thoroughly. Cold pastry cracks. Warm pastry rolls beautifully.
  • When you roll puff pastry, the butter in it melts. When you chill the rolled log, the butter solidifies again, and that’s what gives the flaky layers.
  • Don’t overcrowd the tray. They expand and puff dramatically.
  • I recommend keeping an eye on the French palmiers after the 12-minute mark. Each oven is different, and the sugar on the cookies can burn easily.
  • Flip halfway if your oven runs hot to get even browning.
Cookies on a tray with lights and Christmas decor around.

French Hearts Recipe FAQs

What are palmiers?

Palmiers are French puff pastry cookies shaped like hearts or palm leaves, which is why they’re also called French heart cookies, elephant ears, or palm leaves cookies. Flaky, sugary, caramelized, these cookies are just so delicious!

Why did my French heart cookies not puff?

There are two common reasons. The butter in the puff pastry was melted- so do chill the pastry log. Or the oven wasn’t hot enough when baking started.

How do you know when the French palmiers are done?

The cookies are done when they are puffed up, golden on top, and brown on the bottom.

What is the best way to store French Hearts?

Store the cookies in an airtight container for up to 1 week. If they soften, just pop them in the oven to crisp back up.

    More Fun Holiday Cookies

    • matcha pinwheel cookies in a bowl on a green napkin.
      Matcha Pinwheel Cookies
    • cranberry pistachio biscotti in a golden serving bowl.
      Cranberry Pistachio Biscotti
    • lemon crinkle cookies on a platter with Christmas decorations around.
      Soft Lemon Crinkle Cookies Recipe
    • Biscoff Shortbread Recipe
      Biscoff Shortbread Recipe

    Half the joy of cooking is sharing it with others. That’s why I’m always eager to hear from you. So go right ahead & drop a comment or reach out on Instagram, Pinterest, YouTube, or Facebook. I hope you love these French heart cookies as much as we do.

    📖 Recipe

    Tried this recipe?Let us know how it was!
    French heart cookies in a small tray on a wooden board with old papers.

    French Hearts Recipe

    Natasha Minocha
    These French heart cookies (or palmiers) are the easiest cookies to bake. Ever! With just 3 ingredients and 12 minutes in the oven, you get shatteringly crisp, golden cookies that taste like they came straight from a Parisian bakery.
    No ratings yet
    Print Recipe Pin Recipe
    Prep Time 30 minutes mins
    Cook Time 12 minutes mins
    Course Cookies, Snack
    Cuisine French
    Servings 30 cookies
    Calories 99 kcal

    Ingredients


    • 17.3 oz Puff pastry at room temperature
    • 1/3 cup Raw sugar You can use regular granulated sugar too
    • 2 tsp Cinnamon powder

    Instructions
     

    • Preheat your oven to 200 C / 400 F. Line a baking tray with Silpat or parchment paper.
    • Roll out the puff pastry into a rectangle about 14" x 12".
    • Sprinkle sugar and cinnamon powder on the dough. Lightly press the sugar and cinnamon into the dough, using a rolling pin.
    • Starting with one long side, start rolling the dough tightly until the center. Repeat on the other side.
    • Chill the log for at least 20 minutes.
    • Cut into 1/4" thick slices and place on the baking tray. Sprinkle some more sugar if you like.
    • Bake for 12-14 minutes until the pastry is all puffed up and golden brown in color.
    • Transfer the cookies onto a cooling rack and allow them to cool completely before transferring to an air-tight container. Enjoy!

    Notes

    • Your pastry must be at room temperature when rolling it. So, if it’s frozen, thaw it thoroughly. Cold pastry cracks. Warm pastry rolls beautifully.
    • When you roll puff pastry, the butter in it melts. When you chill the rolled log, the butter solidifies again, and that’s what gives the flaky layers.
    • Don’t overcrowd the tray. They expand and puff dramatically.
    • I recommend keeping an eye on the French palmiers after the 12-minute mark. Each oven is different, and the sugar on the cookies can burn easily.
    • Flip halfway if your oven runs hot to get even browning.

    Nutrition

    Serving: 1 ServingCalories: 99kcalCarbohydrates: 10gProtein: 1gFat: 6gSaturated Fat: 2gPolyunsaturated Fat: 1gMonounsaturated Fat: 4gSodium: 41mgPotassium: 11mgFiber: 0.3gSugar: 2gVitamin A: 1IUVitamin C: 0.01mgCalcium: 3mgIron: 0.4mg

    Pistachio Pesto

    January 3, 2022

    Pistachio pesto in a small white bowl with ingredients in the background.

    Pistachio pesto is a no-fuss, no-muss recipe. There’s no easier way to add bold, fresh flavor to a meal than basil pesto with pistachios. With just six simple ingredients and 15 minutes, you get a creamy, nutty, and flavor-packed sauce.

    Pistachio pesto in a small white bowl with ingredients in the background.

    Toss it with pasta (or pasta salad), spread it on sandwich bread, or drizzle it over grilled veggies or roasted carrots. Honestly, my tea takes longer to make. And once you’ve got a jar in the fridge, you’ll be finding excuses to add it to just about everything.

    [feast_advanced_jump_to]

    Why You’ll Love This Recipe

    Quick and easy to make with no complicated steps and no waiting around.

    Pistachios give the pesto a rich, ultra-creamy texture with a slightly sweet, nutty taste.

    It’s versatile. So many possibilities and variations you can make.

    Better than store-bought. Fresh, homemade pesto beats everything.

    Recipe Ingredients

    Ingredients for making pistachio pesto.

    Pistachios: A traditional pesto recipe calls for pine nuts. But you don’t have to limit yourselves to them. Pistachios give pesto a subtle sweetness, making the flavor rather rich and creamy. Try walnuts. Almonds and pecans are fantastic, too. 

    Basil: Bright, fragrant, and absolutely essential for that classic pesto taste. Fresh is best! Feel free to add in some parsley if you wish.

    Cheese: Parmesan is salty, nutty, and full of umami goodness. It ties everything together beautifully. Increase the amount, reduce it, or add a plant-based version (if you want to make vegan pistachio pesto). The choice is yours. 

    Garlic gives the pesto a bold, savory kick.

    Olive Oil: Smooth, silky, and essential for getting that dreamy consistency. Use a good-quality extra virgin olive oil for the best basil pistachio pesto flavor.

    Add-ins: The recipe really doesn’t need any additions. But if you’re feeling inspired, I’d suggest lemon zest and chili flakes. 

    See the recipe card below for full information on ingredients and quantities.

    How To Make Pistachio Pesto?

    Step 1: Put basil, pistachios, garlic, cheese, and pepper in a blender and blitz.

    Basil, garlic, pistachio, and cheese in a blender jar.

    Step 2: Slowly add olive oil. Blend until combined.

    Step 3: You can continue blending to make a silky, creamy pistachio pesto. Or make a more textured pesto that looks like a coarse paste. The choice is yours.

    Step 4: Taste and adjust for salt.

    Optional step: Add a splash of lemon juice to brighten the flavor.

    Final step: Serve and savor!

    Pro Tips

    • I did not add the salt with the dry ingredients in step 1 because the Parmesan already has some. I like to stir it in after the pesto is made.
    • Pesto with pistachio has so few ingredients that I recommend using the best quality you can get your hands on.
    • If you want a textured pesto, please use a mortar pestle instead of a food processor or blender.
    • For the best flavor and texture, use freshly grated parmesan cheese! Not the pre-grated or powdered cheese please.

    How To Use Pistachio Pesto?

    Pistachio pesto is the ultimate kitchen essential. It’s a sauce, dip, and marinade all in one! Keep a jar in the fridge, and you’ll never run out of ways to use it.

    • Make pasta with pistachio pesto using a generous dollop.
    • It's so good tossed in sweet potato gnocchi.
    • Spread it on everything to make pistachio pesto pizza, sandwiches, or even eggs. Try it in my easy shakshuka recipe!
    • Marinate veggies in it before roasting for a deep, nutty flavor. It’s next-level good.
    • Use it as a dip for baked sweet potato fries, crackers, or crunchy crudités.
    • Stir it into warm, fluffy rice and serve with Moroccan vegetable stew.
    • Dress up your avocado salad or Caprese skewers. Fresh, vibrant, and downright delicious.
    • Use it to make the most delicious cheesy pesto swirl rolls and braided pesto bread!
    A plateful of pasta tossed with pesto.

    Recipe FAQs

    What is pesto?

    Pesto is a sauce originally from Italy. It’s fresh, bold, and packed with flavor. At its heart? Basil. Blended with nuts, garlic, olive oil, and cheese, it creates a perfectly balanced mix of herby, nutty, and savory goodness. A good pesto isn’t about any one ingredient standing out. Everything works together. A well-made pesto is incredibly tasty. 

    Can you use a food processor to make pistachio basil pesto?

    Both a blender and a food processor work well for the recipe. If you want the creamiest pesto, go with a blender. Prefer a little texture? A food processor is your best bet.
    You can even use a mortar and pestle. It takes a little more effort, but, trust me, the result is out of the world! The fragrance and flavor are so much better because the hand moment coaxes the oils from the leaves very gently.

    Should you toast the nuts in pesto?

    Toasting the pistachios is not essential. But if you want more depth of flavor, go ahead and lightly toast the nuts.

    Why is my pesto brown? Can I still eat it?

    Sometimes, pesto made at home turns brown because of oxidation. It’s perfectly safe to eat. It’s just brownish instead of green. 

    How to keep pesto green?

    Blanch the basil. A quick dip in hot water ( followed by a quick dip in iced water) keeps the leaves vibrant green. Add lemon juice. It brightens the flavor and keeps the pesto from turning brown. Don’t skimp on olive oil.

    How to store pistachio pesto?

    The pesto keeps well for 2 to 3 weeks in an airtight container in the fridge.

    More Dips & Sauces

    • Feta dip with cherry tomatoes, pinenuts, olive oil and mint on top.
      Whipped Feta Cheese Dip
    • Easy Creamy Avocado Dip
      Easy Creamy Avocado Dip
    • Creamy dip in a bowl garnished with parsley and pomegranate arils.
      Whipped Goat Cheese Dip
    • Tzatziki in a bowl with a piece of pita bread scooping it up.
      Tzatziki

    Half the joy of cooking is sharing it with others. That is why I’m always eager to hear from you. So go right ahead and drop a comment or reach out on Instagram, Pinterest, YouTube, or Facebook. I hope you love this pistachio pesto as much as we do!

    📖 Recipe

    Tried this recipe?Let us know how it was!
    Pistachio pesto in a small white bowl with ingredients in the background.

    Pistachio Pesto

    Natasha Minocha
    Pistachio Pesto - 6-ingredient, no-fuss, no-muss pesto recipe! With a bright taste and a creamy texture, this pesto is a staple in my kitchen!
    No ratings yet
    Print Recipe Pin Recipe
    Prep Time 15 minutes mins
    Total Time 12 minutes mins
    Course Side Dish
    Cuisine Italian
    Servings 10 servings
    Calories 96 kcal

    Ingredients
      

    • 2 cup Fresh Basil
    • 1/2 cup Pistachio, shelled
    • 1/4 cup Parmesan cheese, grated
    • 1 tsp Black pepper
    • 3-4 cloves Garlic
    • 1/4 cup Olive oil
    • Salt to taste

    Instructions
     

    • Combine all the dry ingredients in a blender or food processor.
    • Blend until everything is almost chopped, then slowly drizzle in the olive oil.
    • Pulse until combined. You can continue blending to make a silky, creamy pistachio pesto. Or make a more textured pesto that looks like a coarse paste.
      Taste and add salt to taste.
    • Transfer to a bowl or an air-tight container. Drizzle some olive oil on top. Serve and enjoy!

    Notes

    •  
    • For the best flavor and texture, please use freshly grated parmesan cheese!
    • I did not add the salt with the dry ingredients in step 1 because the Parmesan already has some.
    • Pesto with pistachio has so few ingredients that I recommend using the best quality you can get your hands on.
    • If you want a textured pesto, please use a mortar pestle instead of a food processor or blender.
    •  

    Nutrition

    Serving: 1 ServingCalories: 96kcalCarbohydrates: 2gProtein: 2gFat: 9gSaturated Fat: 2gPolyunsaturated Fat: 1gMonounsaturated Fat: 6gCholesterol: 2mgSodium: 274mgPotassium: 84mgFiber: 1gSugar: 1gVitamin A: 303IUVitamin C: 2mgCalcium: 47mgIron: 0.5mg

    Chai Spice Chocolate Cookies

    December 23, 2021

    Chai Spice Chocolate Cookies | Easy Chai spiced cookies

    With each recipe I make this holiday season, it got harder to pin down my favorite. Until I baked these chai spice chocolate cookies. Lavishly suffused with ginger, cardamom, clove, black pepper, cinnamon, and nutmeg, these cookies are like a love letter written for tea. 

    ...

    Read More

    Maple Pecan Cookies

    December 21, 2021

    Maple pecan cookies with glaze on a wooden board.

    These maple pecan cookies are crisp on the edges, soft and chewy in the center, and full of cozy maple flavor! Each cookie is dotted with crunchy pecans and topped with maple glaze that instantly makes them festive and special. The perfect Holiday cookies!

    cookies with glaze and pecans on a wooden board.

    The dough for these oatmeal pecan cookies comes together with basic pantry ingredients and needs no chilling time, so you can bake a batch in minutes! Oat flour gives the cookies a lovely, tender texture, while the maple syrup adds a deep, warm sweetness that goes so well with toasted pecans.

    They are perfect for tea time, Holiday gifting, or whenever you want an easy cookie that tastes and looks impressive without any extra effort!

    [feast_advanced_jump_to]

    Why You’ll Love This Recipe

    ✨ They bake up really fast because you don’t have to chill the cookie dough. The dough comes together so easily! Ideal for quick bakes and last-minute cravings.

    ✨ The recipe is totally customizable. Swap pecans for almonds, walnuts, or even dried fruit. Add chocolate chips or freeze-dried berries if you’re feeling fancy.

    ✨ Full of wonderful textures and flavors - crispy and chewy! Sweetness from maple syrup complements the toasty pecans and hearty oats beautifully.

    ✨ If you’re looking for a cozy, easy maple pecan cookies recipe to carry you through fall, the holidays, or just a random Wednesday, this is it. Truly.

    ✨They’re perfect for holiday gifting. The cookies stay fresh, look festive, and stack beautifully in cookie boxes along with Christmas wreath sugar cookies and Christmas spritz cookies!

    6 cookies with glaze and pecans on a wooden board.

    Recipe Ingredients

    Flour: All-purpose flour is the base of the cookies. I also added oat flour. You can use store-bought or just grind some oats in your coffee blender at home! With any leftover oat flour, try my recipe for cranberry oatmeal cookies.

    Sugar: I prefer raw sugar (for the caramel notes), but regular white sugar works just as well.

    Maple syrup is the star of the show! It gives these maple and pecan cookies their warm sweetness. Avoid "pancake syrups" and go for pure maple syrup.

    Butter: Use soft, not melted, so the cookies stay thick and chewy. If using unsalted butter, add a pinch of salt.

    Pecans are the reason these cookies sing! But don’t skip this recipe if you don’t have pecans. Walnuts, almonds, or even pistachios work great. Got leftover pecans? Make bite-sized pecan tassies.

    Vanilla extract brings a little warmth that ties all the flavors together. Use store-bought or homemade vanilla extract.

    See the recipe card for full information on ingredients and quantities.

    How To Make Maple Pecan Cookies

    Step 1: Whisk together all-purpose flour, oat flour, and baking soda.

    Step 2: Beat softened butter and raw sugar until light and fluffy.

    Step 3: Add maple syrup and homemade vanilla extract until glossy and smooth.

    Step 4: Fold the dry ingredients into the wet.

    Step 5: Stir in chopped pecans.

    cookie dough with pecans in a mixing bowl.

    Step 6: Drop spoonfuls onto a lined tray and bake 12–14 minutes.

    Cookie dough balls on parchment lined tray.
    Baked cookies on a parchment-lined tray.

    Step 7: Let them cool. Then glaze, top with chopped nuts, and serve!

    Top Tips

    • Use room-temperature butter. Melted butter makes for thin cookies that spread while baking.
    • Watch the maple syrup and pecan cookies closely after 12 minutes. These babies go from golden to too golden fast. When they’re pale golden on top and very nicely browned on the bottom, take them out.
    • Right out of the oven, the pecan cookies are soft and chewy. Don’t worry. They’ll harden as they cool.
    • If you opt for the maple glaze and pecan garnish, work fast. Scatter the chopped nuts immediately so they stick.

    How To Serve

    Once cooled, these maple pecan cookies are ready to shine. Pour yourself a hot cup of tea or coffee and enjoy. I decided to go for some holiday sparkle and drizzled them with maple glaze (whisk icing sugar + maple syrup + a splash of milk).

    You can even add a pinch of flaky sea salt! It really enhances the flavors.

    Cookies with maple glaze and pecans on a wooden board.

    Recipe FAQs

    How to make crispy butter pecan cookies?

    To make crispier maple and pecan cookies, flatten the cookie dough before baking, and bake for longer, like I did with my chocolate gingerbread cookies. If you enjoy domed, soft, and cakey cookies, bake on the shorter side—11–12 minutes.

    How to make easy maple pecan cookies vegan?

    Use plant-based butter or coconut oil instead of butter to make vegan maple pecan cookies.

    How do I store maple pecan cookies?

    Store in an airtight container at room temperature for up to 5–6 days. You can also freeze the unbaked cookie dough for up to 1 month. Baked (unglazed) cookies also freeze well.

    More Delicious Cookie Recipes

    • Sliced chocolate chip banana bread on a white platter.
      Chocolate Chip Banana Bread
    • Sliced cheese pizza on a wooden board with basil leaves on top.
      Quick Pizza Dough
    • 16 squares on blondies on parchment paper.
      Chocolate Chip Coffee Blondies
    • A picture collage of cherry cheesecake, cherry galette, popsicles and cake.
      10 Easy Cherry Dessert Recipes To Make This Summer

    Half the joy of cooking is sharing it with others. That’s why I’m always eager to hear from you. So go right ahead & drop a comment or reach out on Instagram, Pinterest, YouTube, or Facebook. I hope you love these maple pecan cookies as much as we do!

    📖 Recipe

    Tried this recipe?Let us know how it was!
    Maple pecan cookies with glaze on a wooden board.

    Maple Pecan Cookies

    Natasha Minocha
    Soft, chewy, maple pecan cookies with crisp edges, warm maple flavor, and a simple glaze. Quick to make, no chilling needed, and perfect for any time of year!
    No ratings yet
    Print Recipe Pin Recipe
    Prep Time 15 minutes mins
    Cook Time 15 minutes mins
    Course Cookies, Snack
    Cuisine American
    Servings 20 cookies
    Calories 140 kcal

    Ingredients


    • 1 cup All-purpose flour
    • 1 cup Oat flour I simply ground up oats in my food processor
    • 1/2 tsp Baking soda
    • 1/4 tsp Salt, if using unsalted butter
    • 1/2 cup Butter, softened I used salted butter
    • 1/2 cup Raw sugar
    • 3 tbsp Maple syrup
    • 1 tsp Vanilla extract
    • 1/3 cup Pecans, chopped Plus, extra for topping

    Maple Glaze

    • 1/3 cup Icing sugar
    • 1 tbsp Maple syrup
    • 1/2 tbsp Almond milk

    Instructions
     

    • Preheat your oven to 180 C / 350 F. Line a baking tray with Silpat or parchment paper.
    • Combine the flours, baking soda, and salt ( if using) in a bowl.
      1 cup All-purpose flour, 1 cup Oat flour, 1/2 tsp Baking soda
    • In a separate bowl, beat together the butter and raw sugar until light and fluffy.
      1/2 cup Butter, 1/2 cup Raw sugar
    • Add in the maple syrup and vanilla extract. Beat well.
      3 tbsp Maple syrup, 1 tsp Vanilla extract
    • Mix in the dry ingredients using a spatula, until a stiff dough is formed.
    • Fold in the pecans. You may need to use your hands to ensure the pecans are distributed evenly in the dough.
      1/3 cup Pecans, chopped
    • Scoop out the dough onto the prepared tray, using a tablespoon or a cookie scoop.
    • Bake at 180 C / 350 F for 12-14 minutes, until the cookies are slightly firm to touch and golden brown.
    • Transfer to a cooling rack to cool completely.
    • Drizzle the glaze over each cookie and immediately sprinkle the chopped pecans. Let the glaze set for 5 minutes before serving. Enjoy!

    Maple Glaze

    • Combine the three ingredients in a small bowl, whisk well until a thick, smooth glaze is formed.
      1/3 cup Icing sugar, 1 tbsp Maple syrup, 1/2 tbsp Almond milk
    • Add more icing sugar if the glaze is too runny. Stir in more maple syrup if its too thick.

    Notes

    • Use room-temperature butter. Melted butter makes for thin cookies that spread while baking.
    • Watch the maple syrup and pecan cookies closely after 12 minutes. These babies go from golden to too golden fast. When they’re pale golden on top and very nicely browned on the bottom, take them out.
    • Right out of the oven, the pecan cookies are soft and chewy. Don’t worry. They’ll harden as they cool.
    • If you opt for the maple glaze and pecan garnish, work fast. Scatter the chopped nuts immediately so they stick.

    Nutrition

    Serving: 1 ServingCalories: 140kcalCarbohydrates: 19gProtein: 2gFat: 6gSaturated Fat: 3gPolyunsaturated Fat: 1gMonounsaturated Fat: 2gTrans Fat: 0.2gCholesterol: 12mgSodium: 96mgPotassium: 48mgFiber: 1gSugar: 10gVitamin A: 145IUVitamin C: 0.02mgCalcium: 12mgIron: 1mg

    Almond Ricotta Cookies

    December 20, 2021

    almond ricotta cookies with sprinkles on top on a white platter.

    Almond ricotta cookies are less cookie and more cake with a soft, crumbly texture that tastes divine. Divine. Perfect for morning tea or a nice light after-dinner dessert, everyone will love these cookies for Christmas!

    almond ricotta cookies with sprinkles on top on a white platter.

    These Christmas ricotta cookies with almond extract are soft and almost cake-like! They are little moist glazed cookies full of almond flavor that are irresistible with delicious creamy ricotta.

    The recipe for these ricotta almond cookies is very straightforward. The only kind of recipe you want for the holidays because you’re already cooking too much. From the old to the young, I promise, everyone will love them!

    [feast_advanced_jump_to]

    Why You’ll Love This Recipe

    A wonderful make-ahead recipe.

    Easy to bake and fabulous for holiday gifting.

    They look absolutely festive with red, green, and gold sprinkles! 

    They have a lovely cake-like texture that goes so well with a cup of coffee or tea!

    Ricotta Almond Cookies Ingredients

    ingredients for making almond ricotta cookies.

    Flour: We are using all-purpose flour and almond flour for these Christmas almond cookies. All-purpose flour makes the cookies soft and tender. The almond flour is lovely and nutty—equal parts subtle and delicious. You can use store-bought or make it at home.

    Ricotta: Homemade or store-bought; both versions work like a charm. The only condition is not to skip the ricotta cheese, as it is essential. It gives structure and texture to the cookies. 

    Butter has to be softened. If you use unsalted butter, add ¼ teaspoon of salt to the cookie dough.

    Extracts: I added homemade vanilla extract and pure almond extract. The latter is optional in the dough, but don’t skip it in the glaze.

    Sugar: You’ll need powdered sugar for the dough and icing sugar for the almond glaze.

    Milk: Almond milk was my choice (hello lactose intolerance) for the glaze. You can use any milk you prefer.

    See the recipe card for full information on ingredients and quantities.

    Variations

    Eggless: I haven't tried making these almond flour ricotta cookies without eggs. But I am sure they can be made eggless with a flax egg. Mix 1 tablespoon of ground flaxseed with 3 tablespoons of water. Set aside for at least 15 minutes, till it’s goopy and thick. Continue with the rest of the recipe. 

    Flavors: In case you don’t have almond extract or don’t fancy it too much, replace it with lemon zest to make Italian ricotta cookies. The original Italian ricotta cookie recipe has lemon in it. You can even try orange zest. Add it to the dough to give the cookies brightness and use it as a garnish.

    almond cookies on a platter with 2 halves of a cookie to show the soft texture.

    How To Make Almond Ricotta Cookies?

    Step 1: Mix almond flour, all-purpose flour, and baking powder.

    Step 2: Separately, beat butter with powdered sugar till it’s nice and light, and fluffy. 

    Step 3: Toss eggs, almond extract, and vanilla extract into the beaten mixture. 

    Step 4: Then add the ricotta cheese and combine thoroughly.

    Step 5: Fold the dry ingredients into the wet. With a spatula, bring them together into a dough. 

    Step 6: Refrigerate the dough of almond ricotta cookies.

    dough for Italian ricotta cookies in a mixing bowl.

    Baking The Ricotta Cookies

    Step 7: Scoop out the dough using a tablespoon or ice cream scoop, and then roll it between your palms.

    cookie dough balls on a parchment-lined baking tray.
    baked cookies on a parchment-lined baking tray.

    Step 8: Place each rolled ball on a Silpat-lined tray, leaving ample space between them.

    Step 9: Bake for 12 to 14 minutes, till they’re very pale yellow and just firm to the touch. 

    Optional step: Cool and glaze.

    Final step: Serve and savor!

    Pro Tips

    • The dough of these almond ricotta cookies is soft and sticks to your hands. I recommend refrigerating it for half an hour to one hour till it’s easy to handle.
    • These cookies bake fast. So, after 12 minutes, keep an eye. Don’t worry if they seem too soft. They’ll harden as they cool.

    How to serve

    We’re making these ricotta cookies for Christmas, so why not make them extra special? While the cookies cool, go ahead and make a thick almond glaze.

    • Mix the icing sugar with almond milk and almond extract. 
    • Drizzle the glossy glaze on each cookie.
    • Immediately dust sprinkles on top because the glaze sets rather quickly, and after that, the sprinkles won’t stick. 

    Serving Italian ricotta cookies with almond glaze is a completely optional step. By no means do you have to decorate them. Once baked and cooled, they’re pretty enough to serve as-is or with powdered sugar like I did with my Mexican wedding cookies. 

    Almond Ricotta Cookies FAQs

    Can you make almond ricotta cookies ahead of time?

    Absolutely, make them a few weeks in advance. They store well in an airtight container. I do suggest not glazing them beforehand. Add the icing and sprinkles right before you’re serving, as the colors of the sprinkles tend to bleed.

    How many cookies does this recipe for ricotta cookies make?

    It makes a decently sized batch of 24. You can, of course, double it to share with friends and family during the season. Or halve it.

    Can you substitute cottage cheese for ricotta in almond cookies?

    Yes, you can, but keep these things in mind. Cottage cheese is chunkier. Ricotta is creamy. So, you’ll have to blend the cottage cheese until smooth before adding it to the ricotta almond flour cookie dough. Cottage cheese is also runnier. It has more moisture than ricotta. Drain that excess using a sieve or cheesecloth.

    More Christmas Cookie Recipes

    • Lemon crescent cookies in a tin box with christmas decorations around.
      Lemon Crescent Cookies
    • Five Chocolate ginger cookies stacked up on parchment paper with a red string.
      Chocolate Ginger Cookies
    • Cookies with sprinkles on a doily-lined platter.
      Butter Cookies
    • linzer cookies piled up on a metal tray with green Christmas decorations.
      Gluten-free Linzer Cookies

    Half the joy of cooking is sharing it with others. That’s why I’m always eager to hear from you. So go right ahead & drop a comment or reach out on Instagram, Pinterest, YouTube, or Facebook. I hope you love these almond ricotta cookies as much as we do!

    📖 Recipe

    Tried this recipe?Let us know how it was!
    Almond Ricotta Cookies | Italian Ricotta Cookies

    Almond Ricotta Cookies

    Natasha Minocha
    These almond ricotta cookies are just fabulous! They’re less cookie and more cake, with a soft, crumbly texture that tastes positively divine!
    5 from 1 vote
    Print Recipe Pin Recipe
    Prep Time 15 minutes mins
    Cook Time 14 minutes mins
    Chilling Time 30 minutes mins
    Total Time 1 hour hr
    Course Cookies, Snack
    Cuisine American, Italian
    Servings 24 cookies
    Calories 100 kcal

    Ingredients


    • 1.5 cup All-purpose flour
    • 1/2 cup Almond flour
    • 1 1/4 tsp Baking powder
    • 1/4 tsp Salt Please omit if using salted butter
    • 1/2 cup Butter, softened
    • 3/4 cup Powdered sugar
    • 1 Egg
    • 3/4 cup Ricotta cheese
    • 1 tsp Vanilla extract
    • 1/2 tsp Pure almond extract ( optional)

    Almond Glaze

    • 1/3 cup Icing sugar
    • 2-3 tbsp Almond milk You can use any milk you prefer
    • 1/4 tsp Almond extract

    Instructions
     

    • Preheat your oven to 180C. Line a cookie tray with Silpat or parchment paper.
    • Sift together the all-purpose flour, almond flour, baking powder, and salt ( if using) in a bowl.
    • In another bowl, beat together butter and sugar until pale and fluffy.
    • Add the egg. Beat well.
    • Now add in the ricotta, vanilla extract, and almond extract. Mix until well combined.
    • If the dough seems too soft, cover and refrigerate for 20-30 minutes until firm.
    • Scoop out the dough, using a tablespoon. Roll the dough balls and place on the tray.
    • Bake at 180 C for 12-14 minutes until very light golden in color.
    • Transfer to a cooling rack, let the cookies cool completely. Serve as is or glaze the cookies with almond glaze and add sprinkles.
    • Allow the glaze to set, about 5-10 minutes.

    Almond Glaze

    • Combine almond milk, almond extract, and icing sugar until smooth and thick.

    Notes

    This recipe has been adapted from the very talented Cooking Classy.
    • The dough of these almond ricotta cookies is soft and sticky. I recommend refrigerating it for half an hour to one hour till it’s easy to handle.
    • These cookies bake fast. So, after 12 minutes, keep an eye. Don’t worry if they seem too soft. They’ll harden as they cool.

    Nutrition

    Serving: 1 CookieCalories: 100kcalCarbohydrates: 13gProtein: 2gFat: 6gSaturated Fat: 3gPolyunsaturated Fat: 0.3gMonounsaturated Fat: 1gTrans Fat: 0.2gCholesterol: 21mgSodium: 88mgPotassium: 21mgFiber: 0.5gSugar: 2gVitamin A: 165IUCalcium: 38mgIron: 1mg

    Gluten-free Linzer Cookies

    December 18, 2021

    linzer cookies piled up on a metal tray with green Christmas decorations.

    With my gluten-free Linzer cookies, a buttery soft shortbread gets a nutty dose from almond flour. These buckwheat cookies, sandwiched with delicious fruit jam, are a delightful holiday bake, made with simple pantry ingredients and little effort!

    linzer cookies on a metal serving tray with green Christmas decorations.

    These eggless Linzer cookies look fancy but really are super simple to make. The dough comes together quickly and is easy to work with. The flavors of buckwheat and almond flours complement the sweet strawberry jam well. These melt-in-your-mouth cookies are a Holiday classic!

    Linzer and Spritz cookies were one of the first Christmas cookies I baked, some 15 years ago. From then on, these are baked every year in December because I can make them in all shapes, sizes, and jam fillings. Needless to say, I have a lot of fun with them!

    [feast_advanced_jump_to]

    What Are Linzer Cookies?

    The origins of Linzer cookies are Austrian. Linzertorte is a traditional Austrian dessert torte/tart from the Linz region in the country, which is where the cookies get their name from.

    The classic dessert is a pastry, topped with fruit preserves. Linzer cookies use mostly the same ingredients and have a similar flavor, but are just presented differently.

    star shaped linzer cookies stacked up on a metal serving tray.

    Why You'll Love This Recipe

    These buttery, nutty, melt-in-your-mouth cookies are irresistible!

    They look absolutely gorgeous and festive. Perfect for your Holiday cookie box!

    These eggless Linzer cookies are a breeze to make. The dough comes together quickly and doesn't need much chilling time.

    You get a cookie and a dessert in one go!

    Recipe Ingredients

    Flour: I used a combination of buckwheat and almond flour. Almond flour gives a lovely sweet nutty flavor that perfectly complements the earthiness of buckwheat flour. But please feel free to use any gluten-free flour you prefer.

    Butter: Makes the cookies tender and rich. I used salted butter. If you prefer to use unsalted butter, please add 1/8 teaspoon of salt along with the flours.

    Sugar: I like using icing sugar, also called powdered sugar in this recipe. It melds easily in the butter and makes a smooth dough.

    Jam: For filling the cookies. You can use any flavor you like, I love strawberry jam here. Homemade jams are also wonderful for this recipe - you can try my strawberry chia jam, easy fig jam, or my 3-ingredient persimmon jam too!

    Vanilla extract: This is great for rounding up the flavors. You can use storebought or homemade vanilla extract.

    See the recipe card for full information on ingredients and quantities.

    How To Make Gluten-Free Linzer Cookies

    Even with buckwheat flour and no eggs, the cookies stay buttery soft, slightly nutty, and utterly delicious thanks to the almond meal and butter!

    Step 1: Preheat the oven to 180C and line a baking sheet with parchment paper or Silpat. 

    Step 2: Beat the butter in a large bowl, until smooth. Add the sugar. Beat until fluffy.

    Step 3: Mix in the vanilla extract, buckwheat flour, and almond meal. Use your hands to bring together the dough gently.

    Step 4: Divide the dough into half. Wrap with plastic wrap and place in the refrigerator for 15-20 minutes or so.

    Step 5: Flour your work surface well, working with one dough ball at a time, and roll out into a rough circle, about 1/8" thick.

    Step 6: Use a heart-shaped cookie cutter, to cut out the cookies. Use a smaller heart-shaped cookie cutter to cut out the centers of half of the cookies. As you will be sandwiching the cookies, make sure there is an equal number of whole cookies and cookies with cutouts.

    rolled out dough with cookie cutter and cutout star cookies on a baking tray.

    Step 7: Place them on the baking sheet and bake for about 10-12 minutes, until golden.

    star-shaped linzer cookies with jam filling.

    Step 8: Cool the cookies completely and sprinkle the cutout cookies with icing sugar.

    Step 9: Now assemble the cookie sandwiches. Place one whole cookie, right side down, put a small teaspoon of jam in the center, and spread it gently. Place the cutout cookie on top. Press it slightly. Continue with the rest of the cookies.

    Step 10: Your festive and delicious Linzer cookies are ready to serve!

    star-shaped linzer cookies with icing sugar sprinkled on top.

    Top Tips

    • If your dough seems too sticky. You can do 2 things - add a little bit more flour or chill the dough for a longer time.
    • If your dough is too dry, you can add 1-2 tablespoons of milk.
    • You can make the dough ahead of time, up to 2 days in advance in the refrigerator. You will need to let the cold dough sit at room temperature for a few minutes before rolling it out.
    linzer cookies in a serving tray.

    Linzer Cookies Recipe FAQs

    How can I store Linzer cookies?

    These buckwheat almond Linzer cookies keep well for 4 to 5 days in an air-tight container. Beyond that, they begin to get a bit moist (although the taste is still great). So, if you’re making a big batch ahead of time for holiday gifting, assemble them on the day of or just before you’re serving.

    How to make vegan Linzer cookies?

    The recipe is already eggless, so all you have to do is use plant-based butter!

    Can I use a different filling?

    Absolutely! You can fill these gluten-free Linzer cookies with any kind of jam you like. You can also use homemade apple butter, caramel sauce, lemon curd, or even Nutella.

    More Festive Cookie Ideas

    • Lemon crescent cookies in a tin box with christmas decorations around.
      Lemon Crescent Cookies
    • matcha pinwheel cookies in a bowl on a green napkin.
      Matcha Pinwheel Cookies
    • decorated christmas wreath cookies on a plate with christmas decor around.
      Christmas Wreath Cookies
    • French heart cookies in a small tray on a wooden board with old papers.
      French Hearts Recipe

    Half the joy of cooking is sharing it with others. That’s why I’m always eager to hear from you. So go right ahead & drop a comment or reach out on Instagram, Pinterest, YouTube, or Facebook. I hope you love these gluten-free Linzer cookies as much as we do!

    📖 Recipe

    Tried this recipe?Let us know how it was!
    Gluten-free Linzer Cookies | Almond Buckwheat Linzer Cookies

    Gluten-free Linzer Cookies

    Natasha Minocha
    These Gluten-free Linzer Cookies, sandwiched with delicious fruit jam, are a delightful holiday bake, made with simple pantry ingredients and little effort!
    3 from 2 votes
    Print Recipe Pin Recipe
    Prep Time 15 minutes mins
    Cook Time 12 minutes mins
    Chilling time for the dough 20 minutes mins
    Course Cookies
    Cuisine American
    Servings 24 Cookies
    Calories 94 kcal

    Ingredients
      

    • 2/3 cup Butter I use salted butter
    • 1/2 cup Icing sugar Plus more for dusting on the cookies.
    • 1 cup Buckwheat flour
    • 1/2 cup Almond meal
    • 1 tsp Vanilla extract
    • 1/4 cup Strawberry jam You can use any jam of your choice. You may need more.
    • Icing sugar for dusting on top

    Instructions
     

    • Preheat the oven to 180 C / 350 F and line a baking sheet with parchment paper or Silpat.
      Keep a 2" star-shaped cookie cutter and a smaller star-shaped cookie cutter handy. You can use any shape though.
    • Beat the butter in a large bowl, until smooth. Add the sugar. Beat until fluffy.
    • Mix in the vanilla extract, buckwheat flour and almond meal. Use your hands to bring together the dough gently.
    • Divide the dough into half. Roll each half into a disc.
      Wrap each disc with plastic wrap and place in the refrigerator for 15-20 minutes or so.
    • Flour your work surface well, working with one dough ball at a time, roll out into a rough circle, about 1/8" thick.
    • Use a heart shaped cookie cutter, cut out the cookies. Use a smaller heart shaped cookie cutter to cut out the centers of half of the cookies. As you will be sandwiching the cookies, make sure there are equal number of whole cookies and cookies with cutouts.
    • Place them on the baking sheet and bake for about 10-12 minutes, until golden.
    • Cool the cookies completely and sprinkle the cutout cookies with icing sugar.
    • Now assemble the cookies. Place one whole cookie, right side down, put a small teaspoon of jam in the center, and spread it gently. Place the cutout cookie on top. Press it slightly. Continue with the rest of the cookies.
    • Serve and enjoy!

    Notes

    • If your dough seems too sticky. You can do 2 things - add a little bit more flour or chill the dough for a longer time.
    • If your dough is too dry, you can add 1-2 tablespoons of milk.
    • You can make the dough ahead of time, up to 2 days in advance in the refrigerator. You will need to let the cold dough sit at room temperature for a few minutes before rolling it out.
    • You can use any kind of jam or filling to sandwich the cookies.
    • Store the cookies in an air-tight container for up to 5 days at room temperature.
     

    Nutrition

    Serving: 1 CookieCalories: 94kcalCarbohydrates: 9gProtein: 1gFat: 6gSaturated Fat: 3gPolyunsaturated Fat: 0.2gMonounsaturated Fat: 1gTrans Fat: 0.2gCholesterol: 13mgSodium: 42mgPotassium: 34mgFiber: 1gSugar: 4gVitamin A: 156IUVitamin C: 0.3mgCalcium: 9mgIron: 0.3mg

    Christmas Rum Cake

    December 17, 2021

    christmas rum cake on a serving platter on a colorful runner with a cake server.

    Warm spices, candied fruits, crunchy nuts embedded in a gooey, moist crumb soaked in enough rum to reach blissful heaven: this Christmas rum cake is not the usual fruitcake. It has a sweet side perfectly counterbalanced by the bite of cloves, ginger, and nutmeg.

    christmas cake on a serving platter with christmas decorations around.

    And I know there are endless Christmas cake recipes, with each family swearing up and down that, theirs is the best, but this is my favorite way to make it. 

    It is so loaded with exquisite revelry of savors that a little goes a long way. And it tests my willpower mercilessly, begging for a nibble. I’m not ashamed to admit that already only a tiny morsel of it is left!

    [feast_advanced_jump_to]
    a slice of christmas rum fruit cake on a small plate with a fork.

    Recipe Ingredients

    Sugar: Typically, traditional Christmas cakes have brown sugar. I just wanted to make use of the jaggery powder I had lying around, so that’s what went into the recipe. FYI, it lends a gorgeous, deep caramelly flavor. 

    Egg: I have never made an eggless Christmas fruitcake. However, you can substitute the eggs with full-fat Greek yogurt. Homemade yogurt is another alternative, as long as you drain it thoroughly. You don’t want watery yogurt in this recipe. 

    Fruits: You can use any combination of fruits and dry fruits you relish or are available. Raisins of any type, black currants, dates, candied ginger, everything works.

    Nuts: These are optional. Cashews and almonds are my preference. You can use whatever rocks your tastebuds: walnuts, pecans, hazelnuts.

    Spices: Pander to your palate and pick the spice(s) you love. I adore the sharpness of ginger and the bite of cloves. But if you don’t enjoy them, simply stick to cinnamon. For a citrus punch, up the amount of orange zest.

    Alcohol: Whiskey is not necessary for fruit cakes. But I really enjoy using it for this cake. Only rum is fantastic for the cake. Brandy also works.

    Booze-free: Without a worry, replace the rum with orange juice. Wherever the recipe calls for alcohol, absolutely go ahead with OJ. You’ll still get a wonderfully flavorsome cake.

    How To Soak Fruits for Christmas Rum Cake?

    fruits soaked in alcohol in a glass jar.

    Soaking the fruits in rum is the most essential part of the Christmas cake. It’s also the reason why most people don’t try it because they think it’ll take ages. You can also use the soaked fruits for making this scrumptious German Christmas stollen!

    So, I found a shorter route (see the FAQ section) to rum cake. Where the cake can be ready in days, not weeks or months. But, if you have the time and Christmas is still a ways off, follow the (slightly) longer one. The result is a perfect holiday gift (or a treat to be kept all for yourself).

    Soak the Christmas cake fruits in rum 

    • Add to a mixture of rum and whiskey, cherries, cranberries, apricots, figs, tutti-frutti, and orange peel.
    • Close the jar and set it aside for at least 10 days. If you have the time, soak for 1 or 2 months.
    • For those enjoying chilly winters like me, the kitchen/pantry countertop is fine. If it’s warm where you are, refrigerate the jar. 
    • Every couple of days, shake the jar. 

    How To Make Christmas Rum Cake 

    Step 1: In a bowl, beat softened butter with jaggery powder till it's light and creamy. 

    Step 2: Add an egg. Beat it in and then add another egg. Beat again and then incorporate the last egg. 

    Step 3: In another bowl, sift all-purpose flour, almond flour, baking powder, and baking soda. 

    Step 4: Mix ginger powder, clove powder, cinnamon powder, and grated nutmeg into the dry ingredients.

    Step 5: Fold the dry ingredients into the wet, and you’ll get a thick batter. 

    Step 6: Now add in the soaked fruits. 

    Step 7: I appreciate a bit of crunch and a play of texture in my Christmas cake, so I also included chopped cashews and almonds. However, this is a completely optional step. Feel free to omit it. 

    Step 8: The final touch was orange zest, giving the rum cake a citrusy brightness. 

    nuts ans soaked fruits on top of cake batter in a mixing bowl.
    cake batter in a parchment paper lined round cake tin.

    Step 9: Take an 8-inch tin and grease it liberally. 

    Step 10: Line the bottom with butter or parchment paper. 

    Step 11: I advise lining the sides with paper too. It just makes it so much easier to take out the cake. 

    Step 12: Grease the paper as well, so that the cake doesn’t stick. Pour the batter into the tin and then bake in a preheated oven for a good 1 hour and 15 minutes.

    baked christmas cake with rum in a round cake tin.

    Store And Feed The Christmas Cake With Rum

    Once baked, the cake can be eaten immediately ( after it's cooled), but feeding it enhances the flavor, adding a luscious dimension. The longer you keep the cake, the more intense the flavors will be. I fed the cake for two days, and it developed the flavors stunningly.

    • Once the cake is baked, grab a skewer and gently poke holes in the cake. 
    • Then either brush or slowly drizzle the soaked fruit liquid so that it seeps inside and noses its way to random pockets of crumbs. You also have the option of feeding it just rum.
    • Let it cool completely. It is important to mature the flavors.
    • Then wrap it in foil nicely and store it.
    • The next day, unwrap and then brush either the soaked fruit liquid or rum once again. 
    christmas rum cake with a slice taken out on a small plate.

    Serving the Christmas Rum Cake

    When you’re ready to serve the cake, garnish with some glace cherries or a spoonful of any leftover soaked fruit. Don’t have either? Dust it with icing sugar or dig in as-is; the dense, rich, and super flavorful cake needs no embellishments. 

    I bid you adieu with a little inside tip. Give the cake a little time to marry all the spices and live happily ever after. My recommendation is to let it feed and mature for a day before you dig in. 

    Trust me, you will not regret the wait!

    rum cake with a slice taken out to show its texture.

    Recipe FAQs

    How long should you soak fruits for Christmas fruit cake?

    The longer you soak the fruits, the more flavor your cake will have. A month or two is what most people say. I kept them for 10 days, and the cake was sweet, spiced, and lush, with yummily boozy!

    Is there a quicker method to soak the fruit for the Christmas cake?

    There is a shortcut to soaking fruits in alcohol. You can do it overnight. For those bound by time, use these steps:
    - Combine the rum and whiskey with the fruits in a saucepan.
    - Gently bring it to a bare simmer and then switch off the heat.
    - Let it cool down to room temperature and then use it in the recipe. 

    What should be the consistency of the Christmas rum cake batter?

    The batter is thick with a consistency that drops slowly from a spoon. If you feel it’s too thick, you have three options:
    - Pour some of the liquid you soaked the fruits in.
    - Include a splash of rum.
    - Use freshly squeezed orange juice. 

    How do you know when a Christmas fruit cake is done?

    You’ll know the fruitcake is done when a skewer inserted in the center of the cake comes out clean. I recommend checking the cake after the one-hour mark is crossed, as oven temperatures differ a lot. 

    How do you stop the Christmas cake from burning?

    If the top of the cake is browning too much or too fast, loosely cover the top with foil.

    Can I make Christmas fruit cake alcohol-free?

    Yes! You can easily substitute alcohol with orange juice for soaking the fruits and also for feeding the cake.

    More Christmas Recipes To Try This Holiday Season

    • walnut pie on a red napkin with a knife alongside.
      Easy Walnut Pie
    • masala chai tiramisu in a blue dish with chai masala and other spices around.
      Masala Chai Tiramisu
    • sliced no-knead cranberry walnut bread on a wooden board.
      No-Knead Cranberry Walnut Bread
    • Mulled Wine Cake |Mulled wine chocolate cake
      Mulled Wine Cake

    Half the joy of cooking is sharing it with others. That’s why I’m always eager to hear from you. So go right ahead and drop a comment or reach out on Instagram, Pinterest, YouTube, or Facebook. I hope you love this Christmas Rum Cake as much as we do!

    📖 Recipe

    Tried this recipe?Let us know how it was!
    Christmas Rum Cake | Christmas Plum Cake Recipe

    Christmas Rum Cake

    Natasha Minocha
    Christmas Rum Cake - Warm spices, candied fruits, crunchy nuts embedded in a gooey, moist crumb soaked in enough rum to reach blissful heaven! A no-fuss, easy recipe to make the loveliest cake of the season!
    4.75 from 4 votes
    Print Recipe Pin Recipe
    Prep Time 15 minutes mins
    Cook Time 1 hour hr 15 minutes mins
    Soaking time 7 days d
    Course Cakes, Dessert
    Cuisine British, World
    Servings 12 servings
    Calories 512 kcal

    Ingredients


    Soaking dry fruits

    • 1/3 cup Tutti frutti
    • 1/3 cup Dried cranberries
    • 1/3 cup Dried figs, chopped
    • 1/4 cup Dried cherries
    • 1/4 cup Dried apricots, chopped
    • 2 tbsp Orange peel
    • 1 cup Rum
    • 1/2 cup Whiskey

    Cake

    • 1 cup Butter, softened
    • 1 1/4 cup Jaggery powder or Brown sugar
    • 3 Eggs, room temperature You can replace the eggs with 120 gms or 1/2 cup of plain Greek yogurt.
    • 2 1/4 cup All-purpose flour
    • 1/2 cup Almond flour
    • 1 tsp Baking powder
    • 1/2 tsp Baking soda
    • 1.5 tsp Cinnamon powder
    • 1.5 tsp Ginger powder
    • 1/2 tsp Clove powder
    • 1/2 tsp Nutmeg powder
    • Zest of 1 orange
    • 1/4 cup Almonds, chopped
    • 1/4 cup Cashew, chopped

    Instructions
     

    Soaking dry fruits

    • Combine all the dry fruits and orange peel in a jar. Pour over the rum and whiskey. Stir well and set aside for at least 1 week.

    Cake

    • Preheat your oven to 170C. Grease and line an 8" cake tin with parchment paper. Butter the parchment paper too.
    • Sift together the flours, spices, baking powder, and baking soda in a large bowl.
    • In another bowl, beat together the butter and jaggery powder or brown sugar, until pale and creamy.
    • Add in the eggs, one at a time.
    • Fold in the dry ingredients, until no white streaks remain.
    • Fold in the orange zest, nuts, and all the soaked fruits ( keep aside 2-3 tbsp for topping the cake later).
    • This will be a thick batter. Pour into the prepared cake tin and smooth the top.
    • Bake at 170C for 1 hour 15 minutes, or until a skewer inserted in the center comes out clean.
      If the top is getting too brown, cover lightly with foil.
    • Once you've taken the cake out of the oven, use a wooden skewer to poke holes on the surface of the cake. Brush with rum or the leftover alcohol from soaking. Let the cake cool completely. Cover with aluminum foil and let the cake rest for at least 1 day.
    • Next day, unmould the cake and place it on a serving platter. Brush the surface again with rum or leftover soaking alcohol.
    • Top with reserved soaked fruits and some glace cherries if you like. Cut into slices and serve. Enjoy!

    Notes

    *This cake can be kept out for 1 week before serving. Just make sure its tightly covered in aluminum foil. 
    *You can brush or feed the cake with rum or leftover alcohol from soaking the fruits every 2 days for a more intense flavor.
    *If you don't have the time to soak the dried fruits for a week, simply combine all the soaking ingredients and bring it to a gentle simmer on low heat. Take it off the heat, let it come to room temperature, and then proceed to use in the cake as per the recipe.

    Nutrition

    Serving: 1 ServingCalories: 512kcalCarbohydrates: 57gProtein: 7gFat: 22gSaturated Fat: 11gPolyunsaturated Fat: 2gMonounsaturated Fat: 6gTrans Fat: 1gCholesterol: 82mgSodium: 233mgPotassium: 189mgFiber: 3gSugar: 34gVitamin A: 736IUVitamin C: 1mgCalcium: 89mgIron: 2mg

    Eggless Brownie Cookies

    December 14, 2021

    brownie cookies on a platter.

    Eggless brownie cookies are fudgy, chewy, rich in the middle, crispy, and crunchy around the edges. A fusion of cookies and chocolate brownies, the brookies are easy to make and the best cookie recipe without eggs!

    eggless brownie cookies on a platter with Christmas decorations around.

    Everyone will love these fudgy chocolate brownie cookies. I didn’t need evidence of it. There are over 200 comments on Sally’s Baking Addiction recipe (from where I’ve adapted the recipe) about these mind-blowing cookie brownies. But the appreciative noises from my family as they devoured the brookies were rewarding.

    [feast_advanced_jump_to]

    Why You’ll Love This Recipe

    Simple ingredients and incredibly easy to make—anyone can follow the recipe.

    Comes together rather fast, that's always a bonus!

    Perfect homemade gift for the season.

    Fudgy and intensely chocolatey, with a crackly top -Yum!!

    Recipe Ingredients

    ingredients for making brownie cookies.

    Flour: All-purpose works best for a tender cookie crumb.

    Psyllium husk, or Isabgol, acts as an egg substitute. Don’t have psyllium? Use flaxseed powder like I did for my gluten-free chocolate gingerbread cookies.

    Brown sugar: For sweetening the brookies! The molasses in the brown sugar gives a lovely, deep, caramel flavor. Jaggery powder is a great substitute.

    Chocolate: There are three protagonists in eggless brownie cookies: butter, sugar, and chocolate. They make all the difference. It’s very, very, very important that they are the best quality possible, and the result will be everything you could want in a cookie brownie—rich, chewy, and divine. A good baking chocolate is what you need for sure!

    I used 70% dark chocolate, as we have a soft spot for the bitter undertone. If you prefer 60%, 45%, or 40% chocolate, use that. As long as the quality is good, the texture will be perfect.

    Vanilla extract: For a balanced and deeper flavor.

    See the recipe card for full information on ingredients and quantities.

    Eggless Brownie Cookie Variations

    Don’t let a missing ingredient keep you from trying this eggless brookies recipe. The good thing about baking? There are many routes to the same destination. Here are some of the substitutions that work like a charm:

    Egg: Feel free to use 2 regular eggs if you don’t have flaxseed or psyllium husk.

    Add-ins: The eggless brownie cookies' dough is ready to use as-is, but if you’re in the mood for some Christmas oomph, try:

    • Chocolate chips: fold them into the batter right at the end. For once, I wasn’t liberal with them because the dough already had a monumental amount of chocolate. But you do you and make full-blown chocolate chip brownie cookies.
    • Coffee powder does alchemy with chocolate. It enhances the taste, lending a deeper layer to the flavor profile. As it did in these chocolate crinkle cookies. Add a teaspoon to the dry ingredients.
    • Cinnamon, who doesn’t love the warming spice during the holiday season? Like in my super easy almond cinnamon cookies!

    Toppings: To round out the flavors of the brownie cookies, sprinkle sea salt the second they are out of the oven. 

    stack of cookies with one half cookie on top to show the fudgy center.

    How To Make Brownie Cookies

    Step 1: Mix 2 tablespoons of psyllium husk with 6 tablespoons of water. Set it aside for 5 to 10 minutes.

    Step 2: In a double boiler, melt dark chocolate. Set this aside to cool.

    Step 3: Meanwhile, in another bowl, mix all-purpose flour with cocoa powder and baking powder.

    Step 4: In another bowl, beat softened butter and brown sugar until light and fluffy. To this, fold in your flax egg and homemade vanilla extract.

    Step 5: Add the wet ingredients to the melted, cooled chocolate.

    Step 6: Stir in the dry ingredients to make a soft, manageable eggless brownie cookie dough. 

    Step 7: With a spoon, scoop out the dough and place it on a Silpat or parchment paper-lined cookie tray. 

    Step 8: Bake the brookies for about 12–14 minutes.

    Step 9: Cool on a wire rack.

    Final step: Serve and savor!

    Pro Tips

    • Cool the chocolate after melting. You don’t want hot chocolate in your cookie dough. 
    • Don’t skimp on the chocolate. Stick to my recommendation, and you’ll be thanking God with every bite. 
    • The eggless brownie cookies with cocoa powder cookies will be soft right out of the oven. Don’t worry. They firm up as they cool on a wire rack.
    • Love a crispier texture? Bake the brookies for a couple of minutes longer.
    • Be careful not to overbake the brownie cookies. You want that fudgy middle.
    brownie cookies on a platter to show the crackly top.

    Brownie Cookies Recipe FAQs

    How to make a double boiler?

    Fill a pot with an inch or two of water. Place a smaller metal or glass bowl on top of it. The fit should be snug. The bottom of the smaller bowl should not touch the water. Heat till the water is simmering, and the steam begins to melt the chocolate.

    Can I add salt to my cookie dough?

    Yes, if your butter is unsalted, incorporate half a teaspoon of salt into your dry ingredients. I used salted butter, which is why my easy brownie cookie recipe doesn’t include it separately. 

    Do I need to chill the cookie dough before baking?

    I’ve baked these brookies with both chilled cookie dough and one that wasn’t refrigerated. For me, both worked very well.
    However, if it’s still warm or hot where you are, refrigerate the chocolate brownie cookie dough for at least 20 to 30 minutes.

    How do you make vegan brownie cookies?

    These brownie cookies with no egg are very adaptable. You can make them vegan by switching to plant-based butter and dairy-free chocolate. 

    Can you store eggless brownie cookies?

    They store well at room temperature, but you can refrigerate them too. I did. And it transformed the texture, making the brookies gooier in the center, which I loved. My family preferred the ones at room temperature. So, I'll leave it up to you. They are great either way!

    Christmas Cookie Recipes

    • Coconut Macaroons | Easy Coconut Macaroon Recipe
      Coconut Macaroons
    • Five Chocolate ginger cookies stacked up on parchment paper with a red string.
      Chocolate Ginger Cookies
    • Almond Cinnamon Cookies | Easy vegan gluten-free cookies
      Almond Cinnamon Cookies
    • Gluten-free Waffle Cookies | Eggless Waffle Cookies Recipe
      Gluten-free Waffle Cookies

    Half the joy of cooking is sharing it with others. That’s why I’m always eager to hear from you. So go right ahead and drop a comment or reach out on Instagram, Pinterest, YouTube, or Facebook. I hope you love these eggless brownie cookies as much as we do!

    📖 Recipe

    Tried this recipe?Let us know how it was!
    brownie cookies on a platter.

    Eggless Brownie Cookies

    Natasha Minocha
    Eggless Brownie Cookies- fudgy, chewy, and rich in the middle, and crispy, and crunchy around the edges. These cookies are just divine!
    No ratings yet
    Print Recipe Pin Recipe
    Prep Time 15 minutes mins
    Cook Time 15 minutes mins
    Course Cookies, Snack
    Cuisine American
    Servings 20 Cookies
    Calories 173 kcal

    Ingredients


    • 2 tbsp Psyllium husk or flaxseed powder
    • 6 tbsp Water
    • 1 1/3 cup Dark chocolate chips 70%
    • 3/4 cup All-purpose flour
    • 1/4 cup Cocoa powder
    • 1 tsp Baking powder
    • 1/3 cup Butter, softened
    • 3/4 cup Brown sugar
    • 1 tsp Vanilla extract
    • 1/2 cup Chocolate chips ( optional)

    Instructions
     

    • Preheat your oven to 180C. Line a baking tray with Silpat or parchment paper.
    • In a small bowl, combine the psyllium husk or flax meal and water. Stir well and keep aside for 5 minutes until it thickens.
    • Melt the chocolate in a bowl set over simmering water. Once the chocolate has melted, keep aside for a few minutes to cool down.
    • Sift together the all-purpose flour, cocoa powder, and baking powder in a bowl.
    • In a separate bowl, beat together the butter and brown sugar until fluffy.
    • Add in the cooled, melted chocolate. Mix well.
    • Stir in the psyllium-water mixture and vanilla extract.
    • Fold in the dry ingredients. Mix well. Add chocolate chips if using.
    • Scoop out the batter onto the prepared tray, using a tablespoon. Make sure there is space between the dough balls.
    • Bake for 12-14 minutes. The cookies will be soft but will harden up a bit as they cool.
    • Store the cooled cookies in an air-tight container at room temperature or in the refrigerator. Enjoy!

    Notes

    • Cool the chocolate after melting. You don’t want hot chocolate in your cookie dough. 
    • Don’t skimp on the chocolate. Stick to my recommendation, and you’ll be thanking God with every bite. 
    • The eggless brownie cookies with cocoa powder cookies will be soft right out of the oven. Don’t worry. They firm up as they cool on a wire rack.
    • Love a crispier texture? Bake the brookies for a couple of minutes longer.
    • Be careful not to overbake the brownie cookies. You want that fudgy middle.

    Nutrition

    Serving: 1 ServingCalories: 173kcalCarbohydrates: 23gProtein: 2gFat: 9gSaturated Fat: 7gPolyunsaturated Fat: 0.2gMonounsaturated Fat: 1gTrans Fat: 0.1gCholesterol: 8mgSodium: 67mgPotassium: 140mgFiber: 2gSugar: 14gVitamin A: 98IUVitamin C: 0.1mgCalcium: 73mgIron: 1mg

    Easy Walnut Pie

    December 8, 2021

    walnut pie on a red napkin with a knife alongside.

    Walnut pie has a nuttiness that tastes amazing. Every bite is a delicious combination of flaky crust, earthy nuts, and caramelly filling. It’s an easy walnut pie recipe and so quick to whip up!

    walnut pie with a knife on a red napkin surrounded by ingredients and props.

    This recipe for walnut pie is a twist on the classic pecan pie recipe. I replaced pecans with walnuts and threw in a handful of other Tasha twists. The result? Super rich, buttery crust and luscious filling!

    [feast_advanced_jump_to]

    Why You’ll Love The Recipe

    It has gooeyness in spades.

    It’s a showstopping dessert for Thanksgiving, much like a burnt basque pumpkin cheesecake.

    It's easy to make this pie ahead of time. It freezes well, for up to 1 month.

    It’s the pie that wants for nothing and can be customized to your taste!

    Walnut Pie Recipe Ingredients

    ingredients for walnut pie.

    Flour: All-purpose flour is the best choice.

    Sugar: I used powdered sugar for the crust and coconut sugar for the walnut pie filling.

    The butter needs to be cold, to make the crust. Cut into cubes so it’s easier to work into the flour. The butter has to be melted and cooled for the walnut pie filling.

    Water must be chilled.

    Eggs need to be at room temperature to make a smooth filling.

    Walnut: Cut them two ways. Roughly chop them up for the pie filling and halve them for the topping.

    Vanilla extract adds a depth of flavor to the easy walnut pie.

    See the recipe card for full information on ingredients and quantities.

    Substitutes and Variations

    Honey: Typically, pecan pies (the original muse for this recipe) are made from light corn syrup. I didn’t have any and substituted it with honey. You can even replace it with maple syrup. 

    Butter: Chilled coconut oil will work in a jiffy. For a vegan walnut pie, try plant-based butter.

    Eggs: Swap regular eggs with flax eggs. To make two flax eggs, mix 2 tablespoons of ground flaxseed with 6 tablespoons of water. Set that to chill in the fridge for 10–15 minutes.

    Cinnamon is optional. It brings a wonderful winter flavor to many dishes, which is why I use oodles of cinnamon honey butter during these months. But feel free to skip it.

    Nuts: Don’t have walnuts? Use pecans. Want more nuts? Add some. Want a nuttier taste? Toast the walnuts. I know it’s one more step in the recipe, but the flavor toasted nuts bring is addictive. On low heat, roast the nuts for five minutes till they’re fragrant. You can use either the oven or your stovetop. 

    Add-ins: Add a tablespoon of rum to give the walnut pie a boozy touch.

    cross section of walnut pie on a serving platter.

    How To Make Easy Walnut Pie

    Step 1: Sift flour with a tablespoon of powdered sugar and then rub in chilled, cubed pieces of butter. When the mixture looks like coarse bread crumbs, fold in 3 to 4 tablespoons of cold water. 

    Step 2: Working with your hands, gather the walnut pie dough and form a ball. You don’t need to knead; it comes together rather easily.

    Step 3: Flatten the dough slightly, wrap it in foil, and refrigerate for 10 to 15 minutes. It’ll make the dough firm and easy to handle.

    Step 4: Dust your work surface lightly with flour, then roll the walnut pie crust to 1/8th inch thickness and about 10"-11" diameter.

    Step 5: Gently pick up the crust and place it in an 8-inch pie dish. With a firm hand, press it inwards along the base and edges so it takes the shape of the dish. Cut off the extra dough around the edge with a knife. 

    Step 6: Prick the base with a fork and then slide the whole thing into the fridge or freezer while you make the walnut pie filling. 

    Step 7: In a bowl, beat 2 eggs with coconut sugar till they're voluminous. Mix in flour, honey, vanilla extract, and a teaspoon of cinnamon. 

    pie crust and pie filling in a bowl.

    Step 8: Now add melted butter that’s been cooled to room temperature, and fold in roughly chopped walnuts.

    Step 9: Pour the walnut pie filling into the chilled pie crust. Top it with halved walnuts.

    unbaked walnut pie in a pie dish on a tray.

    Step 10: For the first 15 minutes, bake the pie at 200°C. Then lower the temperature to 180°C and bake for 30 minutes more till the pie appears to be set but has the teeny, the tiniest wiggle in the center.

    Step 11: Let the pie cool for at least 2 hours before you cut.

    Final step: Serve and savor!

    baked pie on a trivet with ingredients around.

    Pro Tips

    • It’s very, very important that all ingredients are at room temperature, except butter for the crust. I let mine sit on the countertop for 45 minutes to 1 hour. 
    • Butterand water for making the pie crust must be chilled!
    • Use your fingertips to rub the butter in when making the crust dough. Why not the palms? Because they generate more heat that melts the cold butter, something you do not want. 
    • If your eggs are cold, and you’re short on time, keep a pan of warm water under the bowl you’re using to mix the filling. You’ll get a nice, smooth, and creamy filling. 
    • Pie fillings have a rude tendency to curdle. They’re finicky like that. Adding a bit of flour to the filling helps stabilize it.
    • Most recipes for pies cream butter and sugar first and add the eggs later. It has never worked for me. Every time, pie after pie, the filling curdled. To avoid that, I incorporate butter at the end, and it works like magic. 
    • Each oven is different, and bake times tend to vary. So, I suggest keeping an eye on the pie after it’s crossed the 25-minute mark.

    How To Serve

    The best way to serve walnut pie, according to me, is as-is. The deep bronze pie has a rustic beauty that I didn’t want to spoil, even with a simple dusting of sugar. But you do, you. Feel like making the easy walnut pie recipe extra decadent? Serve it with:

    • A scoop of vanilla, like I did my mulberry pie with crumble. 
    • A drizzle of homemade vegan caramel sauce
    • Whipped cream  
    a slice of walnut pie on a small plate.

    Recipe FAQs

    Why is my pie dough not coming together?

    If the dough feels too dry or is not sticking together, you need to add more chilled water when gathering the pie crust into a smooth dough. 

    How long can uncooked pie dough be refrigerated?

    The great thing about walnut pie recipes is that you can prep it ahead. Make the dough a couple of days in advance. You can keep the rolled-out pie dough in the refrigerator for 3 days. 

    Why do you need to bake the pie at two different temperatures?

    We’re not blind baking the pie crust like we did in my mushroom quiche. That’s why we need to bake it at high temperatures first. To make sure the crust is cooked through. For the same reason, I advise placing the pie on the lower rack of the oven rather than the middle. 

    Can you blind-bake a walnut pie crust?

    You can, of course, pre-bake the crust, especially if you love the crunch of a well-done tart shell. Use my quiche recipe for the steps to blind baking a crust. When you reach the final baking stage, keep the oven temperature at 180°C and bake for 25 minutes. 

    How do you know when the walnut pie is done?

    The top of the pie should be deep golden brown. The crust should be puffy. And the middle of the pie will jiggle if you shake it. 

    What to do if the pie crust is browning too much?

    Loosely cover the top of the pie with a foil ring if the crust is threatening to burn. 

    Can walnut pie be frozen?

    Cool the pie completely and wrap it well in plastic wrap and then foil. This will stay well for up to 1 month in the freezer. You can also refrigerate the pie for up to 3 days. Reheat in a preheated oven.

    More Pie Recipes

    • Gluten-free Apple Hand Pies | easy apple pie recipe
      Gluten-free Apple Hand Pies
    • Apple pie in a basket lined with green checked napkin with apples and forks around.
      Classic Apple Pie
    • A sliced tart with almonds and strawberries on parchment paper.
      Strawberry Frangipane Tart
    • Cherry pie with a few fresh cherries on top.
      Cherry Pie

    Half the joy of cooking is sharing it with others. That’s why I’m always eager to hear from you. So go right ahead & drop a comment or reach out on Instagram, Pinterest, YouTube, or Facebook. I hope you love this walnut pie as much as we do!

    📖 Recipe

    Tried this recipe?Let us know how it was!
    walnut pie on a red napkin with a knife alongside.

    Easy Walnut Pie

    Natasha Minocha
    Walnut pie has a nuttiness that tastes amazing. Every bite is a delicious combination of flaky crust, earthy nuts, and caramelly filling. It’s an easy walnut pie recipe and so quick to whip up!
    5 from 1 vote
    Print Recipe Pin Recipe
    Prep Time 30 minutes mins
    Cook Time 35 minutes mins
    Course Dessert
    Cuisine American
    Servings 8 servings
    Calories 566 kcal

    Ingredients


    Pie Crust

    • 1.5 cup All-purpose flour
    • 1 tbsp Powdered sugar
    • 1/2 cup Butter, cold and cut into cubes
    • 3-4 tbsp Cold water

    Walnut Pie Filling

    • 2 Eggs, at room temperature
    • 3/4 cup Coconut sugar You can also use brown sugar instead
    • 1/4 cup Honey
    • 2 tbsp All-purpose flour
    • 1 tsp Cinnamon powder (optional)
    • 1 tsp Vanilla extract
    • 6 tbsp Butter, melted and cooled
    • 2 cup Walnuts, roughly chopped
    • 8-10 Walnut Halves, for topping (optional)

    Instructions
     

    Pie Crust

    • Combine the flour and butter in a mixing bowl.
    • Rub the butter into the flour, using your fingertips, until the mixture resembles coarse breadcrumbs.
    • Pour in the water, 1 tbsp at a time, and bring the dough together.
    • You don’t have to knead it. Using only the heel of your hand push the dough away from you. Then bring it back with your fingertips till smooth.
    • If the dough feels dry whisk in more chilled water. 
    • Shape the dough into a ball, flatten it slightly, cover in cling wrap and then refrigerate for 10-15 minutes.
    • Keep an 8" pie dish handy.
      On a very lightly floured surface (you don’t want excess dry flour), roll out the dough to an approximately 10" circle. 
    • Pick it up gently and place it in your pie dish. Push the dough inwards along the edges and the base with a very firm hand.
    • After you’ve made sure the dough fits the pan well, trim the dough that’s hanging over with a sharp knife. Prick the base with a fork and place the pie crust in the freezer while you work on the filling.

    Walnut Pie Filling

    • Preheat the oven to 200C.
    • Toast the walnuts lightly ( about 5 minutes) in an oven or in a skillet over the stovetop. Let cool.
    • In a bowl, beat together the eggs and coconut sugar until thick and pale.
    • Add honey, flour, vanilla extract, and cinnamon powder ( if using).
    • Whisk in the melted butter. You'll have a smooth, thickish batter.
    • Fold in the toasted, cooled walnuts.
    • Pour this batter into your chilled pie crust. Top with walnut halves if you like.
    • Bake for 15 minutes at 200C, on the lower rack. Then lower the oven temperature to 180C and continue baking for 35-40 minutes until the pie filling is slightly puffy and is a bit firm to touch in the center.
    • Let the pie cool for at least 2 hours. Slice and serve as is or with whipped cream or ice cream. Enjoy!

    Nutrition

    Serving: 1 ServingCalories: 566kcalCarbohydrates: 47gProtein: 9gFat: 41gSaturated Fat: 15gPolyunsaturated Fat: 15gMonounsaturated Fat: 8gTrans Fat: 1gCholesterol: 94mgSodium: 207mgPotassium: 187mgFiber: 3gSugar: 20gVitamin A: 689IUVitamin C: 0.4mgCalcium: 48mgIron: 2mg

    Chocolate Fudge With Condensed Milk

    December 6, 2021

    chocolate fudge squares stacked on top of each other on small plate.

    This chocolate fudge with condensed milk is decadent, velvety, and chewy. It’s the easy and I don't-have-time way of making fudge at home with just 4 ingredients and 15 minutes. Perfect homemade gift for the holiday season!

    chocolate fudge squares stacked on a plate.

    Of all life’s pleasures, nothing is more indulgent than a piece of good chocolate. Except when you turn it into a rich, intense, and melt-in-your-mouth dessert. That’s what you get with this easy chocolate fudge recipe.

    It is not how you typically make fudge. As said, it’s the easy-quick way. Yet. Yet. The result disappears faster than you think. I’ve lost count of the number of times I’ve made chocolate fudge with condensed milk (and all the variations of it) using this recipe.

    A recipe for which full credit goes to Nigella Lawson, a goddess when it comes to the kitchen and someone I look up to for cooking and baking. I have most of her cookbooks, and every recipe is divine. If you haven’t checked out her blog yet, you’re missing some seriously delicious stuff. 

    [feast_advanced_jump_to]
    fudge squares on parchment paper.

    Why You’ll Love This Recipe

    4 basic ingredients

    Hit for the holidays

    Needs just 5 minutes of your attention

    Makes a big batch, divine for Christmas gifting to spread a little love

    Recipe Ingredients

    Ingredients for making chocolate fudge.

    Condensed milk- I used sweetened condensed milk.

    The butter should be at room temperature. I used salted butter, if you prefer to use unsalted butter, please add 1/4 tsp salt to the fudge mixture.

    Chocolate: I just love dark chocolate, so I used 70%. The darker, the better. 65% to 75% works best for me. White chocolate fudge with condensed milk tastes equally tasty if that’s your preference.

    Rosewater is my twist to Nigella’s recipe and is completely optional (but personally recommended). Feel free to skip them.

    See the recipe card for full information on ingredients and quantities.

    Chocolate Fudge Variations

    Nuts: I love the mouthfeel of nuts. The crunch hidden inside the fudgy goodness is heaven to me. You don’t have to stick to pistachios or walnuts. Any nut you like works, or you can leave them out. Absolutely. I promise the fudge is just as delicious. 

    Love nuts? Toast them. Cool them. Then add them to the chocolate mixture. It’s an extra step, but 100% worth it. I didn’t know you could make fudge any better, but toasted nuts proved me wrong, making it crunchier.

    Add-ons: One reason I find this the best chocolate fudge recipe with condensed milk is that it’s adaptable. You can change the flavor and take it in any direction by adding:

    • Pure orange oil and peel for citrusy brightness
    • Coffee powder. When chocolate stars in a recipe, coffee is the perfect pair.
    • Dried cranberries or cherries
    • Sea salt
    chocolate fudge pieces stacked on top of each other.

    How To Make Chocolate Fudge With Condensed Milk?

    Step 1: In a thick-bottomed pan, on low heat, add sweetened condensed milk.

    Step 2: Combine it with salted butter and dark chocolate. Stir, stir, stir until everything is melted, and you have a nice, glossy, silky mixture.

    Step 3: Turn off the heat and let the mixture cool a touch. Then whisk in a few drops of rose water.

    Step 4: Finally, fold in your chopped pistachios and walnuts.

    Step 5: Pour the mixture into an 8-inch square pan lined either with parchment paper or aluminum foil.

    chocolate fudge topped with pistachios, walnuts, rose petals in a square pan lined with foil.

    Step 6: Smoothen the top and scatter a few more pistachios along with dried rose petals. (The pop of green and red brings all the Christmas feels.)

    Step 7: Slide the condensed milk chocolate fudge into the fridge and let the fudge set for 2 hours. 

    Final step: Cut into squares (I got 36 of them) and serve straight out of the fridge!

    chocolate fudge cut into squares on parchment paper.

    Pro Tips On Making Fudge With Condensed Milk

    • Use low heat. Don't turn the heat up high. It’ll burn your chocolate in seconds.
    • Don’t leave the pan unattended. Keep stirring continuously. Chocolate fudge with condensed milk barely takes any time, and you’ll be done in a blink. 
    • As always, use the best-quality ingredients possible. It genuinely takes the fudge from 0 to 100 in 2 seconds.
    • Lining the pan with foil or parchment paper makes it easier to lift the chocolate fudge out.

    How To Serve

    As Nigella herself says, it’s a rich fudge. Despite the condensed milk, it’s not tooth-achingly sweet. The earthiness of the nuts and dark chocolate counterbalances the sweetness. You can nibble on these little squares of happiness with:

    • Or anytime at all. 
    • A cup of coffee after dinner
    • Your evening tea
    chocolate fudge pieces on a small plate.

    Recipe FAQs

    Can I make the fudge in a 6-inch pan?

    This easy chocolate fudge recipe with condensed milk works in any pan. I used an 8-inch pan, but 7 or 6 inches are great too. Just keep in mind that the thickness and height of each fudge piece will change.

    How to make vegan chocolate fudge?

    Substitute the butter with coconut oil. Use good-quality, dairy-free chocolate. There are plenty available in India. Switch to plant-based condensed milk or homemade coconut condensed milk. It’s easy, thick, creamy, and delectable.

    Can you store chocolate fudge with condensed milk?

    Given the number of times I’ve made this fudge, it’s shocking that I’ve never needed to store it. Not a single fudgy square lasts! It’s all gone in a day or two between the four of us. 
    I do store them in the refrigerator, though these days I’m taking my cue from Nigella’s blog, where it says you can store them in an airtight container in the freezer.

    More Chocolate Recipes

    • Classic Hot Chocolate | Easy and delicious hot chocolate recipe
      Classic Hot Chocolate
    • avocado chocolate mousse in a glass cup with 2 spoons on the side.
      Avocado Chocolate Mousse
    • bowls of chocolate pudding with peanut butter drizzled on top.
      Chocolate Peanut Butter Pudding

    Half the joy of cooking is sharing it with others. That’s why I’m always eager to hear from you. So go right ahead & drop a comment or reach out on Instagram, Pinterest, YouTube, or Facebook. I hope you love this chocolate fudge with condensed milk as much as we do!

    📖 Recipe

    Tried this recipe?Let us know how it was!
    Chocolate Fudge with Condensed Milk | Easy Chocolate Fudge Recipe

    Chocolate Fudge with Condensed Milk

    Natasha Minocha
    Chocolate Fudge with Condensed Milk -decadent, velvety, melty fudge for home and for gifting...perfect for the festive season!
    No ratings yet
    Print Recipe Pin Recipe
    Prep Time 5 minutes mins
    Cook Time 10 minutes mins
    Setting time 2 hours hrs
    Course Dessert
    Cuisine American
    Servings 36 squares
    Calories 116 kcal

    Ingredients


    • 14 oz Sweetened condensed milk
    • 2 tbsp Butter, room temperature
    • 1 3/4 cup Dark chocolate 70%
    • 1 tsp Rosewater ( optional)
    • 1/3 cup Pistachio, chopped
    • 1/3 cup Walnuts, chopped
    • Dried rose petals, for topping (optional)

    Instructions
     

    • Combine the condensed milk, butter, and chocolate in a heavy-bottomed pan.
    • Cook on low heat, stirring constantly until everything has melted and the mixture is smooth and shiny. This will take about 10 minutes.
    • Take the pan off the heat. Stir in the nuts. Let cool for a few minutes, then add rose water, if using. Mix well.
    • Pour into a foil-lined s 8" square pan.
    • Smoothen the top and sprinkle some more nuts and dried rose petals if you want. Press them down gently.
    • Refrigerate for 2 hours or until set. Cut into small squares and serve. Enjoy!

    Notes

    • Use low heat. Don't turn the heat up high. It’ll burn your chocolate in seconds.
    • Don’t leave the pan unattended. Keep stirring continuously. Chocolate fudge with condensed milk barely takes any time, and you’ll be done in a blink. 
    • Lining the pan with foil or parchment paper makes it easier to lift the chocolate fudge out.

    Nutrition

    Serving: 1 ServingCalories: 116kcalCarbohydrates: 12gProtein: 2gFat: 8gSaturated Fat: 4gPolyunsaturated Fat: 1gMonounsaturated Fat: 2gTrans Fat: 0.03gCholesterol: 5mgSodium: 20mgPotassium: 58mgFiber: 1gSugar: 10gVitamin A: 54IUVitamin C: 0.4mgCalcium: 34mgIron: 0.1mg

    Gingerbread Mug Cake

    December 1, 2021

    Gingerbread Mug Cake | Easy Holiday Mug Cake Recipe

    A gingerbread mug cake is bliss in under 5 minutes: moist, gooey, with rich, woody, and warm aroma of gingerbread spices perking up the cake. Loaded with chocolate chips and crunchy nuts, it takes even less time to devour it.

    Gingerbread Mug Cake | Easy Holiday Mug Cake Recipe

    Reminiscent of lights, jingle bells, and Christmas carols in the air, the ginger-spiced mug cake is the perfect way to say hello to the approaching holiday season. 

    [feast_advanced_jump_to]

    What Is A Mug Cake?

    The name says it all. It’s a cake made in a mug (or a cup, or a shallow bowl, or a ramekin). They’ve become insanely popular in the last few years because mug cakes satisfy cravings right away, are ridiculously easy to make, and are single-serving. And, oh, you don’t even need to touch the oven. They’re made in a microwave. 

    Why You'll Love This Recipe

    Mess-free

    5-minute prep

    Instant dessert

    Made with regular pantry items

    Perfect portion-controlled cake

    Easy, ideal weeknight and holiday dessert

    Gingerbread Mug Cake | Easy Eggless Holiday Mug Cake Recipe

    Ingredient Variations

    Flour: Whole-wheat flour or gluten-free, like ragi (finger millet flour), works well. For the latter, use my chocolate cherry mug cake recipe. Or you can try it with quinoa flour, like in my pumpkin mug cake.

    Milk: Try the regular or plant-based milk you prefer. 

    Oil: Don’t have coconut oil? Stick to any vegetable oil. 

    Sugar: Instead of brown sugar, coconut sugar is also a superb choice. 

    Spices: Nutmeg will add all that jazz to this mug cake. 

    Add-ons: For an intensely chocolatey flavor, include a teaspoon of cocoa powder in the batter. For a nice crunch and pretty finish, top it with any nuts or dry fruits. Or you can leave everything out, even the chocolate chips, and enjoy just the slightly fiery, hot bite of ginger.

    How To Make Gingerbread Mug Cake?

    It does bear repeating: there’s nothing easier than making a mug cake.  You lazily sift and stir the batter right in a ramekin (if you want no cleanup) and then bake. 

    • Sift all-purpose flour, baking powder, baking salt, and a pinch of salt with cinnamon powder and ground ginger.
    • Add brown sugar and set aside. 
    • In another bowl, whisk almond milk, coconut oil, honey, and vanilla extract. 
    Steps for making Gingerbread Mug Cake | Easy Holiday Mug Cake Recipe
    • Pour the liquid ingredients into the dry and then whisk well till you have a thick, soft-dropping consistency batter. 
    • You can bake the mug cake at this juncture, but I chose to add some oomph to mine and fold in chopped walnuts and dark chocolate chips. 
    • Microwave it for 1.5 minutes. 
    Gingerbread Mug Cake | Easy Eggless Holiday Mug Cake Recipe
    • Let it cool enough to handle, about 3 to 4 minutes. 
    • Then dig in immediately while it’s still warm. This is the most important rule for mug cakes! Cold mug cakes simply don’t have that cant-get-enough quality.
    • A scoop of ice cream or some whipped cream would be lovely with it. 
    Gingerbread Mug Cake | Easy Eggless Holiday Mug Cake Recipe

    Recipe FAQS

    How to check if my mug cake is done?

    If you’re baking a mug cake for the first time, I recommend nuking it for a minute. Then insert a toothpick or skewer in the center, and if it comes out with batter attached, microwave for 30 seconds more. 

    Can you make the gingerbread mug cake in the oven?

    The beauty of mug cakes is that they can be made in a microwave (and under 2 minutes). Perfect to nip a sudden yearning in the bud without turning on the oven or racking up a pile of dirty baking dishes. 
    That said, you can make the ginger mug cake in the oven. It will take a bit longer though. Bake at 180° C for 10 to 12 mins. 

    Which type of mug to use to make mug cakes?

    A coffee mug, a teacup, or even ramekins are great options, as long as they are microwave-safe. Ceramic is also a good choice.

    Why is my mug cake hard and dry?

    Your mug cake can be hard and dry because you overcooked it or added too much baking powder. Less is more with mug cake, so use a little baking powder. It’ll still rise well and be super soft and moist. 
    Also, don’t microwave the cake for too long. If yours cooks faster than normal, then reduce the time.

    How to make a vegan gingerbread mug cake?

    Typically, gingerbread recipes use molasses as a sweetener. I didn’t have any, so I made do with honey. To make the recipe vegan, replace honey with molasses.

    Gingerbread Mug Cake | Easy Eggless Holiday Mug Cake Recipe

    More Mug Cake Recipes

    • pumpkin mug cake with chocolate chips and whipped cream on a plate.
      Pumpkin Mug Cake
    • Easy Strawberry Mug Cake
      Easy Strawberry Mug Cake
    • brownie mug cake in a green ramekin on a small plate and wooden board.
      Easy Brownie In A Mug
    • Vegan Oats Banana Mug Cake | Easy Kid Friendly Recipe
      Oats Banana Mug Cake

    Half the joy of cooking is sharing it with others. That’s why I’m always eager to hear from you. So go right ahead & drop a comment or reach out on Instagram, Pinterest, YouTube, or Facebook. I hope you love this gingerbread mug cake as much as we do!

    📖 Recipe

    Tried this recipe?Let us know how it was!
    Gingerbread Mug Cake | Easy Holiday Mug Cake Recipe

    Gingerbread Mug Cake

    Natasha Minocha
    A ginger mug cake is bliss in under 5 minutes: moist, gooey, with rich, woody, and warm aroma of gingerbread spices perking up the cake. Loaded with chocolate chips and crunchy from nuts, it takes even less time to devour it.
    No ratings yet
    Print Recipe Pin Recipe
    Prep Time 5 minutes mins
    Cook Time 2 minutes mins
    Course Cakes, Dessert
    Cuisine American
    Servings 1 serving
    Calories 520 kcal

    Ingredients
      

    • 4 tbsp All-purpose flour
    • 1/4 tsp Baking powder
    • 1/8 tsp Baking soda
    • 1/8 tsp Salt
    • 1 tbsp Brown sugar
    • 1/4 tsp Ginger powder
    • 1/2 tsp Cinnamon powder
    • 2 tbsp Coconut oil
    • 4 tbsp Almond milk
    • 1/2 tbsp Honey
    • 1/2 tsp Vanilla extract
    • 1 tbsp Dark chocolate chips (Optional)
    • 1 tbsp Walnuts, roughly chopped (Optional)

    Instructions
     

    • Combine all the dry ingredients - flour, baking powder, baking soda, sugar, salt, ginger powder, and cinnamon powder in a small bowl. Whisk with a fork to break up all lumps.
    • Stir in the wet ingredients - coconut oil, milk, honey, and vanilla extract. Mix well. You should have a thick batter. If the batter seems too dry, add another tablespoon of milk.
    • Fold in chocolate chips and walnuts, if using.
    • Transfer the batter into a microwave-friendly mug. Place a plate underneath ( to catch any overflow). 
    • Cook for 1 minute 30 seconds. You may have to cook for another 15- 30 secs, depending on your microwave.
    • Let the cake cool down for a few minutes and then serve it warm, with or without whipped cream or ice cream! Enjoy!

    Nutrition

    Serving: 1 ServingCalories: 520kcalCarbohydrates: 54gProtein: 5gFat: 34gSaturated Fat: 28gPolyunsaturated Fat: 1gMonounsaturated Fat: 2gCholesterol: 0.1mgSodium: 632mgPotassium: 163mgFiber: 2gSugar: 26gVitamin A: 5IUVitamin C: 0.2mgCalcium: 203mgIron: 2mg
    Gingerbread Mug Cake | Easy Eggless Holiday Mug Cake Recipe

    Pull-Apart Garlic Bread

    November 30, 2021

    Easy Pull-Apart Cheese Garlic Bread | Cheesy Garlic Pull- Apart Bread

    This pull-apart garlic bread was an on-the-fly recipe. With no pre-planning, I picked up a loaf, slathered it in a godly amount of butter, garlic, and cheese, and baked it. And wonders of wonders, half the loaf disappeared in less than 15 minutes! 

    Easy Pull-Apart Cheese Garlic Bread | Cheesy Garlic Pull- Apart Bread

    This easy pull-apart bread is your ticket to cheesy, garlicky heaven! Warm, fluffy bread infused with rich garlic butter and oozing with melted cheese in every bite. It’s the ultimate crowd-pleaser, perfect for any gathering or a cozy night in.

    This cheesy bread is super simple to make, yet it feels like a decadent treat. Whether you’re serving it as an appetizer or alongside your favorite pasta, this recipe will have everyone reaching for seconds—and thirds!

    [feast_advanced_jump_to]

    Easy Pull-Apart Cheese Garlic Bread | Cheesy Garlic Pull- Apart Bread

    Give the easy pull-apart cheese garlic bread a whirl. It’s:

    • Super easy to make
    • Cheesy yummy goodness
    • Full of garlicky flavor
    • Golden, crispy top with a cheesy gooey interior
    • A crowd pleaser

    How to make cheesy pull-apart garlic bread?

    • Bread: 1 loaf
    • Butter: 1/3 cup, melted
    • Garlic: 4 cloves, finely minced
    • Thyme: 1 tsp
    • Oregano: 1 tsp
    • Cheese: 1 cup, grated (or more if you so wish)

    Before I begin, here’s why you need to make these cheesy garlic bread. Not because it’s crave-worthy with flecks of bold, earthy oregano worked in a golden-brown crust bathed in butter. 

    But because you get a fancy-looking appetizer with such a little effort. All because we’re not baking the bread from scratch, we’re using a store-bought one.

    Store-bought loaf for Easy Pull-Apart Cheese Garlic Bread | Cheesy Garlic Pull- Apart Bread

    Prep the pull-apart bread

    • Support a local bakery and grab any of their freshly baked loaves. 
    • Cut the loaf vertically, making sure your knife goes only 3/4th of the way down.
    • Then slice it horizontally, again making sure you don’t cut through the base, so the whole loaf is still intact.
    Cut into squares for making Easy Pull-Apart Cheese Garlic Bread | Cheesy Garlic Pull- Apart Bread
    • In your melted butter, mix the minced garlic and herbs, and then go to town with it. Using a brush, paint the entire loaf.
    • Take your time and liberally butter the cut squares, covering every nook and cranny. 
    Brush the butter, garlic mixture
    • Don’t forget to butter the bottom crust of the loaf too. This is not the time to be stingy; you want maximum flavor, so use up all the butter. 
    • Once the bread is nicely smeared with the herby mix, take your grated cheese and fill it in the cuts and crevasses. 
    Buttered loaf
    Cheese filled loaf

    Bake the pull-apart cheese garlic bread

    • While the oven preheats, wrap the loaf in the foil.
    • Bake it for around 20 to 30 minutes till the cheese melts and drips. 
    • Unwrap the loaf and then bake for a few minutes more, till the cheese is bubbly and the crust is crisp. 
    Ready to eat Easy Pull-Apart Cheese Garlic Bread | Cheesy Garlic Pull- Apart Bread

    Serving ideas for the best cheesy pull-apart bread

    Serve the bread while it’s still piping hot. The minute it was out of the oven, I sprinkled the green part of some green onions, and the bread was gone in minutes! 

    Any fresh herbs of your choice will be equally amazing. Thyme, cilantro, and rosemary, all add a pop of freshness.

    It’s a great appetizer as-is for:

    • Game night
    • Dinner party
    • Evening snack
    • Small gatherings
    Easy Pull-Apart Cheese Garlic Bread | Cheesy Garlic Pull- Apart Bread

    What else can you use in cheesy garlic pull-apart bread?

    You simply can’t go wrong with pull-apart cheese garlic bread. So, without a qualm, use any ingredient that you have in the pantry. Don’t like the taste of something? Use a substitute. The bread will still be fiercely flavorful.

    Butter: Salted butter does wave the magic wand and brings that extra yumminess. However, good-quality olive oil is a great choice too. 

    Garlic: My recipe includes 4 big cloves. More is definitely an option to up that sharp, garlicky touch.

    Herbs: I stuck to the bright, fresh parsley and oregano, but whatever herbs you have or love will do. 

    Cheese: I found that the local mozzarella lent a drool-worthy luscious dimension to garlic bread. So, your best choice is going to be cheese that melts well. How much of it you use, is all on you. Be sparing or generous. 

    Seasoning: Truth be told, the bread doesn’t need any garnishing. I added green onions just for the color. That said, for a bit of heat try red chili flakes, and smoked paprika. Other alternatives are:

    • Cajun seasoning 
    • Italian seasoning
    • Garlic salt
    • Onion salt
    Easy Pull-Apart Cheese Garlic Bread | Cheesy Garlic Pull- Apart Bread

    Pull apart garlic bread recipe FAQs

    What kind of bread should I use for pull-apart cheese garlic bread?

    Pick hearty bread with a crusty exterior and soft interior like sourdough. You don’t have to bake one at home; a store-bought loaf is more than sufficient. But if you want to, here’s an incredibly easy recipe for it.

    How to make pull-apart cheese bread from scratch?

    Making cheesy, garlicky pull-apart bread from scratch means starting with bread dough. It takes longer, but, trust me, the result is just as delicious. 
    Cheesy garlic bread
    Cheesy bubble bread

    Can you reheat cheese and garlic pull-apart bread?

    Yes, you can! Wrap it in foil and then reheat it in a preheated oven or toaster.

    Easy Pull-Apart Cheese Garlic Bread | Cheesy Garlic Pull- Apart Bread

    More easy, fun, and addictive bread recipes:

    Strawberry Star Bread

    Georgian Cheese Bread

    Cheese Beer Bread

    Braided Pesto Bread

    Bake your own loaf of bread at home:

    Easy Sourdough Discard Bread

    Easy Everyday Bread

    📖 Recipe

    Tried this recipe?Let us know how it was!
    Easy Pull-Apart Cheese Garlic Bread | Cheesy Garlic Pull- Apart Bread

    Pull-Apart Garlic Bread

    Natasha Minocha
    A droolworthy cheesy garlicky loaf with flecks of herbs worked in a golden-brown crust bathed in butter. Made with just 6 ingredients, this is the easiest and most addictive appetizer!
    No ratings yet
    Print Recipe Pin Recipe
    Prep Time 20 minutes mins
    Cook Time 30 minutes mins
    Course Bread, Side Dish
    Cuisine American
    Servings 8 servings
    Calories 269 kcal

    Ingredients


    • 1 loaf Sourdough bread or any crusty bread
    • 1/3 cup Butter, melted
    • 4 cloves Garlic, finely minced
    • 1 tsp Dried thyme
    • 1 tsp Dried oregano
    • 1 cup Mozzarella cheese, grated
    • 2-3 tbsp Parsley, finely chopped
    • 1-2 tbsp Spring onion, finely chopped

    Instructions
     

    • Preheat your oven to 200C.
    • Cut the bread into 1" squares, but do not cut all the way through.
    • Combine the butter, garlic, dried thyme, and oregano in a small bowl.
    • Liberally brush each crevice of the bread with the butter mixture. Spread some on the crust as well.
    • Now stuff a little bit of cheese into each crevice.
    • Wrap the bread with aluminum foil.
    • Place the loaf on a baking tray and bake for 20 minutes at 200 C, until the cheese has melted.
    • Unwrap the bread and continue baking for another 5-10 minutes until the cheese is bubbling and the crust, golden brown.
    • Take the loaf out of the oven and sprinkle some fresh parsley and chopped spring onions on top. Serve immediately. Enjoy!

    Nutrition

    Serving: 1 ServingCalories: 269kcalCarbohydrates: 31gProtein: 10gFat: 12gSaturated Fat: 7gPolyunsaturated Fat: 1gMonounsaturated Fat: 3gTrans Fat: 0.3gCholesterol: 32mgSodium: 493mgPotassium: 97mgFiber: 1gSugar: 3gVitamin A: 437IUVitamin C: 2mgCalcium: 114mgIron: 3mg
    Easy Pull-Apart Cheese Garlic Bread | Cheesy Garlic Pull- Apart Bread PIN

    Baked Sweet Potato Fries

    November 27, 2021

    Baked sweet potato slices on parchment paper.

    Crispy, golden, and naturally sweet, these baked sweet potato fries are a healthier cousin to the classic French fries! Lightly seasoned and oven-roasted to perfection, they’re irresistibly snackable and come together with just a few simple ingredients and 10 minutes of prep!

    oven-baked sweet potato slices on parchment paper.

    These oven-baked sweet potato fries are tender and soft inside with a caramelized, crunchy edge. The natural sweetness of the potatoes pairs deliciously with herbs and spices. like paprika, oregano, and thyme, in this case! They are perfect for snacking, salad sides, or dipping into your favorite sauce like yum yum sauce or whipped feta. 

    [feast_advanced_jump_to]

    Why You'll Love This Recipe

    ✨ Sweet potato fries are what I call an anytime recipe. Great as a side, perfect for snacking, and even as a quick appetizer!

    ✨ Sweet, spicy, savory, and crispy all at once, they are excellent finger food. And so easy to make because the oven does all the work.

    ✨ They’re oven-baked, not fried. So, you get all the flavor and crunch without the mess (or extra oil). Plus, they’re just as good fresh from the oven when reheated the next day, making them wonderful for meal prep. I ALWAYS make extra!

    ✨ Sweet potato fries are also a great way to use and eat easily available seasonal veggies. Like these oven-roasted carrots and air fryer pumpkin! Roasting them intensifies their flavor, caramelizes them, crisps up the edges, and leaves the inside irresistibly soft.

    ✨ You can season them any way you like: classic paprika and garlic, herby rosemary and thyme, or even a chili-lime kick. They’re endlessly customizable and work with whatever’s in your spice cabinet.

    ✨ The oven-baked sweet potato fries recipe is easy to serve. Plate them alongside burgers, grain bowls, or as a stand-alone snack with hummus or tzatziki.

    Recipe Ingredients

    Labelled ingredients for making baked sweet potato fries.

    Sweet Potatoes: Choose whatever variety is easily available to you. You can peel them or leave the skins on (like I did) for extra texture. Slice them evenly so they cook at the same speed. Use any extra to make these yummy sweet potato cutlets!

    Olive oil also adds a lovely fruity flavor. You can swap it for any oil you prefer.

    Paprika is a color-and-flavor booster. You can use degi mirch/ Kashmiri red chili powder too. It gives a very gentle heat and a gorgeous red hue.

    Seasoning: I used thyme and oregano for a savory taste with a little sea salt to bring out the flavors.

    Please see the recipe card below for full information about the ingredients and quantities.

    Variations

    Sweet potatoes are naturally sweet and earthy. They take up the taste for any seasoning you love!

    • Keep it classic with just salt, pepper, and olive oil.
    • Turn up the heat with peri-peri seasoning or Korean gochugaru
    • Give them an Indian twist with garam masala or chaat masala.
    • Finish with a pop of green with fresh parsley, cilantro, thyme, or rosemary.

    How To Make Baked Sweet Potato Fries

    Step 1: Set the oven to preheat at 220°C (425°F).

    Step 2: Clean the sweet potatoes thoroughly. Slice the sweet potatoes lengthwise into sticks. Try to cut into even-sized pieces.

    Sliced sweet potatoes with spices in a mixing bowl.

    Step 3: Put the sweet potatoes in a large bowl. Add olive oil, salt, dried oregano, thyme, and paprika.

    Sweet potato sticks coated with spices.

    Step 4: Mix well so each sweet potato piece is coated with the oil and spices.

    Sliced sweet potato on a parchment-lined baking tray.

    Step 5: Spread the slices evenly on a baking tray in a single layer.

    Baked sweet potato fries on parchment paper.

    Step 6: Bake for 15–20 minutes, flipping every few minutes with a spatula for even cooking.

    Final Step: Serve warm!

    Sweet potato fries on parchment paper with a dip.

    Pro Tips

    • Cut thin for crispy, oven-baked sweet potato fries. Slice thick for chunky wedges. Both are delicious, just different personalities. You can also cut them into rounds.
    • Try to cut the sweet potatoes evenly. This will help in even cooking.
    • Give each fry space. Crowding or piling the tray means steaming, not crisping. Spread them in a single layer for golden glory.
    • When they’re nicely browned, switch on the broiler for the last 4–5 minutes. It’ll blister the slices, making them extra crispy.
    • Reheat the fries in the oven, air fryer, or skillet. The microwave will make them soggy.

    How To Serve

    Baked sweet potato fries are a joy all by themselves. Crisp on the outside, tender inside, and full of flavor. Serve them solo. That’s what I do. Or you can serve them alongside a burger or a sandwich.

    But let’s be honest. Fries and dips are a match made in snacking heaven. Here are some of my favorites:

    • Vegan mayo because it’s creamy and tangy.
    • Guacamole or creamy avocado dip 
    • Good old ketchup. Classics never disappoint.
    • Gochujang mayo for a little heat.
    • An Indian favorite, mint chutney
    A sweet potato fry dipped in a sauce.

    Recipe FAQs

    How long to bake sweet potato fries in the oven?

    How long you bake sweet potato fries depends on how you slice them. If you did thin fries like me, bake for 15-20 minutes, flipping every 5-7 minutes or so for even cooking. Thicker slices may take another 5 minutes or so. Remember

    Why won't my sweet potato fries get crispy?

    The most common culprit is overcrowding the tray. Give each slice a little breathing room so it roasts instead of steaming. Also, remember to bake them at a high temperature, 220 °C / 425°F, as mentioned in the recipe card.

    Can you bake sweet potato fries in an air fryer?

    Yes, you can make these in the air fryer. Bake them at 200 °C / 400°F for 10-12 minutes. Want more air fryer recipes? Try my air fryer falafel, air fryer pumpkin slices, and air fryer tortilla chips.

    More Sweet Potato Recipes

    • Sweet Potato Crackers | Healthy Snack Recipe
      Sweet Potato Crackers
    • Sweet potato bread on a platter.
      Sweet Potato Bread Recipe
    • Sweet Potato Cornmeal Waffles easy healthy glutenfree recipe
      Sweet Potato Waffles (Gluten-Free)
    • 3 bowls of chocolate pudding garnished with strawberries and pistachios.
      Sweet Potato Chocolate Pudding

    Half the joy of cooking is sharing it with others. That’s why I’m always eager to hear from you. So go right ahead & drop a comment or reach out on Instagram, Pinterest, YouTube, or Facebook. I hope you love these baked sweet potato fries as much as we do!

    📖 Recipe

    Tried this recipe?Let us know how it was!
    Baked sweet potato slices on parchment paper.

    Baked Sweet Potato Fries

    Natasha Minocha
    Crispy, golden, and perfectly seasoned, these baked sweet potatoes are so easy to make! Perfect as a side, for anytime snacking, and as a fuss-free appetizer!
    No ratings yet
    Print Recipe Pin Recipe
    Prep Time 10 minutes mins
    Cook Time 20 minutes mins
    Total Time 30 minutes mins
    Course Appetizer, Side Dish, Snack
    Cuisine American, World
    Servings 8 Servings
    Calories 155 kcal

    Ingredients
      

    • 2.2 lbs / 1 kg Sweet Potatoes Well scrubbed
    • 3-4 Tbsp Olive oil
    • 1.5 tsp Paprika or Degi Mirch powder
    • 1.5 tsp Dried Thyme
    • 1 tsp Oregano
    • Salt to taste

    Instructions
     

    • Preheat the oven to 220 C / 425 F.
    • Thickly slice the sweet potatoes lengthwise.
      2.2 lbs / 1 kg Sweet Potatoes
    • Put the sliced sweet potatoes in a large bowl.
    • Add the olive oil, salt, paprika, dried oregano, and thyme and mix well.
      3-4 Tbsp Olive oil, 1.5 tsp Paprika or Degi Mirch powder, 1.5 tsp Dried Thyme, 1 tsp Oregano, Salt to taste
    • Spread out evenly on a baking sheet.
    • Bake for 15-20 minutes at 220 C / 425 F , turning the wedges every 10 minutes until cooked through and lightly browned.
    • I like to put them under the broiler for the last 4-5 minutes to make them extra crispy and blistered.
    • Serve warm or at room temperature with any sauce of your choice. Enjoy!!

    Video

    Notes

    • Cut thin for crispy, oven-baked sweet potato fries. Slice thick for chunky wedges. Both are delicious, just different personalities. You can also cut them into rounds.
    • Try to cut the sweet potatoes evenly. This will help in even cooking.
    • Give each fry space. Crowding or piling the tray means steaming, not crisping. Spread them in a single layer for golden glory.
    • When they’re nicely browned, switch on the broiler for the last 4–5 minutes. It’ll blister the slices, making them extra crispy.
    • Reheat the fries in the oven, air fryer, or skillet. The microwave will make them soggy.

    Nutrition

    Serving: 1 ServingCalories: 155kcalCarbohydrates: 25gProtein: 2gFat: 5gSaturated Fat: 1gPolyunsaturated Fat: 1gMonounsaturated Fat: 4gSodium: 69mgPotassium: 425mgFiber: 4gSugar: 5gVitamin A: 17708IUVitamin C: 3mgCalcium: 45mgIron: 1mg


    Upside-Down Persimmon Cake

    November 25, 2021

    Upside-Down Persimmon Cake on a platter with fall decor around.

    This past month, I started a love affair with persimmons, and I was surprised to learn that they're grown all over the northeastern part of India. Yet, the luminous golden orbs that can brighten even the greyest winter day rarely make it to my fruit bowl. 

    Upside-Down Persimmon Cake | eggless persimmon cake

    I finally decided to sate my curiosity and, in my enthusiasm, bought a ton load of them. We found its sweetness delicious and very similar to dates or honey. Most of the fruit was enjoyed fresh, but I did save a few for the upside-down persimmon cake.

    And believe you me, the cake surpassed all my dreams. It’s absolutely wonderful with a moist, fluffy, and marvelously soft crumb, thanks to the oil and yogurt. And the caramelized fruit juices running rivers through the batter give it so much flavor.

    Upside-Down Persimmon Cake | eggless persimmon cake

    Jump to:

    Upside-down persimmon cake recipe

    Garnishing ideas for festivities

    Ingredient substitutes

    Cake serving ideas

    More upside-down cake recipes

    What’s a persimmon?

    Persimmon is a gorgeous, seedless fruit that looks bizarrely similar to ripened tomatoes and is called Ramphal, or Japani phal, here. It’s fairly decently available at this of the year; I bought mine from a local vendor. 

    If you’re new to persimmon, remember this when shopping. There are two categories: The first is astringent, and when it is unripe, the taste makes your mouth pucker from the bitterness. But the ripe ones look like jewels and are creamy, sweet, and perfect for cakes.  

    The second category is non-astringent. These persimmons have a crisper taste, so they’re best in salads or as snacks. Both varieties have more dietary fiber and minerals than apples. They’re also an excellent source of manganese and beta-carotene.

    Persimmon fruit

    How to make an upside-down persimmon cake?

    Keep aside the fact of whether you eat persimmon or not and make this cake anyway. It celebrates the fruit, and the star imprint gives it a quintessential holiday feel and gets the ball rolling for that time of the year. 

    Prep the pan

    • Thinly slice 2 persimmons.
    • Grease your cake pan. I used an 8-inch one. And then line it with parchment paper. Grease the paper too so that the baked cake doesn’t stick, and taking it out is a breeze.
    • Sprinkle raw sugar on the bottom and then arrange the persimmon slices on top. 

    Mix the ingredients

    • In a bowl, sift whole wheat flour, almond flour, baking powder, baking soda, and salt. 
    • Spice it up with cinnamon, nutmeg, and ginger powder. 
    • If you have pumpkin pie spice or love the taste of it, feel free to include it too.
    • Stir in raw sugar.
    • In another bowl, whisk yogurt, coconut oil, and vanilla extract. 
    • Fold the dry ingredients into the wet using a gentle hand. Don’t overbeat the batter. Mix until there are no dry, white streaks visible and the batter is lump-free.
    Step for making Upside-Down Persimmon Cake | eggless persimmon cake

    Bake the batter

    • Pour the thick-ish batter into your prepared pan. 
    • Bake for a good 35 to 40 minutes. When you insert a skewer to check for doneness, it should come out clean. 
    • After it is baked, let the persimmon cake cool for 15 to 20 minutes. 
    • Then flip on your serving plate and serve immediately. It’s mouthwateringly delicious when warm or at room temperature. 
    Upside-Down Persimmon Cake | eggless persimmon cake

    Deck up your upside-down persimmon cake for the festivities

    Persimmons are like ornaments, sitting pretty wherever they are. But once you cut them, they become downright gorgeous with a starburst pattern at the center of each slice. 

    That’s my long-winded way of saying the cake needs no adornment. It’s Instagram-worthy as-is. But I wanted to make it more festive. So, I scattered pistachios and pomegranate arils on top, a hat-tip to holly leaves decked with red berries.  

    Upside-Down Persimmon Cake | eggless persimmon cake

    What else can you use in the persimmon cake recipe?

    Flour: All-purpose flour is a great substitute for whole wheat flour, or you can use half of both. 

    From scones to cakes, I’ve been baking with homemade almond meal for years. This time, I used store-bought almond flour and frankly found it very convenient. Not that making it at home is tough. 

    You blanch, peel, dry, and then grind almonds in a coffee grinder. That’s all there is to it. But somehow the consistency is different. So, for the almond flour, I’d say buy it. It is an expensive proposition but worth it. 

    Don’t want to spend on it? Then make almond meal at home. It’ll add more of a nutty bite to the cake and that's a good thing!

    Sugar: Instead of raw sugar, brown sugar, coconut sugar, cane sugar, or even regular white sugar is fine. Keep in mind, that the cake’s color will change based on the sugar.

    Upside-Down Persimmon Cake | eggless persimmon cake

    How to make vegan upside-down persimmon cake?

    The cake is already eggless, so all you need to do to make it vegan is use a plant-based yogurt. 

    Can I add egg to the spiced persimmon cake?

    Yes, of course. Substitute the yogurt for 2 eggs and remember to add ¼th cup of warm milk to the wet ingredients to maintain balance.  

    How to serve persimmon cake?

    The four of us enjoyed a simple slice each. But if you’re serving it as dessert during a Christmas party (or any other gathering), a scoop of vanilla, a dollop of whipped cream, or a side of warm custard will be exquisite.   

    Never tried persimmons? Start with this cake recipe because:

    Rises well

    Low-effort 

    Fun to make

    The best seasonal cake

    Soft, moist, and pretty as a picture

    Upside-Down Persimmon Cake | eggless persimmon cake

    When you’re done with upside-down persimmon cake, try these:

    Orange Upside Down Cake

    Upside-Down Pineapple Cake

    📖 Recipe

    Tried this recipe?Let us know how it was!
    Upside-Down Persimmon Cake on a platter with fall decor around.

    Upside-Down Persimmon Cake

    Natasha Minocha
    Upside-down Persimmon Cake is moist, fluffy, and has a marvelously soft, spiced crumb! And the caramelized fruit juices running rivers through the batter give it so much flavor.
    4 from 1 vote
    Print Recipe Pin Recipe
    Prep Time 15 minutes mins
    Cook Time 40 minutes mins
    Course Cakes, Dessert
    Cuisine American
    Servings 8 servings
    Calories 417 kcal

    Ingredients


    • 2 Persimmons, thinly sliced
    • 3 tbsp Raw sugar or Brown sugar
    • 1.5 cups Wholewheat flour
    • 1/2 cup Almond flour
    • 1.5 tsp Baking powder
    • 3/4 tsp Baking soda
    • 1/4 tsp Salt
    • 1 tsp Cinnamon powder
    • 3/4 tsp Ginger powder
    • 1/2 tsp Nutmeg powder
    • 3/4 cup Raw sugar
    • 1.5 cups Greek yogurt, plain
    • 1/2 cup Coconut oil You can use any vegetable oil you prefer
    • 1.5 tsp Vanilla extract

    Instructions
     

    • Preheat your oven to 180c. Grease an 8" pan very well. Line the bottom with parchment paper. Butter the paper very well too.
    • Sprinkle 3 tbsp of raw sugar or brown sugar at the bottom of the pan.
    • Arrange the sliced persimmons on top.
    • Sift together the wholewheat flour, almond flour, baking powder, baking soda, salt, cinnamon powder, ginger powder, and nutmeg powder into a large bowl.
    • Stir in the raw sugar.
    • In a separate bowl, whisk together the yogurt, oil, and vanilla extract.
    • Pour over the dry ingredients. Mix well until no white streaks remain. Please do not over mix.
    • Pour the thick batter on top of the persimmon slices in the cake tin.
    • Bake at 180C for 35-40 minutes, or until a skewer inserted in the center comes out clean.
    • Let the cake cool in the pan for about 20 minutes, then invert onto a serving plate.
    • Decorate with pomegranate arils and finely chopped pistachios if you like.
    • Serve warm or at room temperature. Enjoy!

    Nutrition

    Serving: 1 ServingCalories: 417kcalCarbohydrates: 59gProtein: 8gFat: 18gSaturated Fat: 12gPolyunsaturated Fat: 0.3gMonounsaturated Fat: 1gTrans Fat: 0.003gCholesterol: 2mgSodium: 270mgPotassium: 221mgFiber: 2gSugar: 25gVitamin A: 2IUVitamin C: 28mgCalcium: 122mgIron: 3mg
    Upside-Down Persimmon Cake | eggless persimmon cake

    Whipped Feta Cheese Dip

    November 23, 2021

    Feta dip with cherry tomatoes, pinenuts, olive oil and mint on top.

    This whipped feta cheese dip is creamy, tangy, savory, and so addictive. Super simple to make, this recipe uses just 4 ingredients, comes together in 20 minutes, and yet feels so fancy!

    A bowl of dip with tomatoes, pinenuts and mint and tortilla chips.

    If there’s one thing I’ve learned about hosting, it’s that people love a good dip, which is why this feta dip recipe is now a regular at my table. Weeknight snacks, weekend guests, even lazy lunches, it works every time and with everything from stovetop no-yeast naan to crispy crostini.

    Feta on its own is bold and salty, but whipping it with Greek yogurt turns it smooth, fluffy, and so spreadable. Add roasted garlic, and this dip takes on another level of deliciousness!

    [feast_advanced_jump_to]

    Why You’ll Love This Recipe

    ✨ This is truly a mix-and-blitz situation. 2 steps. That’s it. There is nothing easier than making creamy whipped feta dip.

    ✨ It looks gorgeous and tastes addictive. Feta makes it salty and tangy. Greek yogurt makes it thick and spreadable. And the roasted garlic gives it that lovely smoky flavor.

    ✨  This recipe is a keeper. An incredibly versatile dip, spread, or sauce thats perfect for game days, parties or for anytime snacking.

    ✨ This feta dip is very make-ahead friendly. You can whip this up a day early, and it still tastes amazing.

    Whipped Feta Dip Ingredients

    Ingredients for making whipped feat cheese dip.

    Feta Cheese: Stick to the good stuff! The creamier it is, the better your whipped feta cheese dip will be. I suggest buying a block rather than pre-crumbled. If you love feta, try it baked into Khachapuri (Georgian cheese bread) or stirred into my feta and spinach muffins.

    Greek yogurt balances feta’s sharpness and makes the dip thick, smooth, and spreadable. Whole milk Greek yogurt works best.

    Garlic: I love using roasted garlic confit for a mellow, smoky flavor. You can keep it raw if you wish.

    Olive Oil: A drizzle of good extra virgin olive oil makes the texture super silky.

    Please see the recipe card below for full information about the ingredients and quantities.

    Variations

    This easy whipped feta dip is endlessly adaptable. No Greek yogurt? Sour cream or homemade mayonnaise works well as a substitute.

    For extra flavor, blend in lemon zest, freshly cracked black pepper, or your favorite fresh herbs like dill, thyme, or parsley.

    Or make a spiced feta dip with za’atar or sumac.

    How To Make Whipped Feta Cheese Dip

    Step 1: Pour 1 tablespoon of oil into a skillet, add the garlic cloves. Roast on low heat till soft and golden. Keep aside.

    Step 2: Add Feta, Greek yogurt, and roasted garlic into a food processor or a high-speed blender.

    Step 3: Blend until combined, then slowly drizzle in the 2 tbsp olive oil. Process until very smooth.

    Final Step: Garnish and serve!

    A bowl of dip garnished with pinenuts, tomatoes, and mint.

    Pro Tips

    • Blend longer if you want a lighter, fluffier texture to your creamy whipped feta dip.
    • Scrape down the sides once or twice for an extra-smooth finish.
    • Taste before serving. Feta varies in saltiness, so you may not need extra seasoning.
    • Use good quality feta. The creamier, the better. It will make all the difference.

    How To Serve

    When it comes to what to serve with feta dip, the options are endless. Keep it simple with a drizzle of olive oil, or go all out with toppings like roasted cherry tomatoes, pine nuts, chili flakes, and mint. That’s what I did. You can also add olives, seeds, garlic chips, or roasted grapes.

    Here are my favorite ways to enjoy this whipped feta cheese dip recipe:

    • For Dipping: Use it on a mezze platter with pita bread, sourdough crackers, or fresh veggie sticks. It’s also the perfect companion for my soft pretzel bites.
    • As a Spread: Slather it onto a toasted everyday bread or baguette, or use it in wraps and sandwiches.
    • As a Sauce: It’s incredible as a side for grilled chicken or paneer, smashed potatoes, roasted carrots, or roasted cauliflower.
    A bowl of dip on a wooden surface with ingredients around.

    Recipe FAQs

    Do I need to roast garlic for the feta dip recipe?

    No, but I strongly recommend it. Roasted garlic adds a smoky, earthy sweetness that pairs beautifully with feta. Short on time? Use raw garlic instead.

    Can I make a feta cheese dip in advance?

    Absolutely. You can make it a day ahead and keep it in an airtight container in the fridge. Add your toppings (like fresh mint or pine nuts) right before serving.

    How to store leftover dip?

    If there is any leftover whipped feta cheese dip, store it in an airtight container in the fridge. It keeps well for 2 days.

    More Easy Homemade Dips

    • Baked vegan spinach artichoke dip in a cast-iron pan.
      Vegan Spinach Artichoke Dip
    • Tzatziki in a bowl with a piece of pita bread scooping it up.
      Tzatziki
    • Classic Hummus | How to make classic hummus
      Classic Hummus Made Easy!
    • Fried pickle dip in a serving bowl with veggies and chips around.
      Fried Pickle Dip

    Half the joy of cooking is sharing it with others. That is why I’m always eager to hear from you. So go right ahead and drop a comment or reach out on Instagram, Pinterest, YouTube, or Facebook. I hope you love this whipped feta cheese dip as much as we do!

    📖 Recipe

    Tried this recipe?Let us know how it was!
    Feta dip with cherry tomatoes, pinenuts, olive oil and mint on top.

    Whipped Feta Cheese Dip

    Natasha Minocha
    This whipped feta cheese dip is creamy, tangy, savory, and so addictive. Super easy to make, it uses just 4 ingredients, and comes together in 20 minutes!
    No ratings yet
    Print Recipe Pin Recipe
    Prep Time 10 minutes mins
    Cook Time 10 minutes mins
    Course Condiment, Snack
    Cuisine American
    Servings 6 servings
    Calories 168 kcal

    Ingredients


    • 7.5 oz Feta cheese
    • 1/2 cup Greek yogurt, plain
    • 2 tbsp Olive oil
    • 3-4 cloves Garlic
    • 1 tbsp Olive oil

    Toppings

    • Olive oil, Roasted pine nuts, Roasted cherry tomatoes, Red chilli flakes, Fresh mint

    Instructions
     

    • Pour 1 tbsp oil in a skillet, add the garlic cloves. Roast on low heat till soft and golden. Keep aside.
      1 tbsp Olive oil, 3-4 cloves Garlic
    • Combine the feta cheese, Greek yogurt, and roasted garlic in your blender or food processor.
      Blend until combined, then slowly drizzle in the 2 tbsp olive oil.
      Process until very smooth.
      7.5 oz Feta cheese, 1/2 cup Greek yogurt, 2 tbsp Olive oil
    • Transfer to a serving dish. Garnish with some olive oil, roasted nuts and cherry tomatoes, mint, and red chilli flakes.
    • Serve with pita chips. Enjoy!

    Notes

    • Blend longer if you want a lighter, fluffier texture to your creamy whipped feta dip.
    • Scrape down the sides once or twice for an extra-smooth finish.
    • Taste before serving. Feta varies in saltiness, so you may not need extra seasoning.

    Nutrition

    Serving: 1 ServingCalories: 168kcalCarbohydrates: 2gProtein: 7gFat: 15gSaturated Fat: 6gPolyunsaturated Fat: 1gMonounsaturated Fat: 7gTrans Fat: 0.002gCholesterol: 32mgSodium: 410mgPotassium: 52mgFiber: 0.03gSugar: 1gVitamin A: 150IUVitamin C: 0.5mgCalcium: 196mgIron: 0.3mg

    • « Go to Previous Page
    • Page 1
    • Interim pages omitted …
    • Page 5
    • Page 6
    • Page 7
    • Page 8
    • Page 9
    • Interim pages omitted …
    • Page 16
    • Go to Next Page »

    Primary Sidebar

    New-Cover-4-1024x934

    I’m Natasha! I’m a self-taught baker and cook, sharing easy, fuss-free recipes that anyone can make with confidence. From breads and cookies to decadent desserts to simple meals, I hope you’ll find your next favorite recipe here.

    More about me →

    Add us as a Trusted Site

    Sign Up For Email Updates

    Get A Free E-Book With 8 Easy Bread Recipes For Beginner Bakers!

    Popular Recipes

    • mushroom quiche on a platter with ingredients in the background.
      Mushroom Quiche
    • chocolate fudge squares stacked on top of each other on small plate.
      Chocolate Fudge With Condensed Milk
    • Easiest Homemade Cream Cheese | Homemade Cream Cheese Recipe
      Easiest Homemade Cream Cheese
    • Cinnamon Bread Pudding
      Cinnamon Bread Pudding
    • Korean Corn Cheese in a cast iron skillet.
      Korean Corn Cheese Recipe
    • Best Condensed Milk Bread Rolls (Soft & Fluffy)
      Best Condensed Milk Bread Rolls (Soft & Fluffy)

    Summer Recipes

    • Mango Tres Leches Cake
      Mango Tres Leches Cake
    • Strawberry cream cheese rolls stacked on a cake stand with strawberries on the side.
      Strawberry Cream Cheese Rolls
    • cherry bread pudding in 3 ramekins with spoons on the side on a wooden board.
      Cherry Bread Pudding
    • Frozen Yogurt Bark on a white platter.
      Frozen Yogurt Bark - Easy Summer Recipe
    • Sliced lemon blueberry bread on a white platter.
      Blueberry And Lemon Bread
    • Mango Mousse
      The Best Mango Mousse Recipe! (3 Ingredients)

    See More Summer Recipes →

    Footer

    ↑ back to top

    Sign Up For Email Updates

    Get A Free E-Book With 8 Easy Bread Recipes For Beginner Bakers!

    Tasha’s Artisan Foods

    About

    Work With Me

    Connect With Me

    Browse Recipes

    Desserts
    Snacks
    Breads
    Cakes
    Baking Guides

    Published with WordPress

    PRIVACY POLICY

    COPYRIGHT © 2026 TASHA'S ARTISAN FOODS

    Rate This Recipe

    Your vote:


    A rating is required
    A name is required
    An email is required